
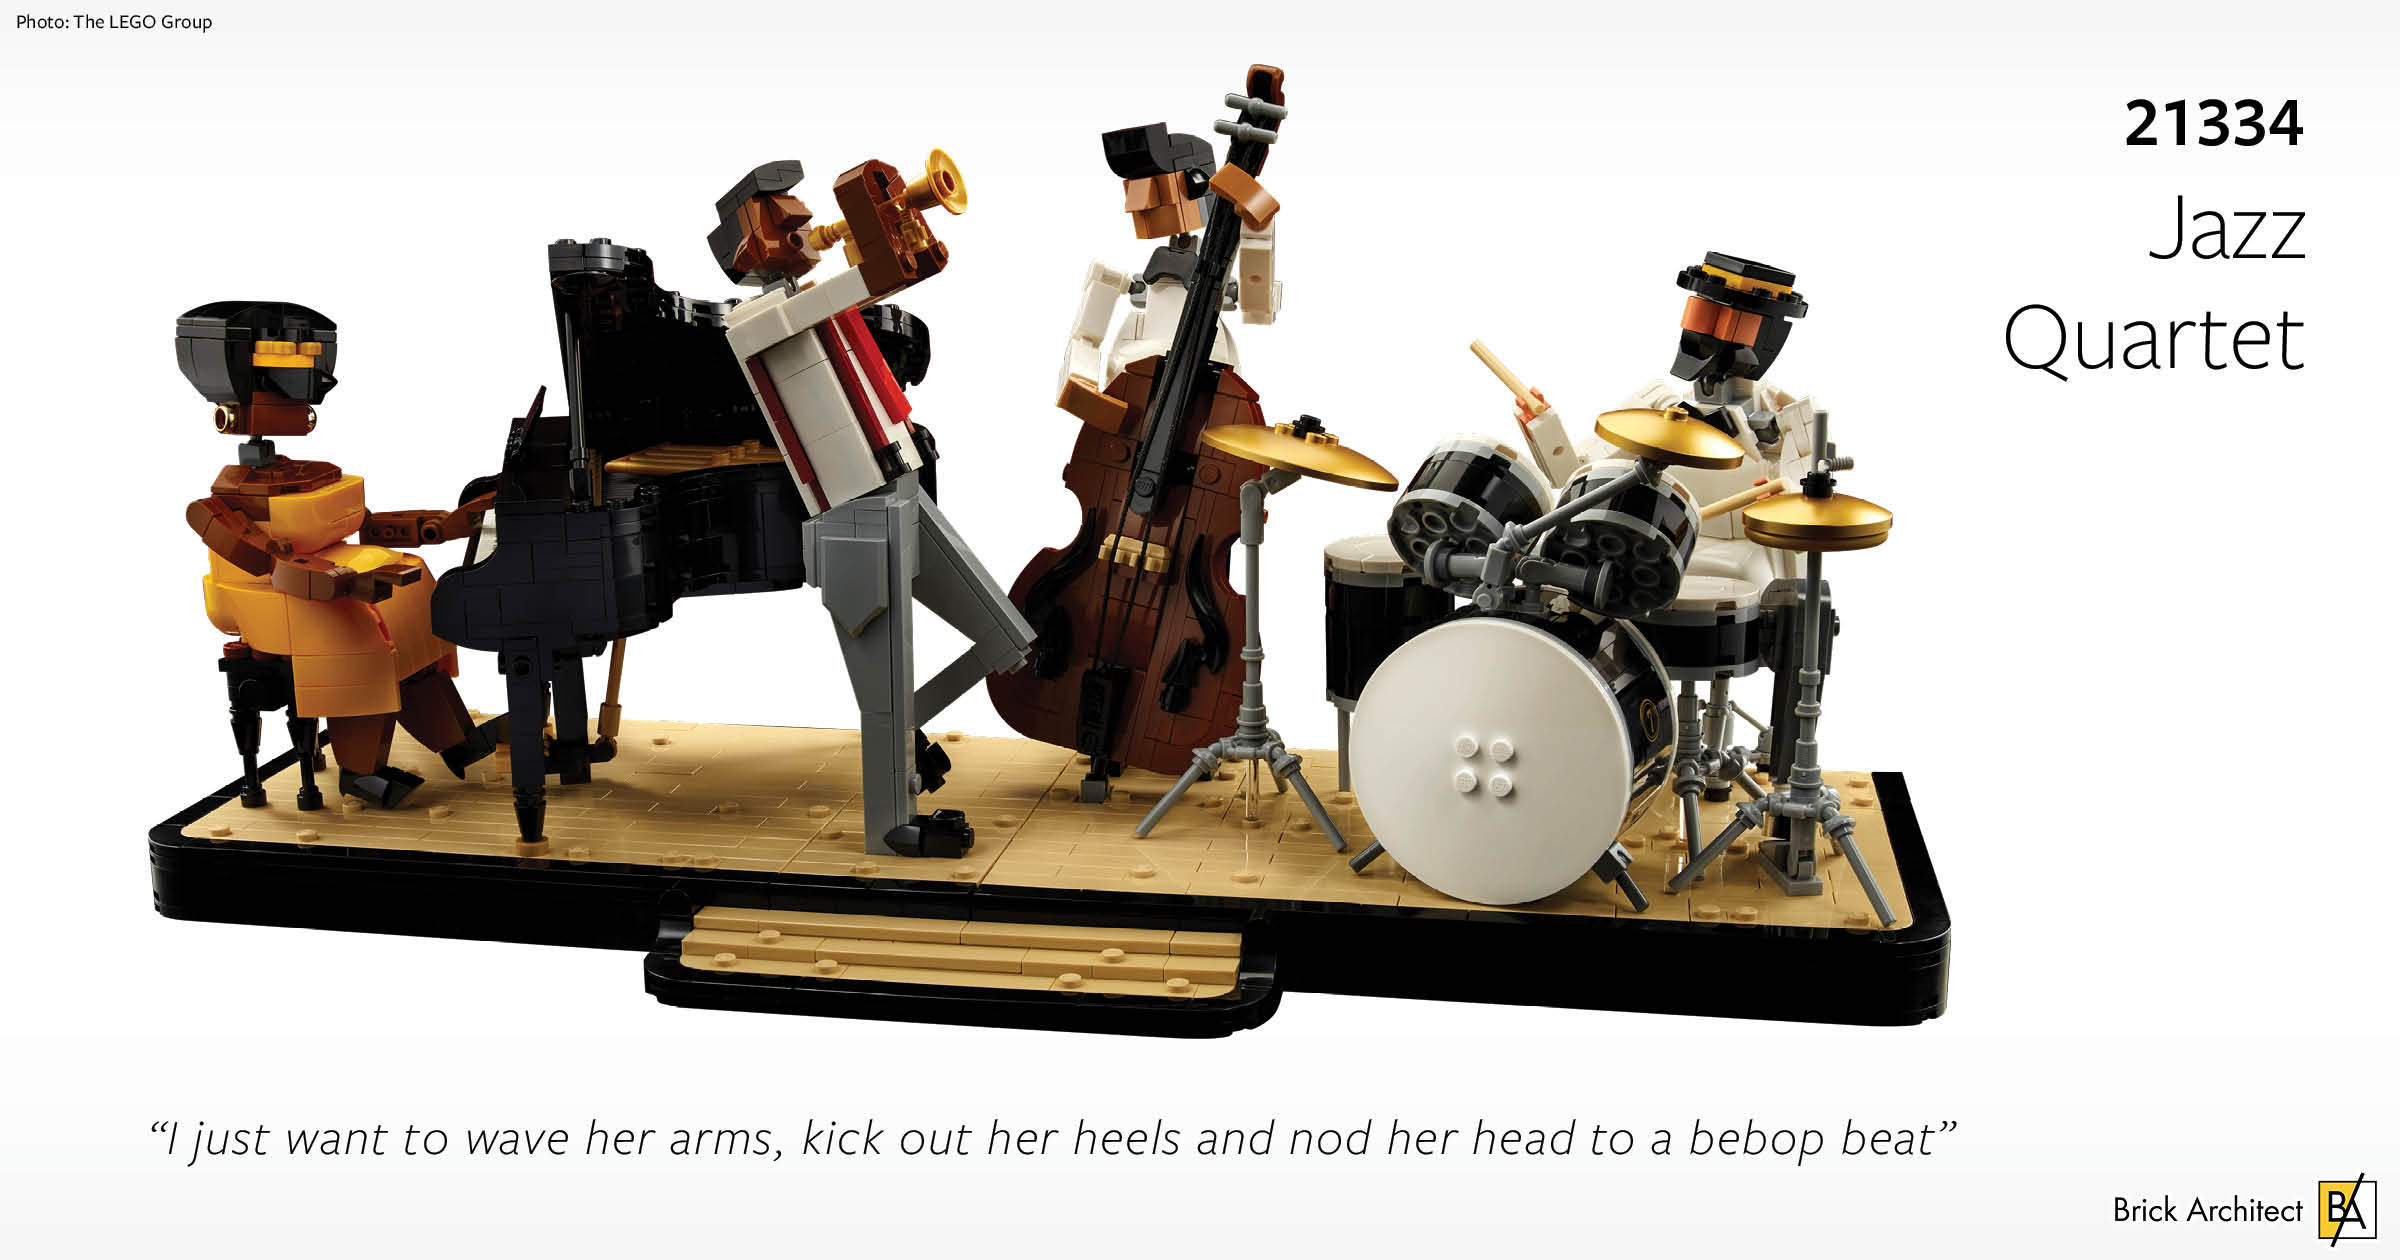
Review: #21334 Jazz Quartet
Let’s explore how this set captures 20th century icons of music who brought in unique blends of soul, folk, jazz and gospel.
As an overall music geek, lover of the unique and AAFOL (African American Fan of LEGO :-D), I was immediately attracted to the #21334 Jazz Quartet set. While looking at photos of the set, I envisioned the pianist in the quartet as Roberta Flack or Nina Simone. These two giants of 20th century music both started out fronting a similar small band, and both musicians performed unique blends of soul, folk, jazz and gospel.
With all that in my mind, I chose the Jazz Quartet to be my first full-size LEGO set to assemble. My first thought when opening this set was, “I didn’t realize it was so big!”. Until this point, I had only put together sets that made models small enough to hold in my hand, such as the LEGO Creator Highway Cruiser (31018). Models that size and smaller have always been my jam. My attitude toward bigger models has always been that they take too long to build and I have no room in my home to build and display them.
Through a variety of shapes and colors this set comes to life.
With this set I now have a 1,606-piece LEGO set big enough to fill an 18 inch long by 11 inch tall by four-inch-thick box. This posed the question.. where am I going to build it? I had to put in some work to make a space in my home office just to prepare to open the box. The Jazz Quartet box alone is a collector’s delight, colored in black with warm amber tones acting as back lighting for the pianist, trumpeter, bassist and drummer playing their instruments on a black and yellow LEGO stage.
Editor’s Note: The set featured in this article has retired. I intended to post this article much sooner but was delayed by other responsibilites. I still wanted to share the article because I love the expressive descriptions of the figures and the build experience.
About the set
#21334 Jazz Quartet was released on the 28th of June 2022 as part of the LEGO Ideas program. Released at the price of $99.99(£89.99/€99.99) and coming with 1606 this set has great price per piece value coming in at 6.2c(5.6p/6.2c). One caveat though is that this set comes with 0 minifigures. While the price per piece is a great value it is important to point that a lot of the included pieces are rather small.
By splitting the instructions across multiple books this set allows for a collaborative build experience.
Unboxing the set
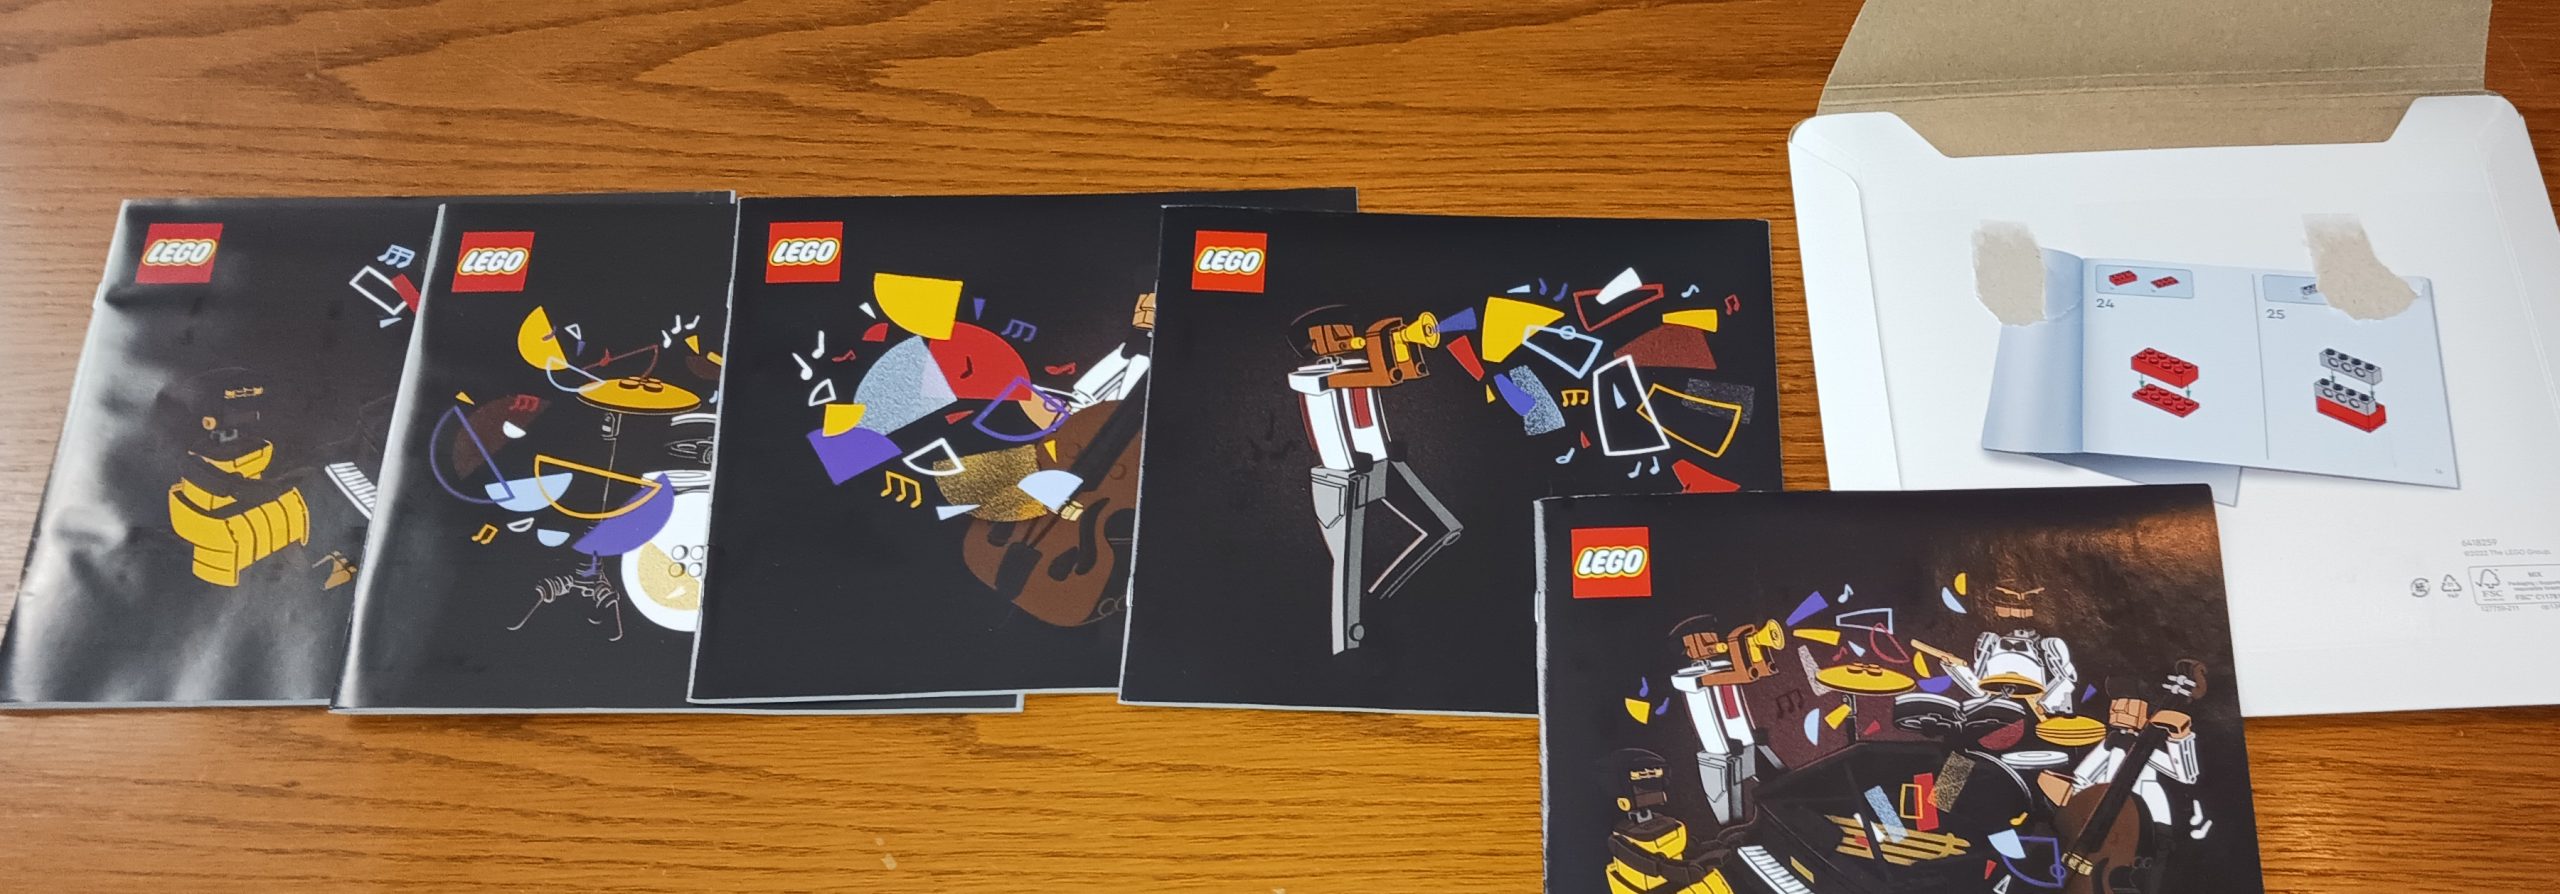
Upon opening the box, I removed 11 numbered plastic baggies of LEGO bricks, two 16×16 Plate, and a cardboard packet that contains five booklets. One has information about the LEGO fan, Hsinwei Chi, who submitted his Jazz Quartet design to LEGO Ideas. This booklet also has quotes from the LEGO designers who brought the design from fan idea to official set, a photo of Chi’s prototype model, and a full illustrated parts list.
The other four booklets included the building instructions; each book devoted to assembling one player with their instrument along with a section of the base that holds this part of the model. This enables the builder to take on one part of the set at a time. This also allows for group builds where each person can work on each player-instrument-base combo. I chose to start with Roberta Simone — yes, I named the player — the pianist and her instrument because of my affinity for a LEGO model of a brown-skinned, curvy woman (like me!).
The instructions clearly highlight what each bag will build.
The building process
The Pianist
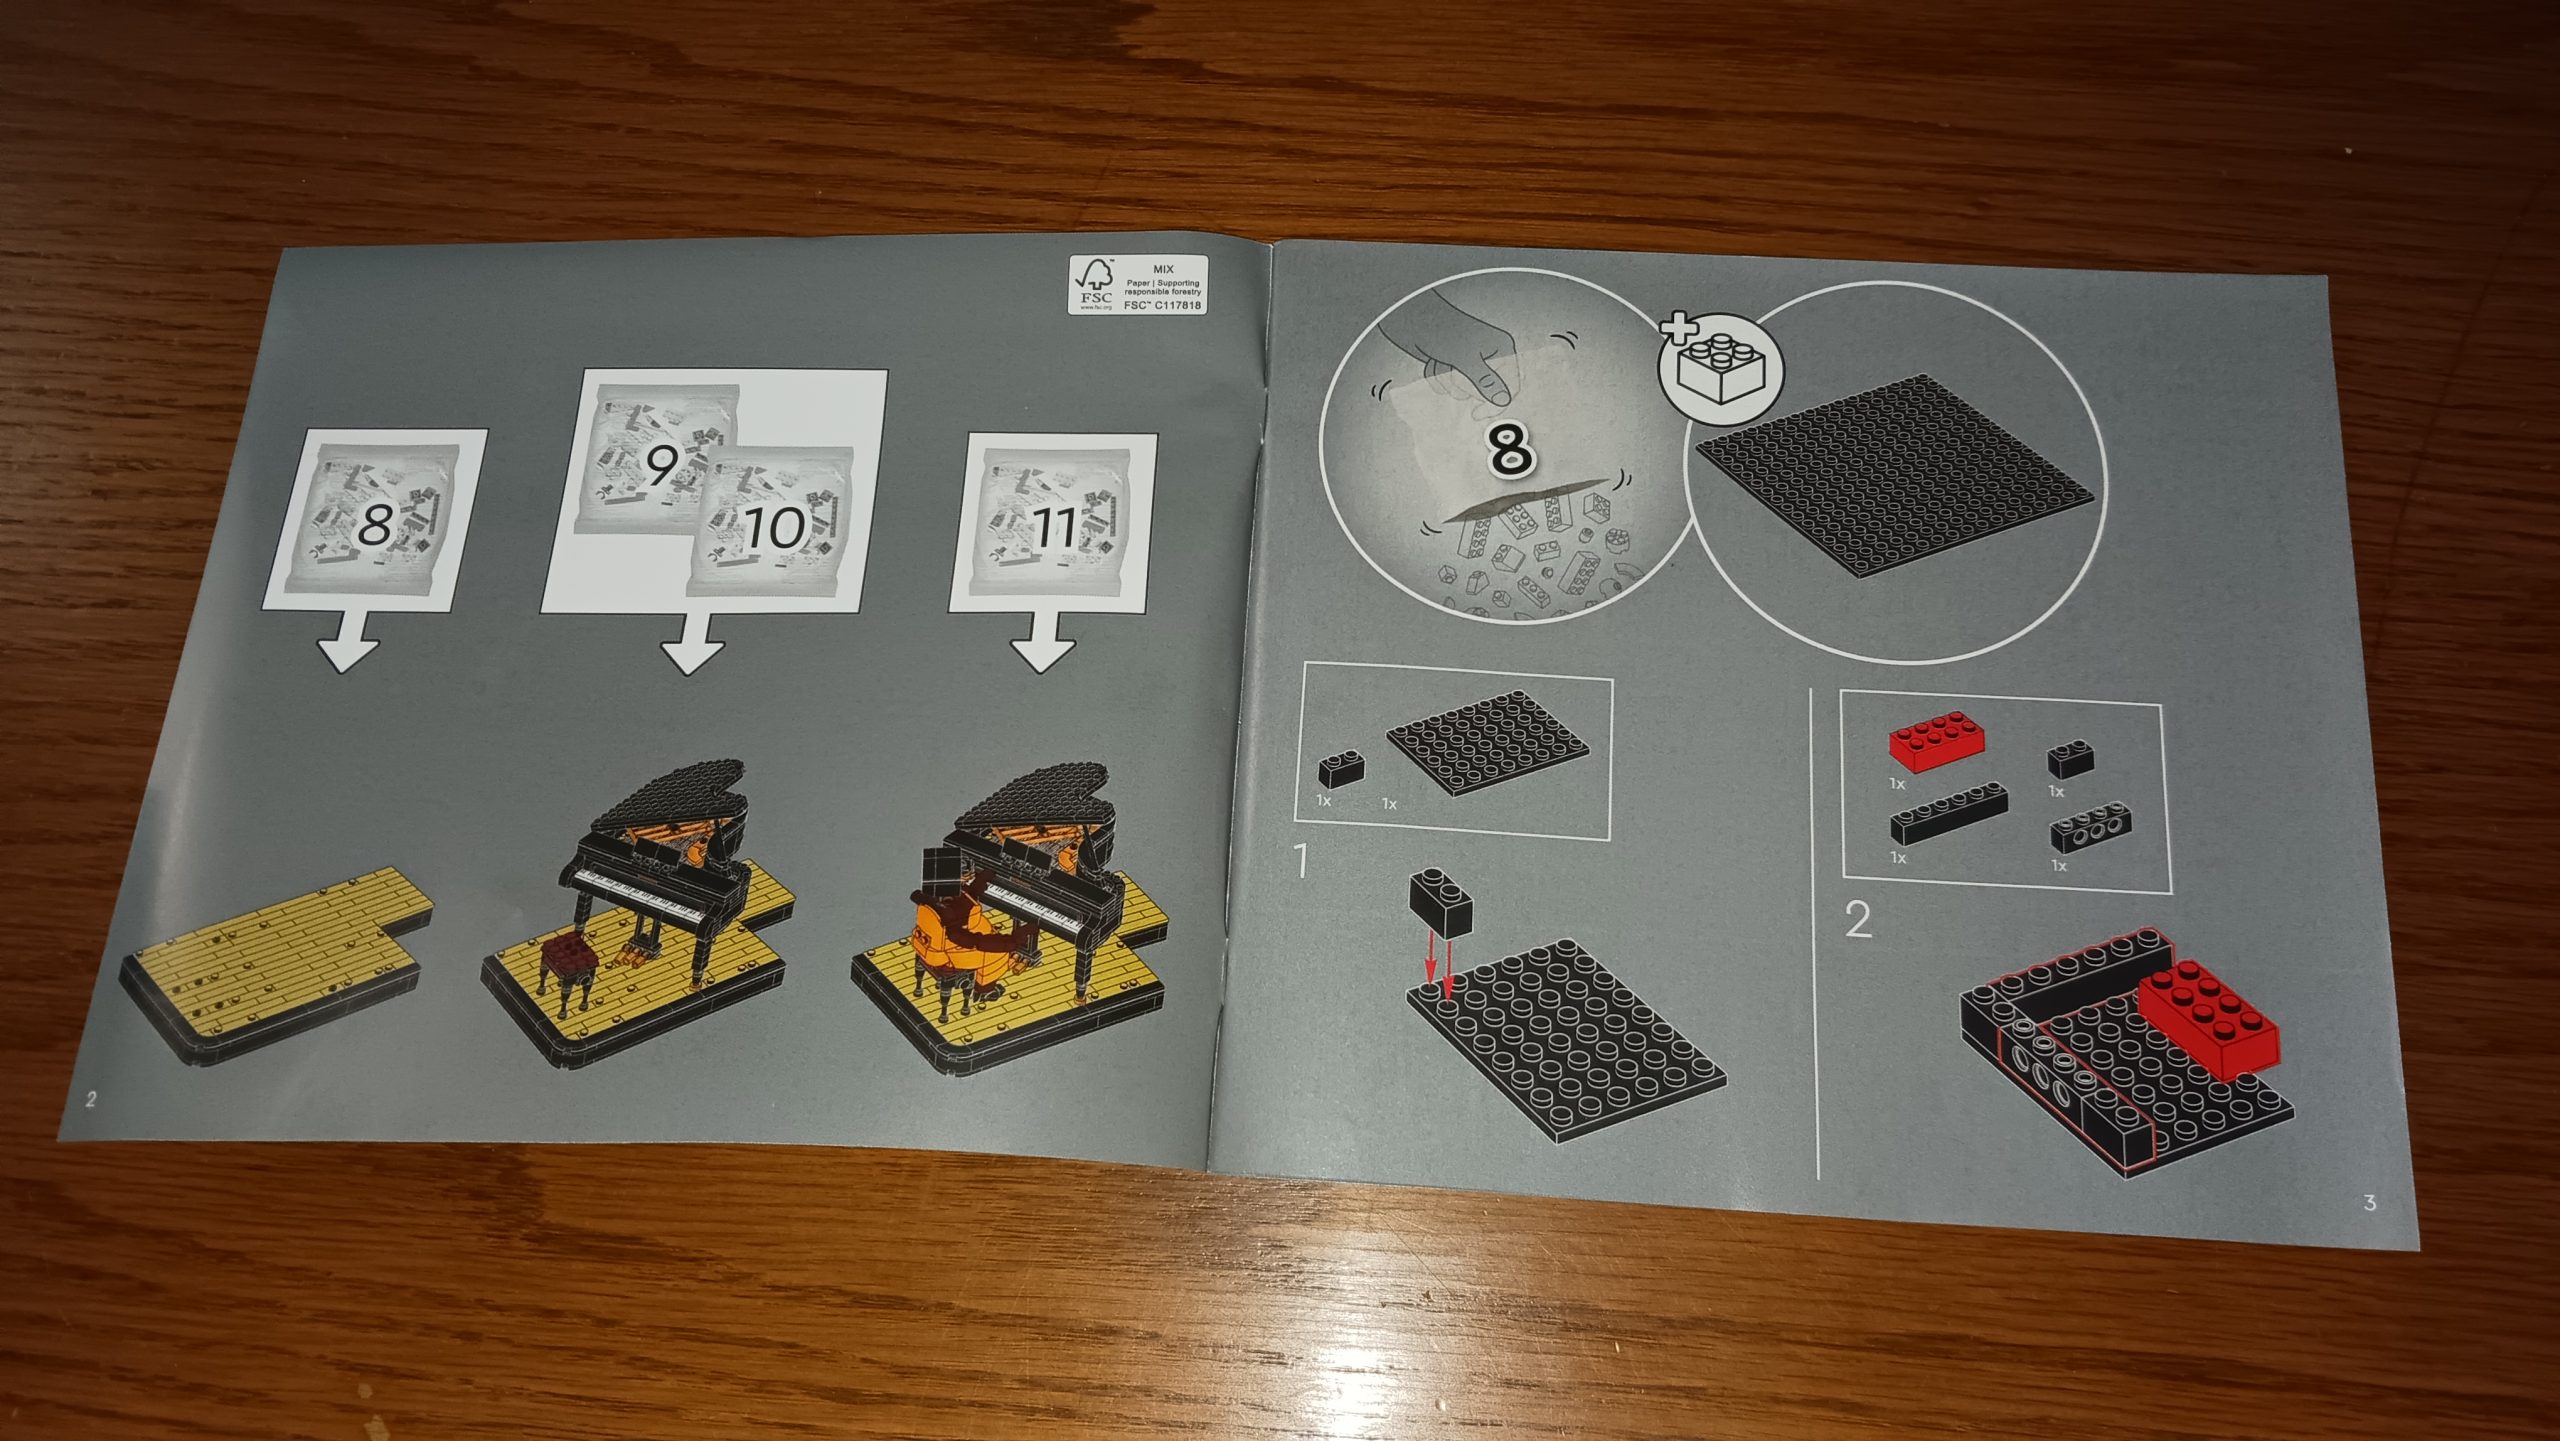
The first two pages of each instruction booklet shows which of the numbered baggies will be used for that player-instrument-stage grouping. In the case of Roberta Simone, it takes four baggies to complete that part of the quartet: one for the stage plus one 16×16 Plate, two for the piano and seat, and one for the pianist.
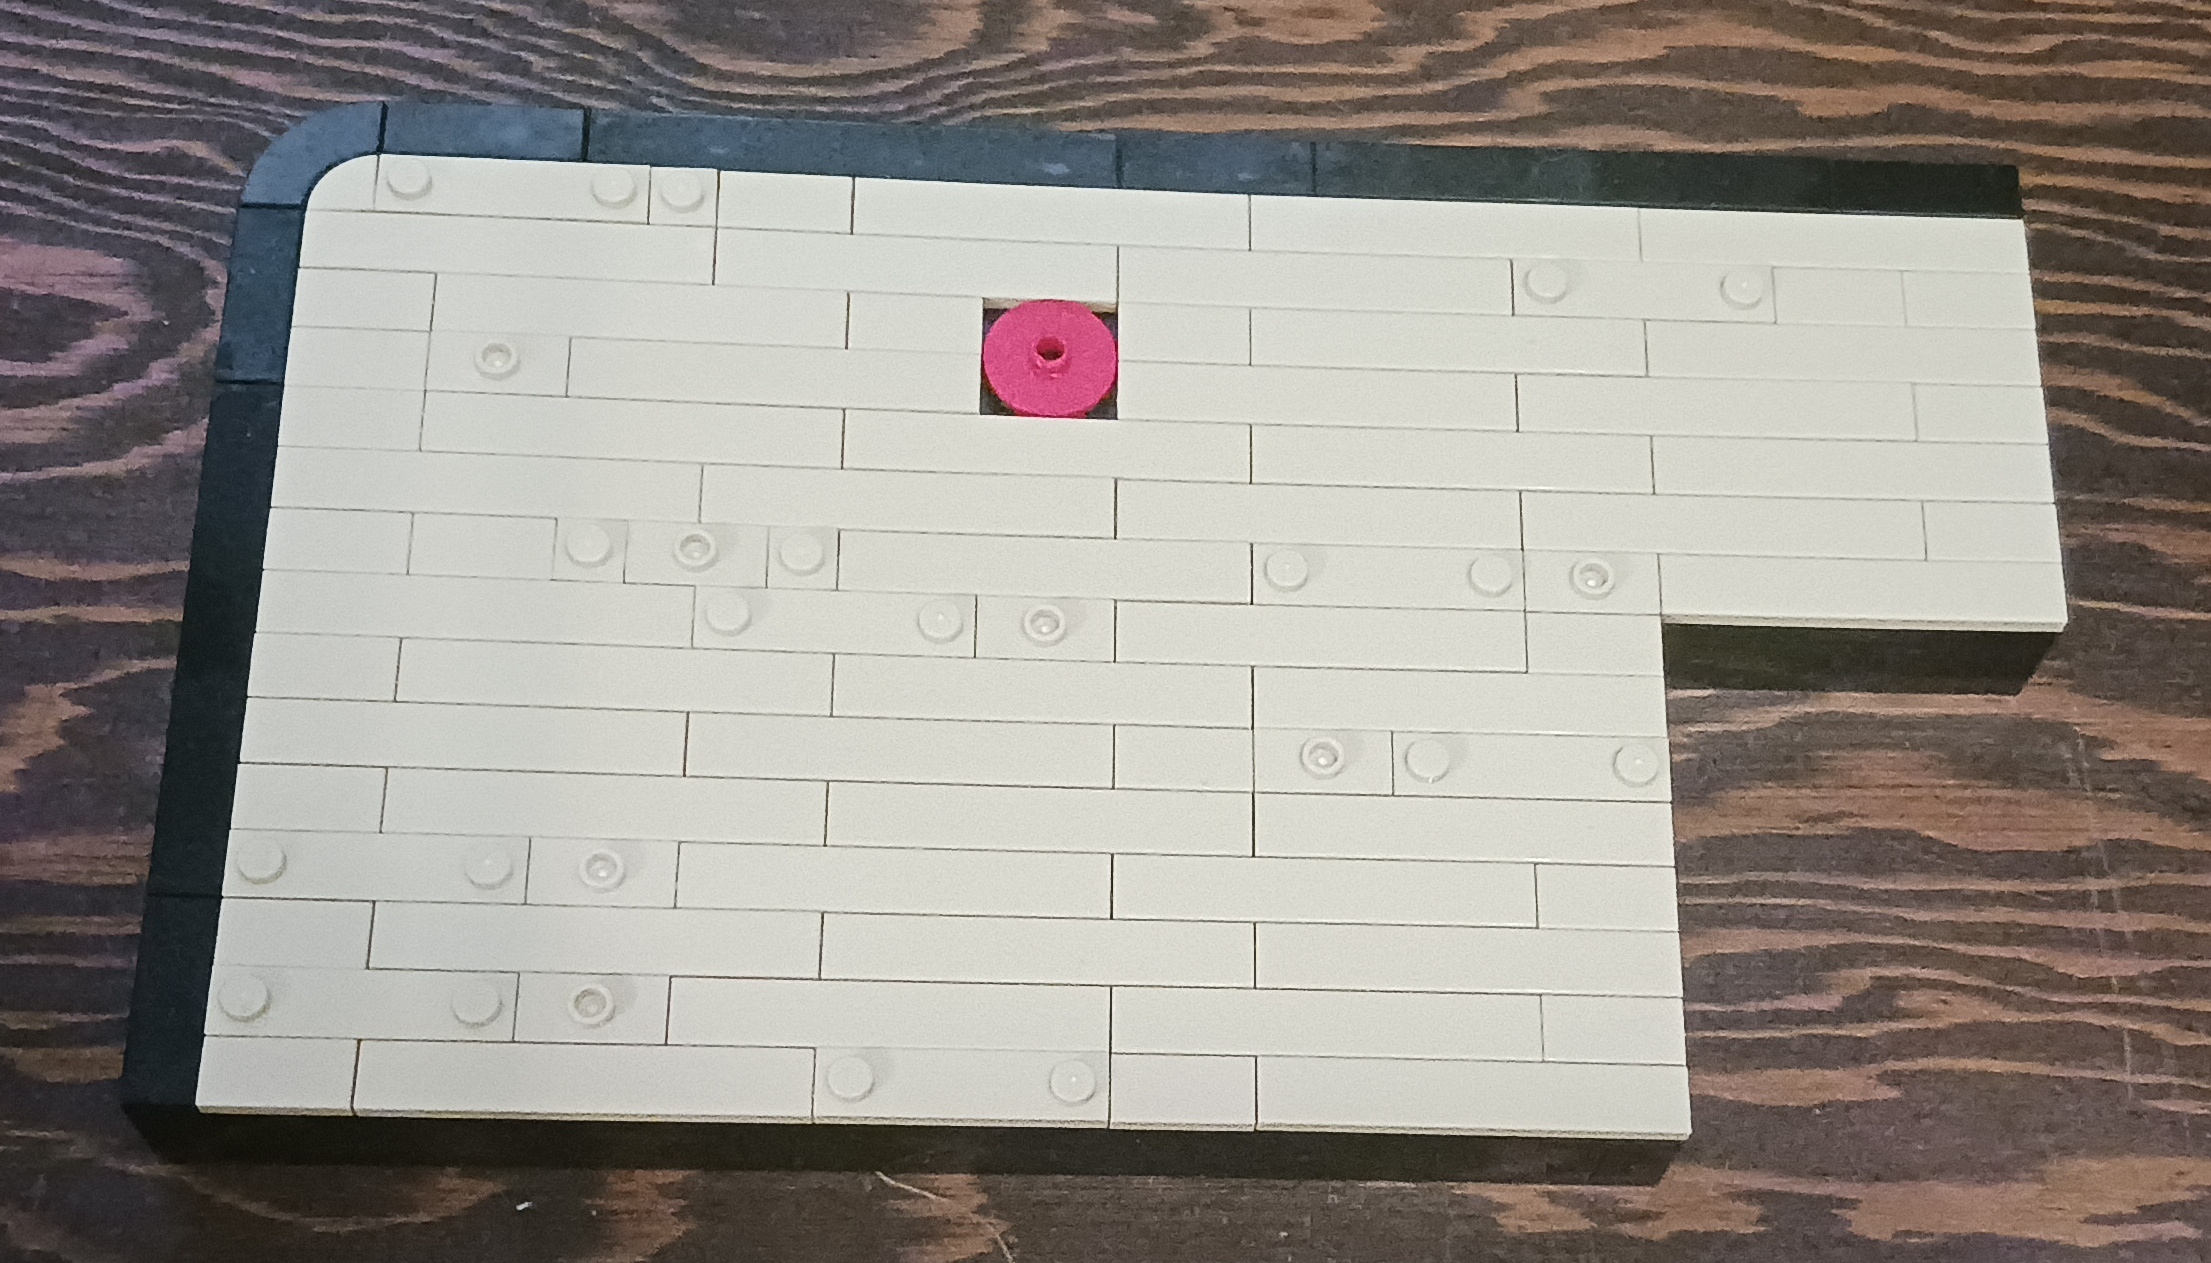
I hate building bases and will avoid making them if models can stand on their own without them. However, since I’m building for a review I can’t skip over or figure my way out of that task. Thankfully, the easy-to-understand LEGO instructions made building Roberta’s base a bearable burden. Smaller pieces such as 1×2 Plate are placed in separate little baggies, which makes sorting and choosing parts less of a hassle. Lots of great techniques are used in this section, especially the interesting use of -33° 3×2 Inverted Slope w/ 6-Studs and 45° 3×3 Corner Brick, Facet.

Building the base is a repetitive process.
As I started to assemble the piano, I found a number of unique and unusual pieces, as expected for such a build, including pieces such as a 297Warm GoldPearl Gold fence-like piece that will form part of the frame that goes inside the brick built instrument along with a 1×14 Brick w/ Groove, Curved Horizontal piece. There is, of course, lots of curved bricks and plates; all this adding a lot of variety and interest to the build. Seeing these curved pieces form the familiar outline of a grand piano as I built the model was a delight.
The intricacies of detail in this build includes creating what is called the action: the row of pivoting little hammers that hit the strings inside the piano when the keys are pressed. It took a 1×1 Brick, Stud, 1-side, a 1×1 Brick, Headlight, a 1×1 Round Plate w/ Bar, and 31 1×1 Round Plate w/ Hole and horizontal bars, all stacked together with the bars lined up perfectly to build the action. The action was tedious to build, but the results look great.
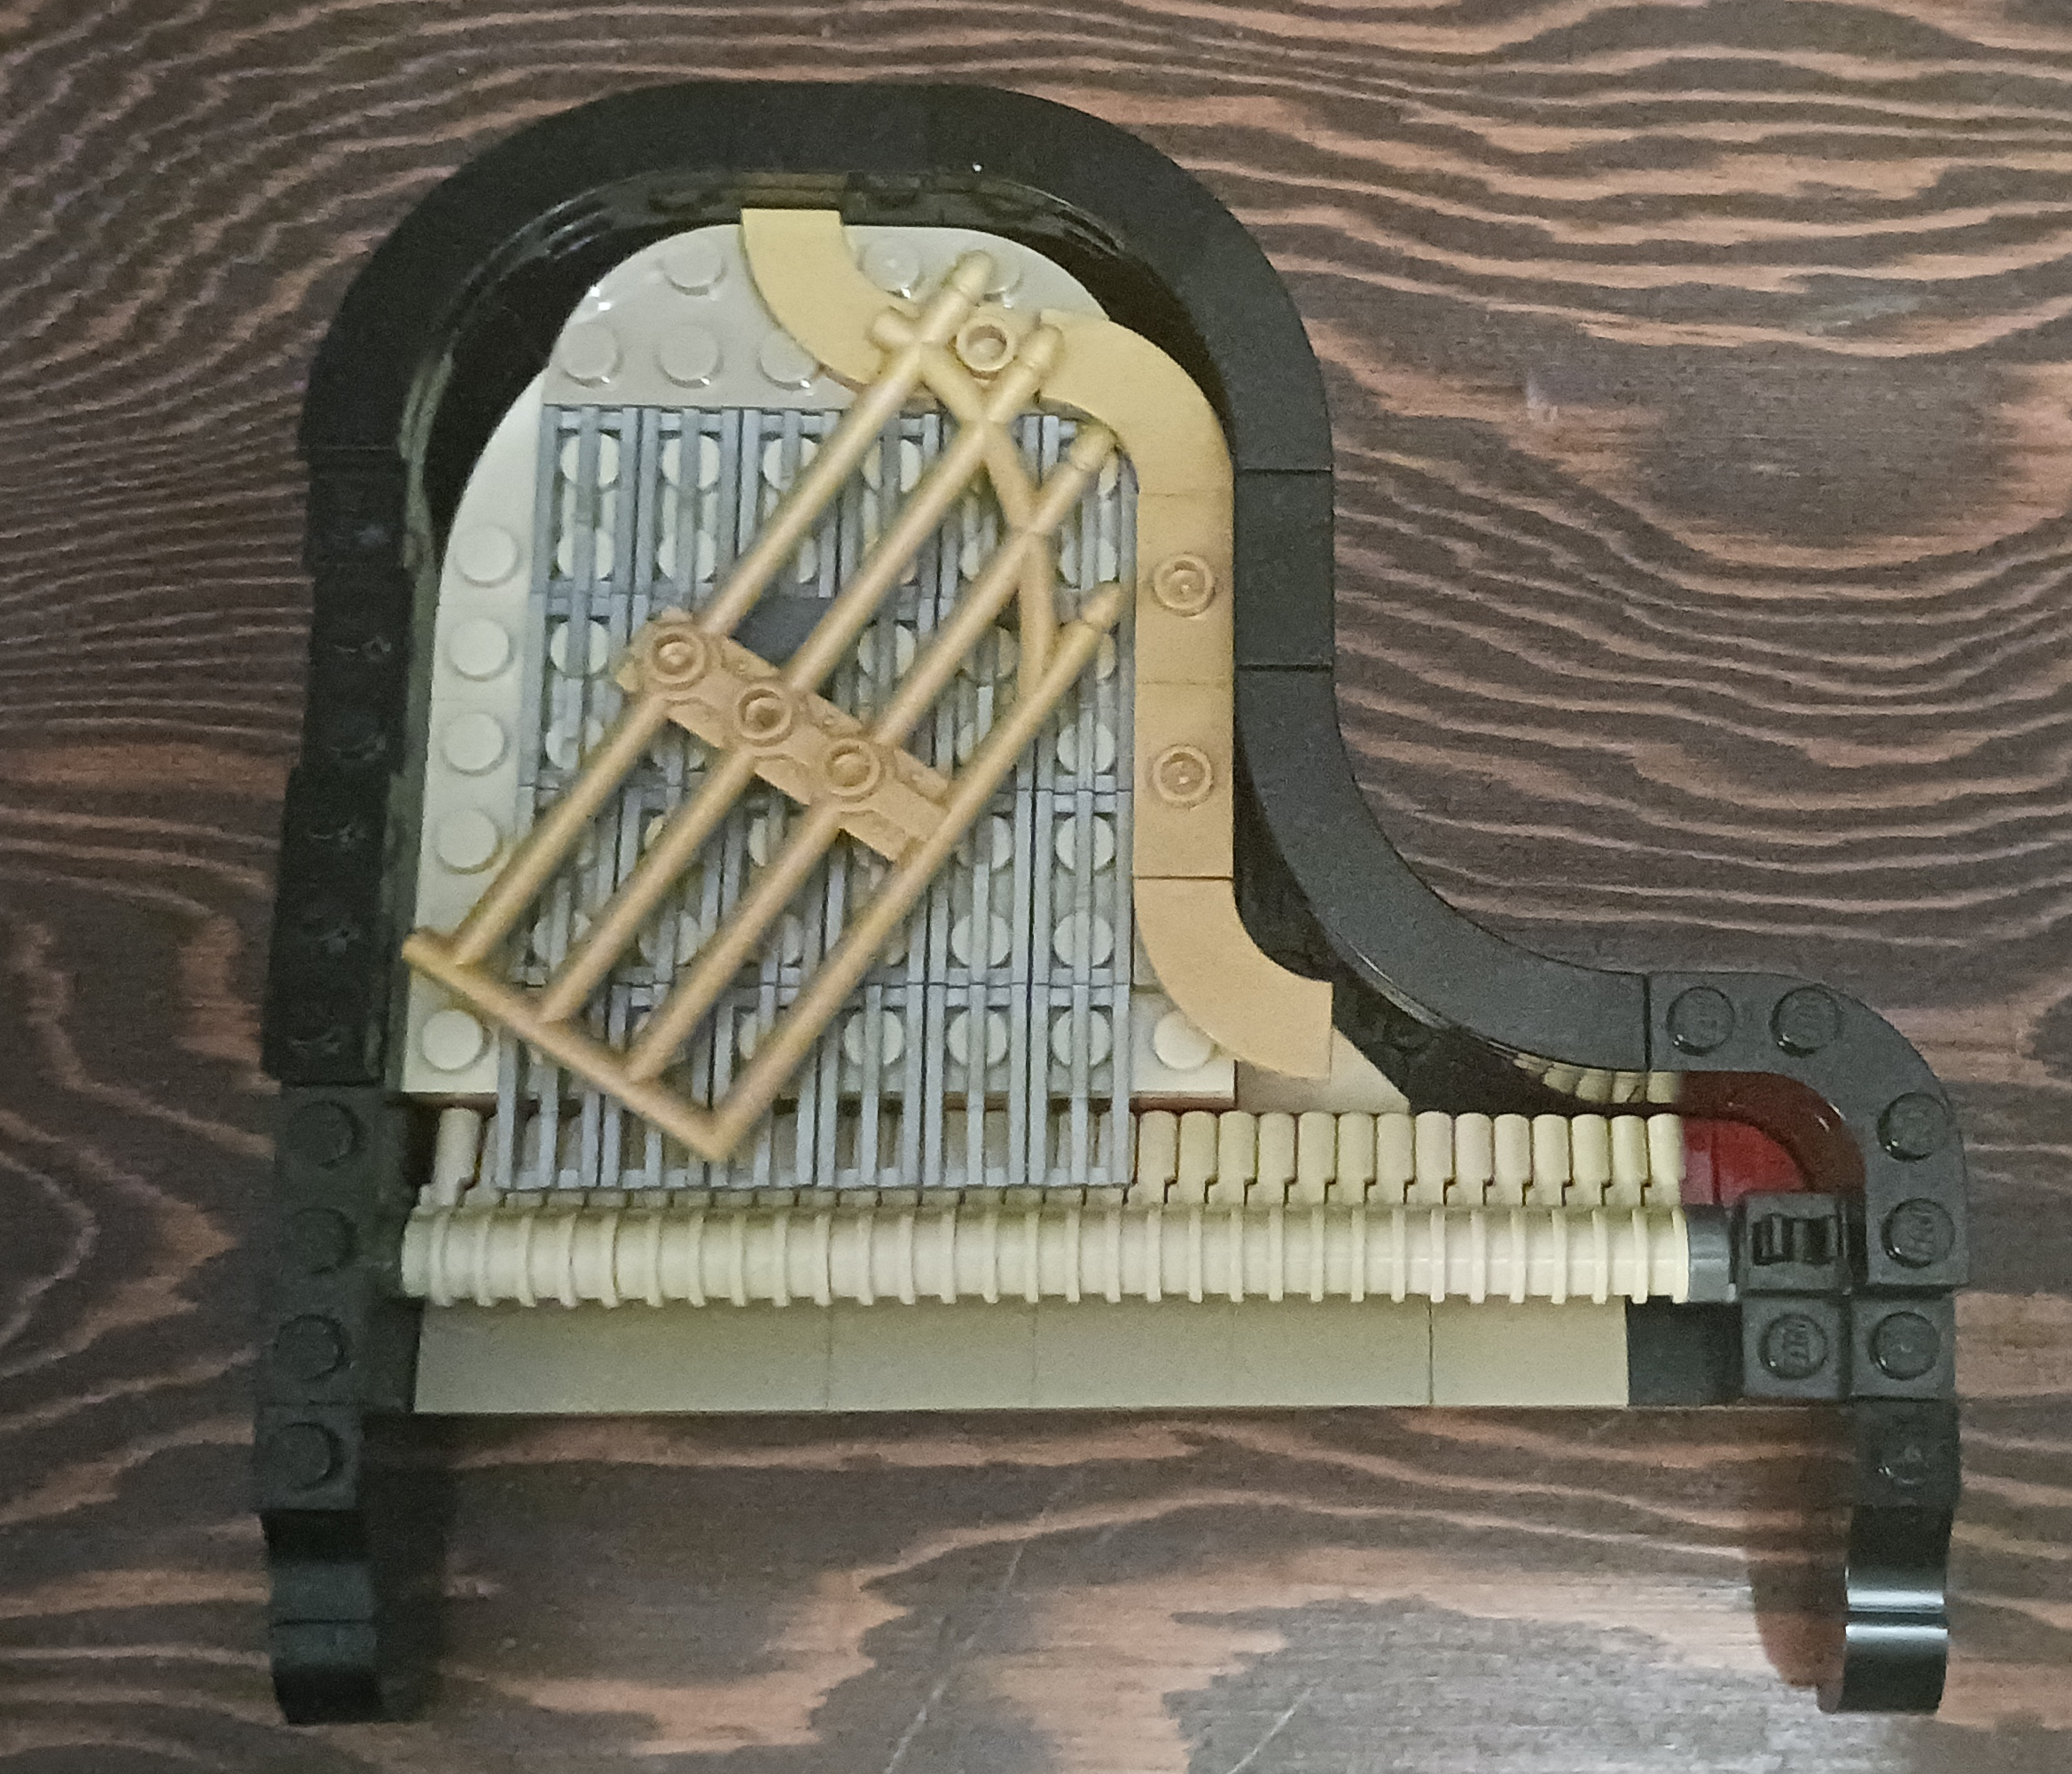
The use of a fence piece as detailing is an interesting addition.
Constructing the soundboard, the strings that go over the action, and the plate (a cast-iron frame that holds the strings) was less tedious than making the action. Some big curved and rectangular plates are joined together then layered with a 315 Silver MetallicFlat Silver 1×2 Tile, Grille. On top of that 297Warm GoldPearl Gold plates are placed alongside the matching fence piece.
The 1×14 Brick w/ Groove, Curved Horizontal is joined with some plates and a 299Warm Gold Drum LacqueredMetallic Gold 1×2 Tile to form the part of the casing that’s behind the keyboard. The keyboard itself required two unusual pieces, 2×6×⅔ 4-studs, Side, plus some other plates including a couple with clips. Tiles complete the keyboard, including ones with the keys printed on them. The clip plates enable the keyboard to slide in and fasten to the rest of the piano casing quite nicely.
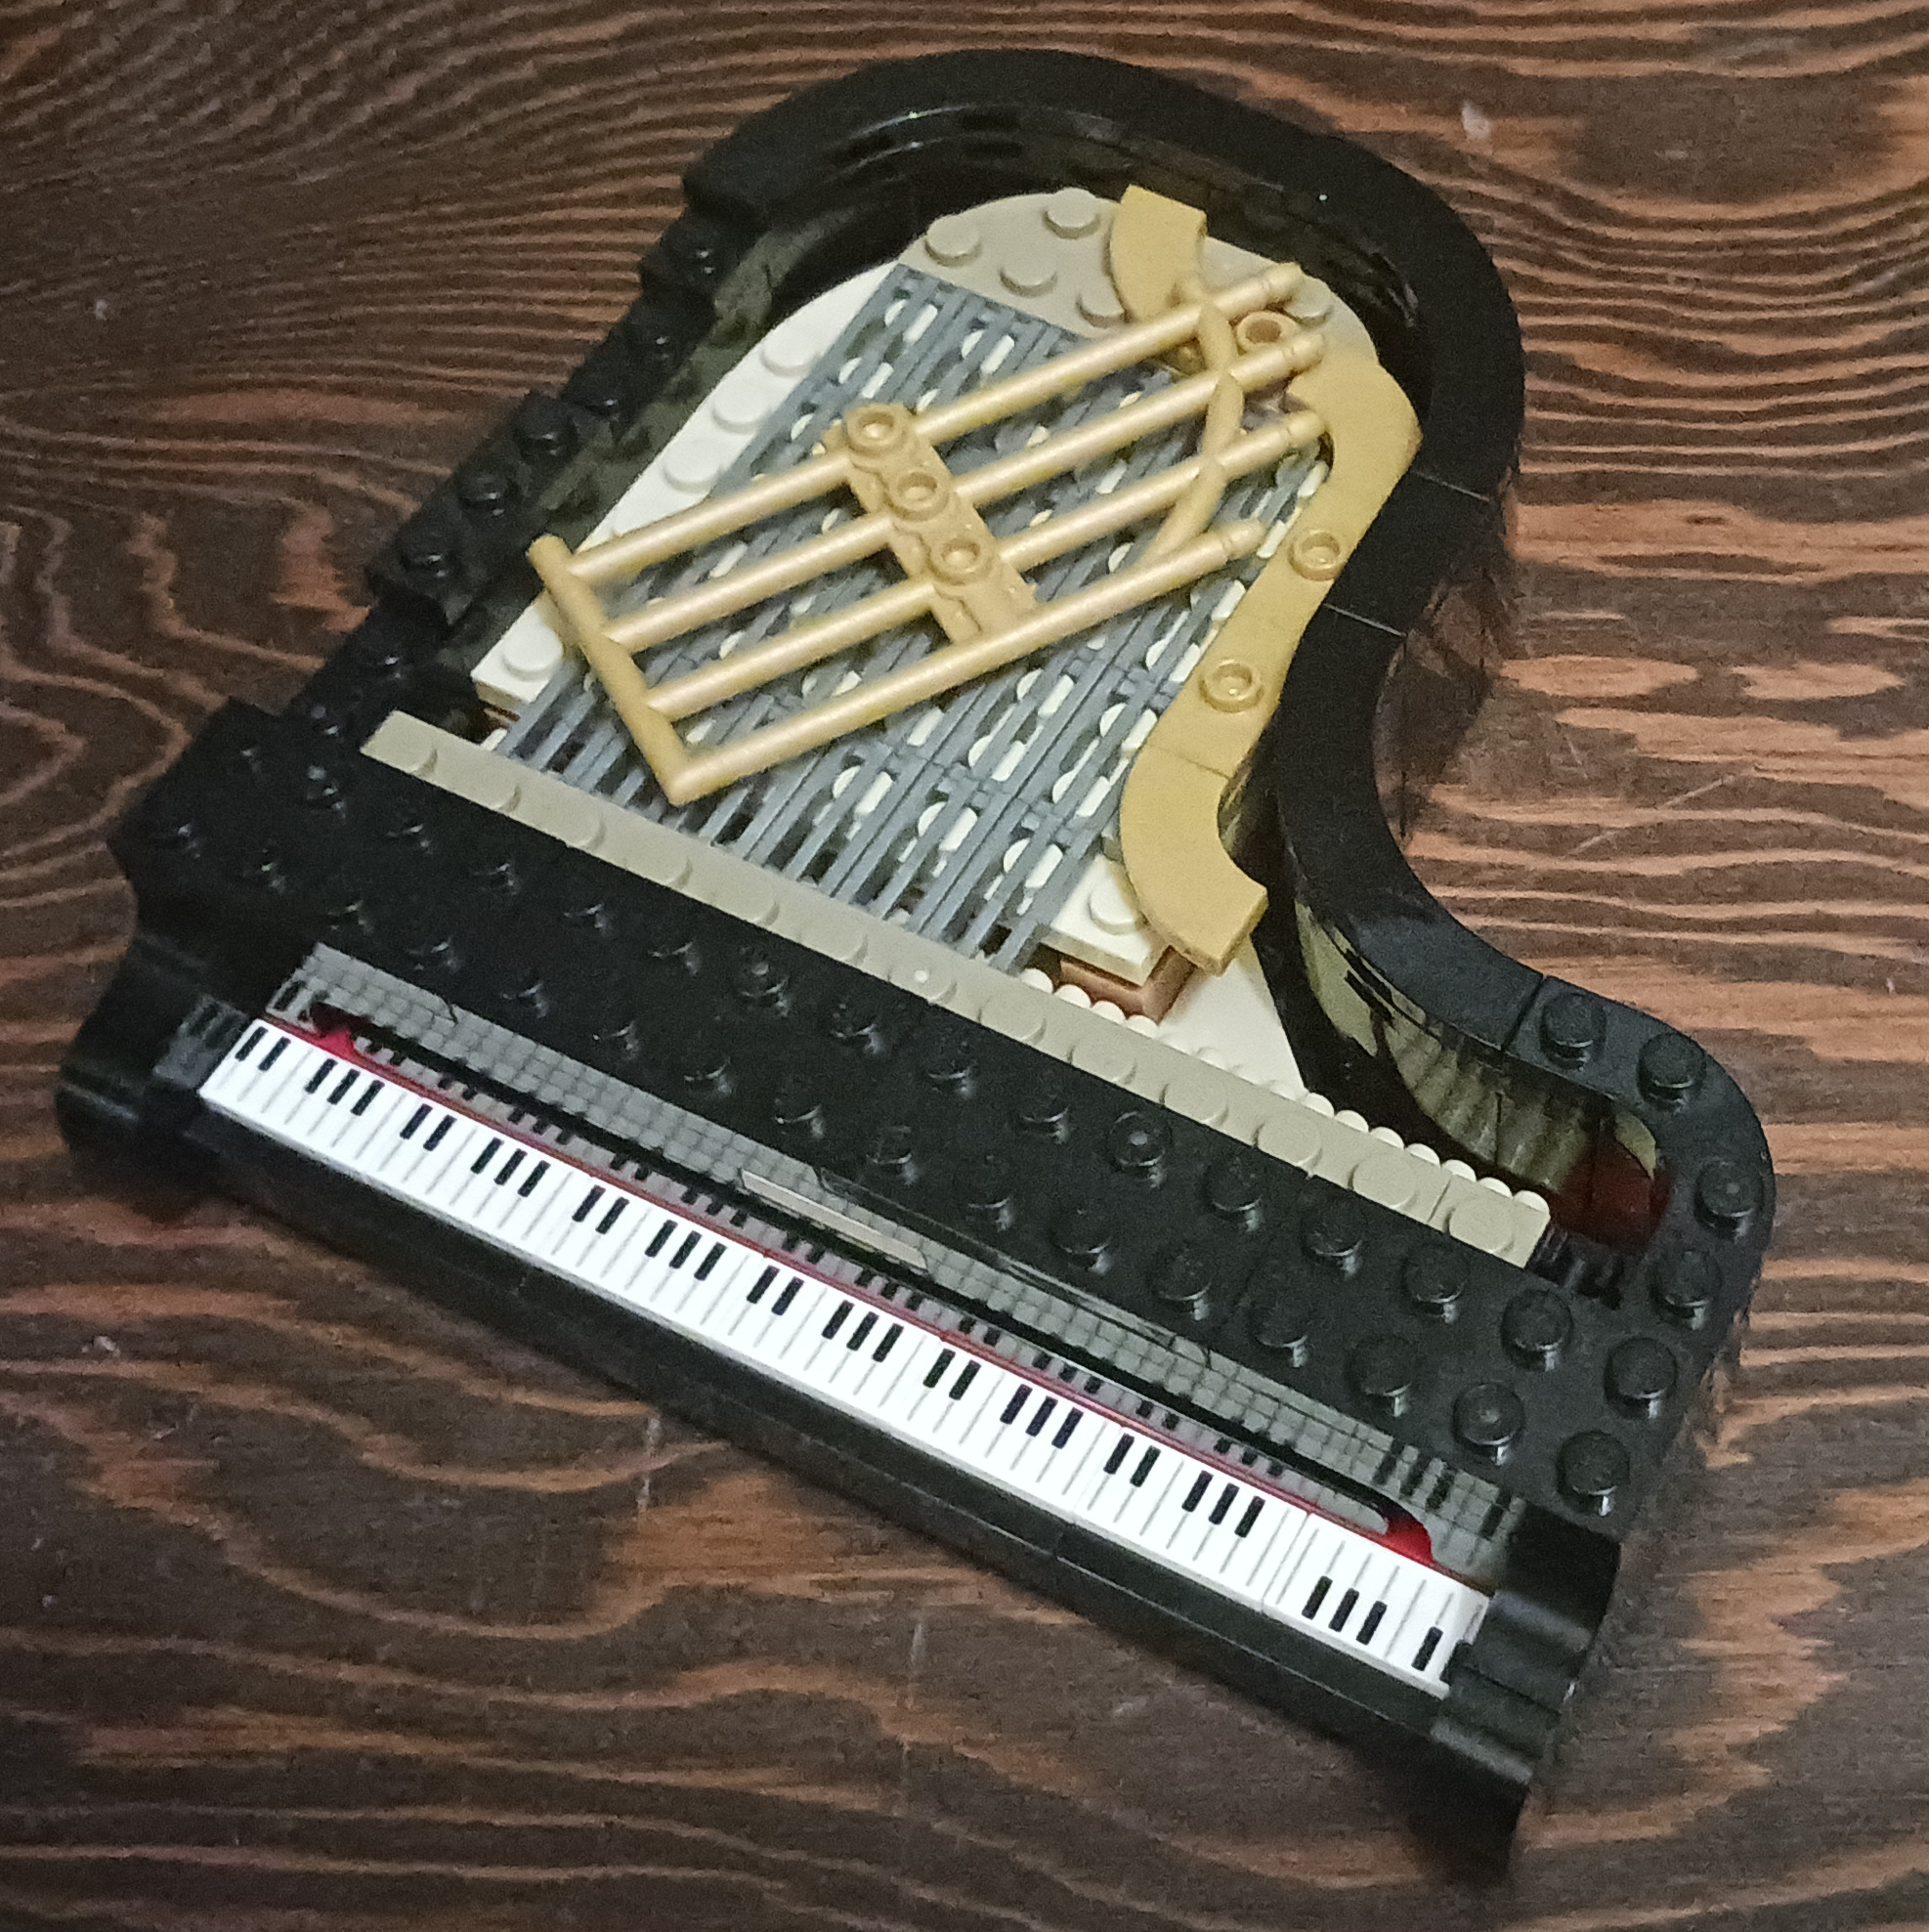
The printed keys add great detail to the Piano.
The piano legs are made using 6L Bar w/ Stop Ring, including some unusual pieces such as a 1×3 Tile, Inverted w/ Hole with a center hole and a 1×1×⅔ Plate that looks like a 1-by-1 brick that’s been cut in half horizontally. The pedal support structure that holds the 297Warm GoldPearl Gold pedals and backstay is made with clip arms, hinge plates, a window frame brick, a 1-by-2 handle tile and some side-stud bricks and plates.
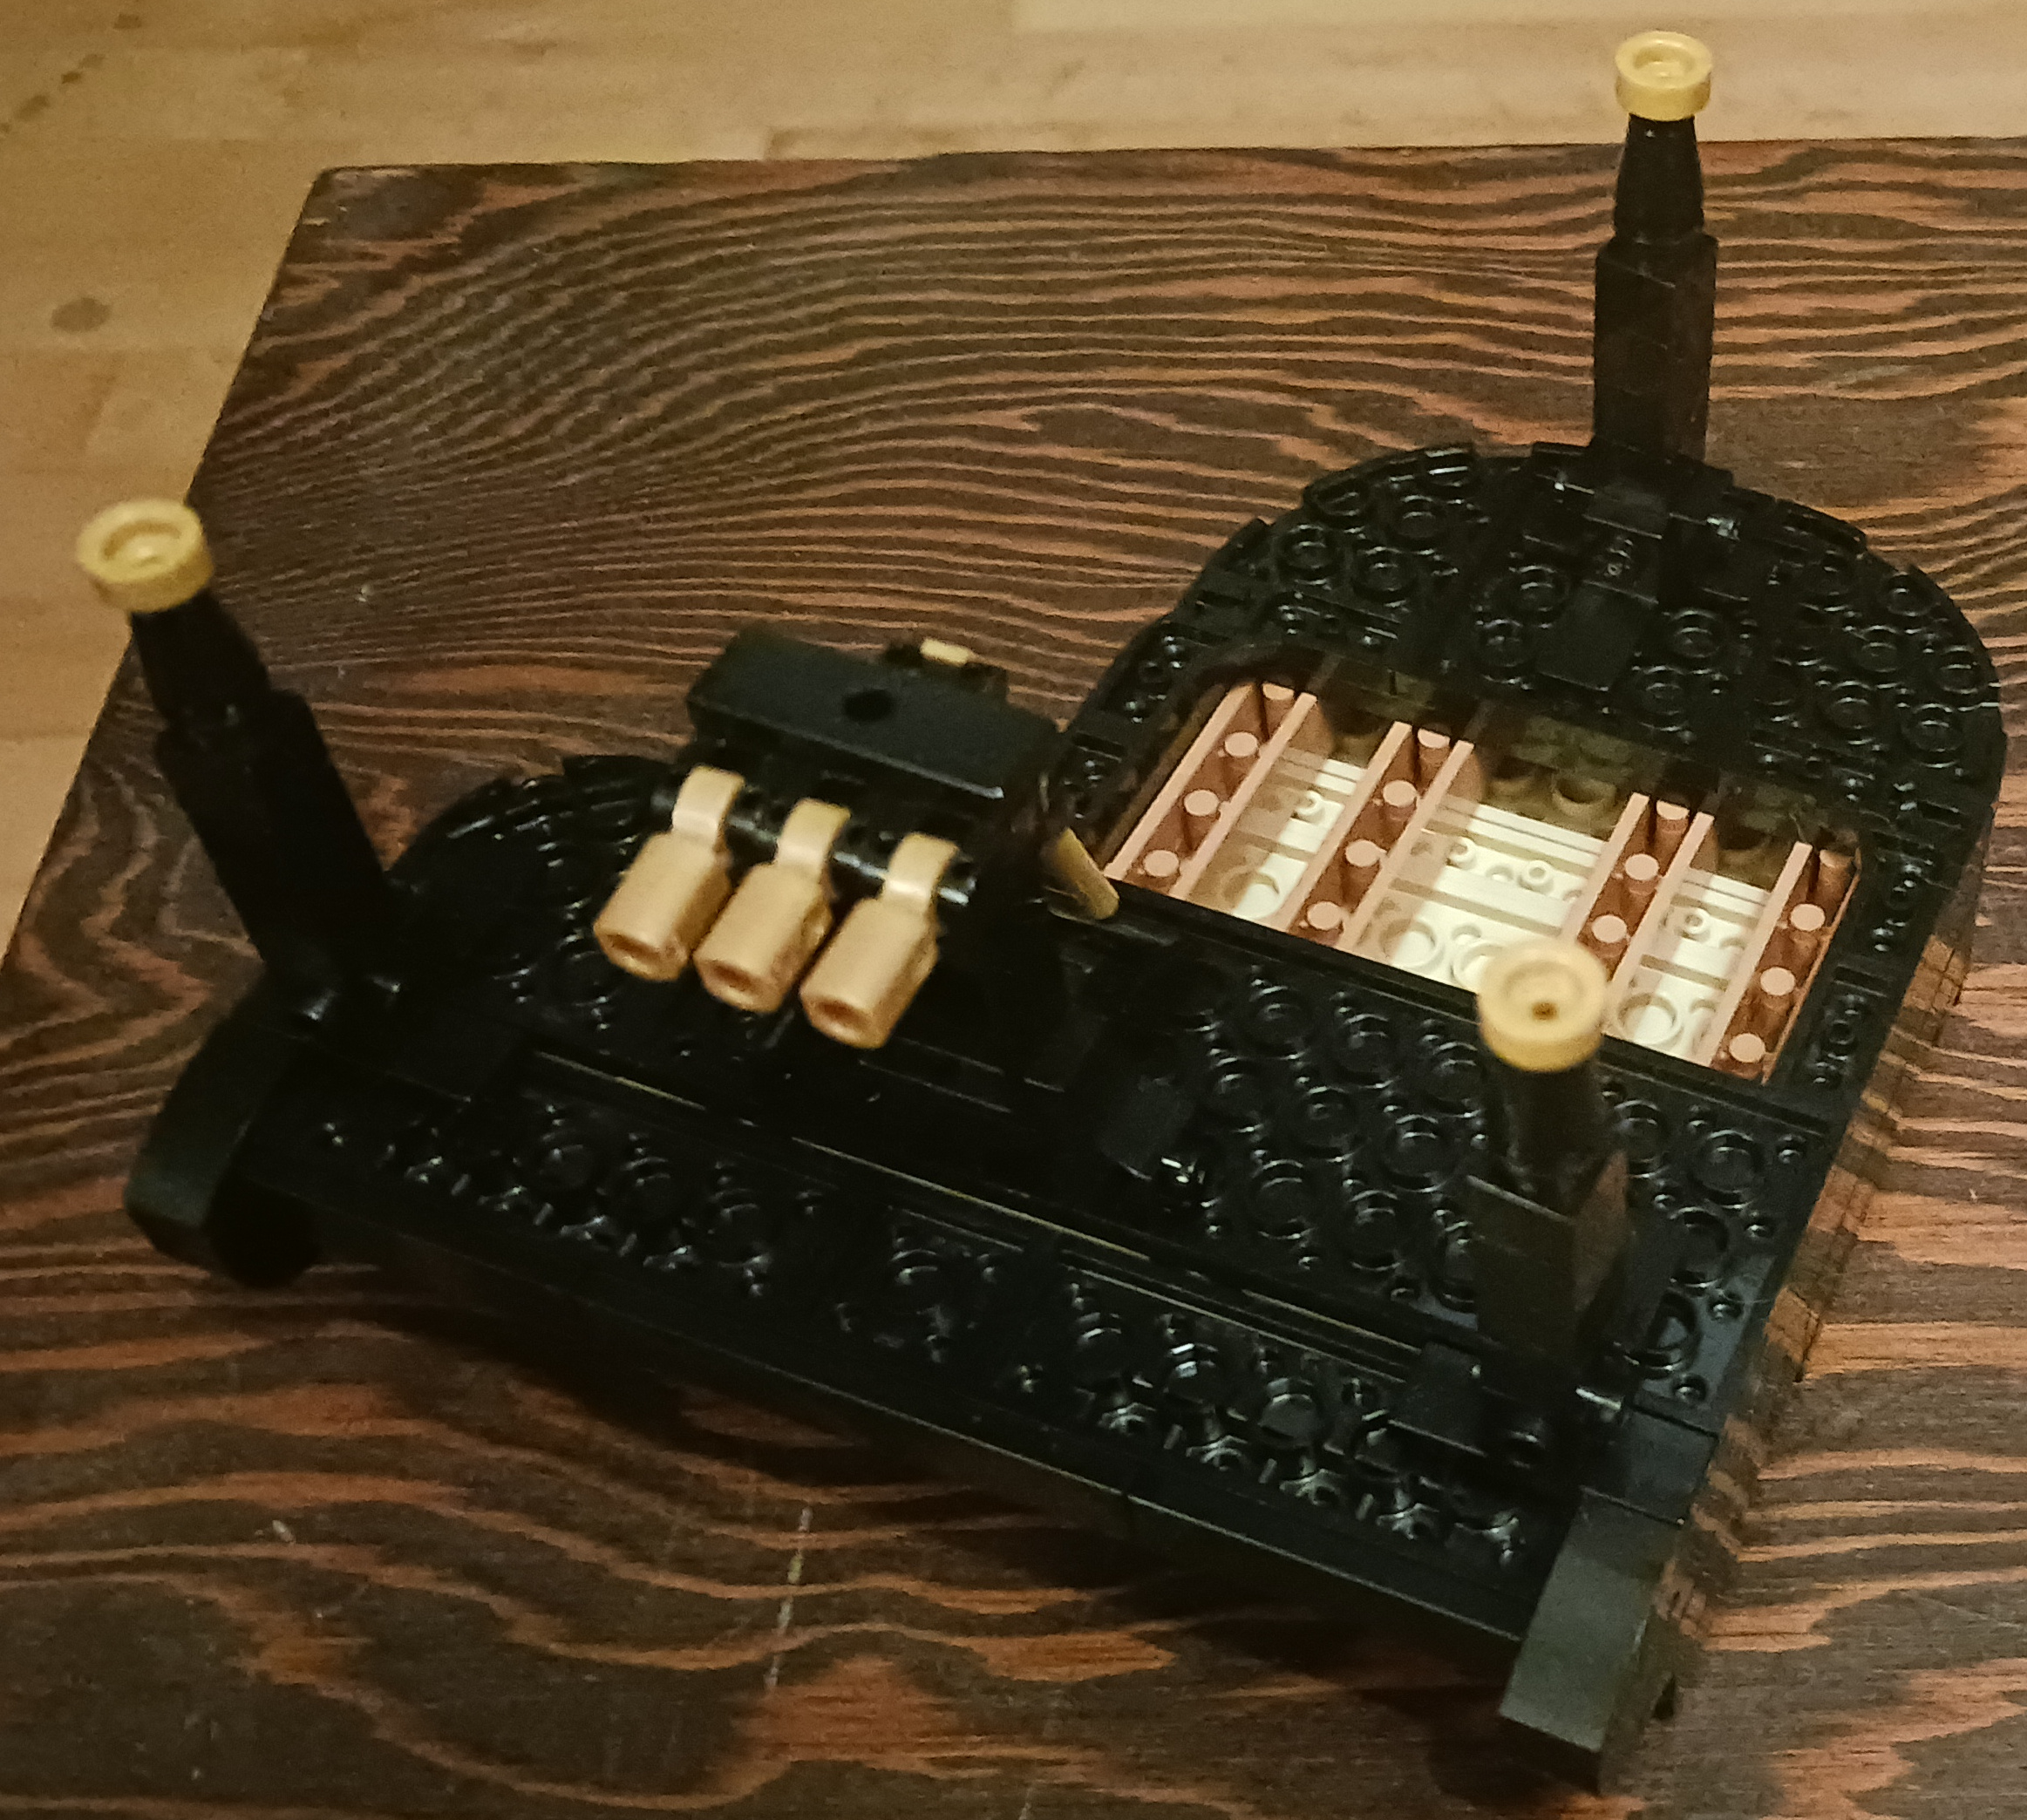
Using a few small pieces details like the pedals are built.
The piano lid construction starts with a combination of straight and rounded plates to form the distinctive shape. There’s an interesting use of a 2×2 Round, Curved Inverted Tile (Boat Stud) and a 2×2 Tile, Ø4 Corner w/ 1×1 Ø2 Cutout on the underside of the lid. A 1×2 Hinge Brick, Base and a 2×2 Hinge, Top allows the lid to be mounted to the rest of the piano.
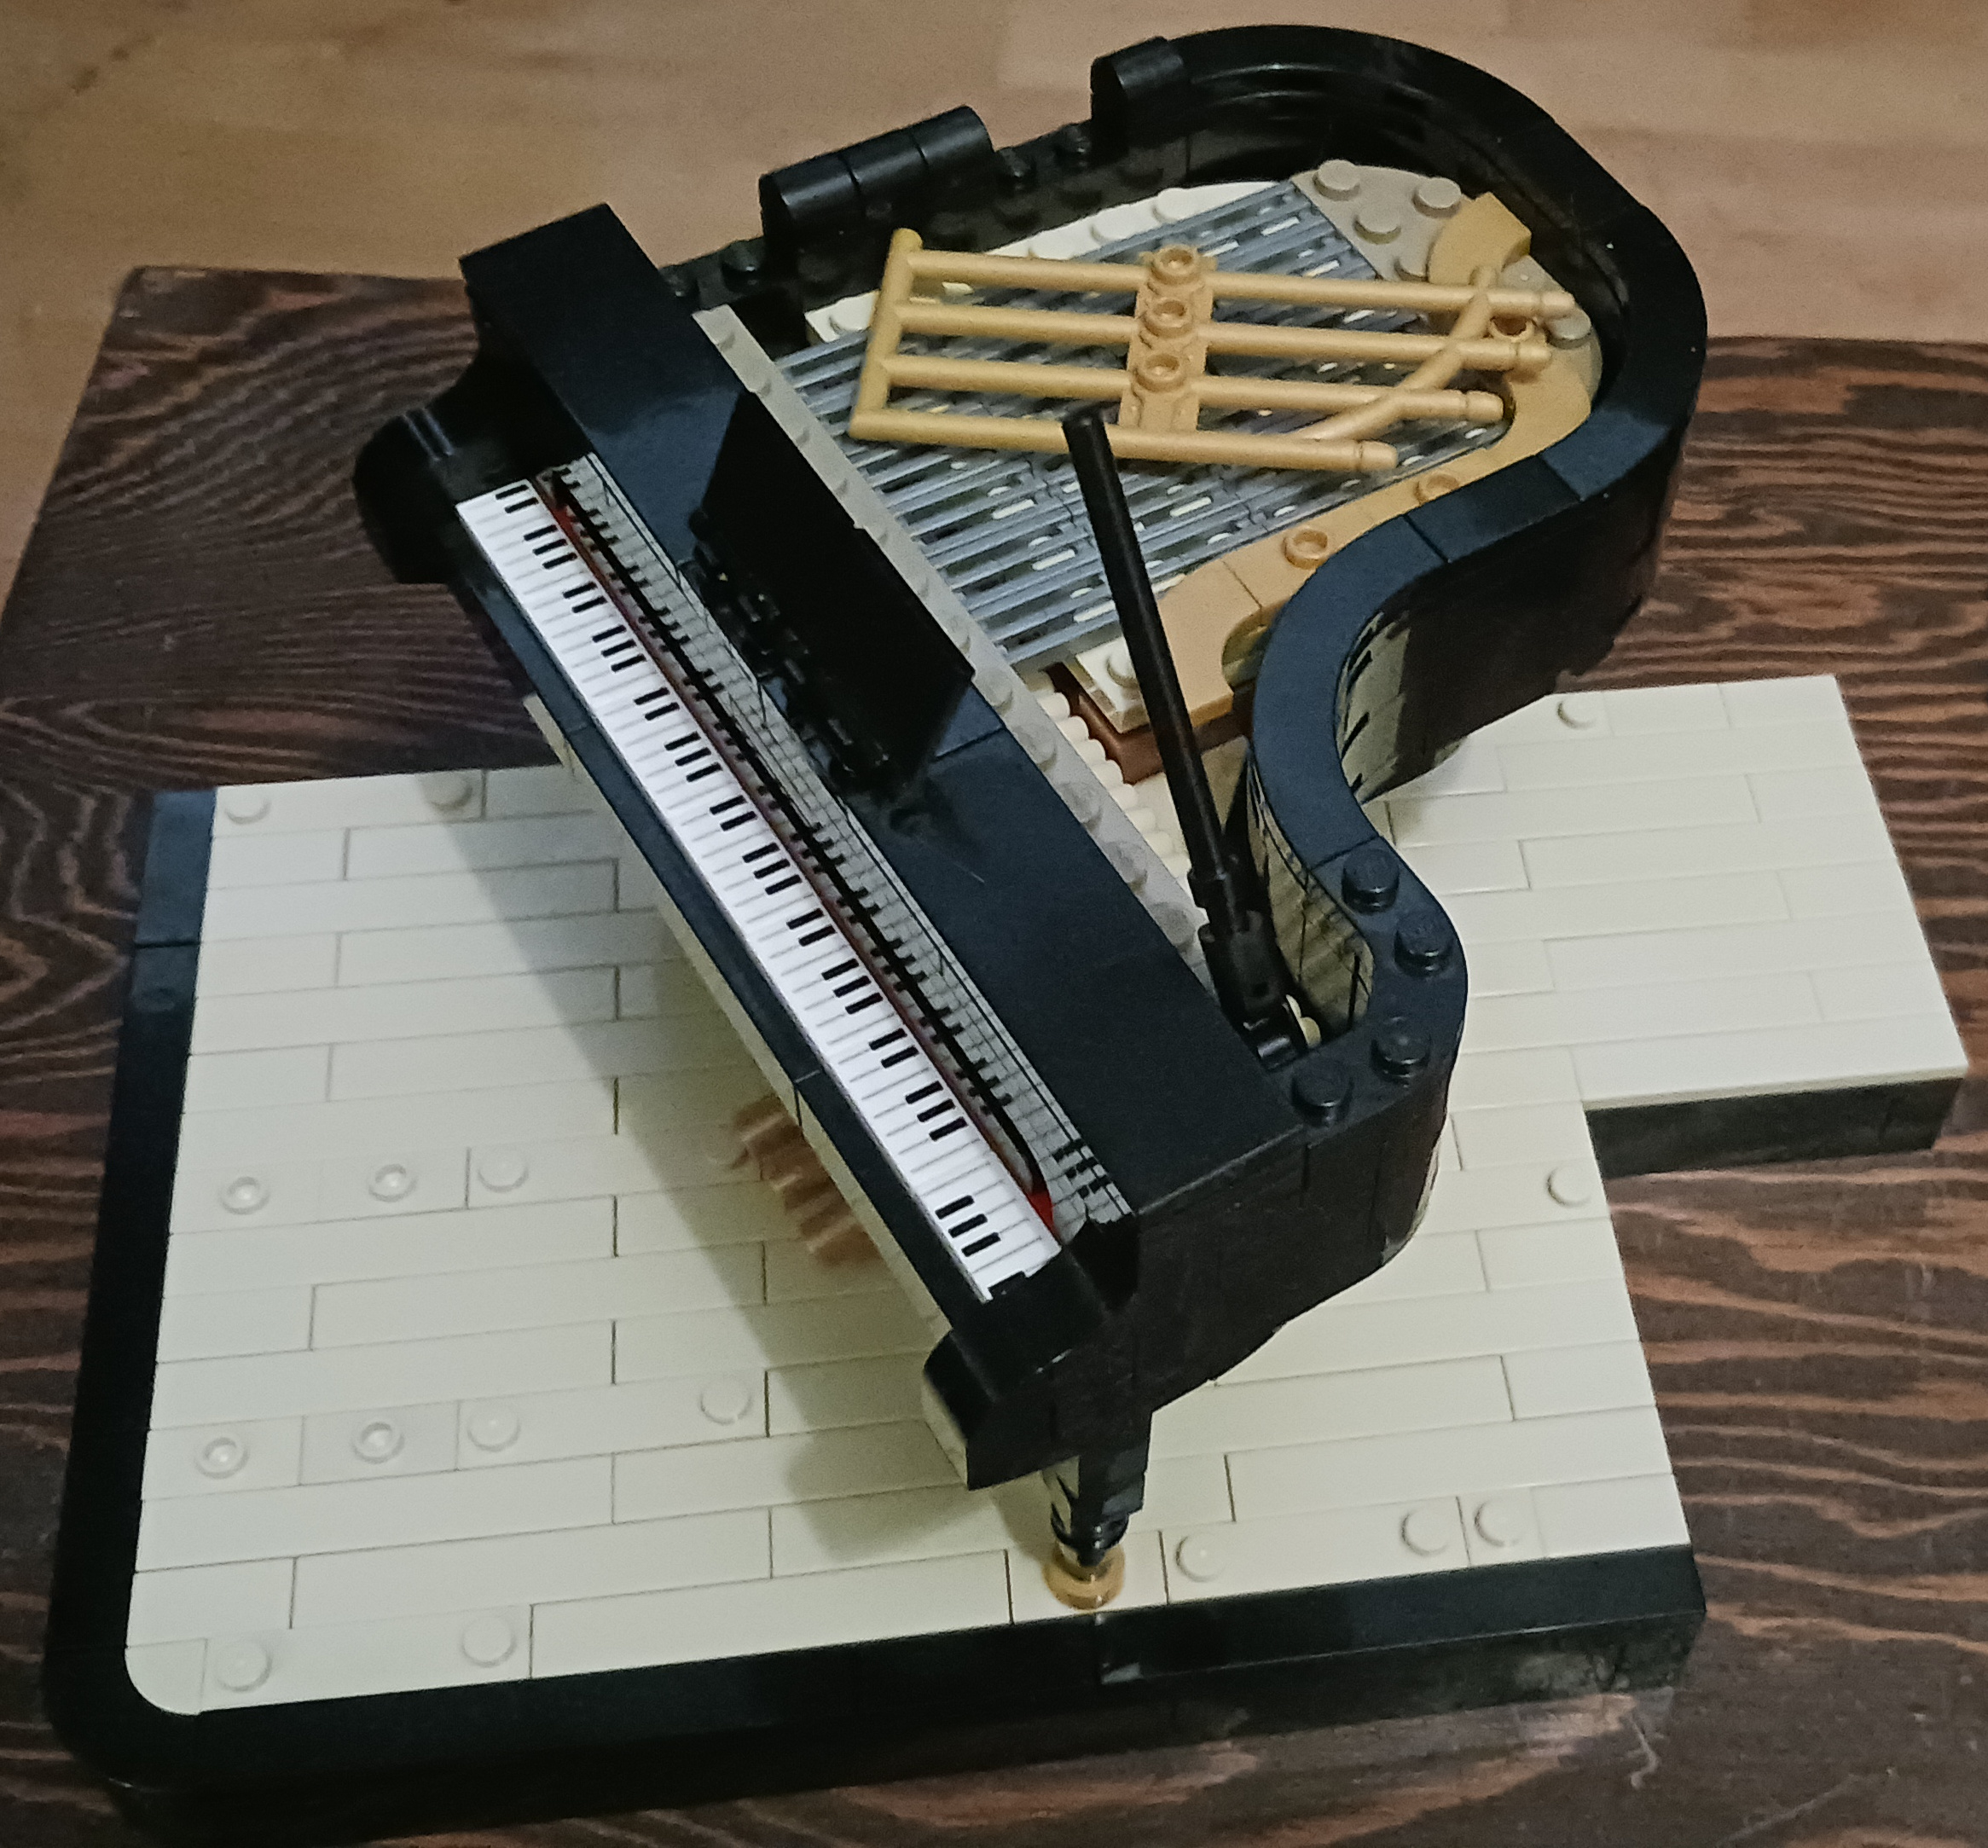
The lid of the Piano rest on hinges.
The piano seat build starts with Technic parts, a 3×5 Beam, H-Shape and some ½-Pin, Smooth. The pins are inserted into the ends of the beam, creating studs to set plates to form the base of the seat. Some 1×1 Tile, Round and a couple of 1×3 Jumper w/ 2-studs (Double) pieces in the center complete the seat cushion. A pair of 1×3 Tile, Inverted w/ Hole along with some more Technic pins on the underside of the seat add stability and prepare it for the legs. A couple of minifigure brackets, more round tiles, antenna pieces, 1-by-1 round plates and cone bricks add the legs and complete the piano seat.
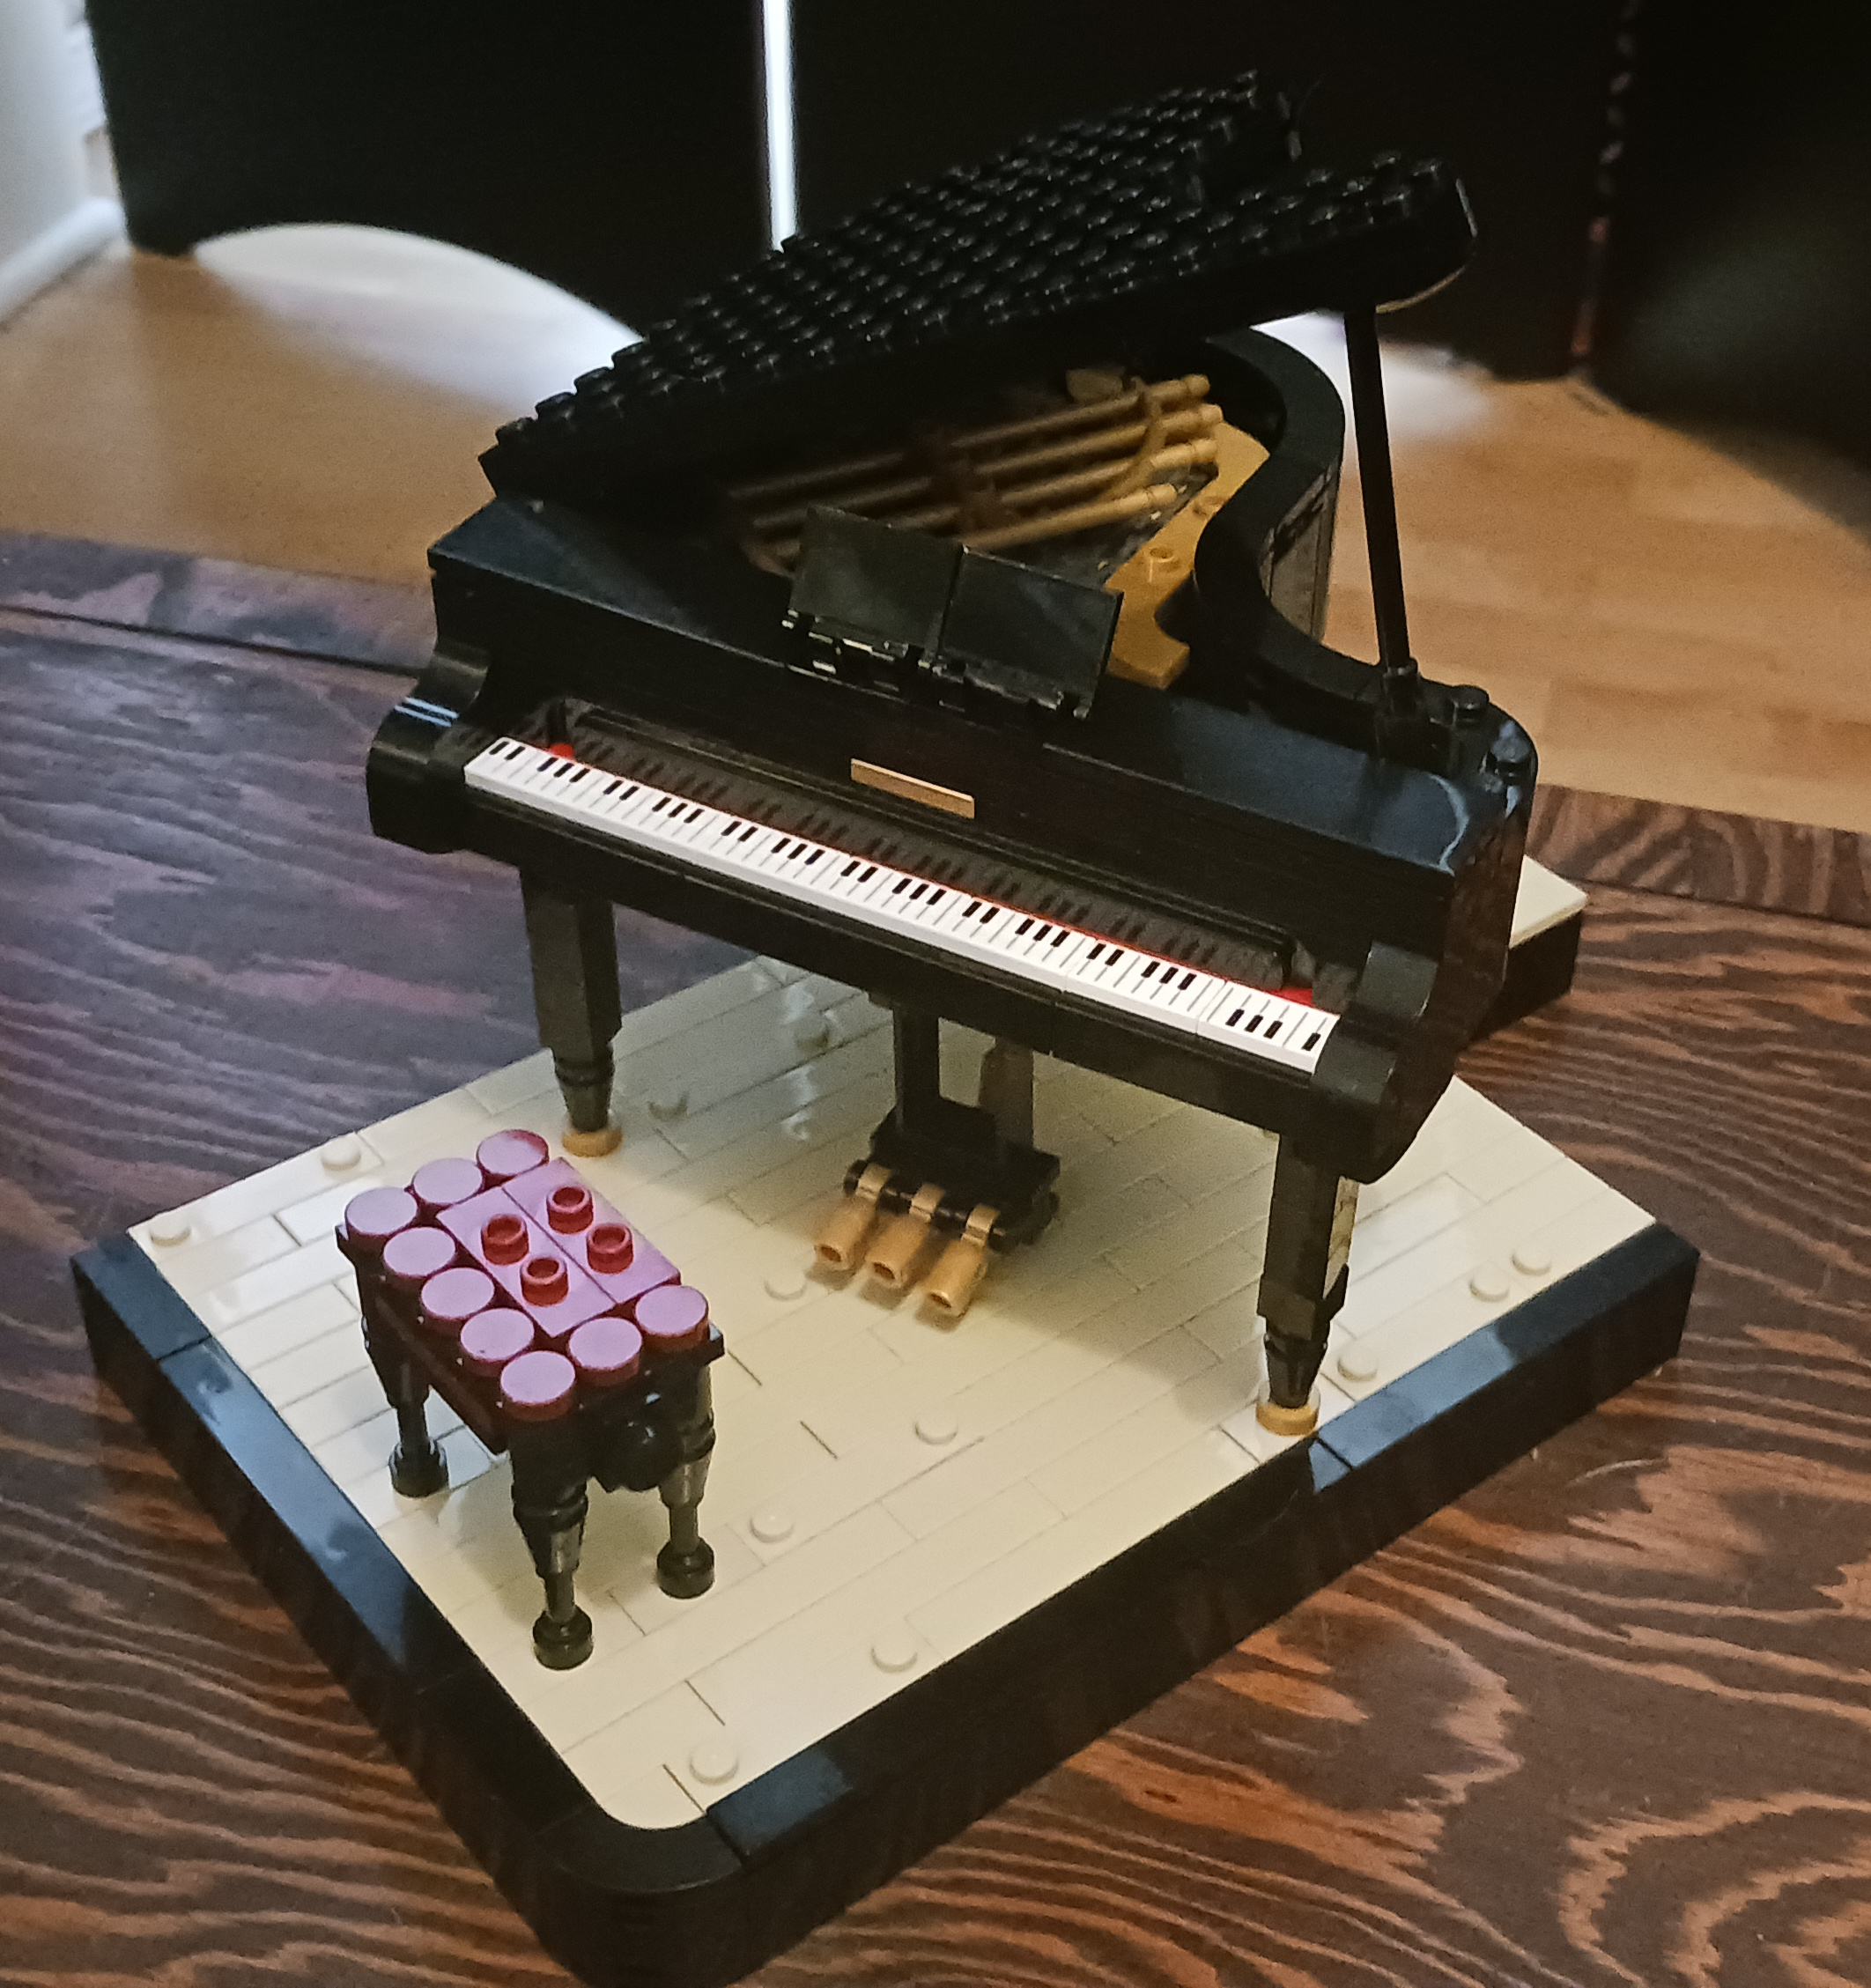
The colors of the seat contrast against the black of the Piano.
Now comes the assembly of Roberta Simone, my pianist. I’ve never assembled a human figure in LEGO form before, so I was eager for the experience. It starts by creating an internal base with lots of side-stud bricks and plates such as 1×1 Brick, Stud, 1-side and 2×2×⅔ 2-studs, Side. This base makes a SNOT block onto which the bricks, tiles and plates forming Roberta’s dress and body parts can be attached. Note the unusual 2×2×1⅓ Curved Corner w/ Cutout in 191Flame Yellowish OrangeBright Light Orange, the color of Roberta’s dress.
More unusual 191Flame Yellowish OrangeBright Light Orange bricks and plates cover the base, with additional side-stud plates to build up Roberta’s body. A combination of a 194Medium Stone GreyLight Bluish Gray 1×2 Plate w/ Towball Socket, Side and a number of plates, tiles and round tiles with hollow bars in the color Reddish Brown begin the construction of the pianist’s chest, arms and shoulders. The internal SNOT base allows for added curvature of bricks for Roberta’s skirt, with two 1×1 Plate, Round w/ Handle used in the building of her legs.
192Reddish Brown round slope bricks, side-stud bricks and clip plates are used to make Roberta’s legs, which then attach to the hinge bars under her skirt. 26Black 30° 1×1 Cheese Slope, minifigure brackets and vertical tooth plates give her a sharp pair of shoes with little spike heels. 2×1×⅔ Curved, 1×4 Hinge Plate and 1×1 Tile w/ Ø1 Rounded End make Roberta’s arms, with 1-by-1 ring clip plates to add mobile wrists for her hands. I have to admit it’s been delightful to see all these unusual pieces in a credible color that represents brown skin.
Roberta’s head included 26Black 2×2 Bracket, Inverted and 2×1 Bracket, Inverted and a horizontal tooth plate, two 297Warm GoldPearl Gold 1×1 Tile, Heart, a 191Flame Yellowish OrangeBright Light Orange 3×2, Ø2 Rounded End Plate w/ Pin Hole, a 194Medium Stone GreyLight Bluish Gray 1×2 Plate w/ Towball, Side, 192Reddish Brown minifigure brackets and stud brackets. These were combined with more conventional bricks, plates and tiles straight, curved and angled (with a lot of SNOT attachments), crowned with a tiara-like hair ornament and a black Afro (you may call her hairstyle anything you like; I’m saying it’s an Afro). 299Warm Gold Drum LacqueredMetallic Gold rings placed on the remaining exposed studs of Roberta’s head add a bejeweled touch to the pianist’s look. The ball piece under her head connects with the cup socket at the top of her torso to complete the jazz pianist.
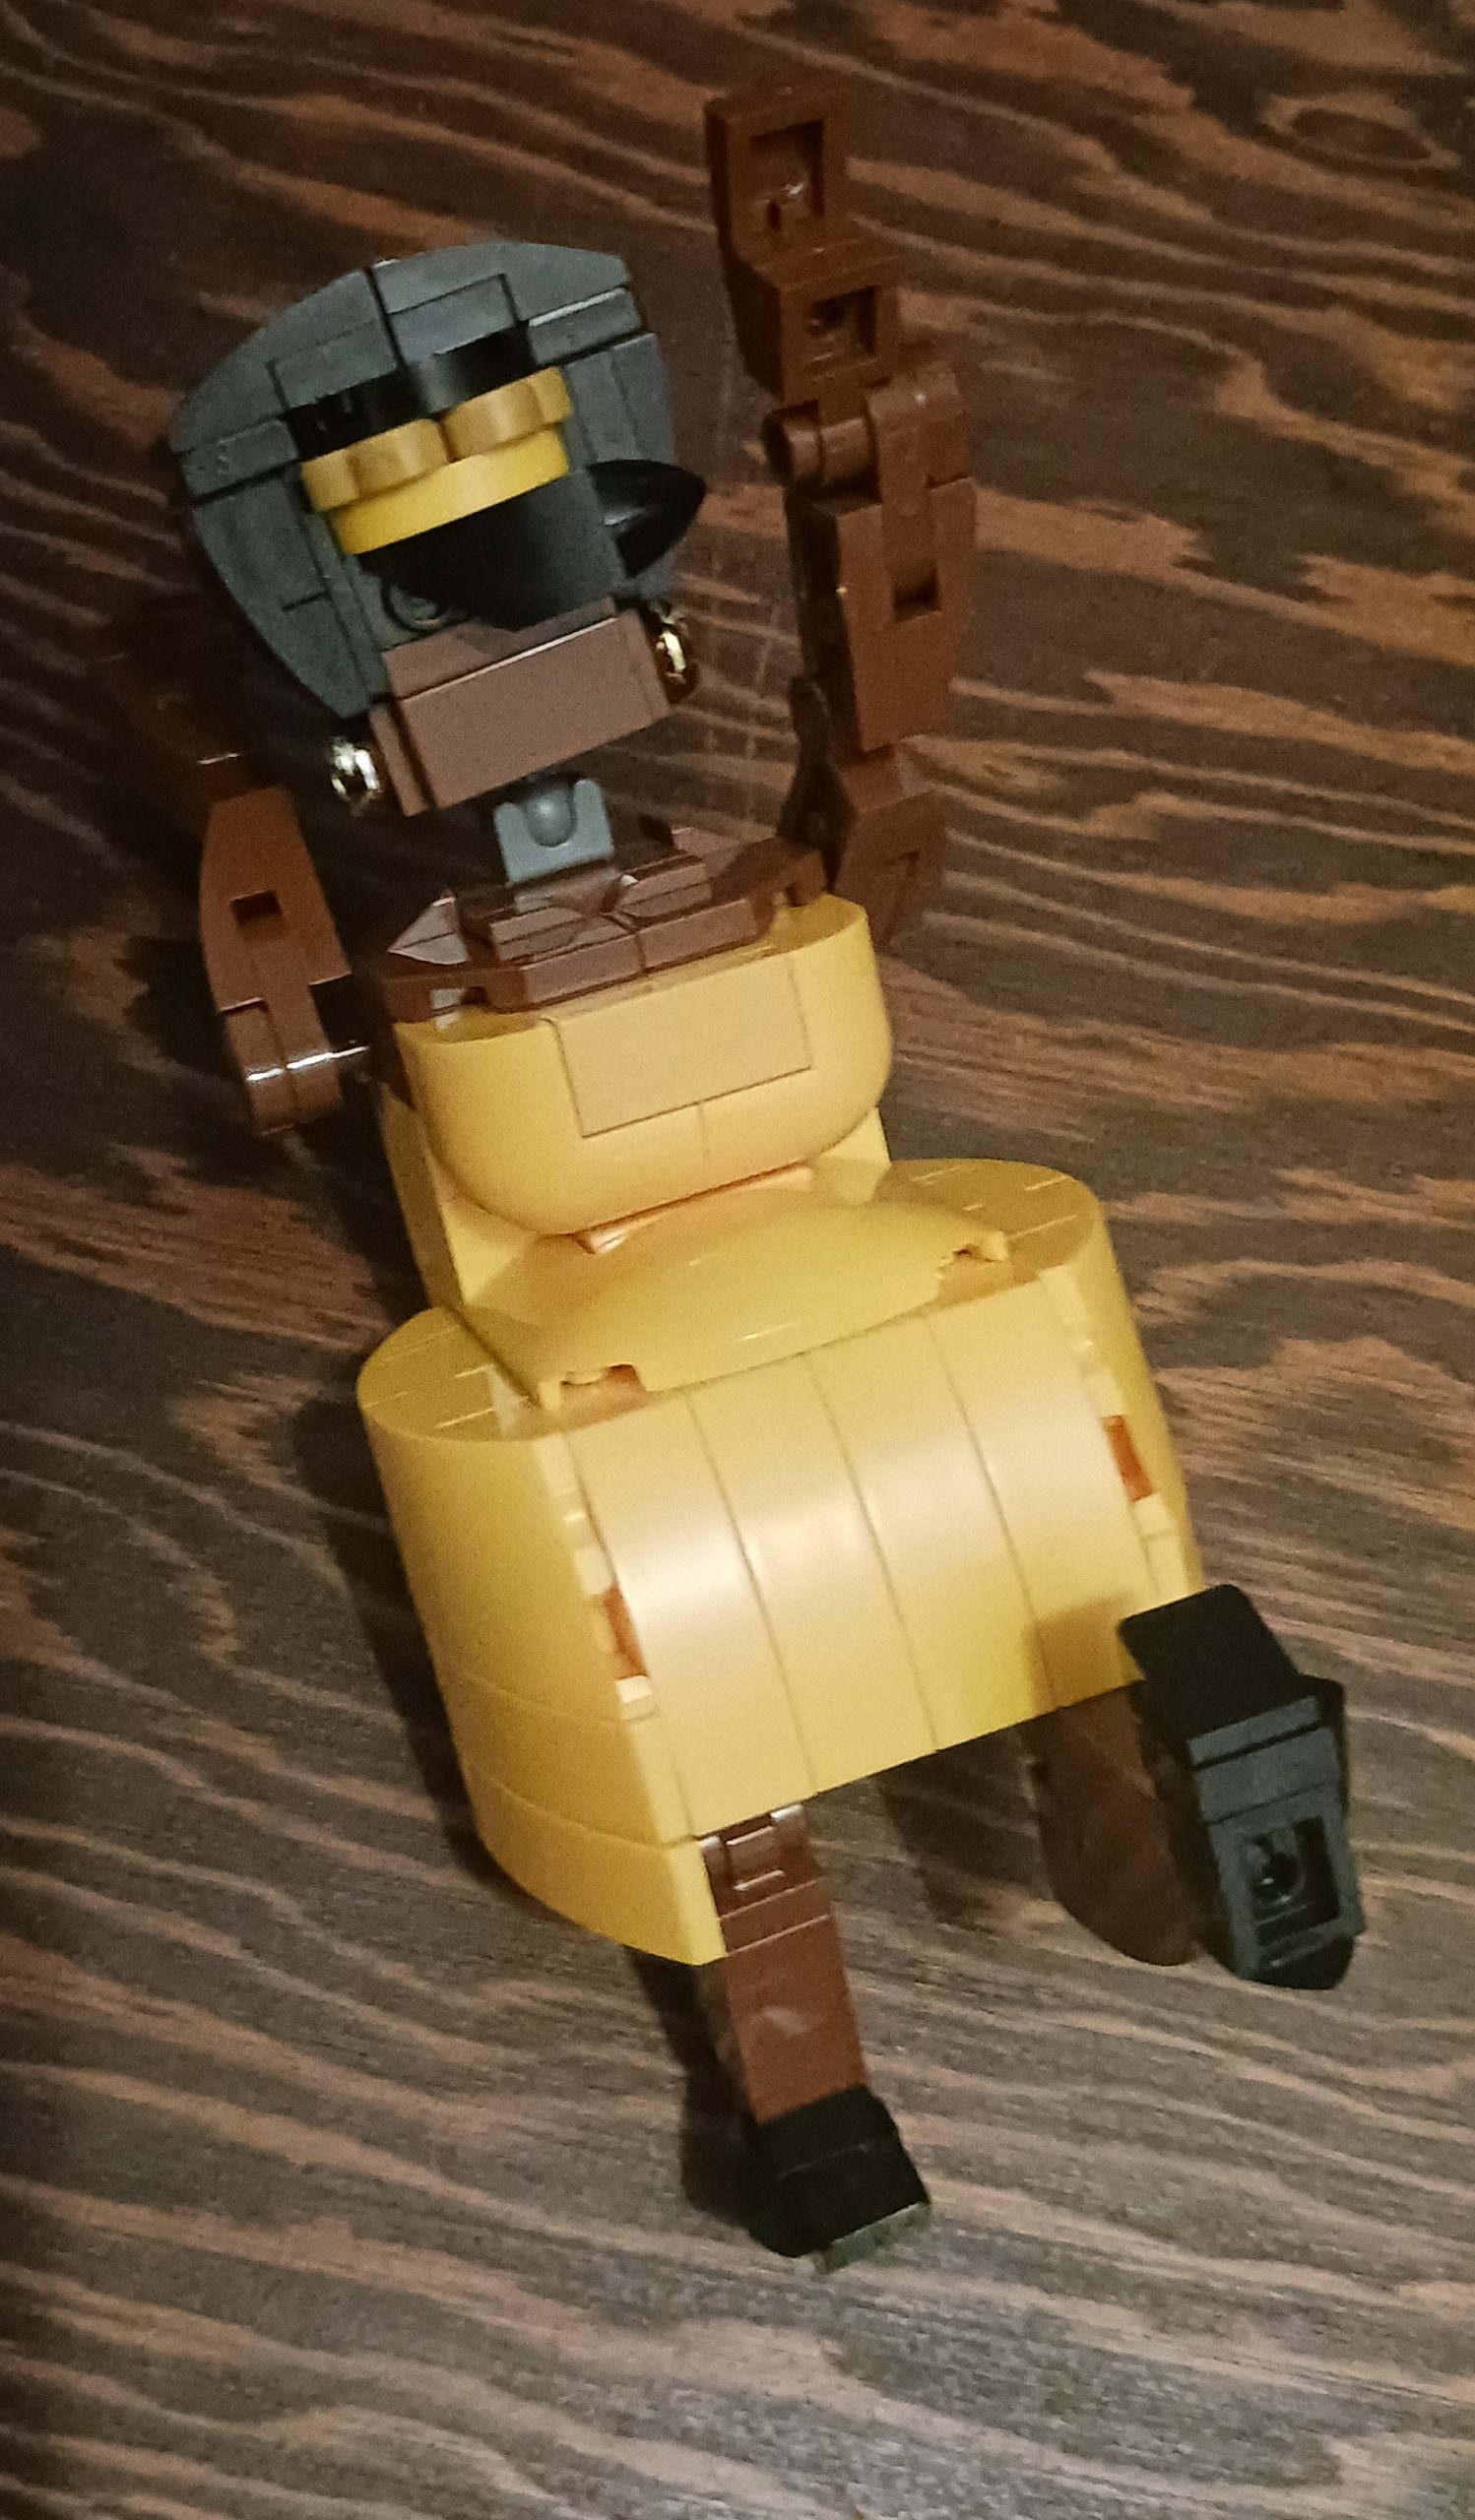
The use of ball joints allows for great articulation.
I love her! I didn’t care for dolls as a kid, but I could play with Roberta Simone all day. Her only flaw with playability is that her shoulder joints are pretty stiff and a little too easy to accidentally break apart. I don’t let this stop me as I just want to wave her arms, kick out her heels and nod her head to a bebop beat. For this review’s sake, I’ll place Roberta Simone where she was designed to go, onto the piano seat tickling the ivories and ebonies.
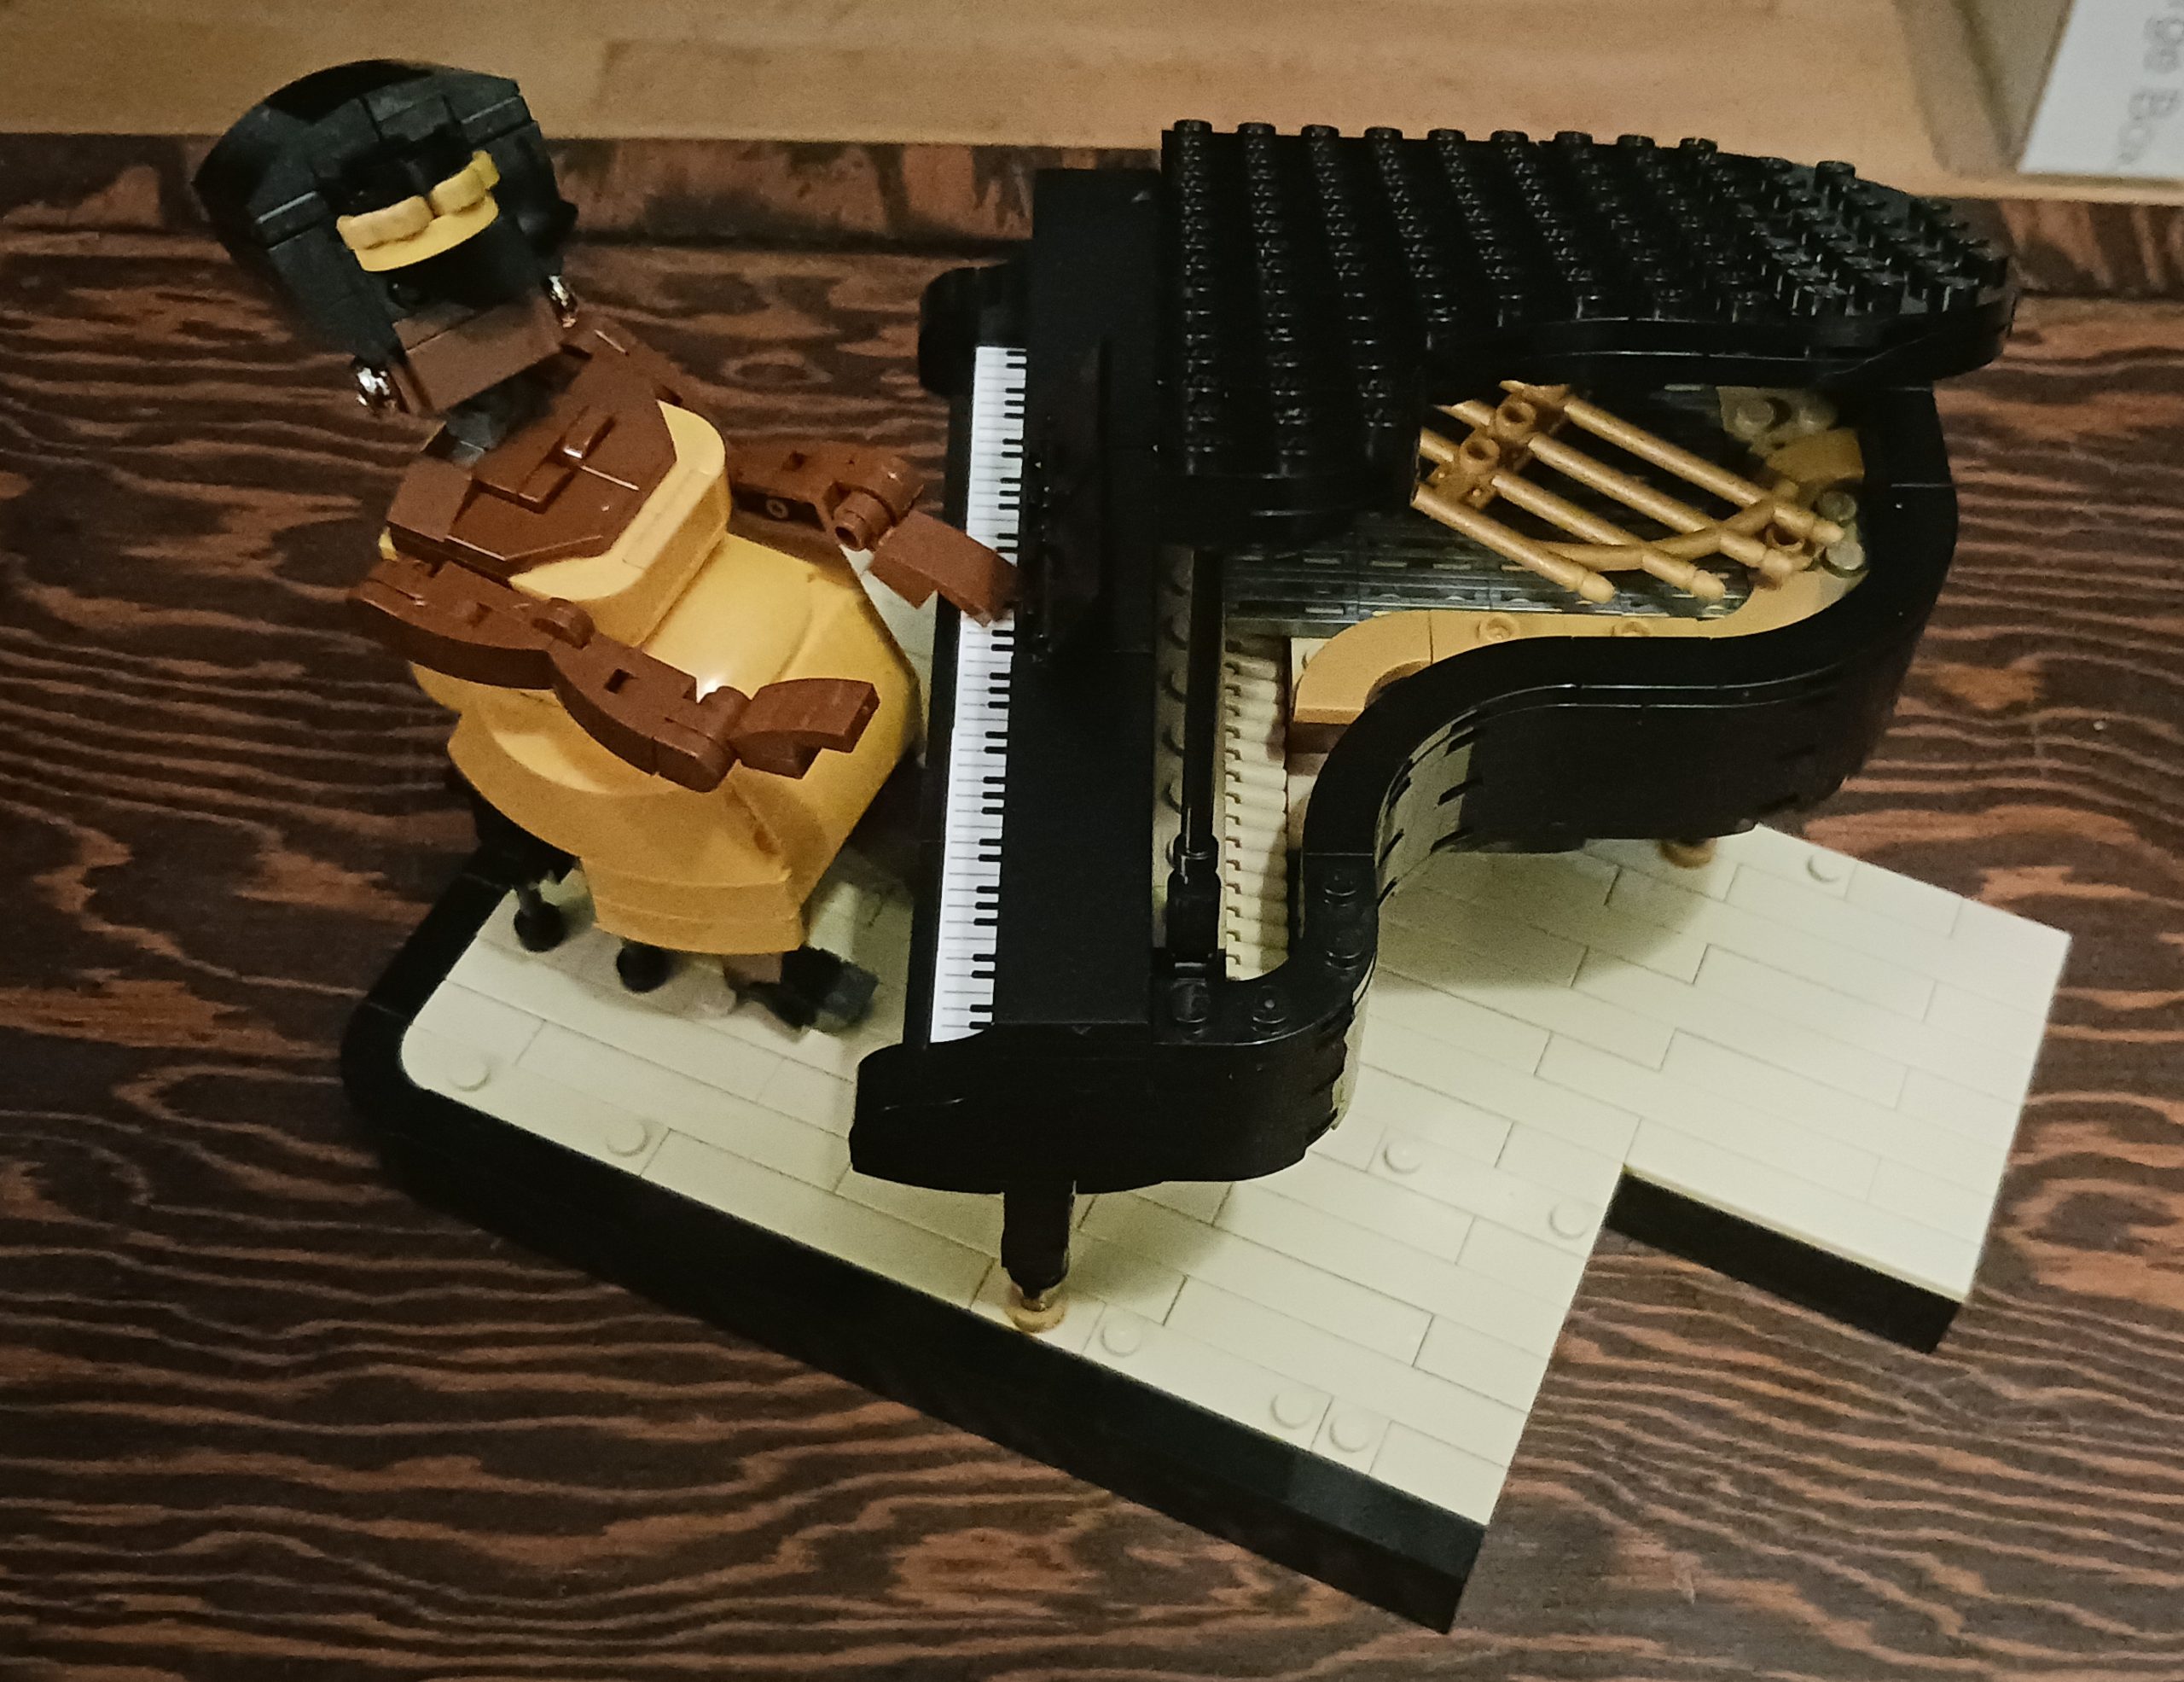
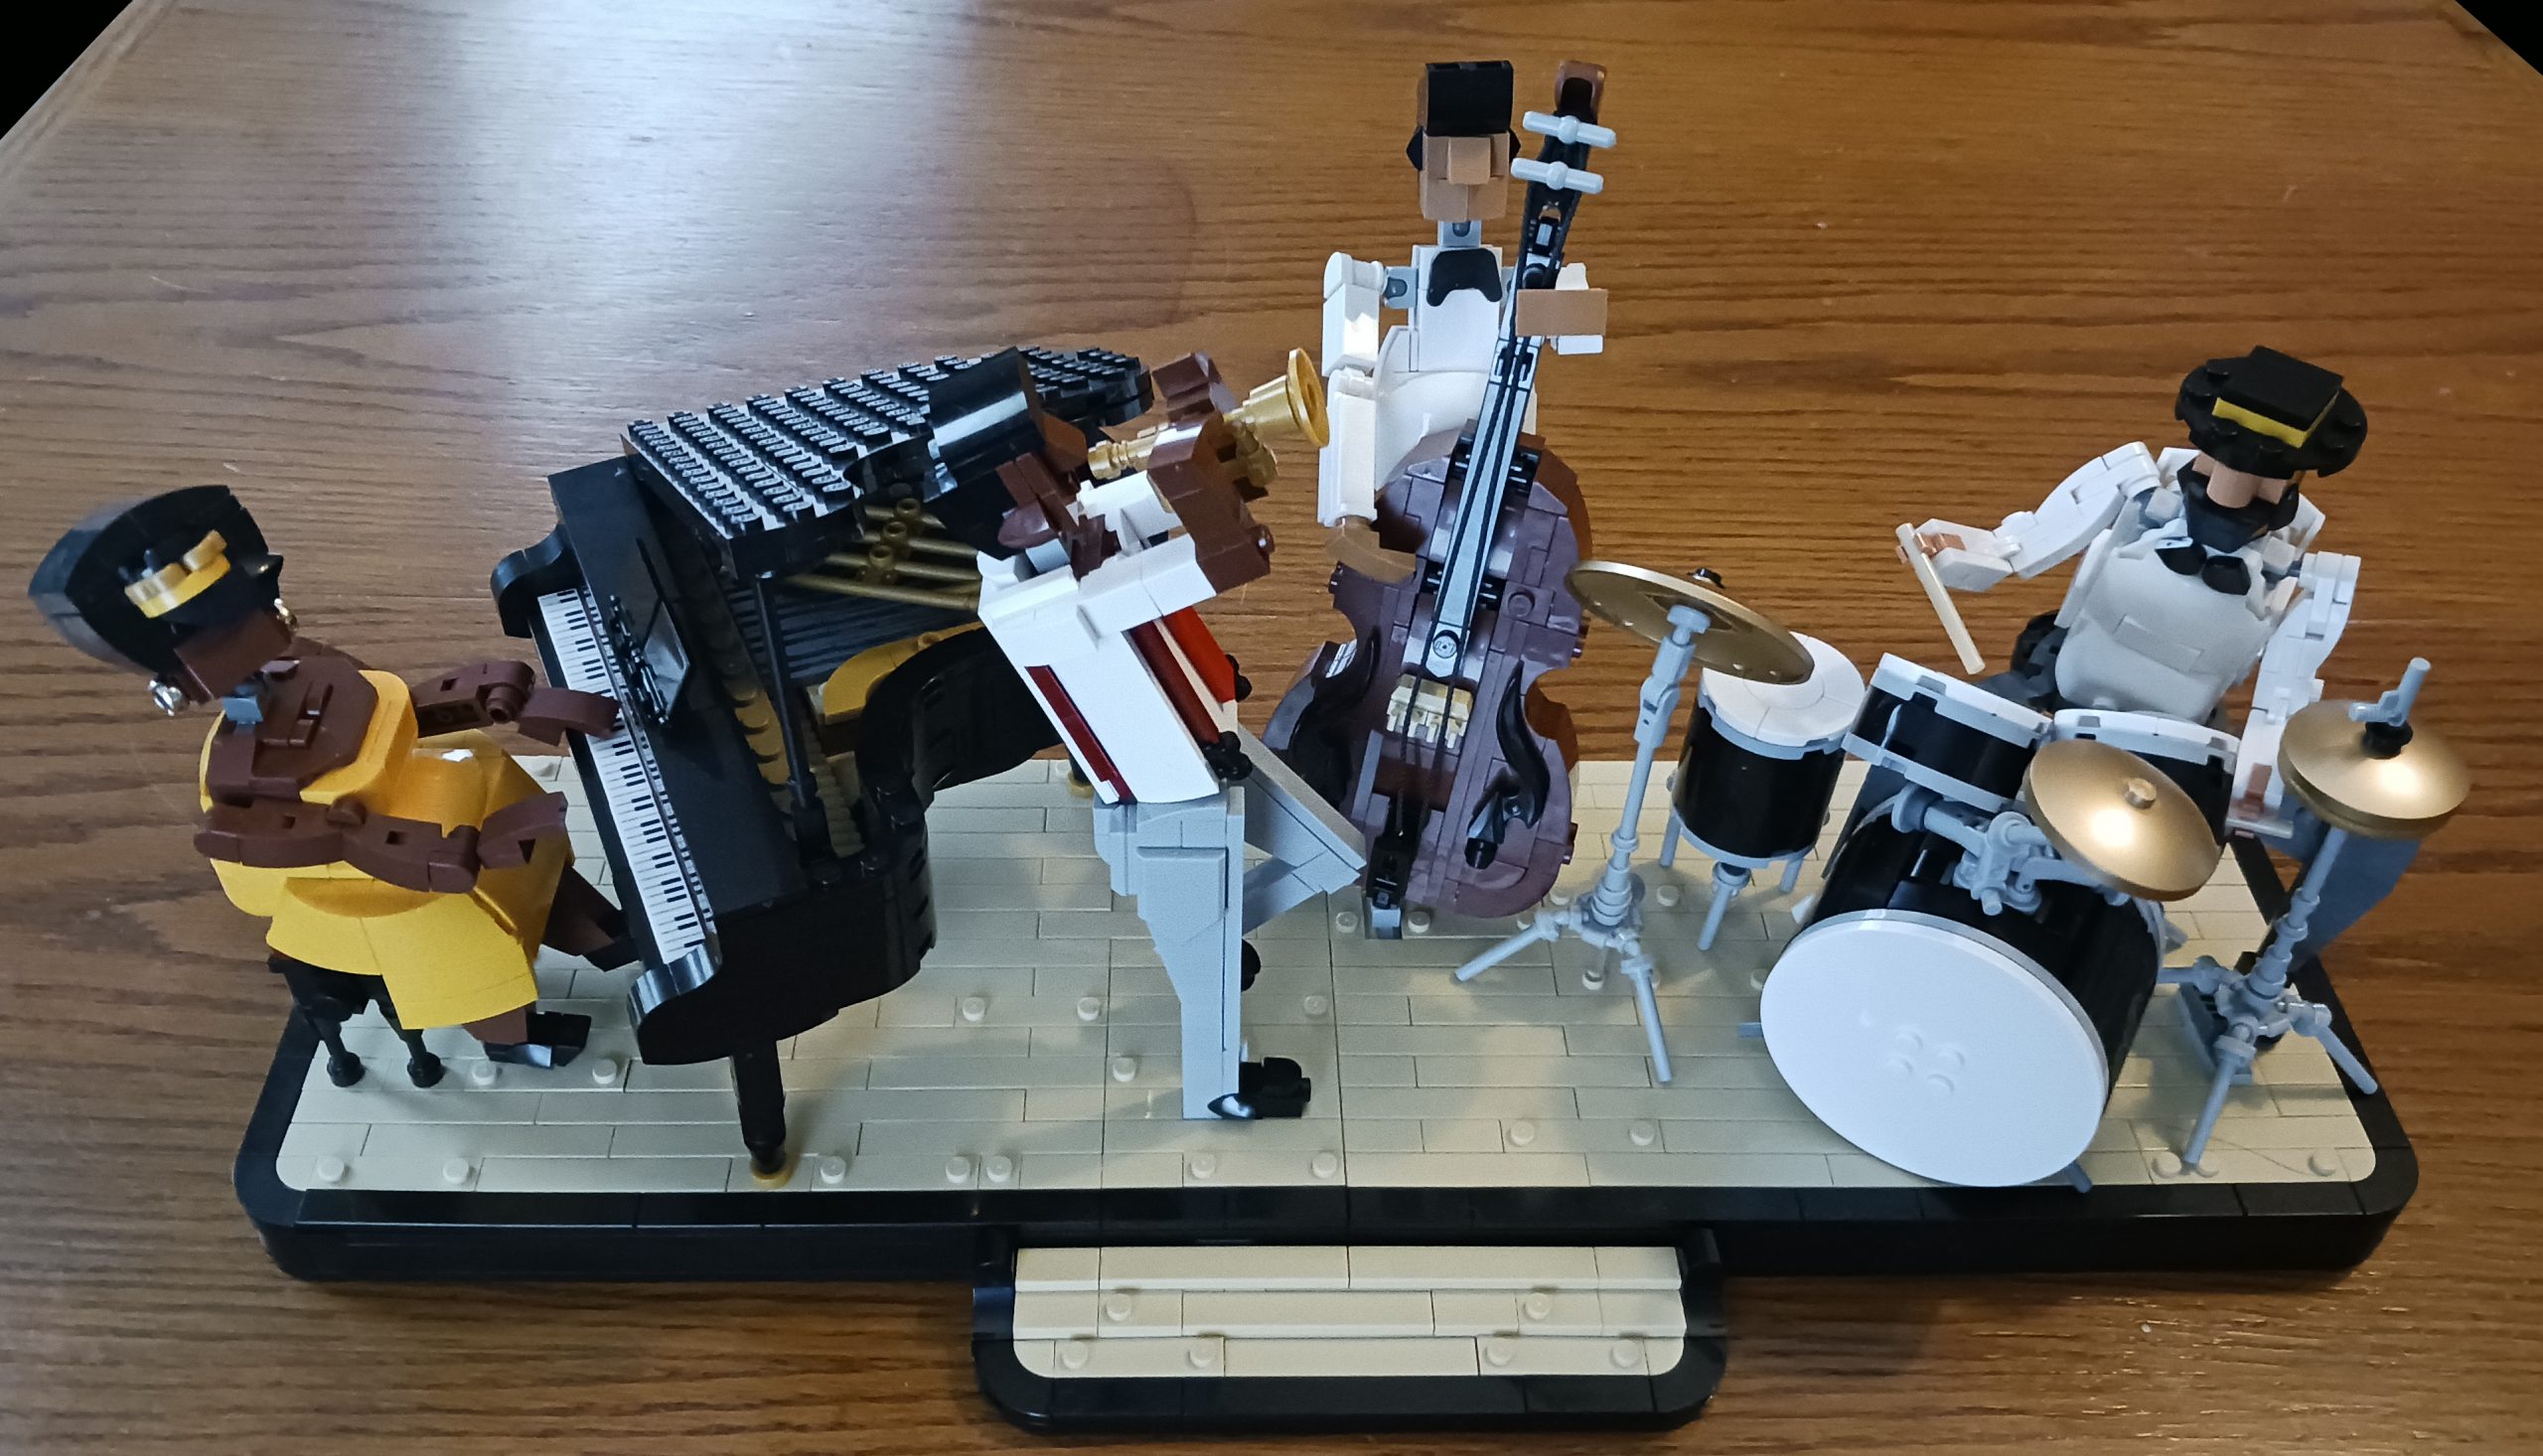
The scene is teeming with life!
The Drummer
The second player-instrument-stage grouping I assembled was the drum kit and Tony E., my drummer named after Afrobeat great Tony Allen and Queen of Drums Sheila E. The stage build was the same as for Roberta Simone’s stage, with the exception of using a 2×2 Round Plate w/ Axle Hole along with the rectangular plates and tiles for the floor.
The same techniques are used for the second base.
A complex combination of SNOT bricks and plates, clip and hinge pieces, and other bricks and plates makes the skeleton of the bass drum. The skeleton holds curved and angled bricks as well as one-stud-wide plates assembled into blocks to make the frame of the drum, and two 8×8 Round Plate become the drum skins.
While colorfull this gets hidden in the final build.
A combination clip, handle and claw pieces make the attachments to connect the rest of the drum kit to the bass drum. The smaller tom drums are made with curved and round tiles, plates and bricks. Some of these parts have center holes to enable the tom drums to slide onto the attachments at the top of the bass drum. A 2L Bar w/ Stop Ring slips into a hole in the bottom of the bass drum, enabling the drum kit to be secured onto the stage in a connection with the 21Bright RedRed 2×2 Round Plate w/ Axle Hole.
A 1×2 Tile, Grille and another bar with a stop in the center help to create the bass drum foot pedal and beater. The drum foot pedal sits on the stage secured by an open-stud plate. Some unusual pieces are used with more conventional bars, clips, hinges and round plates to make the legs and stands of Tony E.’s snare and floor tom drums, cymbals and seat. Clear bars inserted into the center of the leg frames connect them to 1×2 Jumper on the stage.
A 297Warm GoldPearl Gold Belt Wheel (Pulley) with a Technic Belt Wheel Tire of the same color fitted around it and a 299Warm Gold Drum LacqueredMetallic Gold 4×4 Dish are speared onto a 6L Bar w/ Stop Ring to make the hi-hat cymbals. Another4×4 Dish cymbal is attached with clips and a bar to the frame that holds the tom drums. The final 6×6 Dish cymbal is attached to its stand with a clip and hinge piece that’s inserted on a 6L Bar w/ Stop Ring. The completed drum set is huge and gorgeous.
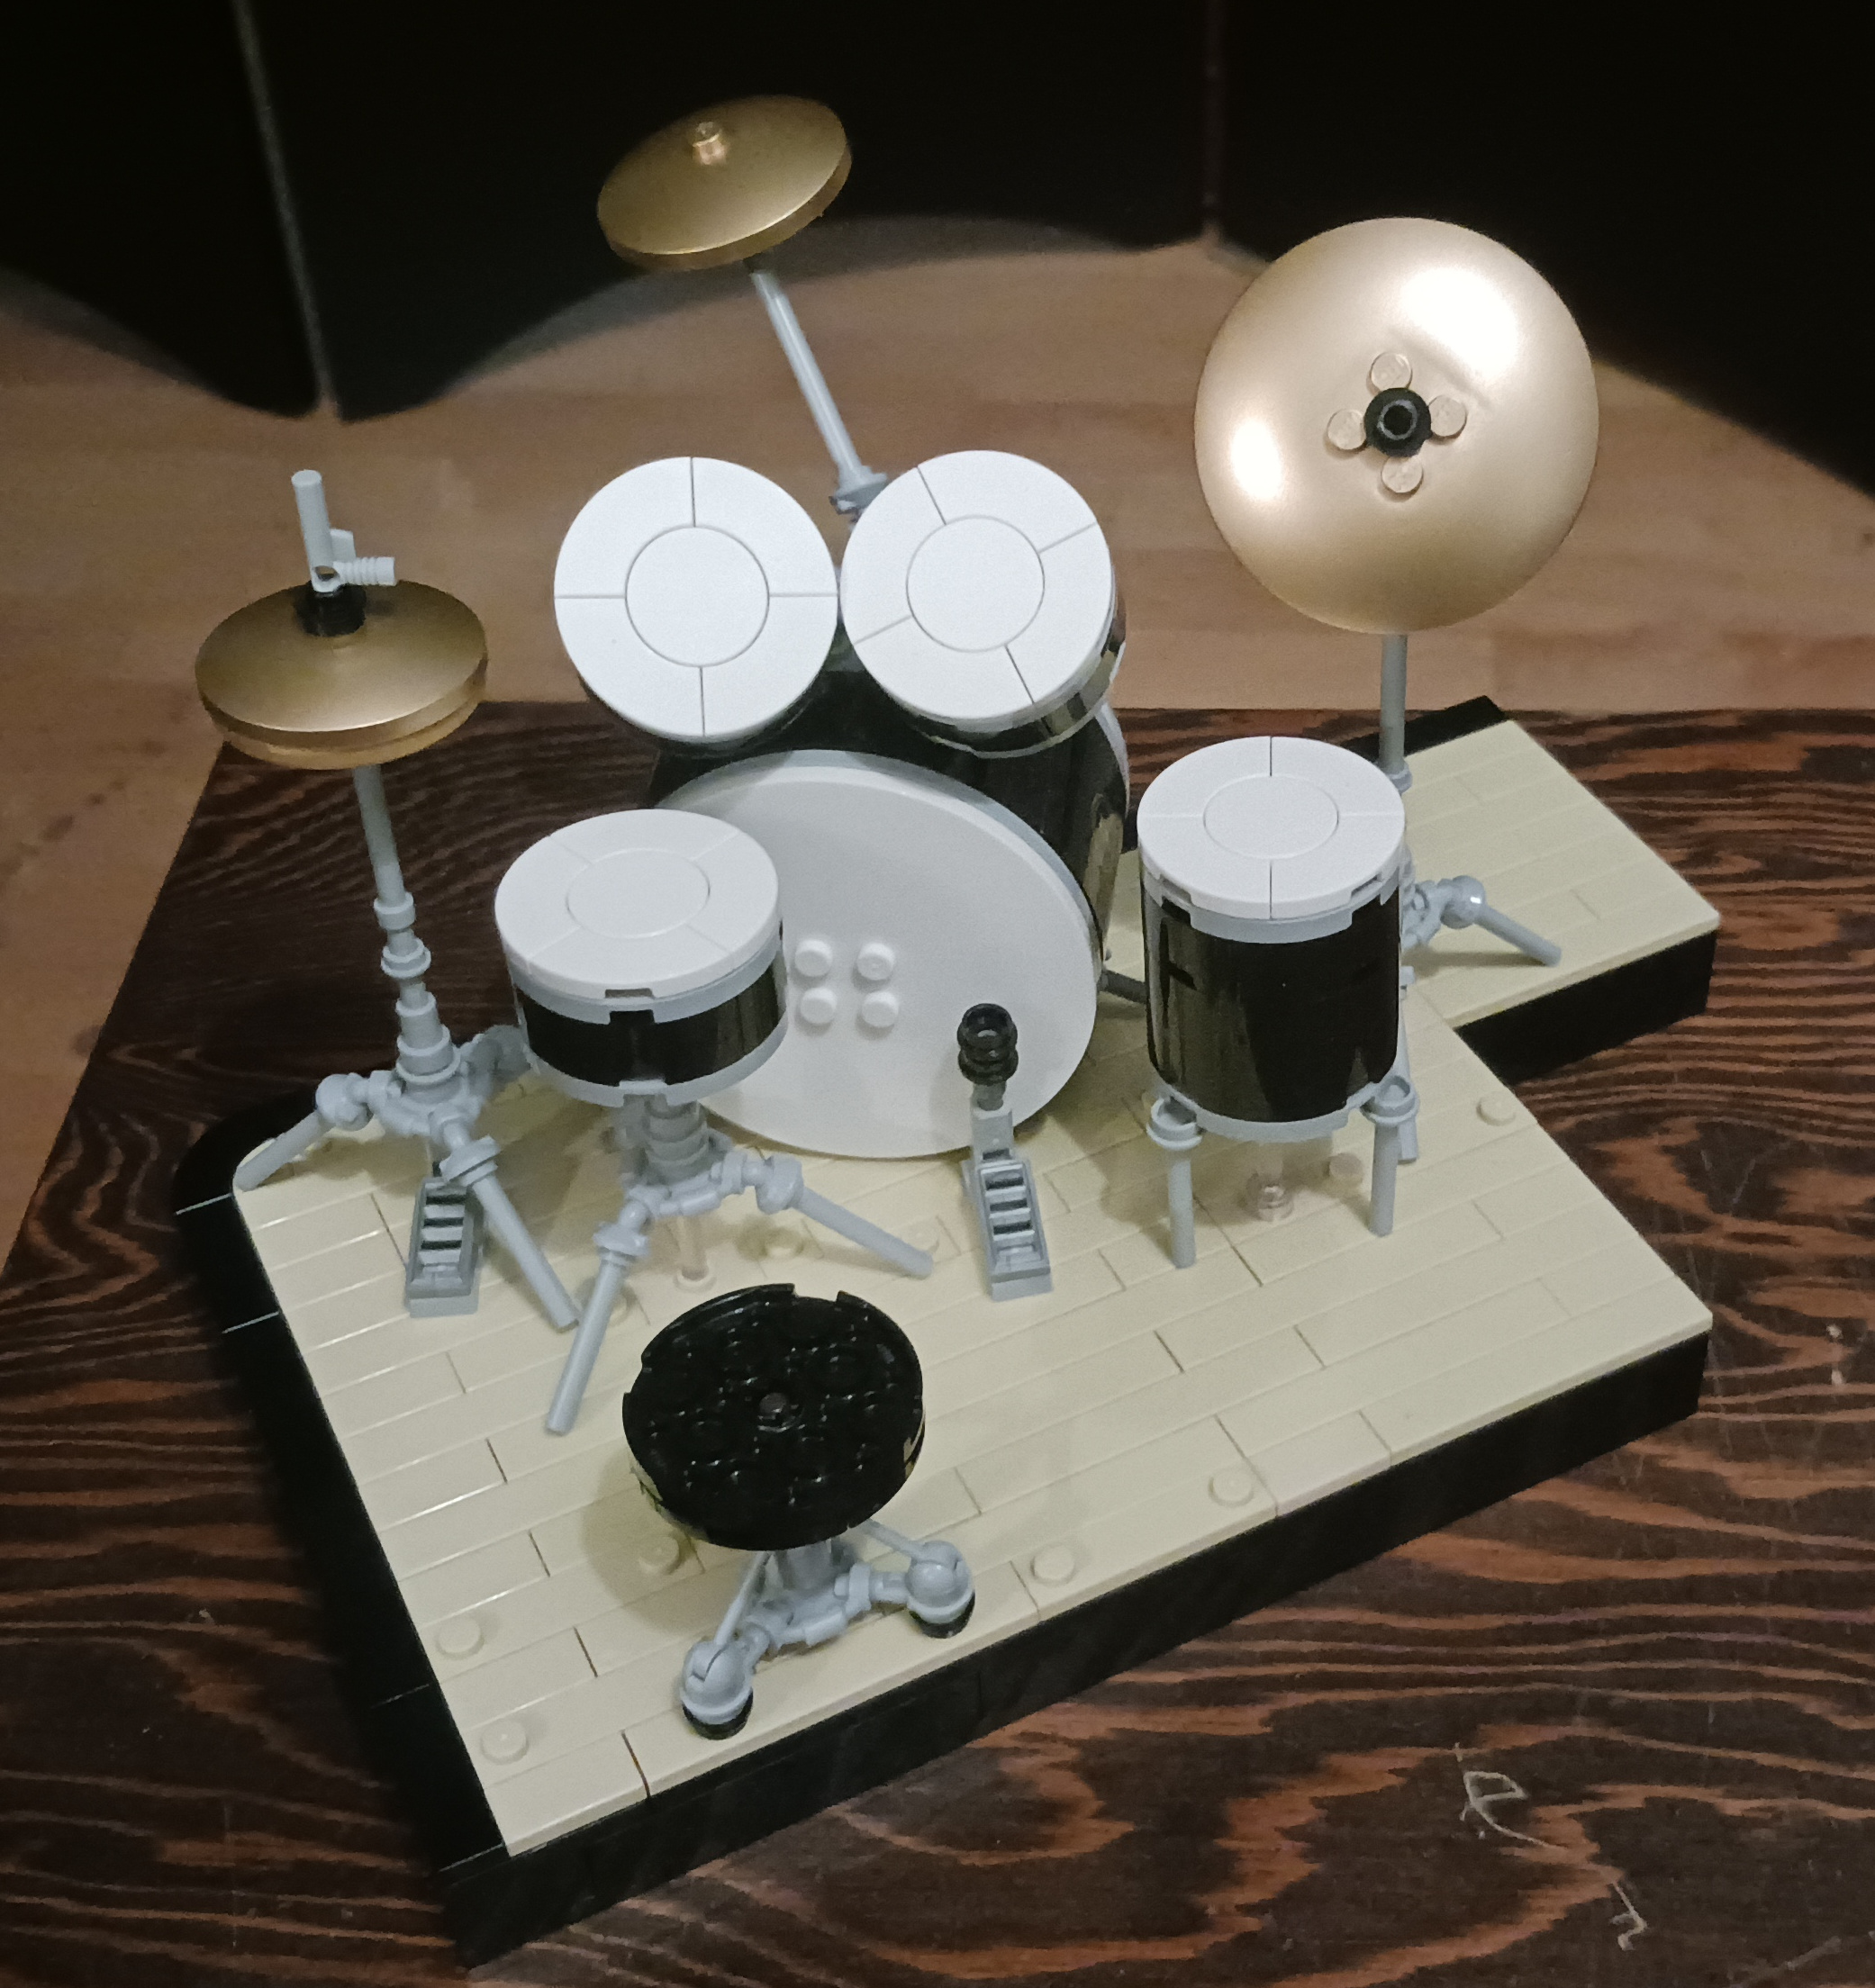
The contrasting sizes and colors makes the Drums pop out.
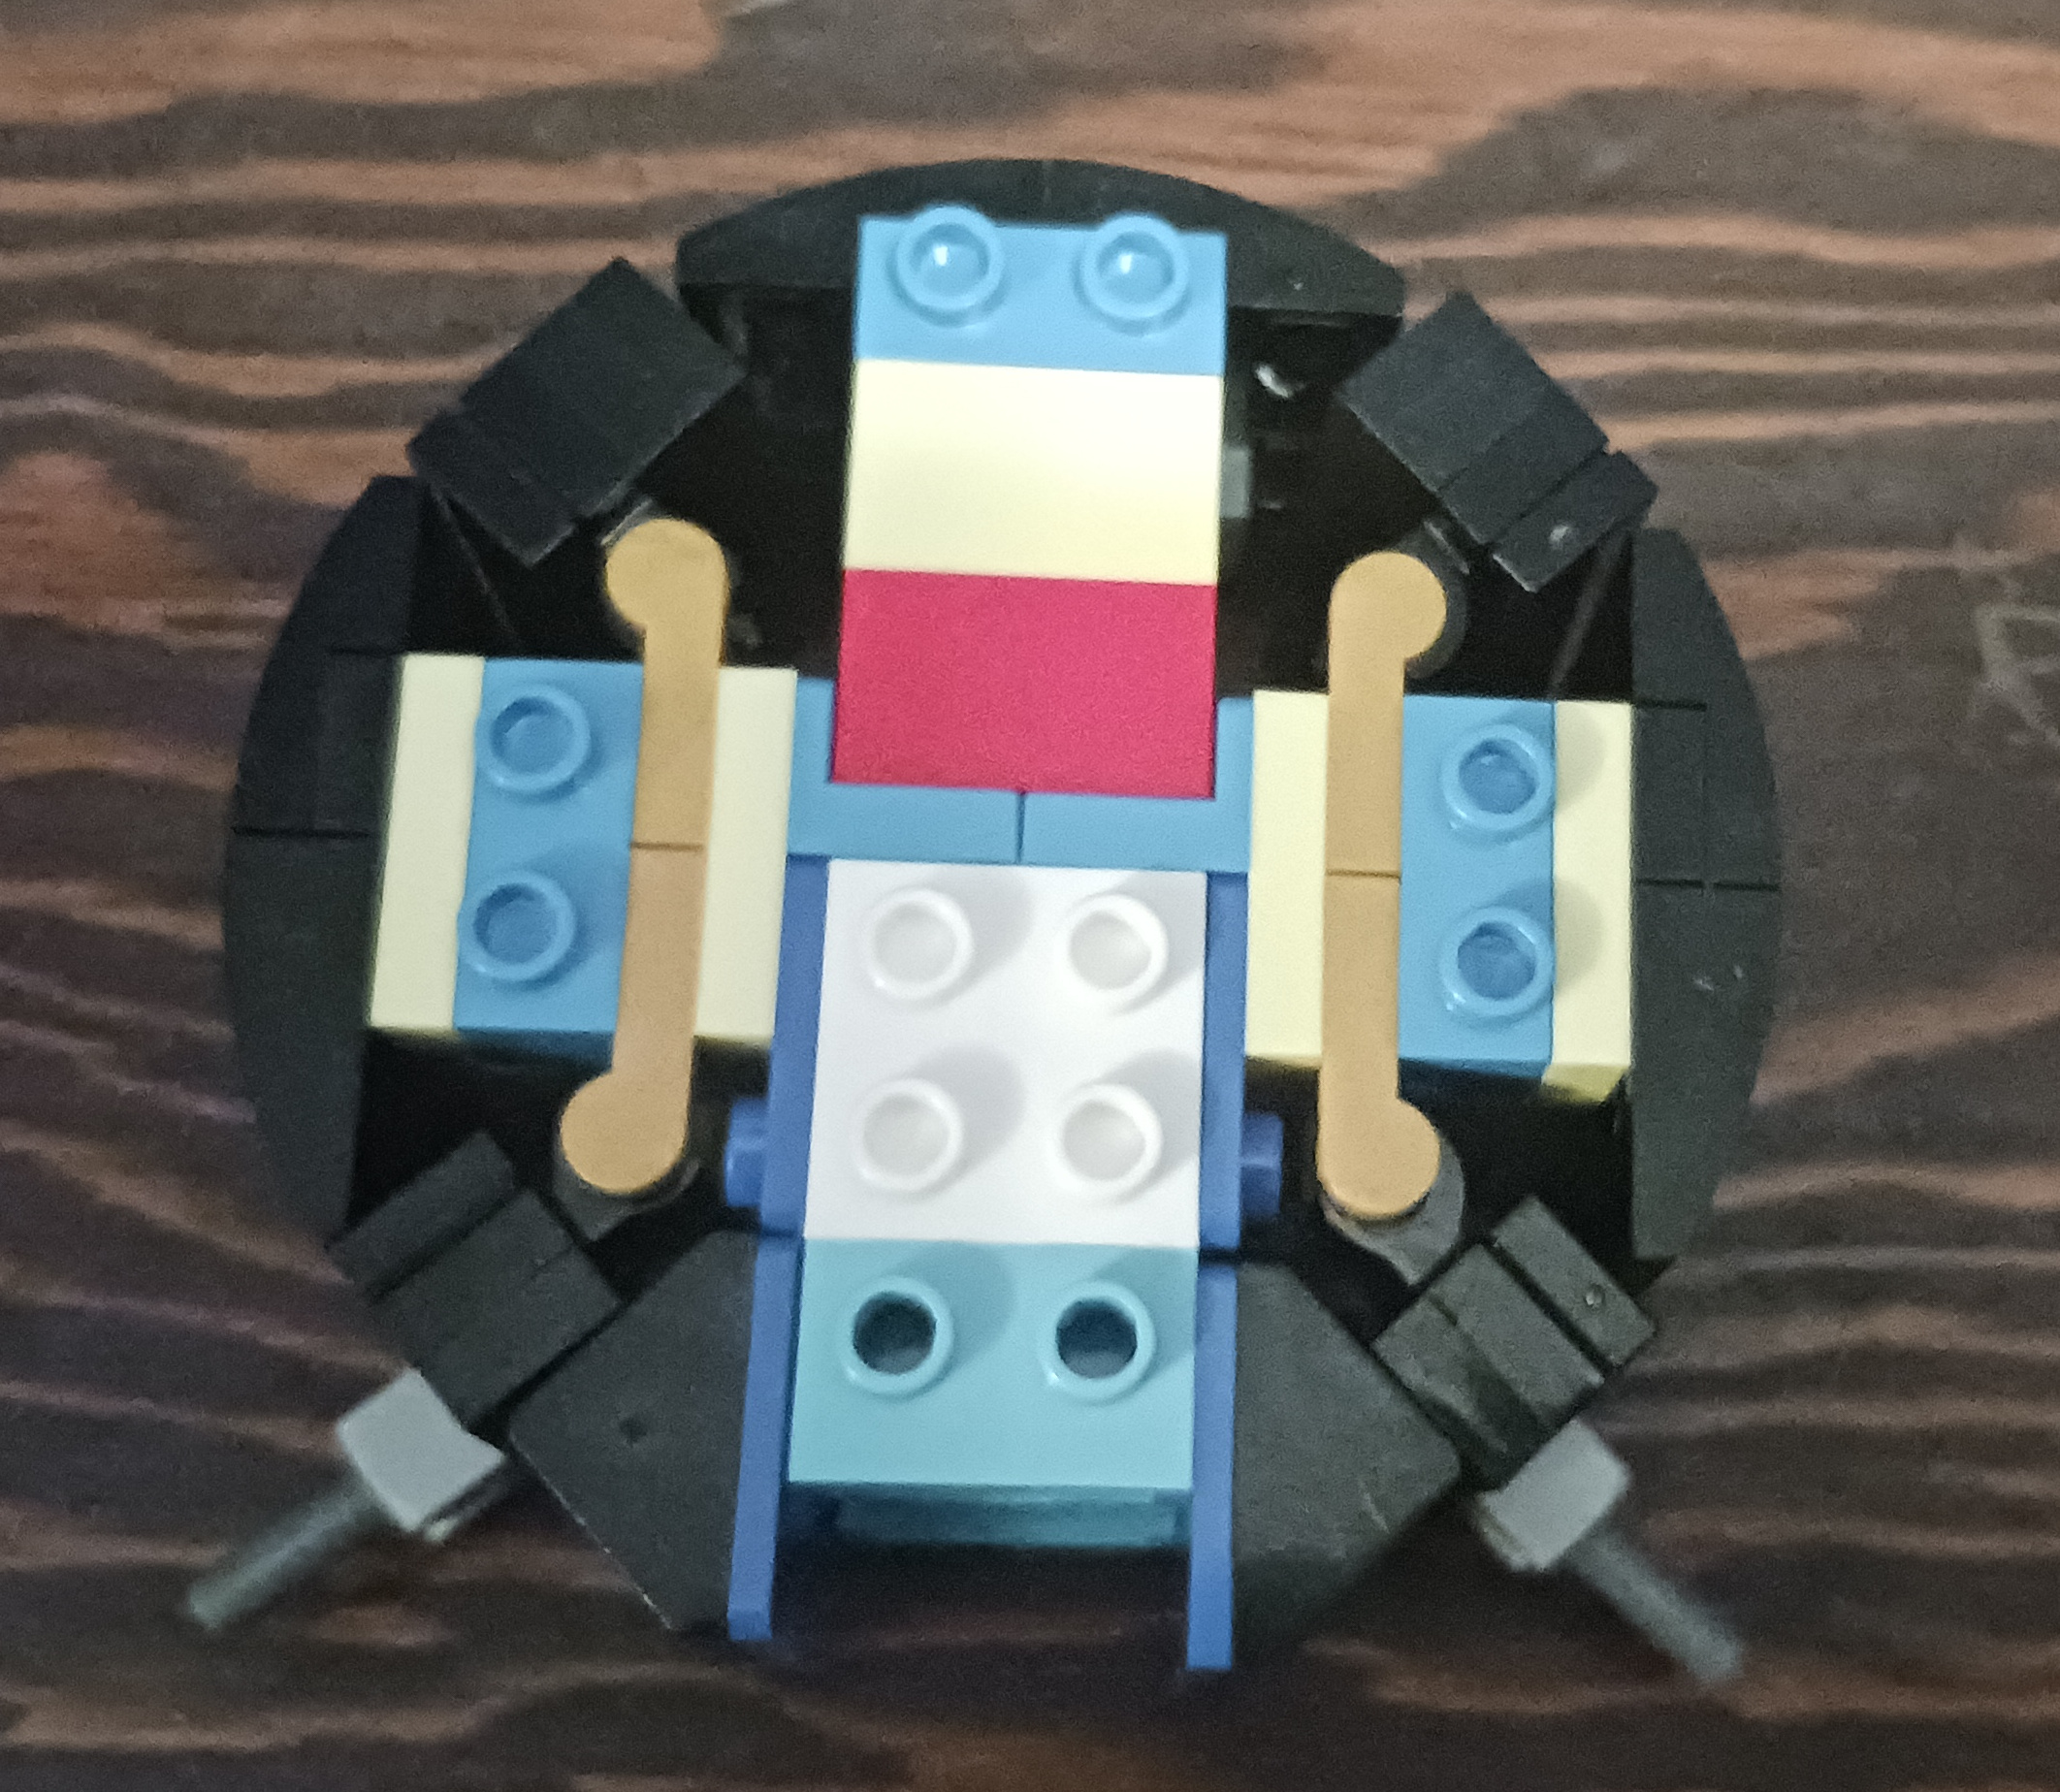
Building Tony E. started with the expected internal frame of SNOT plates and bricks, clips and hinges, and ball joints and sockets. Added to this are Technic pieces along with some wedge plates and unusual parts such as a Windscreen 2 x 4 x 1 1/3, a 3×4×⅔ Curved Roof and a 4×4×⅔ Wedge Roof. One-by-one curved and half-circle tiles add details to the torso. The legs are made with curved and sloped bricks and plates plus 4×1 Curved, Inverted w/ Cutouts and -75° 2×1×3 Inverted Slope w/ 2-Studs. The arms include 1×2 Plate, Ø1 Rounded Ends, 2-by-2 hinge plates, 1-by-3 inverted plates and an “illegal” insertion of a ball joint piece into a 1-by-1 round plate. Horizontal 1-by-1 tooth plates act as cover for the elbow joints. Tony E.’s head uses 18NougatFlesh plates for skin and a 106Bright OrangeOrange plate for the band on his 26Black hat. 1×1 Tooth, Vertical and a 1×2×⅔ Wing End give him a beard.
Facial features are captured well in this figure.
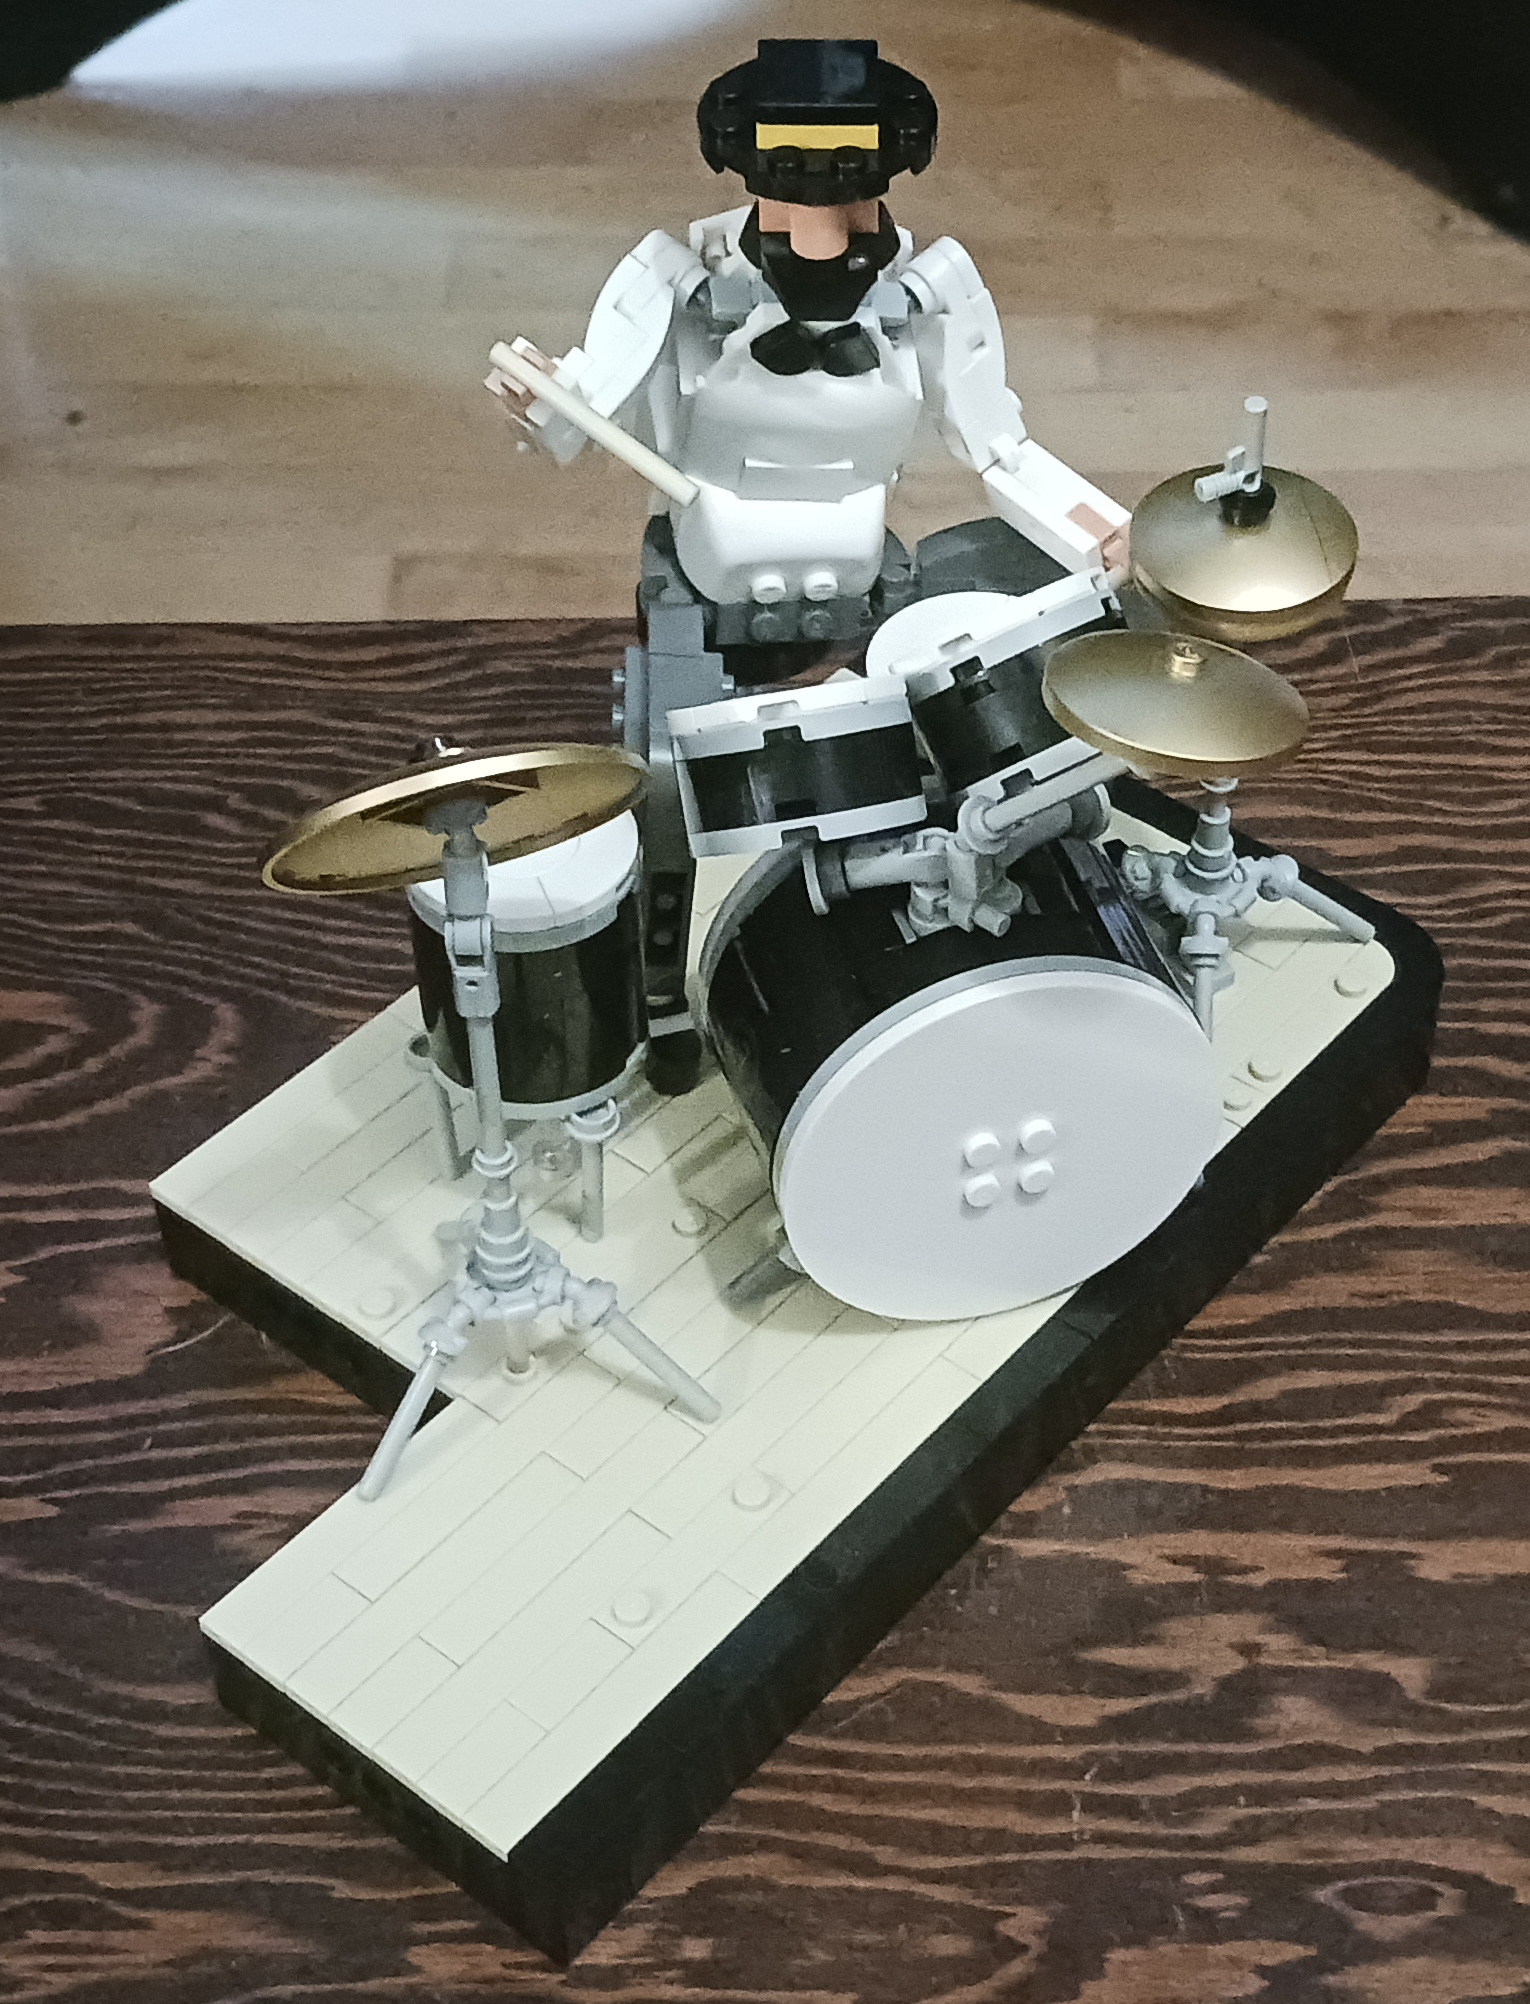
Tony E. is a lot more posable than Roberta Simone, with an upper torso able to do a 360-degree turn at the waist. The secure arms provide a decent range of motion and the legs can open and close at the thigh joints. This pose-ability is needed to properly position the drummer with his kit, placing his feet on the pedals for the bass drum and hi-hat pedals and moving his arms and drumsticks into a realistic action pose. Tony’s bottom doesn’t connect to his seat, unlike with Roberta and her piano bench, so he has to be carefully placed onto the stool.
The Bassist
The bassist I’ve named Stanley McBride, named after Baby Boomer jazz and funk giant Stanley Clarke and Gen-X Grammy winner Christian McBride. Stanley’s section of the stage is much smaller than Tony E.’s and Roberta Simone’s since he’s a standing figure with a vertical bass. Additionally, a couple of 1×4 Technic Brick with two pairs of Pin, Friction inserted make the stage able to connect with with the other musicians’ stages.
Stanley’s legs are built up from inside the stage with a 1×4 Brick, Studs 1-side forming the base that is inserted into a recess. Pairs of 26Black 1×2 Gold Bar, 1×1×⅔ Curved, Double and 1×1 Bracket, Inverted make shoes that are placed onto studs on the stage. SNOT plates and bricks, clips and hinges, curved and angled slopes, and a 4L Bar are used to make Stanley’s hips. Two -75° 2×1×3 Inverted Slope w/ 2-Studs and what I would describe as a 1×1×⅔ Plate make Stanley’s thighs and knees. The hips-thighs-knees combo is connected to the ankles and feet built into the stage. Two 1×8 Tile cover the SNOT bricks and inverted bricks on Stanley’s legs. This makes for a very stationary model in contrast to the mobile Roberta Simone and Tony E., but it makes sense because Stanley has to hold an upright bass.
A combo of SNOT parts, plain bricks and plates, clip plates, curved and flat tiles, and ball pieces come together to make Stanley’s torso. This includes some inverted tiles such as the 2×2 Tile, Inverted and the 2×2×⅔ Curved, Inverted. A 26Black game controller plate makes a smart bow tie for Stanley’s 1White shirt. A clip plate fits onto a hinge plate inside Stanley’s hips, uniting his torso and legs. Hinge and clip plates joined to longer plates and tiles give the bassist the movable arms he needs to play his instrument. Bar 1L w/ Towball fit into the sockets on Stanley’s torso to build his arms, and 312Medium NougatMedium Dark Flesh 1×1 Tile, Round and 2×1×⅔ Curved finish his arms with wrists and hands. More 312Medium NougatMedium Dark Flesh and 26Black slope bricks, plates and a 2×2 Bracket, Centered surround a 1×2 Plate w/ Towball, End to make Stanley’s head.
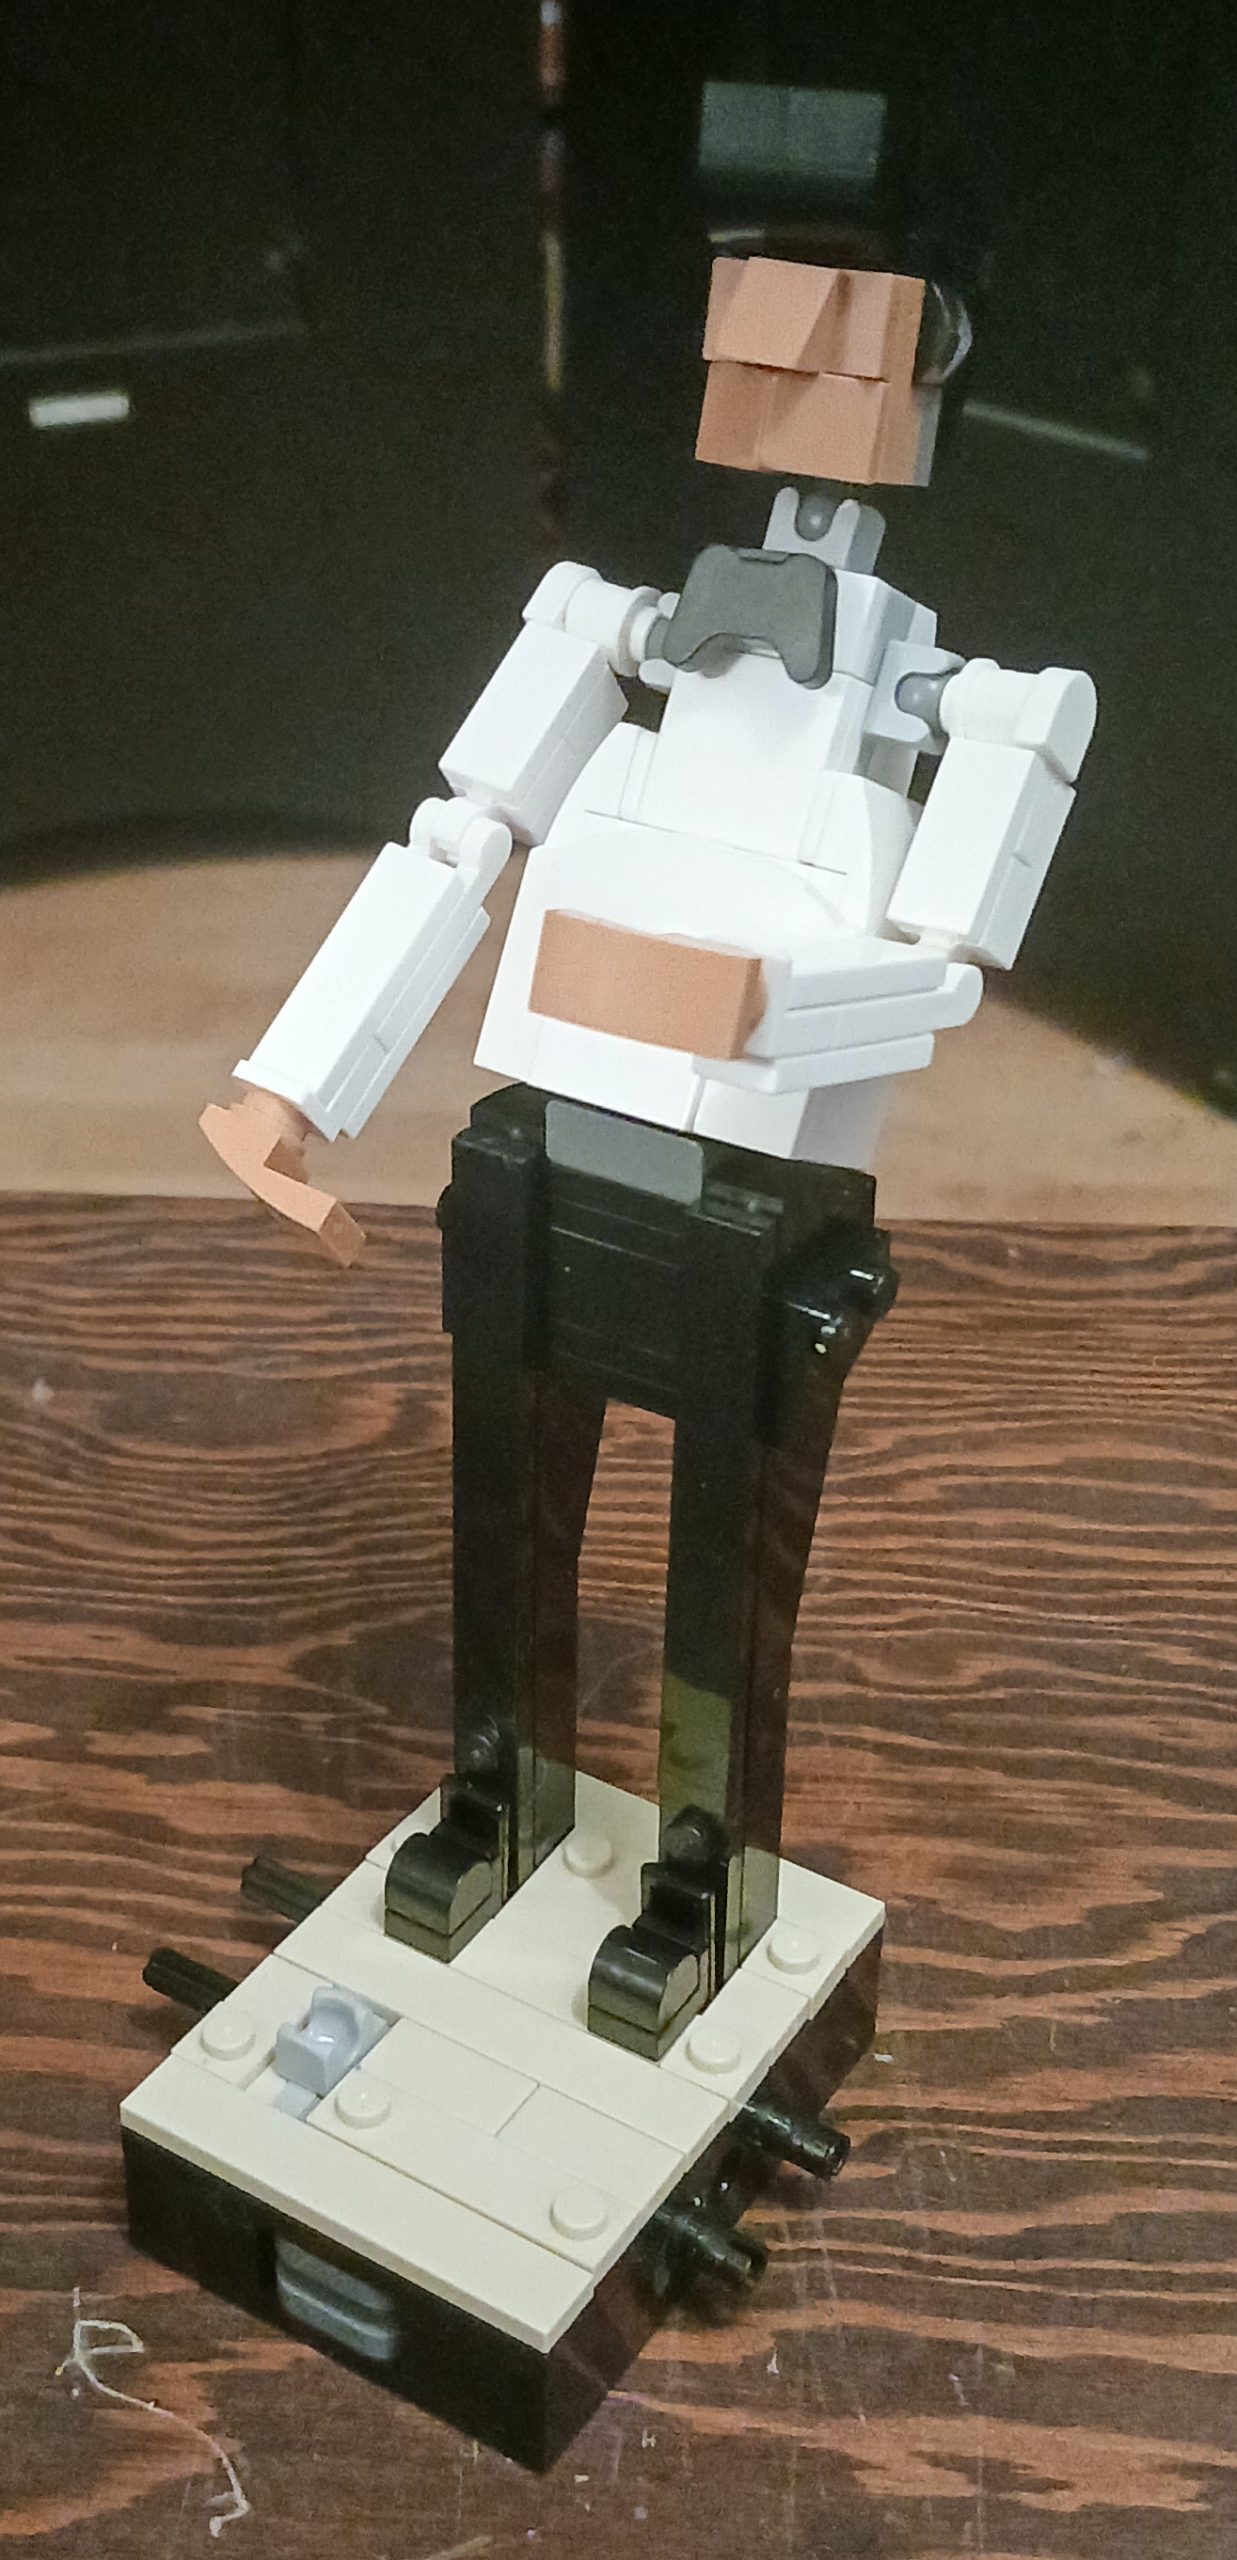
The styles used for the musicians mirror those used in LEGOLAND.
The bass assembly begins with a 2×2 Plate w/ Towball, Side and includes two 1×12 Plate and some 2×8 Plate in 192Reddish Brown along with some SNOT bricks and plates and clip plates. More 192Reddish Brown curved slope plates and bricks help create the hourglass-shaped body of the bass. Two 5L Flame w/ Bar and a 1×3 Tile w/ Click Hinge, 1-Finger, Top, are used to add f-holes and a tail piece to the body. Another 2×2 Bracket, Centered is used with 5Brick YellowTan 1×1 Plate w/ Clip, Horizontal and a 1×2 Gold Bar to make the bridge for the strings.
26Black plates, tiles, hinges and clips along with 26Black and 194Medium Stone GreyLight Bluish Gray Pneumatic T-Piece and a 26Black 1×2 Plate, Ø1 Rounded Ends help make the bass neck. The 26Black Pneumatic T-Piece are inserted into the holes of two 1×3 Tile, Inverted w/ Hole in the neck to attach that part of the bass to clips on the body. Two 194Medium Stone GreyLight Bluish Gray Pneumatic T-Piece are connected into the bottom of the round plate to be tuning pegs for a peg box at the top of the neck. This connection almost seem likean “illegal” building methods to me!
A 192Reddish Brown Cat Tail adds the curvy scroll to the peg box, which fits on top of the bass neck with hinge and clip plates. A 26Black 41-stud-length string attached to two 1-by-1 round plates is attached to a 1×2 Plate w/ Click Hinge, 1-Finger, End. Building onto this, the plate is joined with a hinge plate that forms the tail piece. The string is folded in half, and the resulting loop is wrapped around the tuning pegs and strung through a clip on the neck and the clips on the bridge. The ball joint at the bottom of the bass joins with a socket in the stage to prop up the bass. Stanley McBride’s arms are built such to allow placeement of his hands on the bass neck and body to show him playing the instrument.
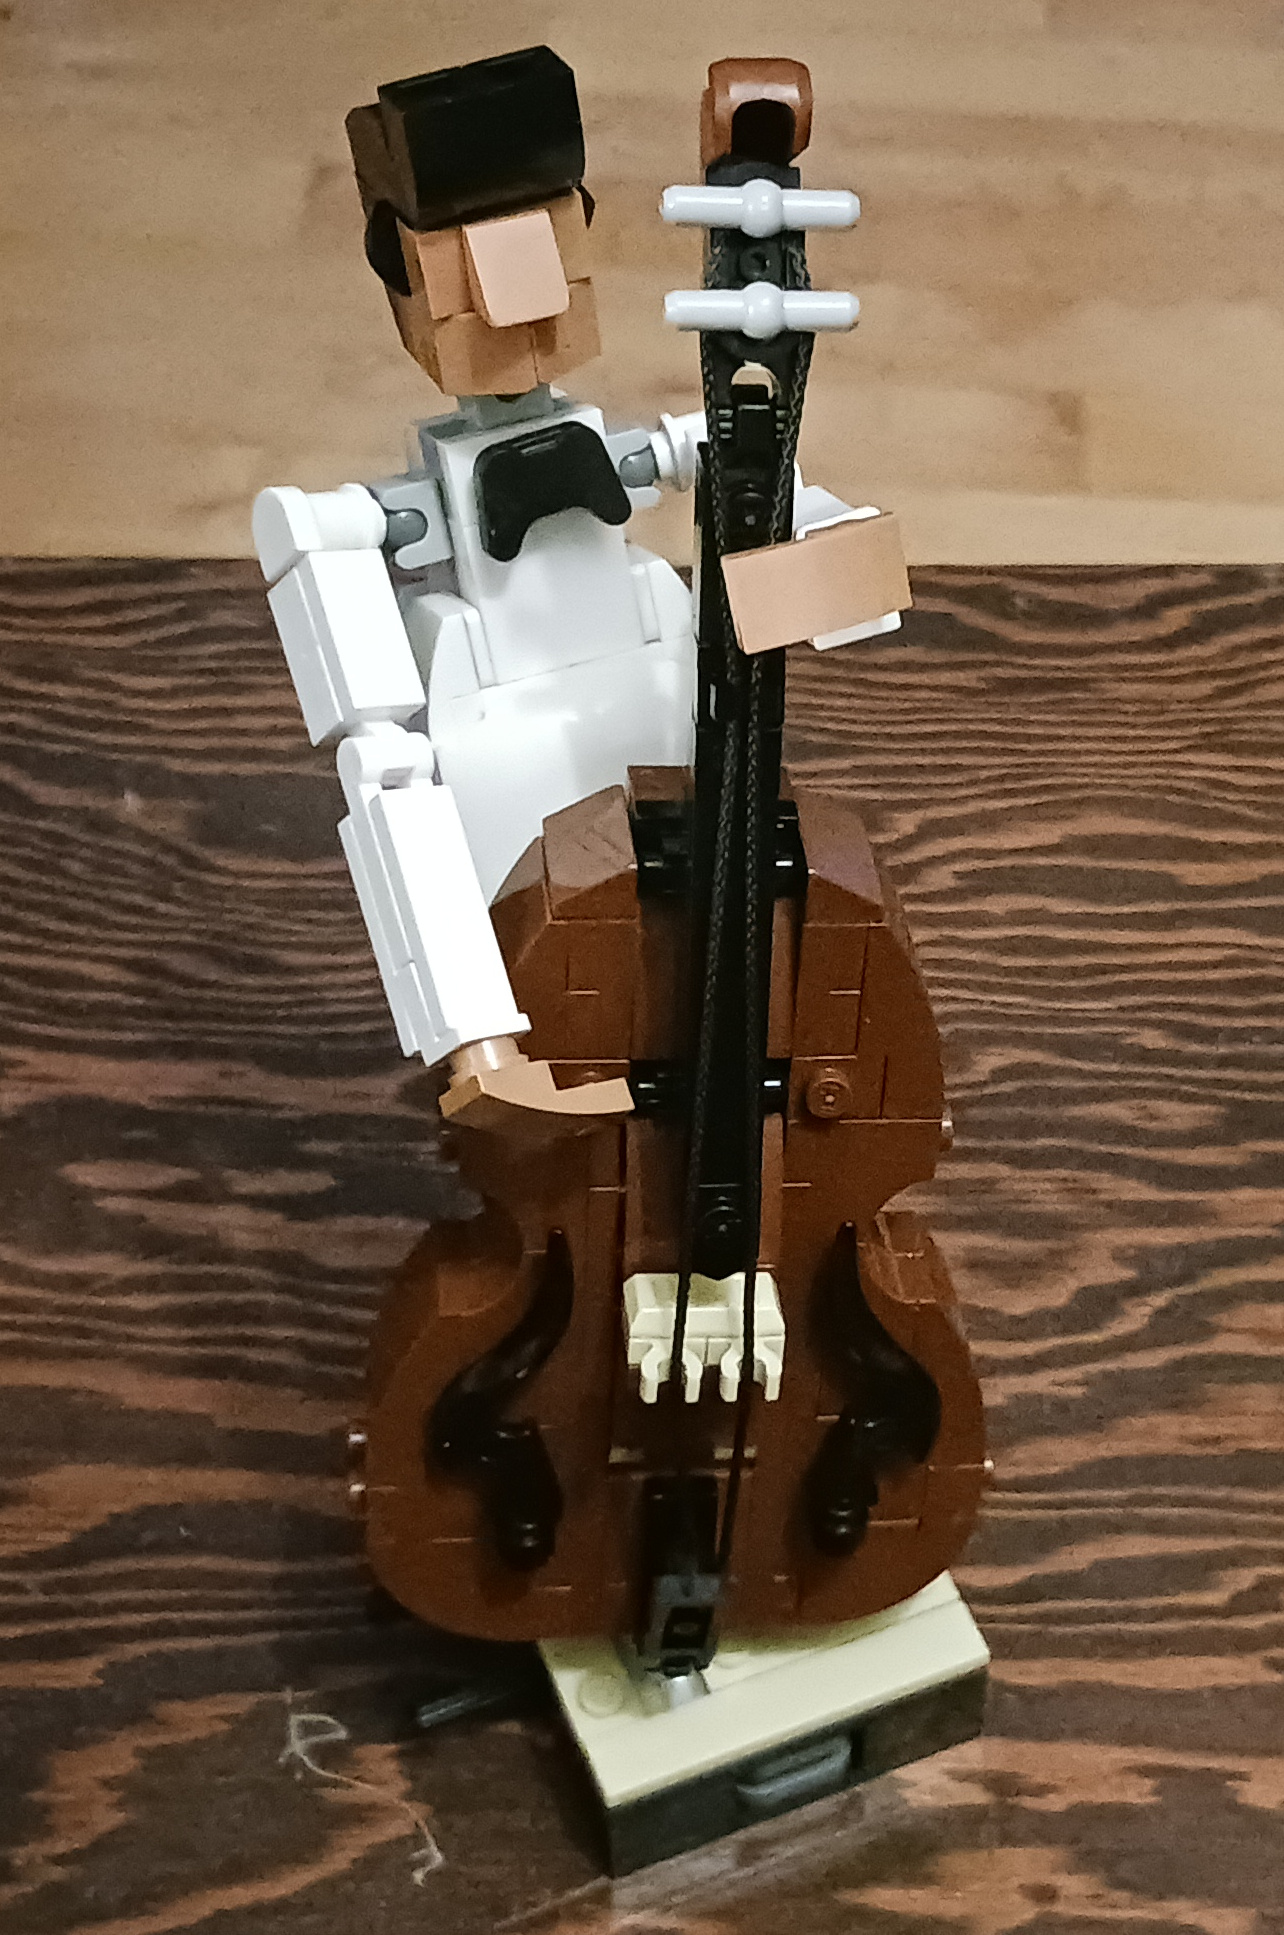
The instrument is beautifully done, and while not the largest has so many details.
The Trumpeter
Herb Blanchard, the trumpeter I named after instrumental pop great Herb Alpert and Oscar-nominated movie score composer Terrance Blanchard, is the smallest of the four player-instrument-stage groupings in the Jazz Quartet set. His part of the stage includes the steps that go with the fully assembled platform. The planks of the steps include multiple 2×2 Plate w/ studs edge, 1×4 Plate w/ 2-studs and two 1×1 Plate w/ Clip, Horizontal.
The small stage section is similar to the other sections in assembly, with Technic bricks, rods and pins to make it connect, plus a 1×2 Rounded Brick w/ 2-handles. Once completed, the rounded brick’s bars in Herb’s stage section connects with the horizontal clips on the steps.
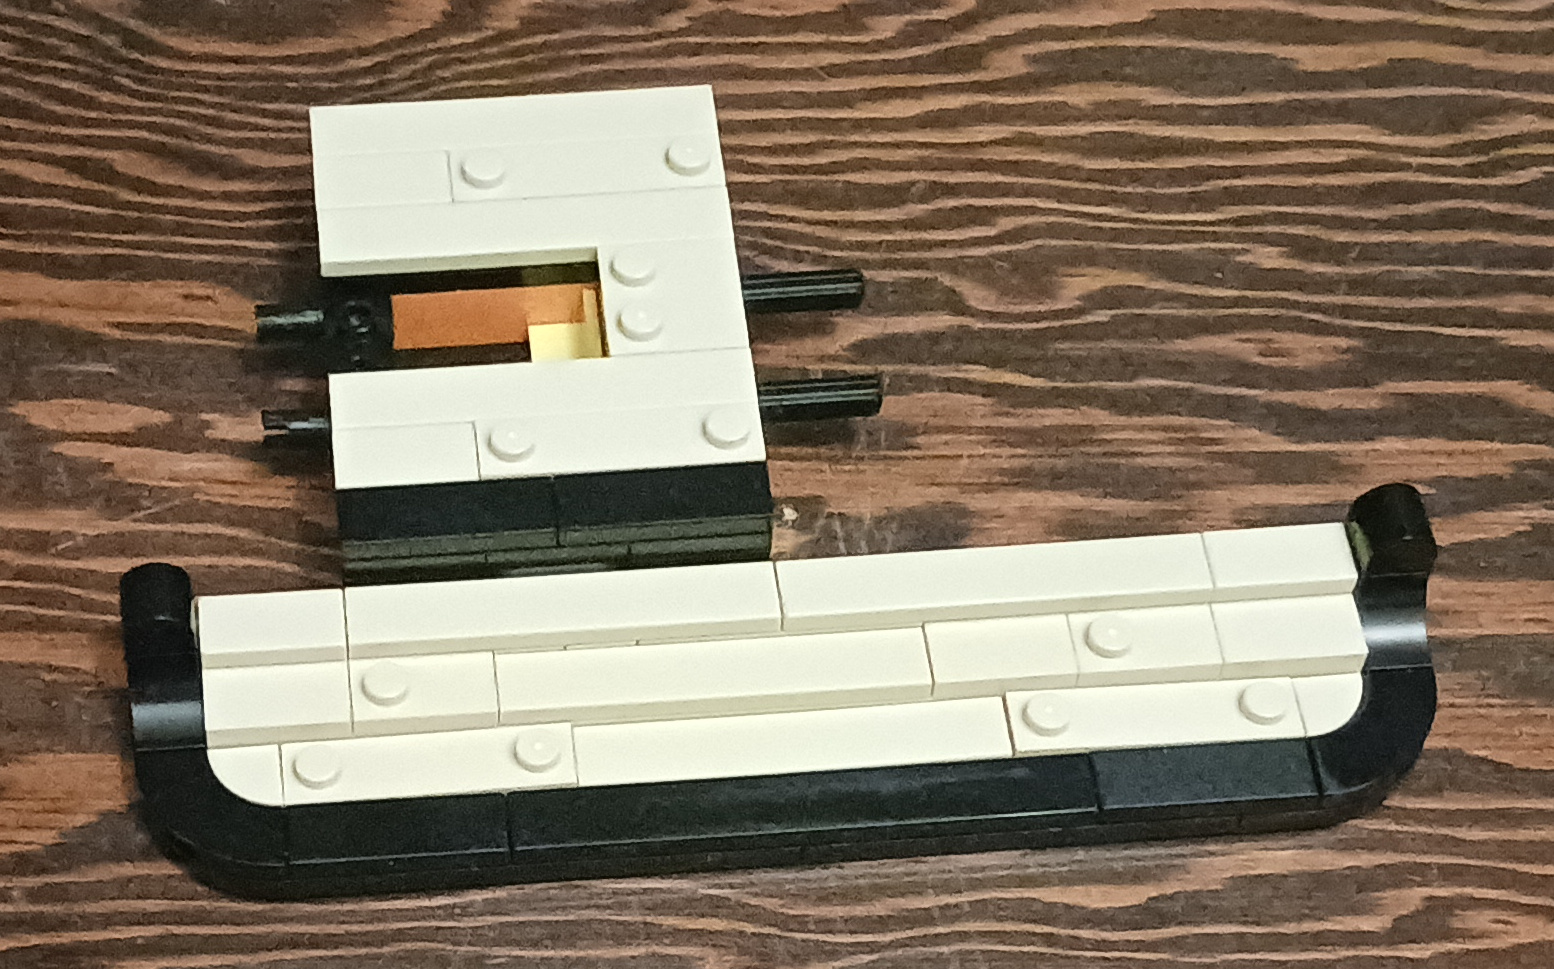
The stage construction allows the musician to be angled while having support.
Herb’s body construction begins with a strange combination of a 1×2 Plate w/ Horizontal Clip, End and 1×2 Plate w/ 2-clips, Side, a 4L Bar and SNOT pieces to form his hips. His right leg is built from there so it can be fitted into an opening in his stage section. Once Herb’s leg is inserted, his foot is built onto the stage around the bottom of his leg using a 26Black 1×1 Brick, Headlight, a 1×1 Tile w/ Ø1 Rounded End and a 1×1 Tooth, Vertical piece.
Three 1White 2×2 Tile, Inverted and four 154Dark Red 1½x2 Door Rail starts the assembly of Herb’s torso. SNOT pieces, hinge plates, a cup plate and more door rail plates are added with other parts to make the internal base onto which white tiles are placed to make the trumpeter’s shirt. The 154Dark Red door rails are used as Herb’s suspenders with a 21Bright RedRed 1×4 Tile finishing his attire with a tie. Hinges at the bottom of Herb’s torso attach him to clips in his hips.
Herb’s hips and bottom are added by attaching a combination of bricks, plates, tiles and SNOT and clip pieces connected to a 4L Bar. A joint made from a 1×1 Brick, Headlight and 1×1 Plate gives him a permanently bent knee attached to a calf made from a 1×3 Brick. A couple more 1×1 Brick, Headlight bricks and a 1×1 Tooth, Vertical give the calf an ankle and a shoed foot. A 1×2 Plate w/ Towball, Side is combined with a 2x2x⅔ 2-studs, Side is covered with 26Black and 192Reddish Brown tooth plates and other plates and tiles to make Herb’s head.
Instead of joining his body with clip-and-hinge or ball-and-cup joints, Herb’s arms are attached to SNOT pieces on his shoulders where the studs face the front of his torso. A 1×1 brick with a stud on one side acts as an elbow to bend Herb’s right arm. A second, this time with a clip plate and wedge tile attached to it builds a hand that can hold an instrument. His left arm uses similar construction except for ending with a 2x1x⅔ Curved for his hand. The trumpet is built with a 297Warm GoldPearl Gold 2×2 dish, a 1x1x⅔ Cone (Fez), a lightsaber handle, a nozzle, a bar holder with clip and a Bar 1L 1-stud, stud 2-sides. The completed instrument attaches to the clip on Herb Blanchard’s right hand.
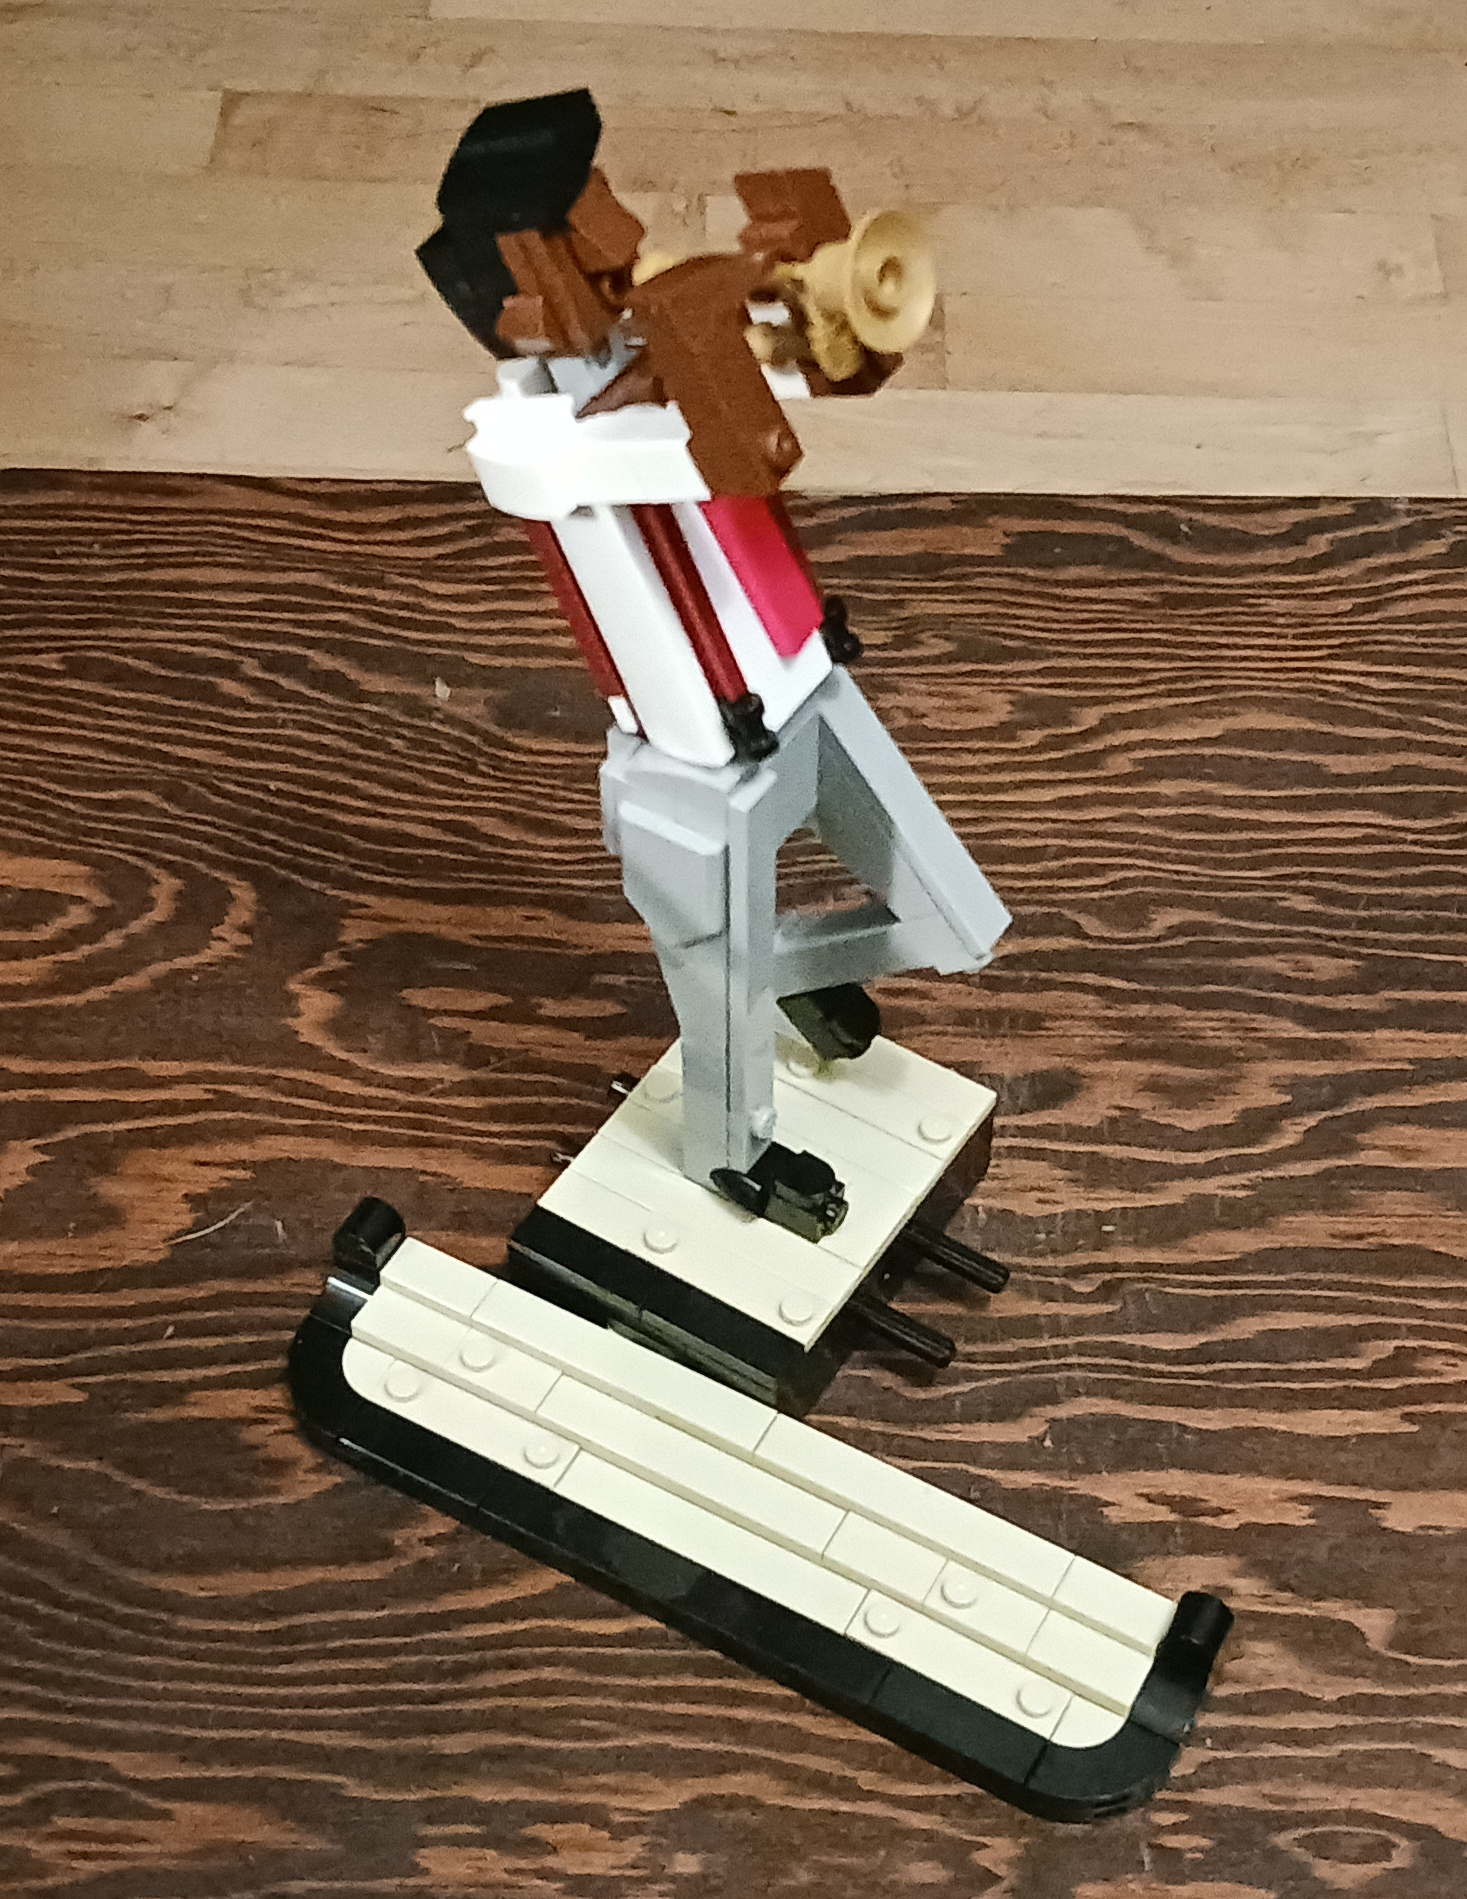
The musicians are built each with unique shapes and sizes that capture the variety of the human body.
Completing the quartet
The separate stage sections that the musicians and instruments sit on are built with Technic pins and rods along with Technic bricks with holes on the sides, so all four sections can connect together to make one stage.
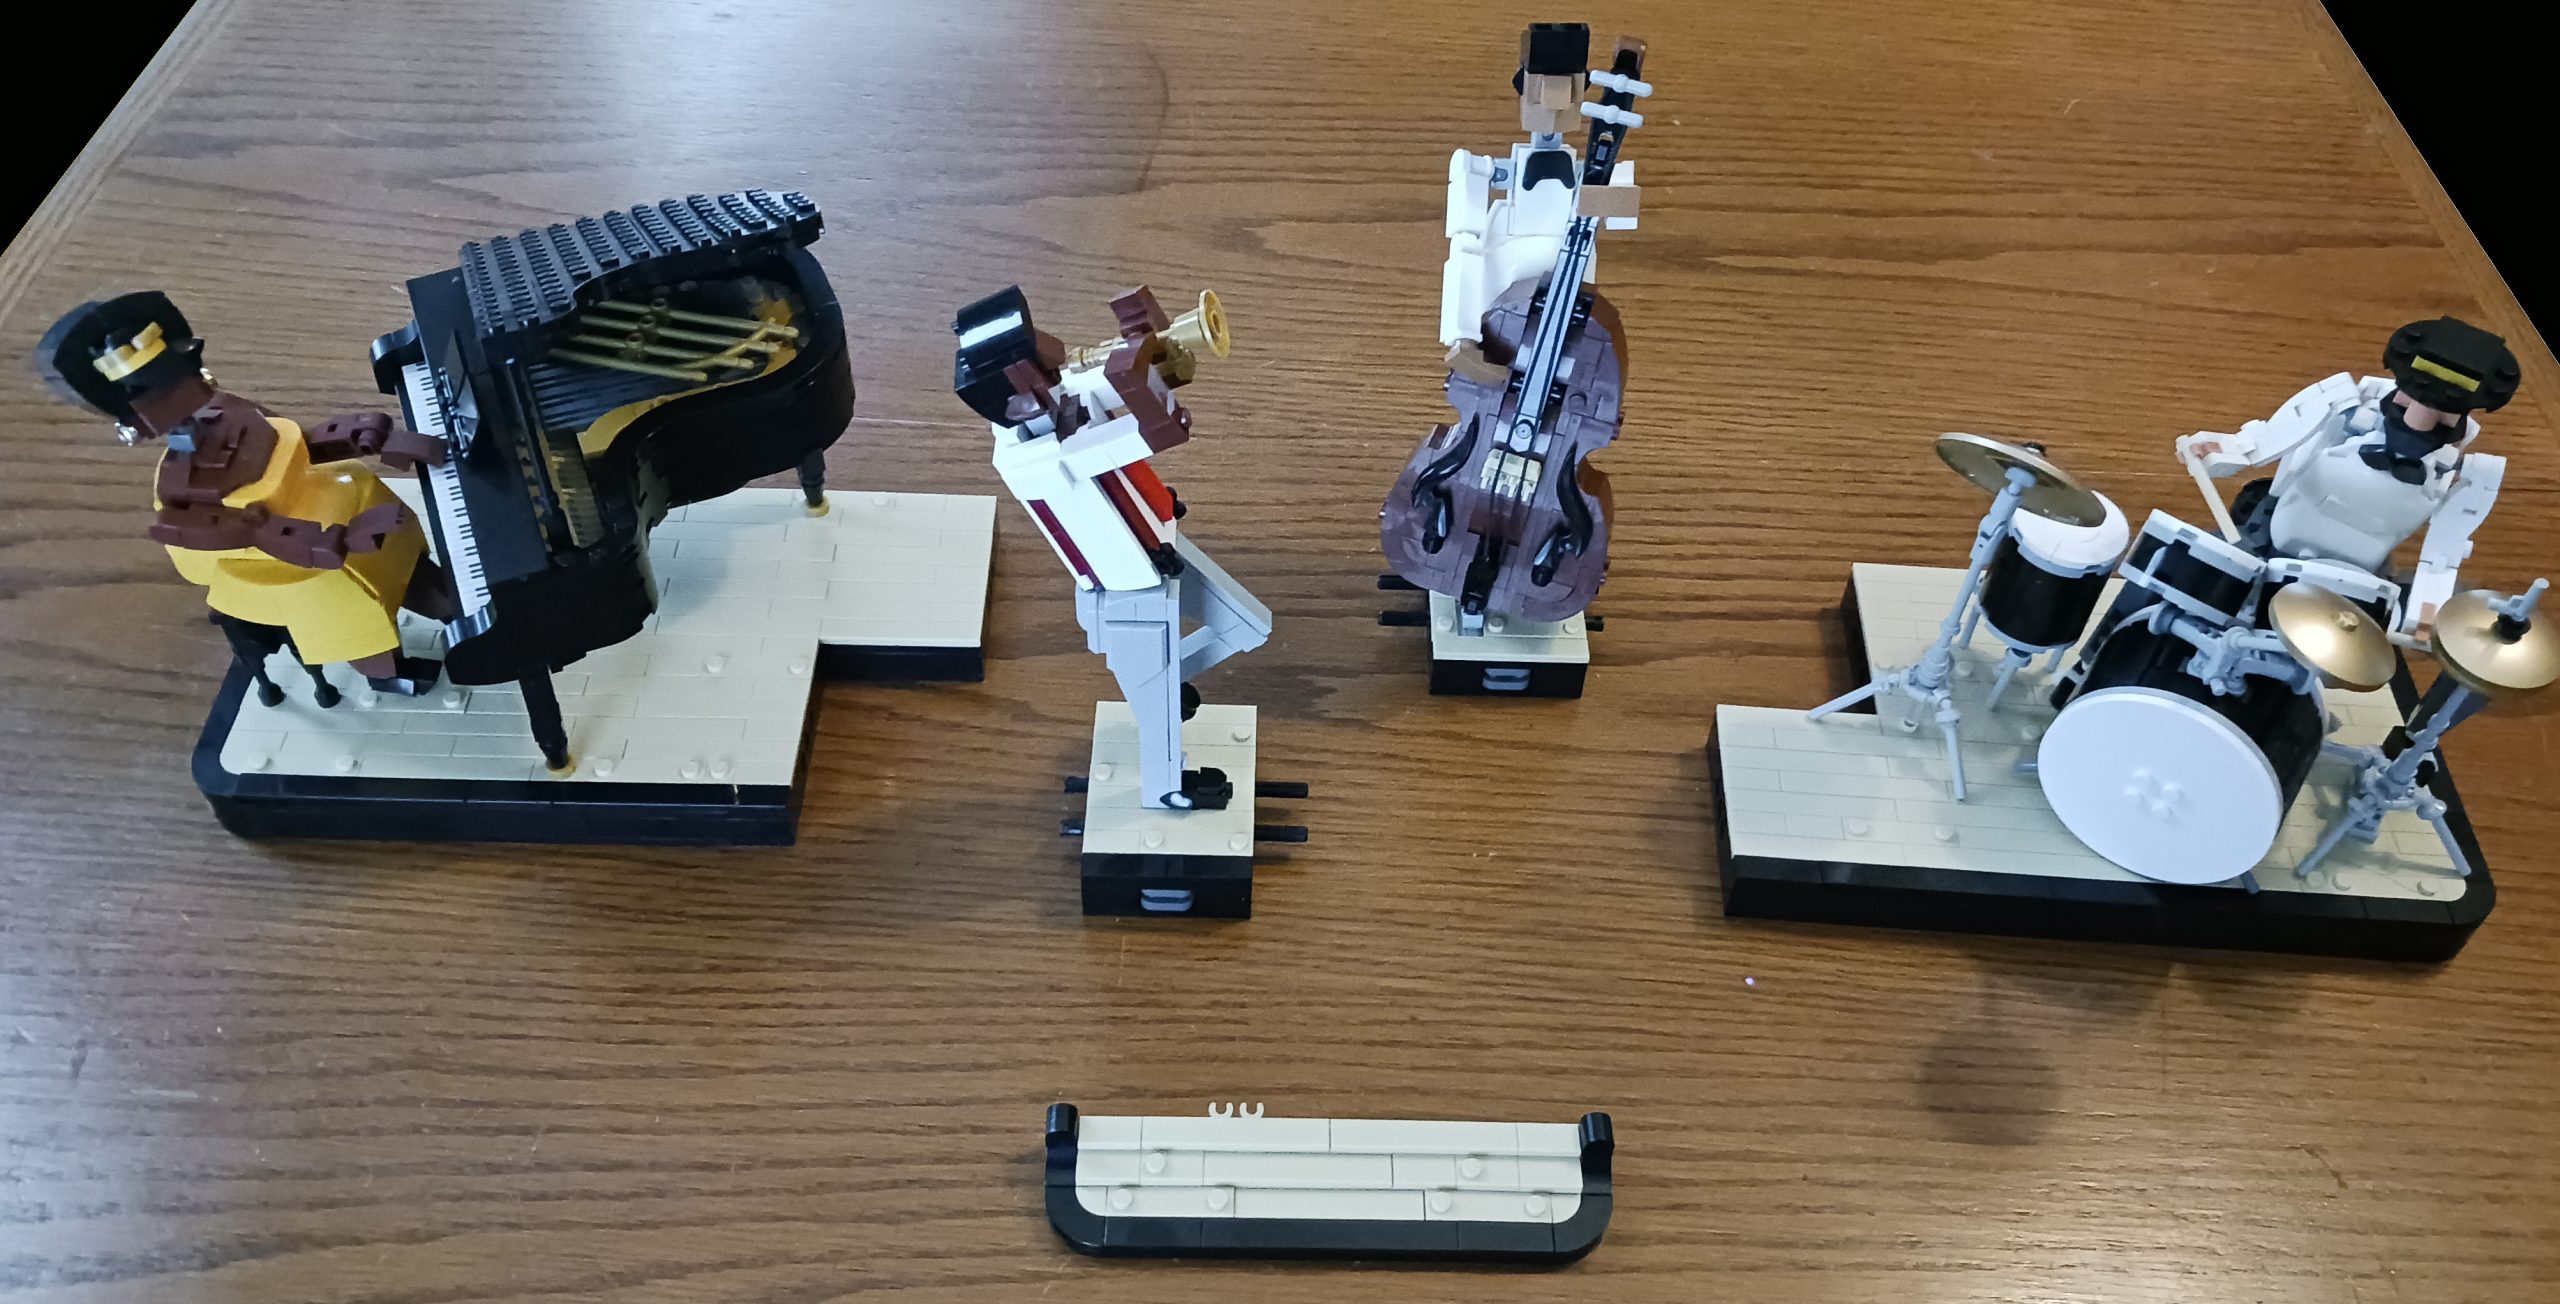
The musicians can be displayed split up or together.
When combined, the results do make for a crowded stage, but it’s true to life as in real jazz clubs there have small stages that bands have to fit into. The stage is easy to assemble and separate, so you can display each musician with their instrument separately if you don’t want the full set taking up space.
Final thoughts on the building experience
As I said earlier, the Jazz Quartet is the first large LEGO set I’ve ever built as I have never built a set that had anywhere near as many pieces as this one. I have to admit that my enjoyment of building this set diminished as time went on, going from joy at putting together Roberta Simone to “Dang! I’m so glad to be done!” when I finished Herb Blanchard. I had to spread my build time out over many weeks to fit it into the rest of my life.
A single LEGO model the size of each of the Jazz Quartet player-instrument-stage groupings would have been a pleasurable build for me (minus the stage sections — I hate building bases!), but repeating similar building processes four times over became work rather than play for me. Still, I had to take on this unique LEGO set due to my love for music, my affinity for racial/ethnic and cultural diversity and my desire to stretch myself beyond my favored small-model building and take on the challenge of a large set. #21334 Jazz Quartet set gets a firm Recommended (4/5 stars) rating from me.