
Review: #21325 Medieval Blacksmith (LEGO IDEAS)
From fan submission to official LEGO Set—This blacksmith shop leans in to the classic castle theme (but slightly misses the mark).
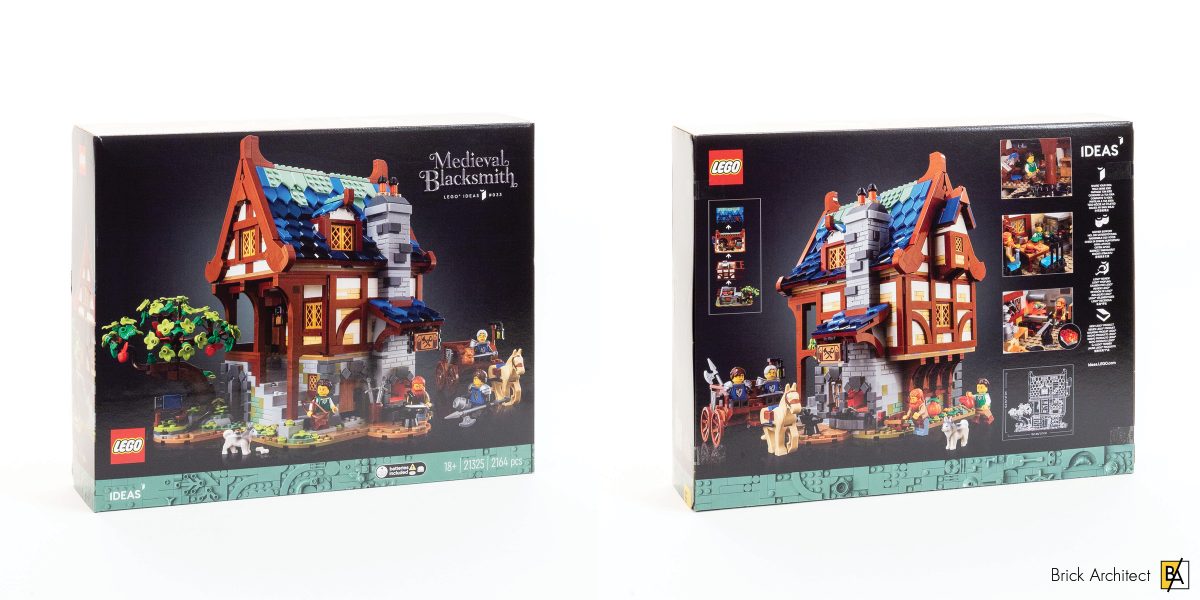
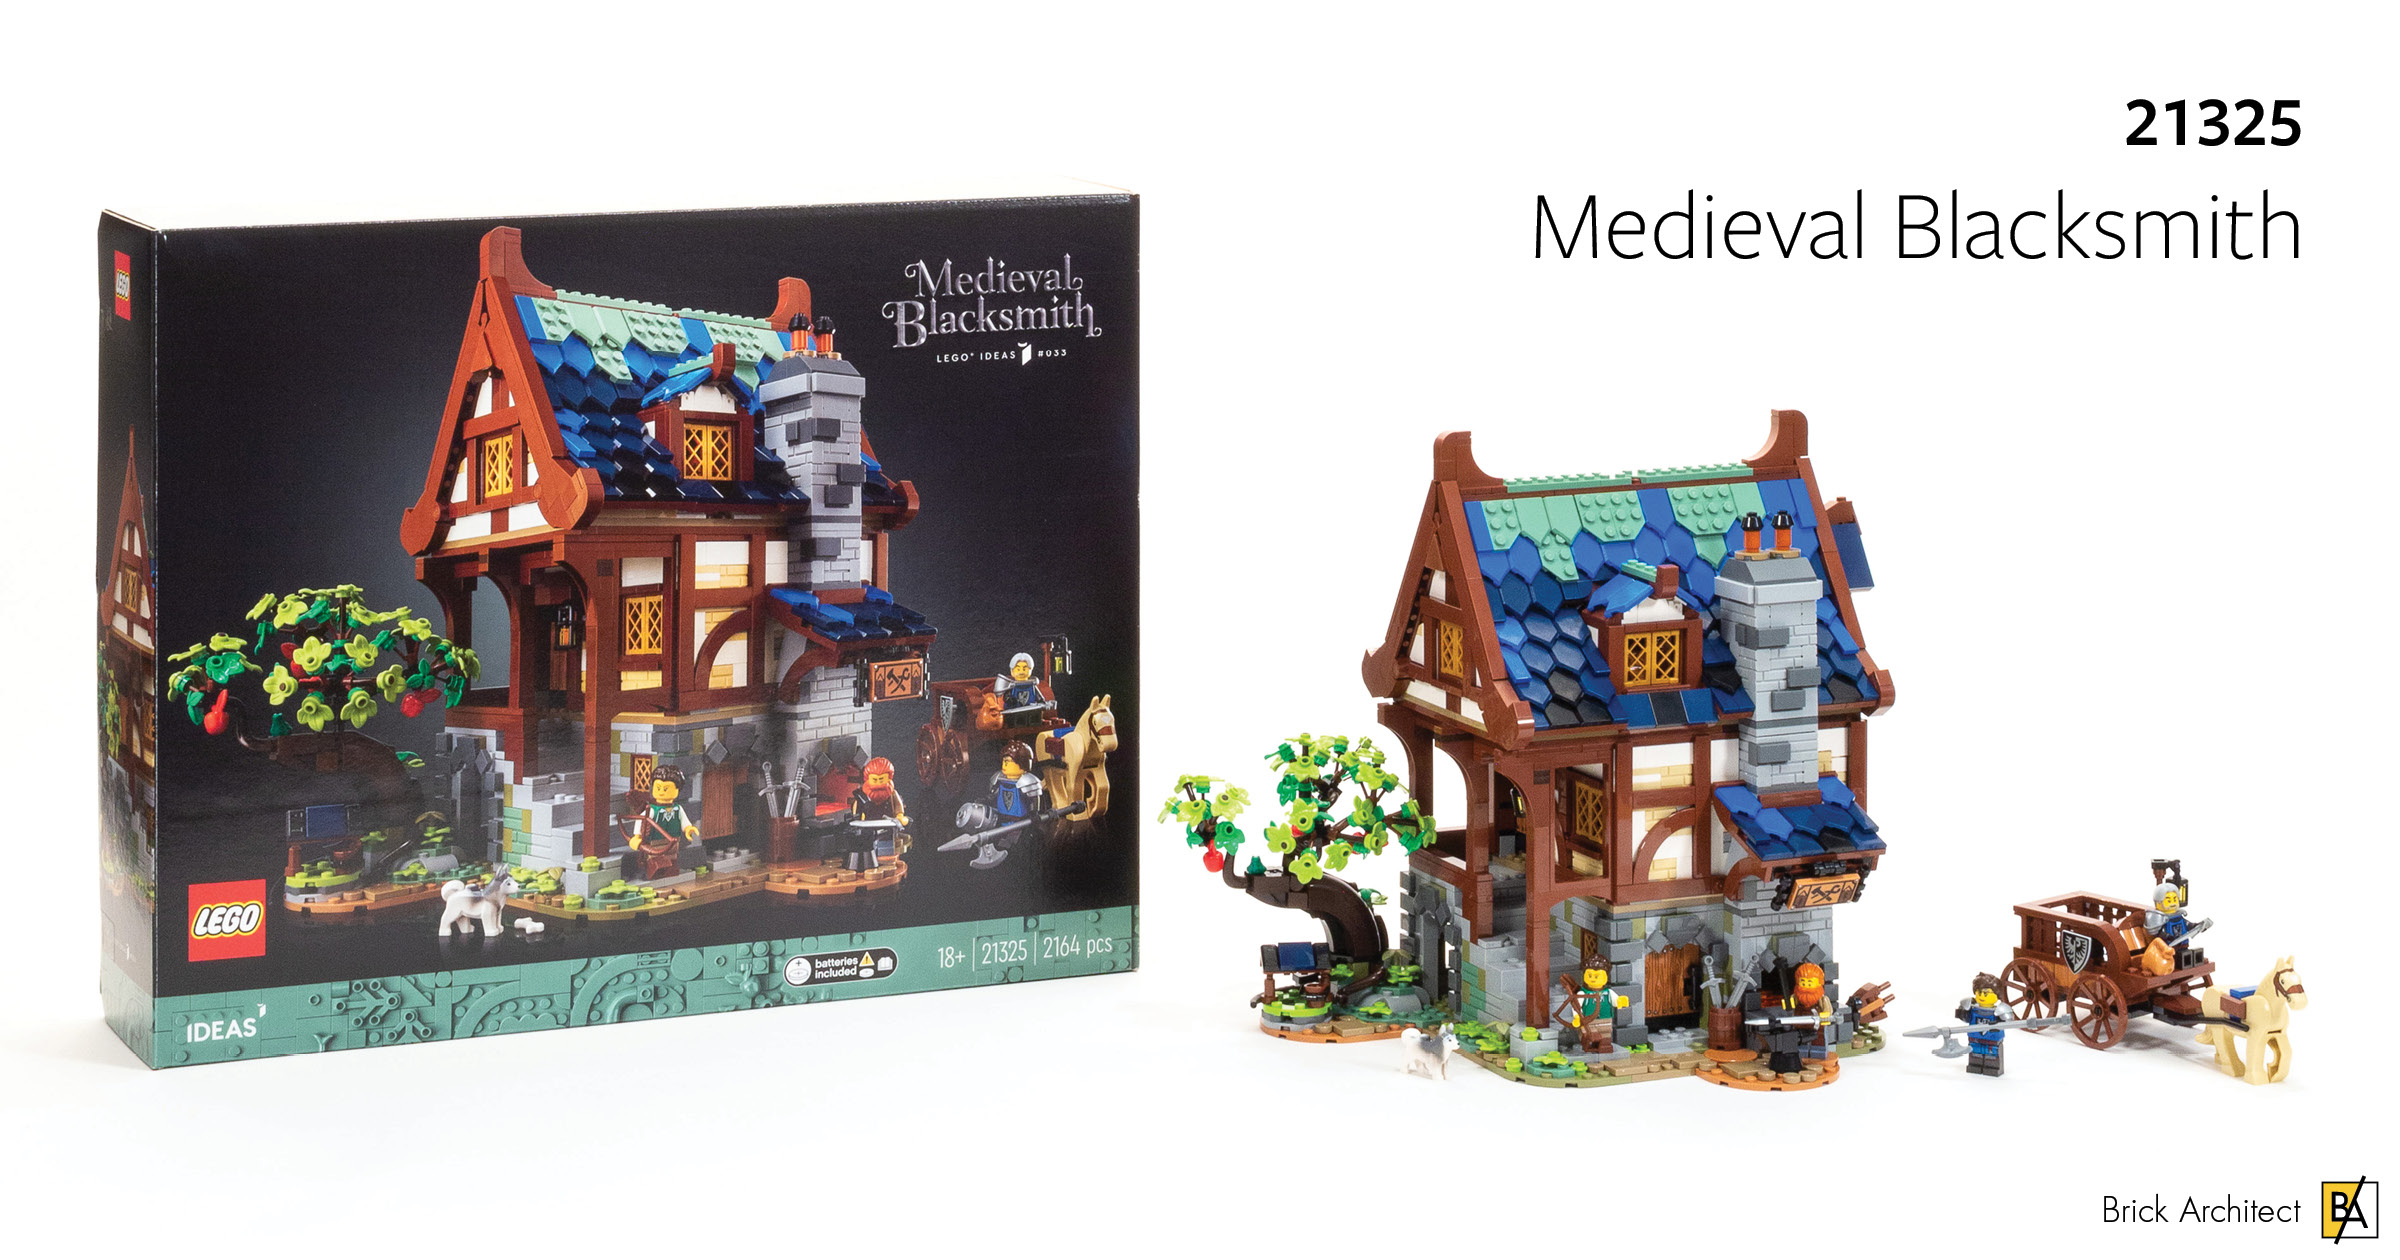
#21325 Medieval Blacksmith – Box Front and Back.
First Impressions
This set is based on a fan submission on the LEGO Ideas platform by young LEGO Artist Clemens Fiedler. In this short interview after his submission reached 10k votes, he explains that he is just 22 years old and from Hannover, Germany. The original submission has a ramshackle appearance, a muted color palette, and included around 3000 pieces.
Contents
The box features the new 18+ packaging design with a 151Sand Green brick-built stripe along the bottom of the box. At 18 ¾ × 14 5/8 × 4 ¼ ” (47.6×37.1×10.8 cm), it’s large enough to feel substantial, but small enough to easily carry to your car.
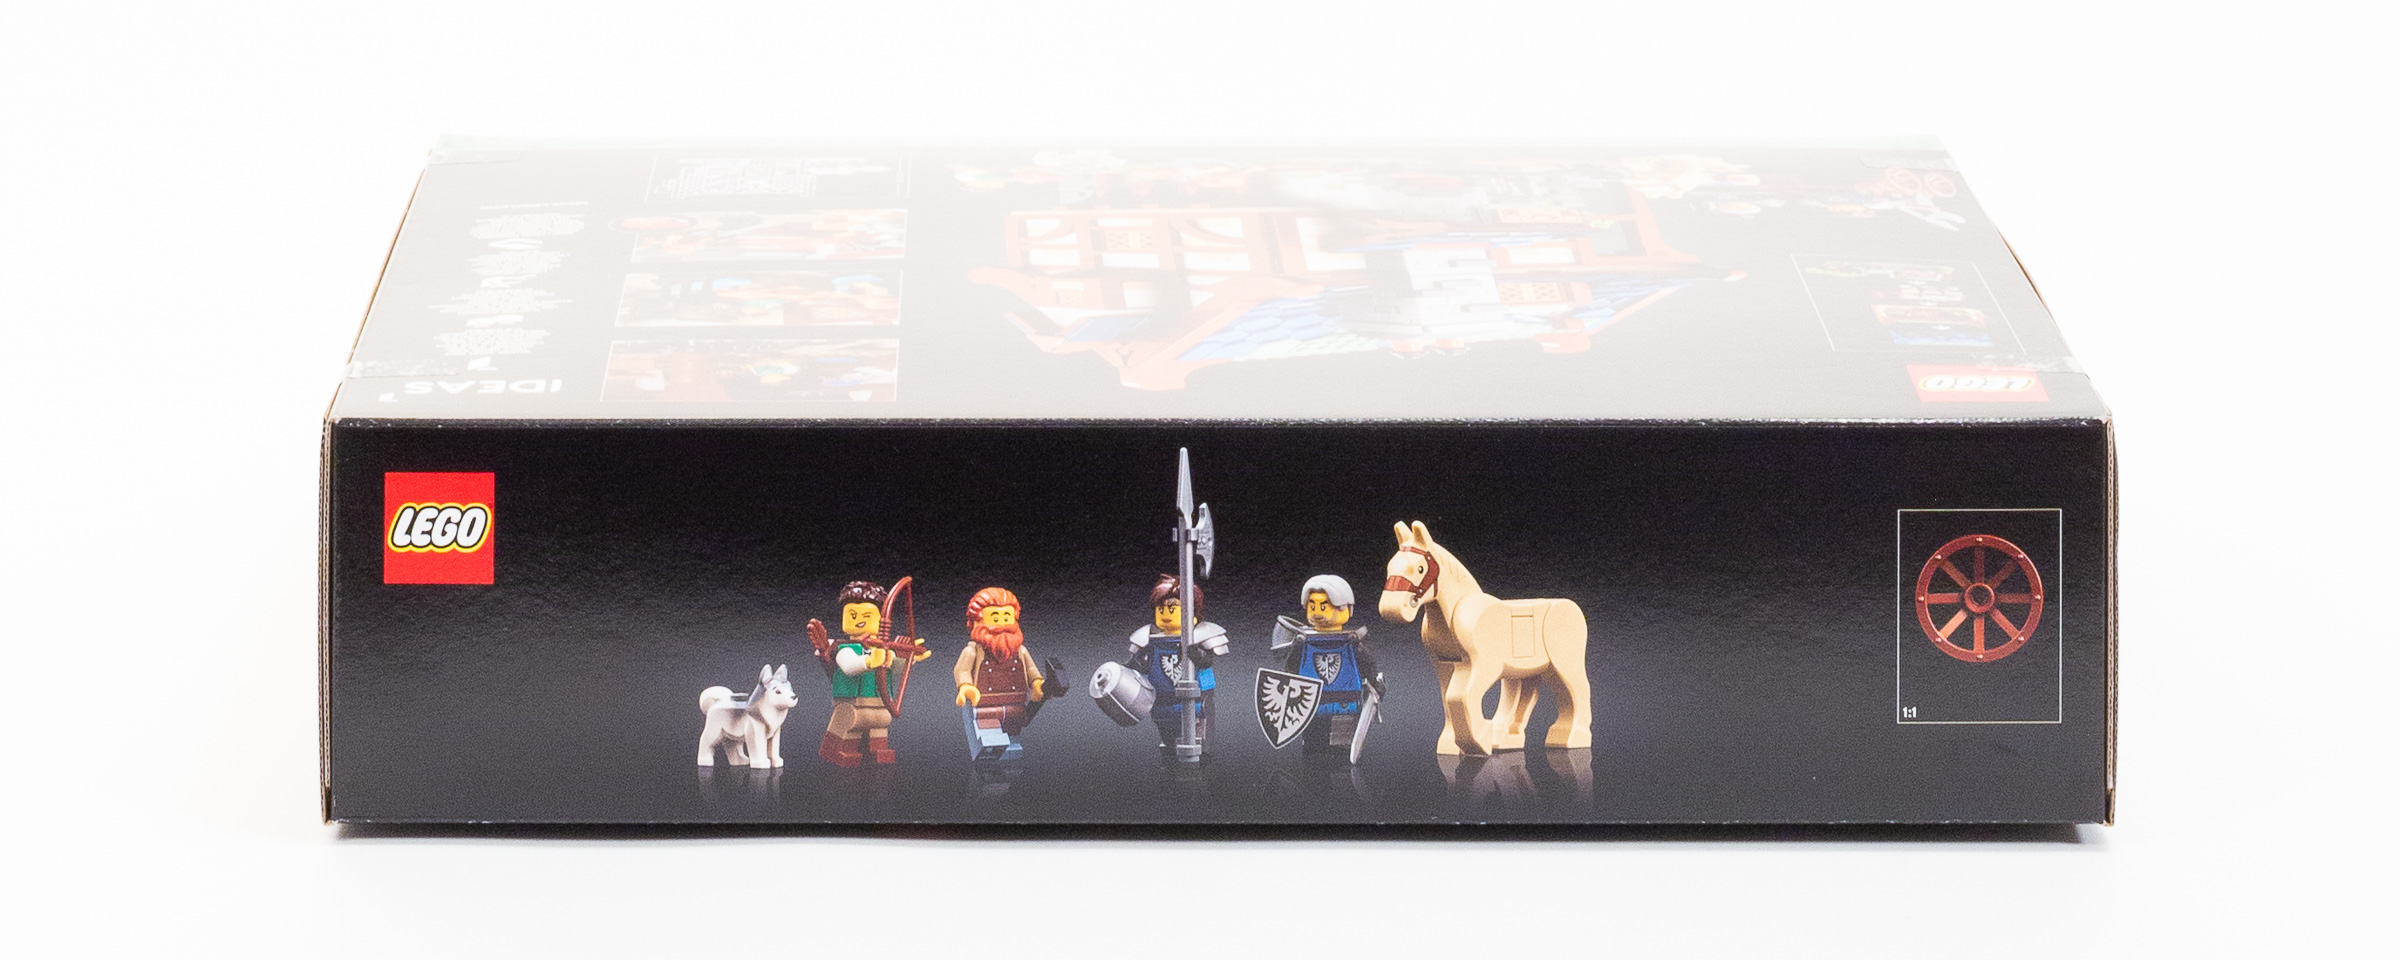
The top of the box shows four minifigures, a horse, and a dog.
Build Process
Some of the larger sets have started to not only number the bags but offer a summary of the main phases of the build process before getting started. In the case of this set, we have 14 bags which they recommend that you build as three phases, matching roughly to the three floors of the building.
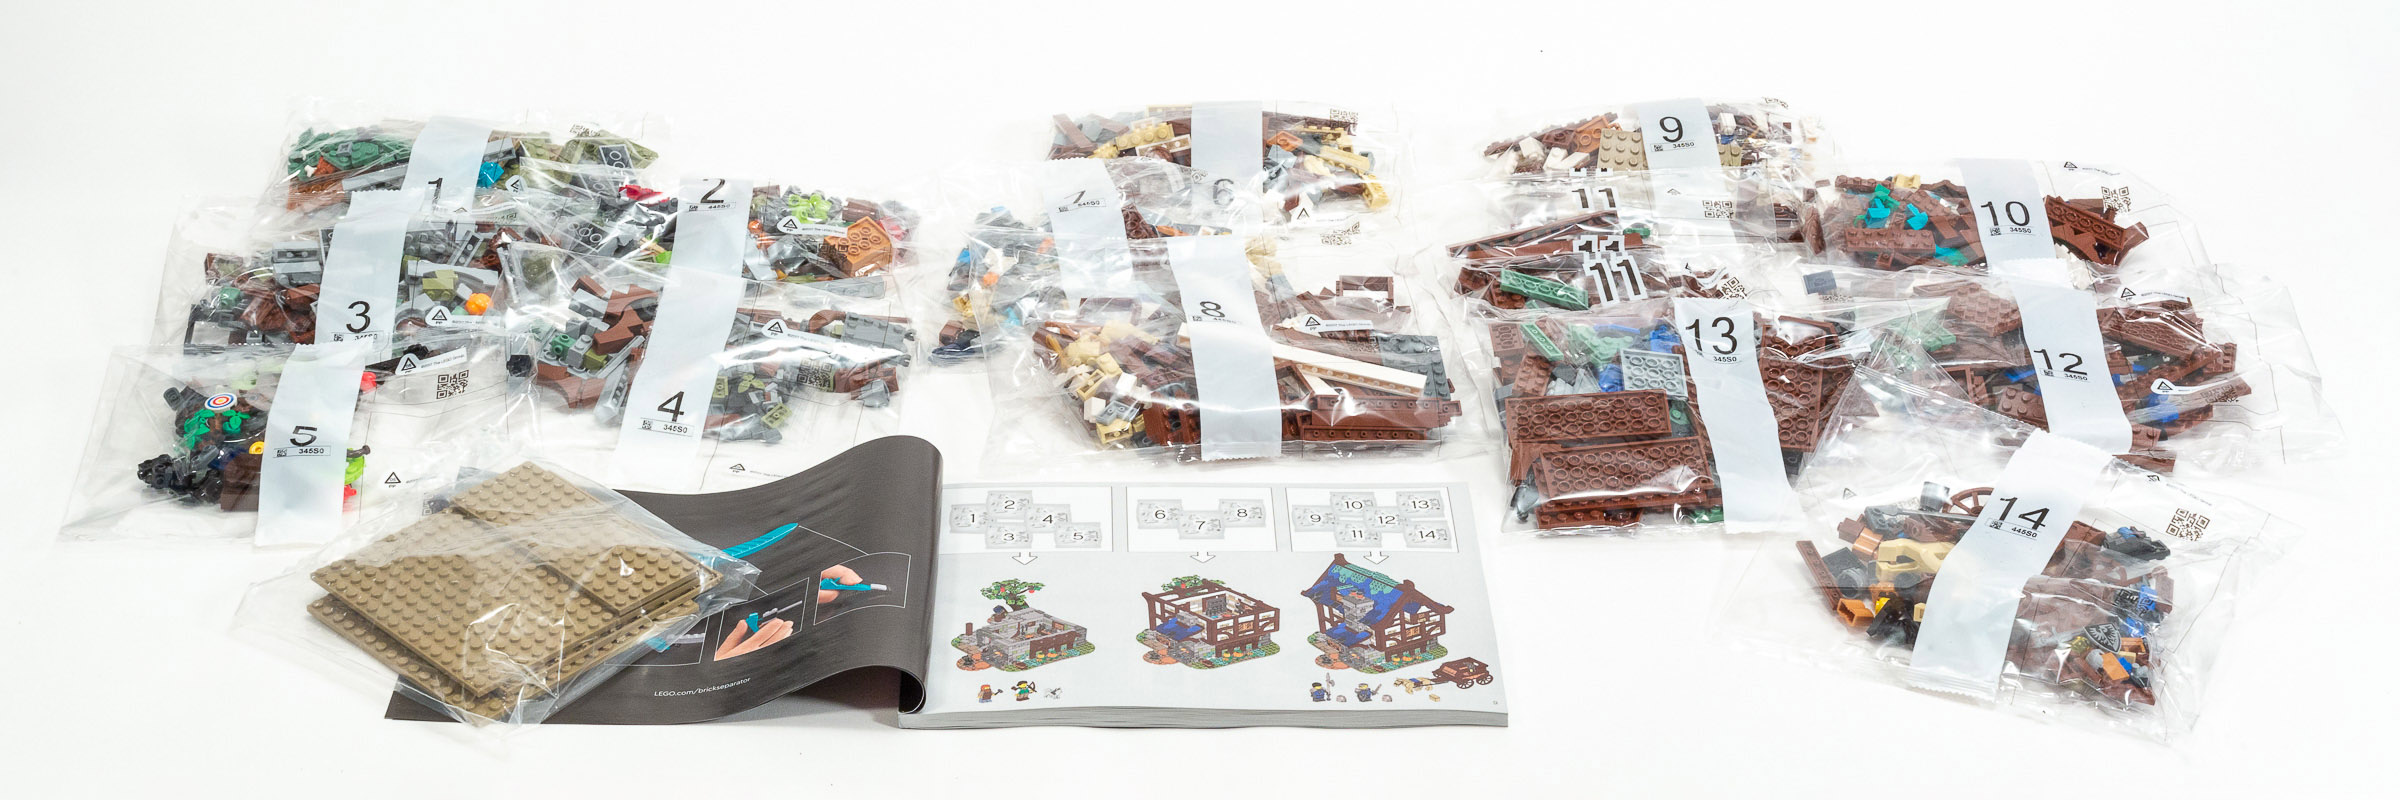
The Medieval Blacksmith set is built across 14 bags, but just three (or four) distinct building phases.
I think that 4 phases is more appropriate, since the very last bag includes just the horse, cart, and two knights. (Go ahead and build that bag first if it will get you excited for the rest of the model, or invite a younger builder in your family to do it—it’s super quick and easy.)
Stages 1-5: Landscaping, Tree, and Ground Floors
As with so many LEGO sets, the first bag is all about building a sturdy base and applying some light decoration to it. This set is a bit unusual in that it has a well rounded and irregular base, which is a stark contrast to the angular bases that I’m used to in the LEGO Architecture series.
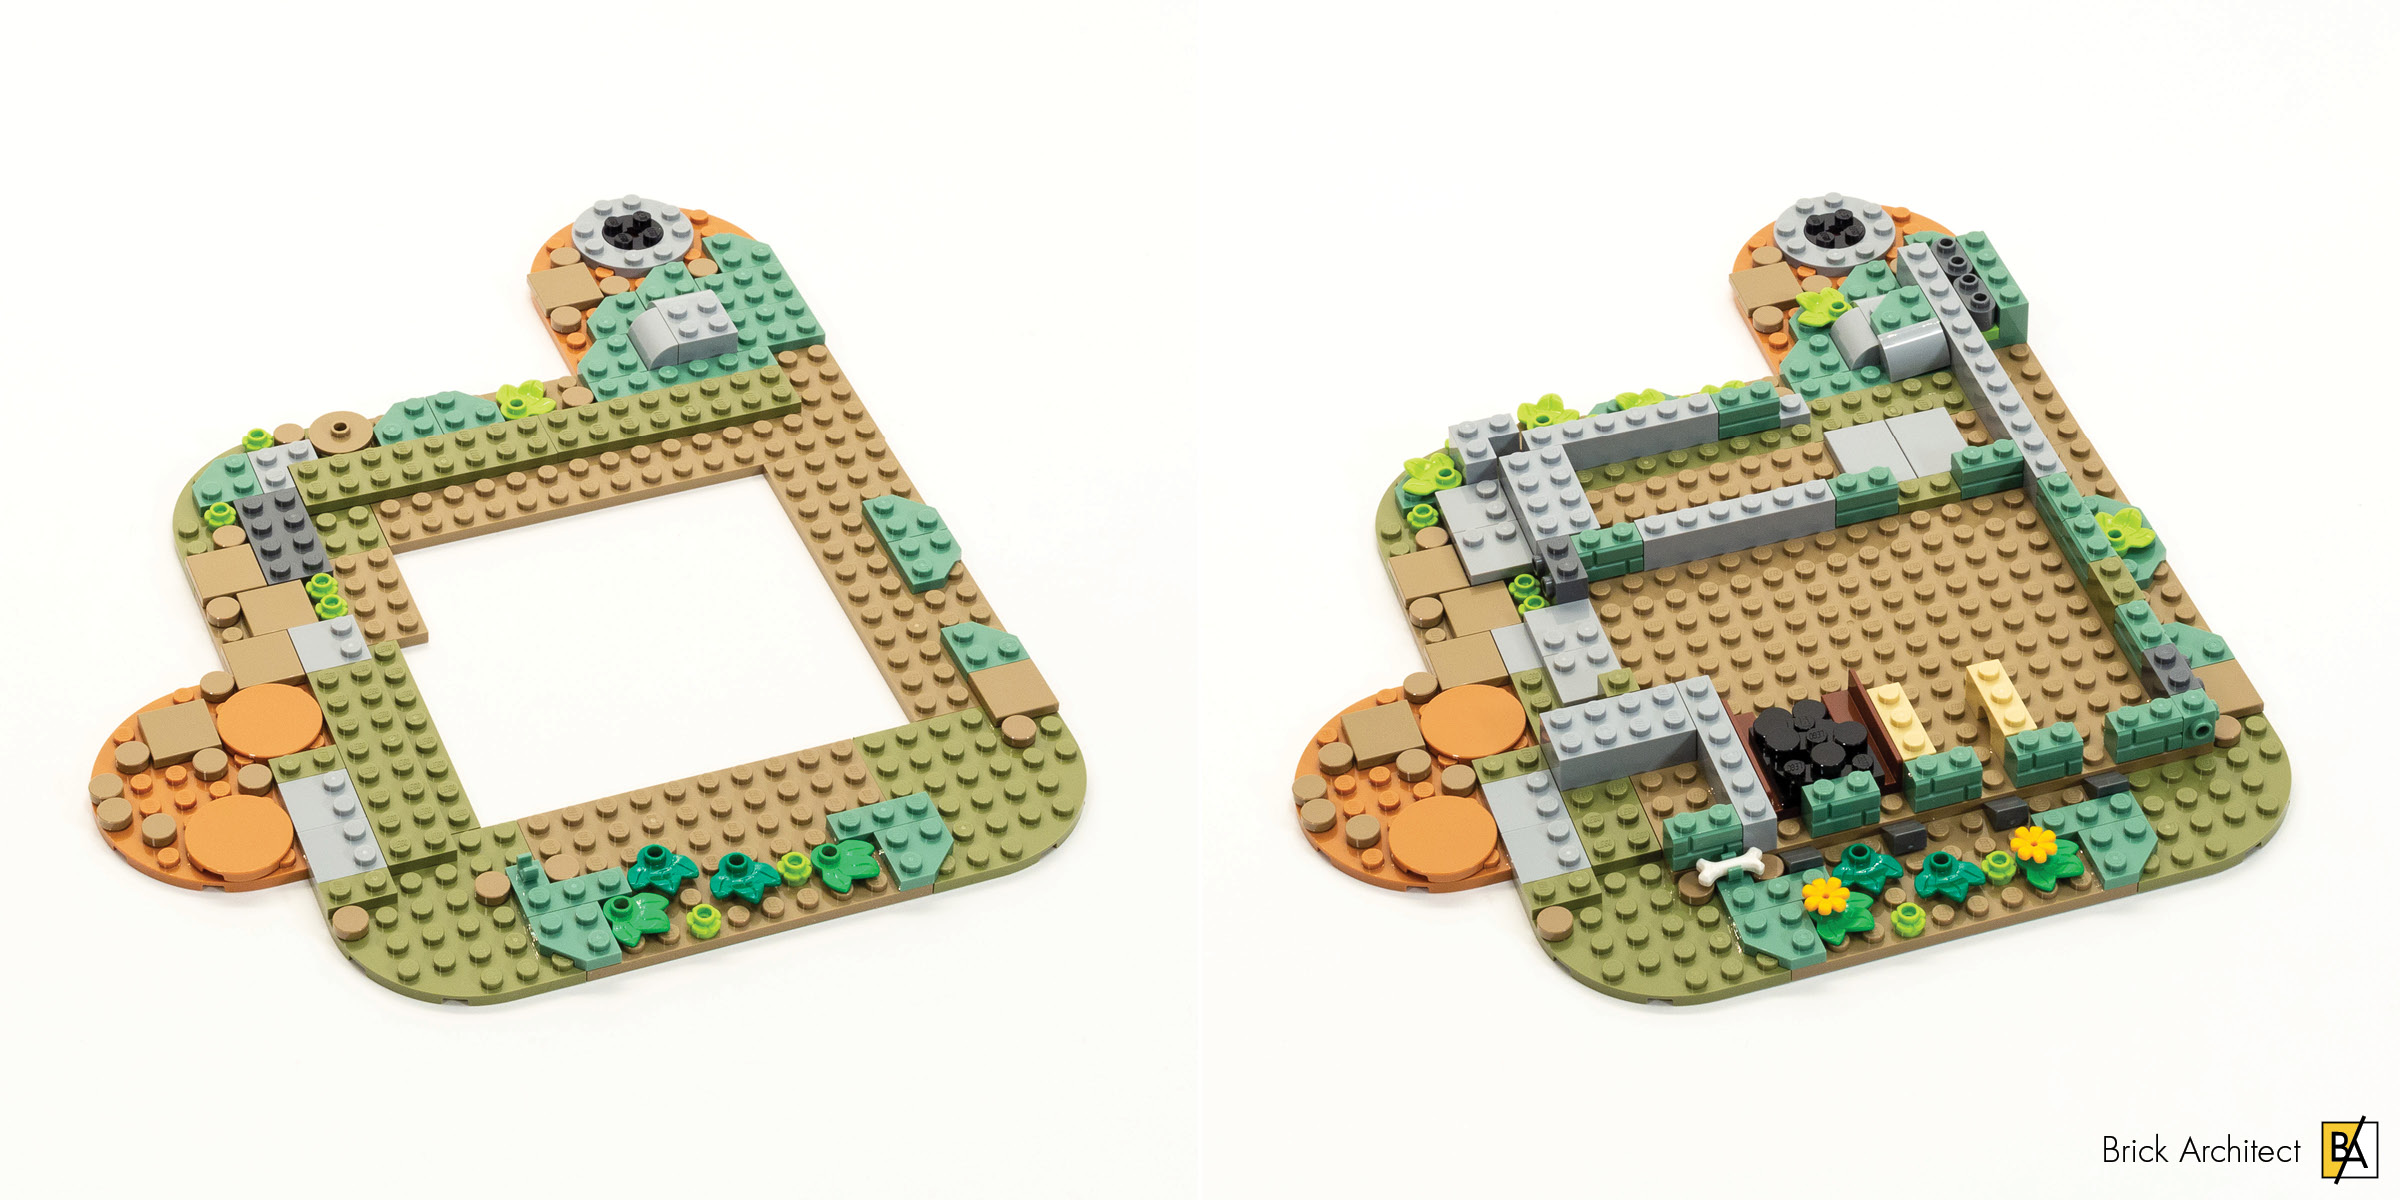
Partially completed base (left), and end of Stage 1 (right).
One interesting detail that I wanted to highlight was that the 16×16 Plate is not on the bottom-most layer of the build. Instead, we build a ground-level frame, and add the large plate in the middle near the end of this stage. This results in a sturdy base with an organic shape, and a total size of 27×32 studs.
We continue to add a lot of fun details in Bag 2. This includes a stack of wood beneath what I expect will be the stairs, and some interior furniture including a workbench, grinding wheel, and large crate.
Best of all, we add the 2×3 Light Brick (Part 54930c01) at this time, which is integrated into the red-hot forge where a large sword is positioned on top. The light brick is activated by pressing gently on a pair of simple but immediately recognizable brick-built bellows on the side of the forge.
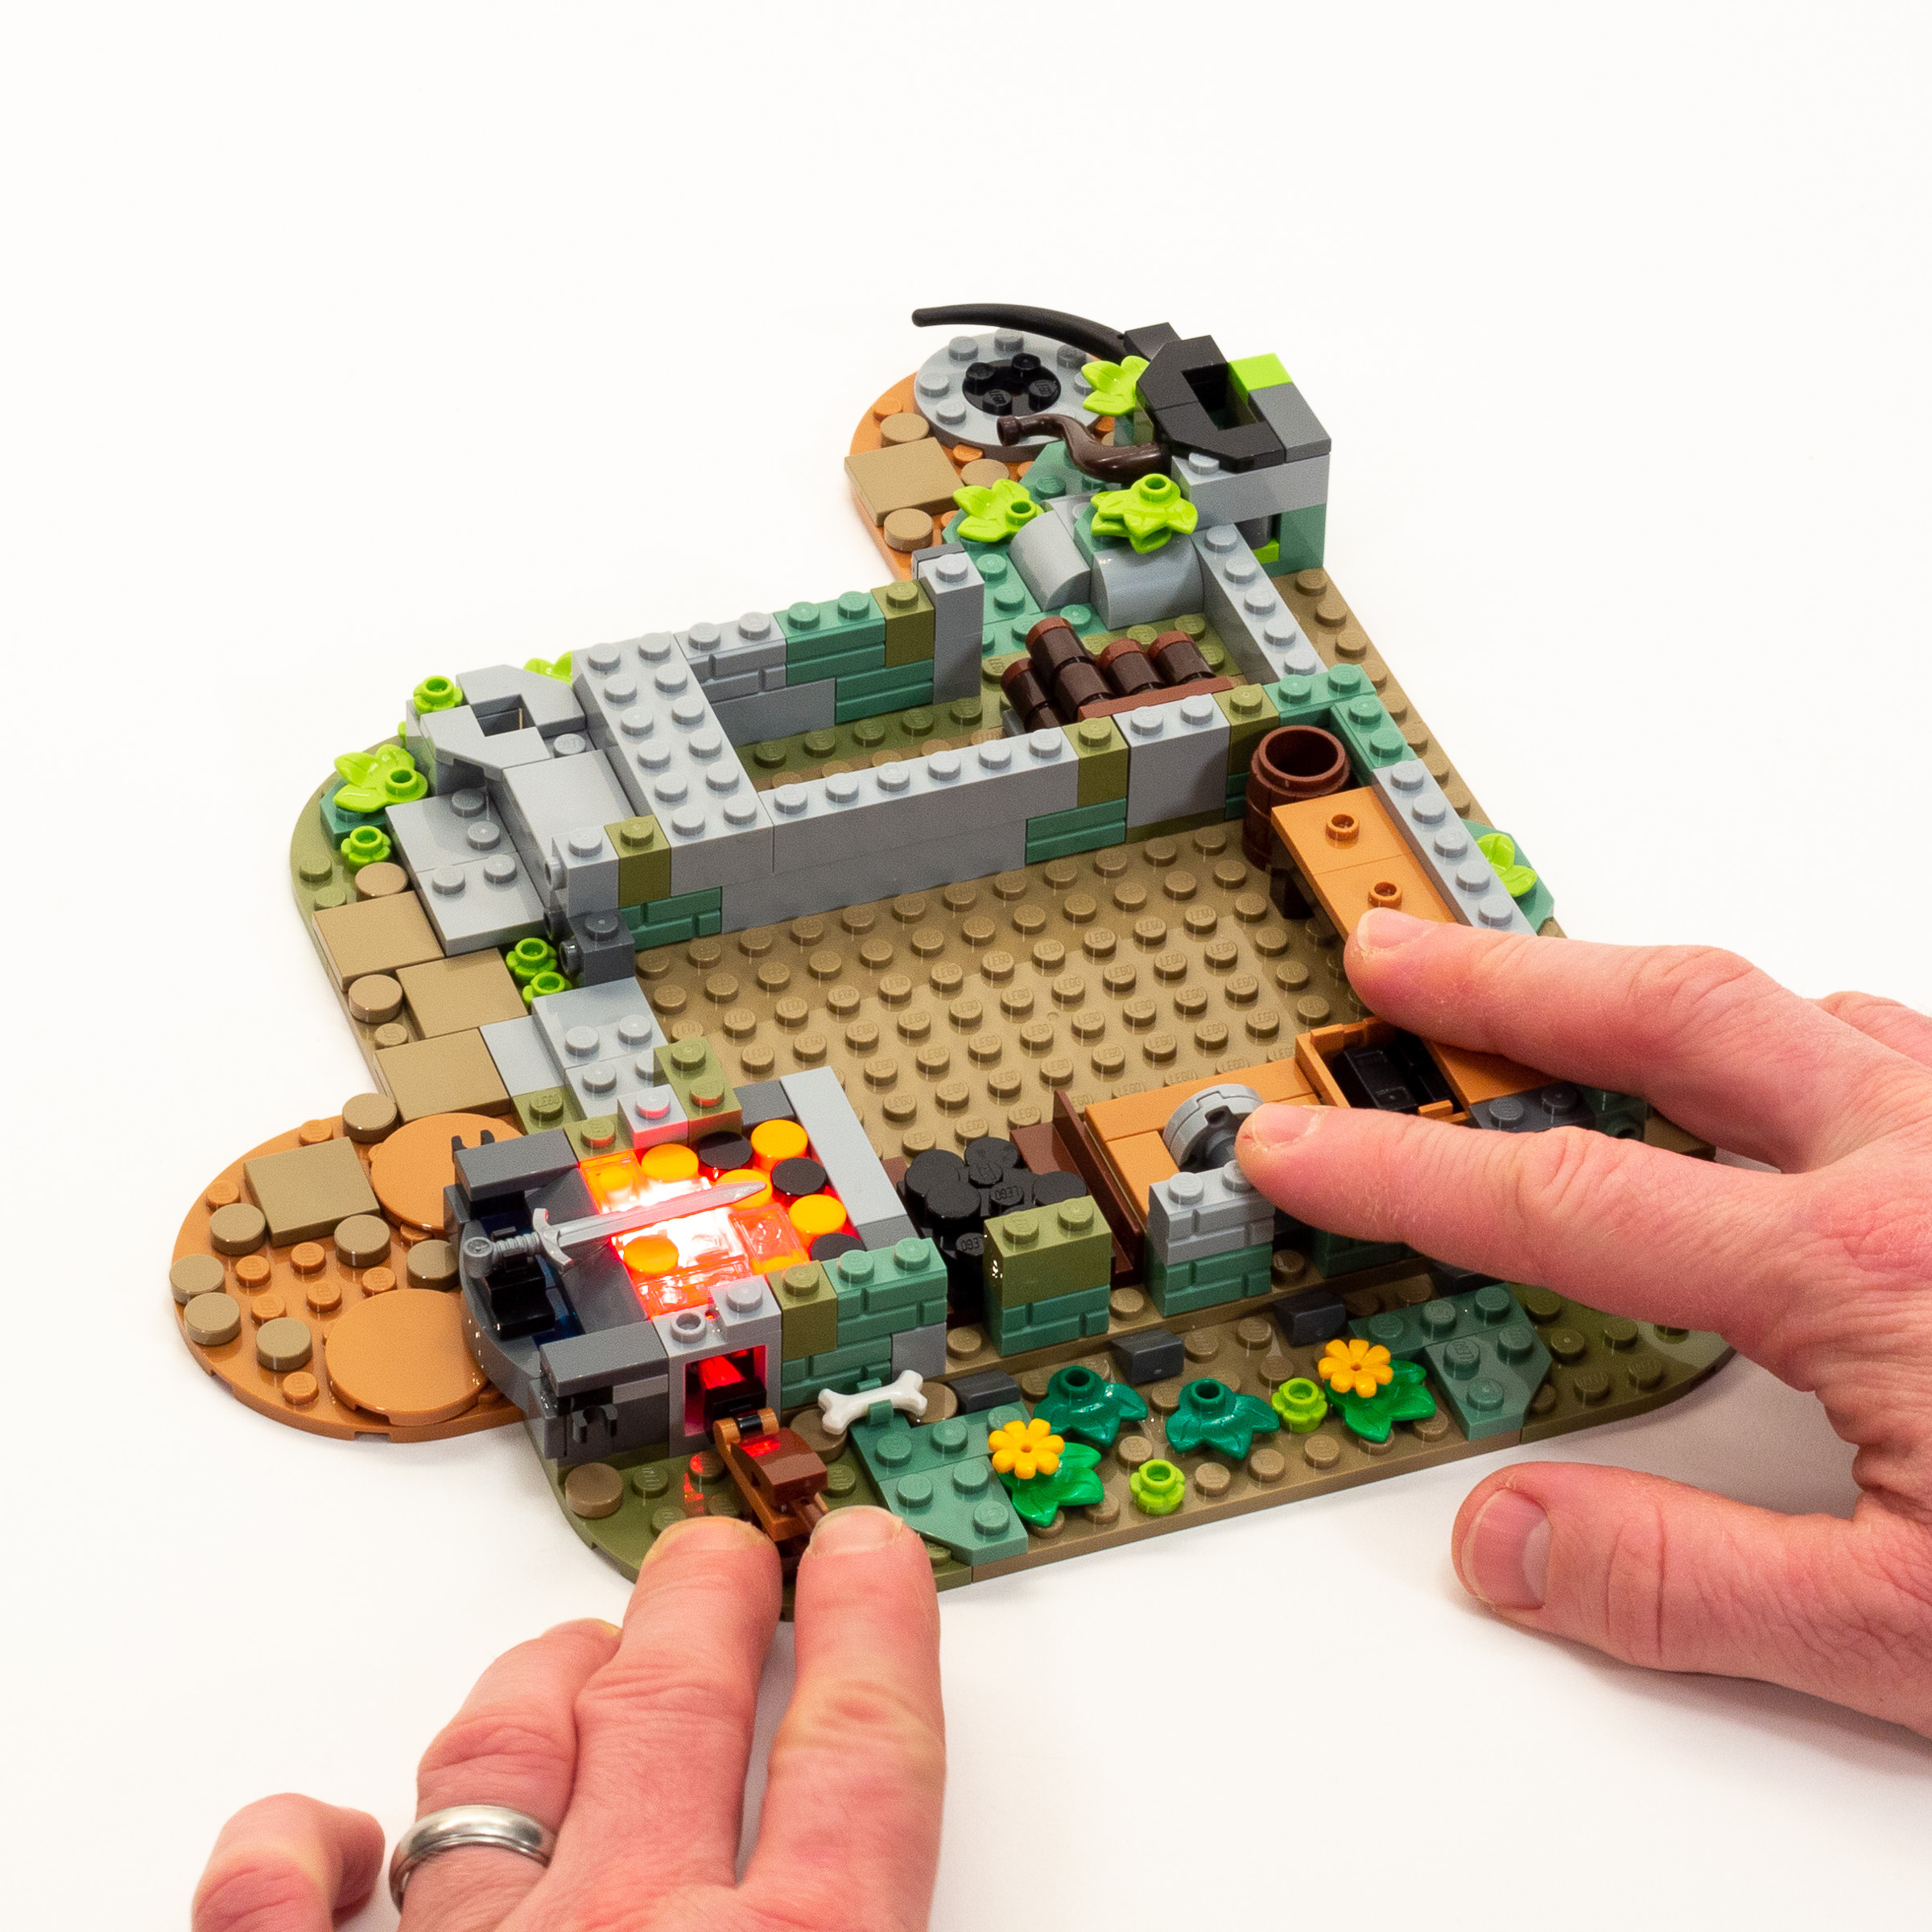
Progress at the end of bag 2 (with light brick activated).
The third bag adds a few layers of brick to the growing foundation, as well as the windows to the lowest floor of the building. A few more fun details are added to the interior such as a shield and armor mounted on the wall. We wrap this stage off by putting tiles on the steps which go up to what will be our second floor.
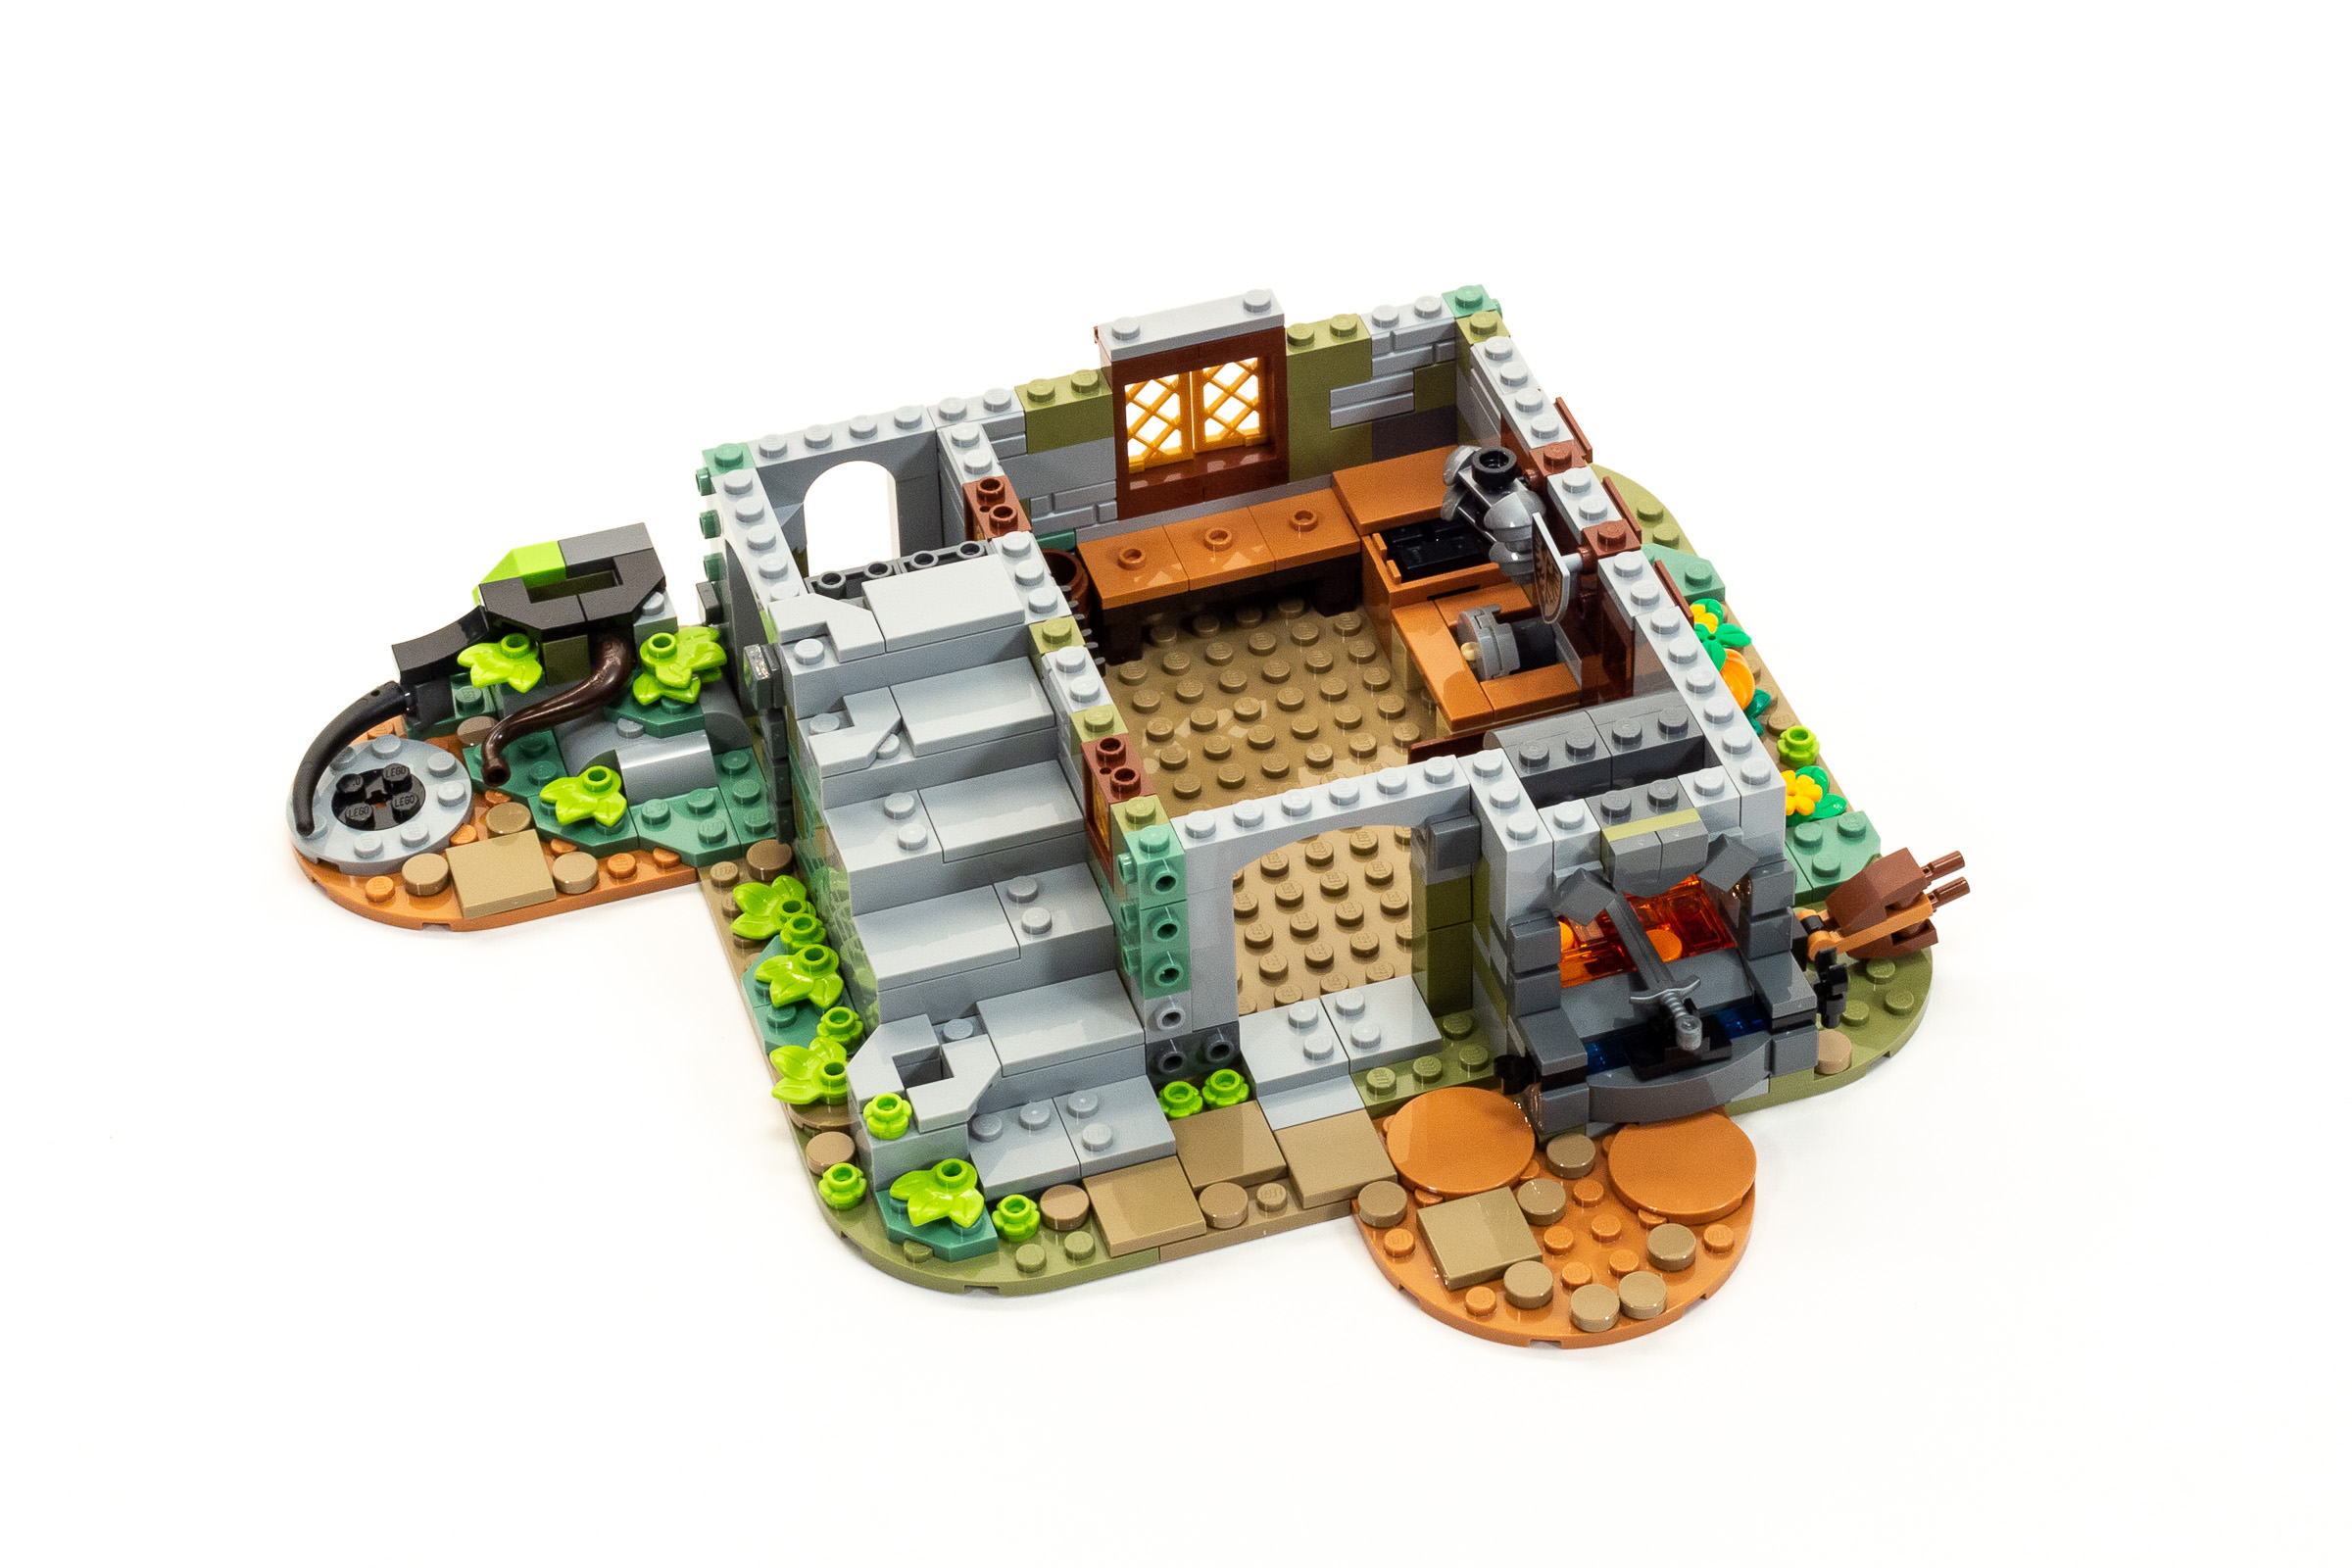
Progress at the end of Bag 3.
The fourth bag appears to finish the bottom floor of the building. I was pleased to see that the model uses a common AFOL technique to achieve rusticated corners which exploits the fact that a 1×2 tile doesn’t have any notches on the back so it can be positioned as needed. This covers the studs facing outward on three corners of the building with 1×1 through 1×3 tiles in 194Medium Stone GreyLight Bluish Gray.
Also, in this stage we add some final details to the interior and exterior including two 26Black anvils, and a selection of minifigure accessories such as a shovel and broom. Lastly, we attach tiles along the upper lip of the building, making it easier to remove the second story, much like what is seen on sets in the Modular Building series.
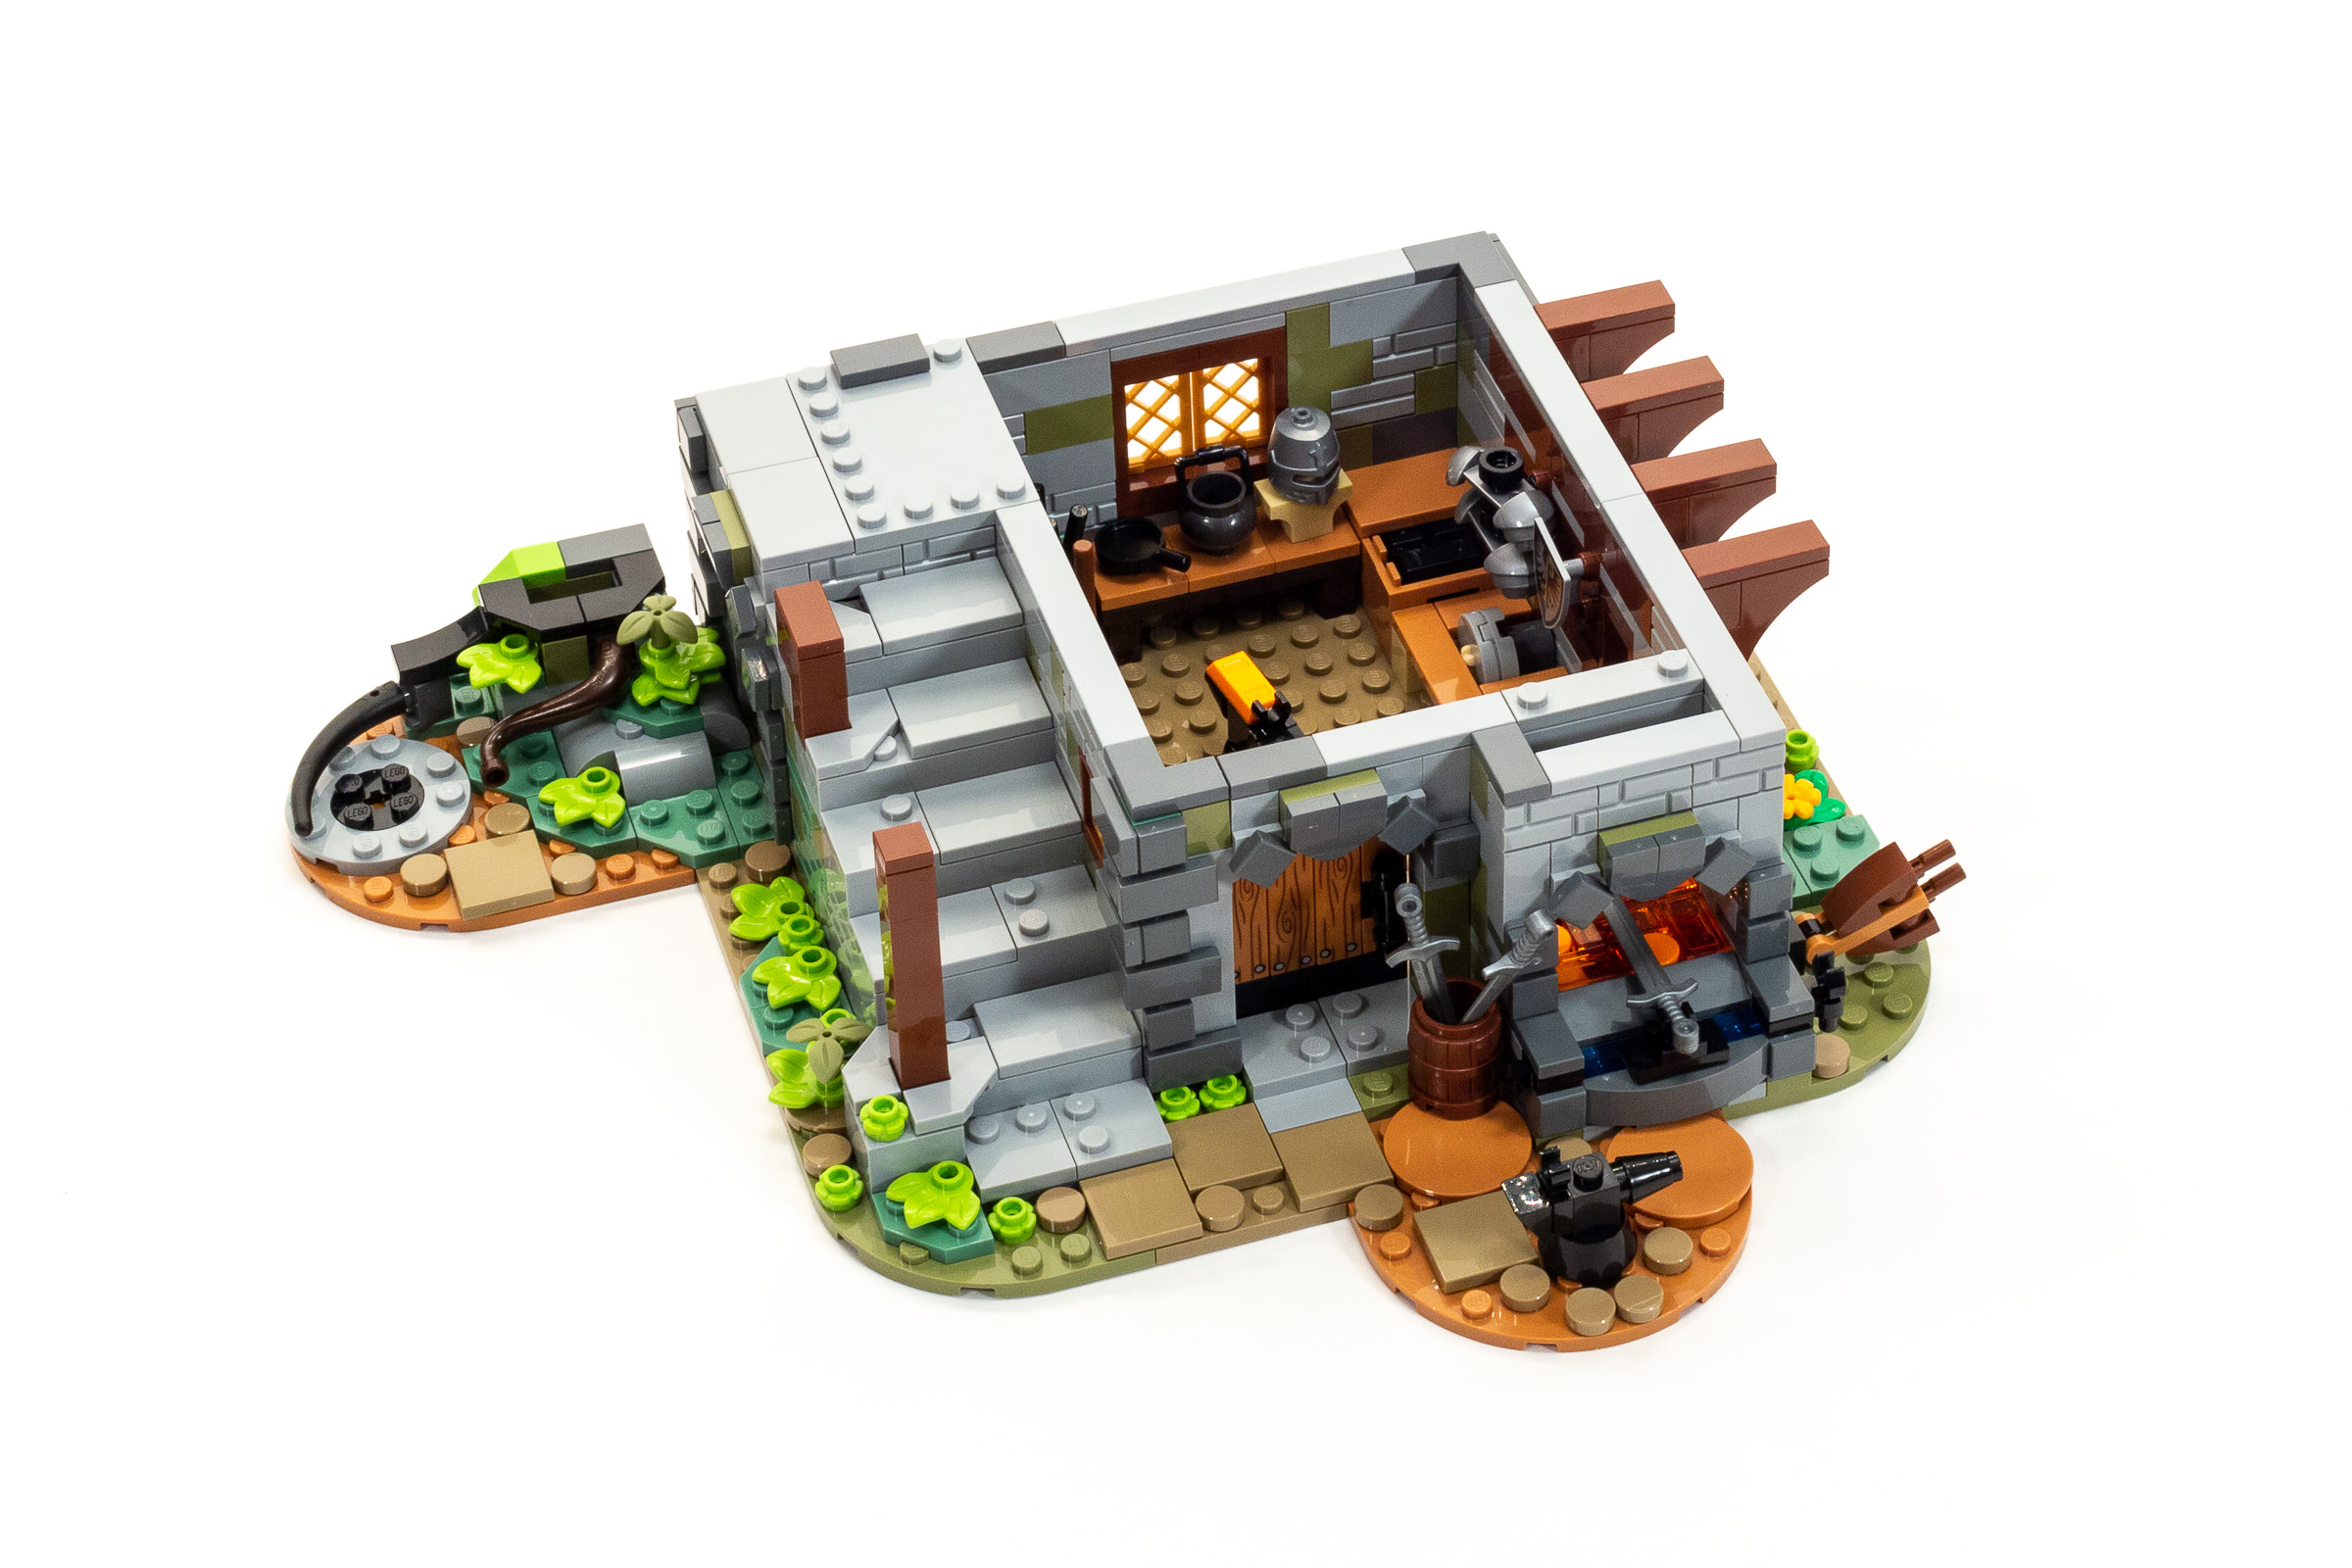
Progress at the end of Bag 4.
The fifth bag is all about the tree, which begins by building a gnarled tree using a variety of SNOT techniques. (The instructions are a bit hard to follow, because The LEGO Group still hasn’t figured out how to create readable building instructions with parts in the 308Dark Brown color.) The back of the tree trunk includes an archery target. This goes well with the female minifigure with a bow and arrow also included in this bag.
Moving on to the branches and foliage, we build four identical modules which each contain 8 branches and a red apple. These attach to the gnarled branches in the previous step. The end result is pleasing and gives the model a hint of the rougher aesthetic present in the original LEGO Ideas submission.

Progress at the end of Bag 5.
Build Time 1 hour, 35 minutes. (Stage 1: 20 minutes, Stage 2: 15 minutes, Stage 3: 20 minutes, Stage 4: 20 minutes, Stage 5: 20 minutes.)
Stages 6-8: Second Story
We have just three bags for the second story, and bag 6 doesn’t take long at all. We start with a 16×16 plate, and build the walls of the room around the perimeter. A small chimney juts two studs off the front side, and we start building the porch off the left side too.
So far, the single room is appointed with a keg of ale, a fireplace and stove, and a table. I’m eager to see how the half-timbered design looks in the finished model.
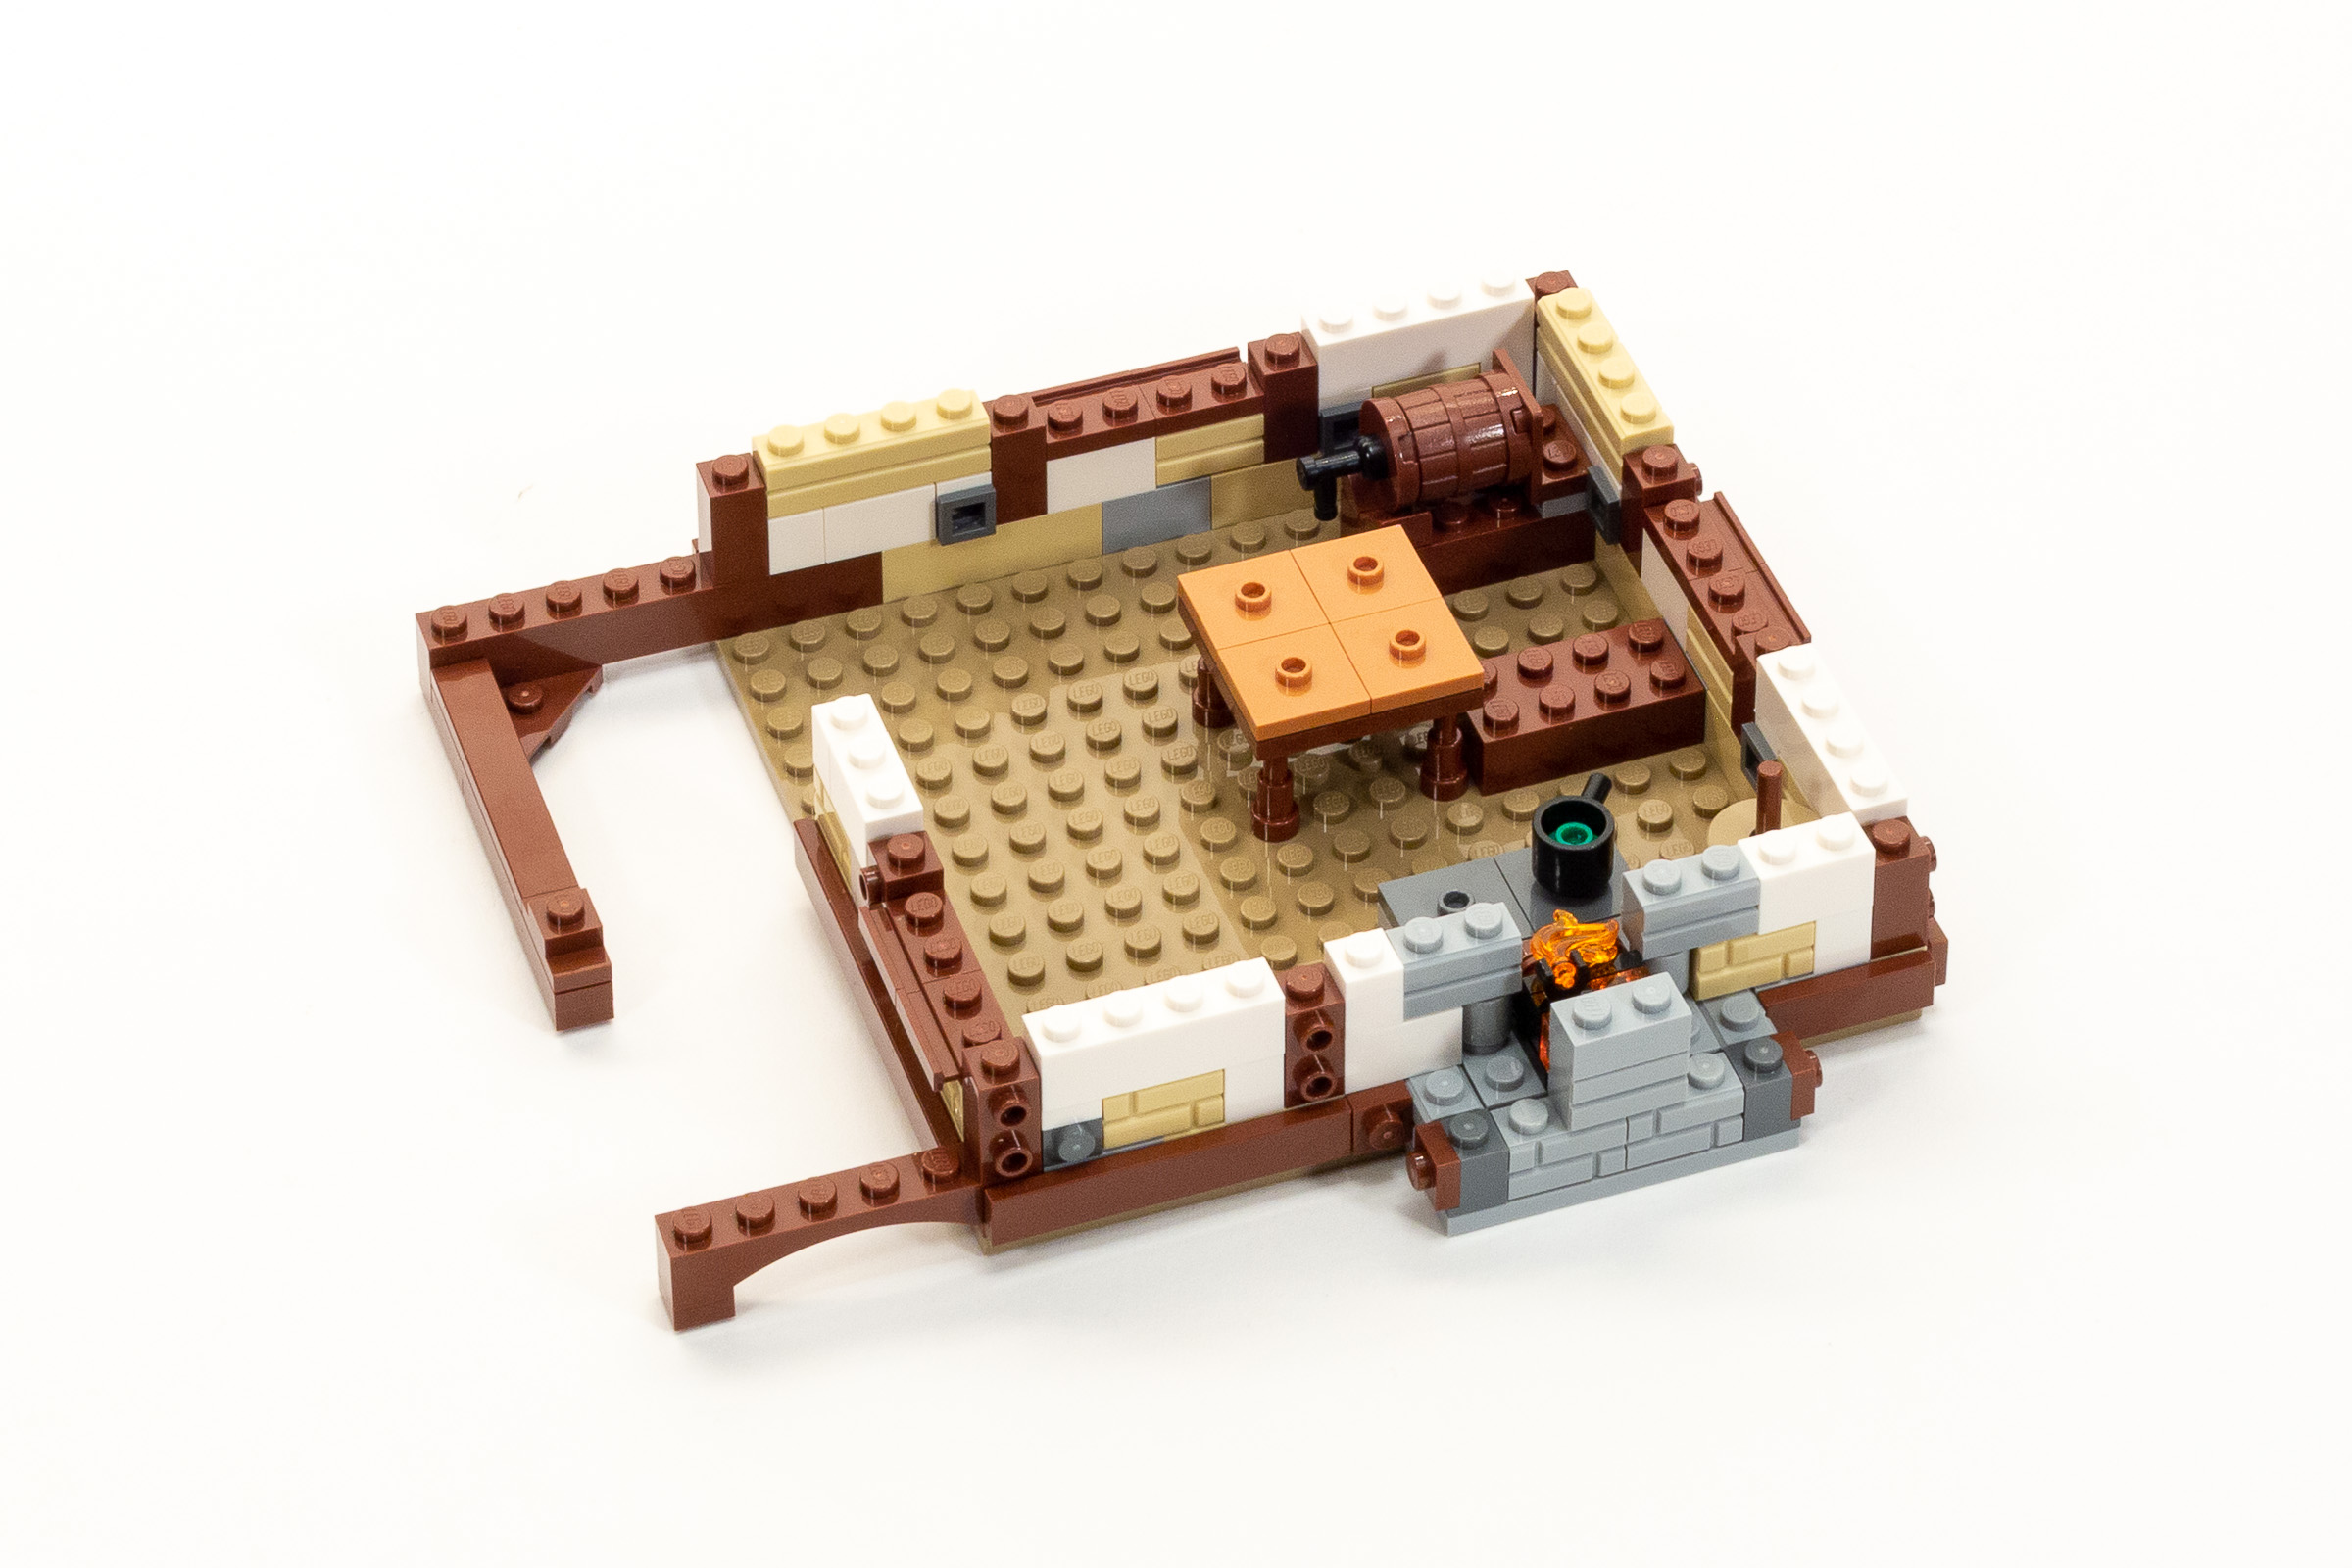
Bag 6 includes the floor, table and a keg in the corner.
I continue to be pleased with what I’m seeing in this set in Stage 7. The interior is well detailed with the addition of two generous chairs based on a 3×3 plate rather than the more common 2×2 size. (They look a bit out of scale to a Minifigure, but are aesthetically pleasing.) The table is now set with a turkey dinner and pewter goblets, and we have food cooking on the stove. Outside, we see continued progress on the walls, and the addition of an awning which covers the forge. The small roof uses the same parts and colors which we will discuss more when we get to the roof of the third floor.
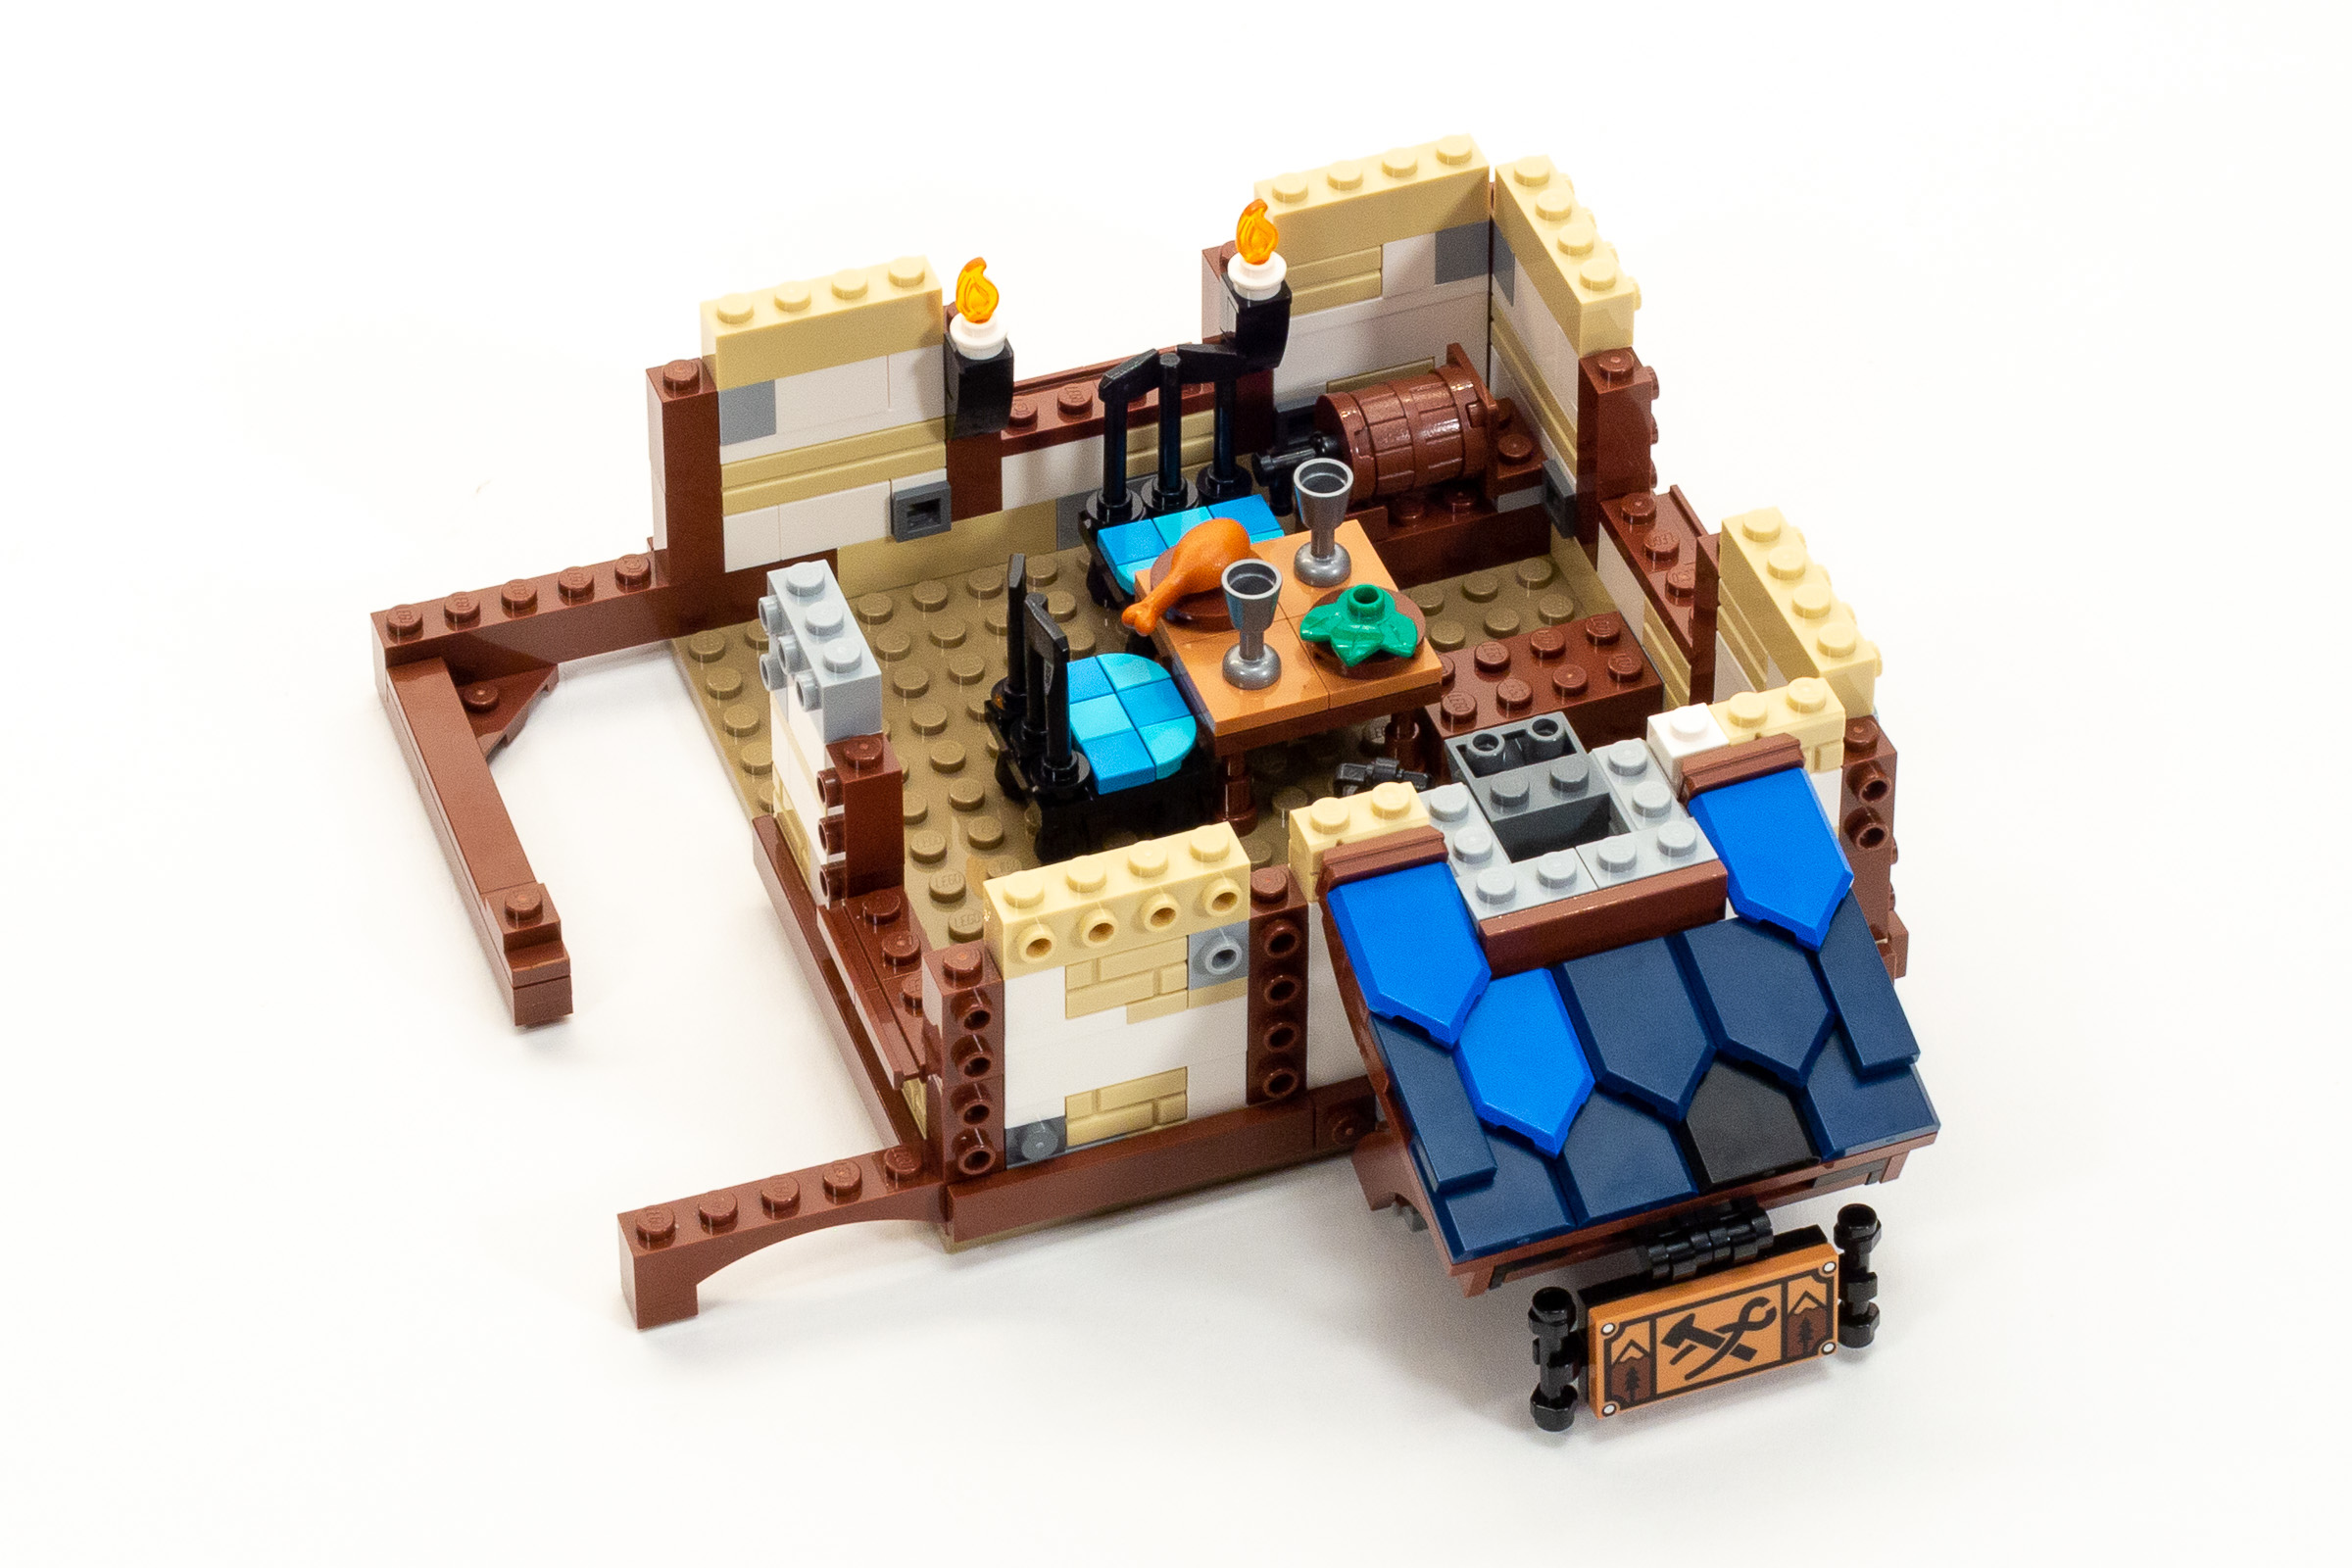
Progress at the end of bag 7.
The 8th bag is a bit more involved, as it takes some time finish the walls, but also to carefully apply the exposed wooden beams to exposed studs on the exterior. This requires some care, especially on the side closest to the doorway, as it is difficult to apply 1×1 tiles to the side of a building while holding it awkwardly in the other hand.
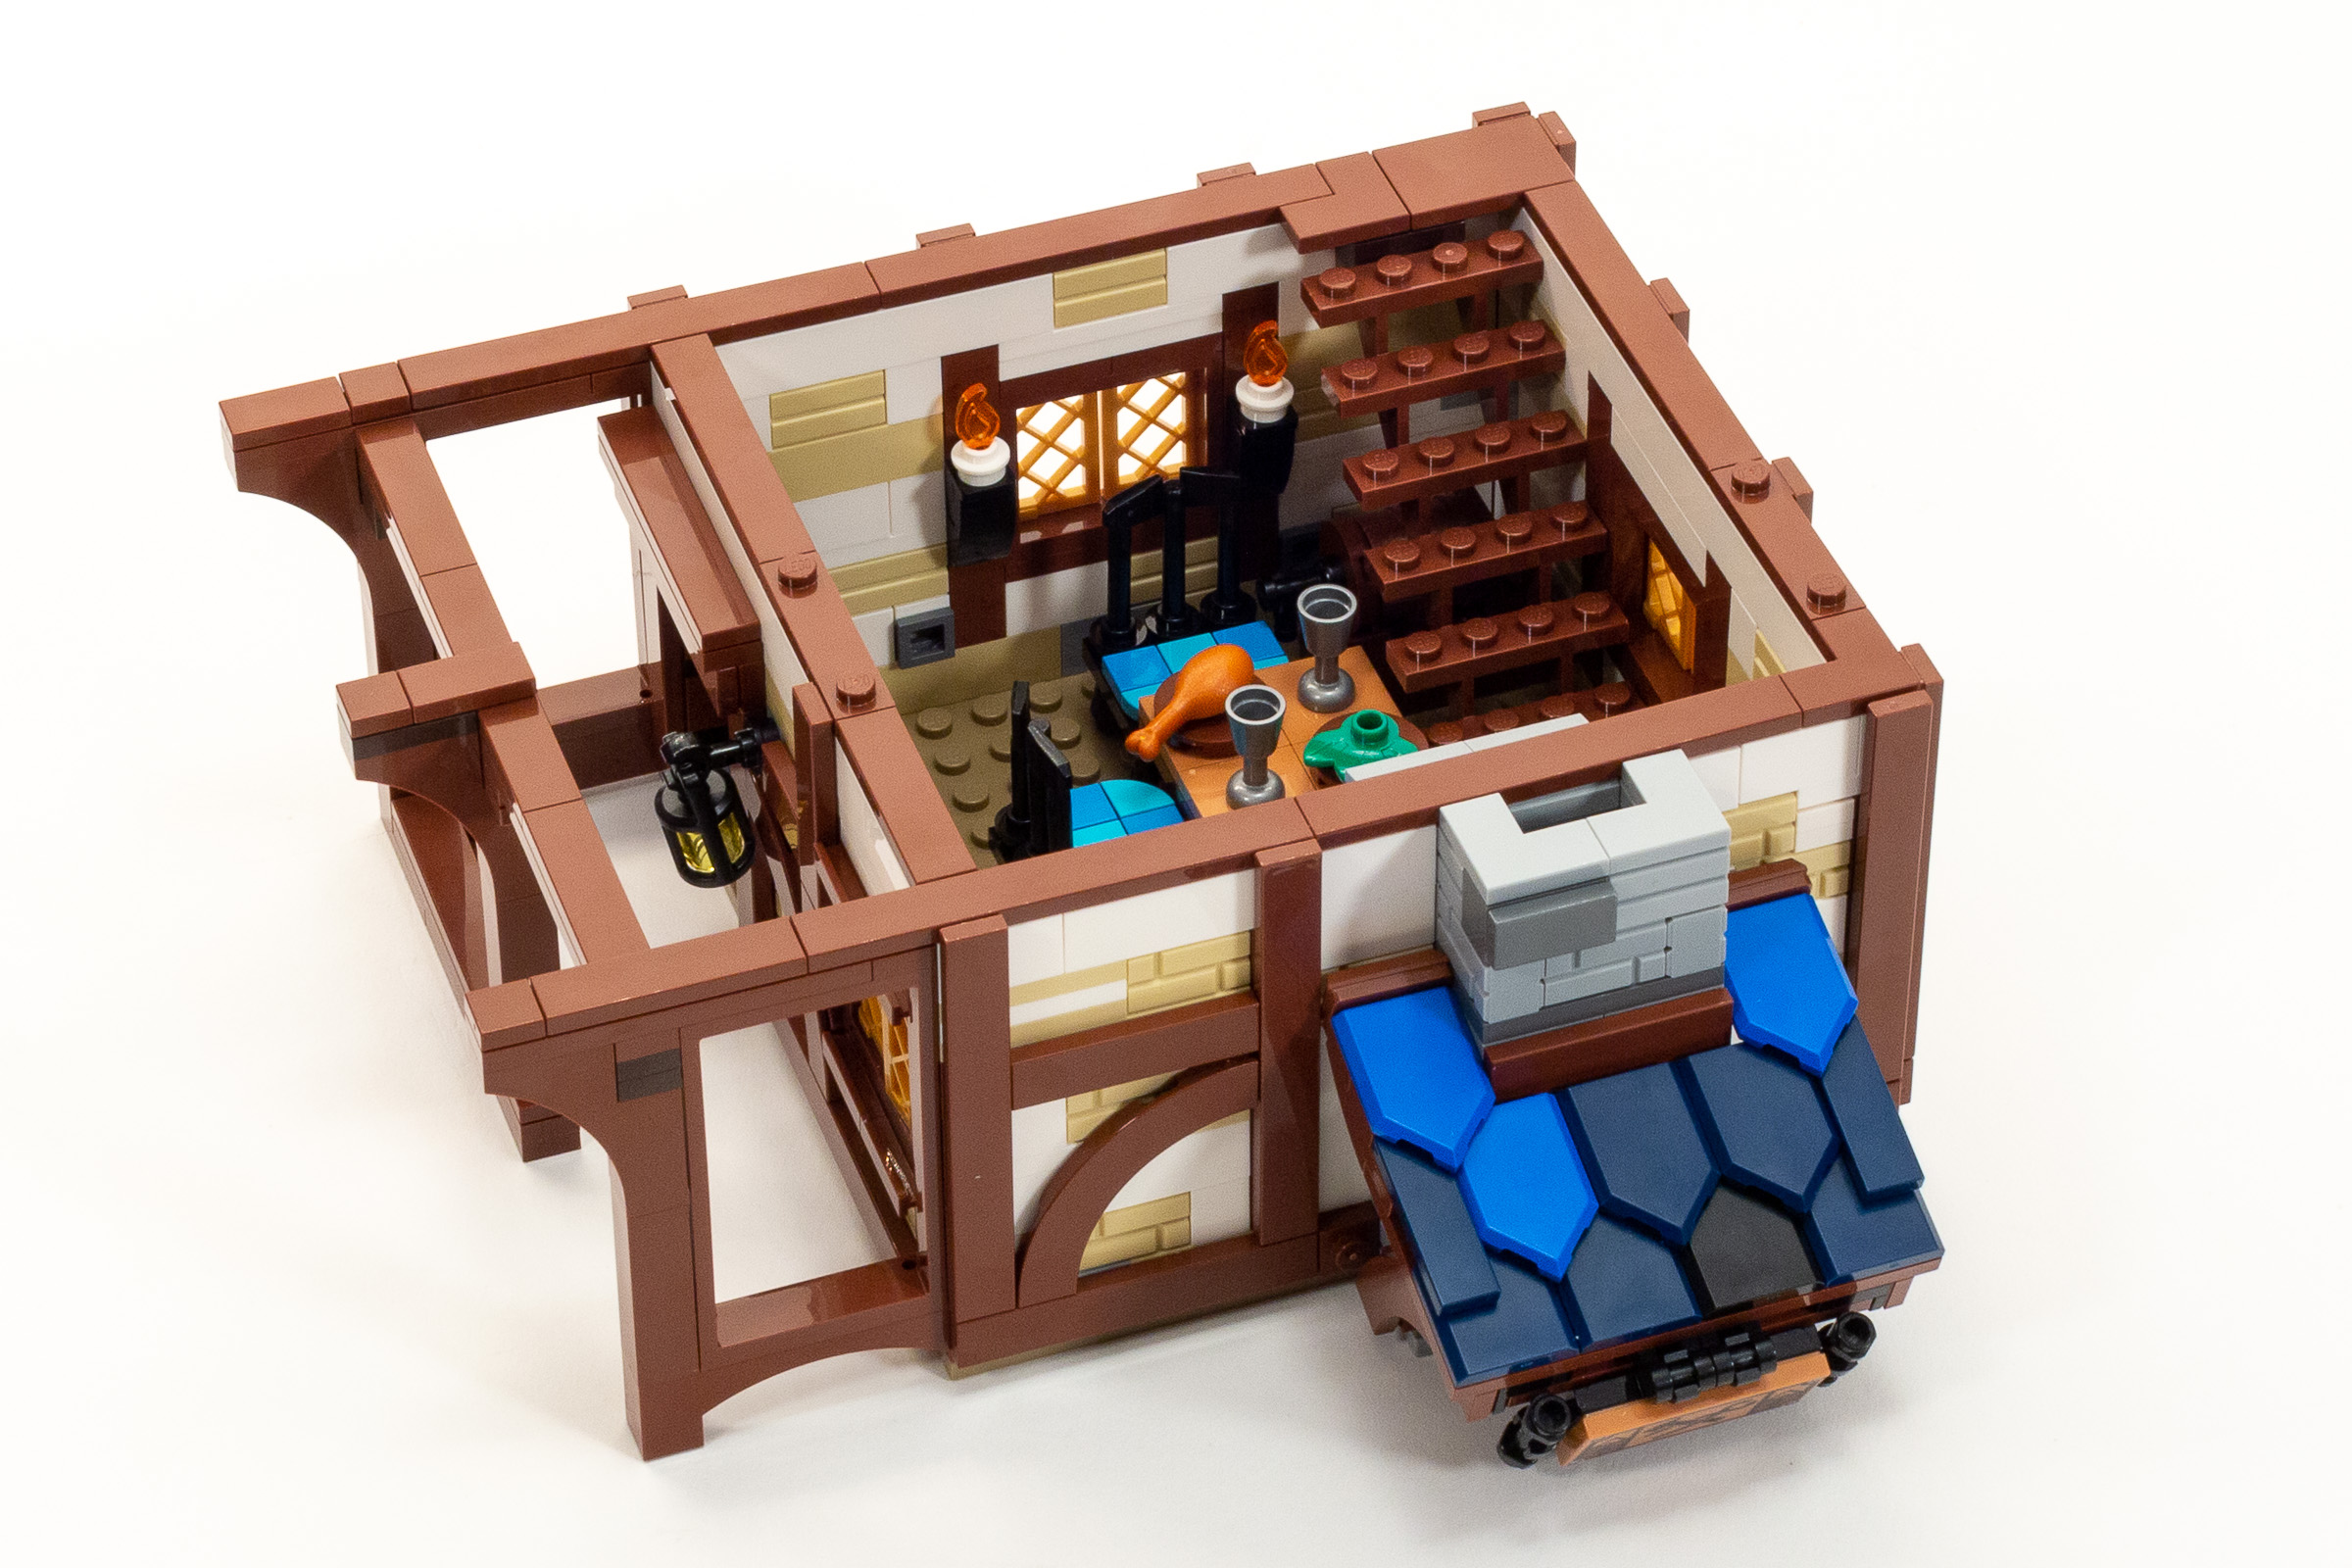
Progress at the end of Bag 8.
Build Time 1 hour. (Stage 6: 15 minutes, Stage 7: 20 minutes, Stage 8: 25 minutes.)
Stages 9-13: Third Floor
The third floor begins with bag 9, where we build a strong floor with two layers of plate. A hole in the back right corner of the floor aligns with the stairs coming up. We also start building the walls, and some nice interior details. The same “once upon a time” tile that’s included in #10270 Bookshop sits on a small desk with an ink well and quill.
The most fun detail is the bearskin rug, which is brick-built and just behind the roof post. Speaking of which, I love the inclusion of a chunky vertical support, but it doesn’t make structural sense that it’s only on the third floor.
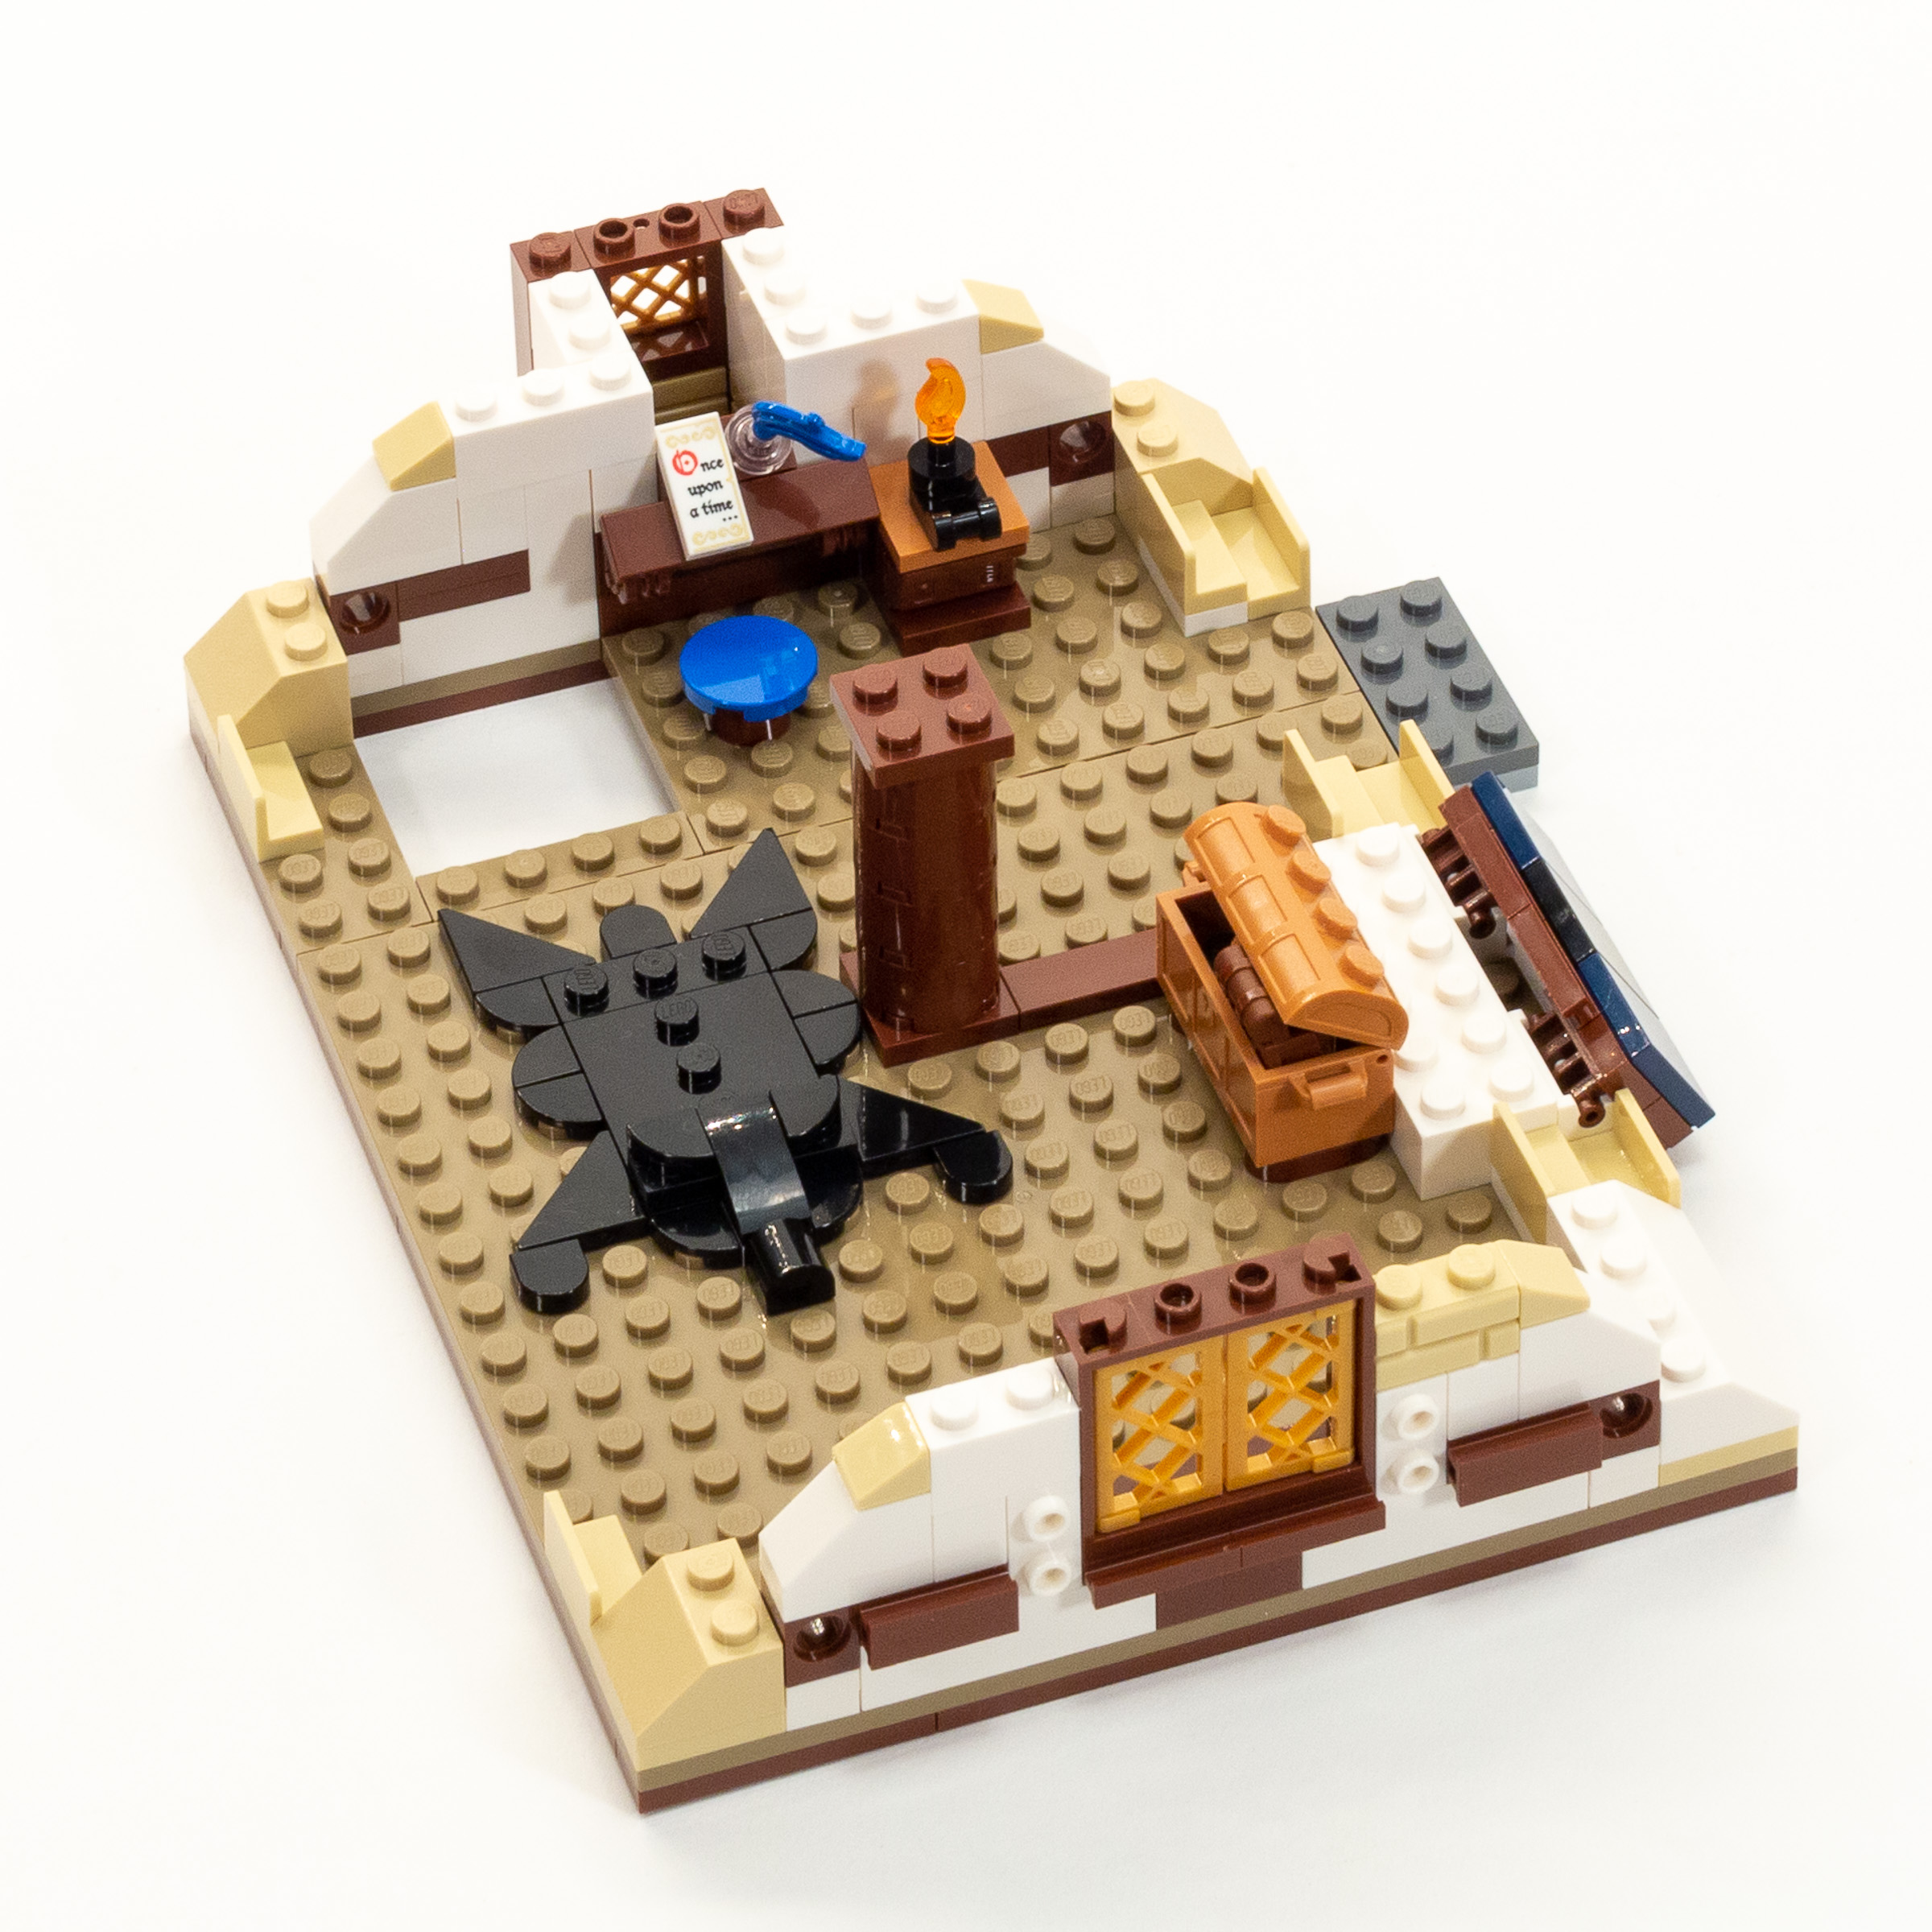
Bearskin rug and drawing table in bag 9.
Bag 10 follows by finishing the gables on either side of the building, and reinforcing the roofline with large archways. We also add a roof to the small outcropping behind the desk. The real highlight of this stage is the gorgeously detailed wooden bed which has a nice looking checkered blanket in 28Dark GreenGreen, 107Bright Bluish GreenDark Turquoise / Teal, and 37Bright Green.

Stages 10 (left) and 11 (right).
Bag 11 is really quick, adding a few layers of plate along the peak of the roof, followed by chunky eaves on both sides of the roofline. It’s quick, but gives the roof a crisp edge.
Bags 12 and 13 add the roof to both sides of the model. The roofline is not straight, but rather have a slight bend to the roof which is achieved using towball joints. We also add a gabled window to one side and a chimney that extends through the roof on the other side.
The roof on the front is tricky to install because of the notches for the chimney and gabled window. It’s locked into place pretty well once the chimney is installed at the beginning of bag 13. The roof on the back is simpler, so you can remove it easily to access the interior.
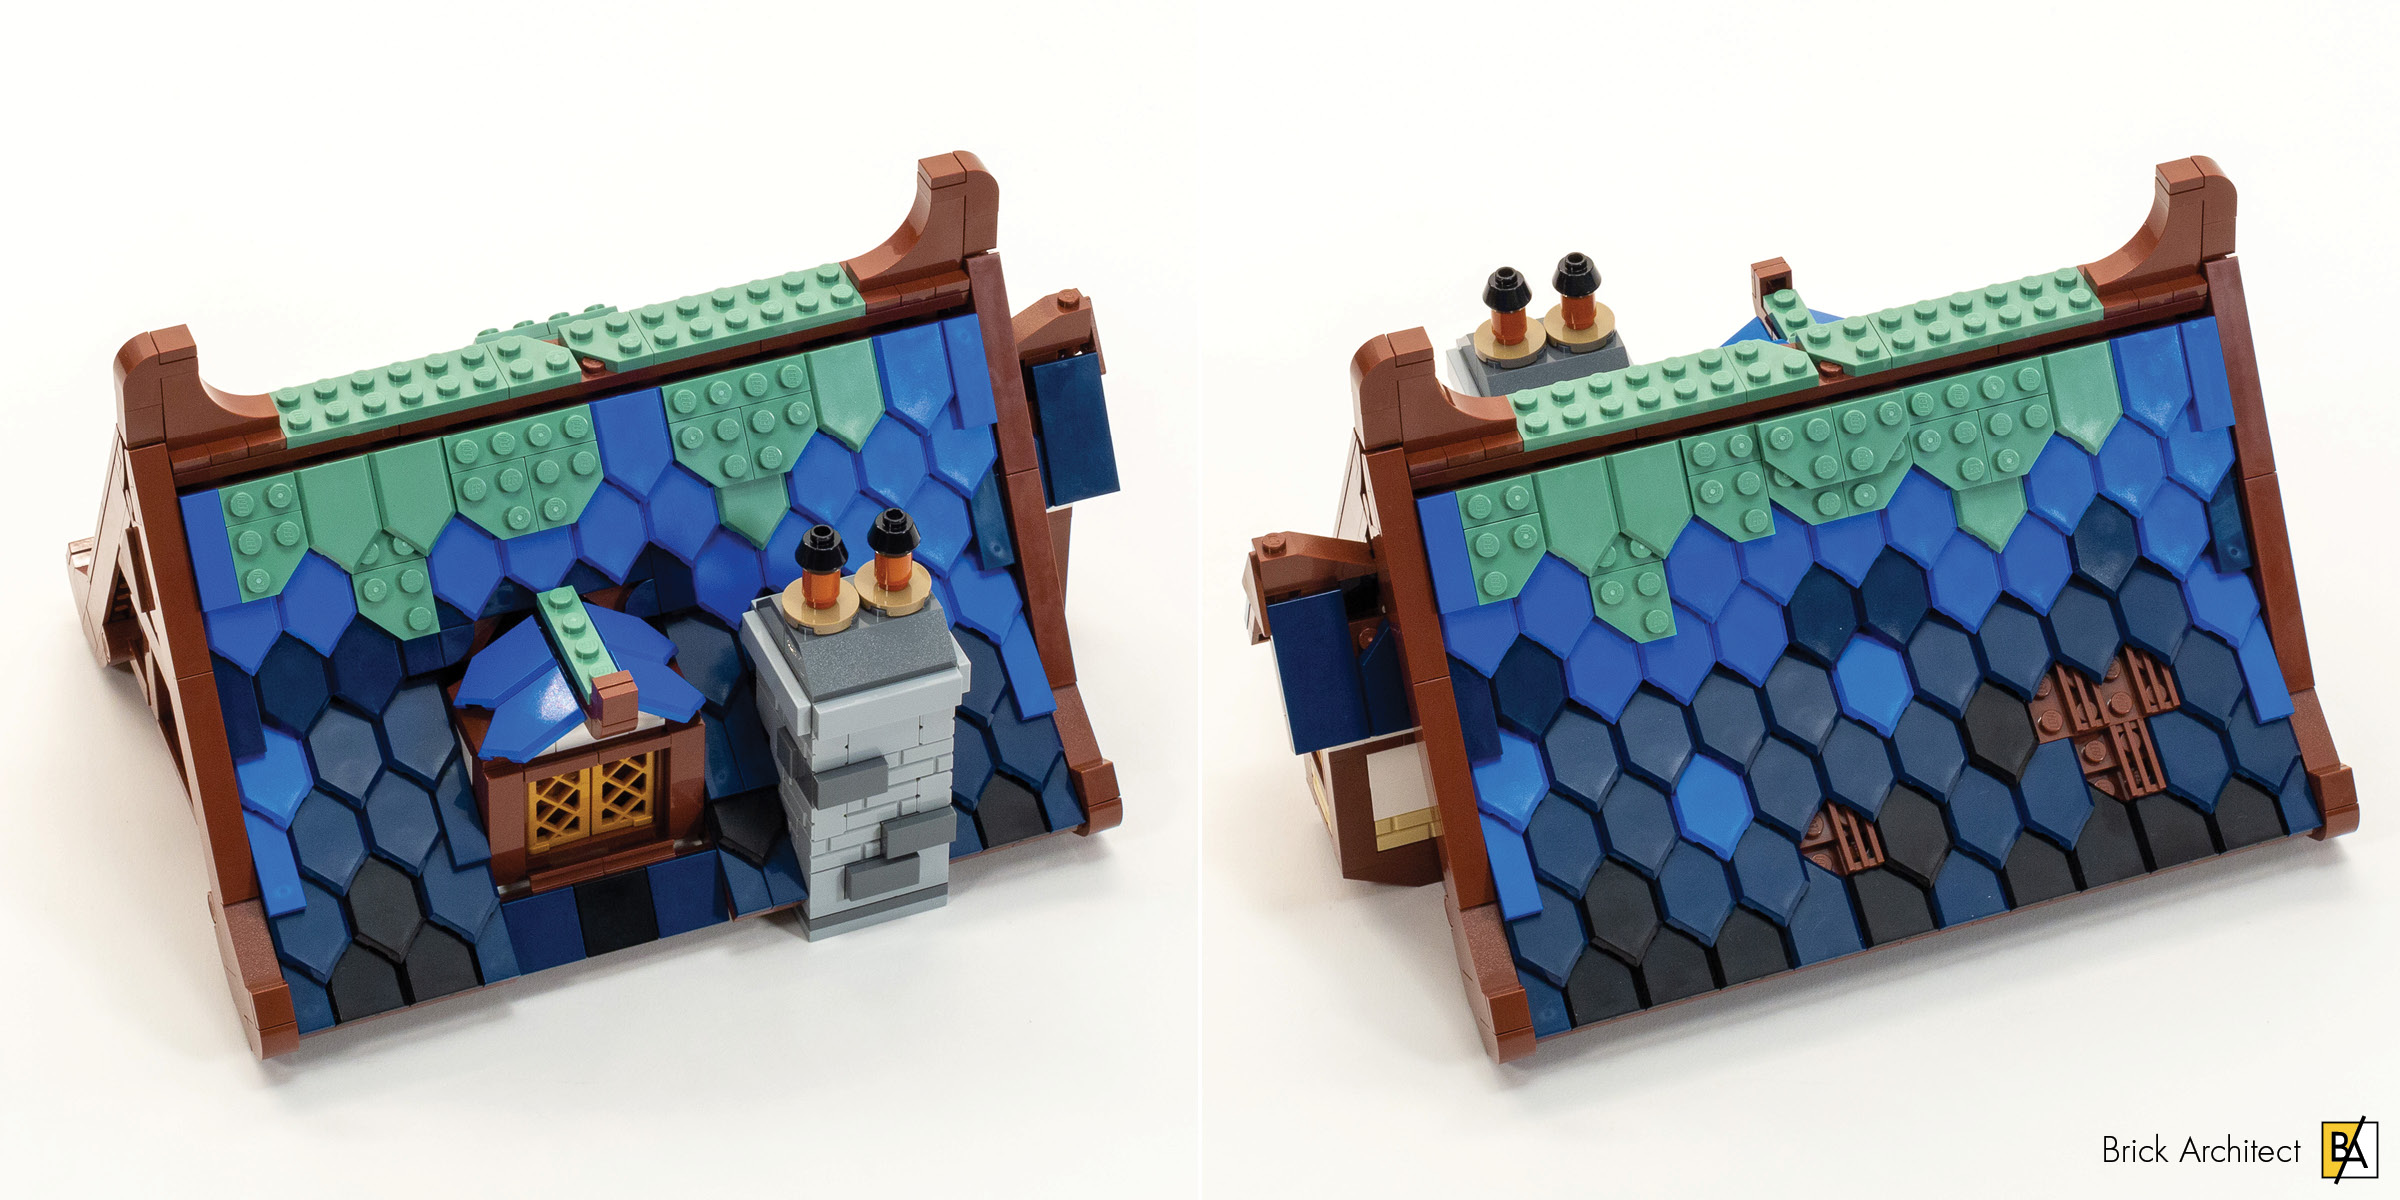
Stages 12 and 13 complete the two sides of the roof and finish the chimney.
I did want to discuss the roof a bit more now that it’s complete. My first issue is that it’s easy to make mistakes while building the roof, because it uses four colors, two of which are difficult to distinguish in the building instructions: 140Earth BlueDark Blue and 26Black. This would not have been an issue if these similar colors came in unique parts, but they both are provided in 2×3 Pentagonal Tile (part 22385).
The second concern with the roof is that it loses the realism of the original fan submission. I don’t mind the use of 151Sand Green along the ridge of the roof (which I’m guessing is meant to be moss), but the 23Bright BlueBlue color breaks the realism as it is too saturated and doesn’t match any realistic building materials for a modest building/home of the medieval period. I think it is meant as a nod to Classic Castle, which used a lot of primary colors, but it really detracts from the finished model.
Build Time 1 hour, 35 minutes. (Stage 9: 20 minutes, Stage 10: 20 minutes, Stage 11: 10 minutes, Stage 12: 25 minutes, Stage 13: 20 minutes.)
Stage 14: Horse-drawn cart
The last bag is super simple. Just two classic castle minifigures, a horse in 5Brick YellowTan, and a very simple horse-drawn cart. It’s a nice addition to the model, but feels like a bit of an afterthought compared to the intricately detailed building that precedes it.

A simple cart, horse, and two knights.
Stage 14: 10 minutes
Parts
The set comes with a ton of different parts, but not very many new or recolored parts.
Recently re-colored parts:
- 2x – 1×3 Inverted Bow w/ Notch in 26Black (Element ID 6328095)
This part was introduced in #10278 Police Station and is new in this color. - 5x – Long lightsaber-style handle (part 66909) in 26Black (Element ID 6331084)
This part was new in this color in the two 2021 Lunar New Year sets, but still new enough to highlight here. - 2x – 3×3 Round Tile (part 67095) in 312Medium NougatMedium Dark Flesh (Element ID 6326106)
This part/color was introduced in a 2020 Super Mario set but is new outside of that series.
I may have missed something, and will update these lists when the official part lists are published…
Minifigs & Printed Parts
The set comes with four minifigs and two animals. The minifigures in this set use a mix of new and existing printed parts. Of most interest to classic castle is probably the two knights with updated Black Falcon shields, and an articulated horse (of course) with a new printing.
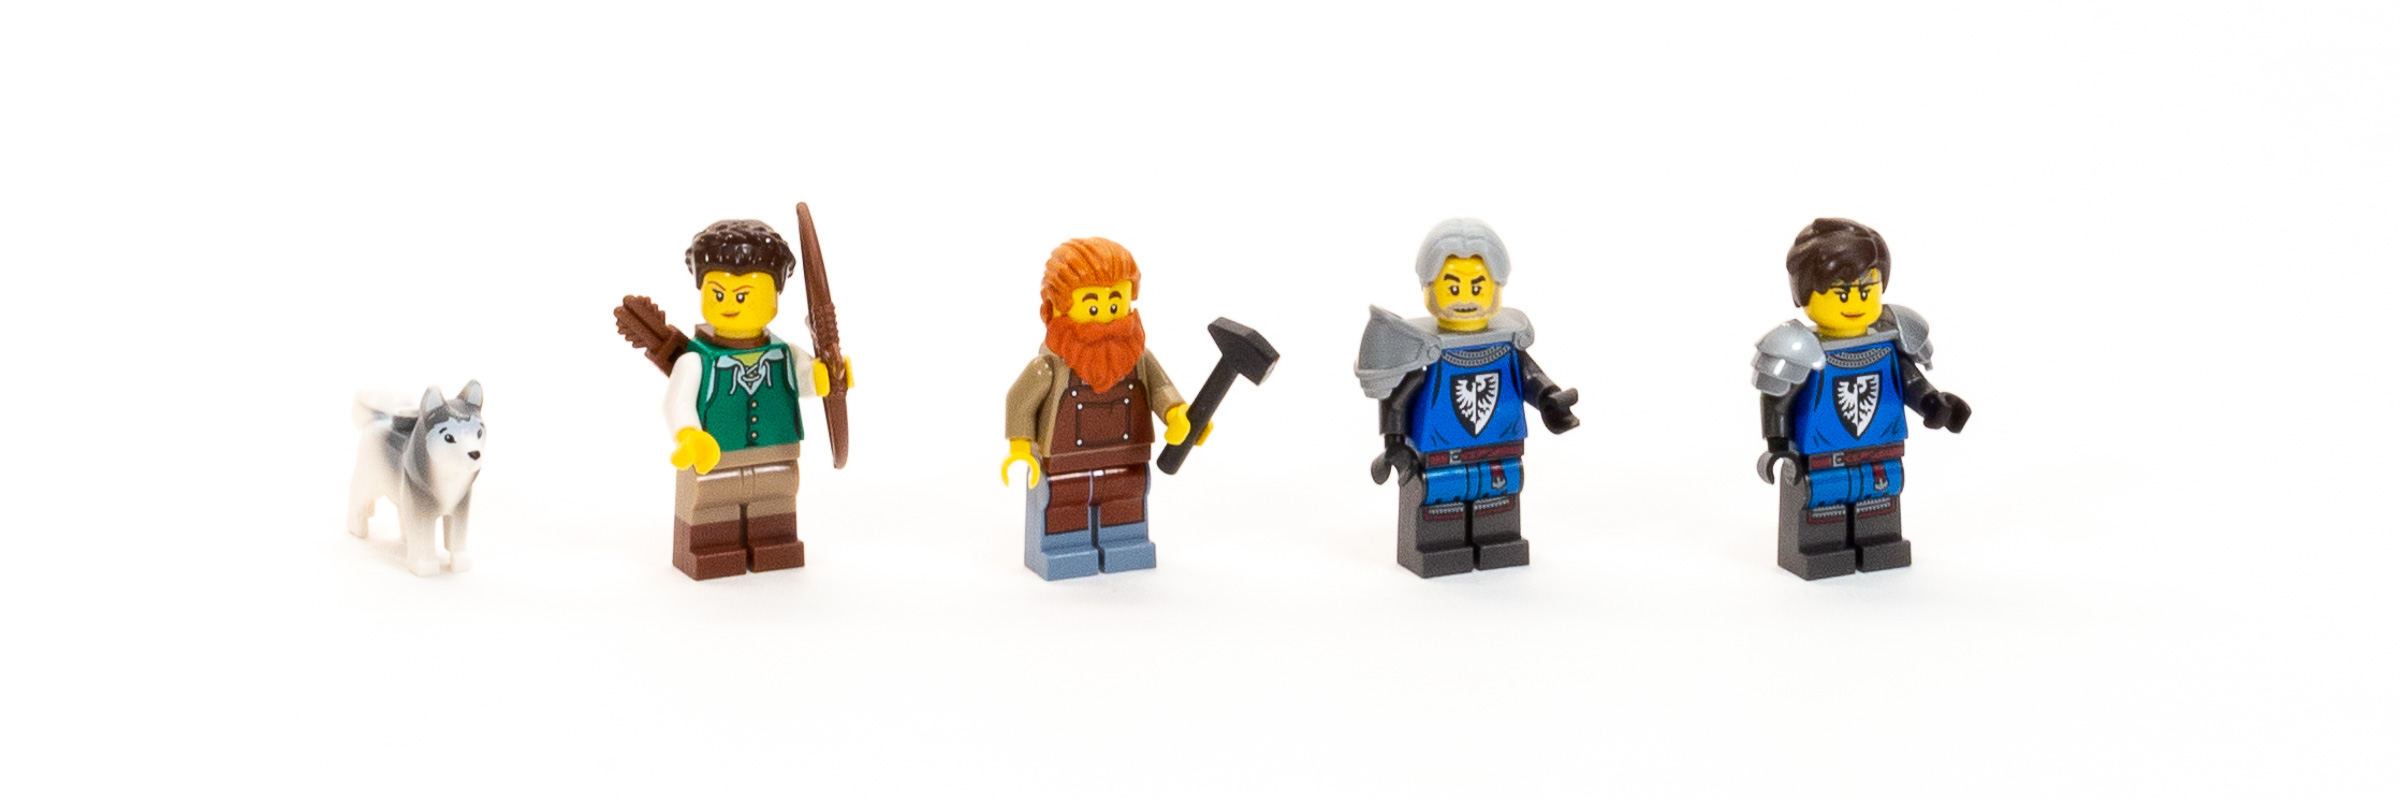
The set includes four minifigures, a dog, and a horse (not pictured).
New printed parts:
- 1x – Horse with bending neck and legs (part 10509) in 5Brick YellowTan. (Element ID 6343565)
- 1x – Minifig Torso w/ Leather Apron in 138Sand YellowDark Tan. (Element ID 6335769)
- 2x – Minifig Torso w/ revised Black Falcon shield in 23Bright BlueBlue. (Element ID 6335192)
- 2x – Minifig Legs w/ Blue apron in 199Dark Stone GreyDark Bluish Gray (Element ID 6335666)
- 3x – Shield w/ revised Black Falcon logo in 194Medium Stone GreyLight Bluish Gray (Element ID 6335631)
- 3x – Shoulder Armor (part 37614) in 315 Silver MetallicFlat Silver (Element ID 6327807)
- 1x – 2×4 tile w/ Blacksmith shop logo (part 87079) in 312Medium NougatMedium Dark Flesh (Element ID 6337061)
More like this?

Subscribe to the Brick Architect newsletter for early access to exclusive content, the latest articles, and updates to the Printable LEGO Brick Labels, LEGO Storage Guide, and my book The LEGO Architect.
Conclusion
While the finished model is quite striking, there are a number of issues with this set that I want to highlight for potential buyers. The first issue is that the build experience starts off very strong but becomes less satisfying near the end. This uneven building experience ends on a low note with the overly simplistic horse cart, and the garish roof color. (While 23Bright BlueBlue is a classic LEGO color which appeared sporadically in Castle sets, it’s way too bright and distracts from the overall composition.)
I also found that the interior style is inconsistent across the three floors. The workshop is appropriately rustic, but it clashes with the large upstairs bedroom with a drawing table and fancy bedspread. I also can’t excuse the vertical support on the third floor which doesn’t match the geometry of the rest of the building.
On the other hand, this is a brand new set that’s clearly anchored in the classic Castle theme, but with a fresh coat of paint. In particular, the half-timbered exterior is very well executed. This will be a huge draw for folks who grew up building those sets as kids, and might be interested in re-visiting LEGO as an adult (especially after being stuck at home for almost a year due to COVID-19).

Half-timbered walls are framed with large beams of wood, and filled with a variety of materials including stone, brick, or woven sticks covered in plaster (known as wattle and daub).
When I am building sets for review, I’m constantly adjusting my expected rating for the set as I build. In the case of this set, my expectations started low, but grew a lot after building the ground floor and tree, followed by a slow decrease in enthusiasm in the bags which followed. The rating for this set is ultimately a battle between a warm breath of nostalgia and the awesome overall vibe of this set, versus a few individual design decisions which drag this set down.
While it was definitely on the edge of a lower rating, I feel like this set does deserve the Recommended (4/5 star rating) because it is ultimately a great LEGO set with lots of nostalgia and plenty of play features. It’s closest comparison are sets in the Modular Building Series, which are about the same size and known for beautifully detailed interiors and exteriors.
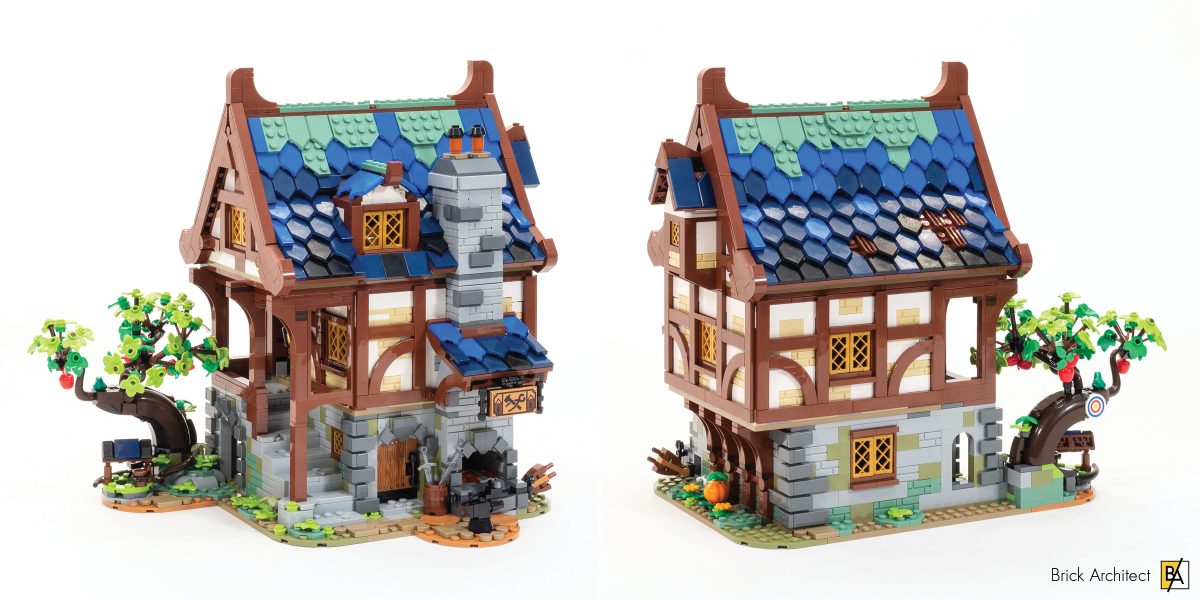
#21325 Medieval Blacksmith – The completed model looks good from all sides.
While I’m definitely annoyed by vertical post on the third floor and the blue roof, both of these issues are relatively minor and can be easily fixed if you decide to modify the set. It’s ultimately up to you—if you love classic Castle, you will probably love this too. It’s not as dramatic as the original fan submission, but it still offers a good building experience.
Interesting review. I completely agree with your comments about the massive pillar in the roof section. Even if they had made it a much more narrow post, or series of posts, it would have been a lot better, but as it stands, it just isn’t believable.
While I agree that blue is an odd colour for the roof, I have to pick you up on your comment about the medieval period being dull and muted. In fact, this is now widely understood in academic circles that the opposite is true. Most interior and exterior decor was a riot of colour, and I’m pleased to see this represented in the build.
The reason I like the blue roof is because it works incredibly well stylistically, even if it is far from realistic. It makes the whole build pop and of course, reminds me of the sets I had as a kid. I do look forward to seeing someone mod it to include red terracotta tiles though, as that could look fantastic. I had initially assumed that the green on the roof was copper that had suffered from verdigris, turning it green. The colour match for this is very close indeed. I imagine it is actually supposed to be moss though, now that you mention it.
Thanks so much for the review. As an adult female I am in LOVE with the roof… sorry you don’t like it:( For me the green and bright blue remind me of a mosaic and I can not wait to buy this one. I am not sure I would want to purchase otherwise. I am already looking for a place to display it. Seriously though, after the Bonzai tree, Bouquet of flowers, the Spring Lantern, and the Ninjago I just pre-ordered… I may need to find a Lego Addicts Anonymous group… haha! Thanks again!!
It looks as if I was more positive about the set in my review, but I too called out the arches and pillar in the attic. The pillar is not supported in the floors below and the arches just look wrong. A hefty plank of oak would have been used, probably without support in the middle. Still, it will be easy enough to remedy, I suspect.
Excellent review. I enjoy how the roof colors make me think of St Stephen’s in Vienna, albeit much less dramatic in its tilework. Yet I agree that the colors look far too garish and decorative for a trade cottage of the medieval period. Furthermore the ‘moss’ on the peak doesn’t work, IMO, in color or execution in how it would naturally form on a roof. It’s one of the details I dislike even more than the roof tile colors.
That’s interesting—I also thought of that cathedral, but didn’t mention it because it’s a bit of an obscure reference… As you say, decorative tile roof was expensive and special, appropriate for a premiere regional church but not a workshop.
Nice review. I was on the fence and now I’m convinced to get it.
It will be perfect next to the Medieval Market.
https://brickset.com/sets/10193-1/Medieval-Market-Village