
Review: #21046 Empire State Building
Is this set containing 684 identical parts an exercise in frustration, or a meditative glimpse into the life of the professional LEGO Artist? Let’s find out if you should add this set to your collection!
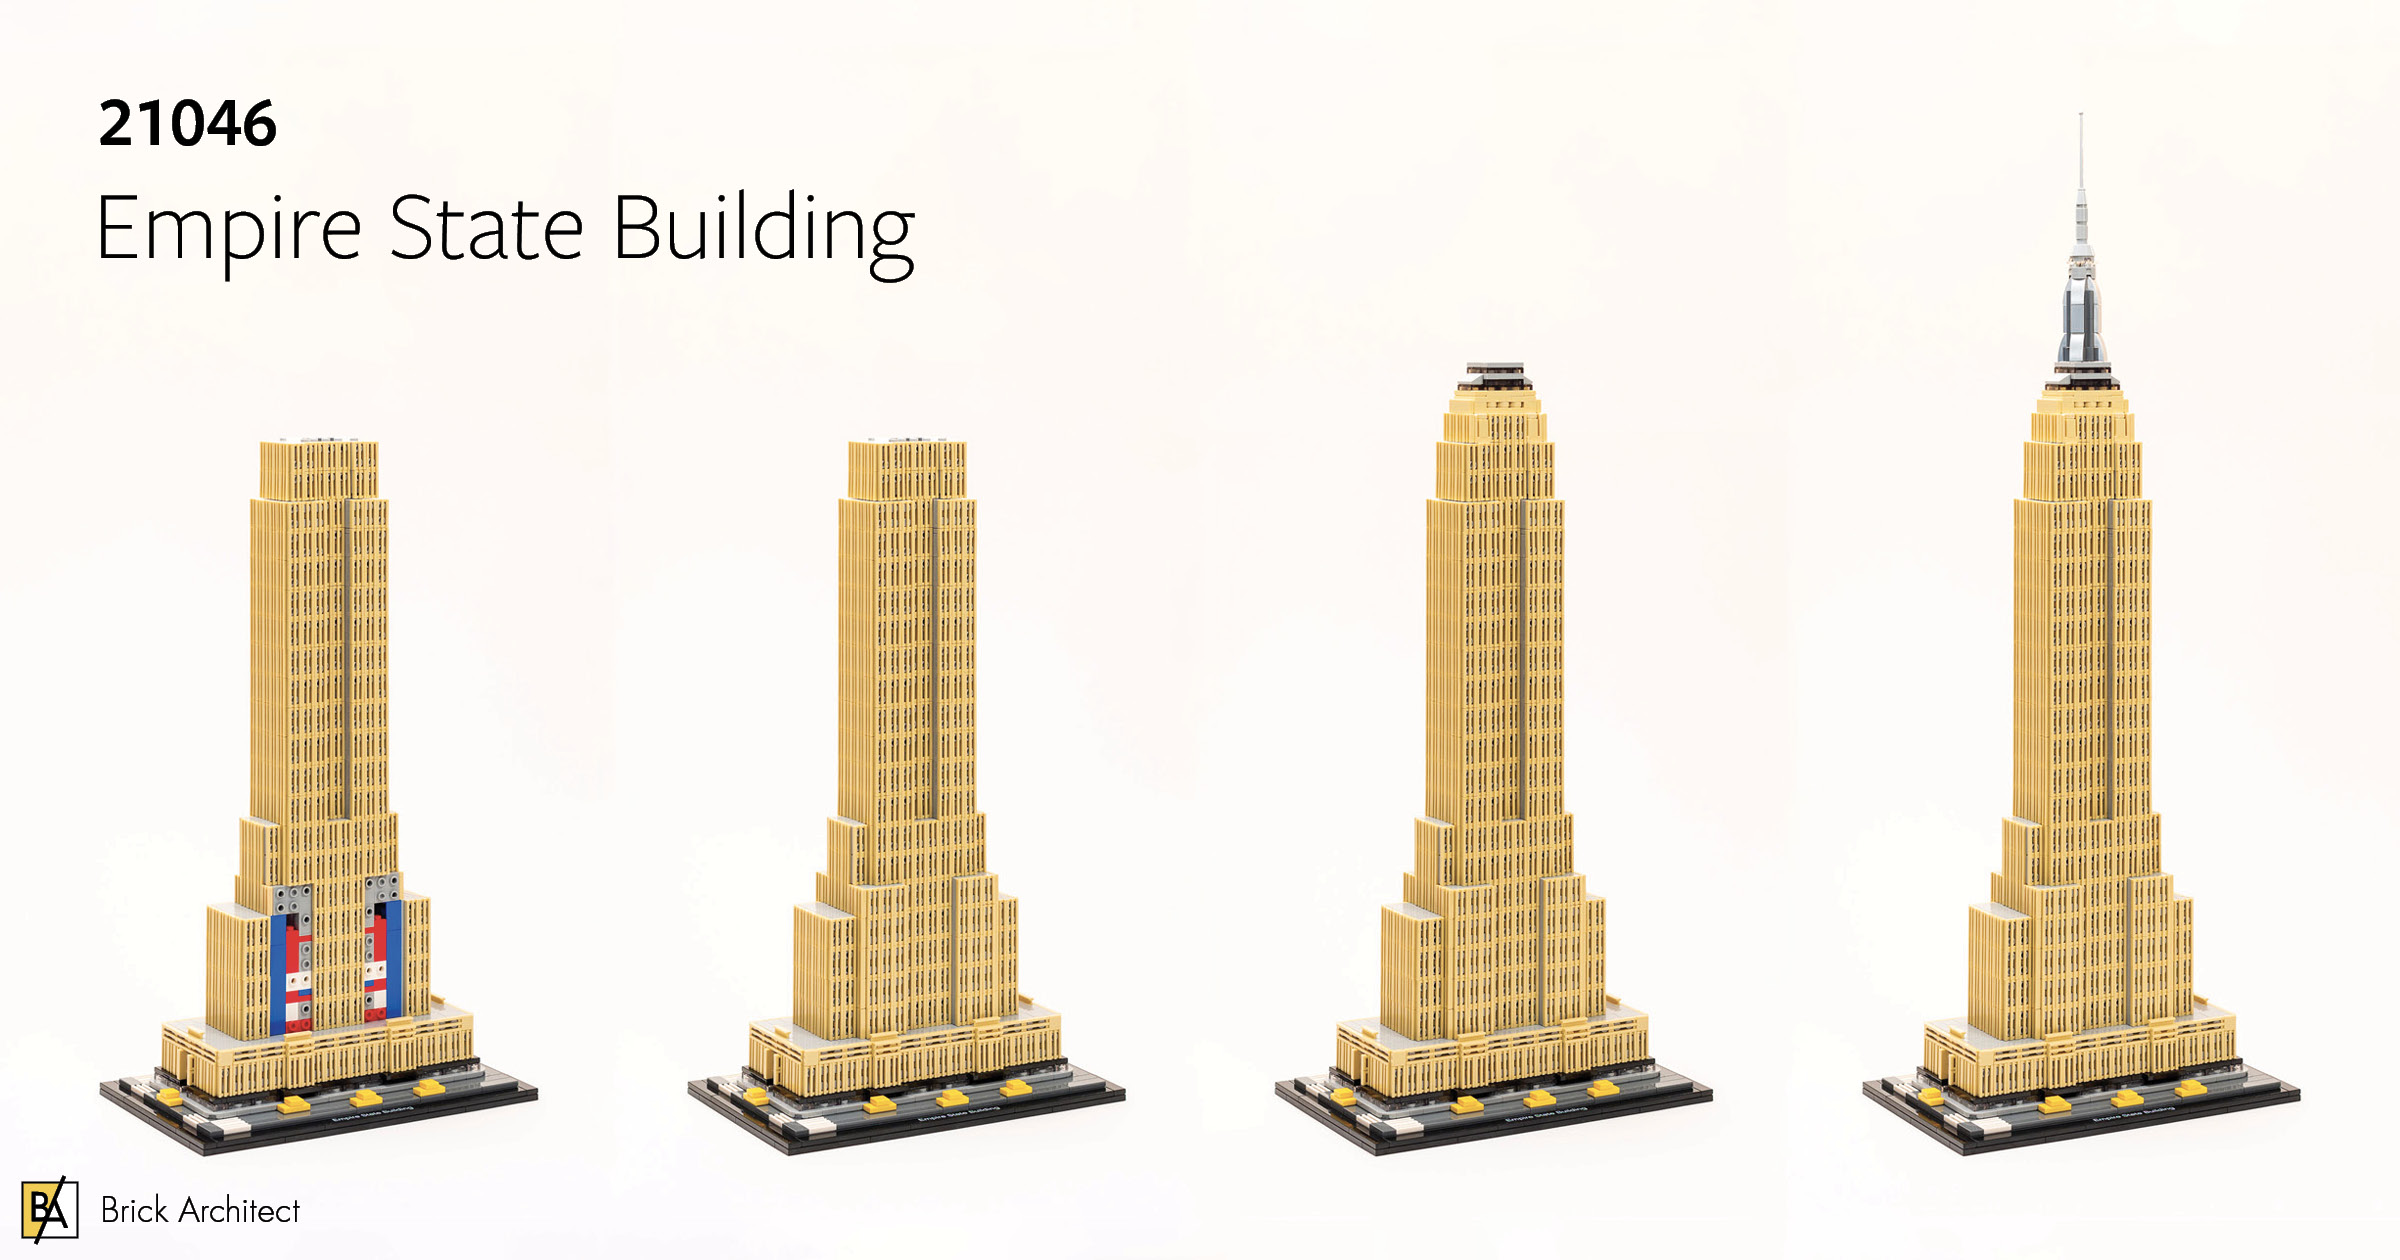
The newly released Empire State Building immediately caught my attention when it was announced earlier this year. By creating such a large model, the design team was able to more accurately capture the intricate stepped setback design of the real building than in previous attempts. By using hundreds of 1×2 Grille Tiles, the set approaches the level of detail achieved by talented LEGO artists.
I was excited to see if this feels more like past experiences building official LEGO sets, or if it offers a window into the intricate but repetitive world of a professional LEGO Artist.
About the set
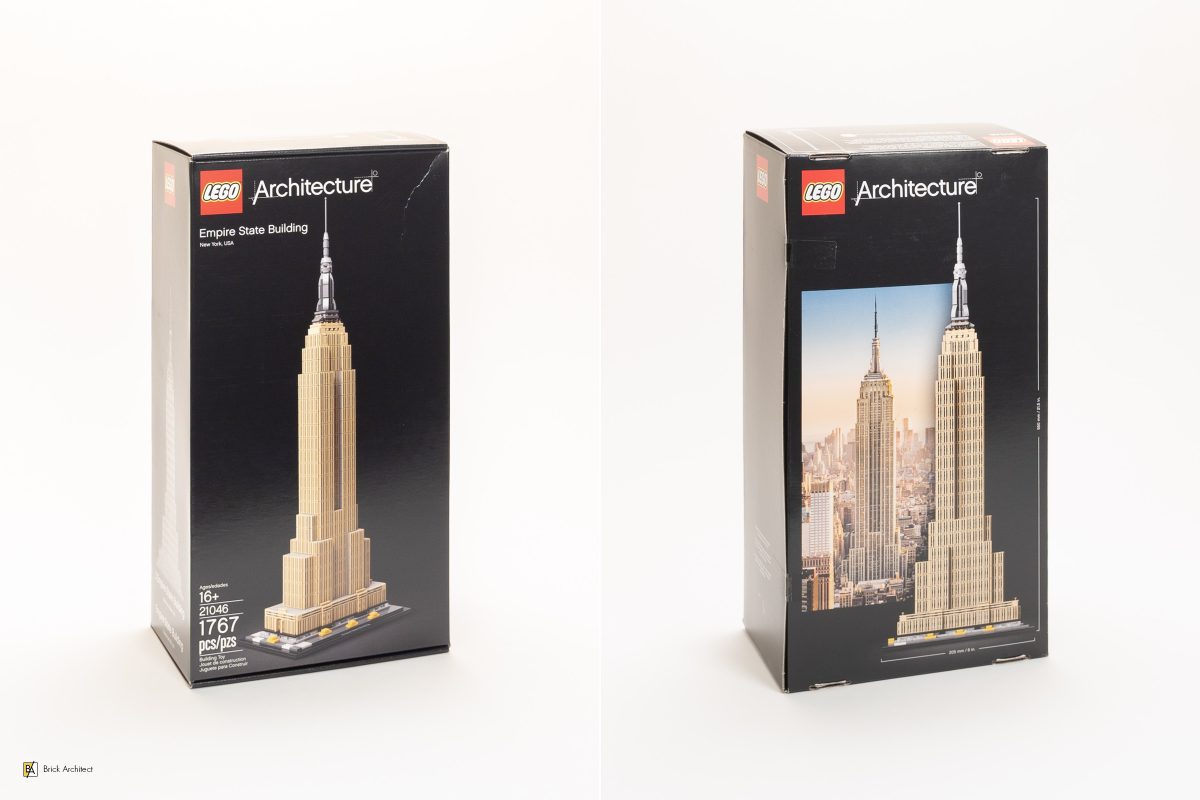
#21046 Empire State Building, Box front & back.
#21046 Empire State Building:
- Date released: August 2019
- Price: $129.99 (£89.99, €99.99)
- Piece count: 1767
- Price-per-piece: $0.07
Related sets
This is the third version of the Empire State Building included in the LEGO Architecture series. #21002 Empire State Building contains just 77 pieces for a $19.99 price tage. It was one of just four small models released when the LEGO Architecture series debuted in February 2009. (The LEGO Architecture series was created by LEGO Fan Adam Reed Tucker, who has clearly articlulated a preference for simple models focusing on the general massing of the structure over intricate details. This shows in the earliest models in the series like this one.)
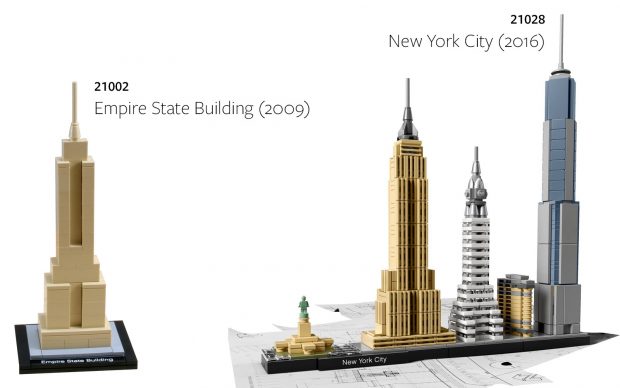
Both the 2009 and 2016 versions of the Empire State building are around 15 cm (6″) tall. (Photo: The LEGO Group)
The Empire State Building was also included in the initial 2016 wave for a new LEGO Architecture subtheme: Skylines. #21028 New York City includes The Statue of Liberty, Empire State Building, Chrysler Building, Flatiron Building, and One WTC. It is interesting to note that the scale of the Empire State Building model is about the same in #21002 and #21028, although the newer version has radically more exterior detailing through the use of the same 1×2 Grille Tiles which we will be seeing a lot of soon.
Build process
I was excited to get started with this big, intricate-looking model. Since the box included five bag numbers, we will review them one-at-a-time.
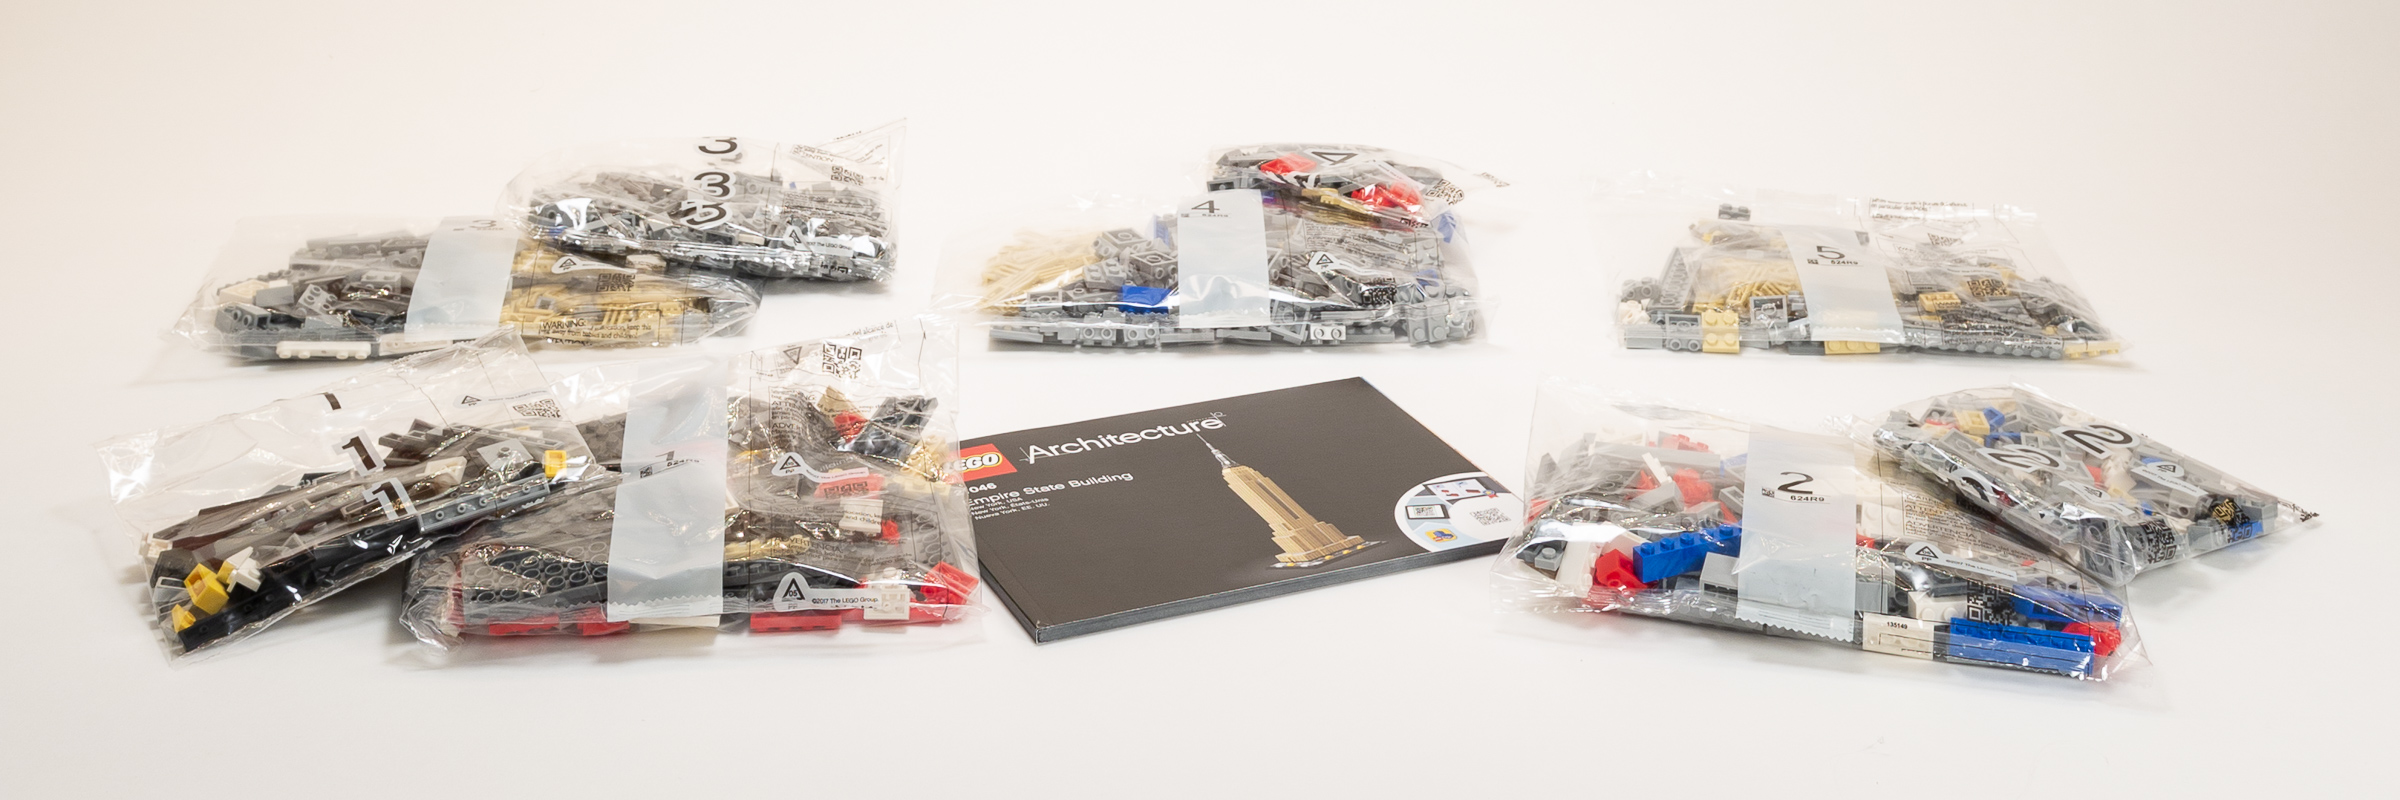
The bags are numbered to help assemble the model in 5 stages.
Bag 1
There were two relatively small bags marked with a 1, indicating the first stage of the build process. As is expected for models in the Architecture series, we begin by assembling the base with its iconic black border and printed tile. The base is a bit unusual, in that it embeds four 4×6 tiles with studs on 3 edges. This makes space for a SNOT (Studs not on Top) assembly which we will build later in bag 1.
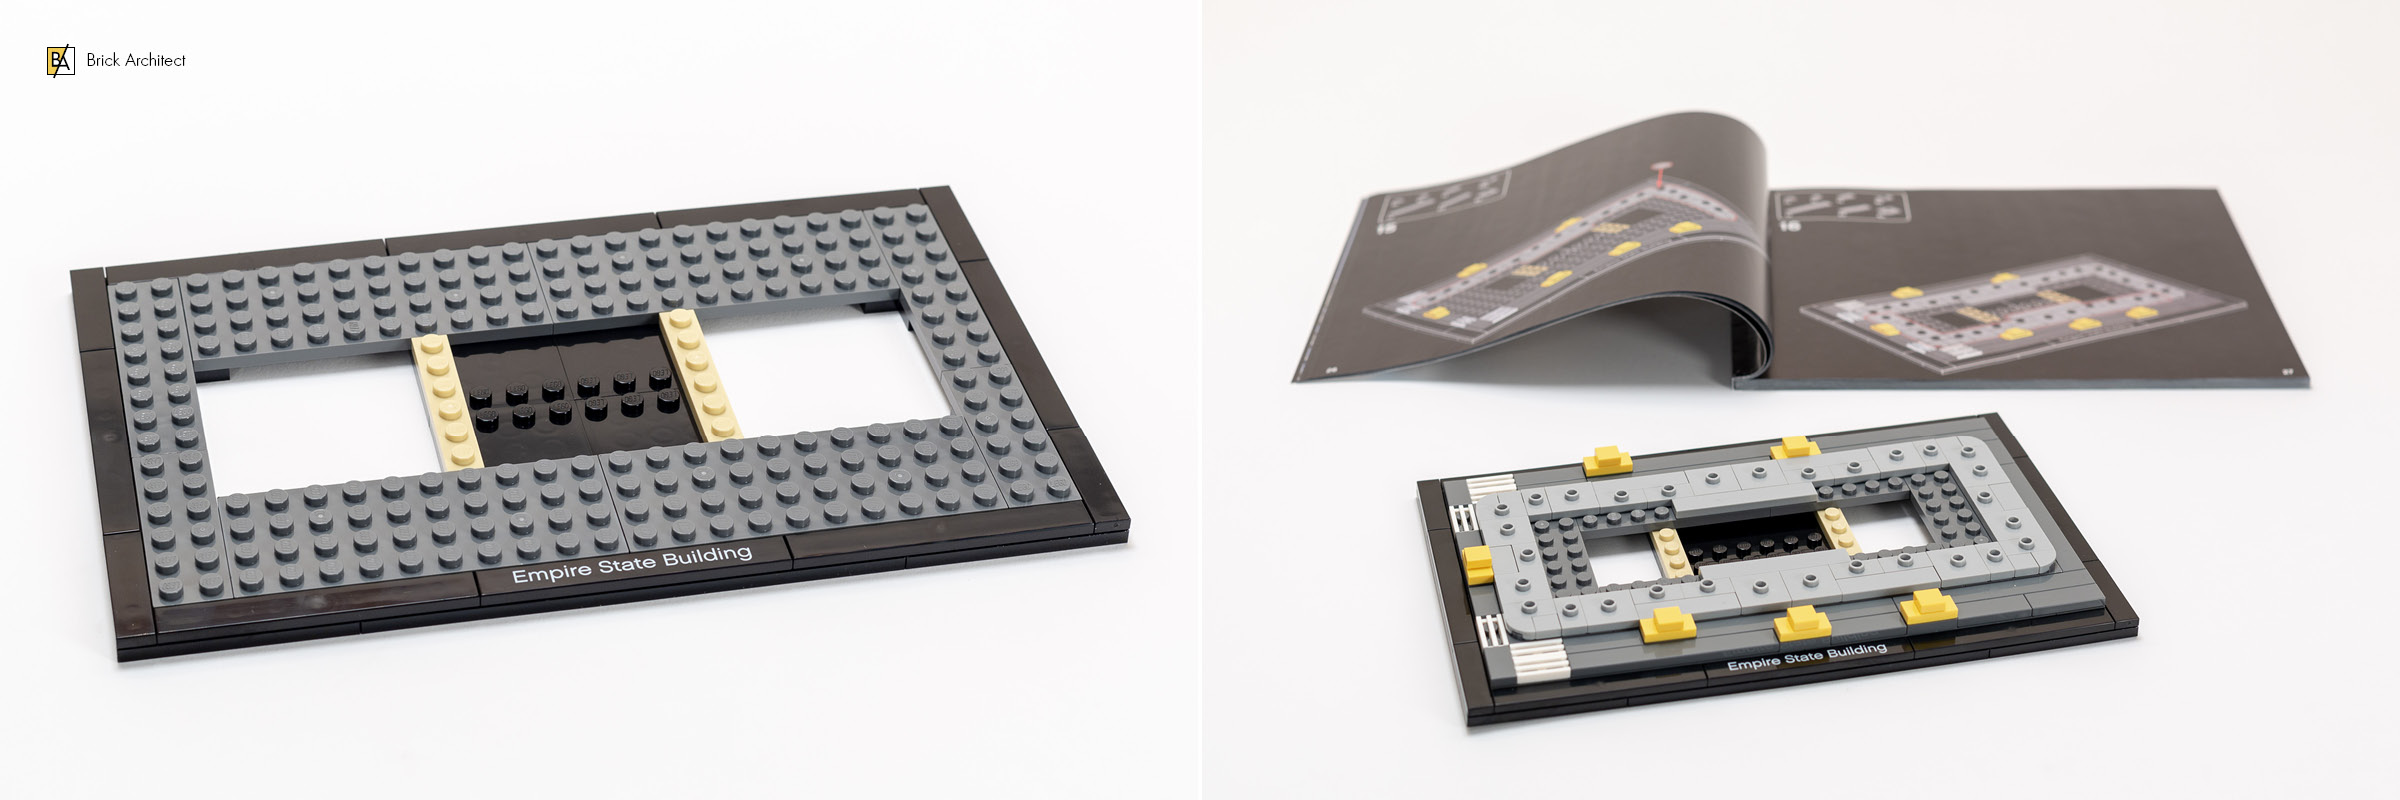
Building the base of the model.
After assembling the base and ground floor, we get our first glimpse at the SNOT core of this large and complex model. An unusual technique is employed to assemble a rigid 3-stud tall SNOT assembly. Instead of just using a plate to connect 6 brackets, two 2×2 with Technic Pin on bottom are used. This takes advantage of the fact that a Technic Pin is 5/6 the height of a LEGO brick, allowing the bottom of the pin to rest perfectly on the 2×4 Tile beneath it.
This clever sub-assembly uses two 2×2 w/ Pin parts which rest on a 2×4 Tile for support.
You will also find a whimsical detail embedded in the structure’s base—The team hid 8 Metallic Silver Cheese Graters representing escalators. This is purely a treat for the person building the model, as you won’t be able to see them when the model is completed.
Bag 1, 25 minutes.
Progress by the end of Bag 1.
Bag 2
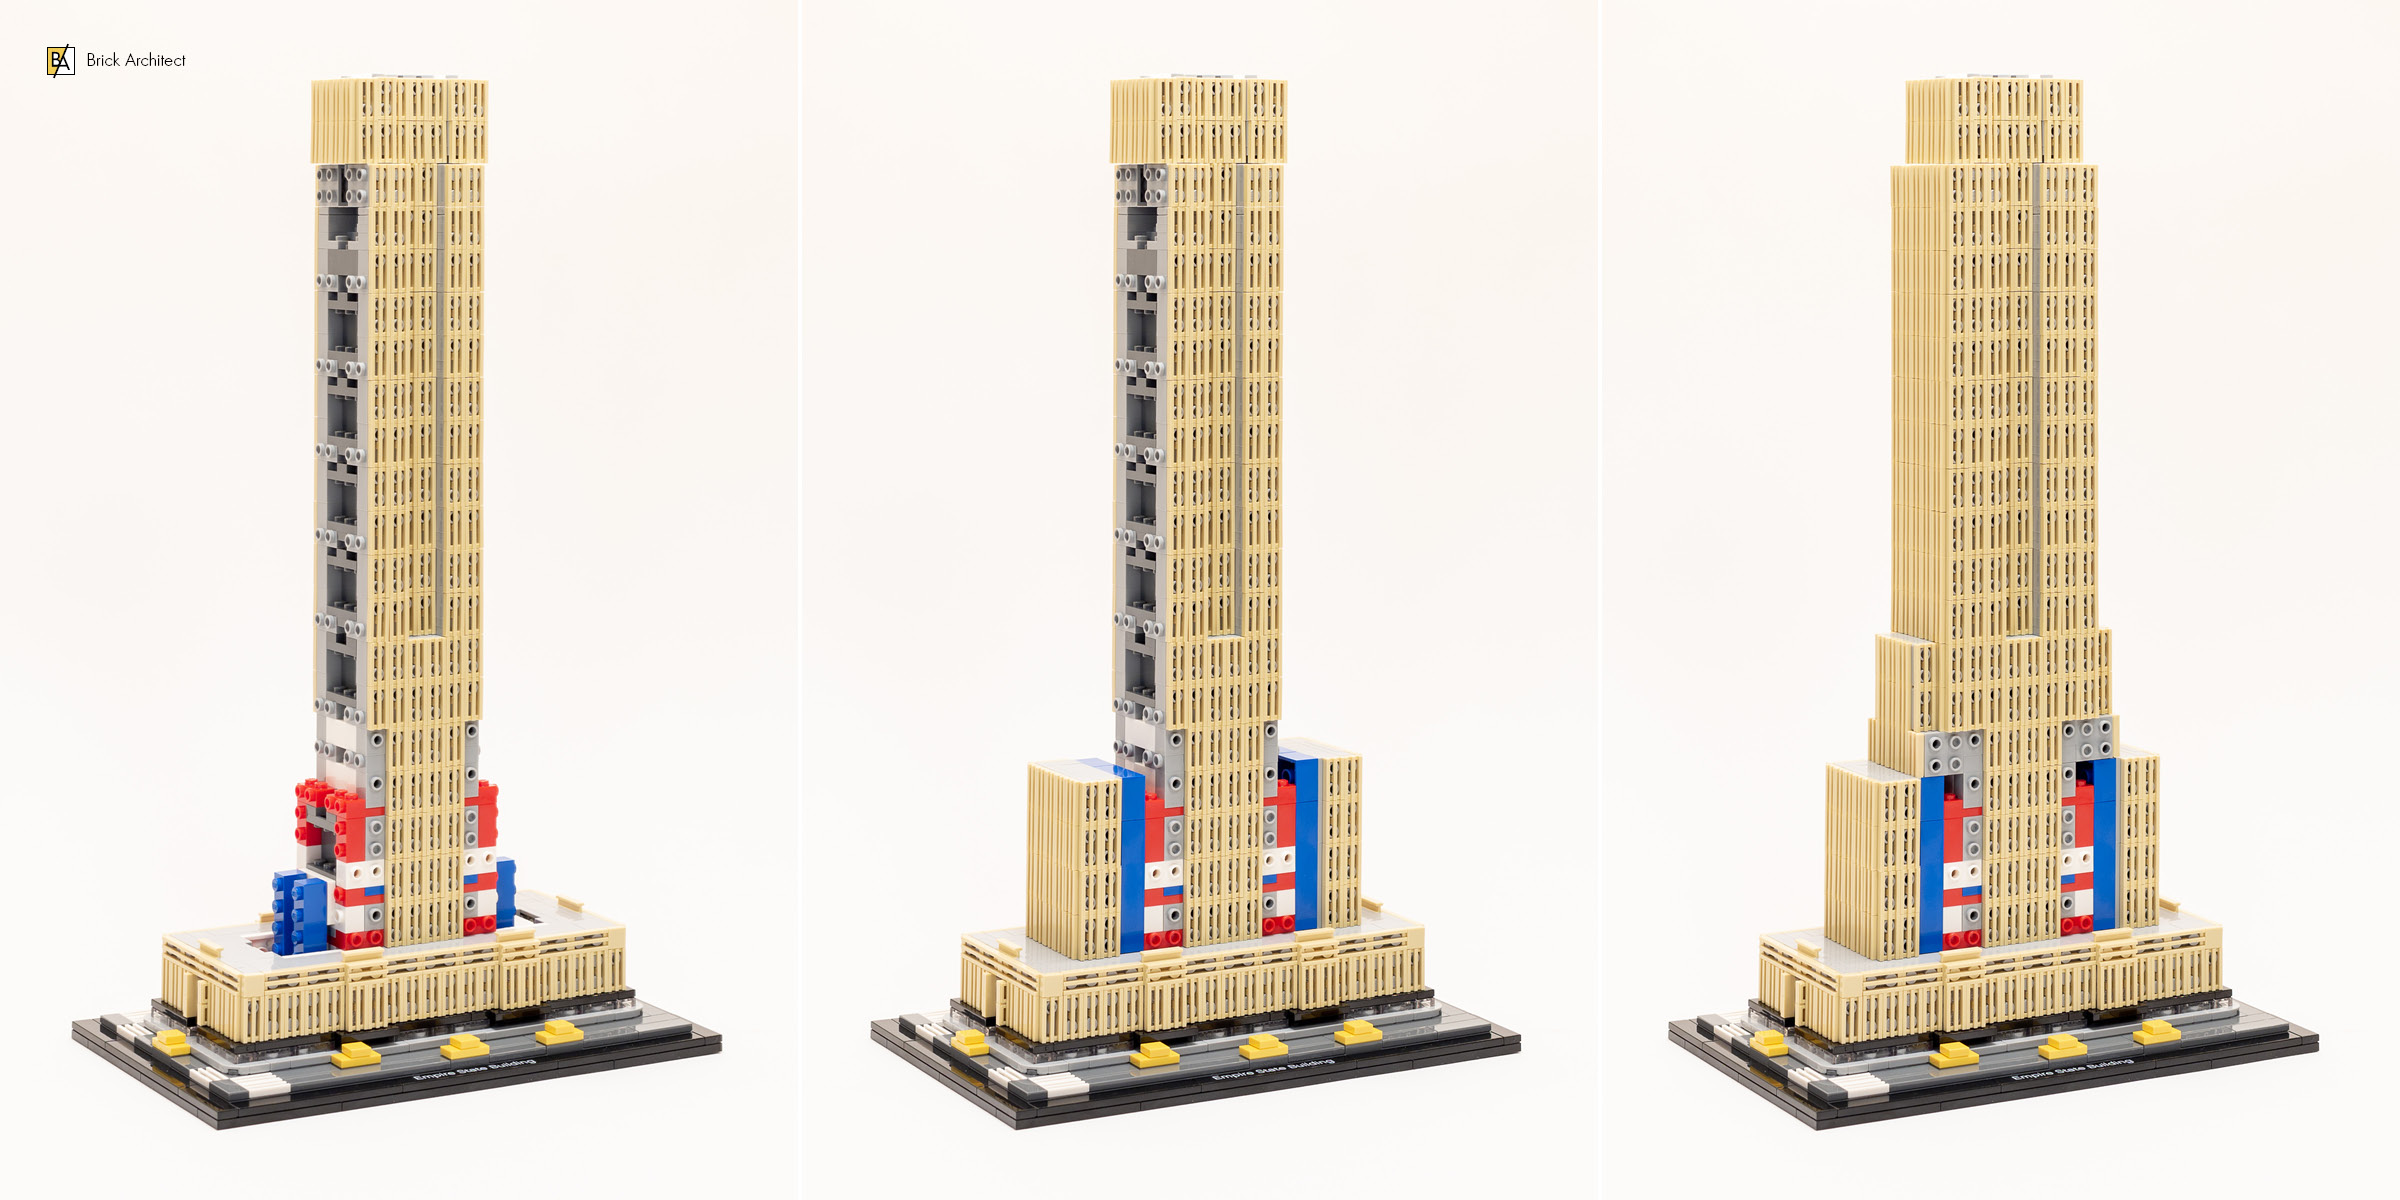
In the second bag, we jump right into more advanced building techniques. We start by adding the exterior panels on the front, back, and sides.

Installing identical front and back assemblies.
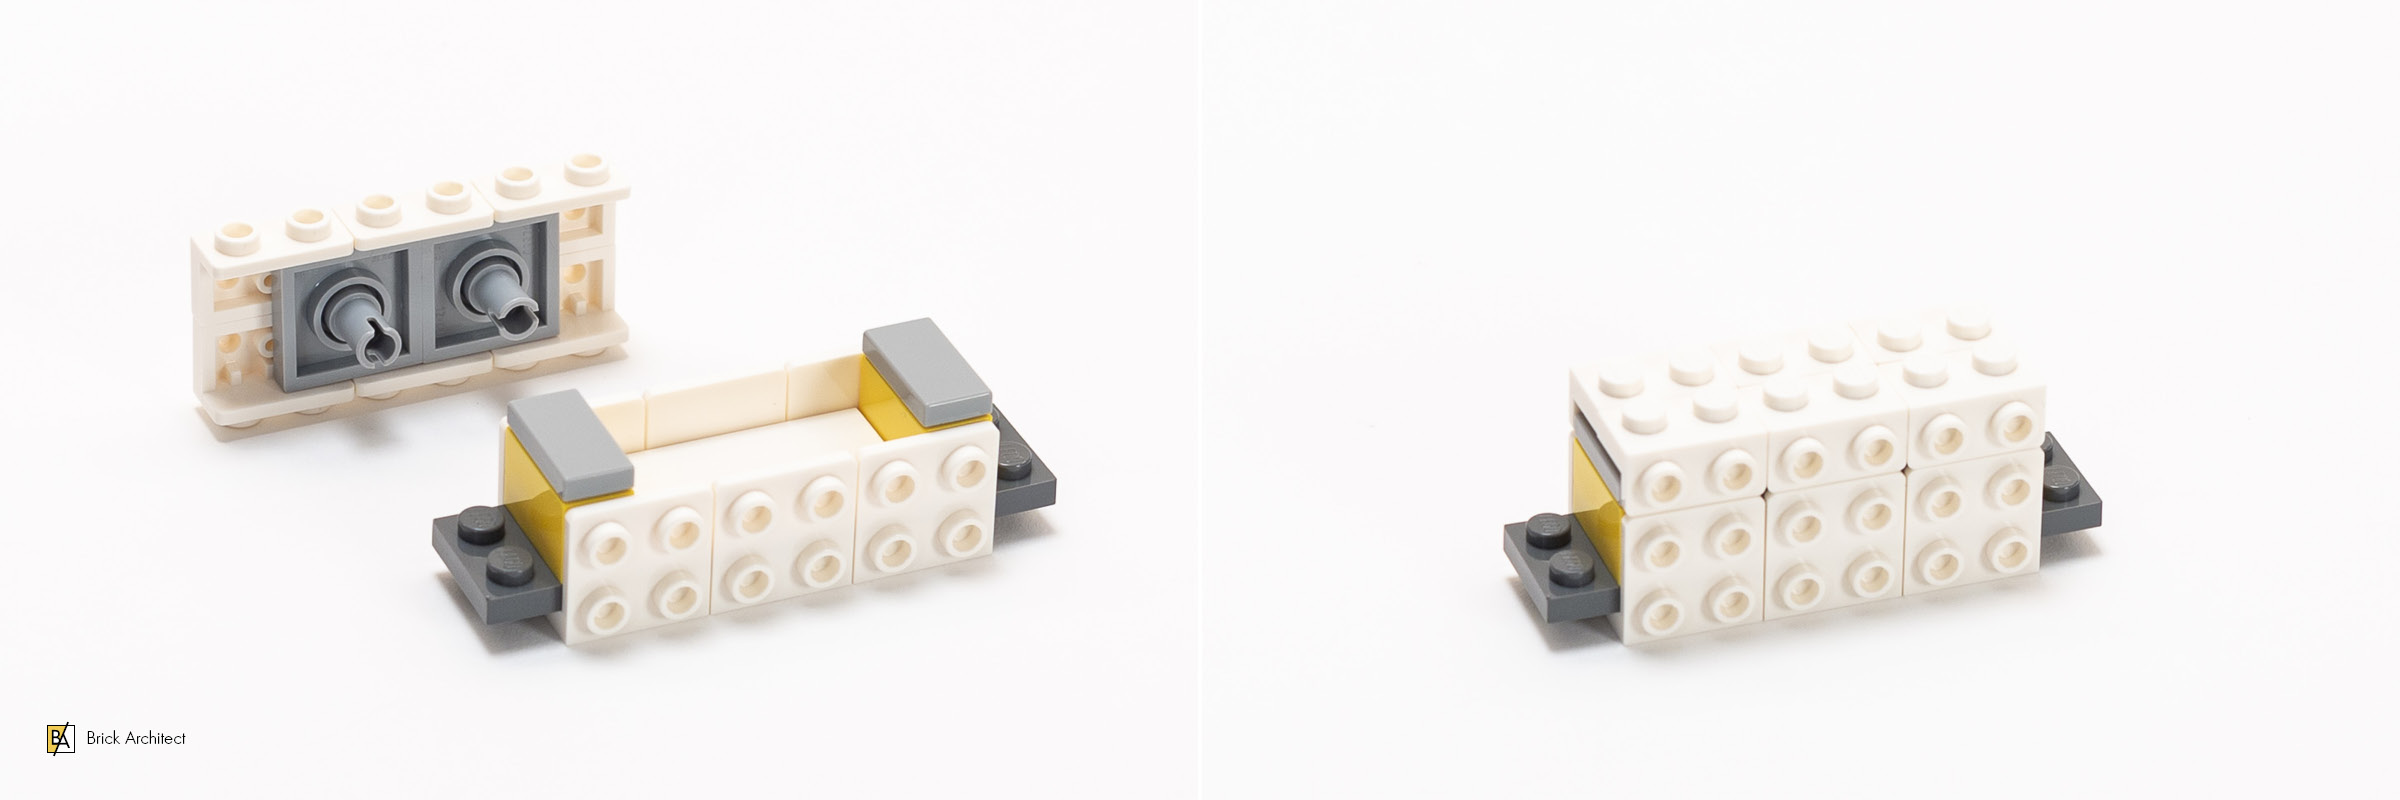
After that, we make the central core 3 1/3 bricks taller. This is another SNOT assembly using three different parts with studs on their sides. The front is clad in those increasingly familiar 5Brick YellowTan 1×2 Grille Tiles.
Bag 2, 25 Minutes.
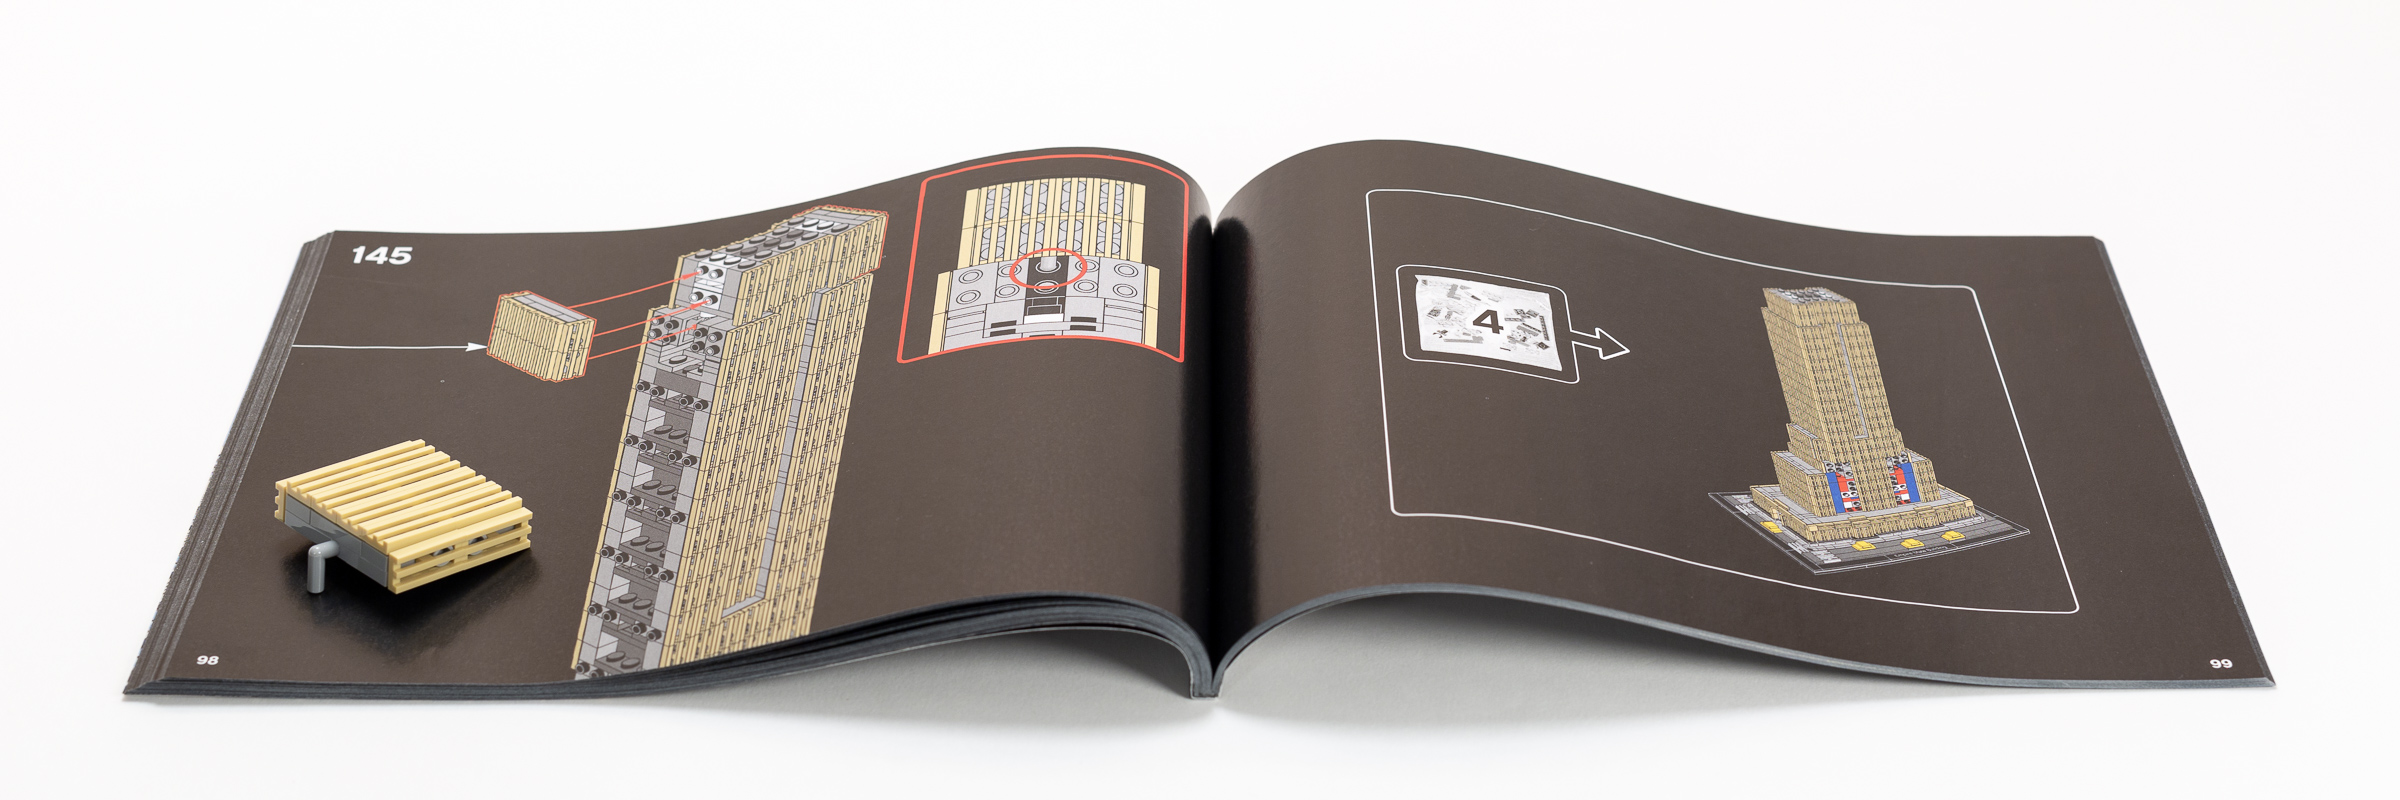
Bag 3
The third bag is the most repetitive section of the build, and the most time consuming. In this step, you will build six very similar modules: the first and last module are slightly different, but the four modules in the middle are identical.

Four identical assemblies will be stacked on the growing central core.
As we saw in the previous bags, these modules were carefully designed to leverage SNOT techniques to work around the unique geometries of the LEGO brick. This includes more sideways 2×3 Tiles that are attached between studs to make the model more stable. Many of the 1×2 grille tiles are attached using just one stud, which makes it harder to ensure that they are all aligned perfectly.
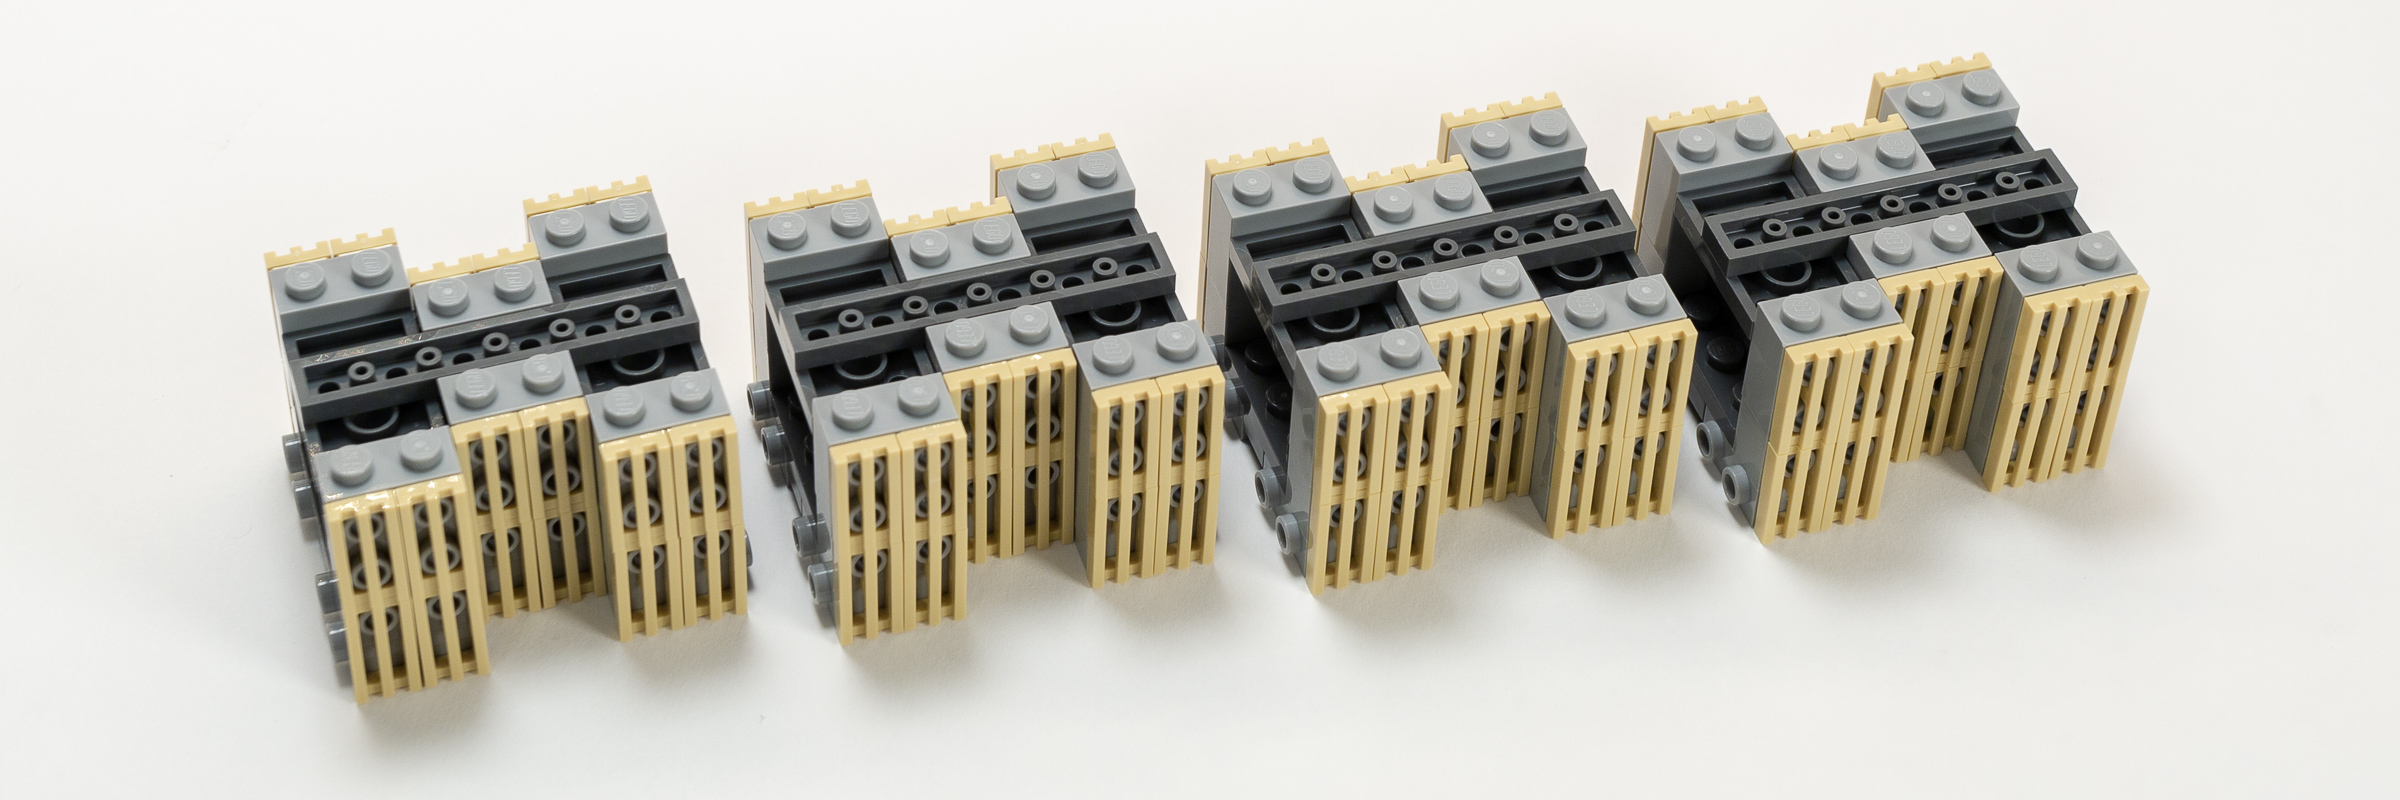
The four identical assemblies are ready to install.
The last module is even weirder, taking advantage of the fact that the 1×5 technic plate with rounded corners is one of the few parts in the system that are 5-studs long. The section wraps up with a set of panels attached to the right and left side of the model using both standard studs, and a 1×4 with Bar which attaches to a hollow stud inside the model. (I’m sure it makes the model stronger, but it feels like the designers are just showing off.)
Bag 3, 40 minutes.
The last step in Bag 3 connects these panels using both studs and a bar connection.
Bag 4
The fourth bag is also repetitive, but a lot bit quicker. Here, we assemble two sets of two identical modules, which cover the right and left hand side of the building.
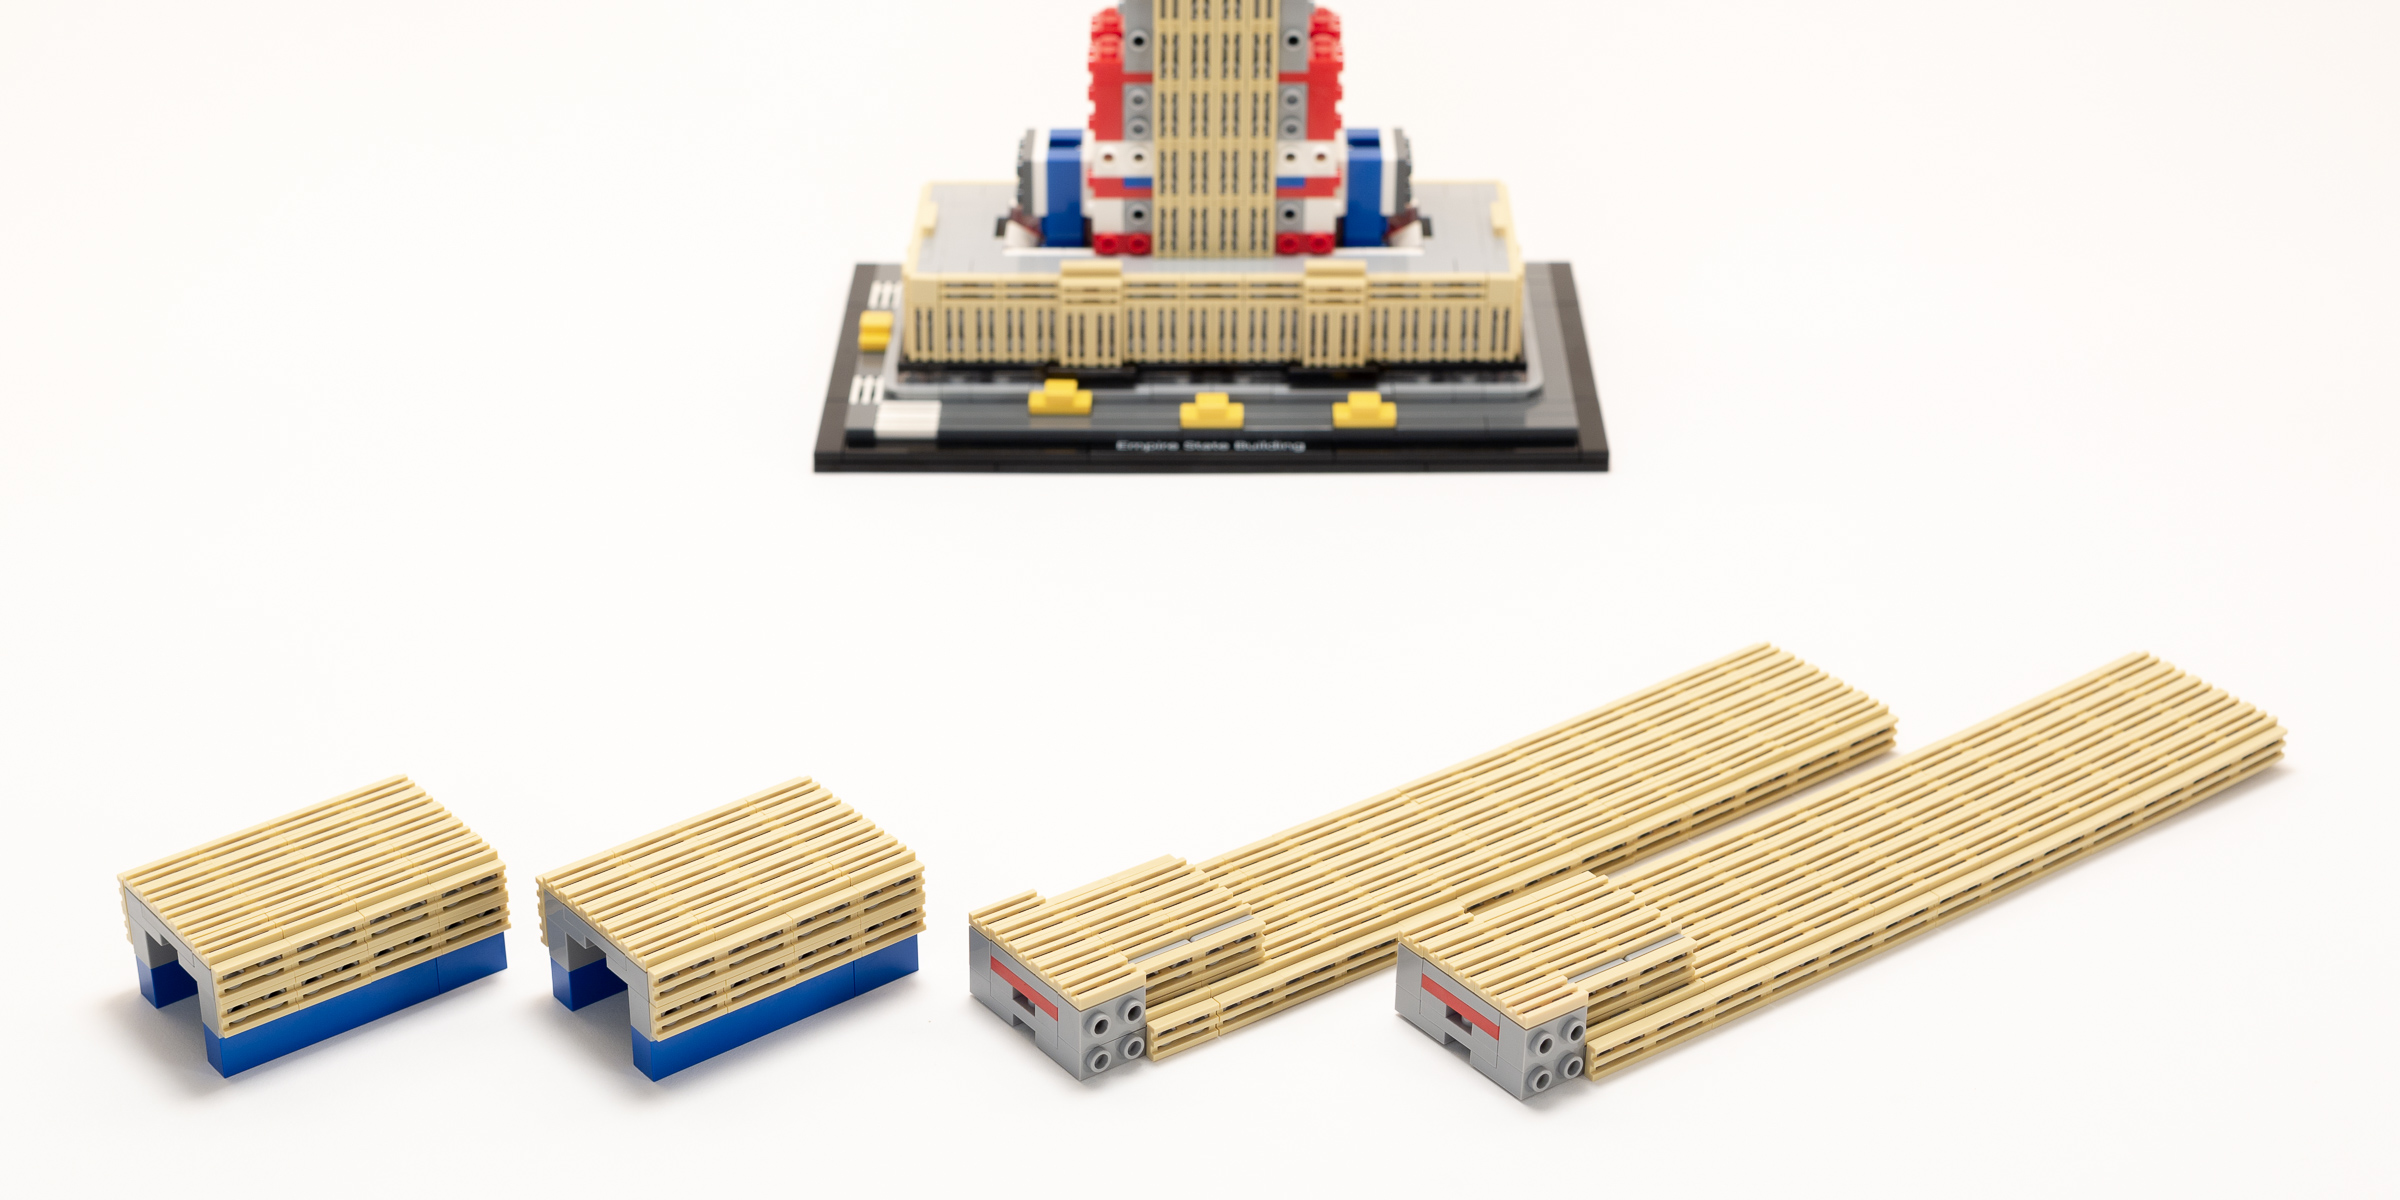
Two assemblies for the sides, and two for the front and back.
The techniques are less advanced than in the previous two steps, but extensive use of SNOT parts remains central to the build process.
Installing the four assemblies from Bag 4.
Bag 4, 20 minutes.
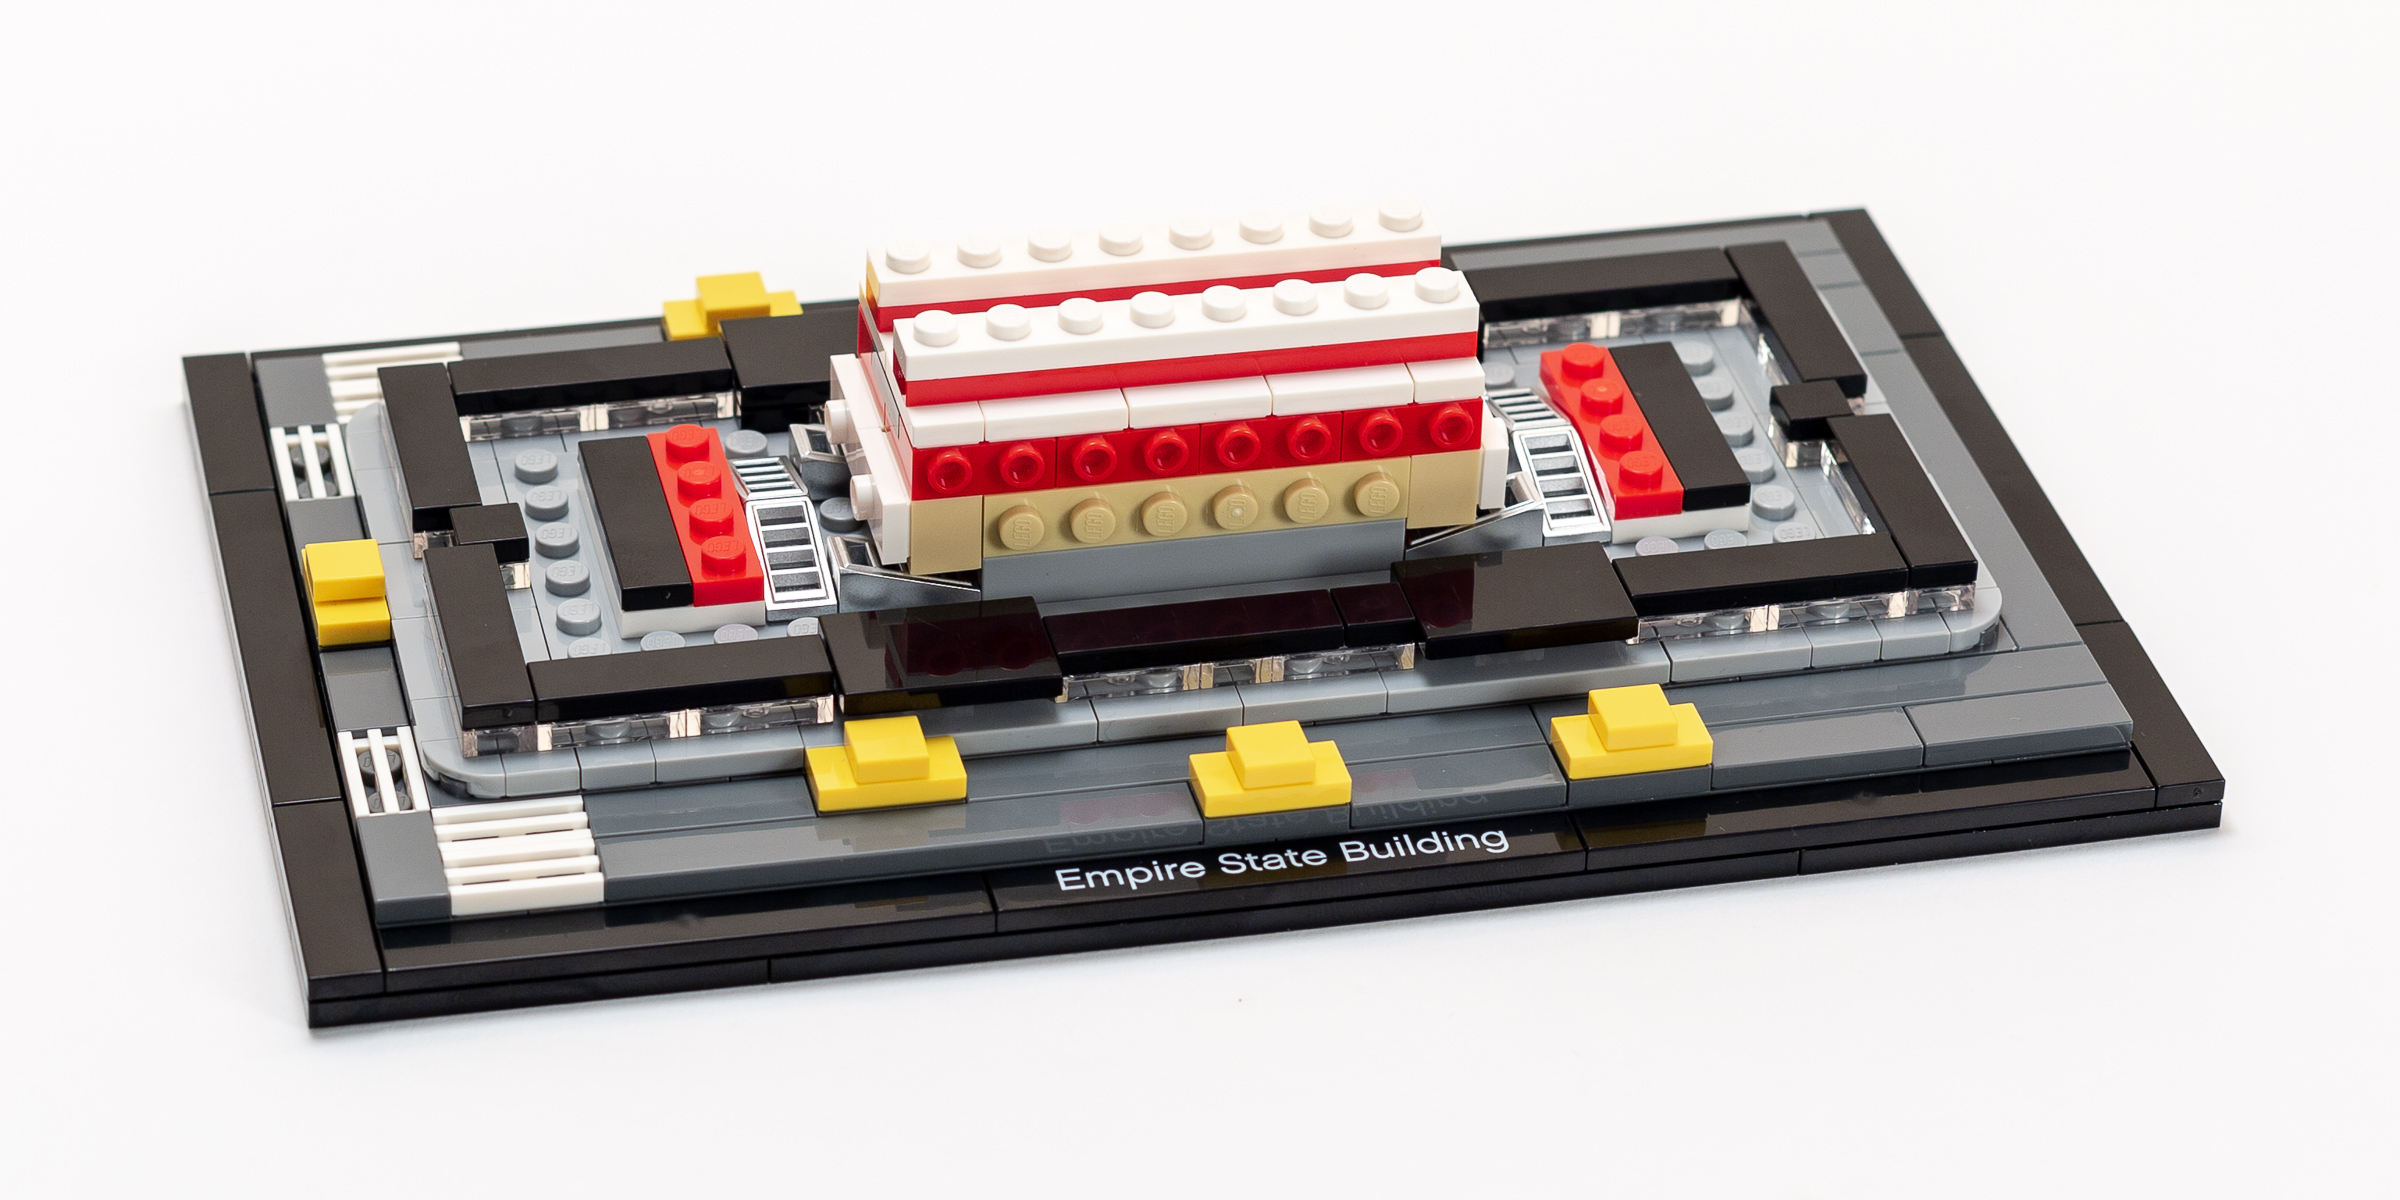
Bag 5
The last bag brings the model together nicely. We start by assembling four quick panels to cover the bottom part of the model. These are simple assemblies using basic plates and SNOT elements, and are quickly covered with more 1×2 Grille Tiles.
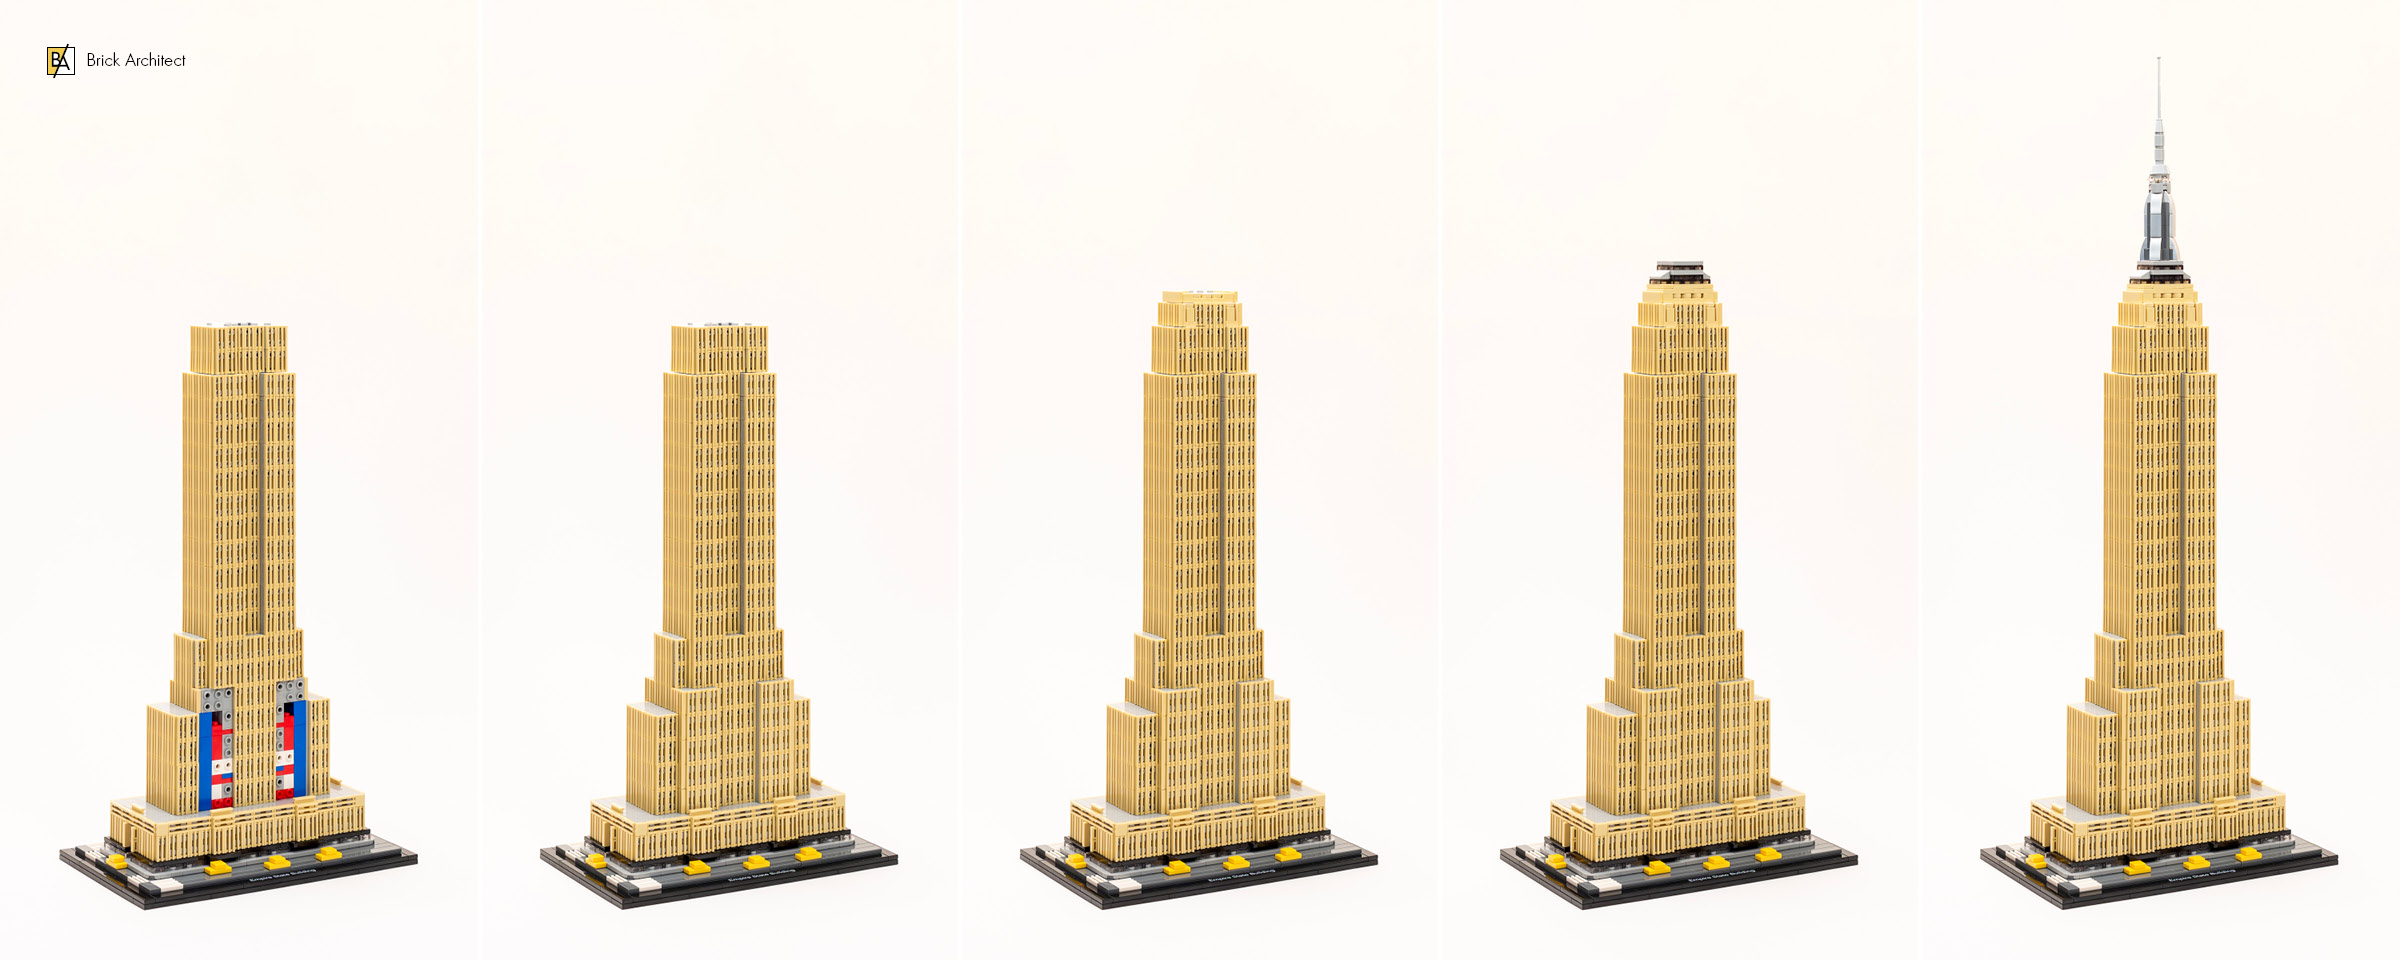
Bag 5 completes the LEGO model.
The remaining stages are fun, quick, and give the model it’s distinctive top. There’s one final set of setbacks for the main building, followed by a section with windows just below the spire. Lastly, we are treated to a beautifully designed spire which uses some drum-lacquered silver parts and clever techniques to good effect.
Bag 5, 20 minutes.
About the parts
There aren’t any new parts in this set besides the 1×8 nameplate tile. On closer look, none of the 1767 pieces are particularly expensive on the secondary market. That why I’ve chosen to highlight the ten most common parts instead—this might be a useful parts pack for some builders (especially in Europe where the price-per-part is better than in the United States.)
- 684x – 2412b 1×2 Grille Tile, 5Brick YellowTan.
- 148x – 99206 1×2×⅔ Plate w/ 2 Studs, 194Medium Stone GreyLight Bluish Gray.
- 72x – 11211 1×2 w/ Studs 1-Side, 194Medium Stone GreyLight Bluish Gray.
- 42x – 22885 1×2×1⅔ w/ Studs 1-Side, 194Medium Stone GreyLight Bluish Gray.
- 39x – 3021 2×3 Plate, 194Medium Stone GreyLight Bluish Gray.
- 32x – 3023 1×2 Plate, 40Transparent Trans-Clear.
- 32x – 2420 2×2 Corner Plate, 194Medium Stone GreyLight Bluish Gray.
- 31x – 3023 1×2 Plate, 194Medium Stone GreyLight Bluish Gray.
- 29x – 3021 2×3 Plate, 199Dark Stone GreyDark Bluish Gray.
- 22x – 15573 1×2 Jumper, 194Medium Stone GreyLight Bluish Gray.
Subscribers got early access to this article

Subscribe to the Brick Architect newsletter for early access to exclusive content, the latest articles, and updates to the Printable LEGO Brick Labels, LEGO Storage Guide, and my book The LEGO Architect.
Conclusion
I’ve mentioned several times how closely this set resembles the larger scale Architecture models frequently created by talented LEGO Artists. I reached out to a few of those artists for their first impressions of the set, even though they haven’t had a chance to build it yet…
All of the LEGO Artists I spoke to were excited about this increased level of detail in an official LEGO Architecture set:
- “I can certainly appreciate the boldness of including so many of a single piece in this set.” —Rocco Buttliere
- “The finished model nails the overall shape of the building and is instantly recognizable as the Empire State Building. Even at its relatively small scale, it manages to capture many of the key details from the actual building.” —Deep Shen
- “I’ve always found that [this scale] tends to offer a great balance of complex building techniques as well as an exciting amount of detail.” —Rocco Buttliere
- “If I was shown this set box seventeen years ago when I was designing my own model, I would have dismissed the notion as an outright impossibility.” —Spencer Rezkalla
Spencer’s quote in particular stood out to me. It perfectly captures the explosion in enthusiasm for the Architecture Series, and the shift from focusing on the high-level form of the building to capturing more and more of the details.
These quotes set the stage for my closing thoughts about the set. The 2.5 hour build process combines an interesting highly technical central core with less exciting highly repetitive exterior panels. This is very similar to most of the large Architectural models designed by artists like Spencer and Rocco. In fact, the greatest joy in building this set is to gain insight into the complex but repetitive world of the most talented AFOLs and professional LEGO Artists.
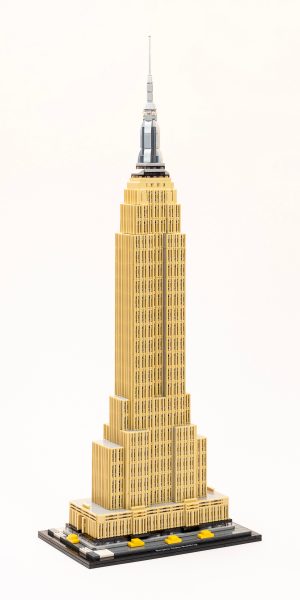
#21046 Empire State Building.
This set is perfect for dedicated fans of the LEGO Architecture theme. Unfortunately, it won’t appeal to many LEGO builders because the build process is too repetitive and the part selection is not very diverse (due to the overabundance of 1×2 Grille Tiles). Nonetheless, #21046 Empire State Building earns an enthusiastic Recommended (4/5 star) rating for fans of the LEGO Architecture theme due to the very high level of detail and interesting building techniques in the central core.
This is the first Architecture set I have built. I thoroughly enjoyed it. I found the grilles relaxing rather than repetetive and I am so pleased with the final result. It is now sitting proudly next to Steam Boat Willy!
I enjoyed this building this set after a long time away from Lego. Now I’m having a hard time finding other work built to this same scale.
After enjoying Lego for most of my childhood I didn’t touch a brick for over 20 years. A few years ago I started collecting Lego again as a adult with a focus on Star Wars sets. But I always kept a eye on those nice looking Architecture sets. The ESB is the first Architecture set I bought and I really enjoyed building it. It led me to your site and your book.
Through your book I found out that creating things with Lego was the thing I loved so much as a child. So I started breaking down those star wars sets for parts.
Nowadays I look at buildings in my homecountry and beyond and try to imagine them in lego style in my mind .
Thank your for the inspiration! And keep up the good Work on your website
Cheers Edgar
The Netherlands
Edgar,
I’m thrilled to hear that my book and website have been an inspiration to you. I agree that using buildings in your community and country as inspiration is a great idea. It’s especially helpful since you can share your models with members of your community at LEGO events, and they will be able to recognize their town re-created using LEGO.
Be sure to share photos of your creations!
Sincerely,
—Tom
This is actually my next project, and I’m so glad Lego has branched out with the Architecture series to include larger models (I’m over the whole skyline theme.) I wish Lego would design more buildings emphasising more artistry in architectural styles — like your book did. (Any word on a sequal to your book? Hint hint) Rockefeller Center I hope is next, its an absolutely facinating story of the design.
I’d love to see a large scale Rockefeller Center, even if it would make the ESB’s amount of grill tiles look trivial.
It would be easy to make a better version than #21007 Rockefeller Center – It’s the second worst set in the series… (In my opinion, only #21008 Burj Khalifa is worse.)
I haven’t and will not buy it but only due to the fact that I’ve built Spencer’s model from its .lxf file. If not for that, I wouldn’t hesitate to buy it. It doesn’t have the finer tuning of Spencer’s model but has enough so that it is highly distinguishable as the ESB. Great review and here’s hoping Lego continues to elevate its architecture theme.
Jim, thanks for sharing your insights having built Spencer’s version! I would love to see a photo of them side-by-side!