
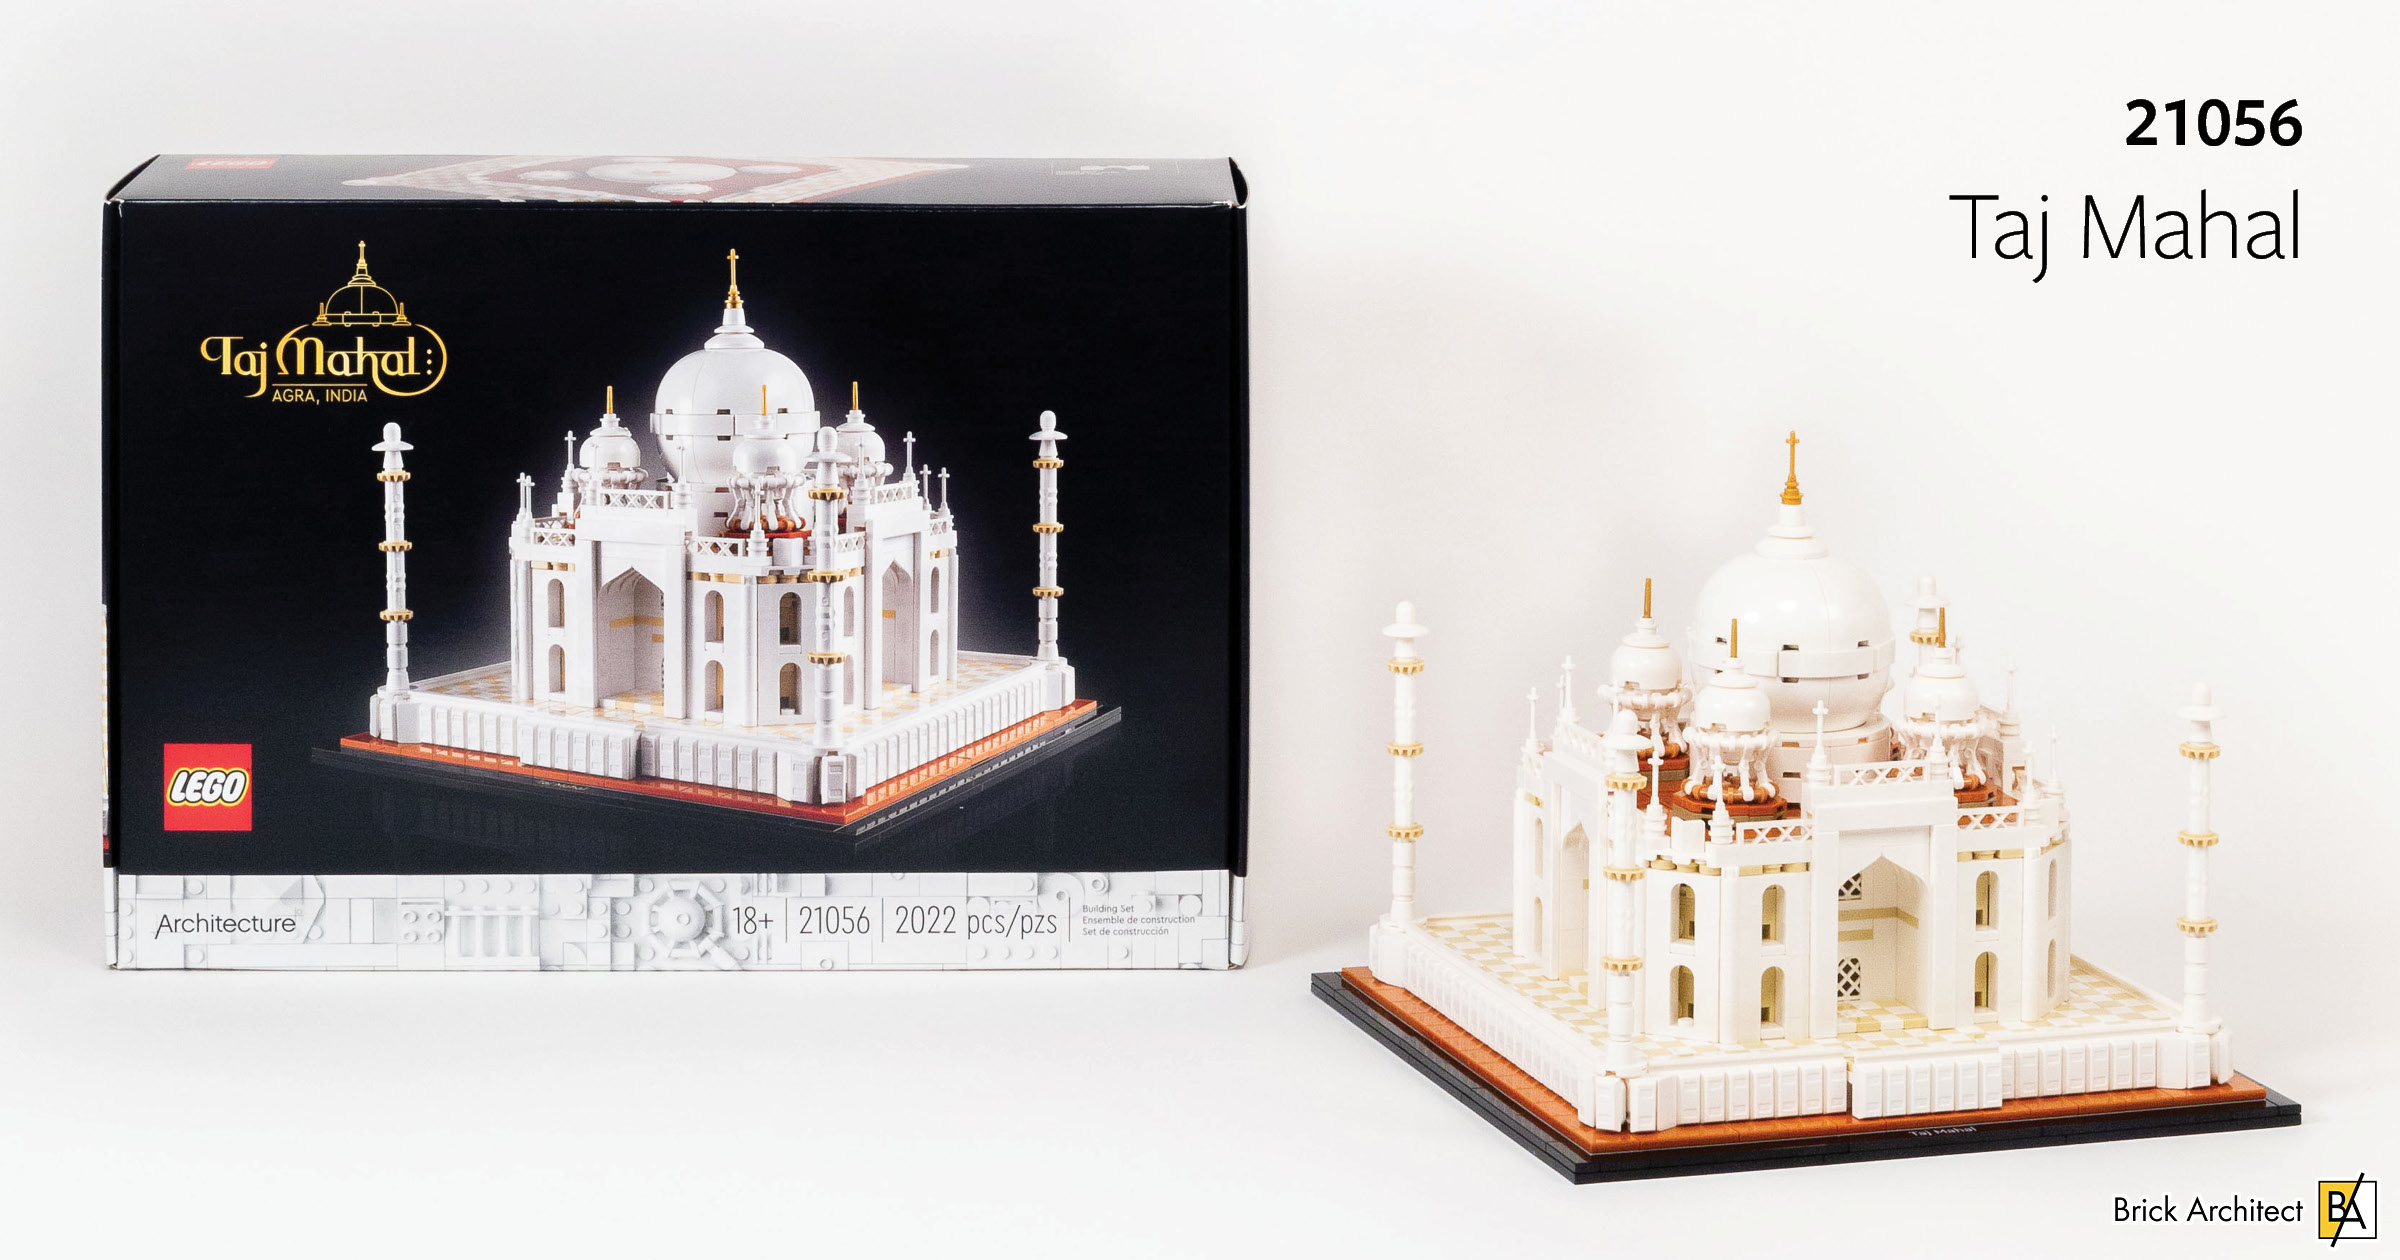
Review: #21056 Taj Mahal
The jewel of Mughal architecture is beautifully captured in this intricate LEGO set. The only real question is whether it’s fun to build (and if there are any surprises hidden within).
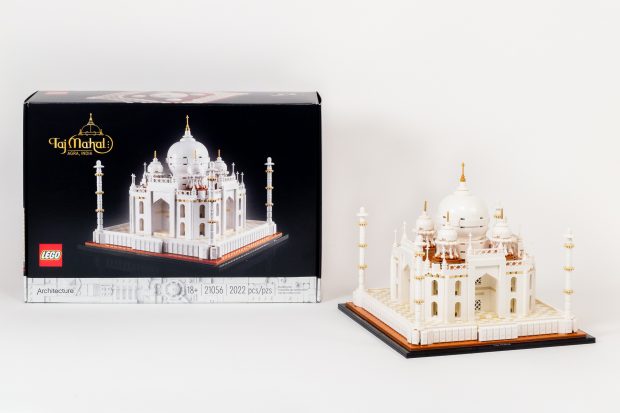
#21056 Taj Mahal was released in June 2021. It costs $119.99 (119.99€ / £104.99 / 169.99 CAD / 149.99 AUD) for 2022 pieces, ages 18+. At that price, the set comes to just $0.059 per piece in the USA, which is a very good price.
That said, I will warn you… 394 of those parts are 1×1 Tiles (part 3070) in 1White and 5Brick YellowTan. They alone account for almost 20% of the part count!
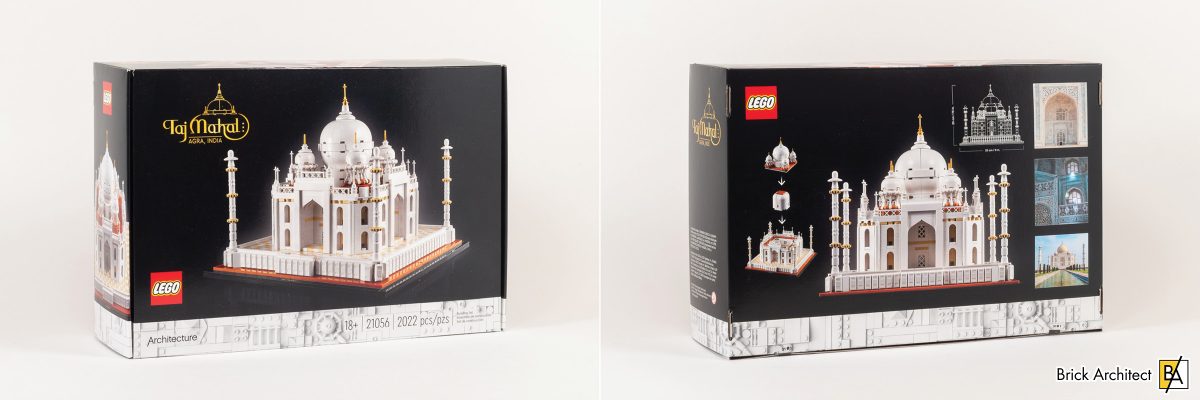
#21056 Taj Mahal – Box Cover and Back.
First Impressions
While I have visited a lot of places, I have never been to India and thusly haven’t visited the Taj Mahal. It nonetheless conveys a sense of beauty which has always captured my curiosity.

Taj Mahal (1653), in Agra, India, by Architect Ustad Ahmad Lahori. (Photo by: Joel Godwin, CC BY-SA 4.0).
As a huge fan of the smaller scale of sets in the core Architecture series, I was never especially drawn to the previous rendition of the Taj Mahal which was part of the Creator Expert series, which has a massive 64×64 stud footprint and a whopping 5923 pieces. (#10189 Taj Mahal was released in 2008, and re-issued in 2017 as #10256 Taj Mahal.)
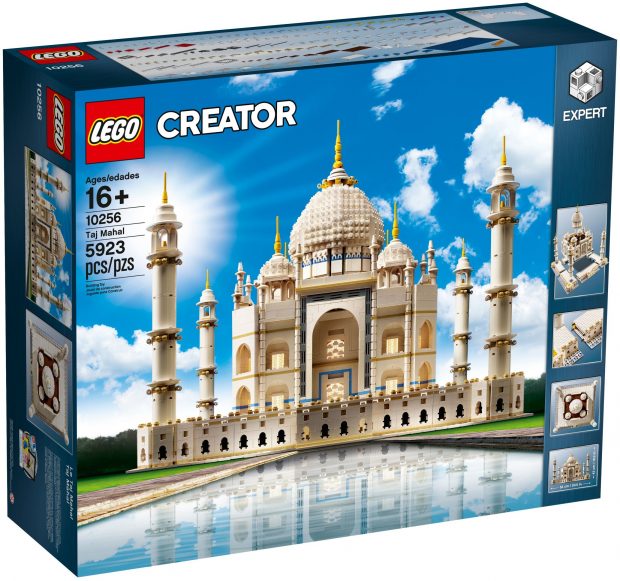
#10256/10189 Taj Mahal contains nearly 3x as many parts!
What struck me after seeing photos of this version for the first time is how it manages to appear more detailed overall when compared to the older version, despite the much smaller size and significantly lower price point!
As I prepare to actually build the model, I’ll admit that I’m a bit concerned that the build process will be repetitive (since the building is very symmetrical), but eager to see how the set re-creates global architectural traditions using modern LEGO parts. I’m also curious to get a better sense of how big the finished set will be – it’s not clear from the photos alone.
Box Contents
This is likely the last box in the LEGO Architecture series to feature the classic flip-top lid design (excluding the limited release #4000038 LEGO Campus set which is not available to purchase). This is too bad for collectors as the older box design is more robust, but the downside is that the older boxes can not be easily folded flat.
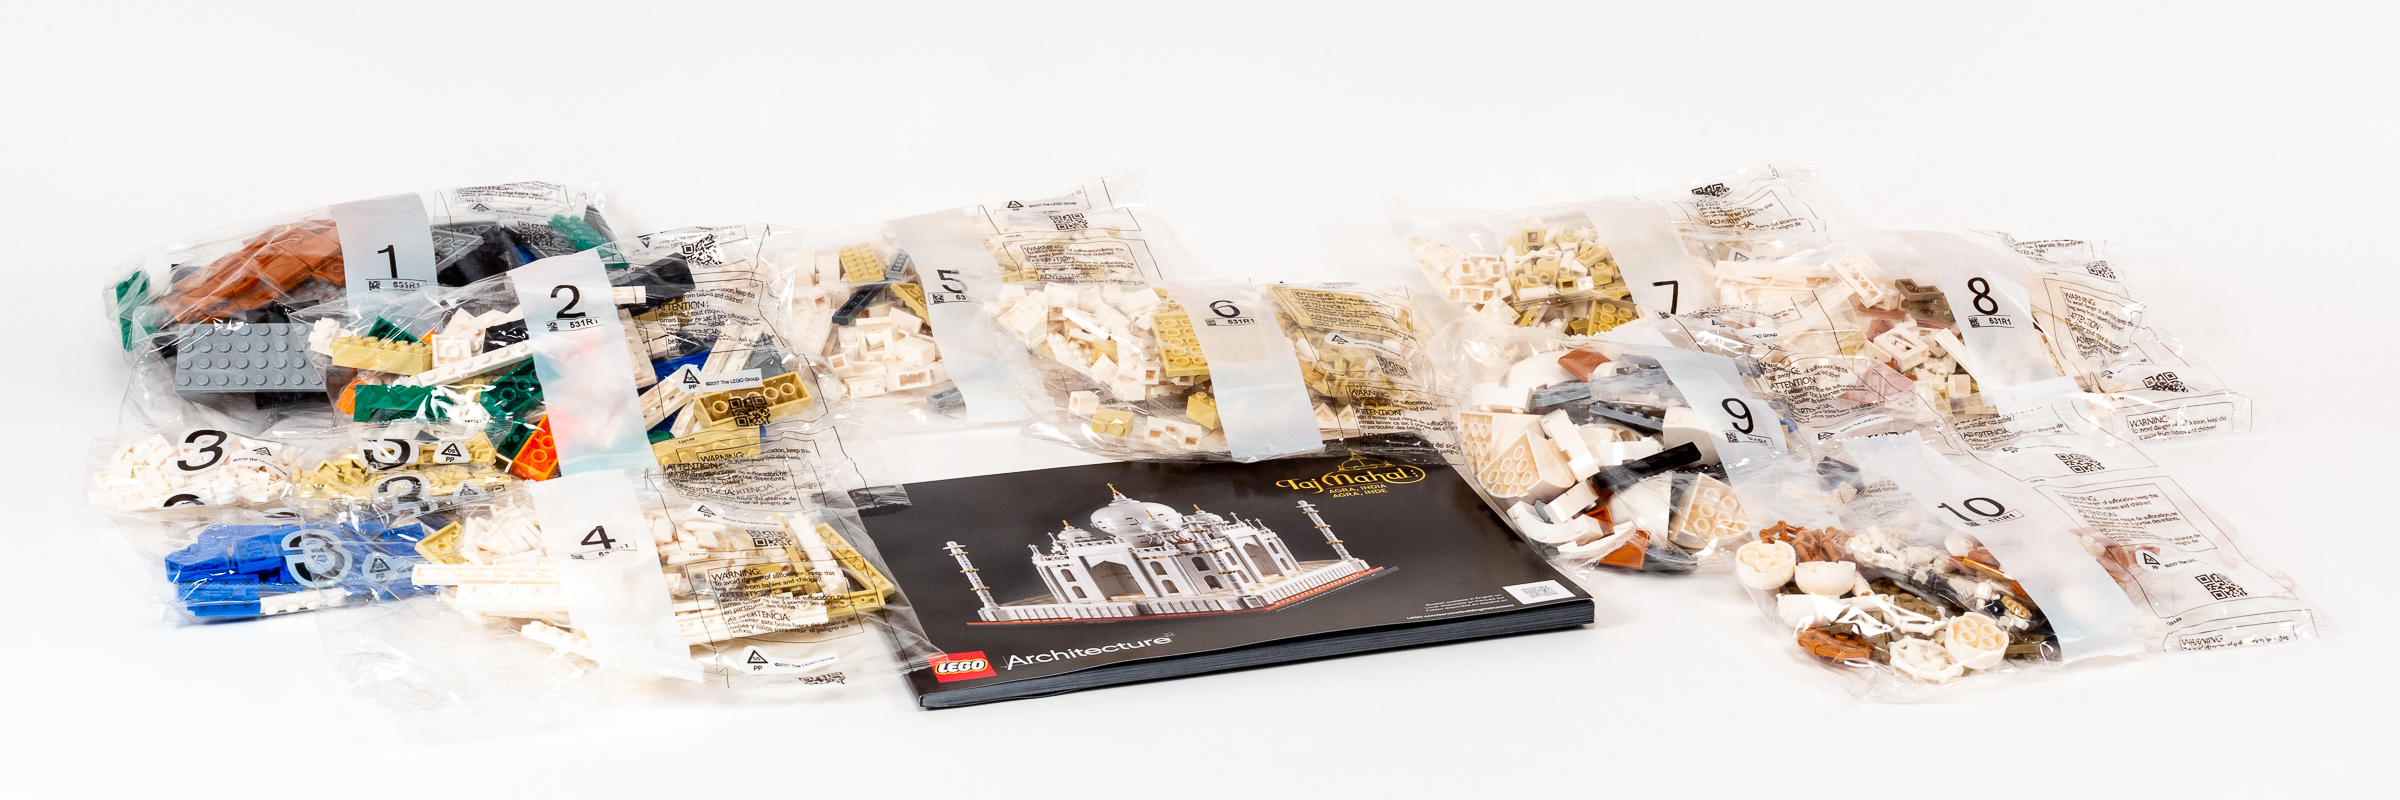
The build process takes place over 10 numbered stages.
Box Contents:
- Stage 1: 1x large bag (marked 631R1).
- Stage 2: 1x large bag (marked 531R1).
- Stage 3: 3x small unmarked bags.
- Stage 4: 1x medium bag (marked 531R1).
- Stage 5: 1x large bag (marked 631R1).
- Stage 6: 1x medium bag (marked 631R1).
- Stage 7: 1x large bag (marked 631R1).
- Stage 8: 1x medium bag (marked 631R1).
- Stage 9: 1x large bag (marked 631R1).
- Stage 10: 1x medium bag (marked 531R1).
- 136-page instruction booklet. 27 x 19.2 cm (10 5/8 x 7 1/2”).
Build Process
It’s time to start building! With 10 numbered stages and a total of 2022 pieces, each bag should have an average of 202 pieces, but I’m sure the prevalence of tiny parts in this set will make some bags much slower than others.
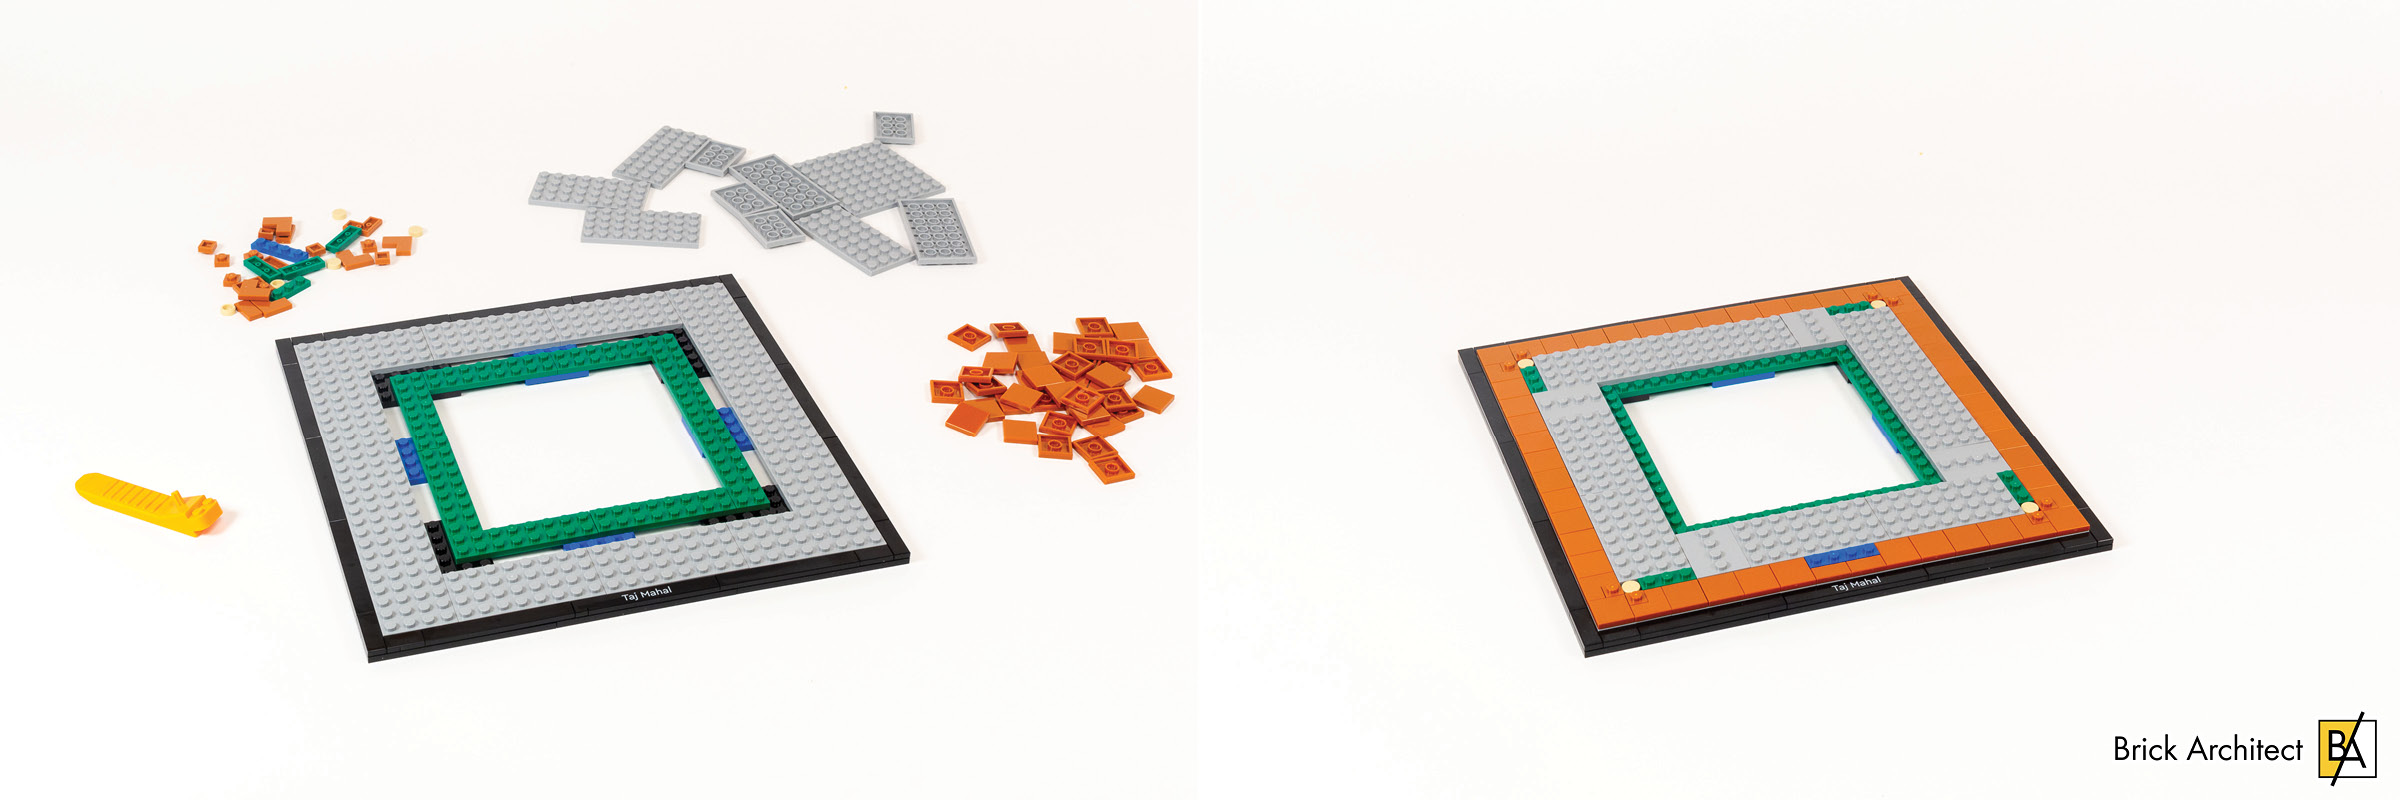
Stages 1-4 – Base and foundation
Like almost every set in the LEGO Architecture series, Bag 1 begins by assembling a sturdy base with a black tile perimeter and a printed nameplate along the front. This is no different, resulting in a 28×28 raised platform on a 30×30 stud base. What is notable is the use of radial symmetry for the structural plates as we build up a strong base.
Partially built (left) and end of Stage 1 (right).
The second bag goes super quickly, lifting up the center of the platform using color-coded 2× bricks, a common trick used to ensure the model is in the right orientation for future steps. 106Bright OrangeOrange and 28Dark GreenGreen feature prominently, no doubt an homage to the flag of India.
End of Stage 2 reveals color-coded corners.
Moving on to the third bag, we see that it’s time to dump out three small bags containing a ton of tiny 1×1 Tiles. I mean a lot… In this stage alone, we use 109x of them in both 1White and 5Brick YellowTan. It is both finger numbing and time consuming to attach three tan and three white tiles to each of the 2×3 Plates, aligning them perfectly, then attaching them to the base.
Carefully assembling 2×3 panels of tiny square tiles.
There is a trick to get them aligned well, though – just rub the corner of the three tiles along one edge on a smooth surface, then flip it over to do the same on the other side and everything usually lines up perfectly.

Closeup at the End of Stage 3 with tiled sections along the four edges.
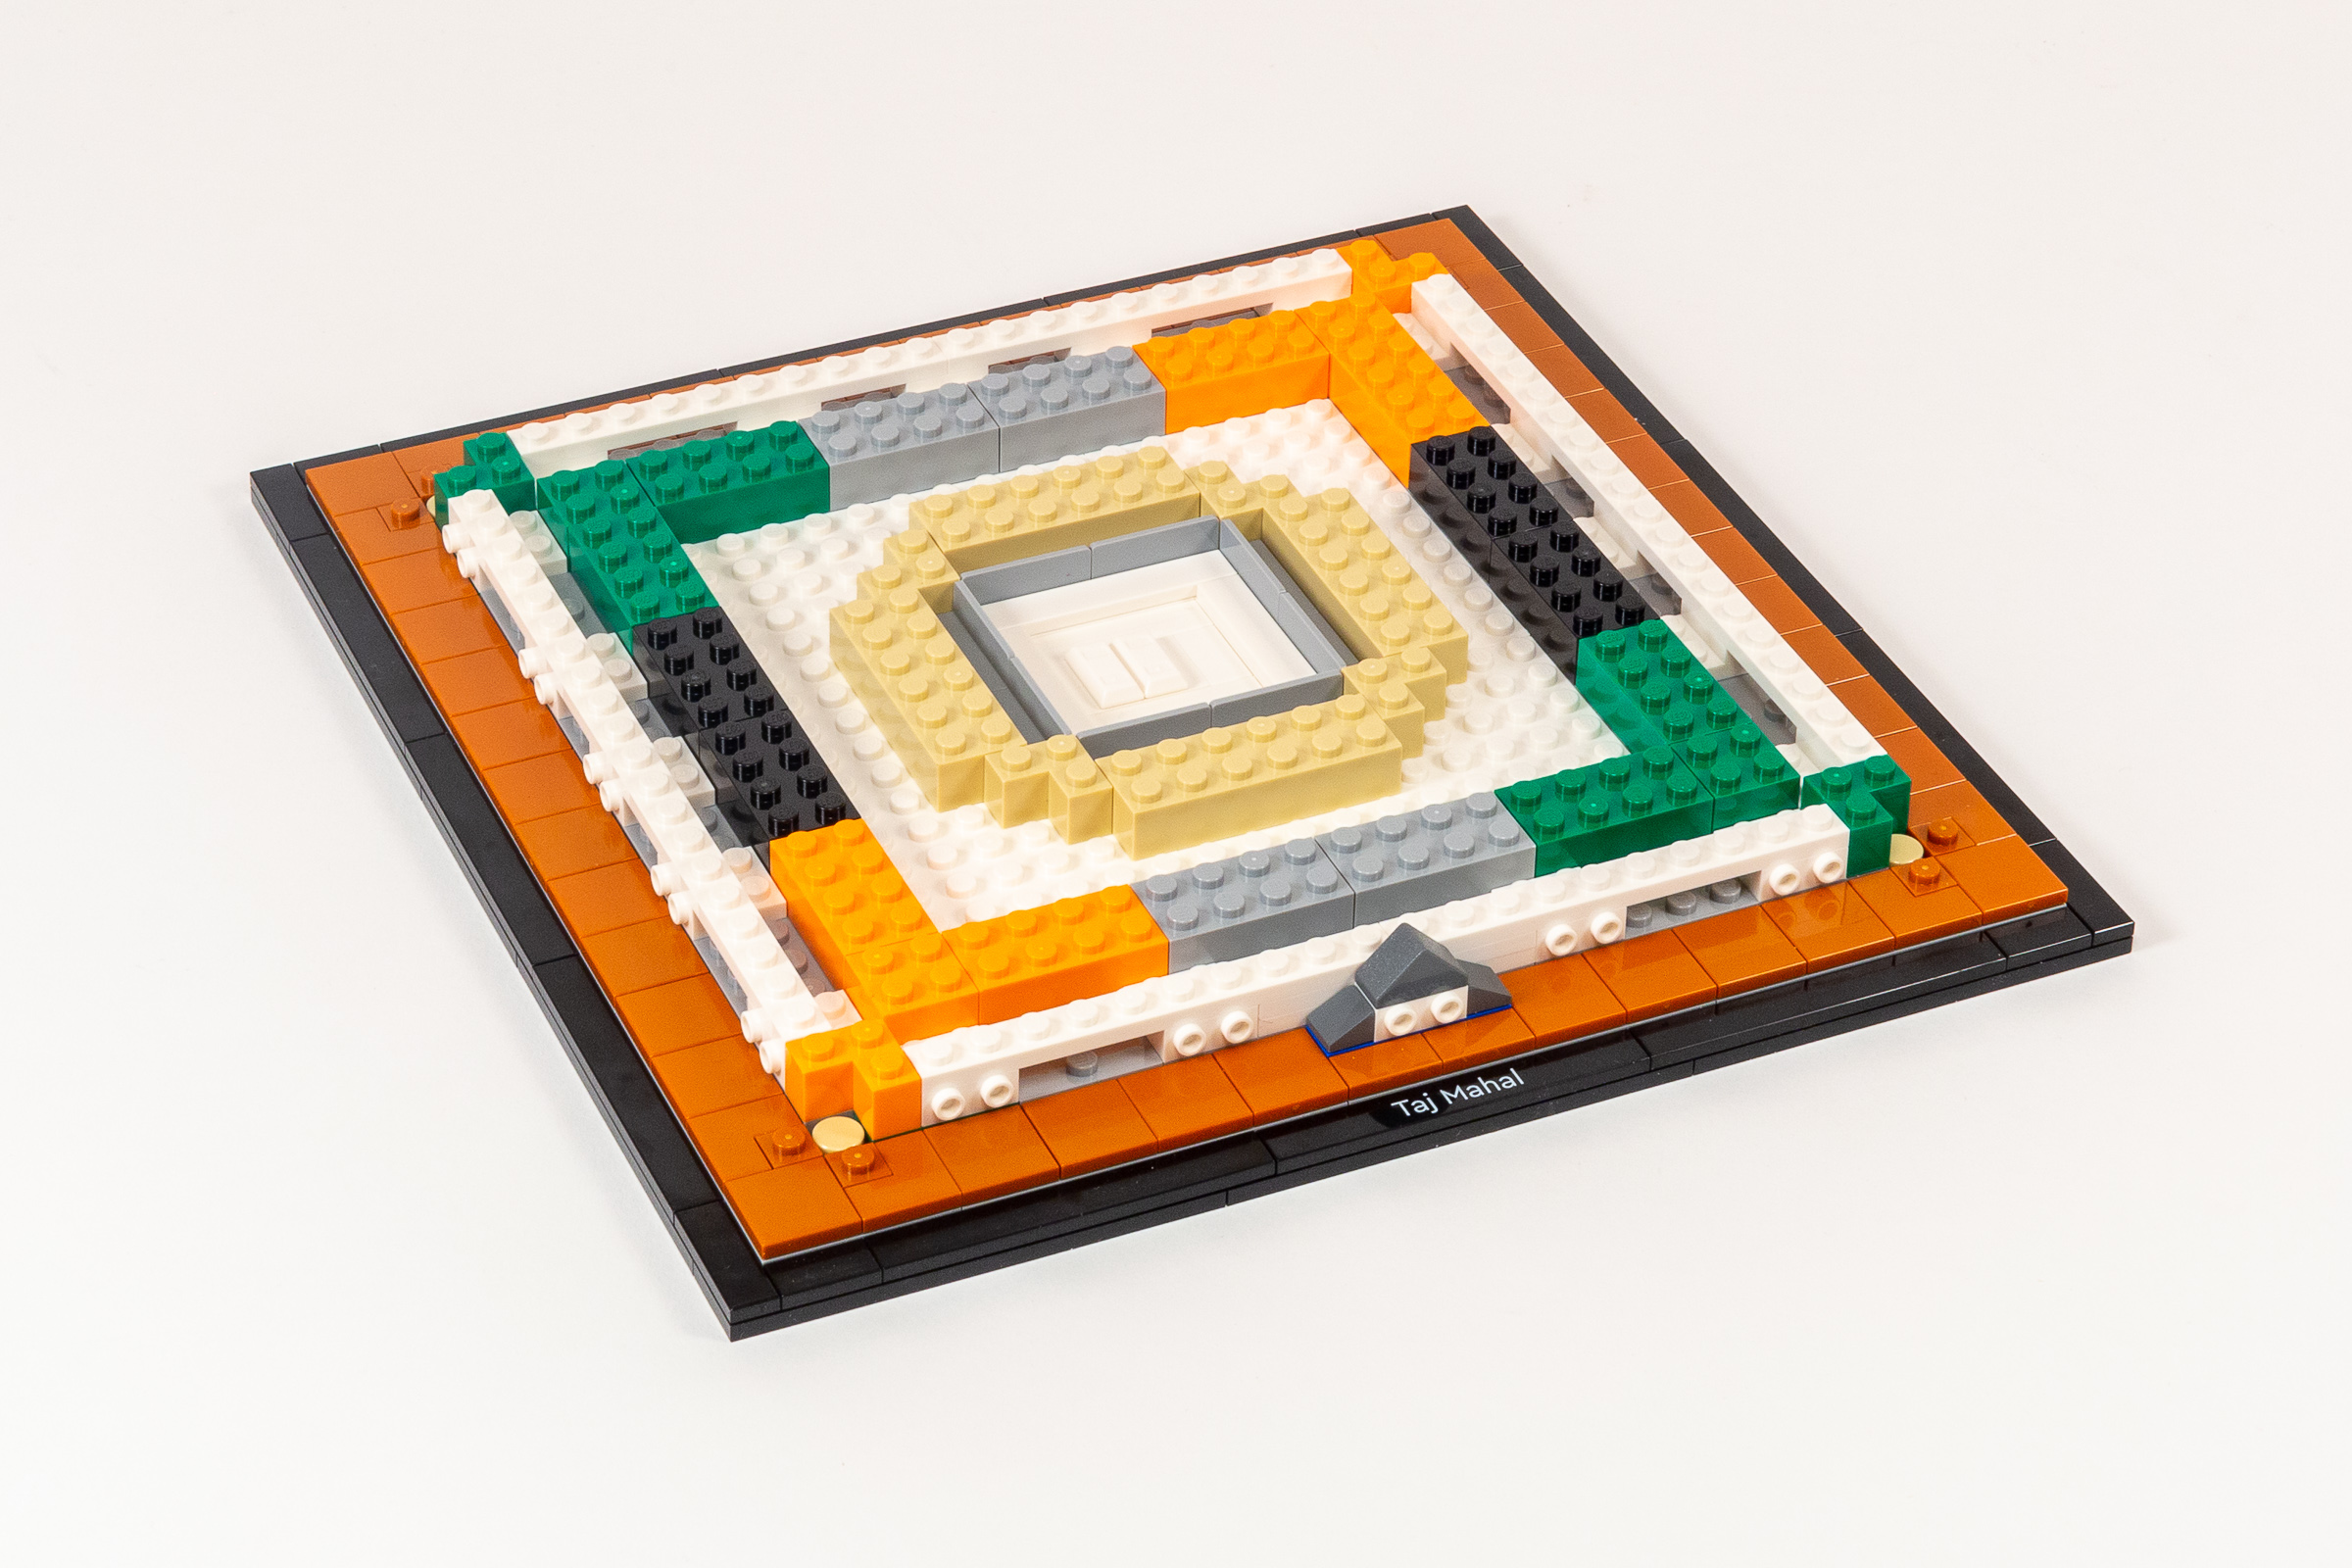
The fourth bag begins by adding the last four corners of tile flooring to the raised platform, which also include (barxx element) at 45 degree angles to the four corners. After that, we attach modules containing outward-facing 1×2 Gold Bar (part 99563) in 1White on all sides.
These last two bags are slow going and pretty repetitive, but the end result is an attractive platform with a checkerboard tile floor. I’m eager to move on to the actual building which will go on top.
Adding the last exterior panel at the end of Stage 4.
Build time: 57 minutes. (Bag 1: 9 minutes, Bag 2: 7 minutes, Bag 3: 21 minutes, Bag 4: 20 minutes.)
Stages 5-7 – Walls
The fifth bag begins to re-create the iconic central structure. This involves creating the four arch-shaped niches which form the center of the building. This includes yet another area of carefully aligned 1×1tiles, slowing the build process down significantly.
Four nearly identical modules are built in Stage 5.
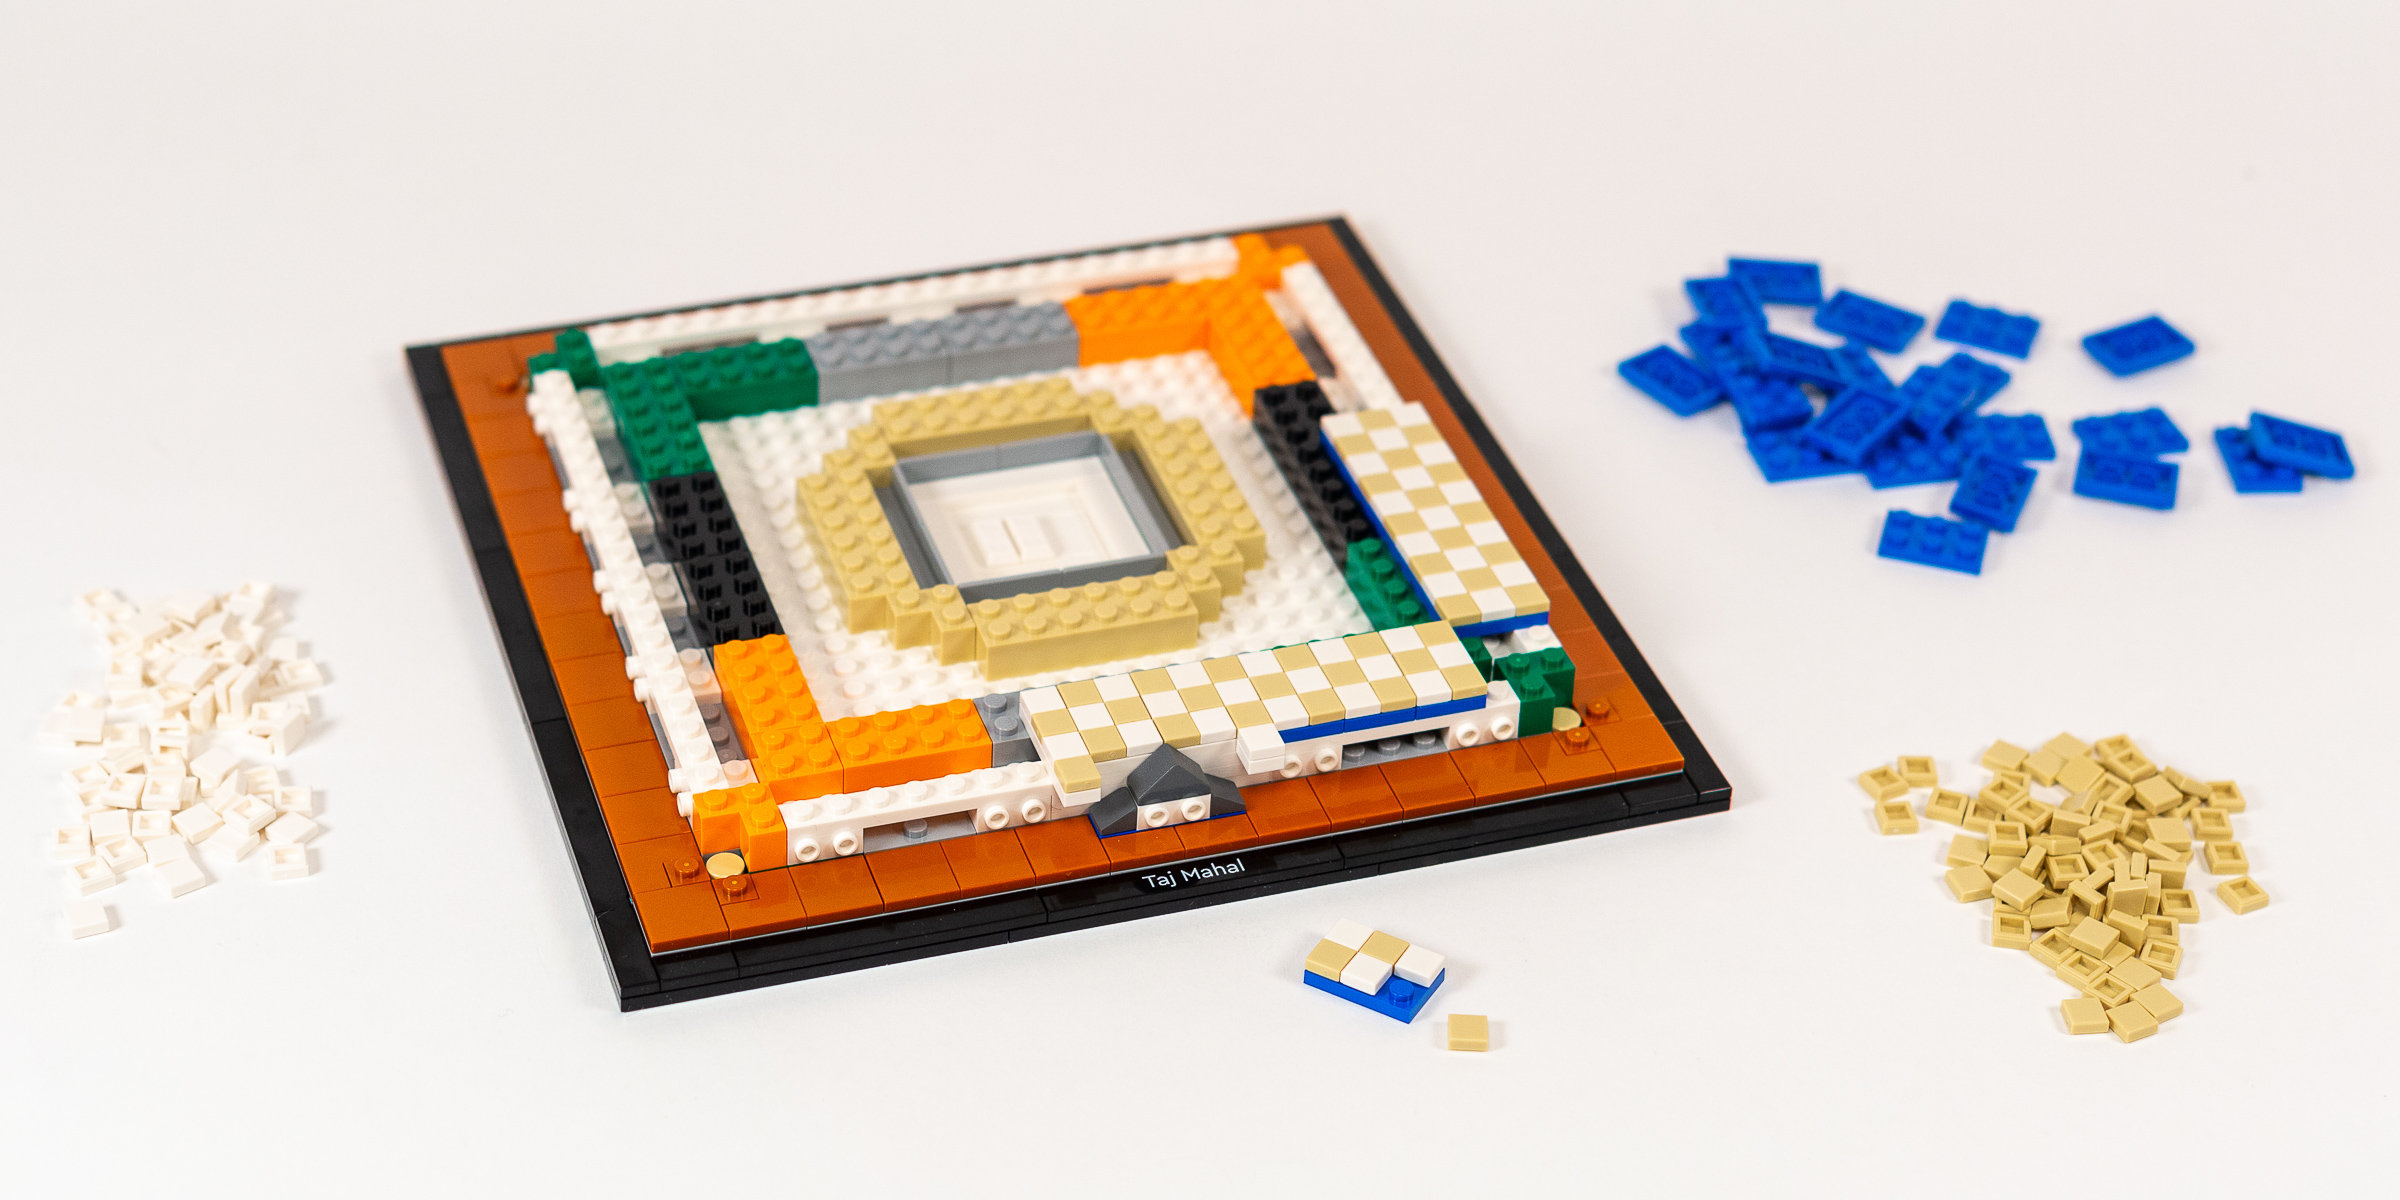
The six and seventh bags assemble opposite corners of the building, with just two corners per bag. I was a bit surprised by how long this takes, but the reason for the slow building process is that this step is packed with top-notch advanced building techniques.
In particular, the 45° angled walls on the corners of the building feature not just one carefully positioned panel, but two. The inner wall is 5Brick YellowTan and is carefully slotted into place in the cavity produced earlier in this stage. The really clever part is how the slightly thinner profile of a 1×1 round plate is exploited to achieve a very stug fit indeed.
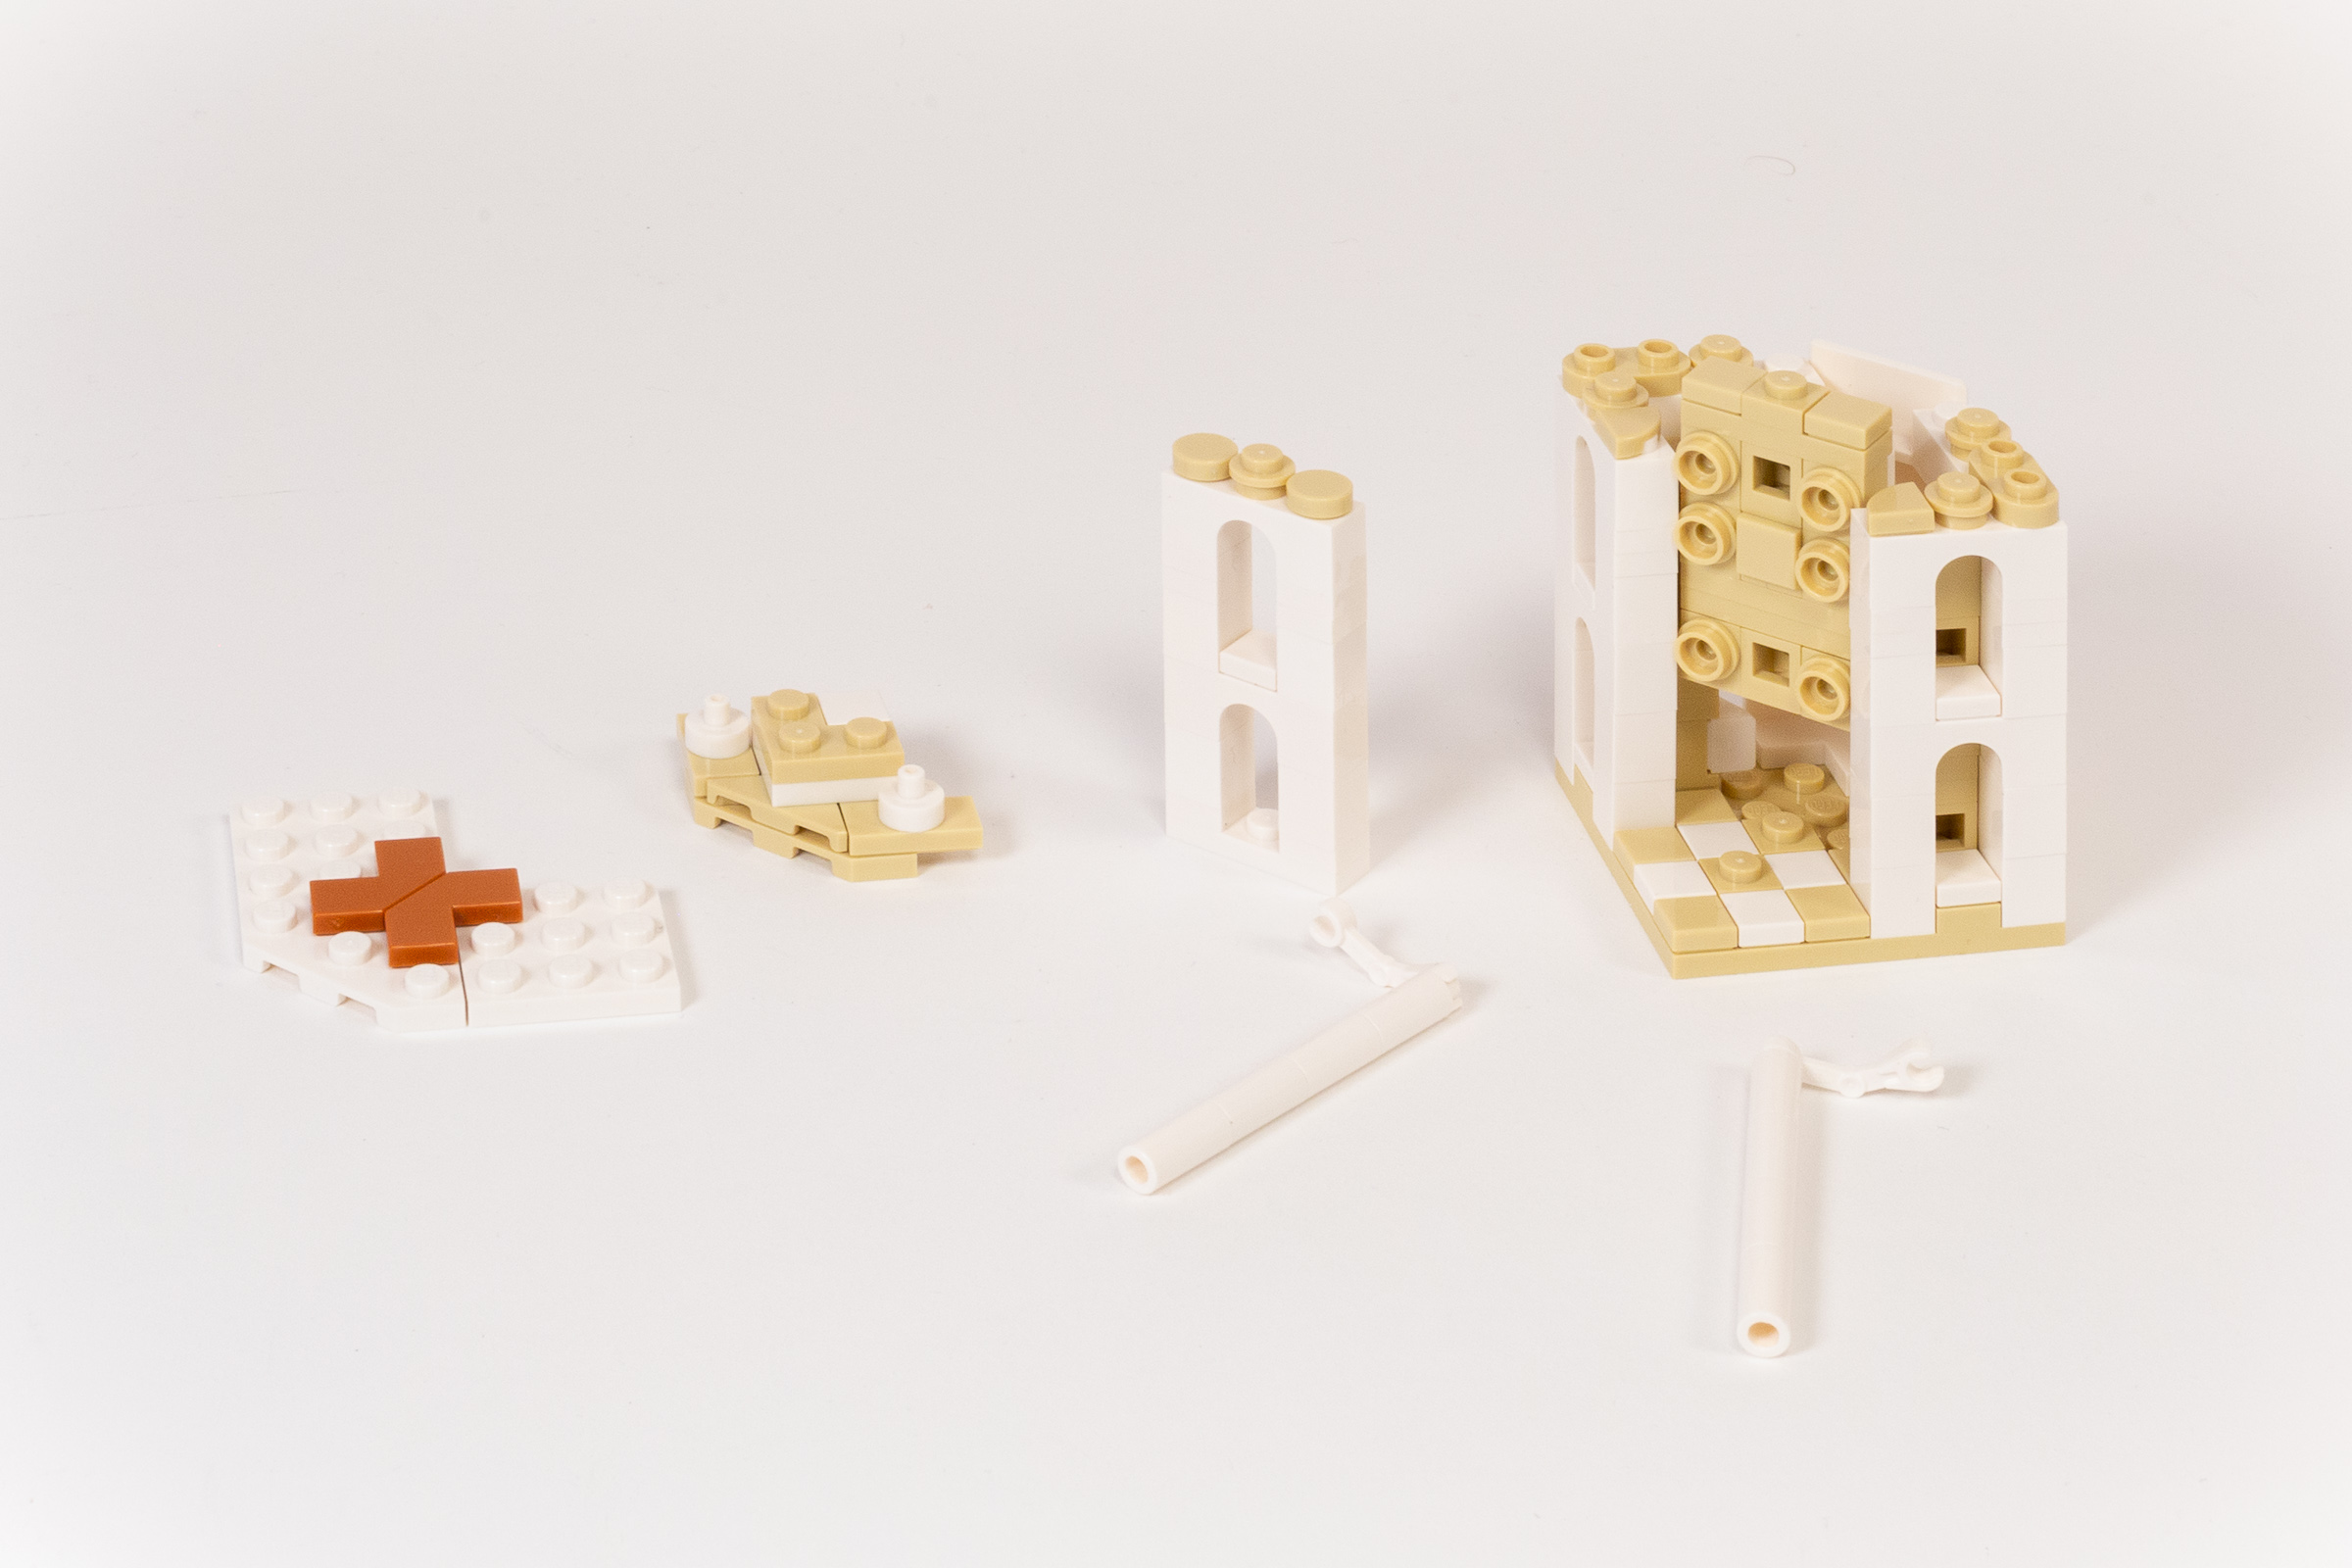
Several modules used to create each of the four corner assemblies.
Lastly, the gaps at the corners are perfectly hidden using a stack of candlestick elements. Although the connection is very well concealed, just a single clip attached to a Droid Arm (part 30377) holds it in place. While these are slow stages, they feature some really interesting techniques which I enjoyed learning.
Finally, the four side modules and four corner modules are locked into place using four 1×8 tiles. It’s a pretty sturdy foundation for the stages to follow — and I’m cautiously optimistic that I’m finally done aligning 1×1 tiles perfectly!
Progress at the end of Stage 7.
Build time: 76 minutes. (Bag 5: 20 minutes, Bag 6: 29 minutes, Bag 7: 27 minutes.)
Stage 8 – Tomb Chamber and Cenotaph
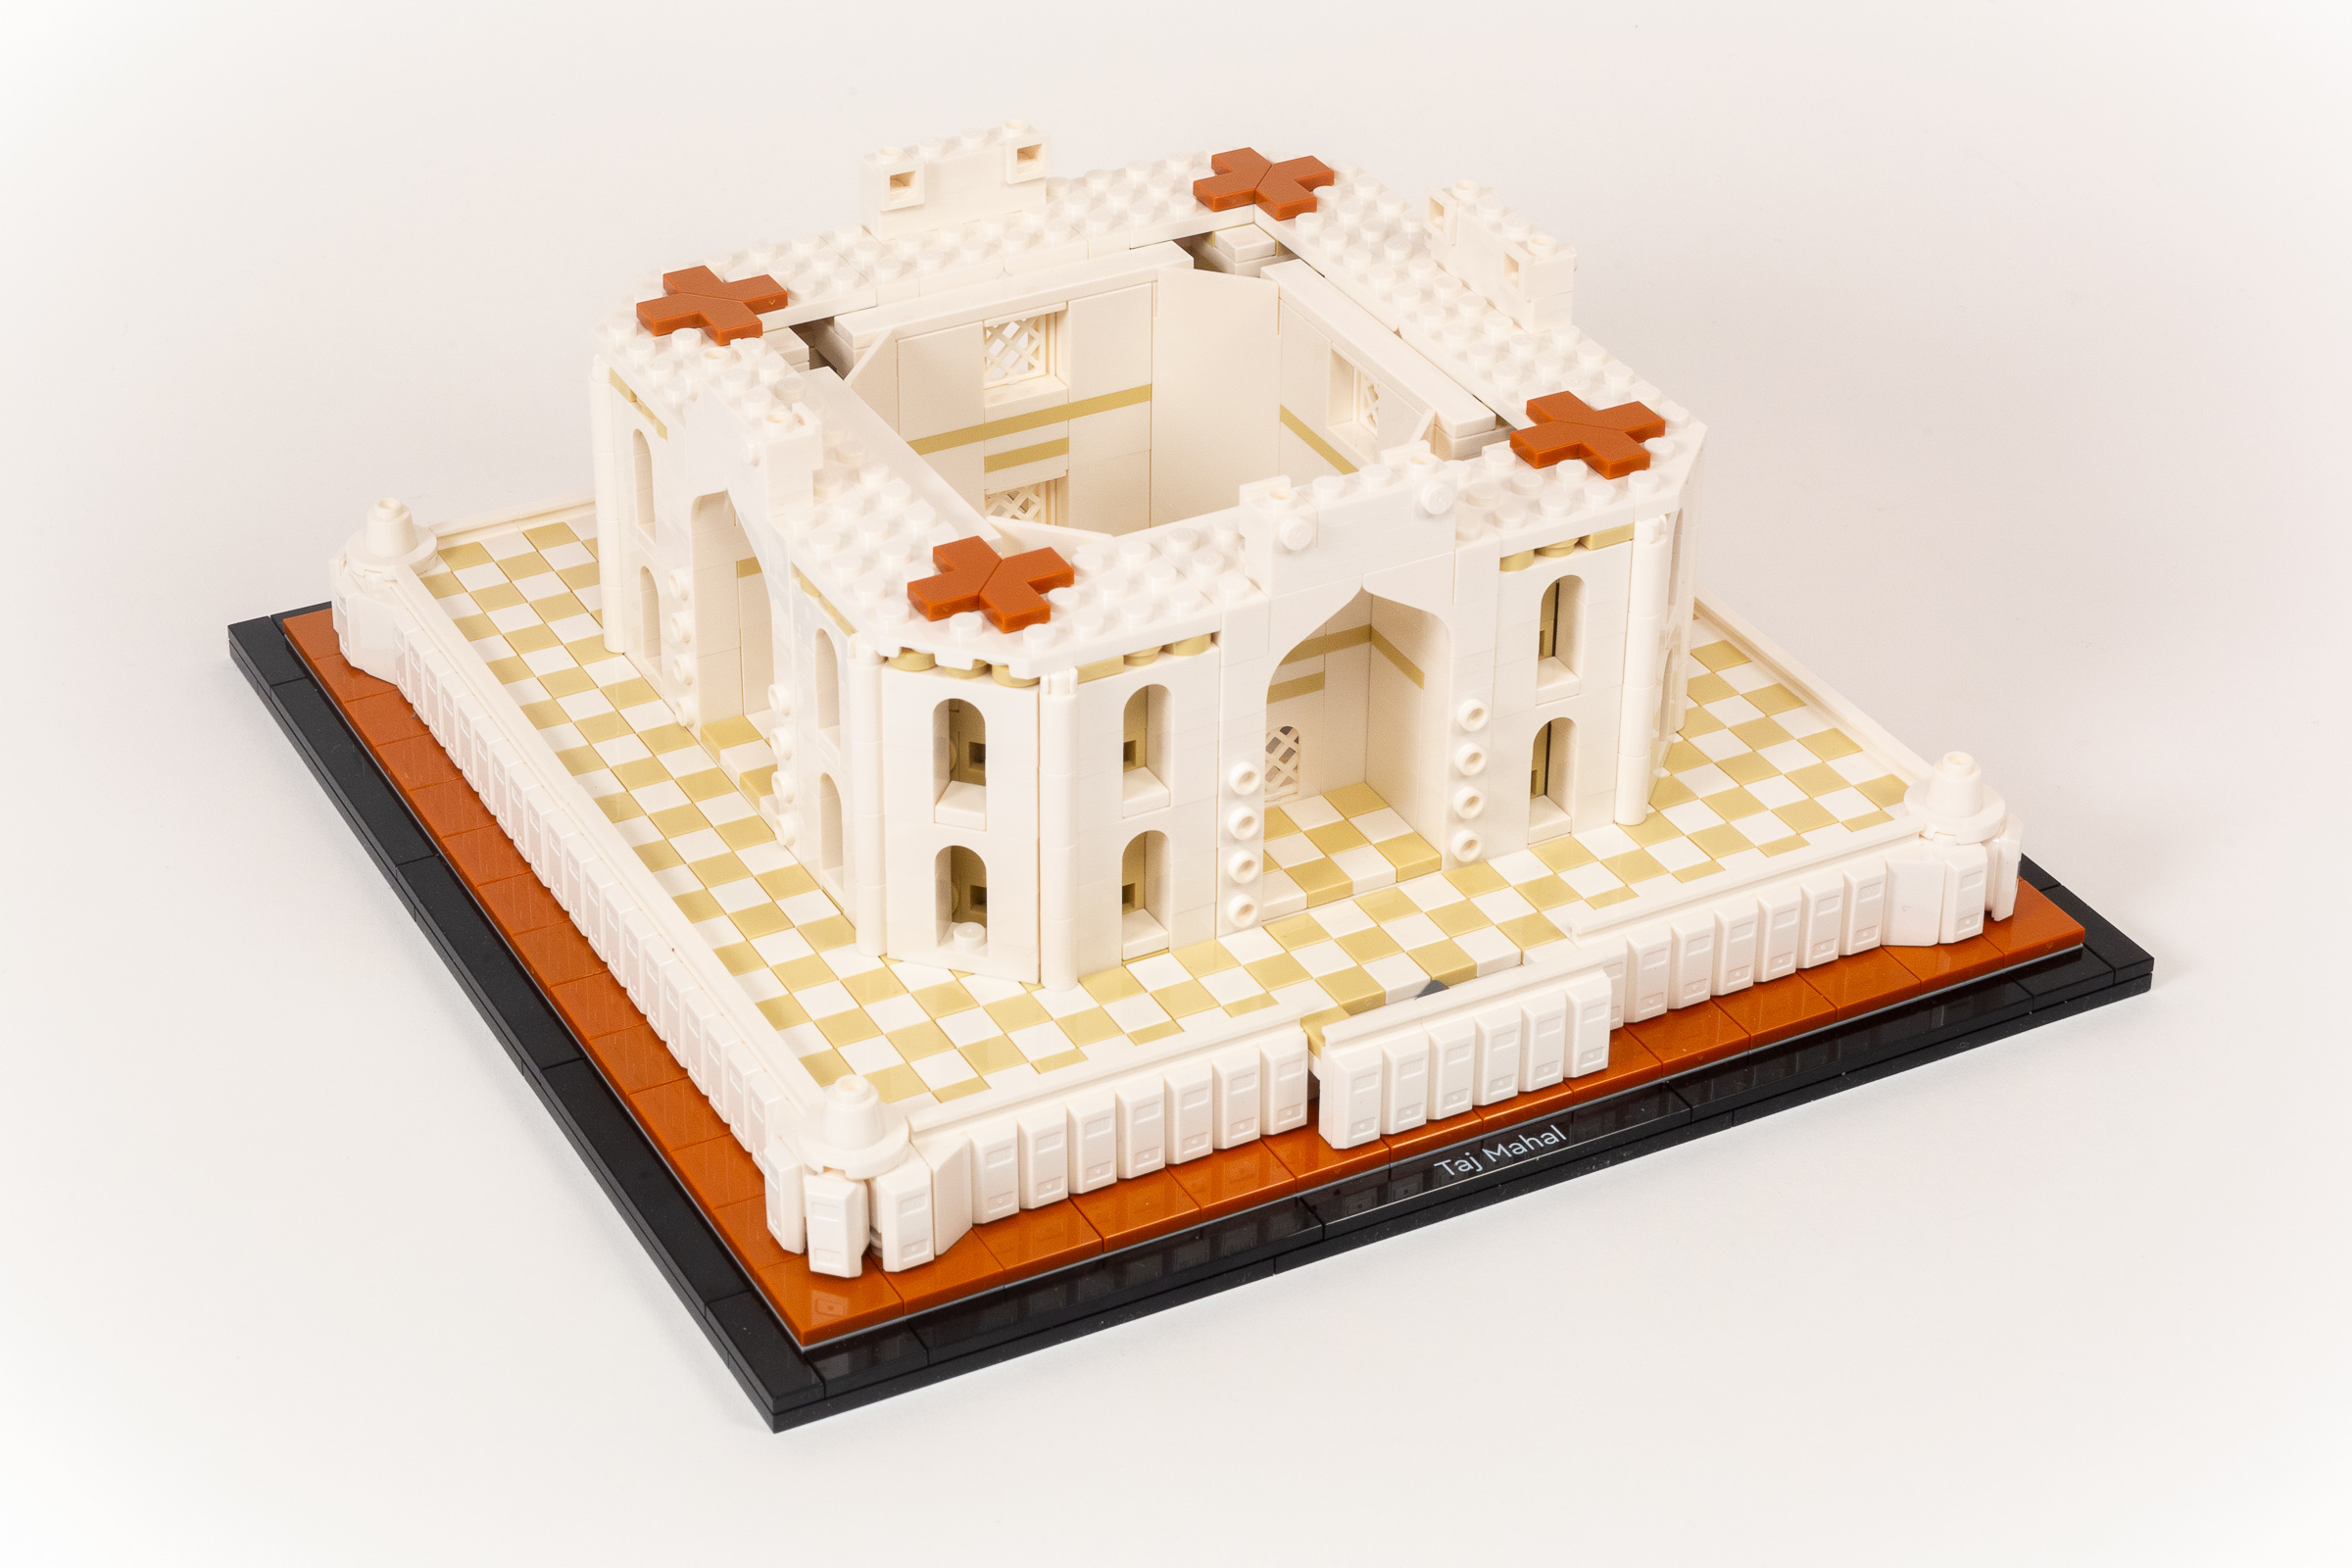
In contrast to the past several bags, bag 8 is really quick. In this stage, we start by adding a layer of 38Dark Orange tiles around the edge of the roof, rectangular trim around the four exterior entrances, and fence detailing along the edges.
Tomb Chamber with one of the panels removed.
Afterwards, we build a small removeable module containing the tomb chamber and cenotaphs of Shah Jahan and Mumtaz Mahal. As noted in one of the few historical insets in the instruction booklet, the positioning of the tombs is one of the few asymmetrical elements in the entire complex.
Build time: 10 minutes.
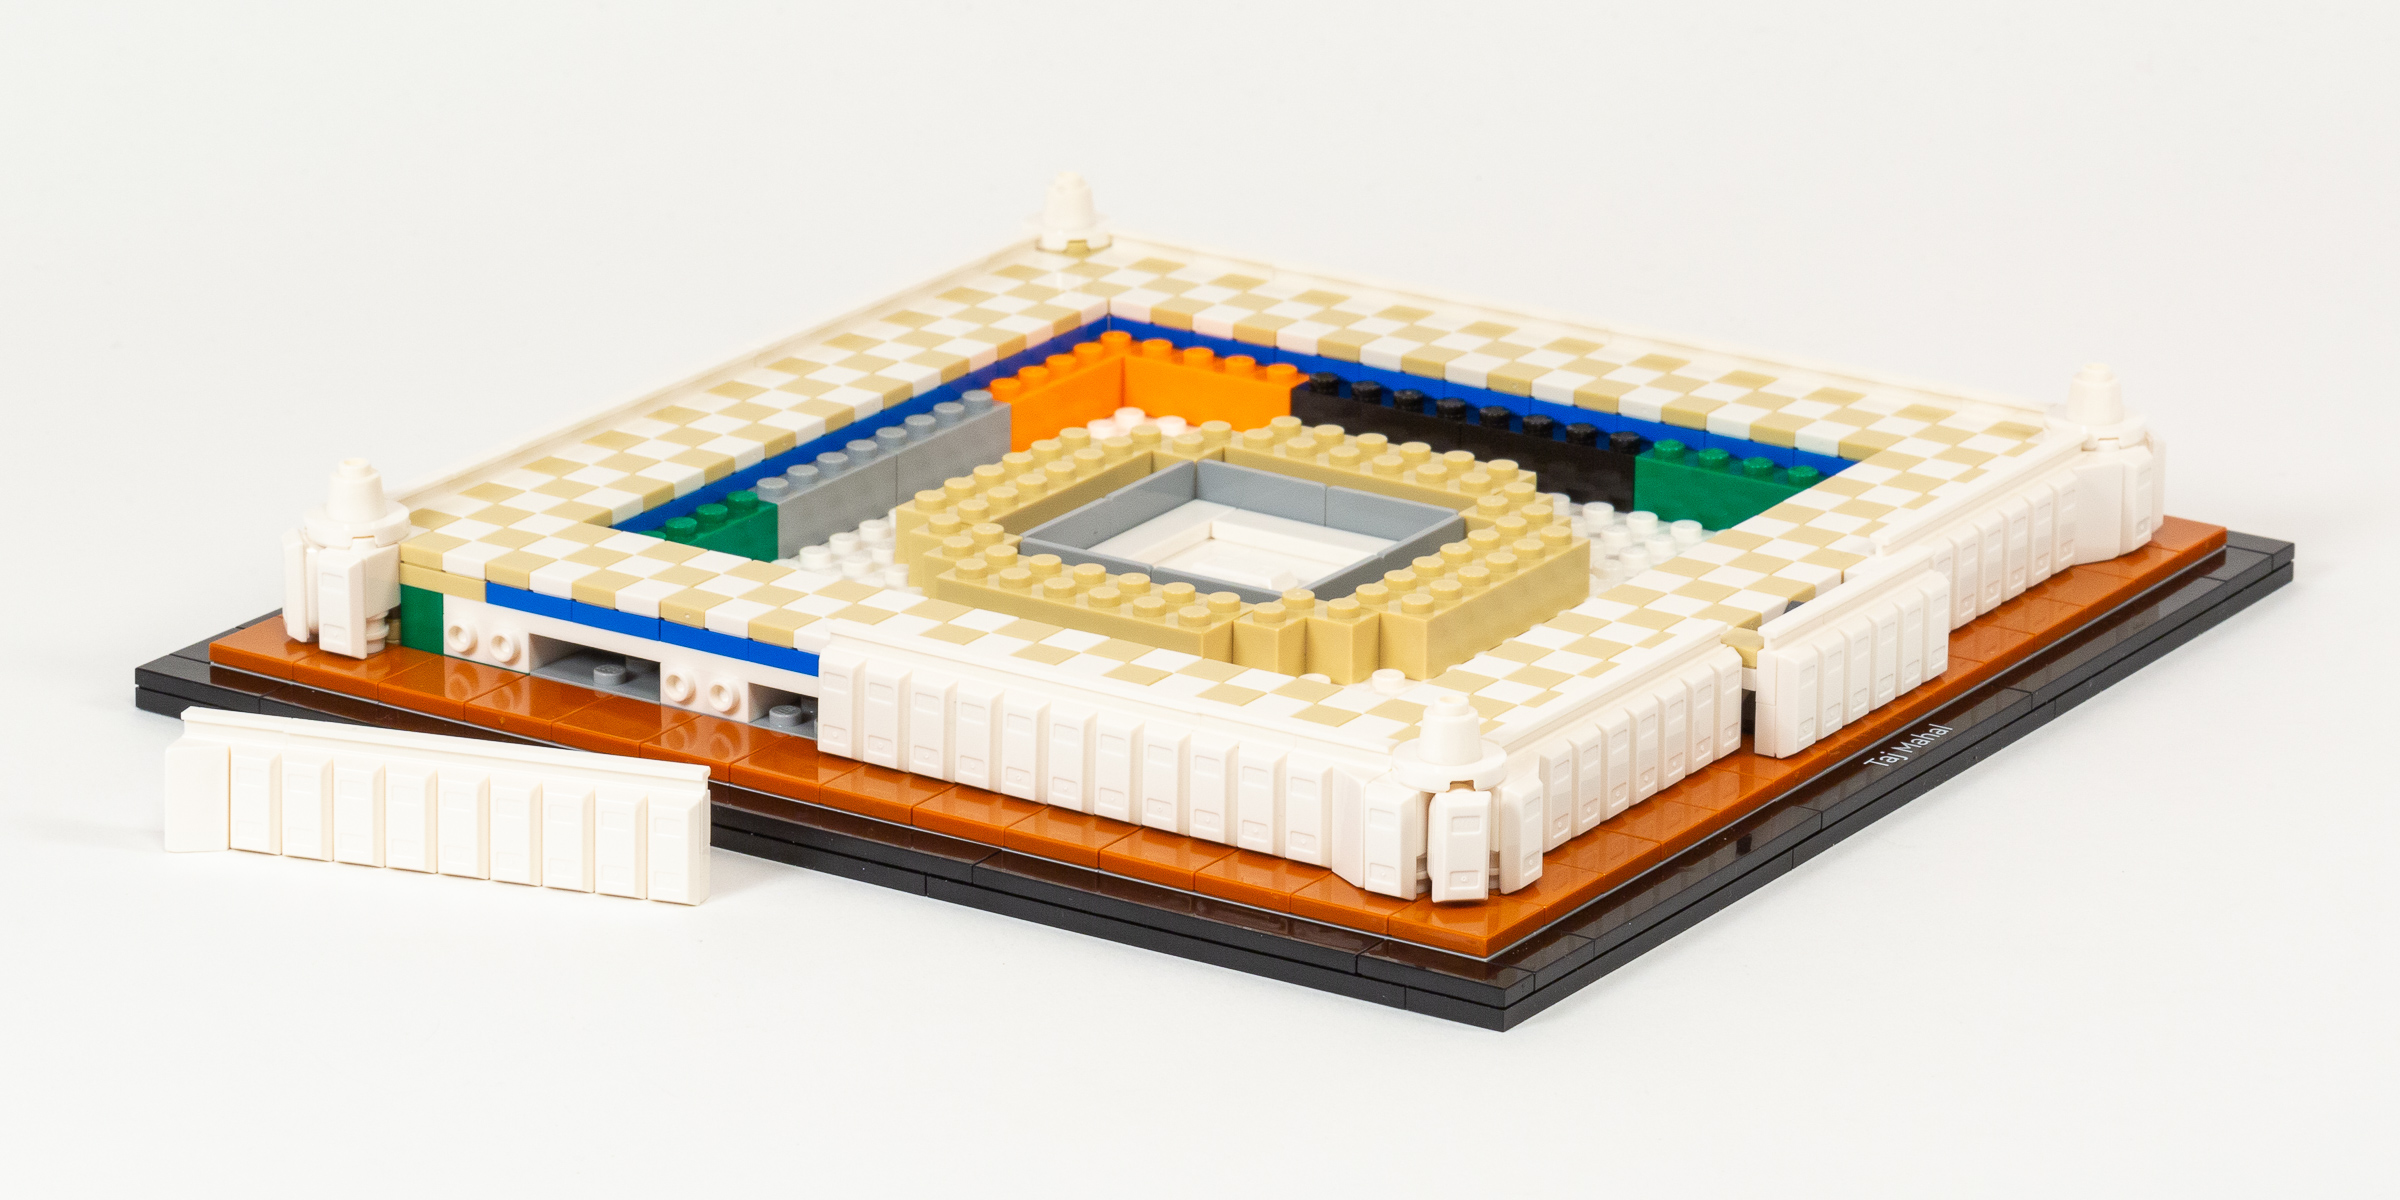
Stages 9-10 – Roof and Minarets
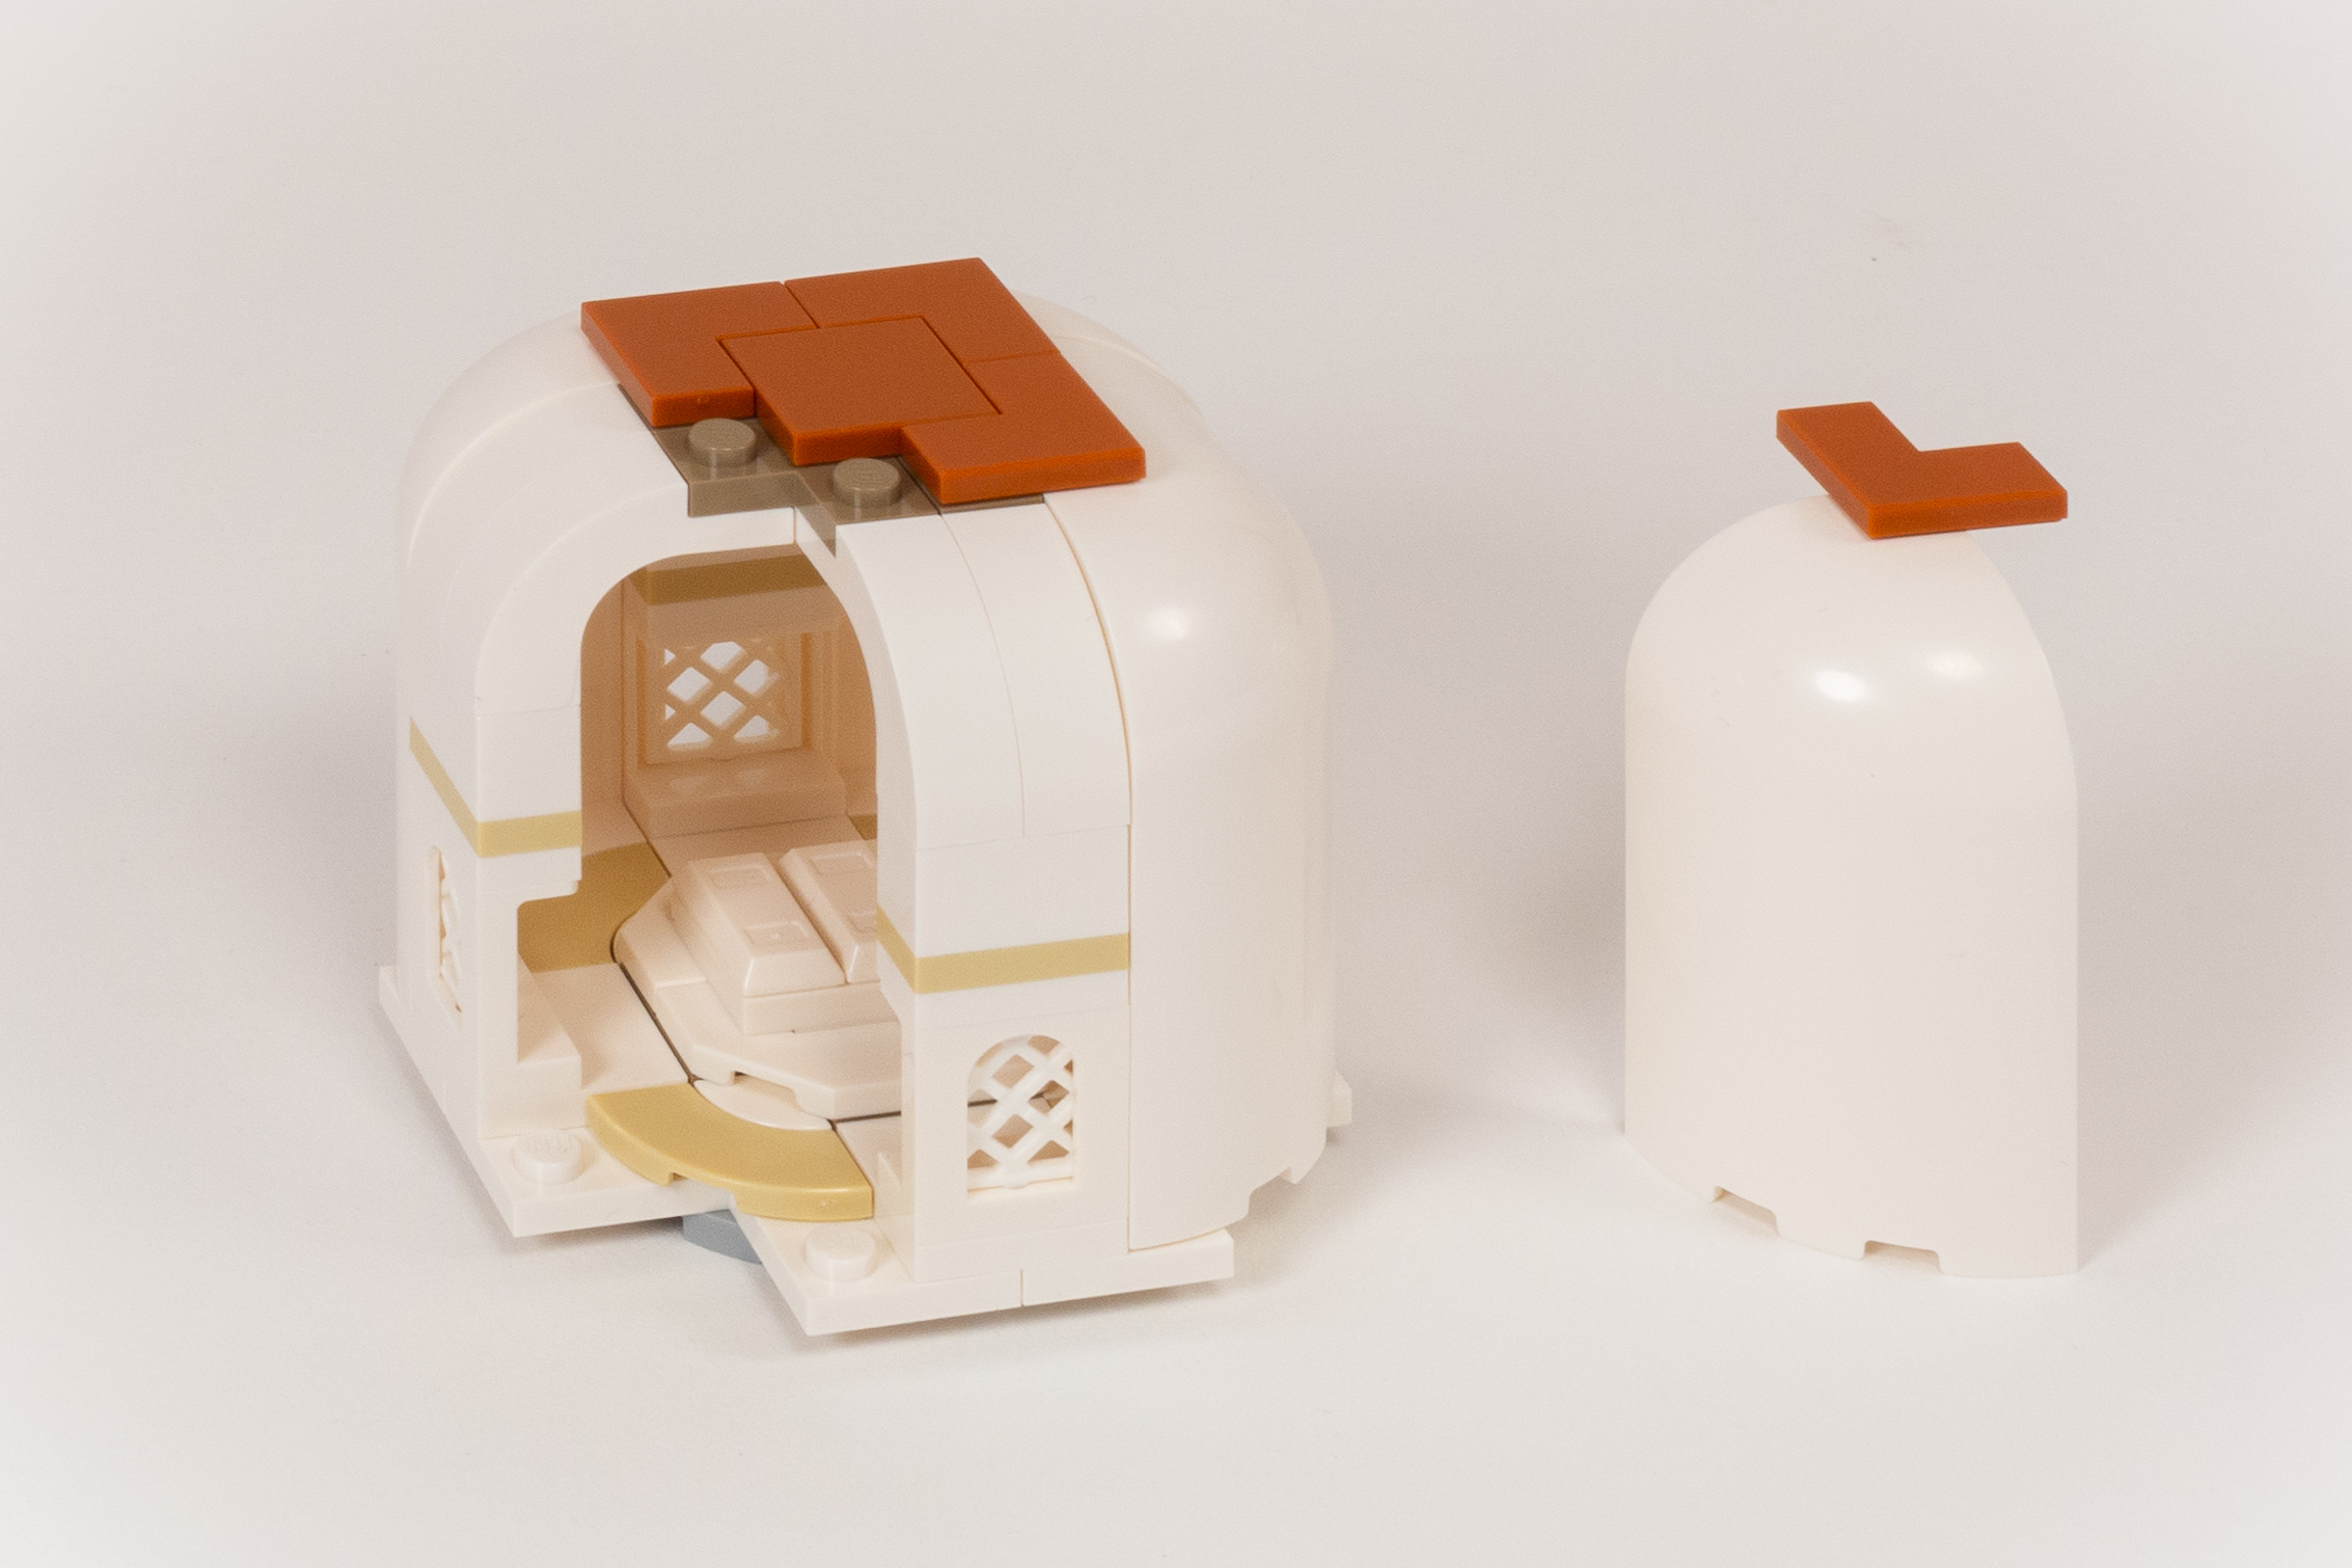
The large central dome is the focus of bag 9. It is built using some interesting techniques, which become apparent when you look closer at photos of the dome. The upper part looks like a sphere with a band around the middle, and this is more or less how it is built. The tricky part is that the bottom section has studs facing downward, so a intricate SNOT assembly is hidden in the collar section to reverse the stud direction.
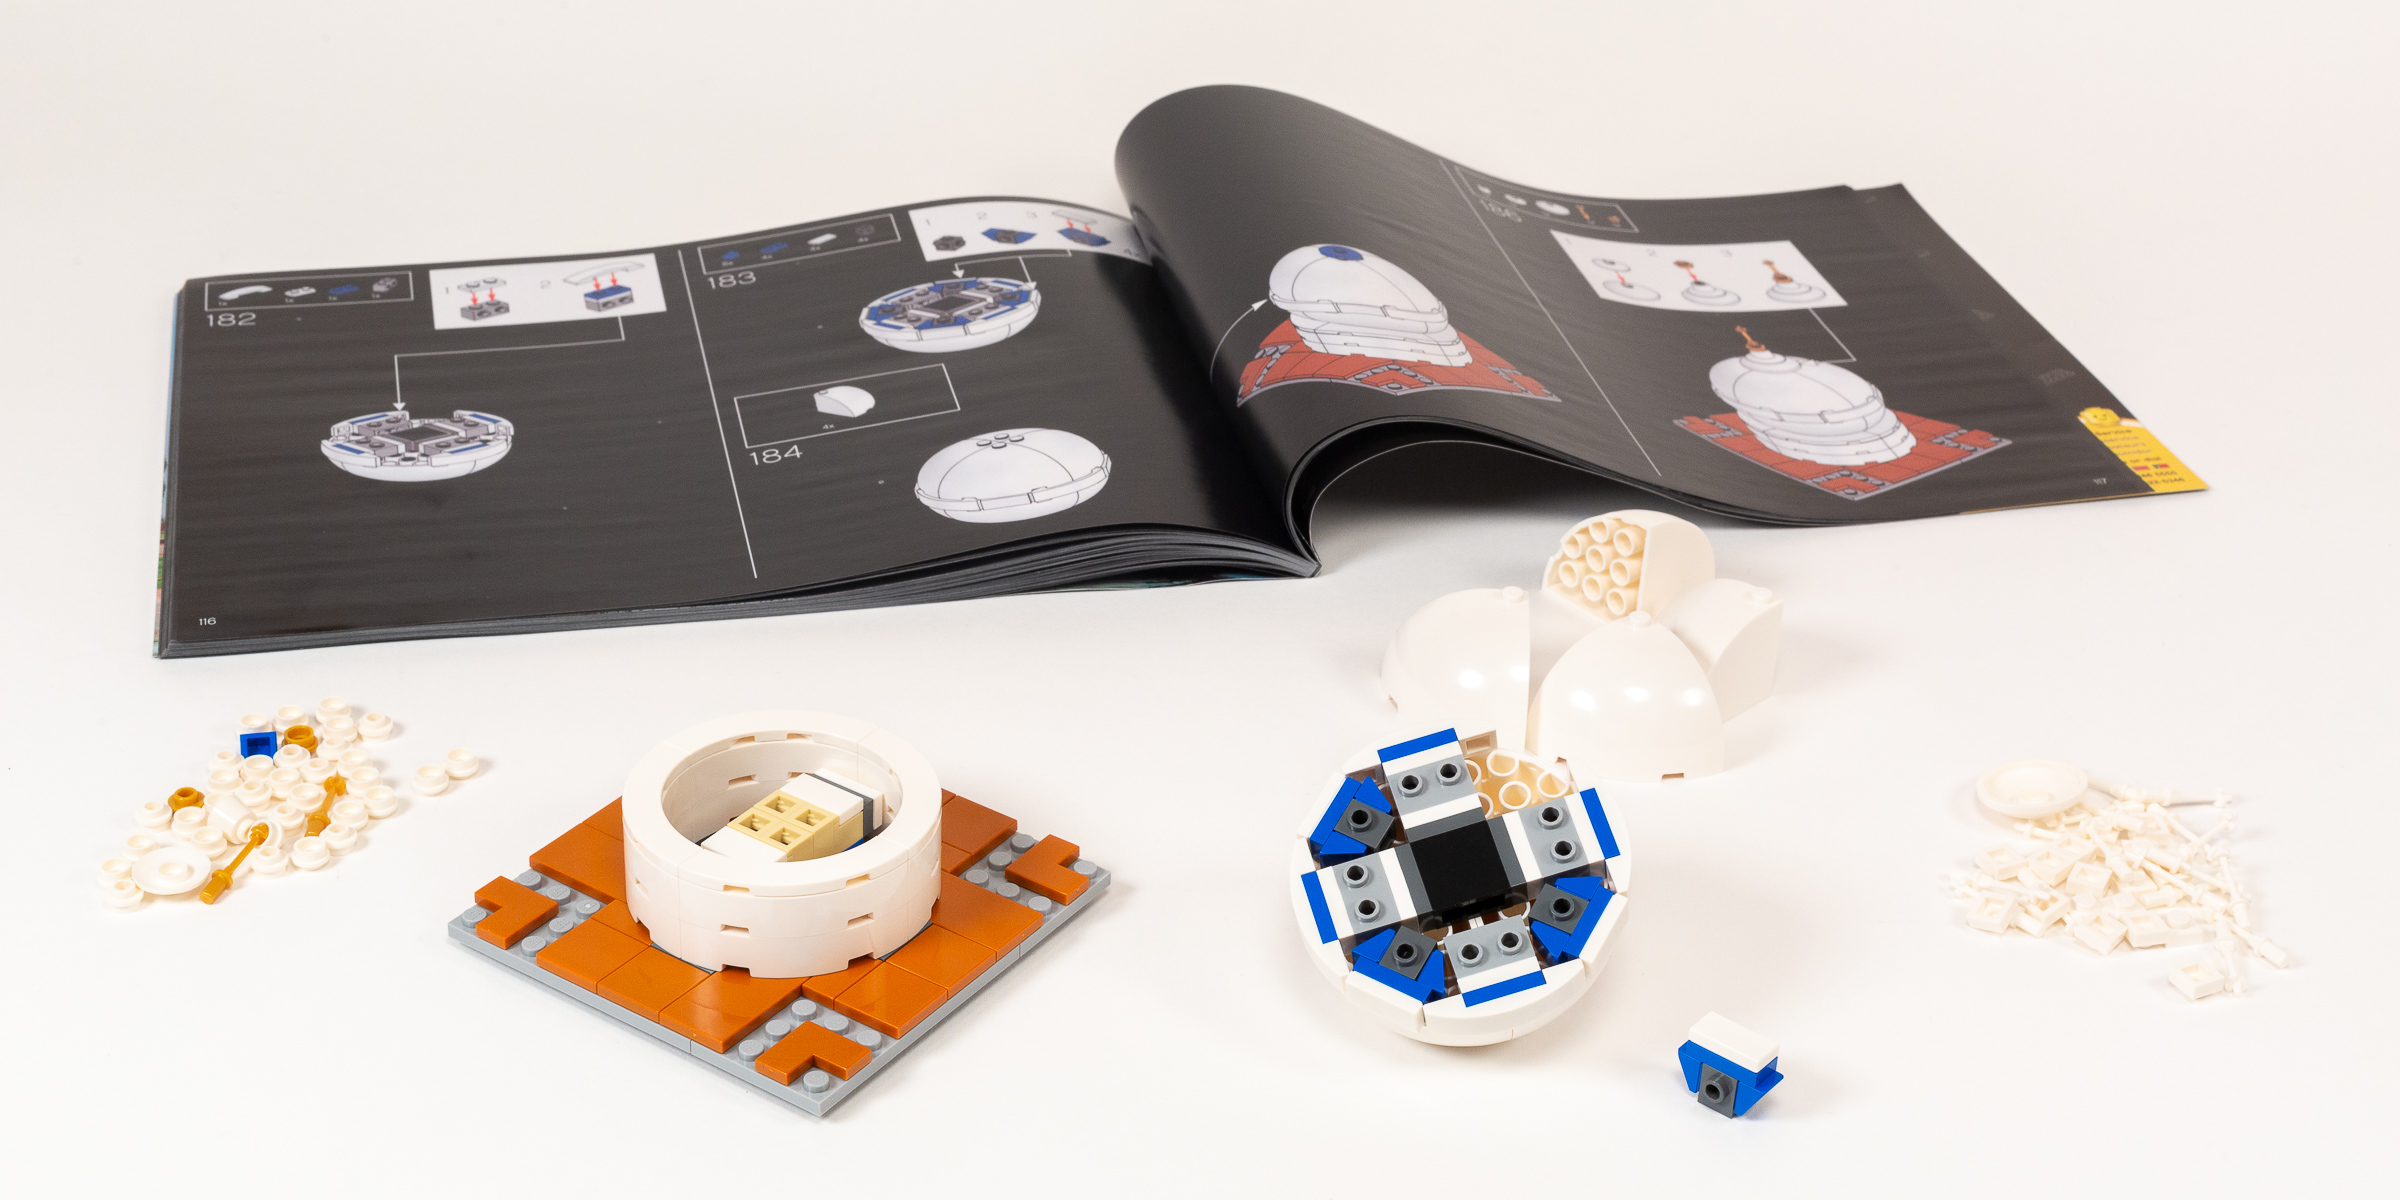
SNOT work to build the spherical part of the dome.
Afterwards, we add 16 spires along the edges of the four exterior facades. They utilize inverted Ski Poles (part 90540) to achieve a decorative top.
Progress at the end of stage 9.
The tenth and final bag adds four smaller domes and four minarets. The smaller domes are positioned on all four corners of the structure and feature a highly decorated styling which is built using eight Droid Arms (part 30377), creating curved columns.
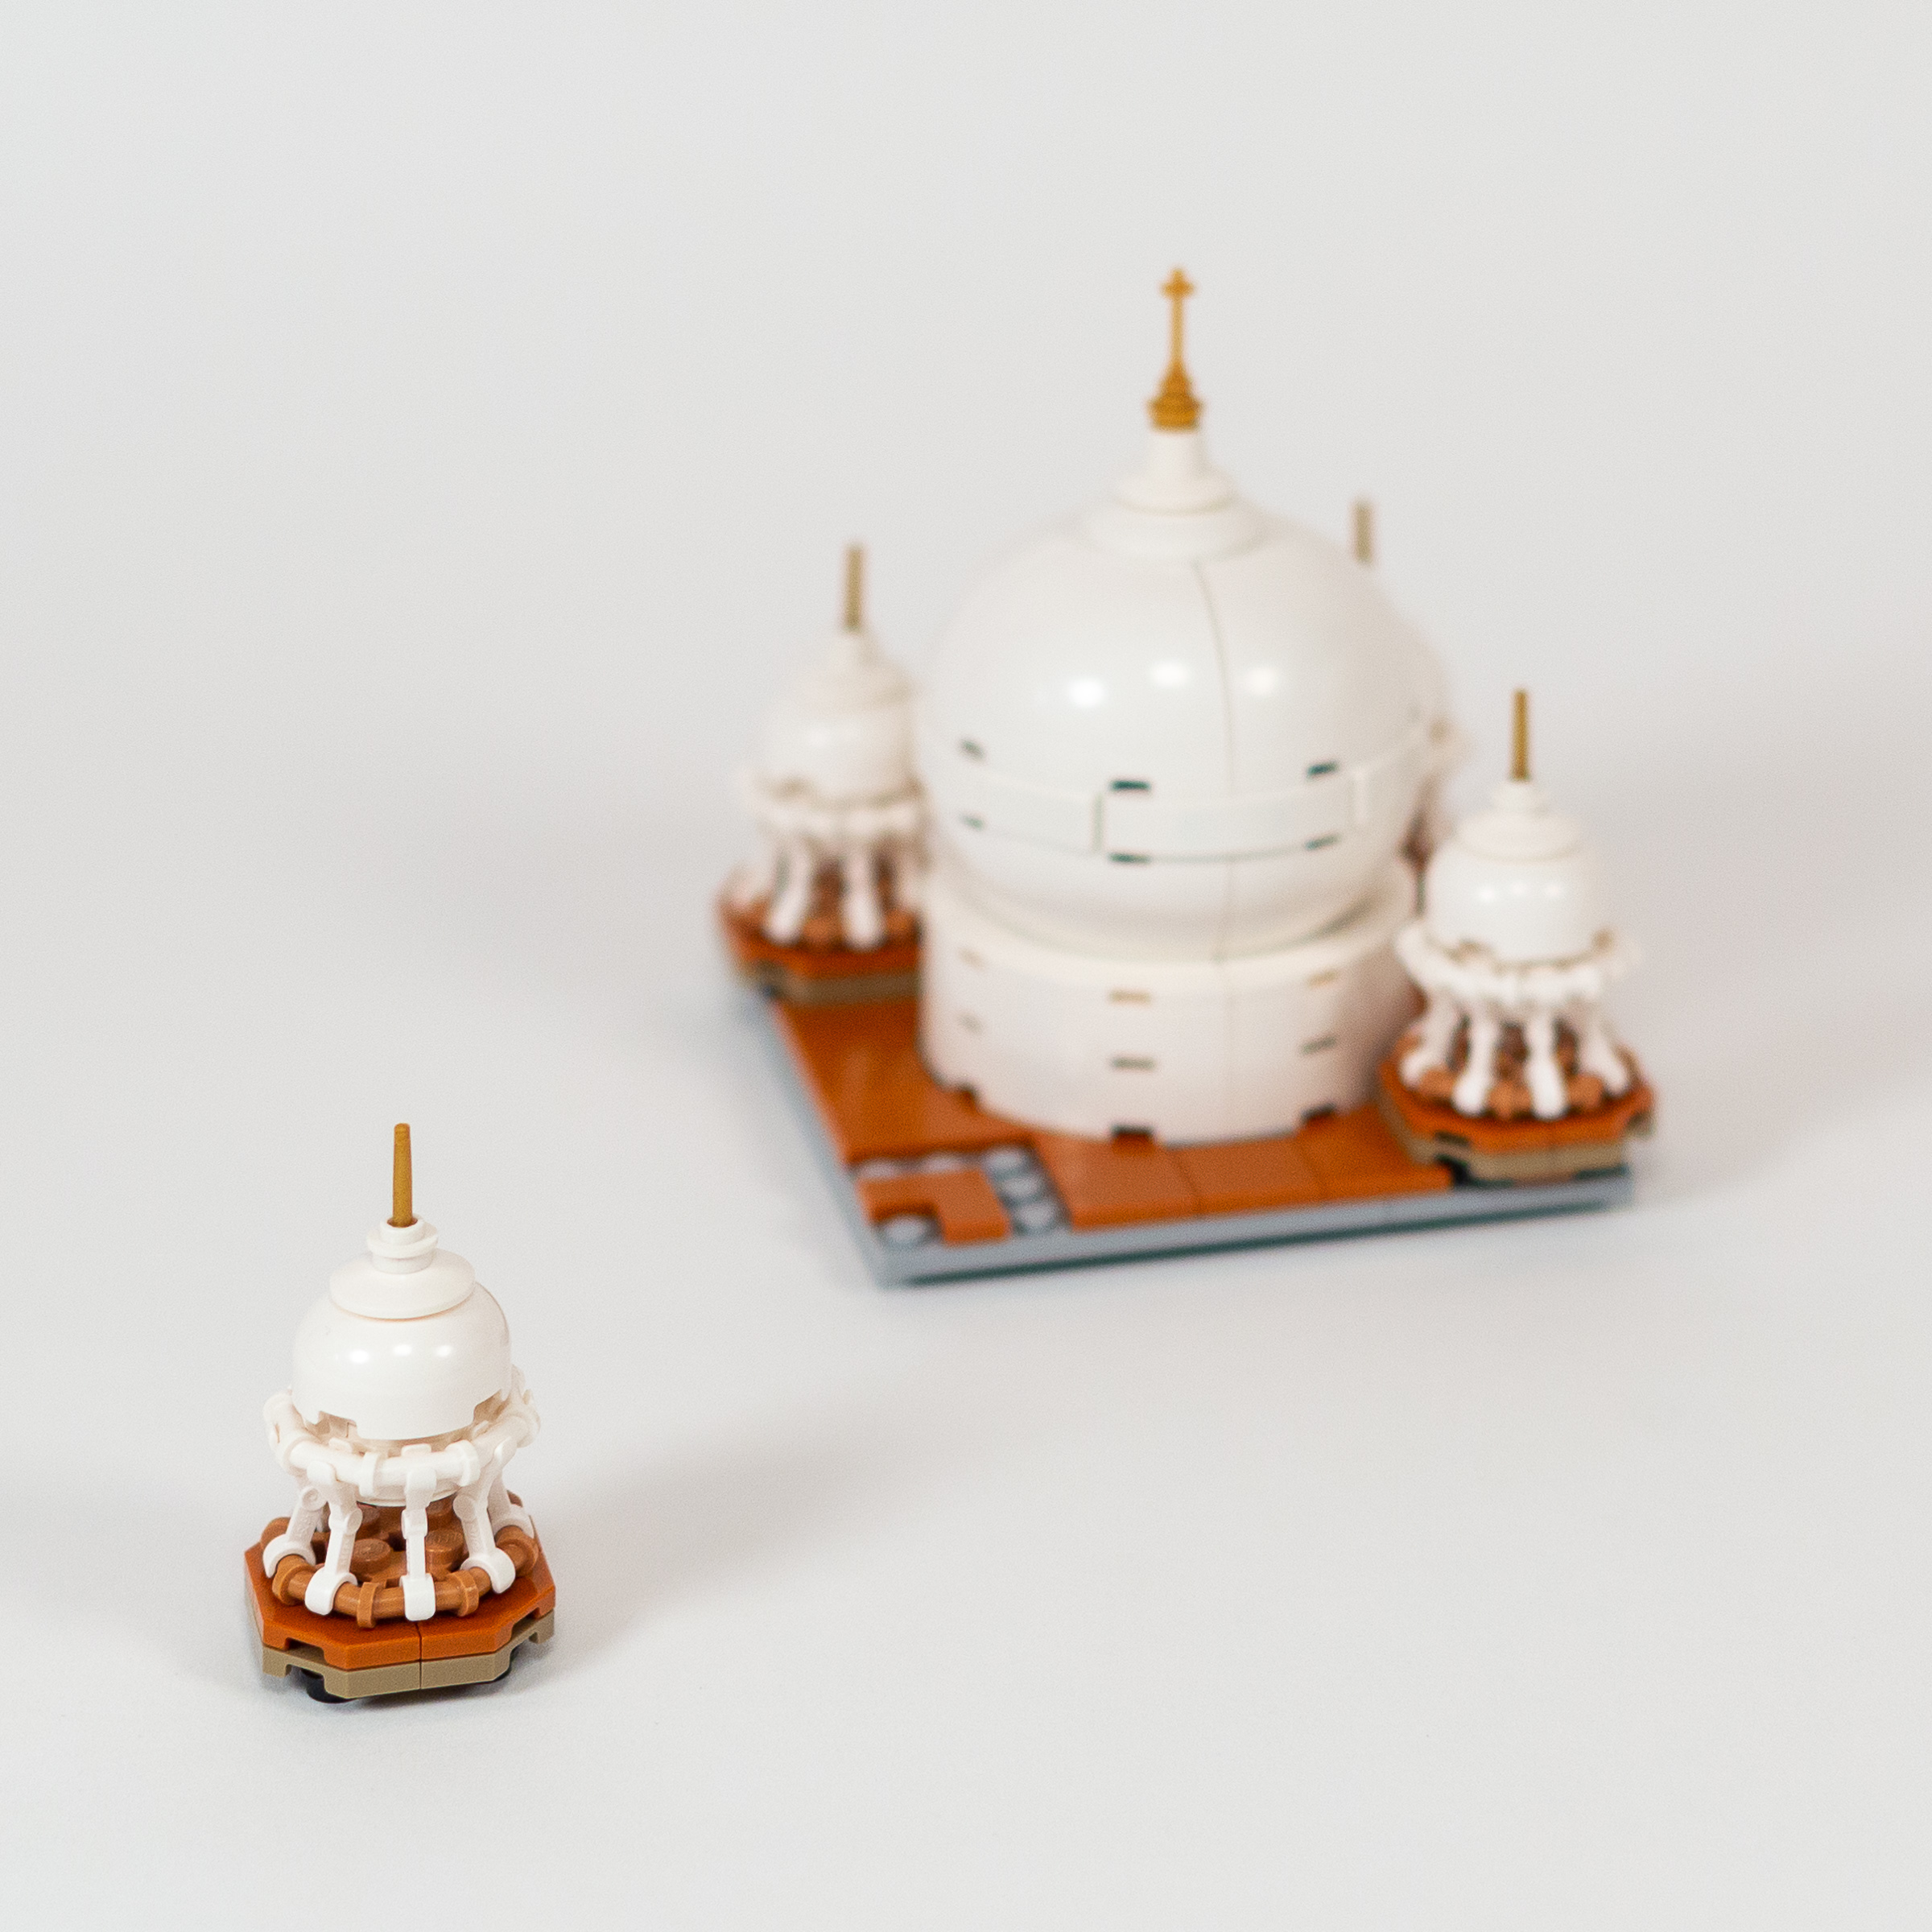
Droid Arms are expertly used to create highly decorated domes on each of the four corners.
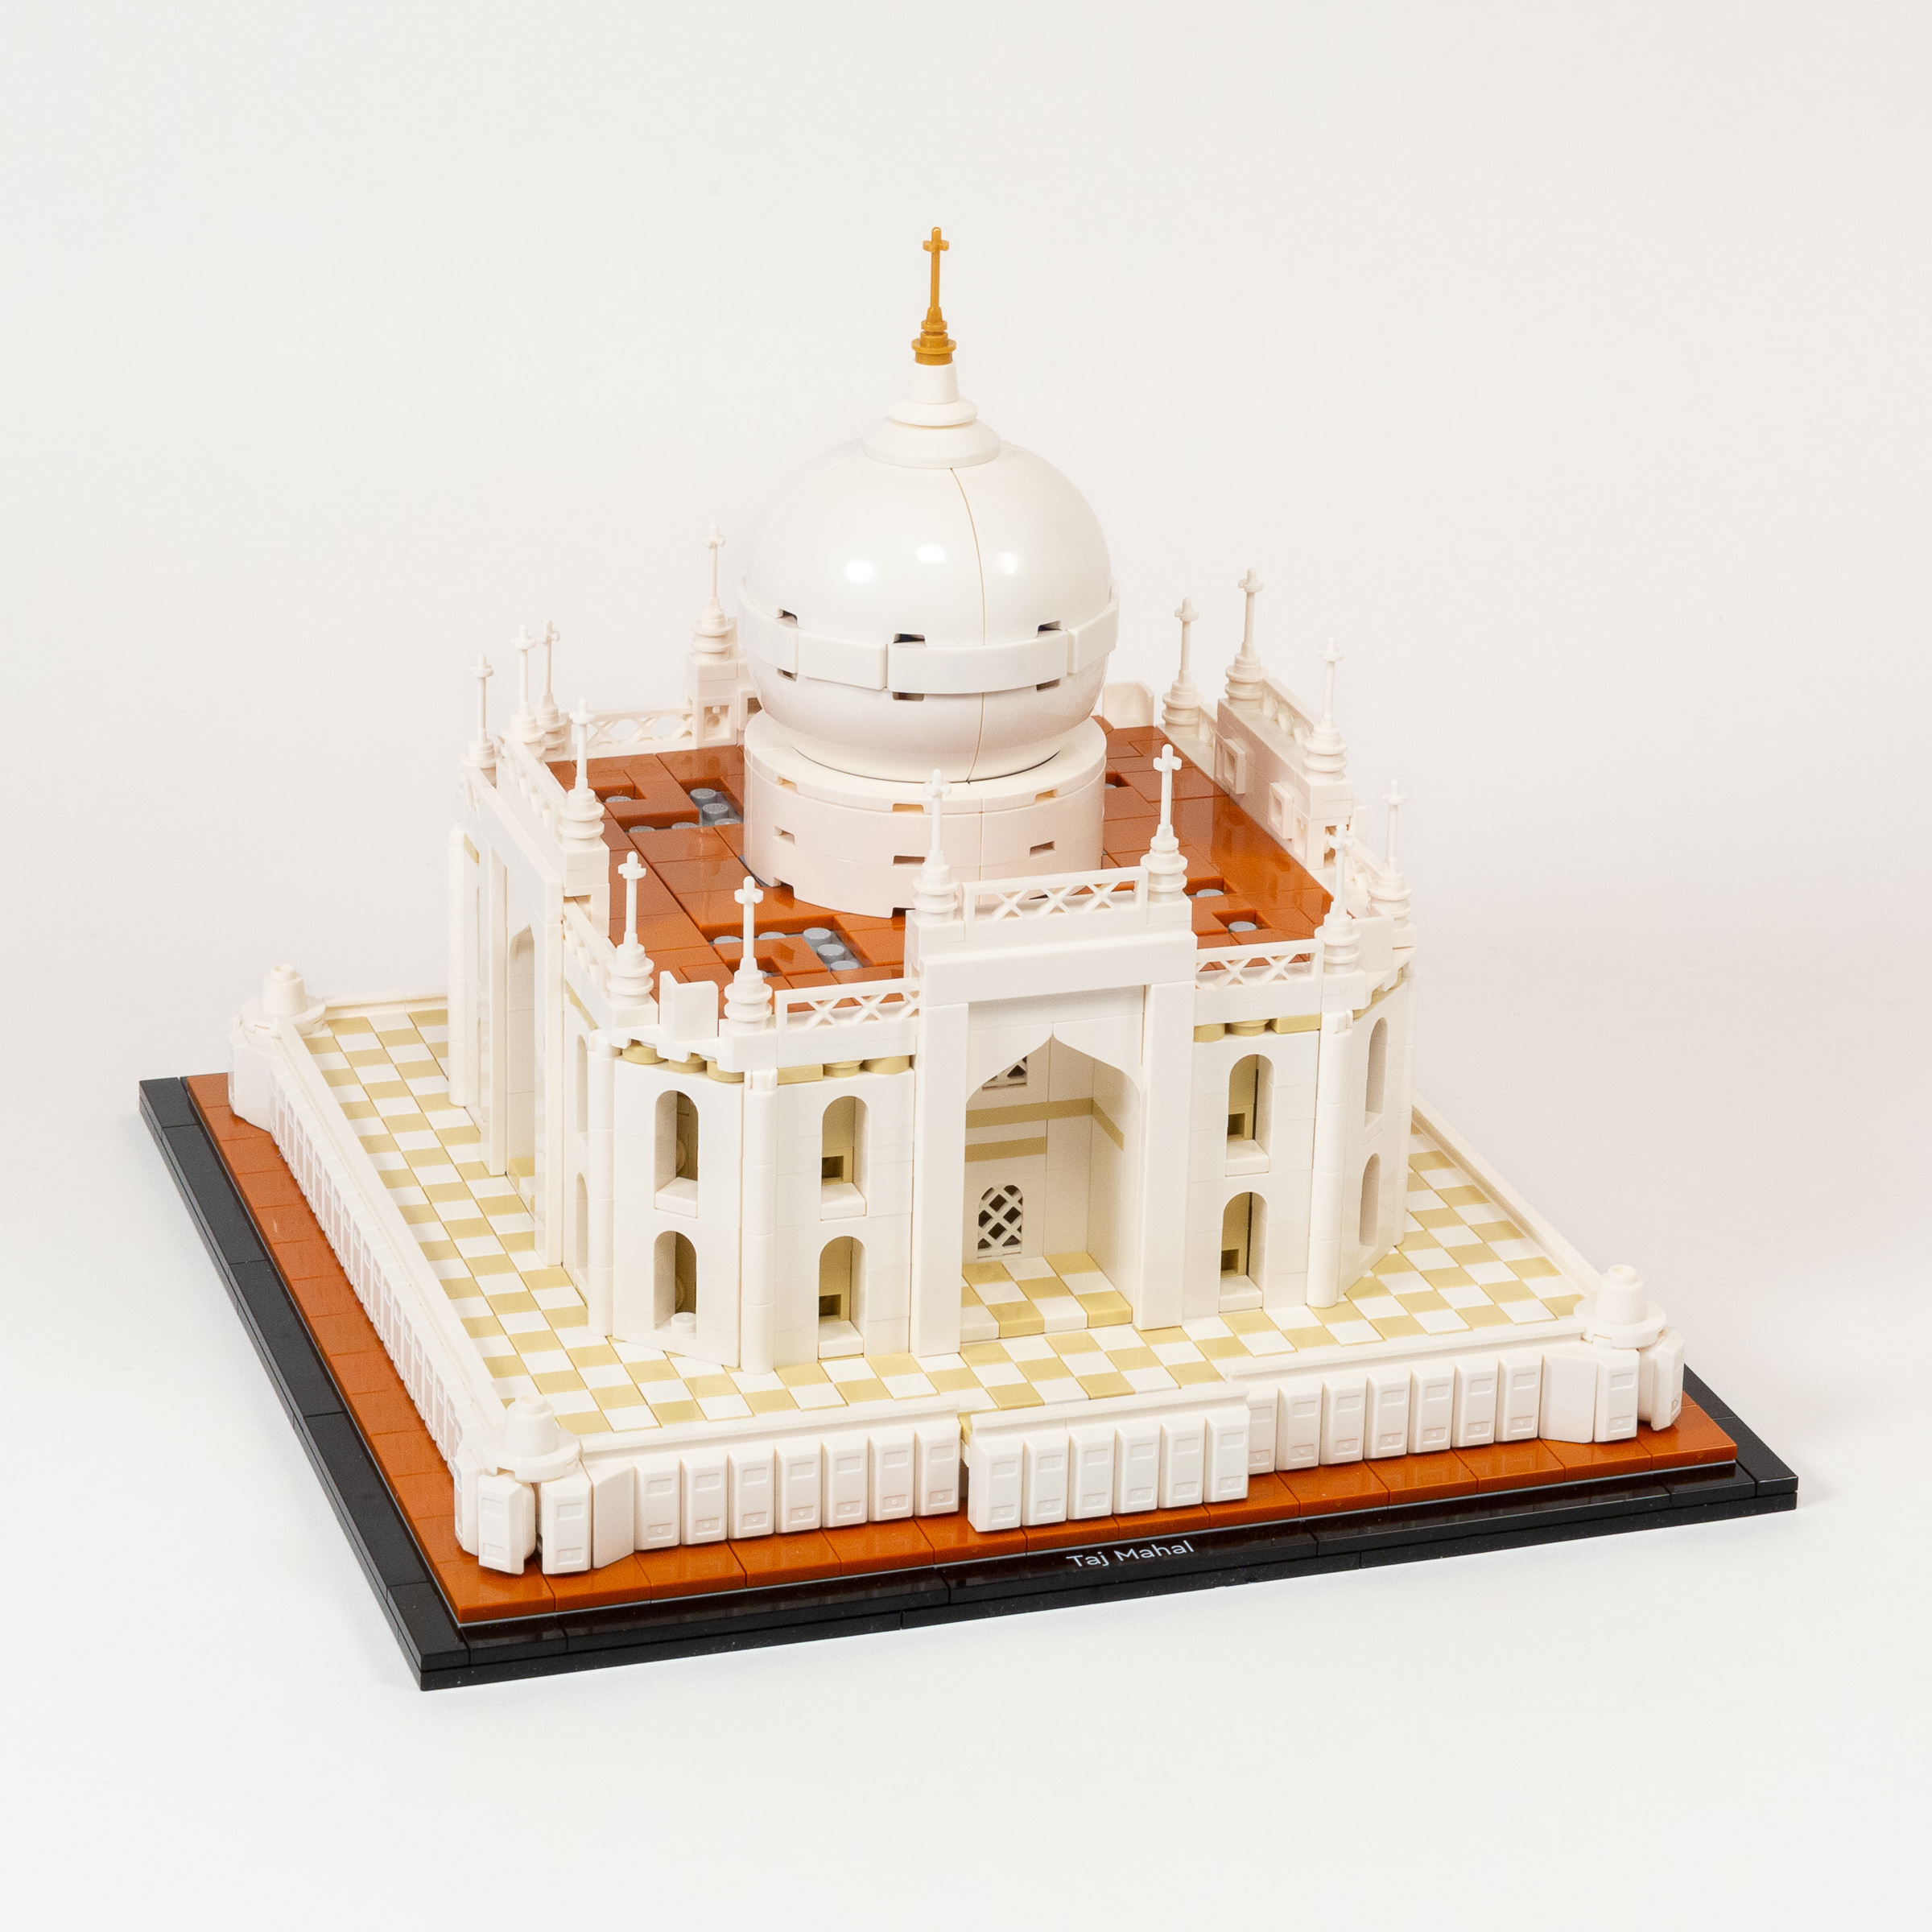
Finally, we build four slender minarets that are positioned on the outer corners of the structure. They use Technic components including tiny 12-tooth beveled gear (part 6589) to achieve an ornamental styling. The finished model is highly symmetrical and ornately detailed – accurately matching the real building it is based on.

Completed model.
Build time: 34 minutes. (Bag 9: 15 minutes, Bag 10: 19 minutes.)
Conclusion
Since #21056 Taj Mahal has been out for more than a year, I will forego my usual analysis of new and interesting parts. (Besides, LEGO Architecture sets rarely feature new elements.) Instead, I will focus on the building experience and completed model.
There were aspects of the building experience which I really liked, especially in the second half of the build process which included most of the interesting building techniques and clever parts usage. Unfortunately, the first half of the build was a bit boring and tedious, mostly due to the massive number of 1×1 Tiles that I feel compelled to ensure are lined up nicely. (Especially since I will notice every mistake when editing the photos for this article).
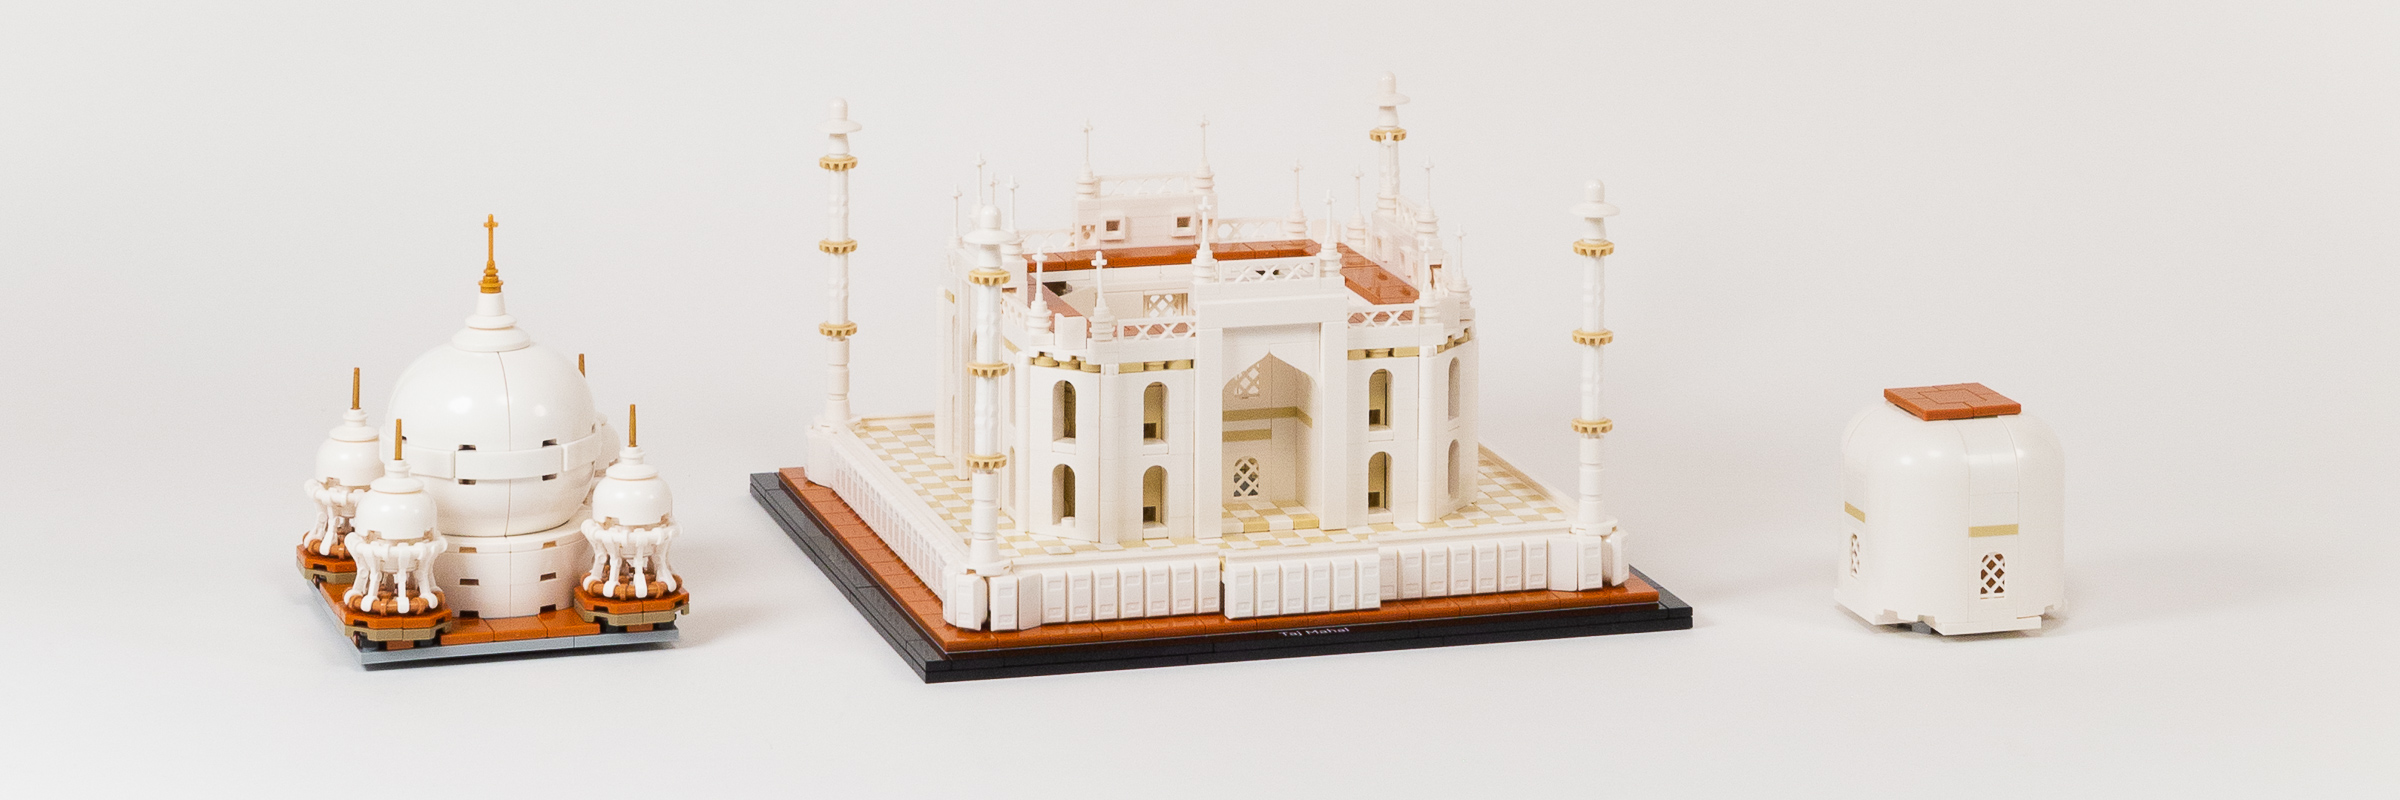
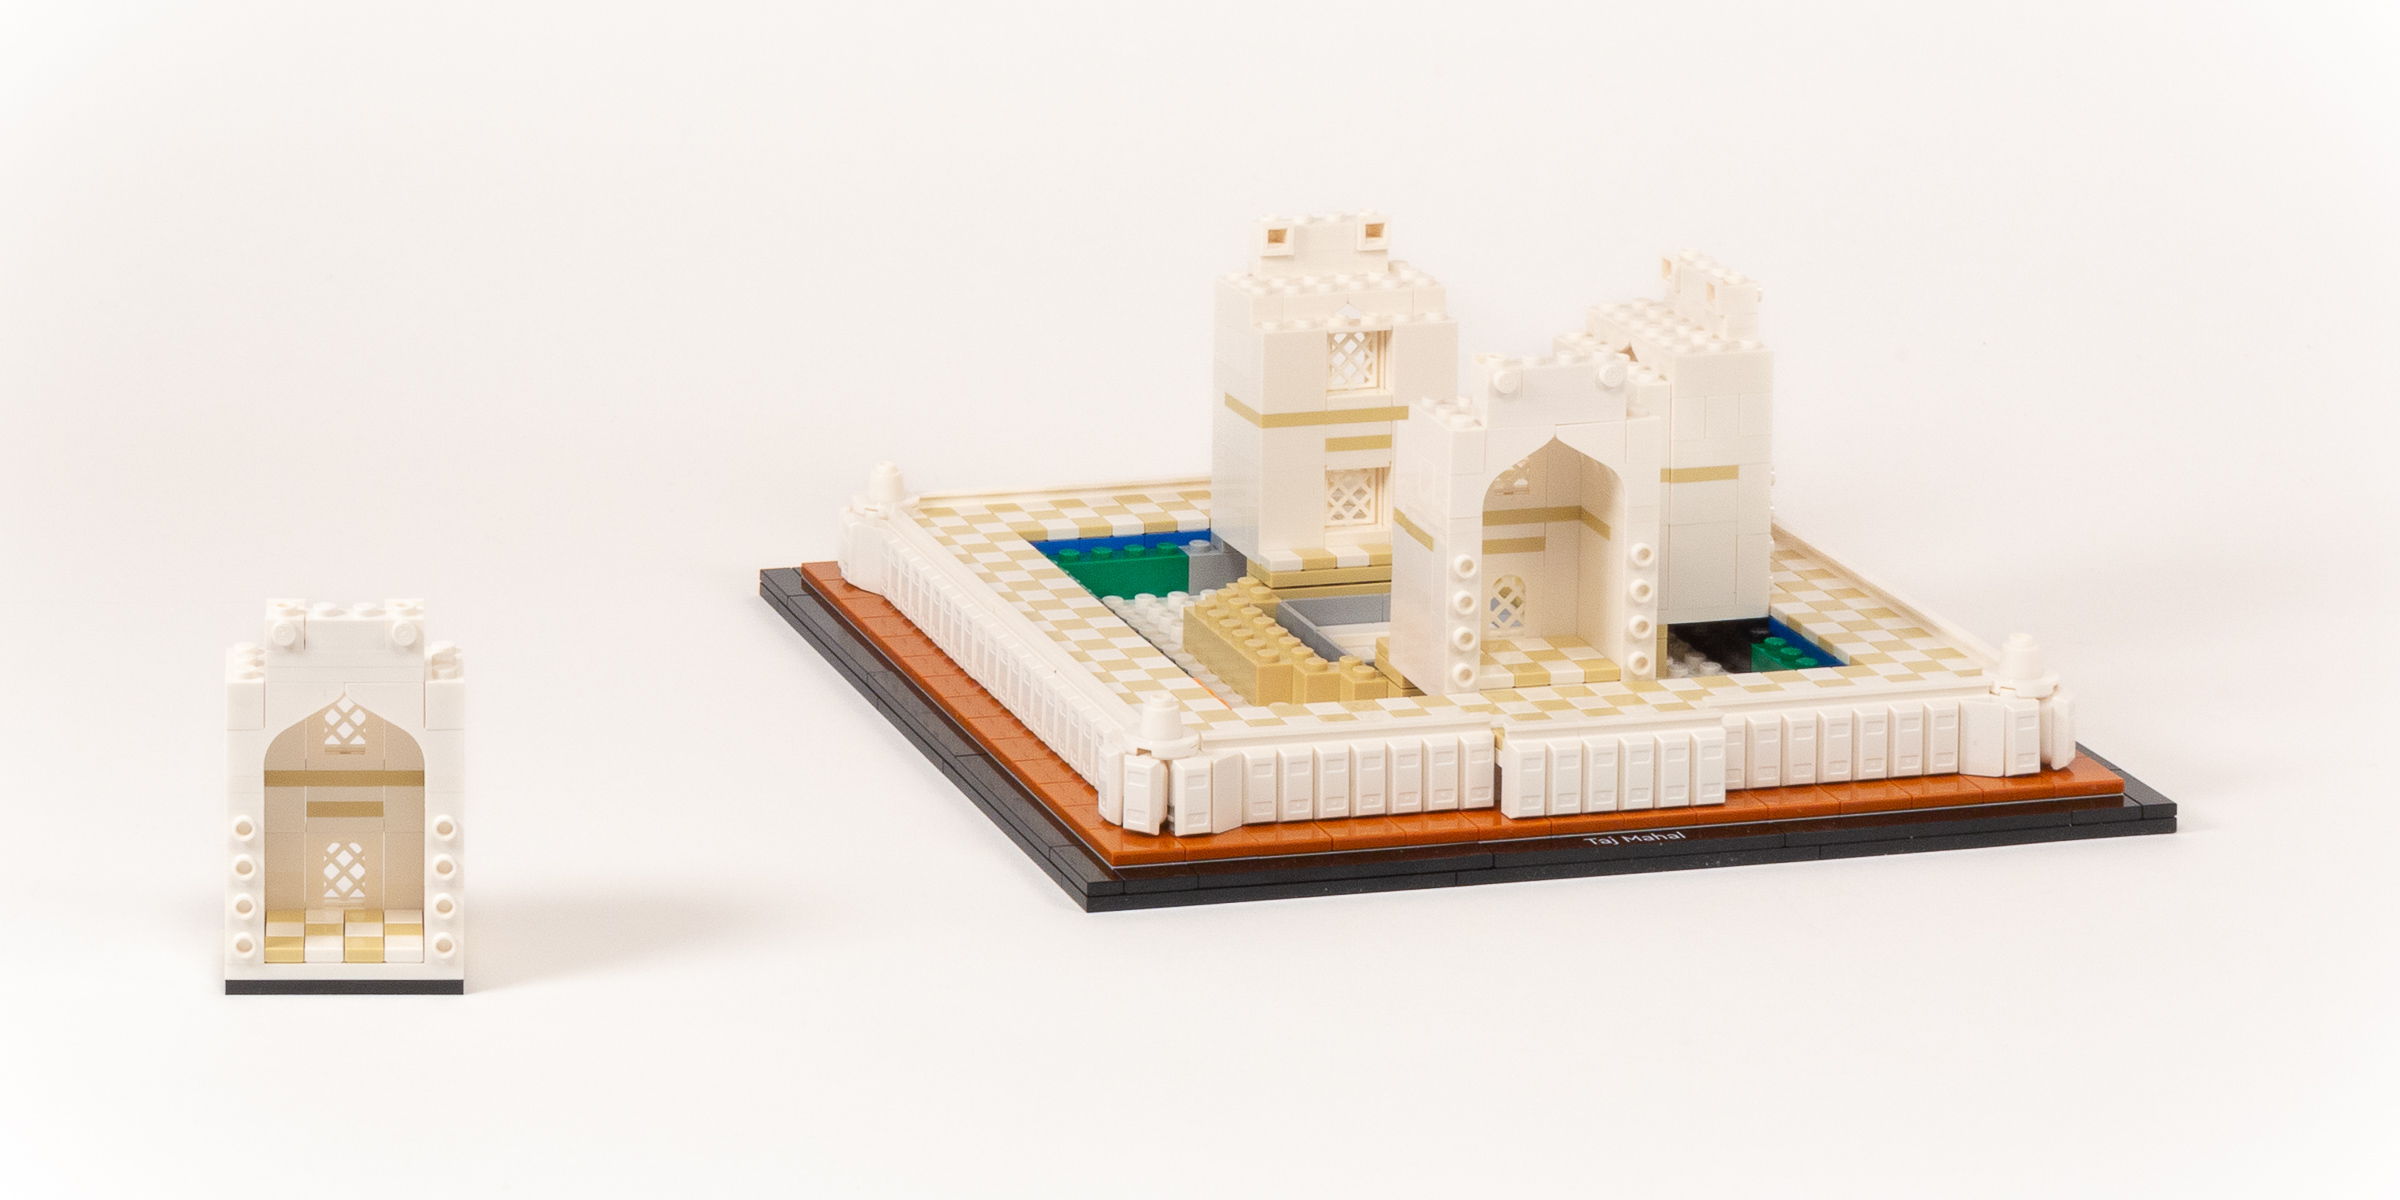
The roof and tomb chamber can be removed to see aspects of the interior.
The upside of this is that there are a lot of builders who really enjoy the more meditative aspects of the hobby, who might not mind aligning pieces perfectly. This also results in a longer build time (3 hours and 17 minutes) than many other sets, — which you could consider a greater “value” in terms of hours of building per dollar.
Lastly, we need to reflect on the finished model, which is stunning! The level of detail achieved in this set is rather impressive, especially compared with the earlier set based on the Taj Mahal which is more than twice as large (in each dimension) while managing to include less detail.
#21056 Taj Mahal — The finished model looks fantastic.
Because of the exceptional level of detail and good value, I’m able to accept that the mind-numbing work required to line up those 1×1 Tiles was worth it. That’s why this set earns our Recommended (4/5 Star) rating!