
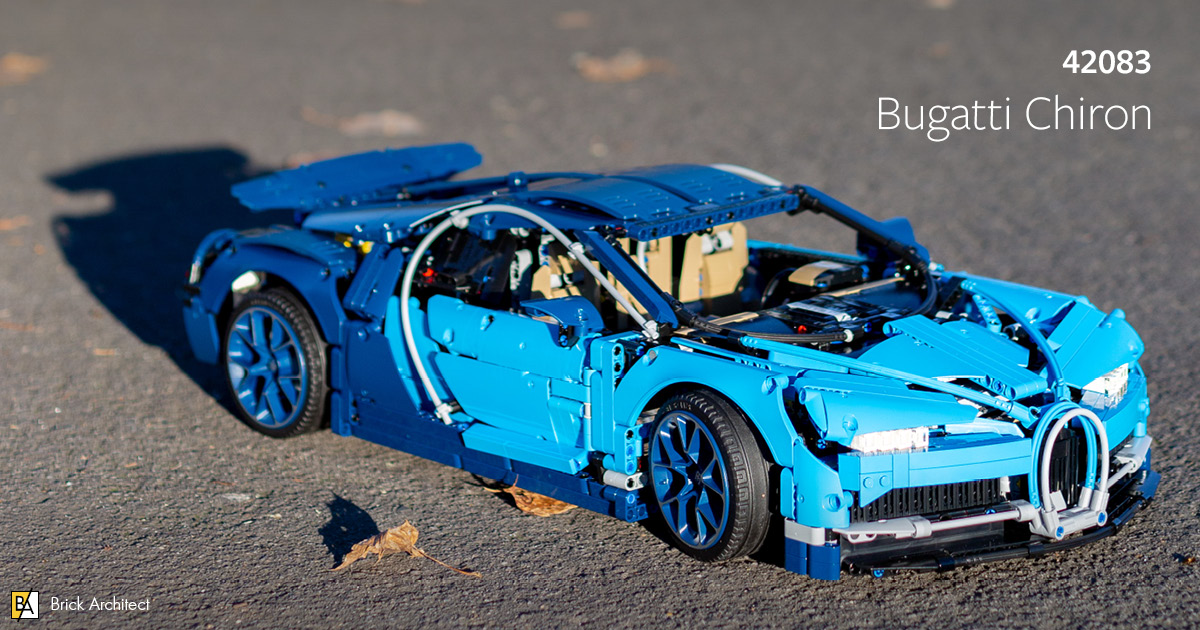
Review: #42083 Bugatti Chiron
The Bugatti Chiron presents itself as the marriage of performance and luxury—can LEGO make a set which feels premium enough to live up to this high standard?
Let’s get right to it—This is a premium LEGO Technic set with a premium pricetag. In this review we will look at some of the high-end features of this set, including the packaging and associated podcast content. We will take a careful look at the build experience, the play features and overall value.
About the set
I’m pleased to report that unlike many licensed LEGO products, #42083 Bugatti Chiron is competitively priced at $349.99 (369.99€ / £329.99) for 3599 pieces. That’s almost exactly $0.10 per part, which is better than the #75192 Millennium Falcon at almost $0.11 per part, but much worse than #71043 Hogwarts Castle at around $0.07 per part. Pretty good for a set which includes premium packaging, a number of new parts, existing parts in rare colors, and large Technic components.
Unboxing
It’s rare that the packaging for a LEGO set is so carefully designed that I would want to talk about the unboxing experience. This is a significant step beyond the above average packaging for the LEGO Architecture series, and some of the LEGO Ideas sets.
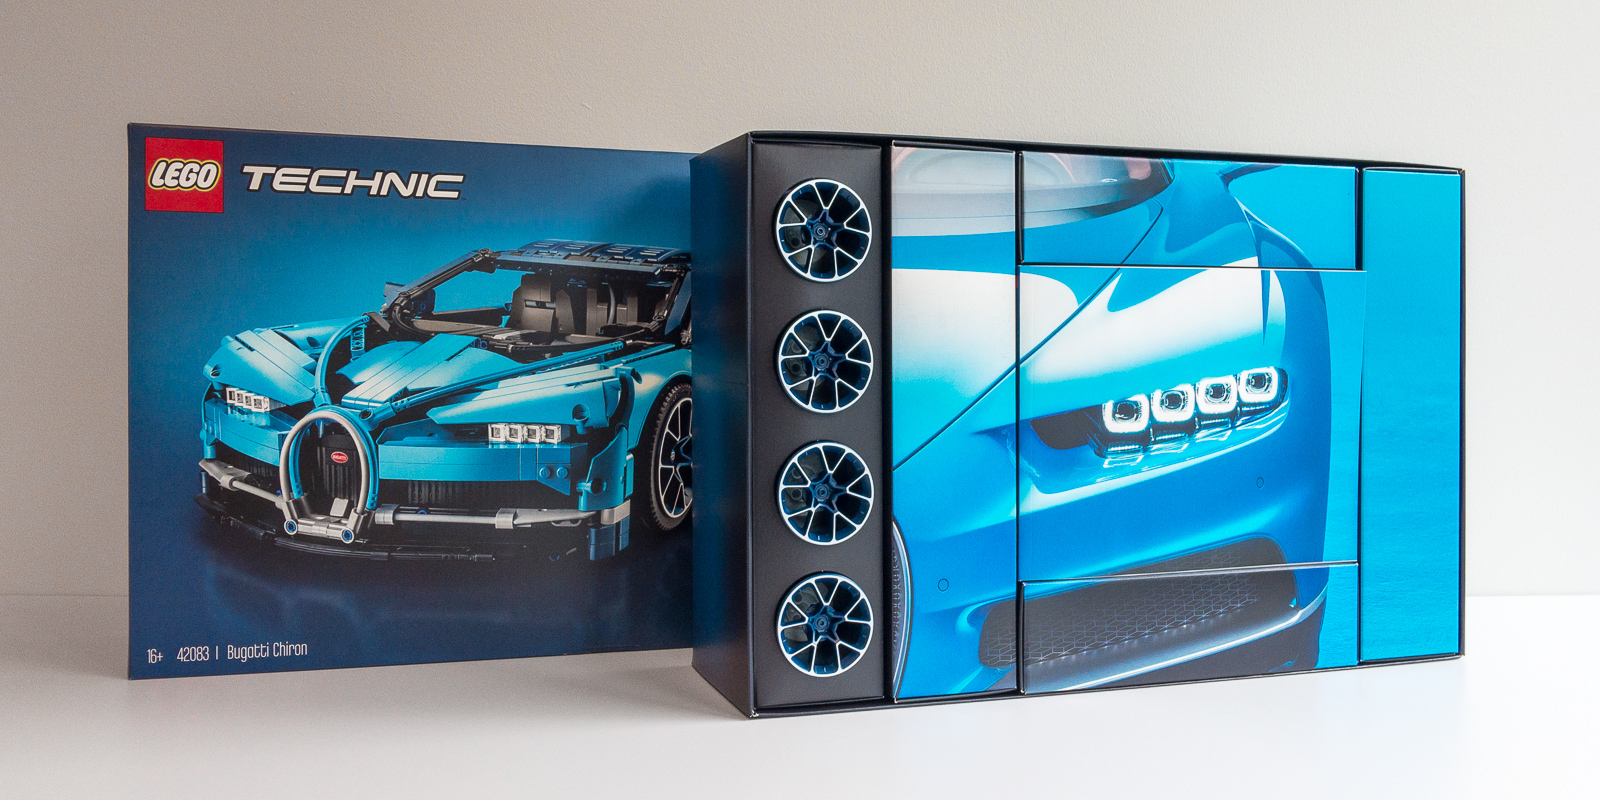
#42083 Bugatti Chiron comes in a beautiful box with a well organized interior comprised of 6 smaller boxes.
The exterior packaging is beautiful, but so is the box interior. When you open the box, you will see that the four custom LEGO wheels are carefully arranged on the left, with five beautifully printed smaller boxes and two instruction manuals carefully arranged on the right.
Unlike the huge Millennium Falcon set which contains four un-numbered boxes, I am happy to report that the five boxes are numbered, and the numbered bags are sorted appropriately. In total, there are 13numbered bags in the set.
Podcast
This is the first LEGO set to come with it’s own podcast! The newly created LEGO Technic Podcast offers 9 episodes designed to accompany each stage of your building experience. The podcast alternates between interviews with the Bugatti design team about the creation of the real Bugatti Chiron, and the LEGO Design Team who were tasked with re-creating it in LEGO.
At about 30 minute each, this is a total of 4 hours 49minutes of audio content! I’ve included highlights from the podcast alongside the build experience below.
Build Experience
Box 1
In Bag 1 we jump right in, quickly resulting in a sturdy frame upon which the car will be assembled. I was surprised to see that we get a chance to build the support structure for two of the four wheels this early in the build. We also install the Brake Discs (part 35189), which is a new element for this set.
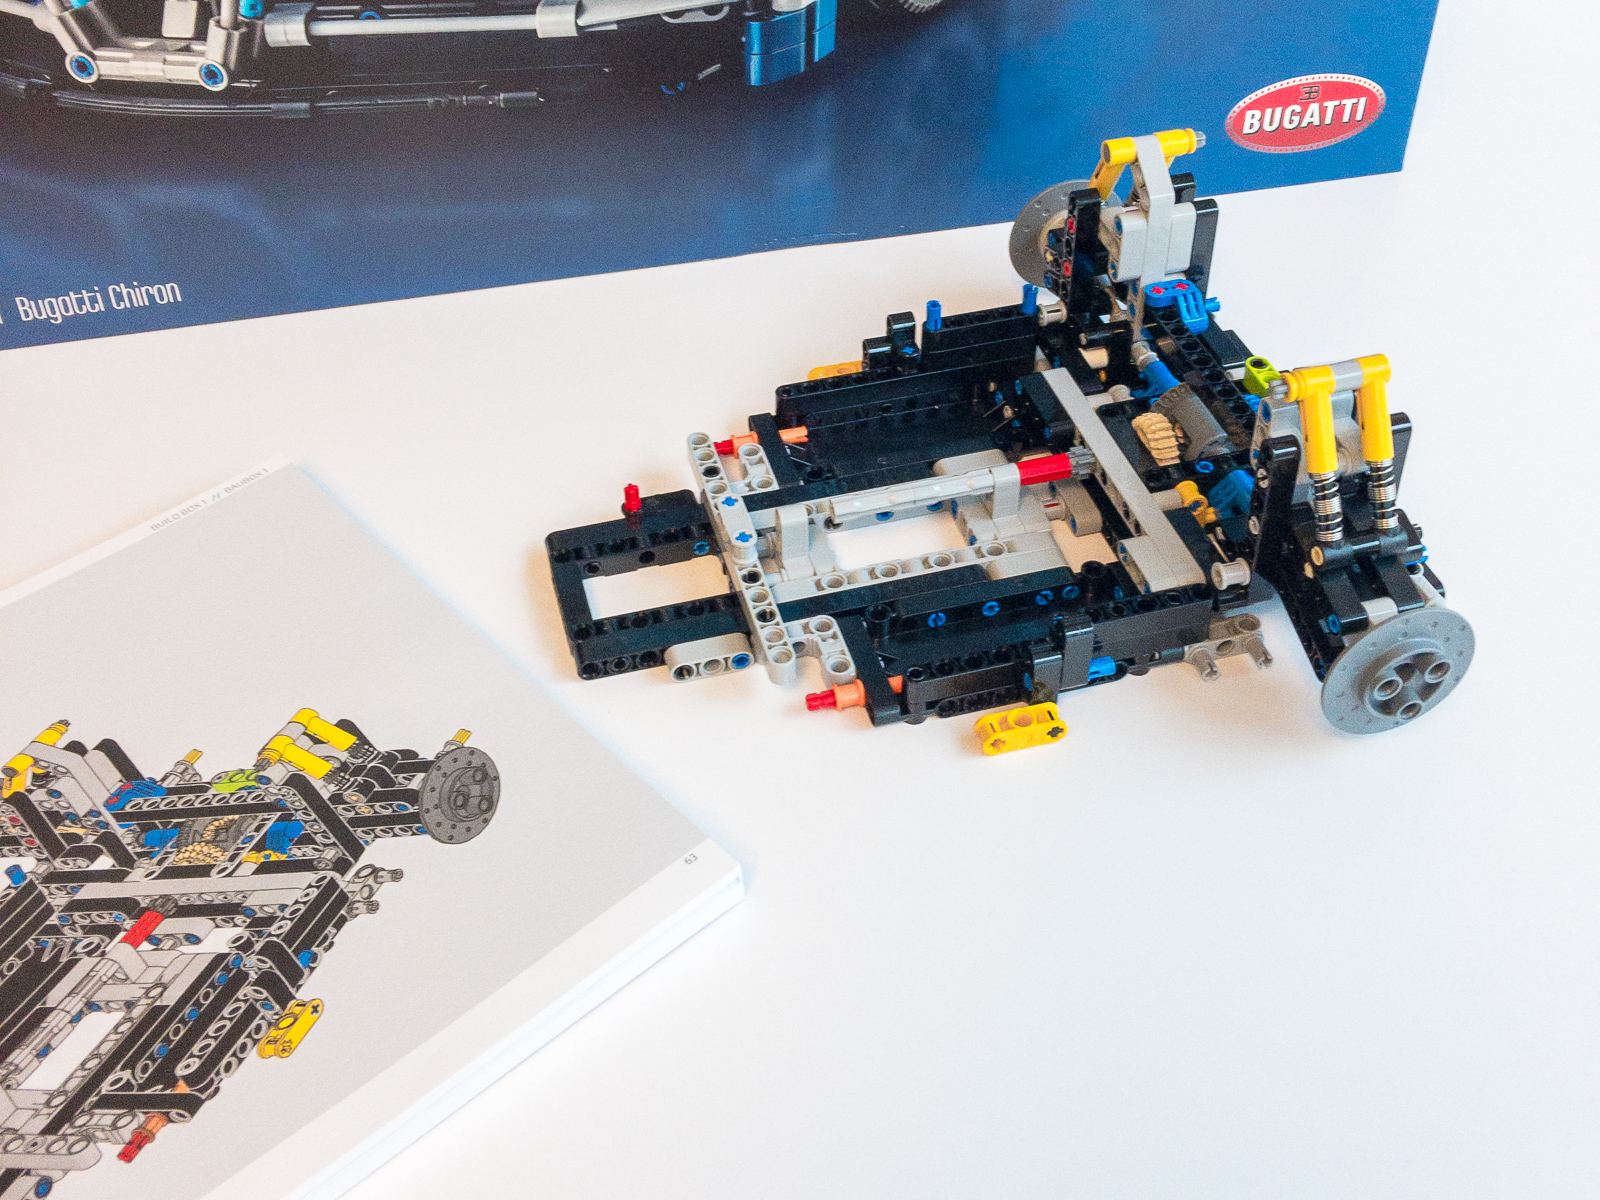
Progress at the end of Bag 1.
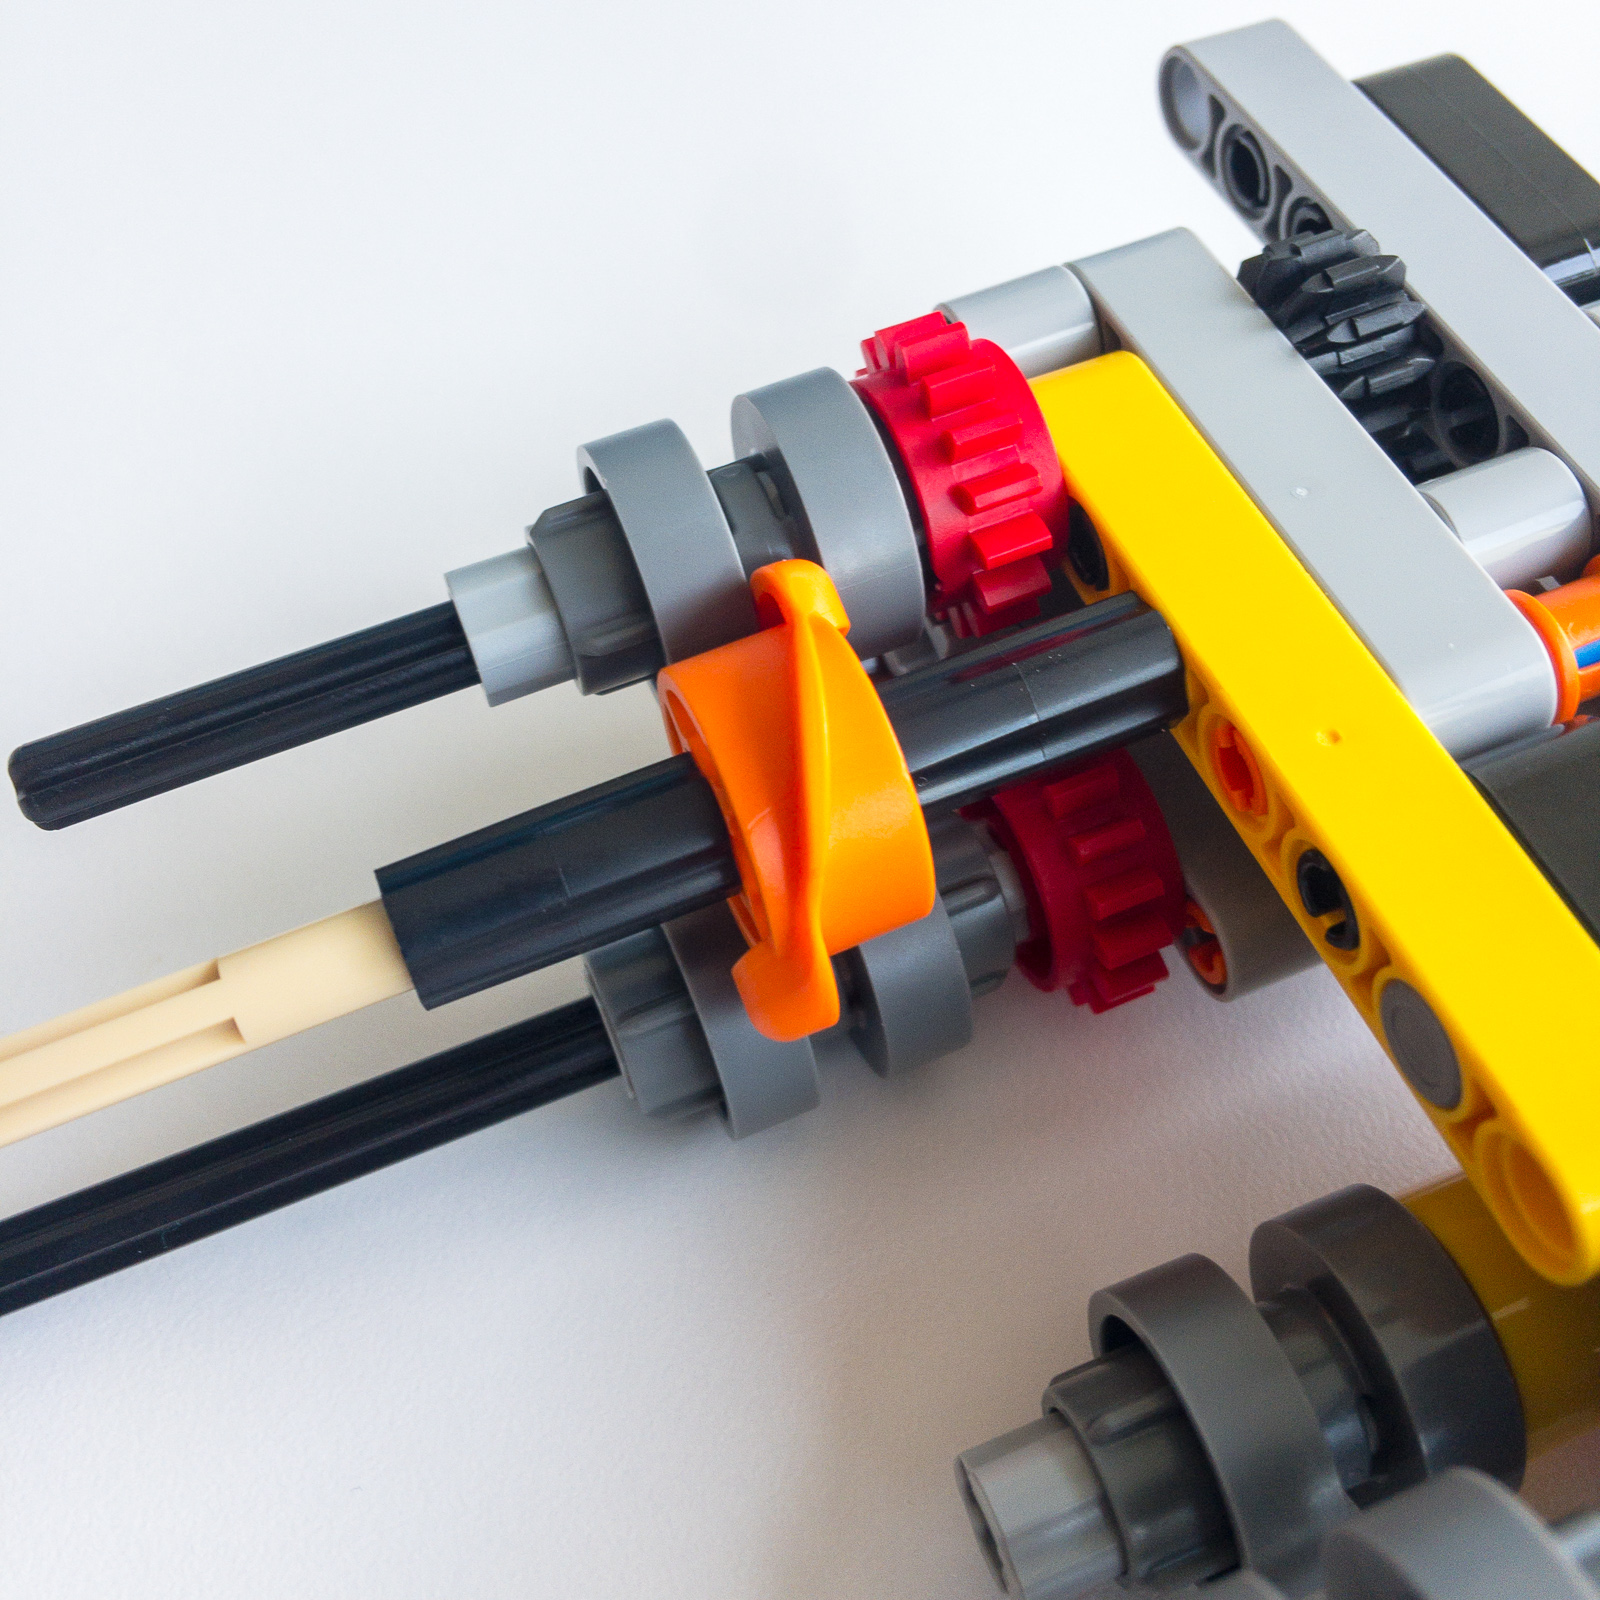
The new shifter part needs to be installed carefully in order to shift both gears at once.
At the end of bag 2, you get to attach the shifting mechanism to the frame you built in bag 1.
Bag 3 is dedicated to the assembly of the massive W16 engine, featuring alternating pistons which “fire” when the vehicle is in motion. As is the case with many other large technic sets, the engine block mimics the function of the real thing, but the completed set is not motorized.
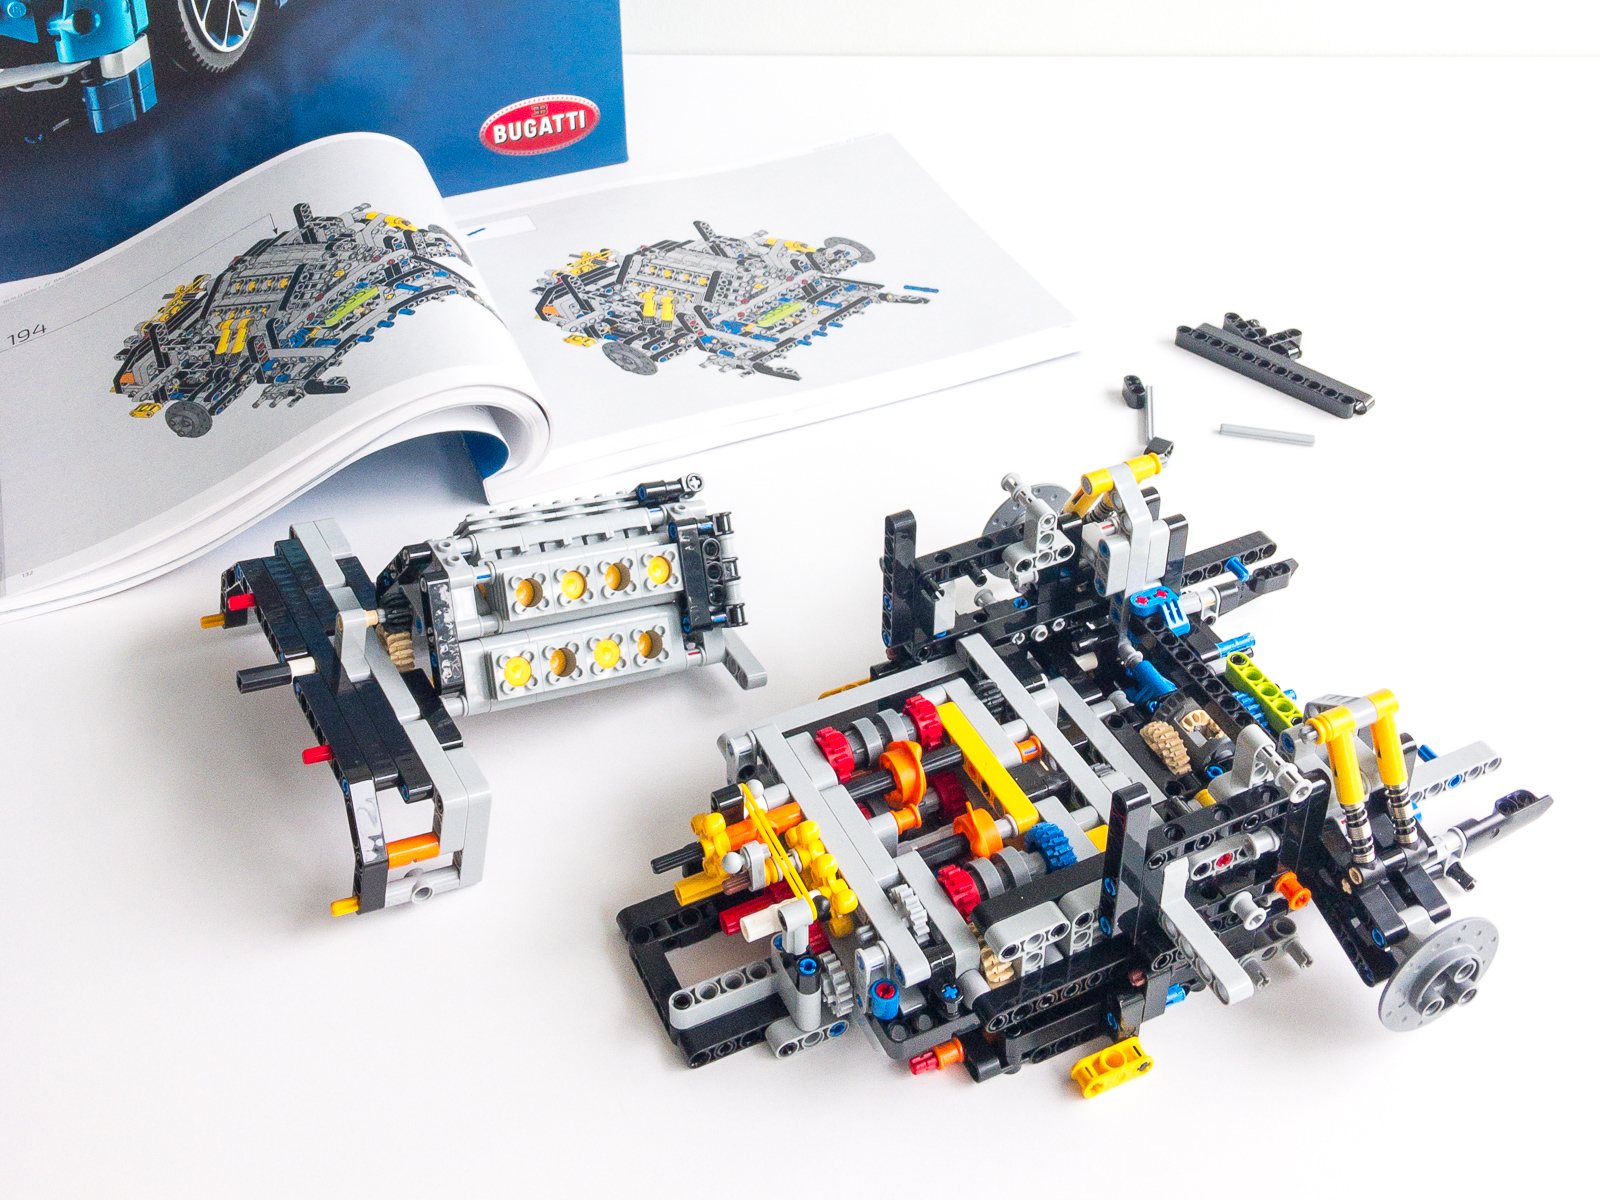
Complete W16 engine block.
With so many little parts, care is required on this step to ensure that all of the pistons are attached correctly and seated in their respective Technic Engine Cylinders (Part 2850). It’s impressive to see how easily this large engine block assembly slides onto the growing vehicle assembly.
Build Time: Bag 1 and unboxing: about 60 minutes. Bag 2: about 50 minutes. Bag 3: about 40 minutes.
Box 2
In bags 4-6, you build the monocoque, or “front end” of the car. Bag 4 is all about the support structure, the front axle and differential, and the part of the drivetrain which will connect with the rear of the car.
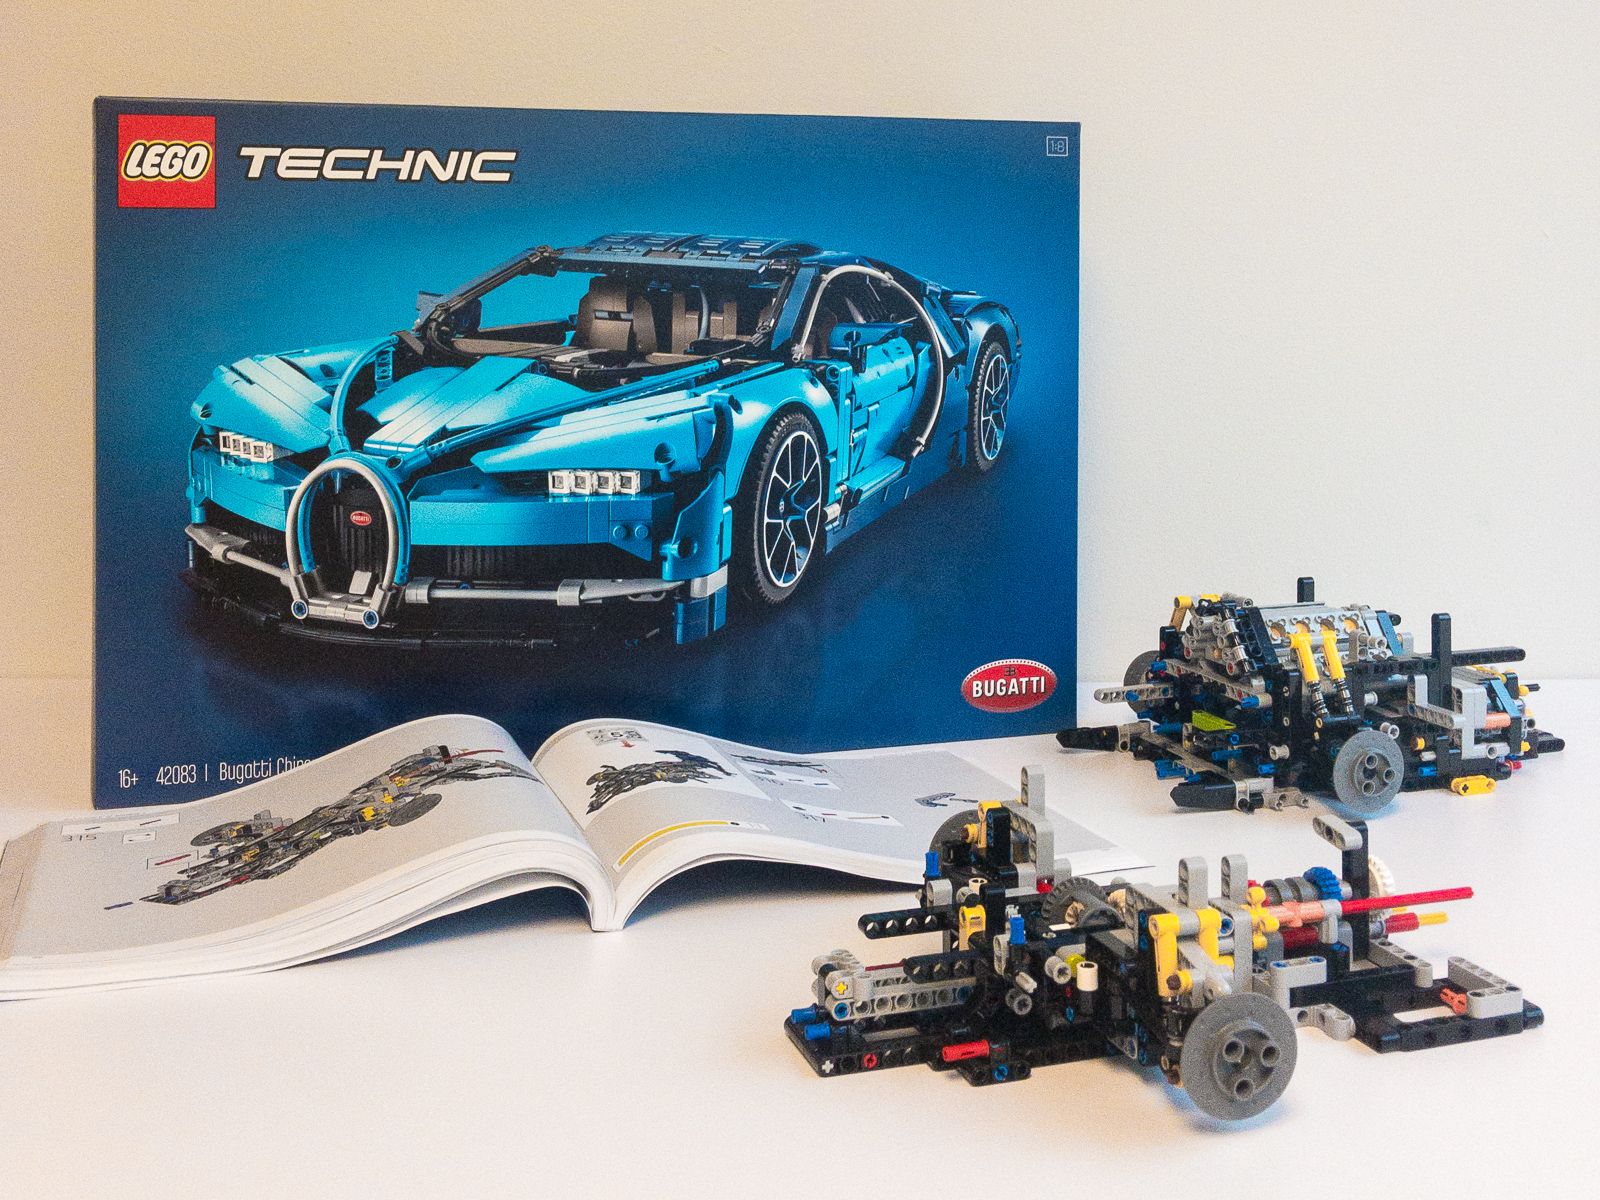
Second assembly at the end of bag 4.
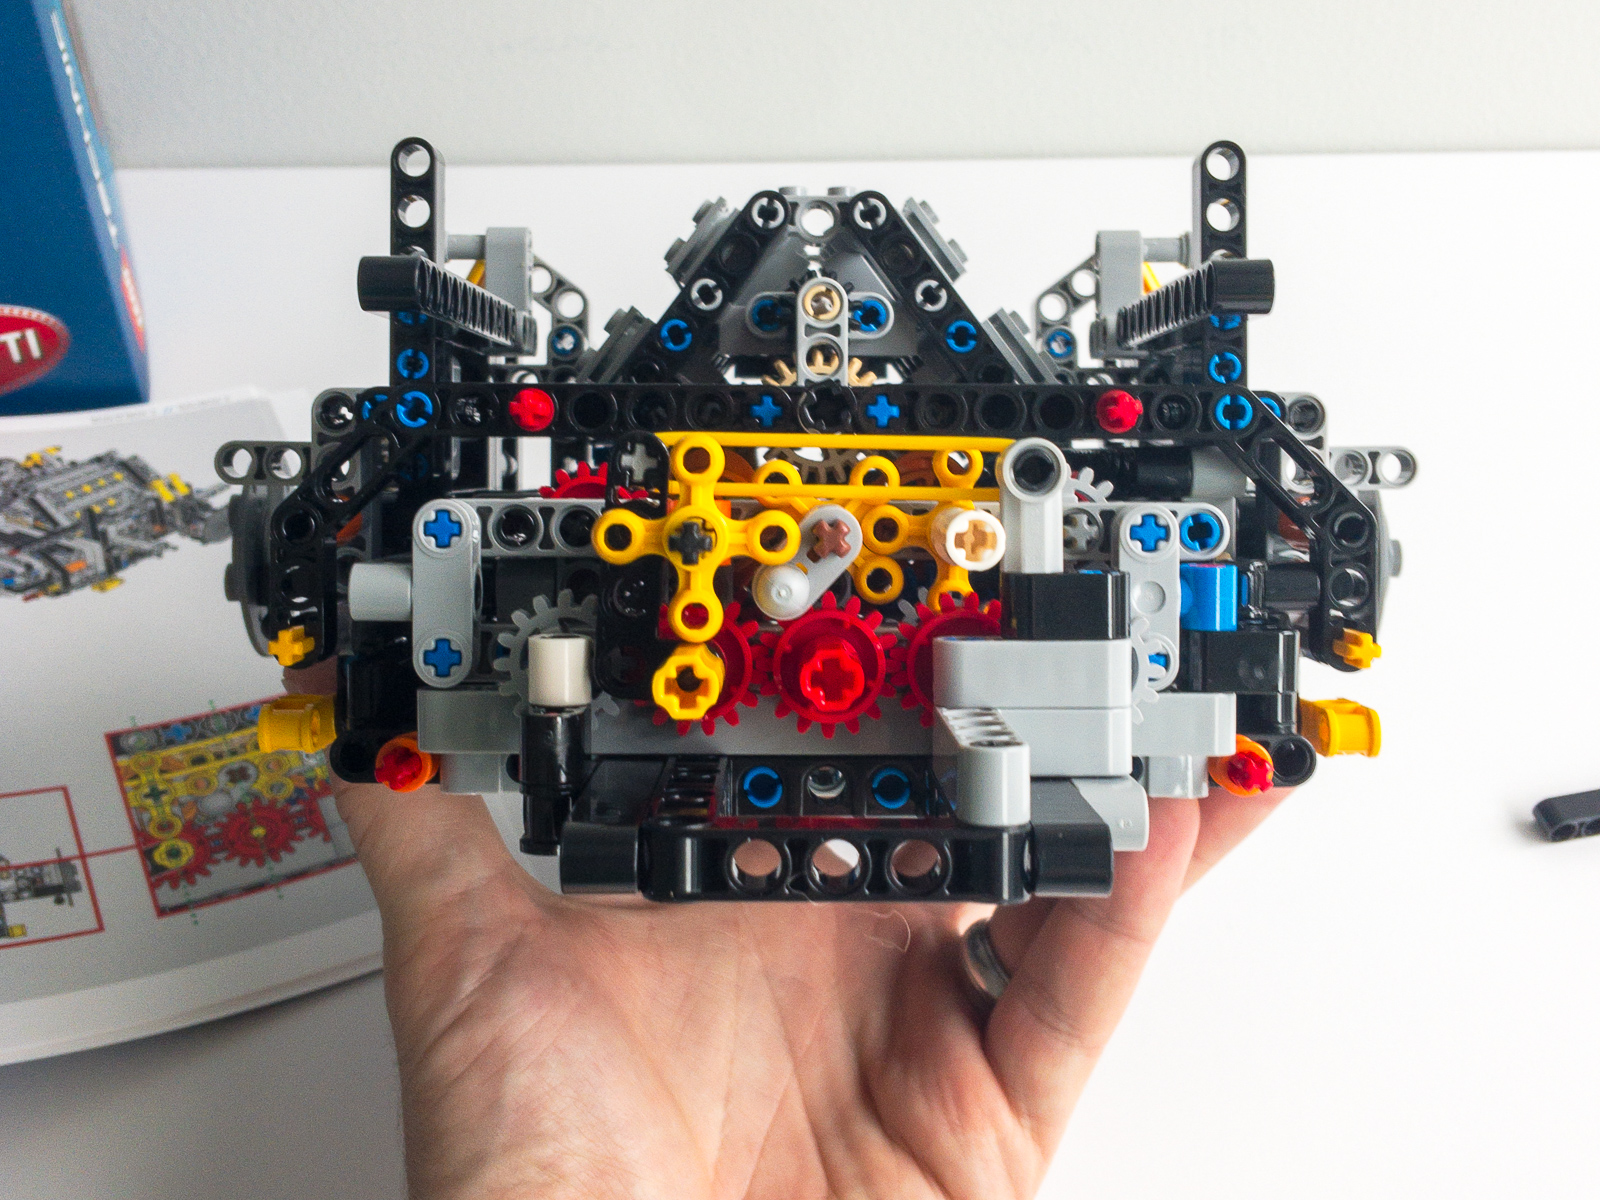
Bag 5 expands the support structure significantly. This is also where you build the carefully designed shifting system which is indexed to snap perfectly into each gear position.
In Bag 6, we finish building the monocoque, which includes some black panels which will be right below the exterior skin. They also protect the bottom of the vehicle and add structural stability.
The axles need to be aligned perfectly before the marriage process.
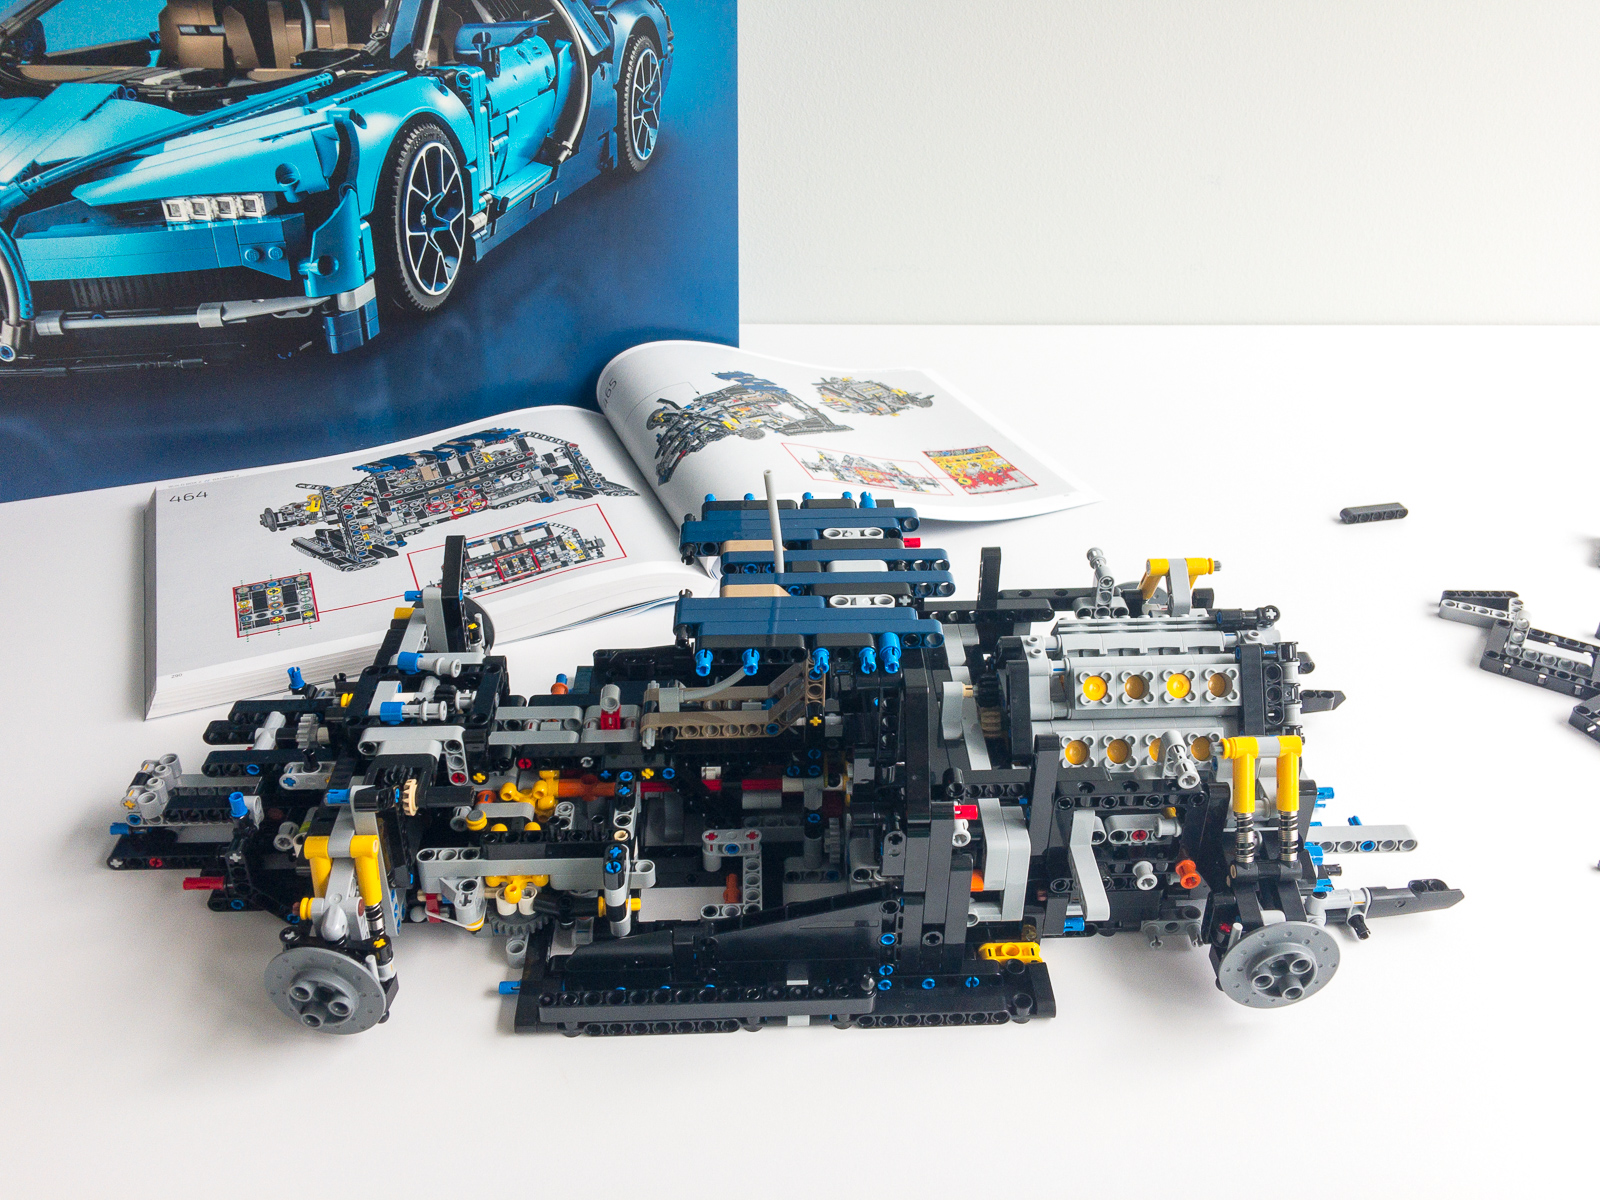
Marriage Complete!
Build Time: Bag 4: about 70 minutes. Bag 5: about 80 minutes. Bag 6: about 35 minutes.
Box 3
In the third box, the build process transitions from structure and function to exterior detailing. I found this exciting, as the car literally begins to take shape across these two bags. In bag 7, we focus on the roof and sides. The two most compelling additions in this step are the exterior bodywork around the massive w16 engine, as well as the real wheel well surrounds.

The car finally starting to “take shape”.
In bag 8, we turn our focus to the rear of the car. In the podcast which accompanies the build process, I was surprised how much the engineers of the real car focused on the problem of managing heat and exhaust.
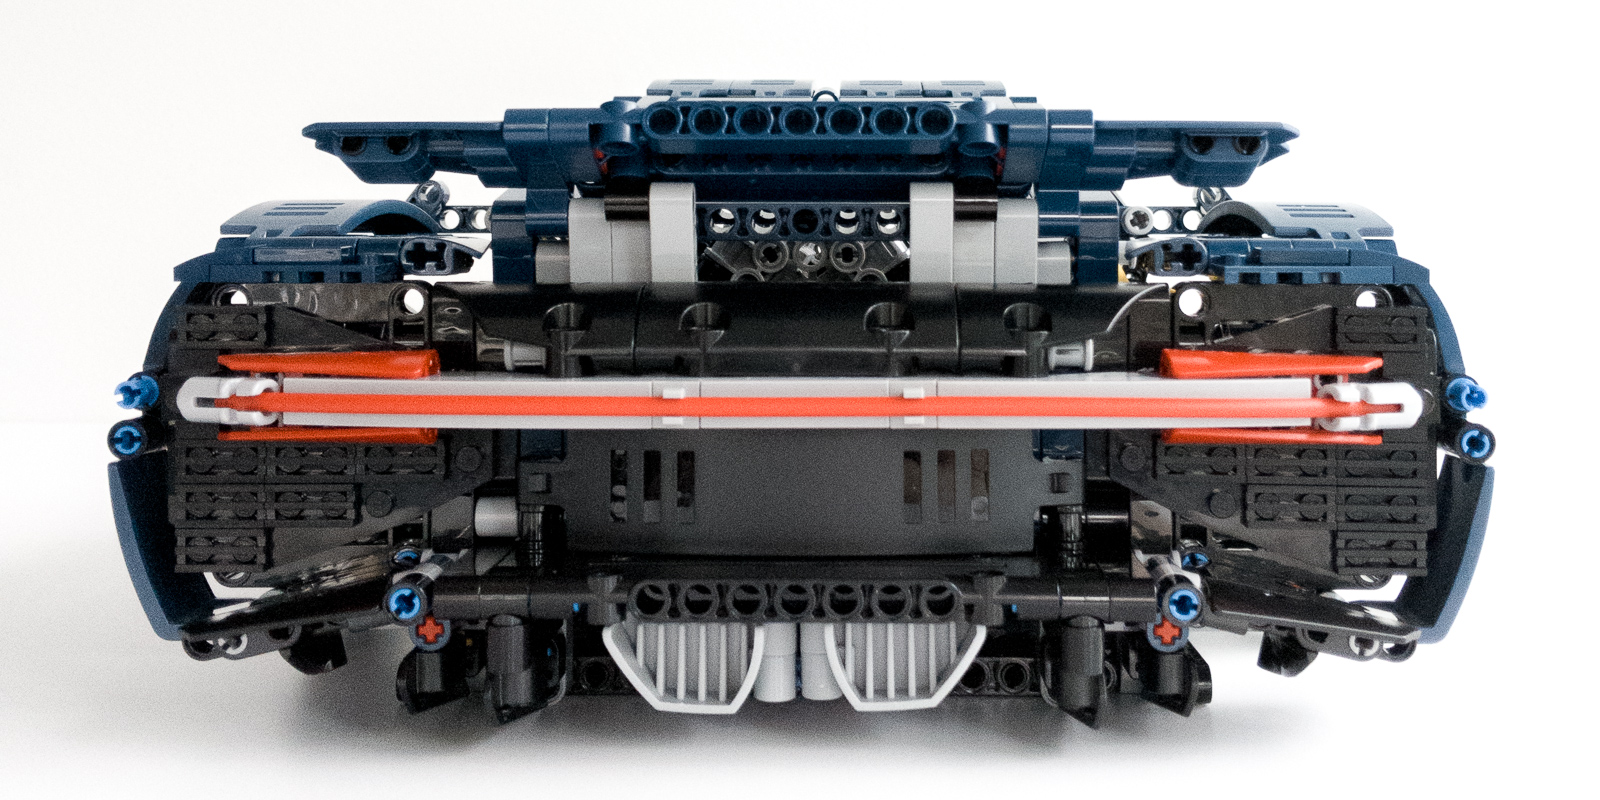
Rear Exhaust Port.
The focus on thermals is brought into reality when you build the massive rear exhaust port. I was surprised to see is built using quite a lot of traditional system bricks instead of just Technic elements. The slender rear braking light and turn signals is elegantly re-created using a long red flex tube.
Build Time: Bag 7: about 70 minutes. Bag 8: about 45 minutes.
Box 4
In this box we focus on the interior design, working from the back to the front. This starts with Bag 9, where you painstakingly build not one, but two nearly identical comfortable looking seats. They are built using a mix of Technic elements and system plates and tiles.

Seats built using a mix of Technic and System elements.
Bag 10 is a little less fun, as it involves a lot of invisible structural elements. That said, the most satisfying step is when you attach the steering wheel and dashboard. While I absolutely loathe stickers, I was tempted to add the dashboard stickers, as they give the finished model a sense of realism that isn’t possible using bricks alone. (I would have been thrilled if they used printed bricks instead.)
Build Time: Bag 9: about 60 minutes. Bag 10: about 50 minutes.
Box 5
Since almost everything else is done at this point, this box is all about the front half of the vehicle exterior. Bag 11 is where you assemble the doors and strengthen the front end in preparation for final sculptural detailing. Adding the doors is a very satisfying step, as it gave me a fantastic “almost there” feeling, and it adds another interactive feature of the finished model.
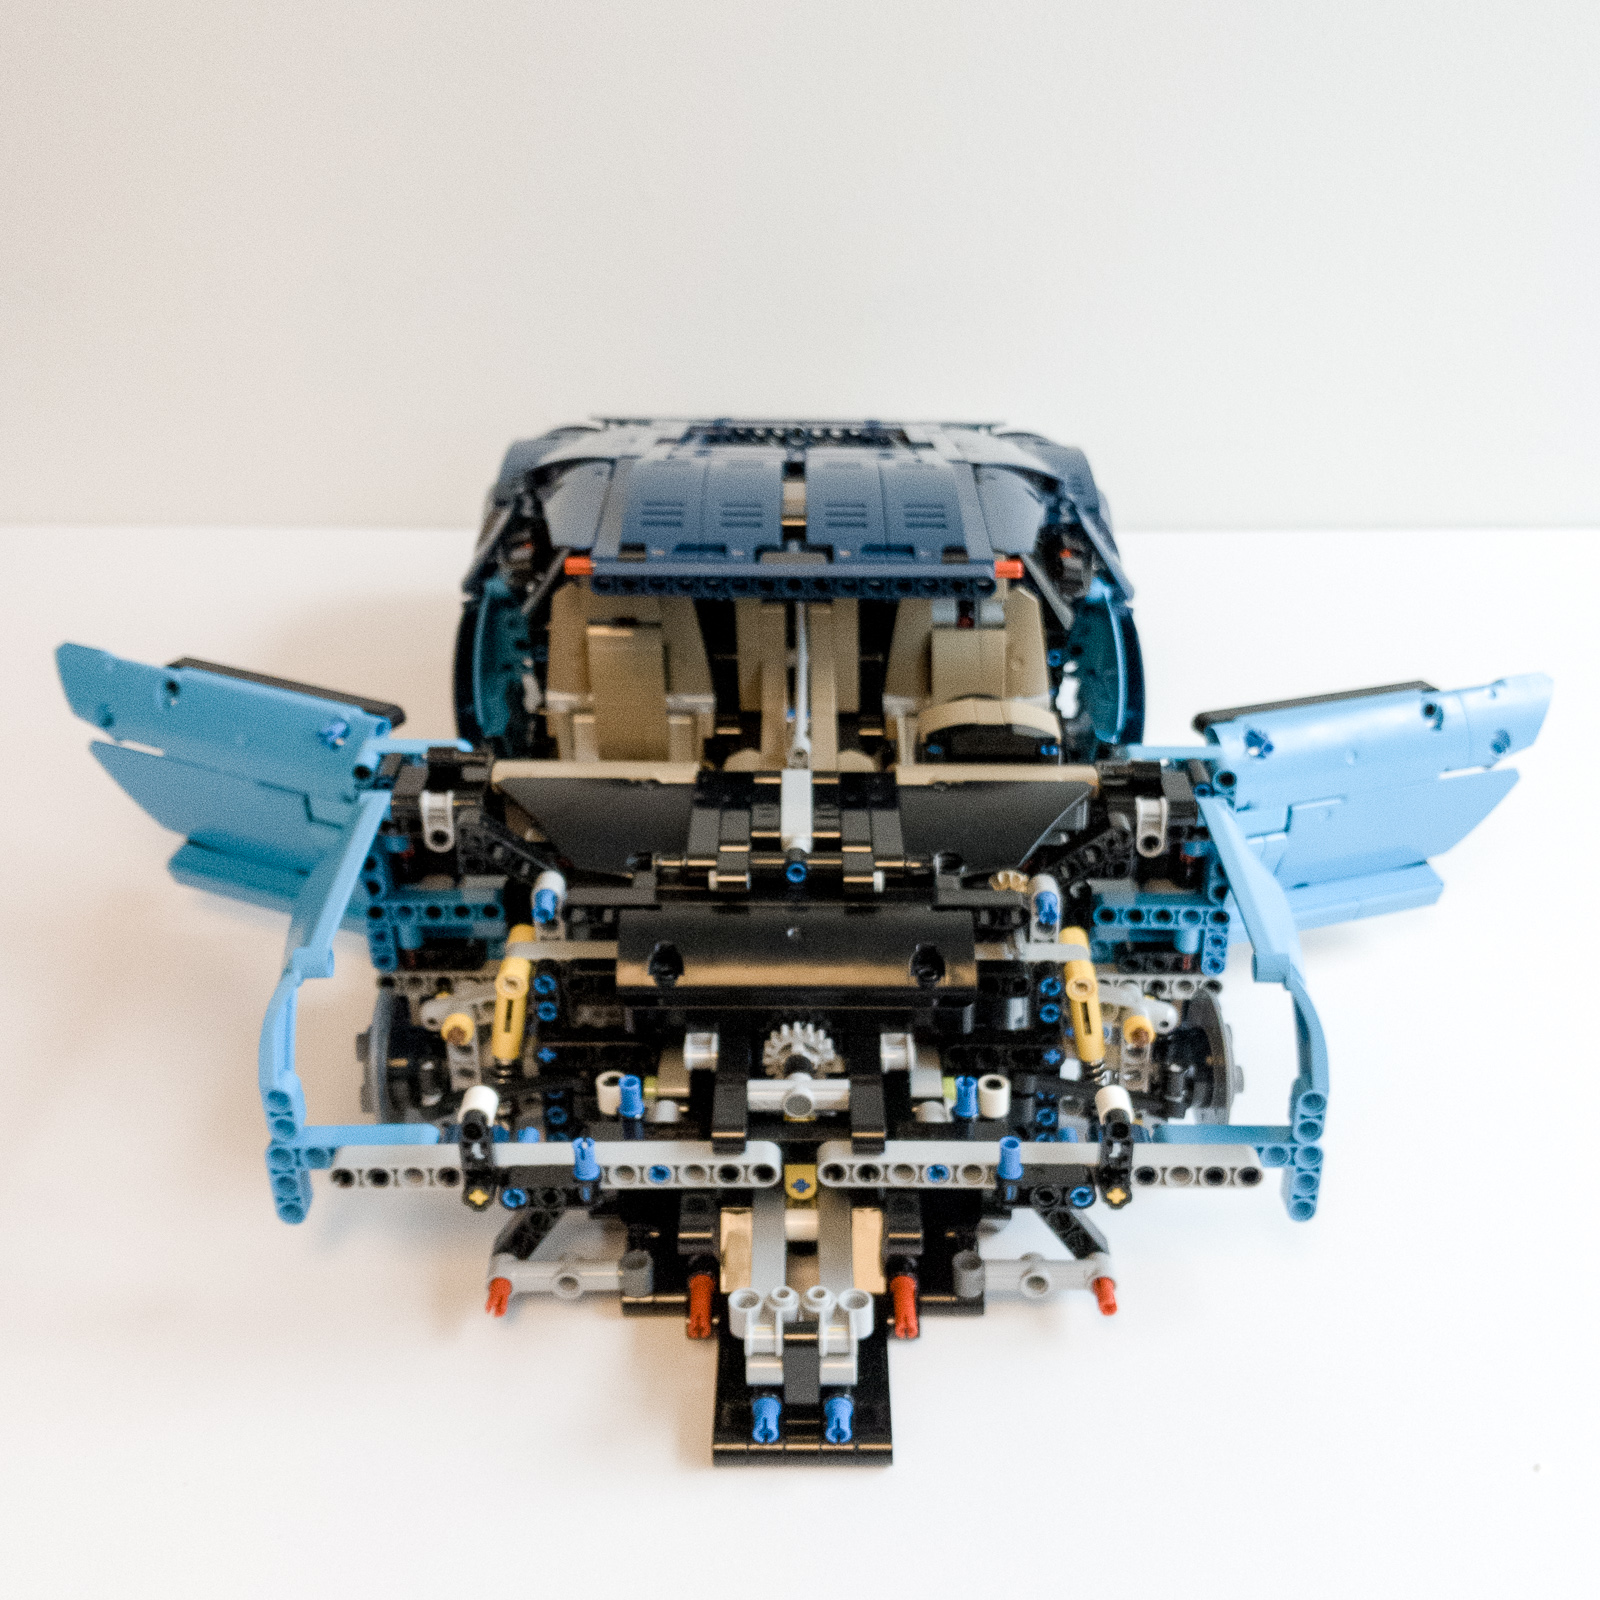
Doors installed!
Bag 12 is one large bag with a lot of parts. During this bag we nearly finish the exterior, including the hood on the front which opens and closes, and the front fenders and air intakes. This is another satisfying step of the process as you nearly complete the vehicle exterior.
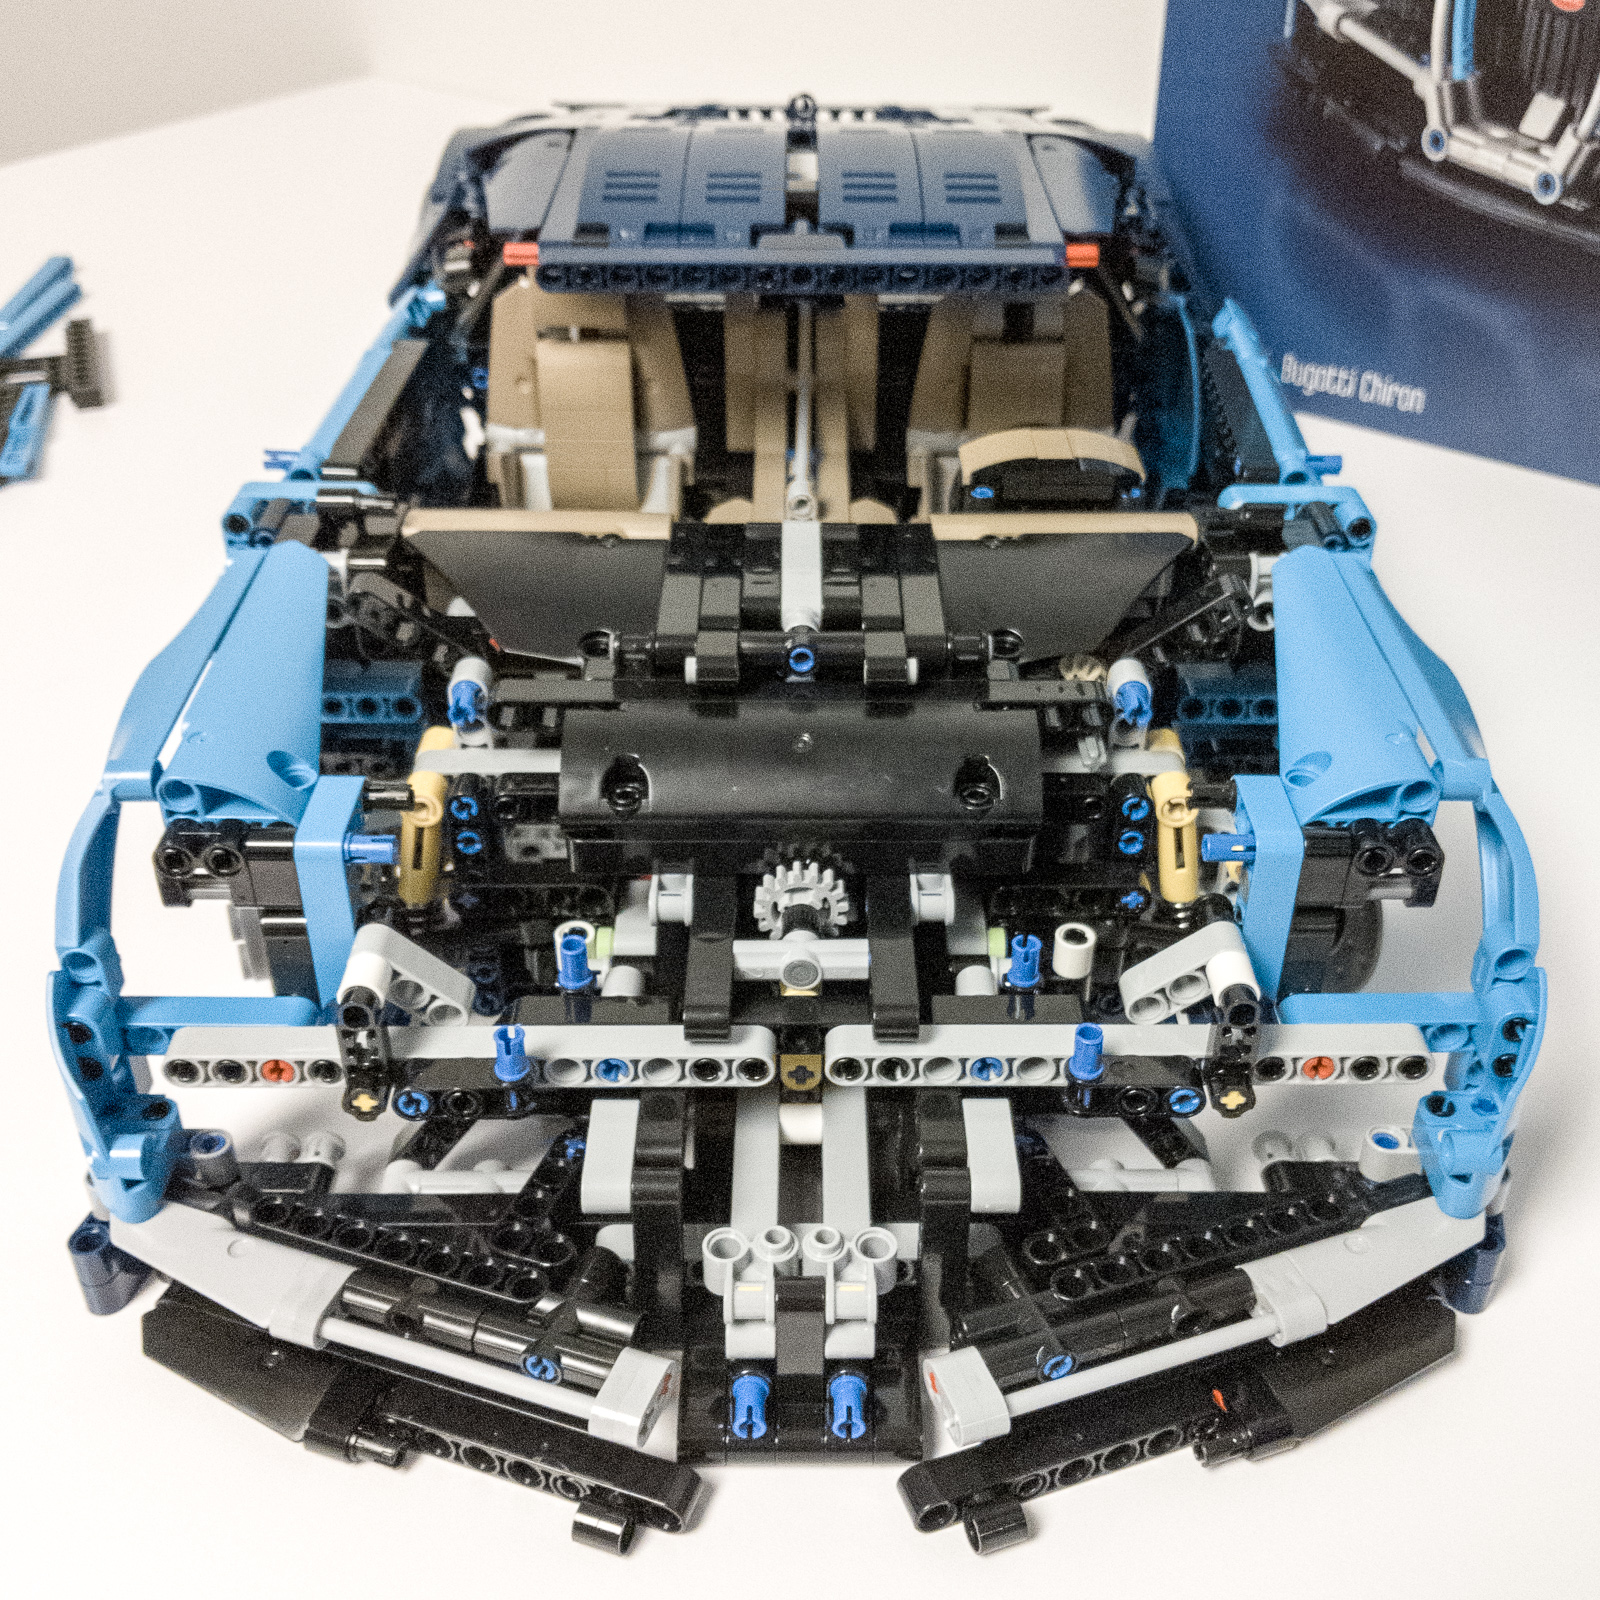
Front end almost complete.
I will admit that I thought that it was going to be the last bag followed only by adding the wheels. While you do get pretty close to finishing the model, I discovered there is a 13th bag hiding beneath the custom wheels in box 6. It was a bit of a bummer to learn that I needed one more day to complete the model!
Build Time: Bag 11: about 30 minutes. Bag 12: about 60 minutes.
Box 6
Bag 13 is a quick conclusion to this massive undertaking. There isn’t much left to add in the final bag, just a few sections of bent flex tube around the doors, rear view mirrors, and a few other details. Of course, the very last step in assembling the car is the addition of the four wheels.
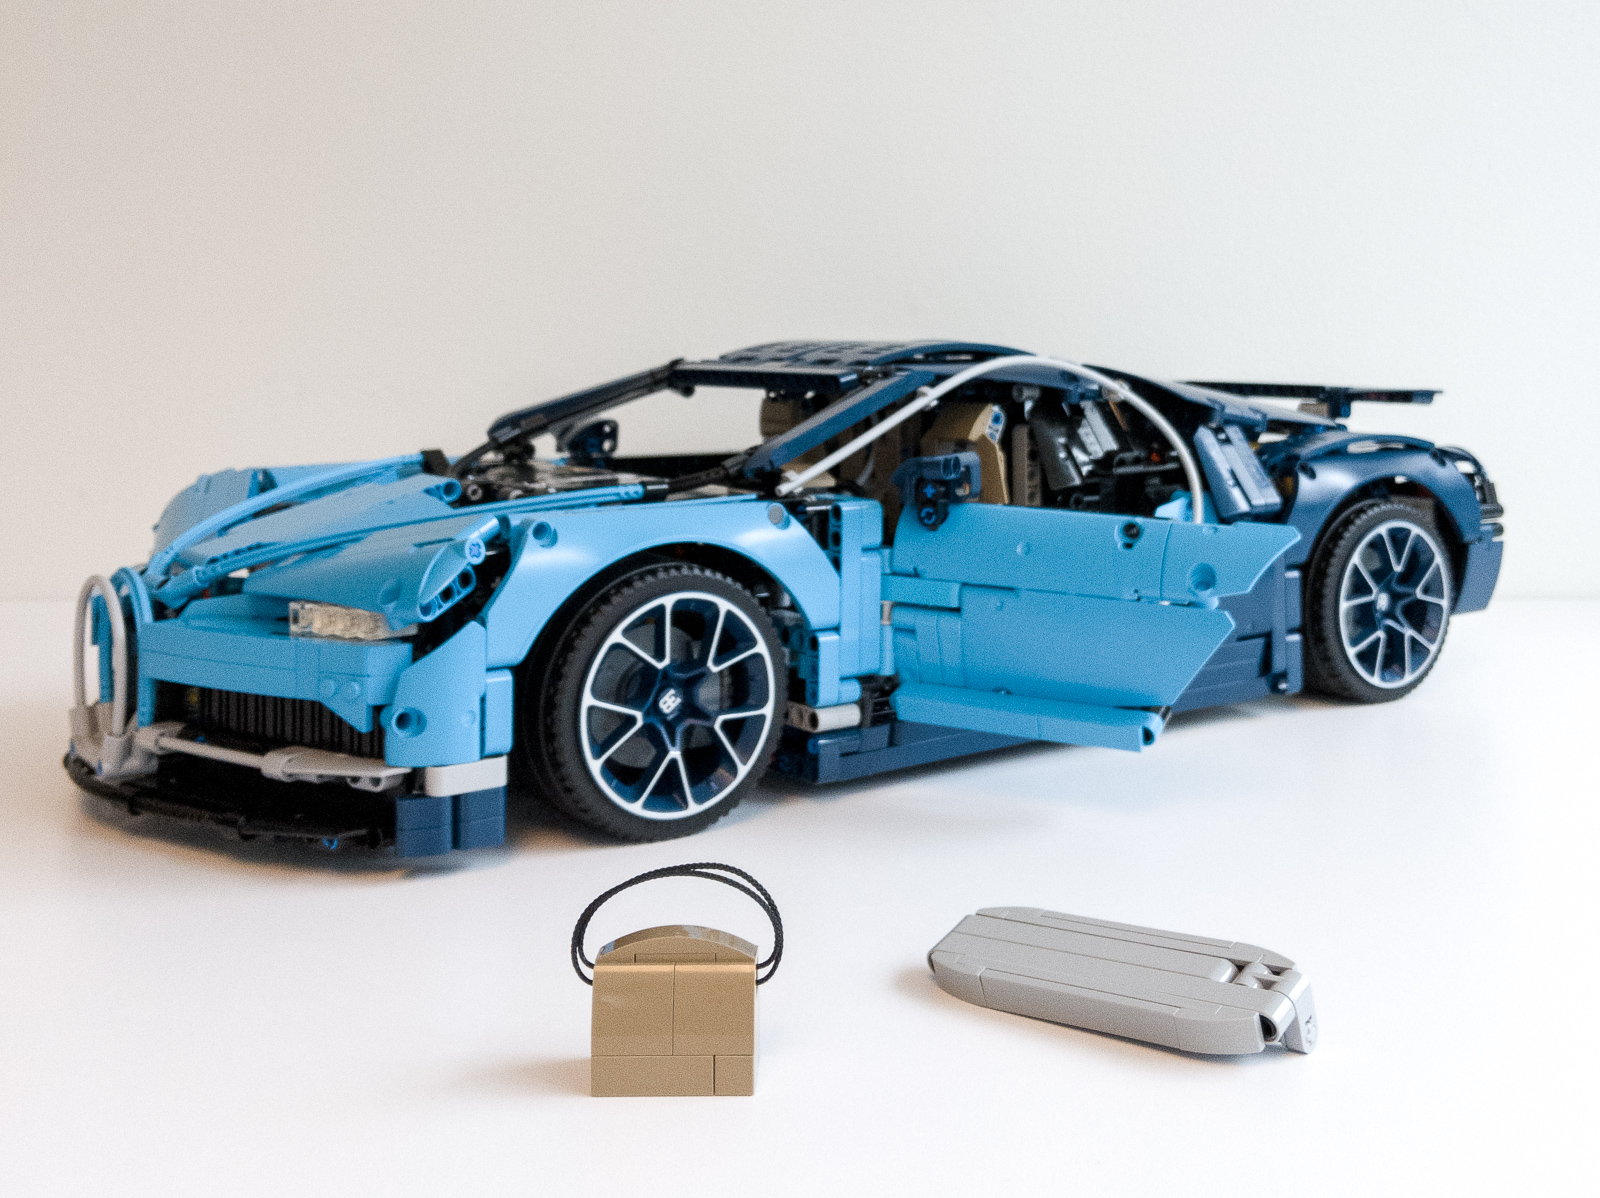
Completed car with it’s accessories.
You might think that is the end of the project, but you will still have about 50 pieces left, which are used to build the “speed key” part which is used to raise and lower the rear spoiler, and the signature Bugatti-branded dark tan travel bag. Having finished building this amazing model, it’s finally time to take your new Bugatti Chiron for a test drive!
Build Time: Bag 13: about 30 minutes.
Play Features
This massive set only offers a couple play features. When the car is in drive position, you will see the pistons go up and down when you push the car.
The biggest time investment in building the model is the complicated 8-speed transmission and all-wheel drive system. This system controls how quickly the pistons move up and down, and you can change gears using the paddle shifter positioned beneath the steering wheel. With 8 different gear positions, it’s a bit difficult to see the difference in piston speed unless you shift through the gears quickly. (The gearing is arranged in a loop, so you can switch directly from the lowest gear to the highest gear, making it really easy to see the change in piston speed.)
The remaining play features are pretty straightforward. You can turn the front wheels by rotating the steering wheel. You can open the front hood to reveal the custom printed serial number for each set, open both doors, and you can use the speed key to raise and lower the rear spoiler.
The Podcast
The Podcast was a really unique addition to the building experience, which helped me better understand the hard work that goes into a supercar like the Bugatti Chiron, and in translating the car into a LEGO set. I will admit that the podcast could have been shorter if it were edited more aggressively. There are a few sections where it is hard to understand what the engineers are describing, sometimes caused by limited English language fluency, but more often caused by the fact that it’s hard to describe complex mechanical systems verbally.
That said, I strongly recommend that you listen to the podcast while building the set—It definitely heightened my appreciation of both the real car and the complexity you re-create in the LEGO model.
Conclusion
Without question, this was an ambitious partnership between Bugatti and The LEGO Group. The resulting set offers a premium building experience complete with deluxe packaging, good quality instructions, lots of glamour shots of beautiful cars, and the unique addition of several hours of podcast content to accompany the building experience. It’s quite an undertaking to build; It took me over 11 hours from start to finish!
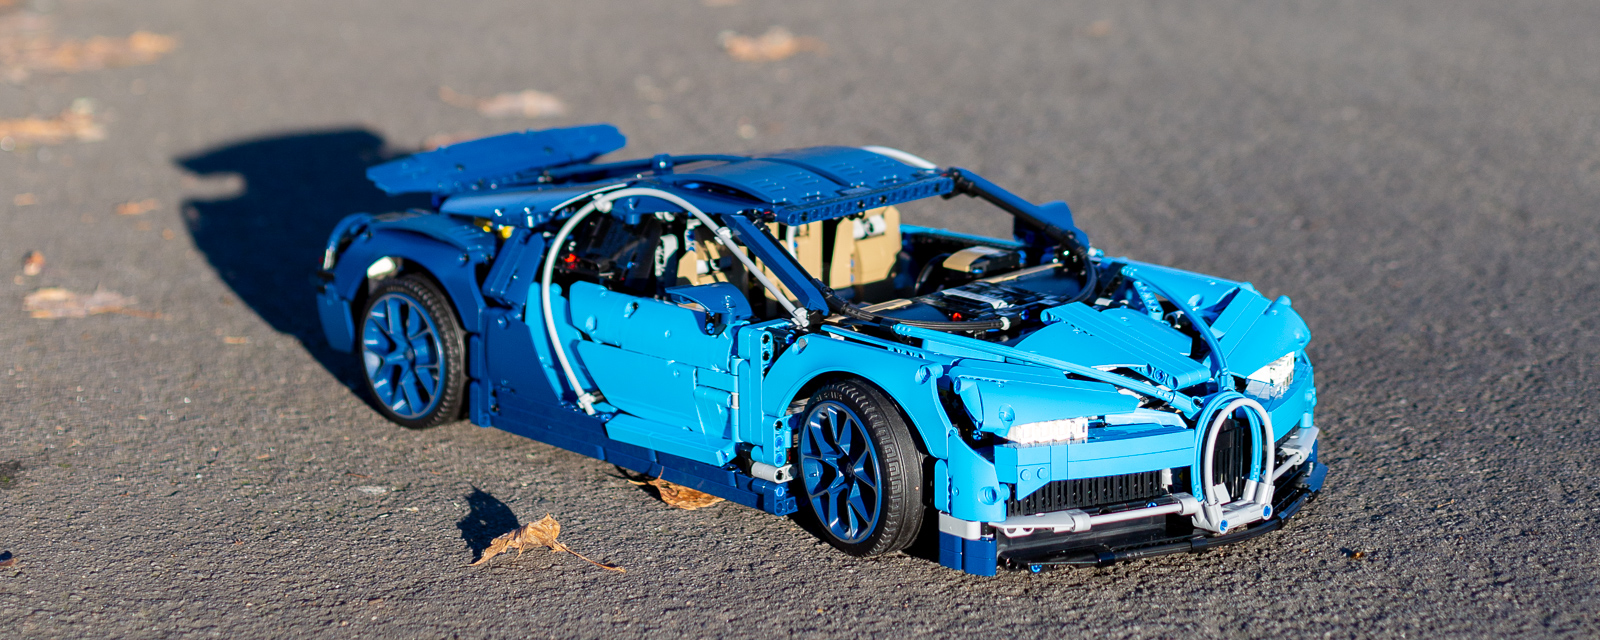
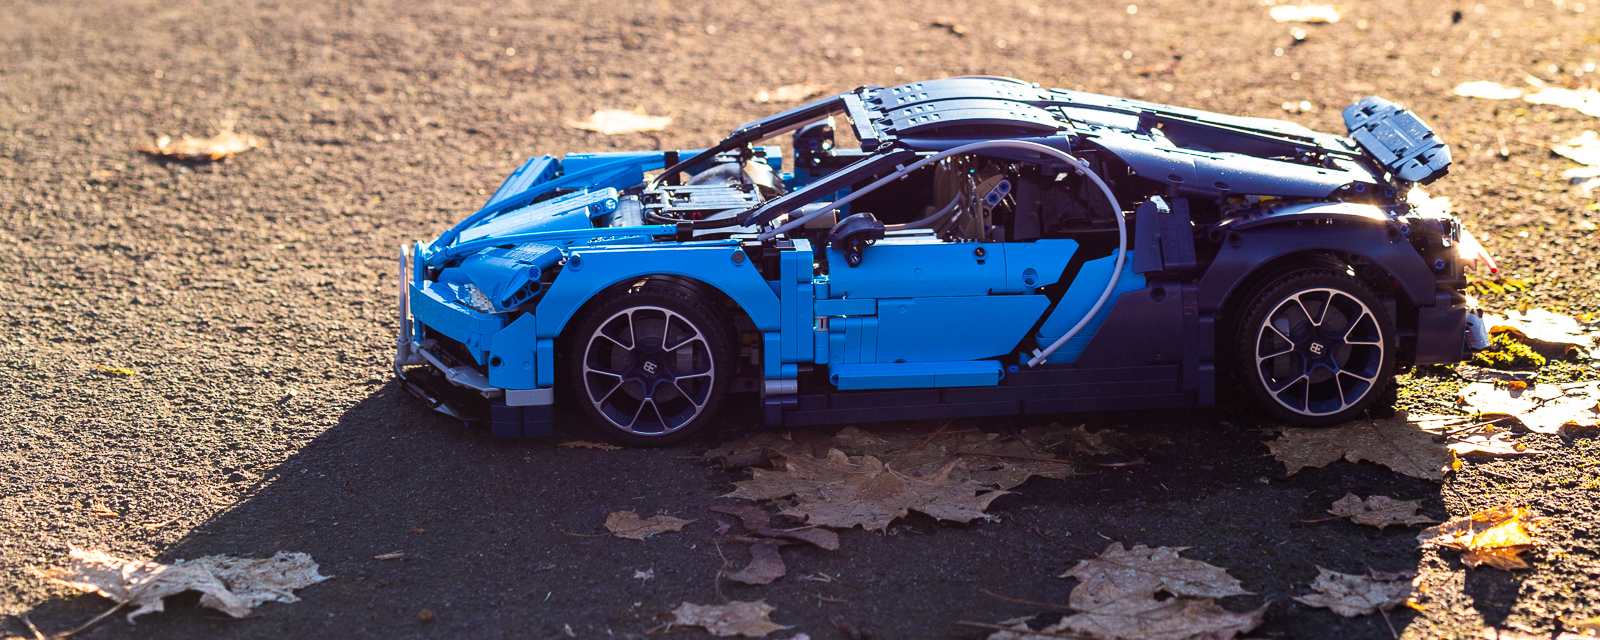
The finished model looks fantastic.
For the most part, they nailed it. The car looks unmistakably Bugatti, and unmistakably LEGO Technic at the same time. The two-tone color palette looks fantastic, and it provides LEGO Technic builders with a lot of elements in 140 Earth Blue and 322 Medium Azur for the first time. There are only four mechanical functions, but they work well. Lastly, I loved the marriage between the podcast and the relevant stages of the LEGO building experience. I hope we see more traditional LEGO sets with complementary multimedia content like this!
Unfortunately, this is probably the closest I will get to driving the real car.
This set earned a well-deserved “Highly Recommended” (4/5 Star) rating. I can’t quite award the top “Must Have” position to this set because it’s mechanical functions aren’t that fun to play with, and it is so large and complex to build that it has a fairly narrow audience. That said, LEGO gearheads will absolutely love this kit, the well organized building experience, and the complementary podcast content. (Just do yourself a favor and take a break between each of the six boxes—It’s a long and intricate build!)
This is my second larger sized technic that I’ve just ordered today and am beyond excited to put it together. I just finished the land rover defender last week and couldn’t wait long for another big set. I love how technical they are
What do you think of Sian that just came out? A better set or Chiron? Thank you!
Mike,
I haven’t looked too closely, but what I saw in the various preview articles suggest that it is comparable. I think the best choice is the one that you are more excited to build. If you plan to eventually buy both, start with the Bugatti since it could retire sooner.
—Tom