
Review: #10264 Corner Garage
It’s finally possible to design a convincing building on a 45-degree angle, thanks to many new parts from the last few years. Let’s find out if this innovative addition to the modular building series is worth adding to your collection.
Previous sets in the Modular Building Series such as #10182 Café Corner included a corner element, but they were unable to achieve this for an entire wall until this year’s addition to the series: #10264 Corner Garage.
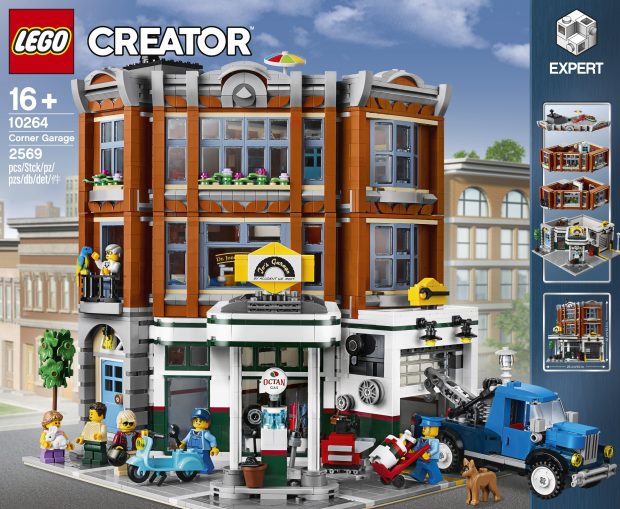
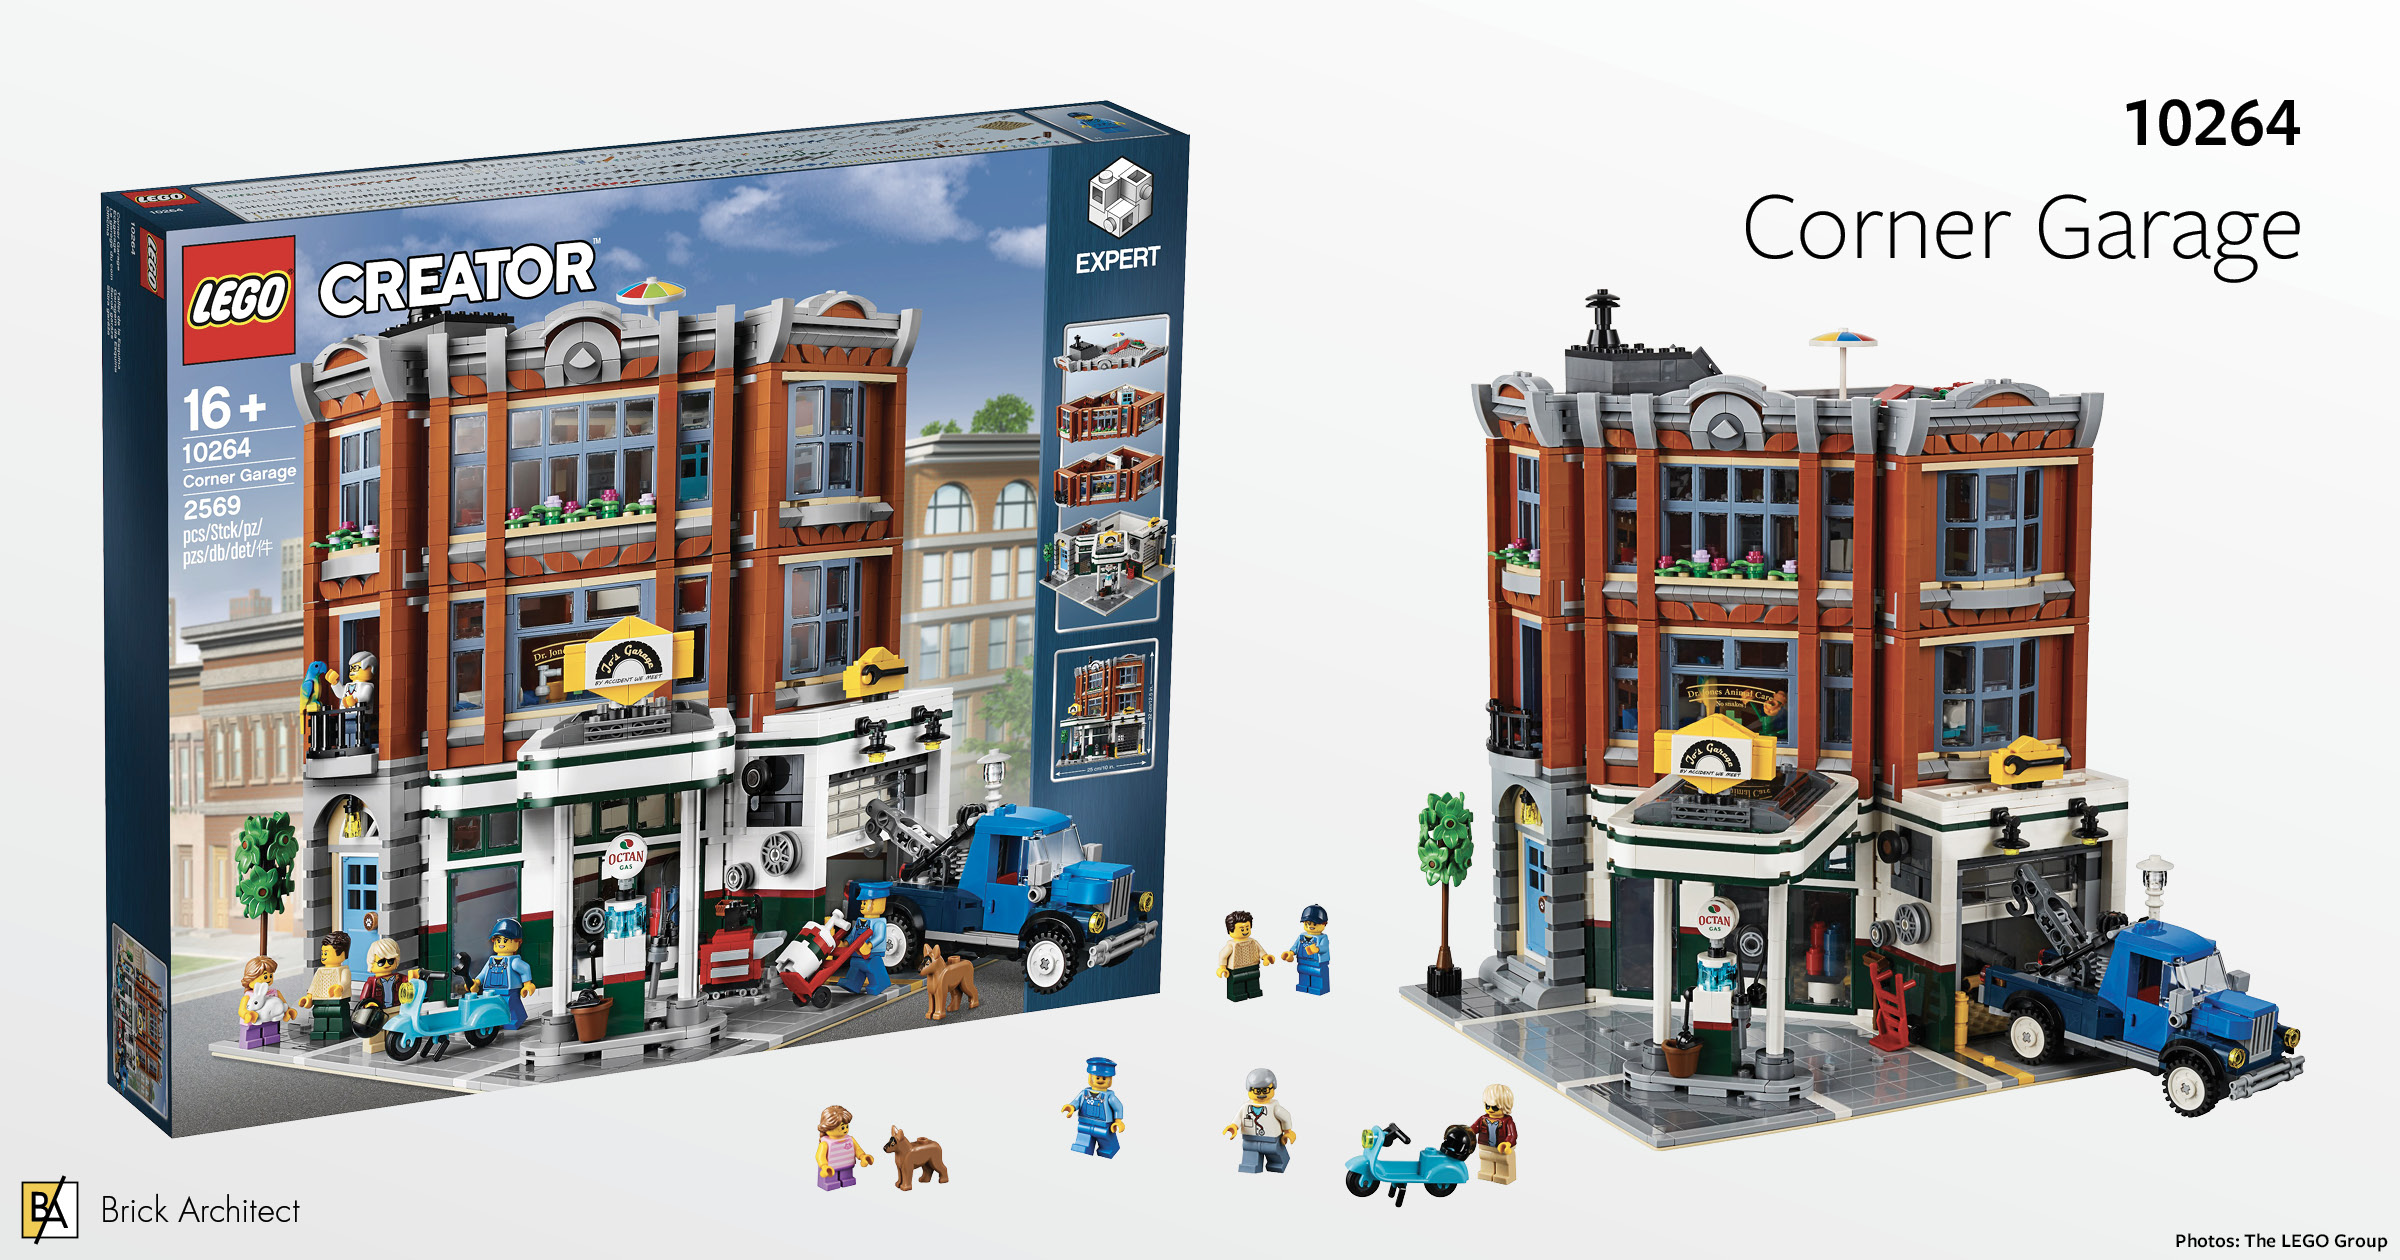
#10264 Corner Garage
About the set
This set is separated into 6 sections. Inside, you will find 20 mid to large sized bags and numerous smaller bags, a 234-page instruction manual, a typical 32×32 baseplate, and two 6×16 light blue grey plates. (Note that you will find an additional 6×16 plate in Section 5 and two more in Section 6 for roofs and floors.)
While building the model, you will discover six minifigures including a man and woman, one girl, two garage attendants and an older gentleman veterinarian.
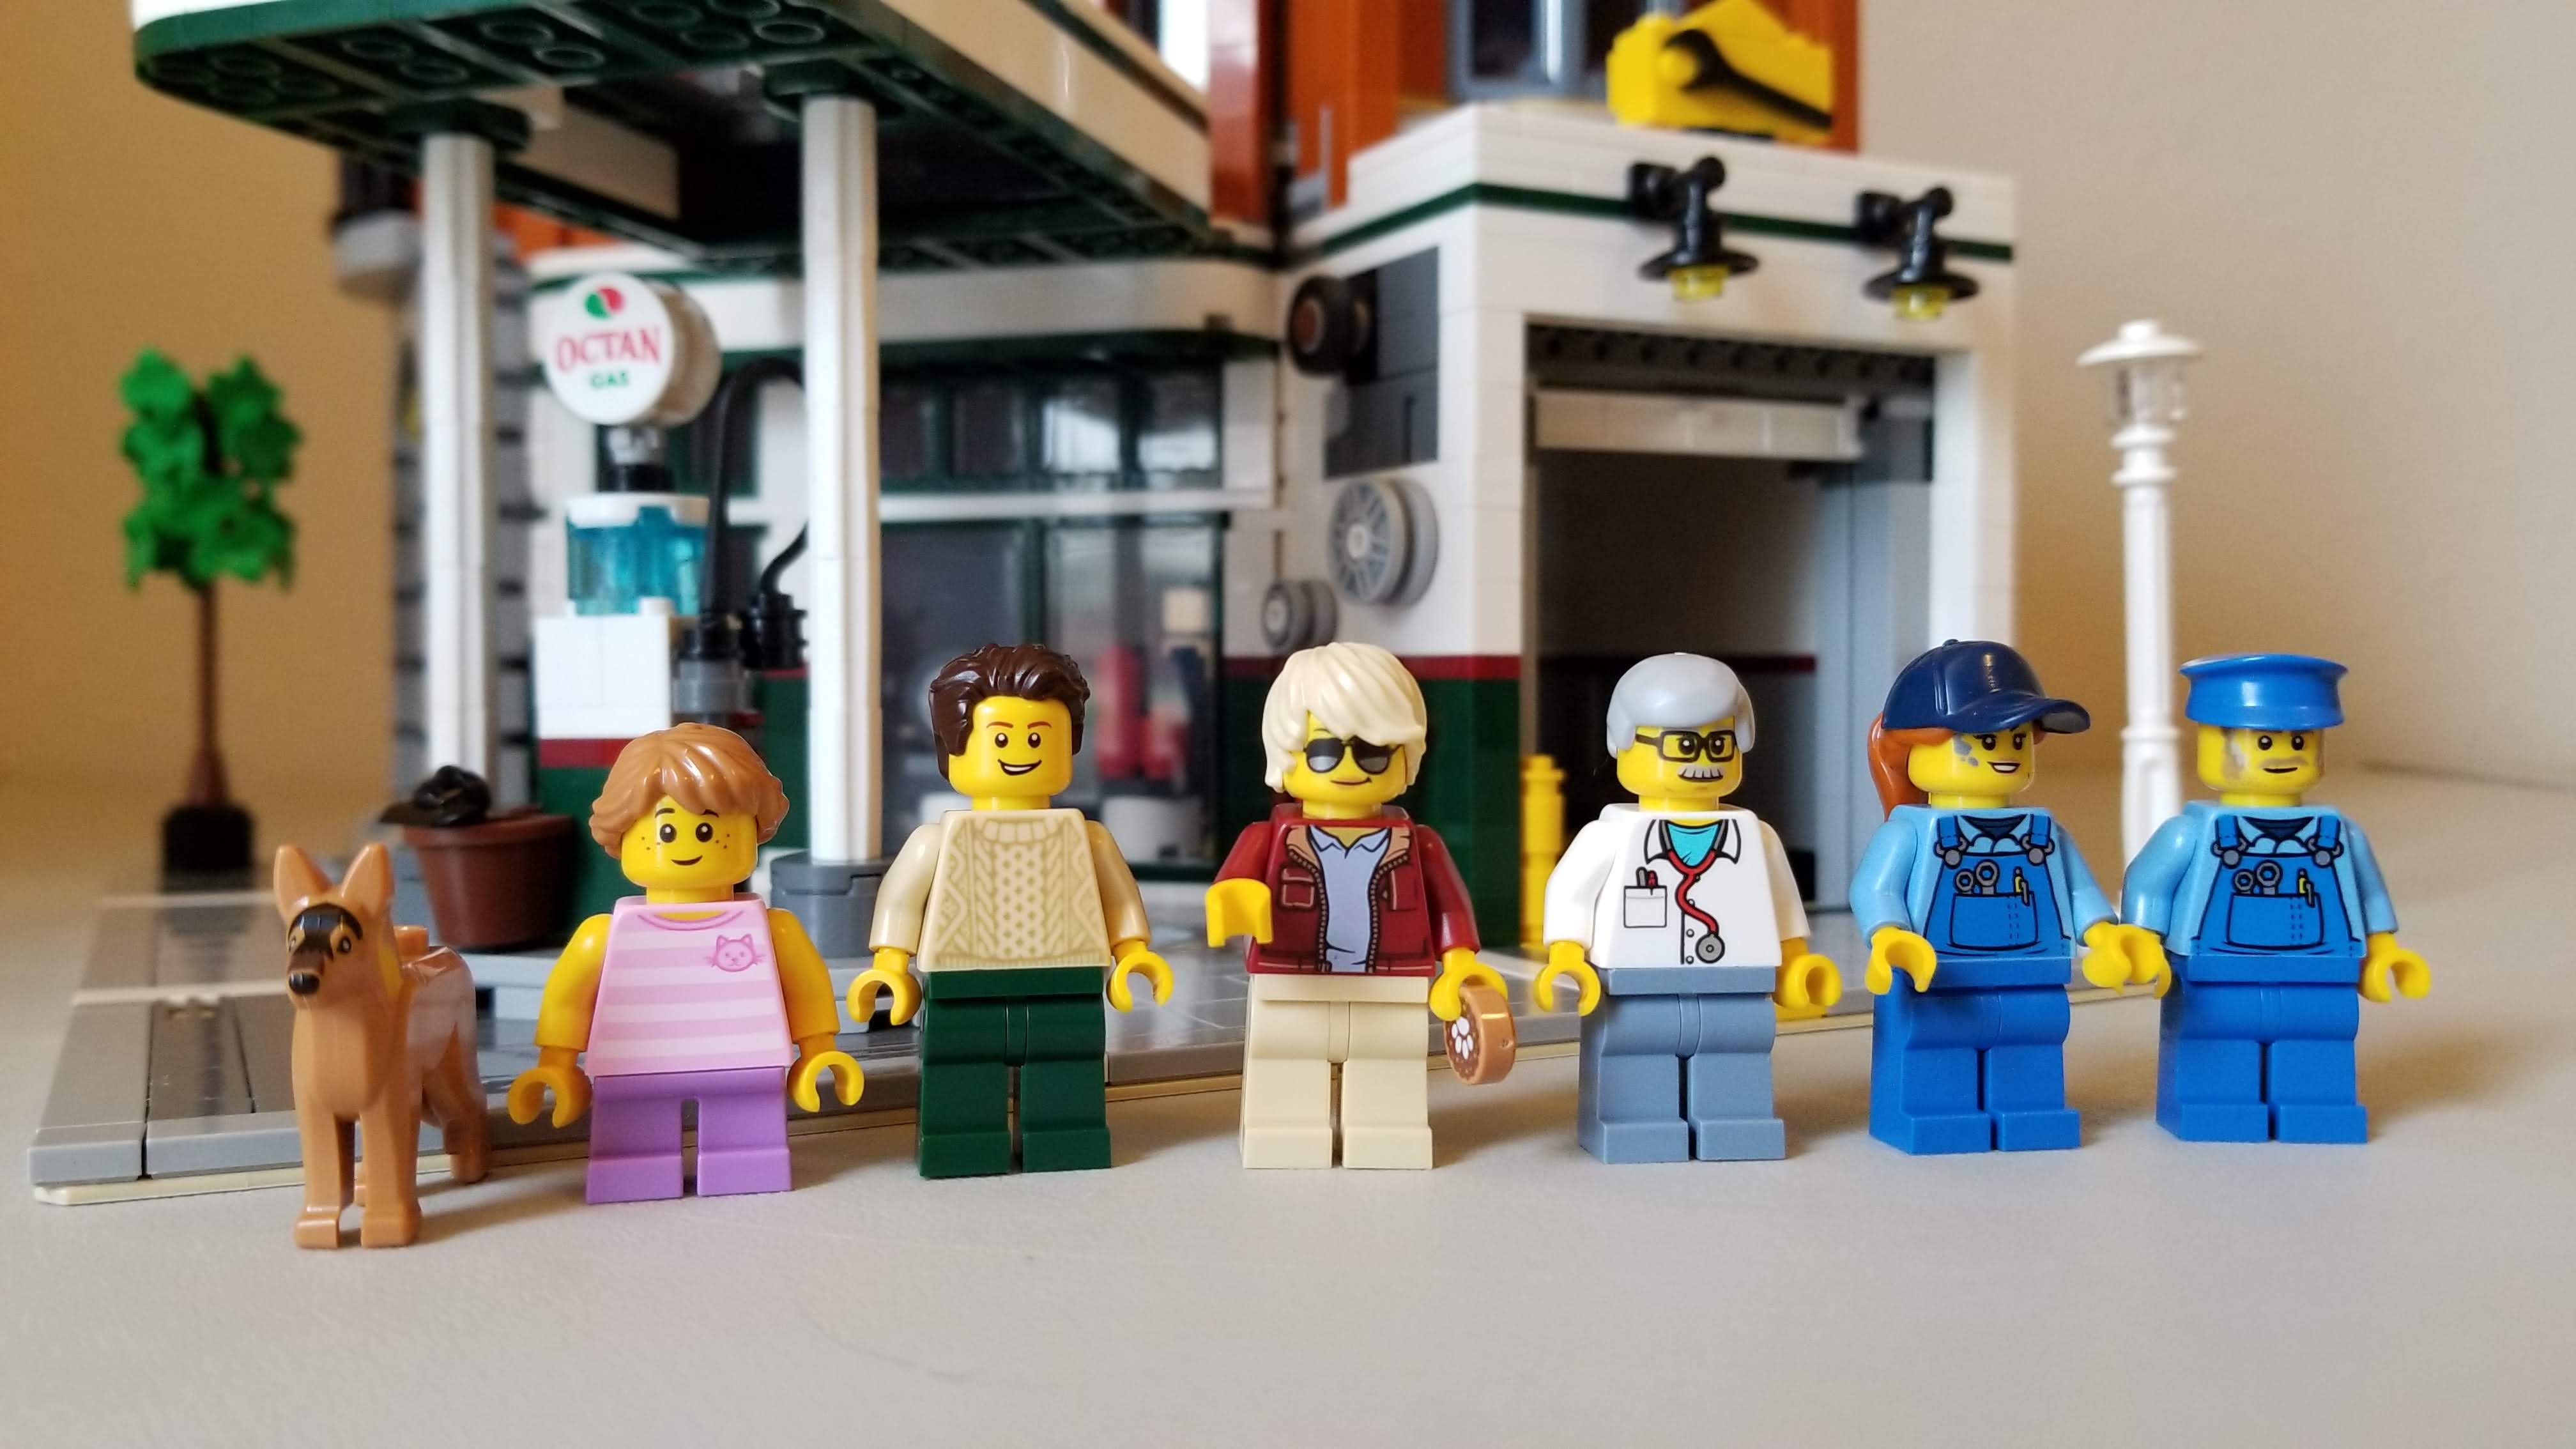
The set contains six Minifigs and one dog.
Also included are various animals including a [Medium Dark Flesh] Dog with a black nose, an 106Bright OrangeOrange goldfish, a 28Dark GreenGreen frog, a 1White bunny, and a 23Bright BlueBlue and 24Bright YellowYellow mixed molded parrot. I particularly like the color scheme used for the parrot. LEGO official lists this piece as “Yellow Bird, Parrot with Wide Beak and Tail with Marbled Blue Pattern”. Due to the way LEGO creates dual molded these elements, the marbling pattern of each parrot is unique.
There are also some new flowers (Part #24866, 1×1 Flower w/ 5 Petals) in four colors: 28Dark GreenGreen, 325Lavender, 191Flame Yellowish OrangeBright Light Orange, and 42Bright Reddish VioletMagenta. We also get the new Plant element (part 32607, Round 1×1 w/ 3 Leaves): five in 28Dark GreenGreen and 24 of them in 37Bright Green.
Build Process
Bag 1 – Tiles, tile and more tiles
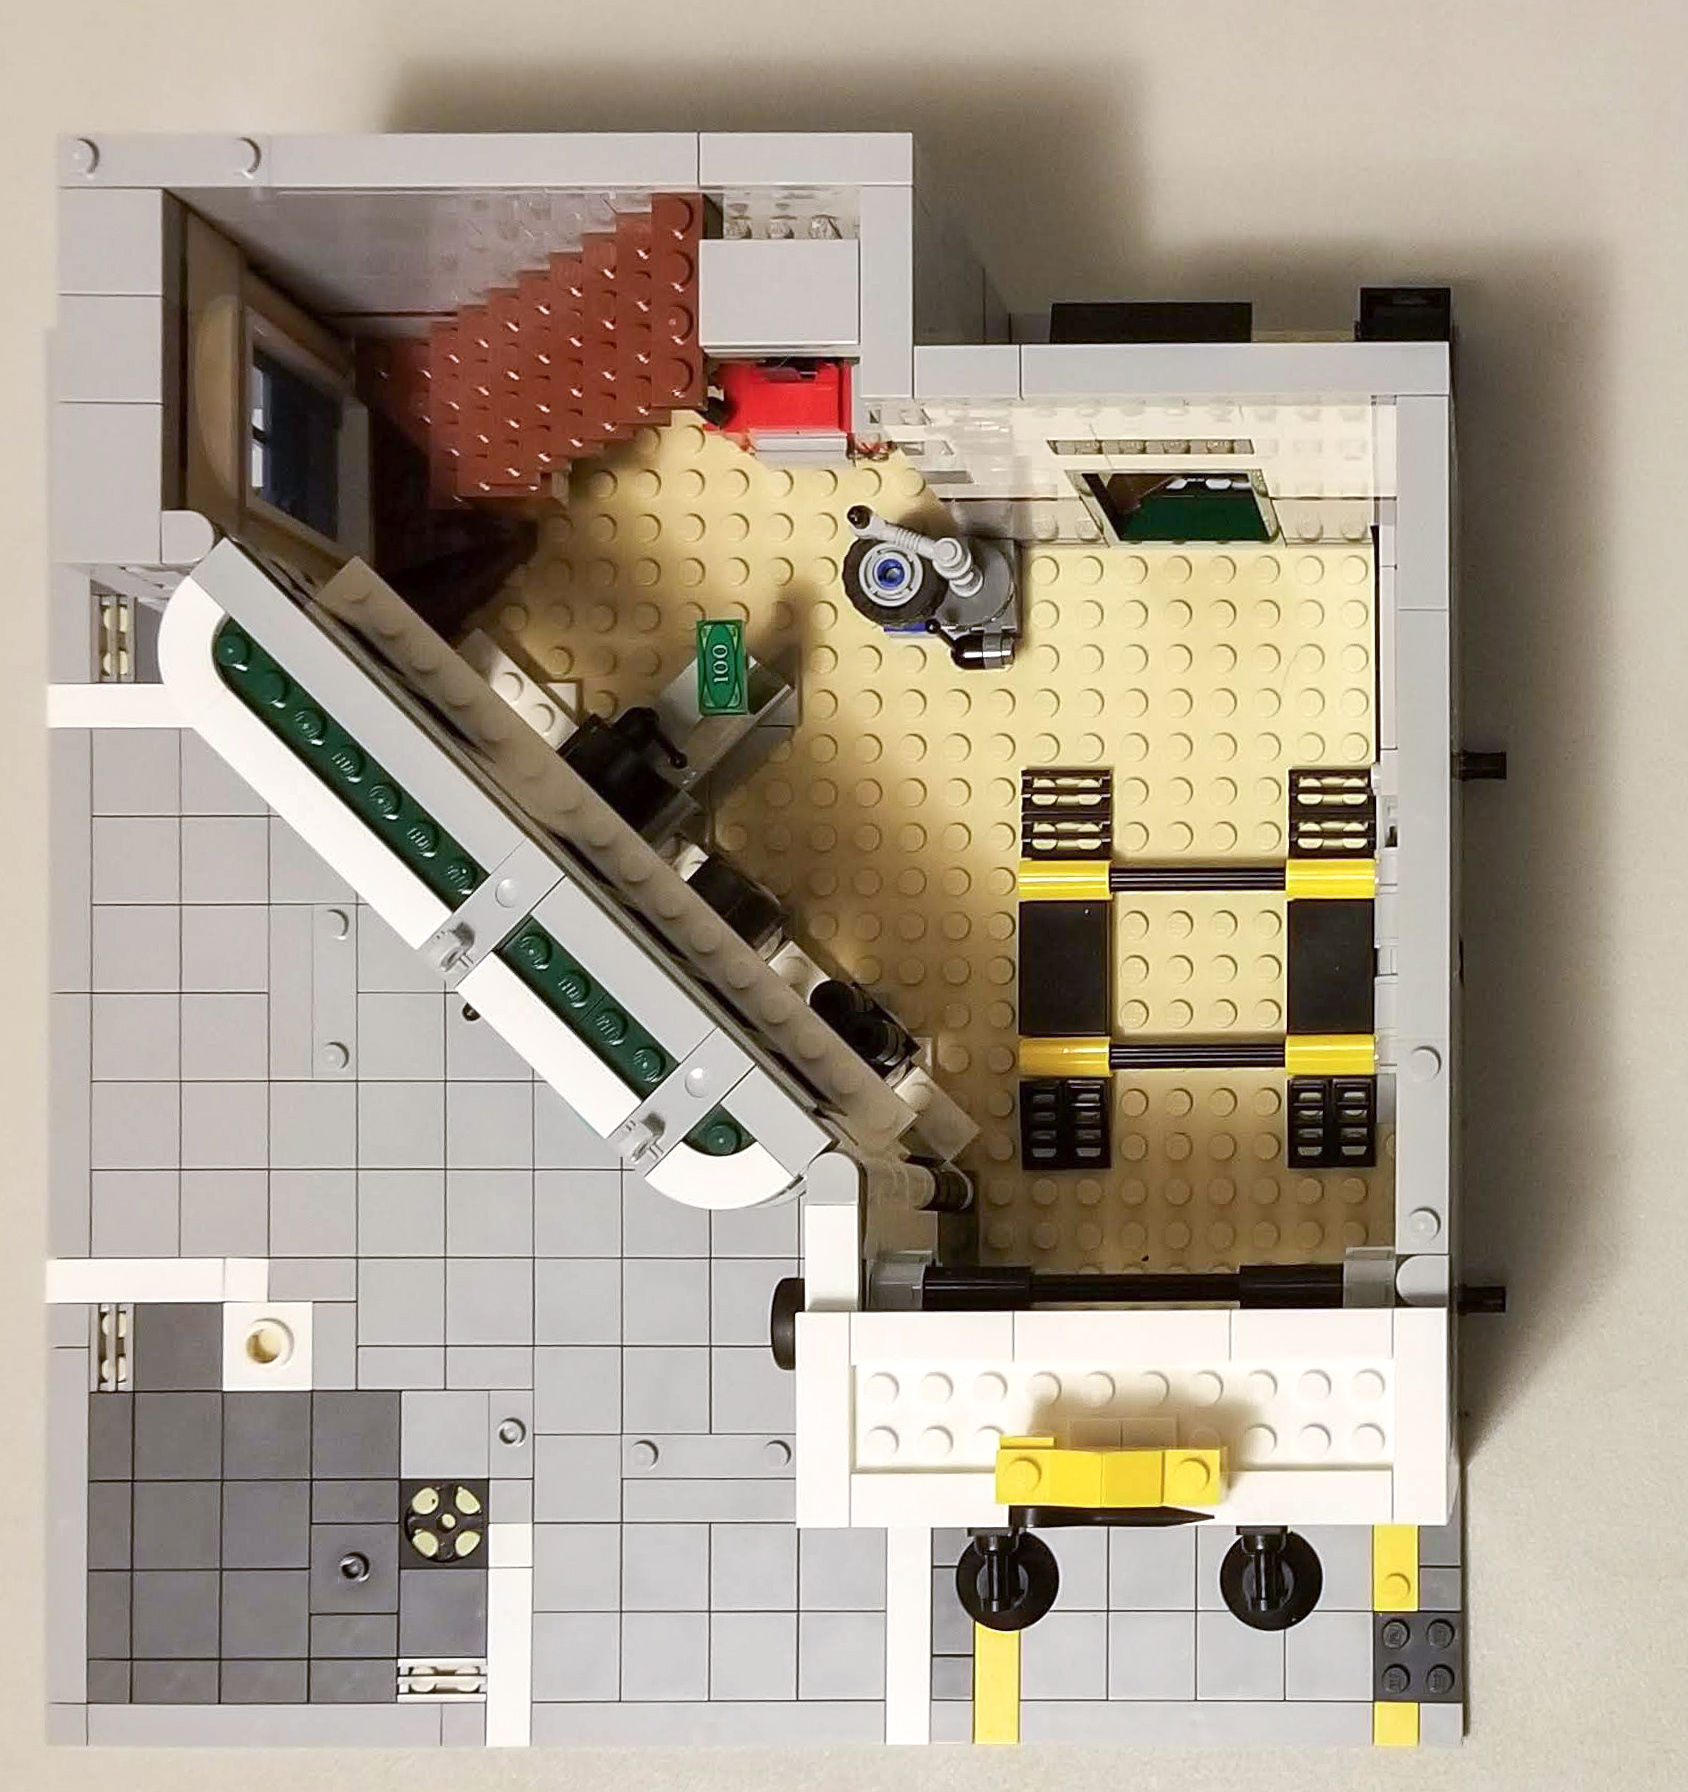
This initial part of the build is devoted to placing tiles on nearly 75% of the 32×32 baseplate. Amongst all of the tiles used is a new piece, White Tile, Modified 2 x 2 with Large Hole, part ID 27448. I played with this part for a few minutes before placing it on the baseplate to see if anything would snap into it other than the back of round plates. While nothing in regular system seemed to fit inside the hole, you can attach a 2×2 or larger part on top and twist it, allowing you to build at any angle you want. As more builders discover this part, we will see even more creative uses. I should note that the connection here is very sturdy unlike other ways this build does 45-degree angles.

Contents sorted by bag number.
A notable build in the first bag is one of the play features of the set, the car lift in the garage. This motion is achieved primarily by building both plates and tiles built sideways and creating a bar that slots between them which can be moved back and forth to raise the lift. At the back of the build by the rear garage door are what could be considered trash bins or grease traps. These are cleverly used as the pull-tab for the lifting bar. However, it doesn’t like it belongs here because of the mishmash of blue, grey and black colored parts used. As a side note, you might notice in the photo below are spare parts leftovers including an extra Harry Potter black wand. One of these wands is used for the tire changing station and another is yours to play with.
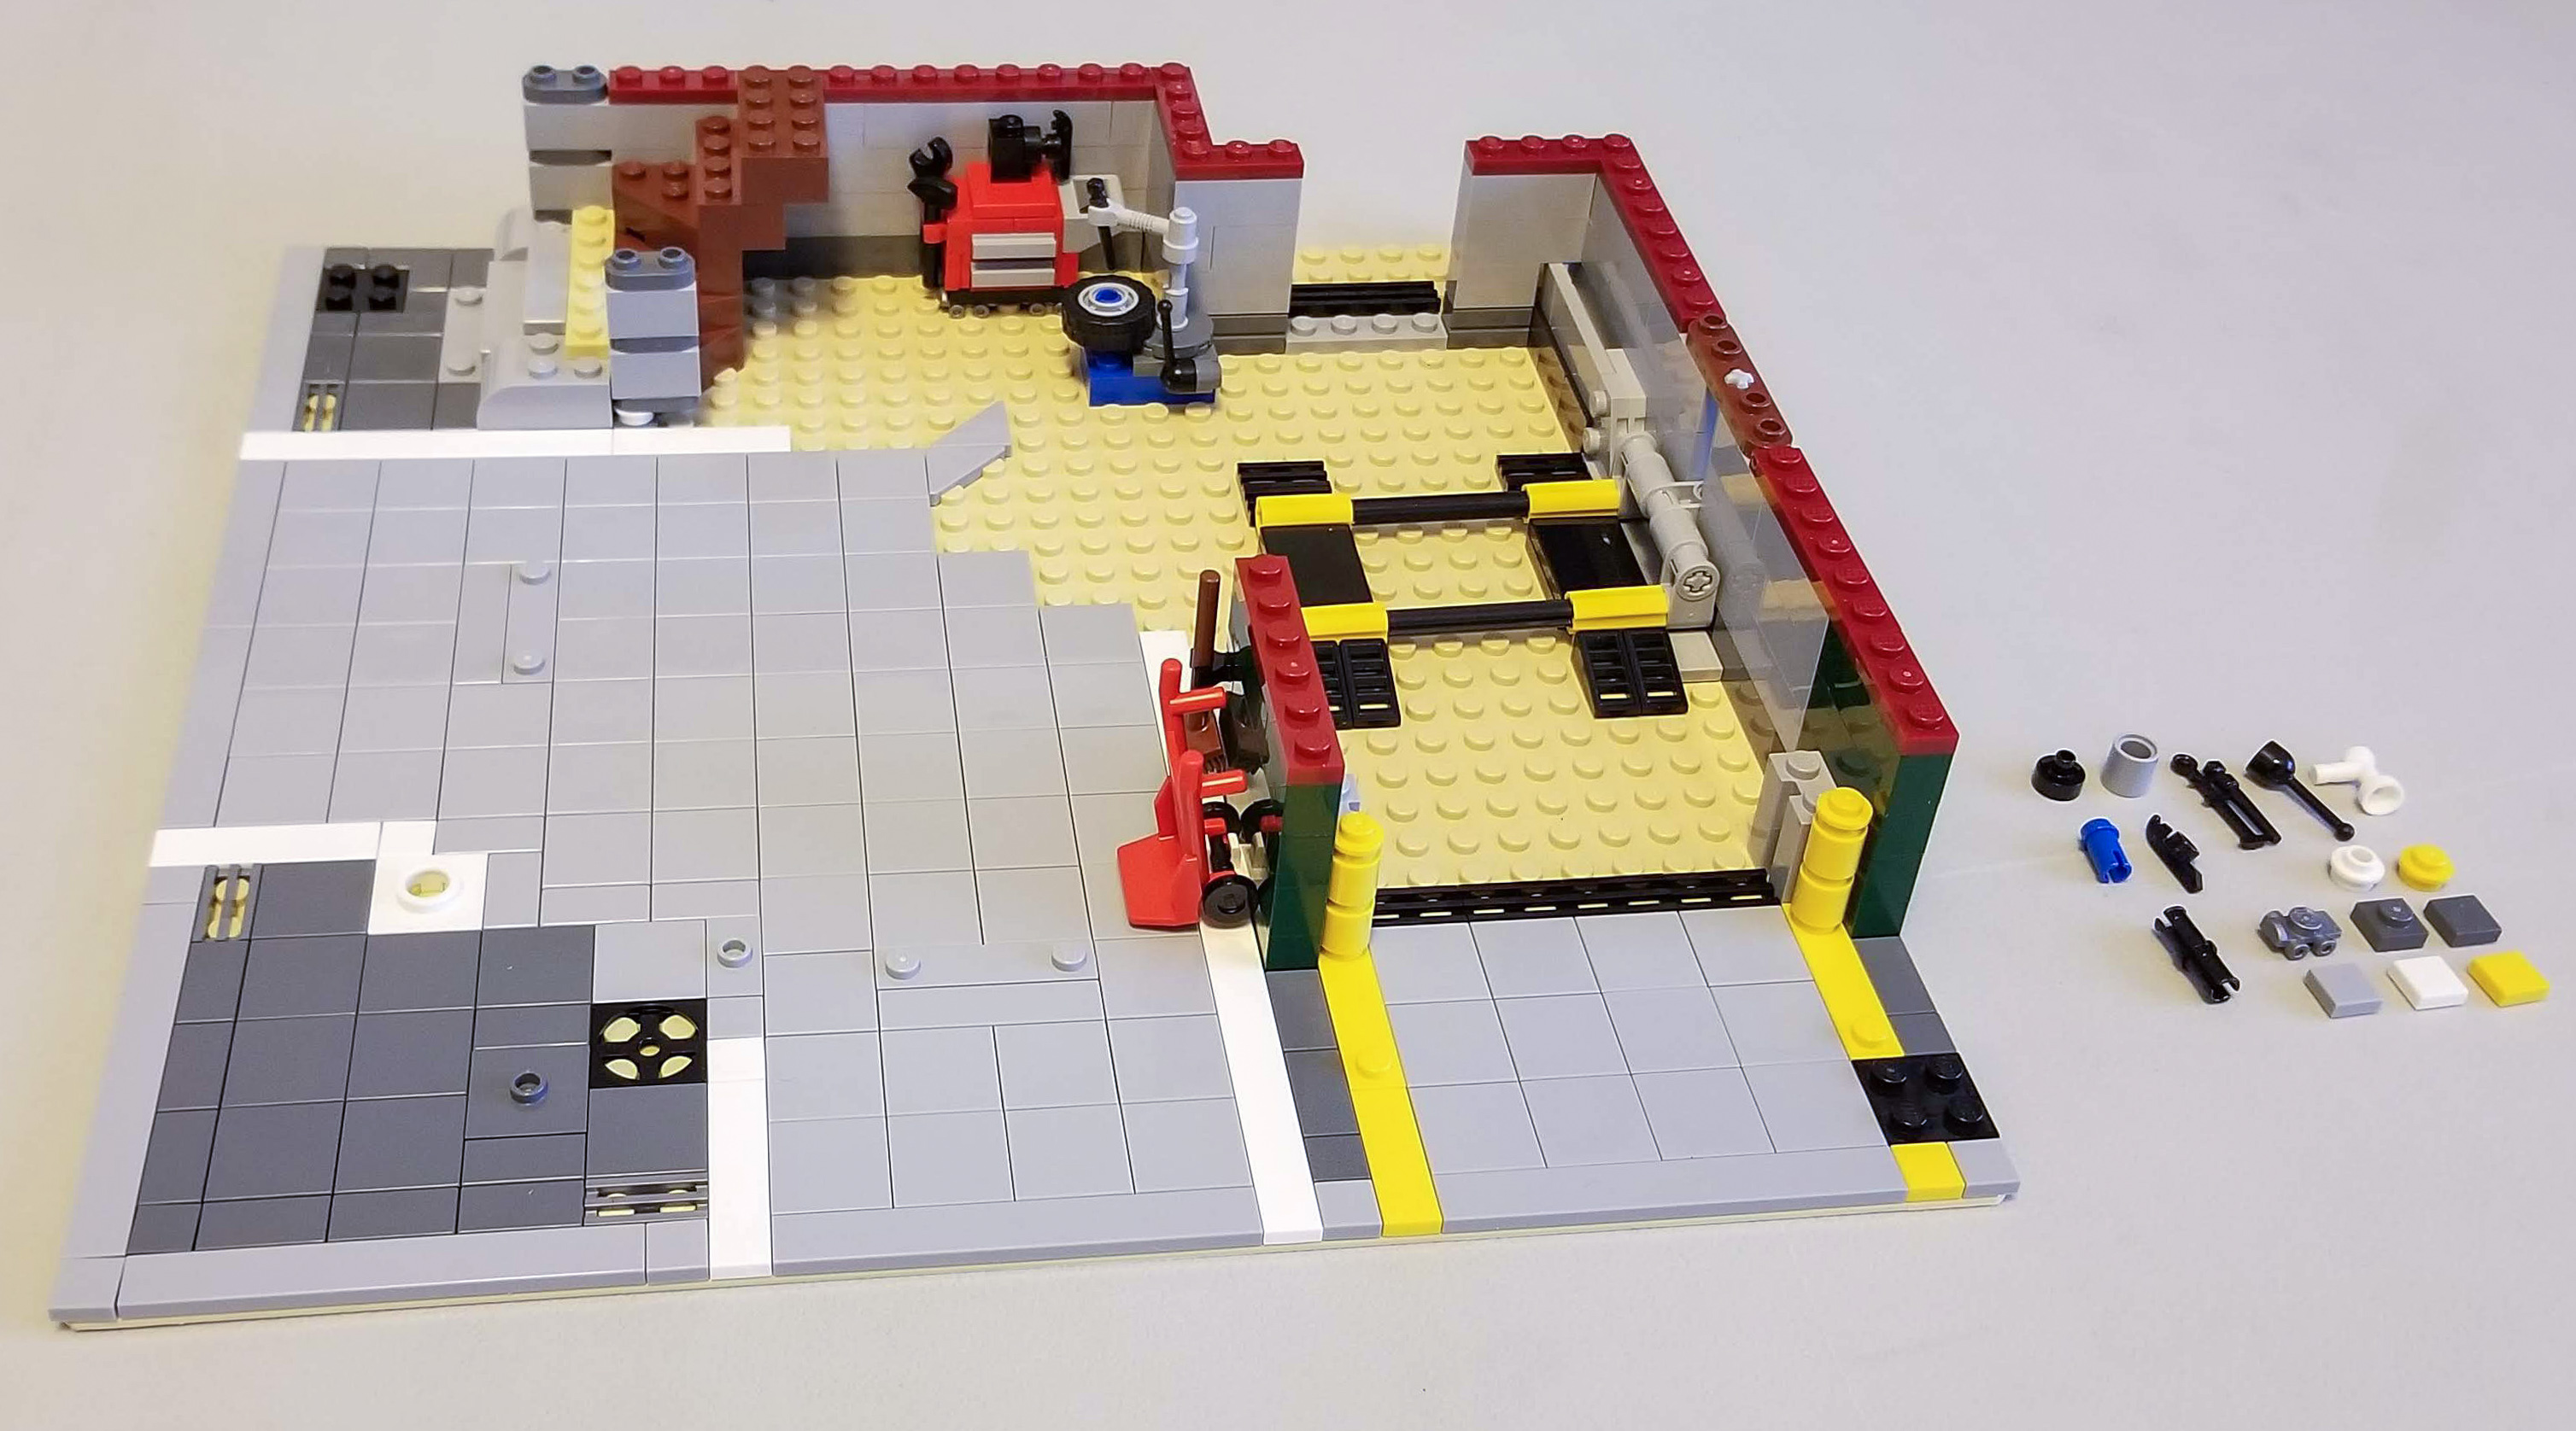
Progress by the end of Bag 1.
Bag 2 – Jo’s Garage
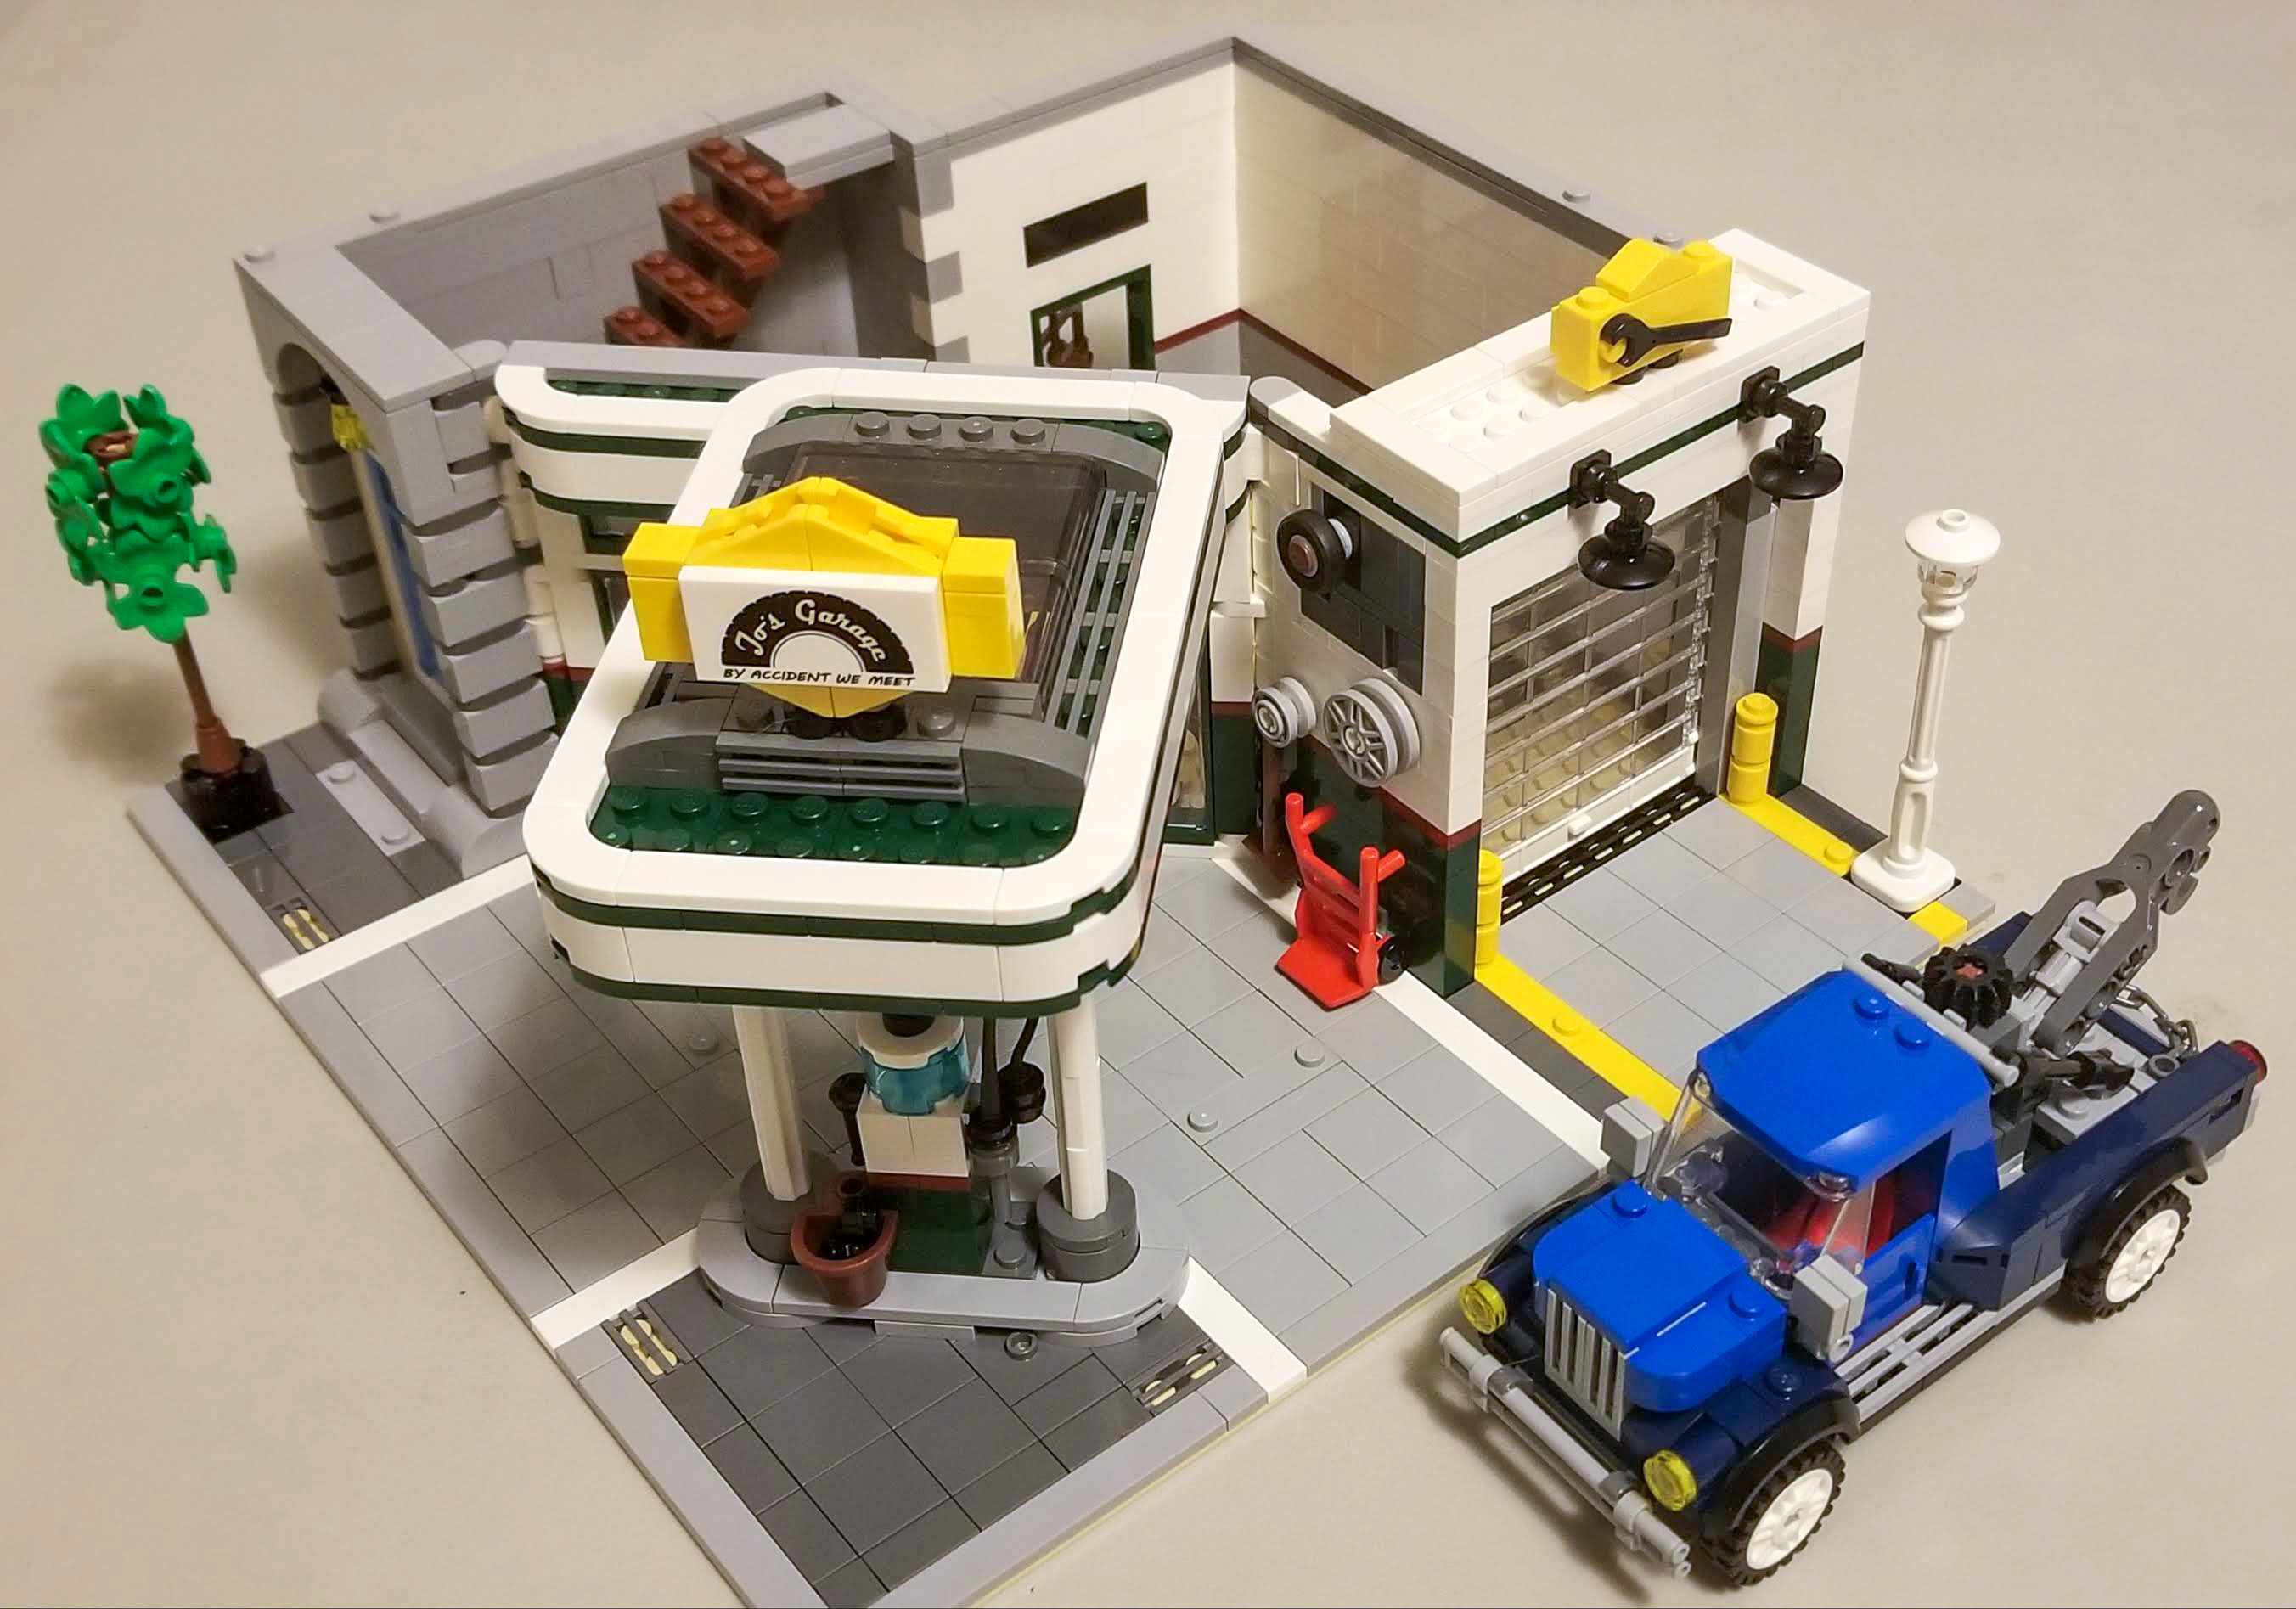
As with many buildings in the modular theme, LEGO has continued with the Americana feel. This garage looks like it would belong in many smaller cities in the United States circa 1950. It has many of the things you’d expect to find in a garage, for example: a tire changer, oil cans and tires for sale in the window, a car lift and a tool chest. The vehicles included in this set are a tow truc, and a classic Vespa-style scooter in 322Medium AzurMedium Azure. The garage also houses the garage attendants and contains everything that comes with them.
However, we are missing the one thing that gives a garage its purpose – a car. This missing element minimizes playability so I was a little disappointed. I understand most kids are going to have a LEGO car that they have built themselves or one that came with another set to supplement this though. Once I got over this missing piece I did what probably anyone would do, open the garage doors. The door is a typical LEGO roll-up door complete with a section that has a hand hold on it. To my disappointment though it doesn’t work. If you try to raise it using the handle it will jam every single time. I thought I must have built it wrong and took that area apart and rebuilt it several times to be sure it wasn’t me. It’s clear that snags on the ceiling of the garage as it goes up; a disappointing end to this section.
Progress by the end of Bag 2.
The designer decided to do a proper roll-up door instead of the typical door track system used in many sets from police to fire station. Even though they use that track piece on the vertical section it is missing the the horizontal piece. To make the door work, there are 3 wheels builton the exterior of the wall. The uppermost wheel has a rubber tire around it which is tied into the system that raises and lowers the garage door. This would be awesome if this were a secret door with a hidden passageway, but it’s not. Even post build after knowing how to open the door I still automatically reach for the door rather than the wheel… To make this motion work there are a bunch of exposed pieces on both sides of the garage walls which adds strangeness.

Rotate the tire on the upper-left hand side of the garage to open it.
Bag 3 – Jo’s Garage
On the pump is advertised the familiar red, white and green of Octan Gas, LEGO’s long standing brand of fuel for brick cars and planes. If this was missing, it just wouldn’t be a LEGO gas station! There’s also the usual windshield wiper station one would find at a garage which cleverly uses a single ice skate as the squeegee. Jo’s Garage itself has a large number of sections for you to enjoy. There is a covered area for cars, to pull into for service. The tow truck has a simple geared hook system, which I will assume is to pick up the musician with his pink caddy in case he crashes it when leaving the Downtown Diner down the street!
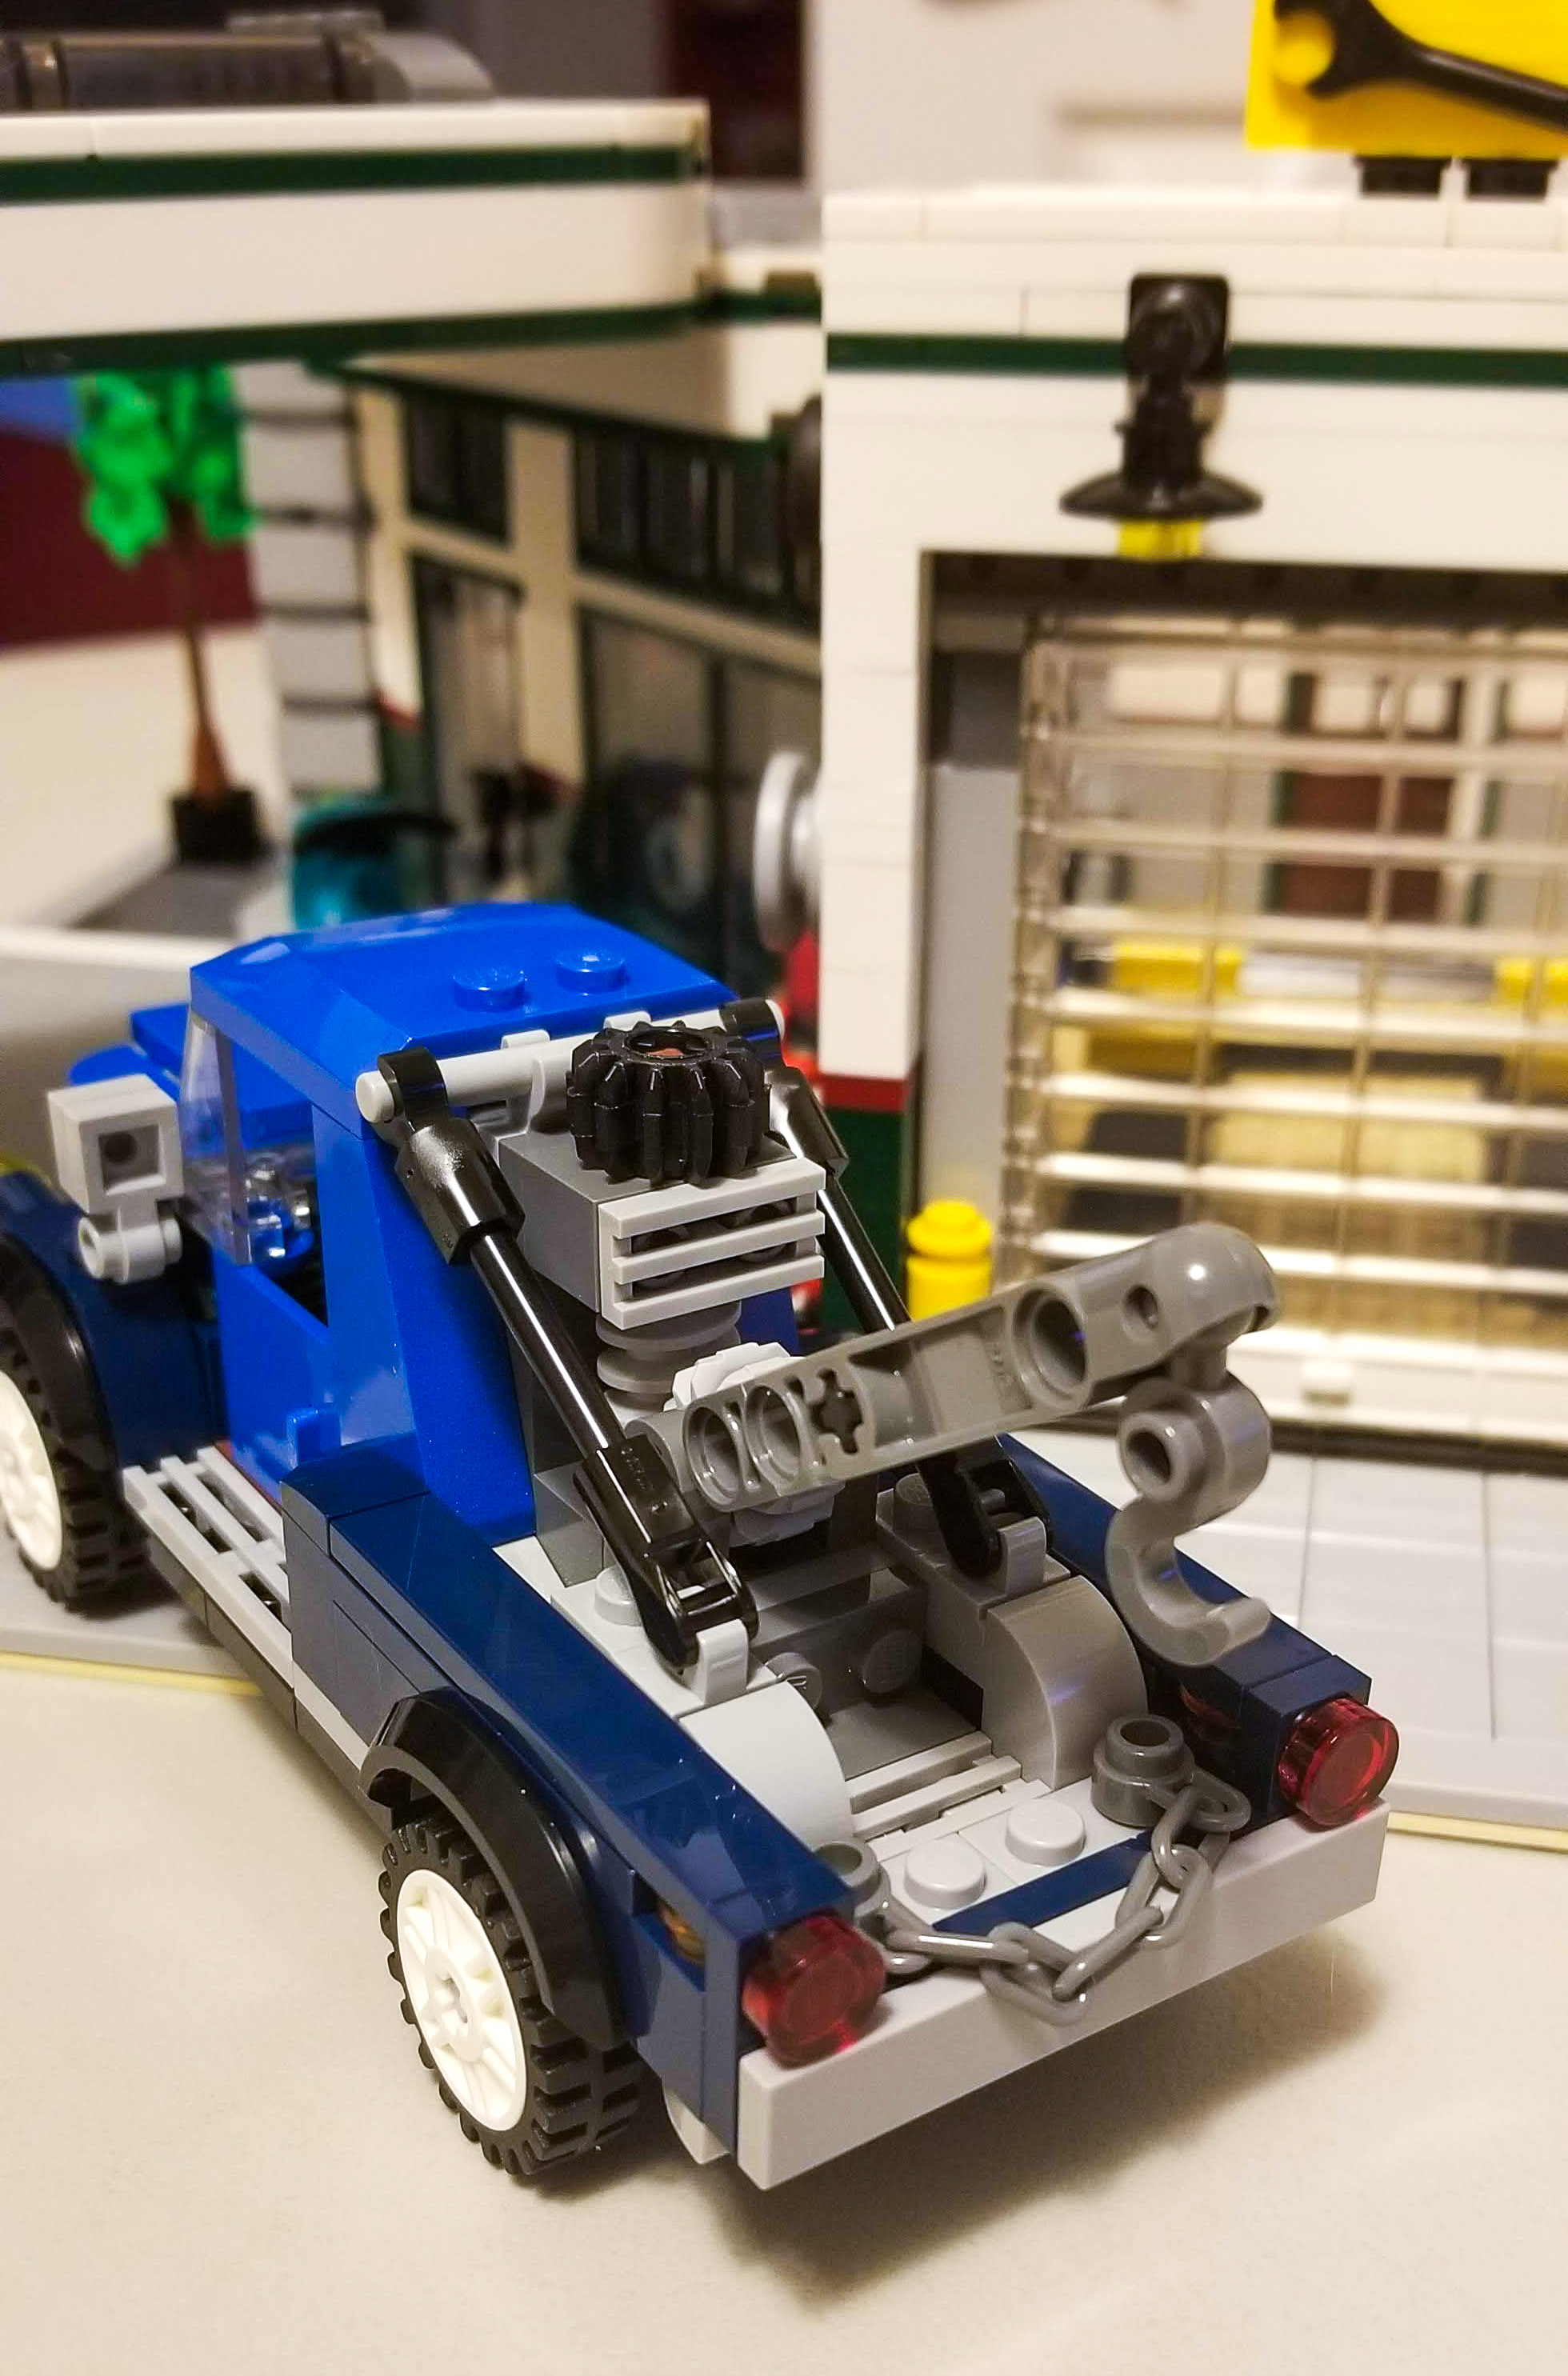
A blue tow truck is included.
By the end of bag 3, the first floor is complete. When done this base has a fairly sturdy feel to it. It also looks good except for the wall area beside the roll-up door. The final task to complete this angled floor of the building involves adding many single stud connections.. Building the glass façade of the garage was done with a single stud at both the left and right ends of the wall, a stack of round 1×1 brick and plate and held in place with the new plate modified 1 x 2 rounded with 2 open studs. Whilst allowing the wall to be constructed, it also meant that during construction the wall was rather flimsy so I was concerned about how strong it would be when done as I often transport my modulars to the various town and train shows our LUG puts on so not having to rebuild this the morning of a show is important. I was quite pleased that it was secure and the pieces held together nicely when it was completed.
The color scheme of the connected awning ties in beautifully. It was fragile while being built but holds together well once completed. I felt while building the awning that if they had used a larger single piece instead of several smaller ones in a few steps of this section, it likely would have been stronger during building and would not have fallen apart while building it. The larger failure in the design is yet to be addressed though. This occurring on the first level with the access stairs to the Vet clinic and apartment.
Progress by the end of Bag 3.
Keeping in mind that ‘ve worked in the architectural profession for many years, I might be a bit sensitive to details that others might not notice. Nonetheless, even as a child, I wanted my LEGO buildings to be realistic. Unfortunately, the first-floor stairs don’t make sense. You would never have a doorway to an upstairs business that allowed you to also walk directly into the business downstairs. The vet has its own door right next to the garage’s door. This door does have a paw print on the knob which is super cute, but when the Doc closes and he locks his door for the day, does he really want people being able to walk freely from the garage up to his business? Having run my own business I know I wouldn’t want that. The vet does have a wall and door to his private office upstairs but still, not right. After all, keep in mind there are LEGO crooks over at the Brick Bank just looking to get away with something!
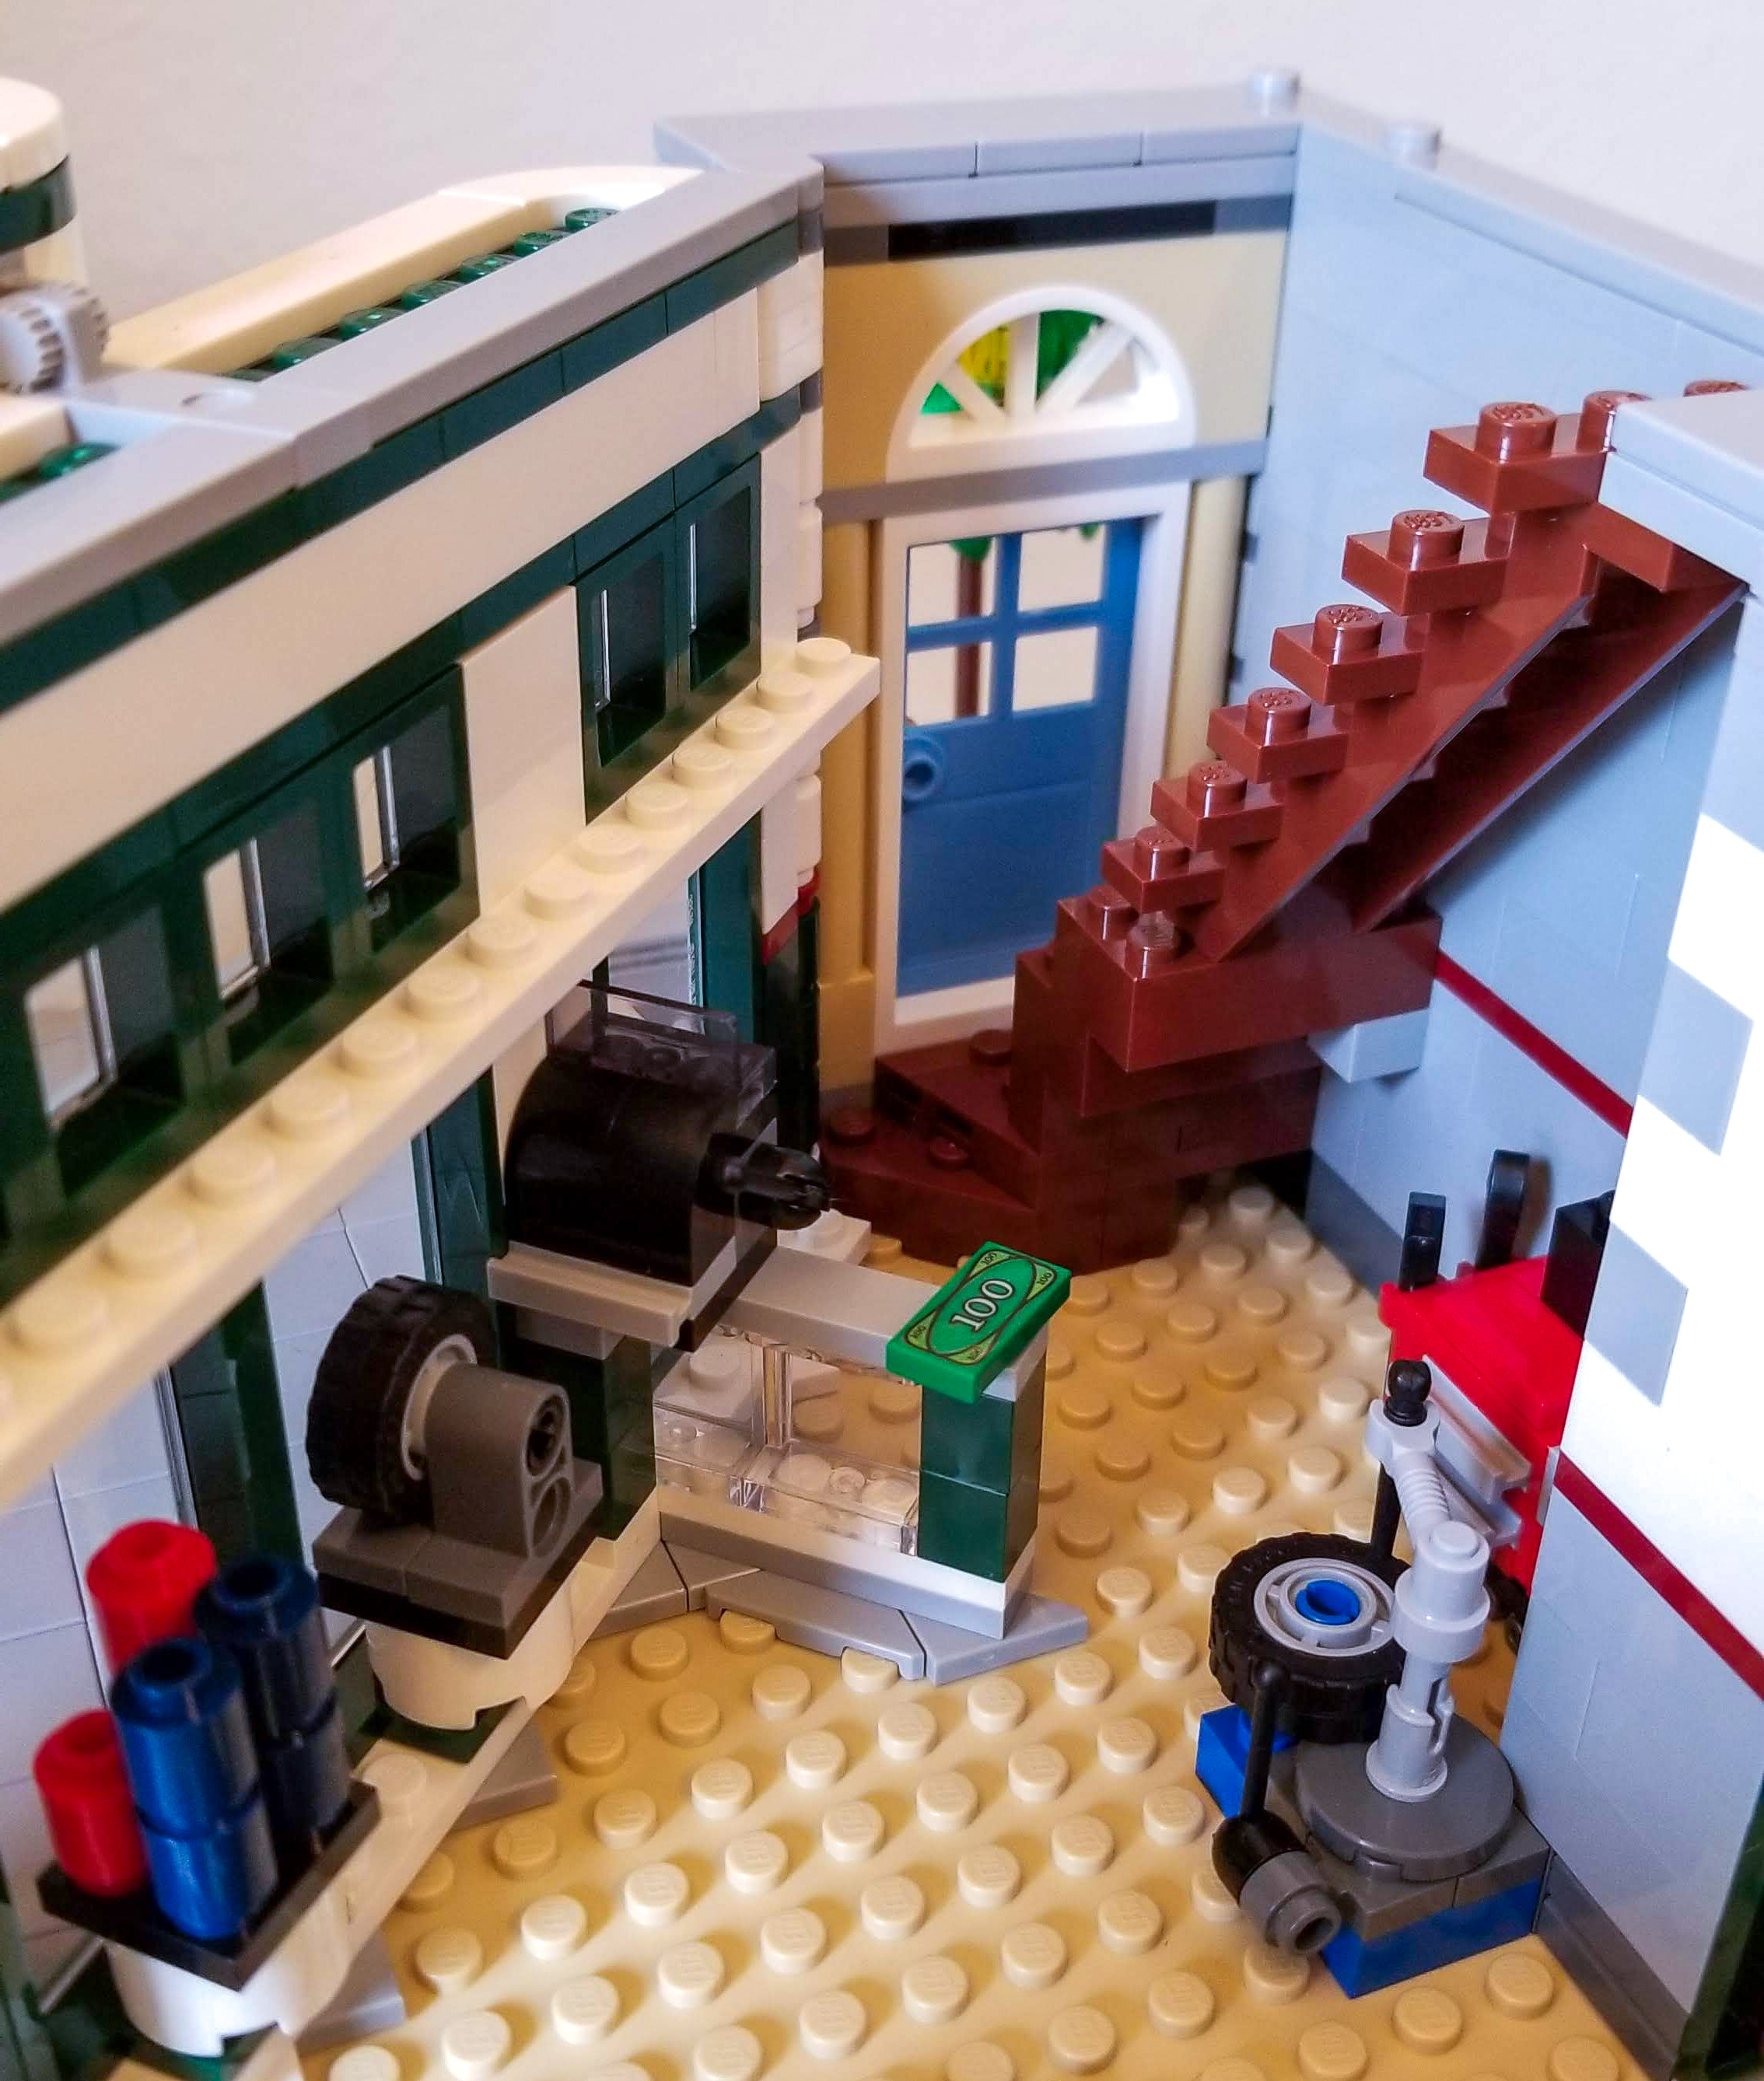
Stairs and inside of garage.
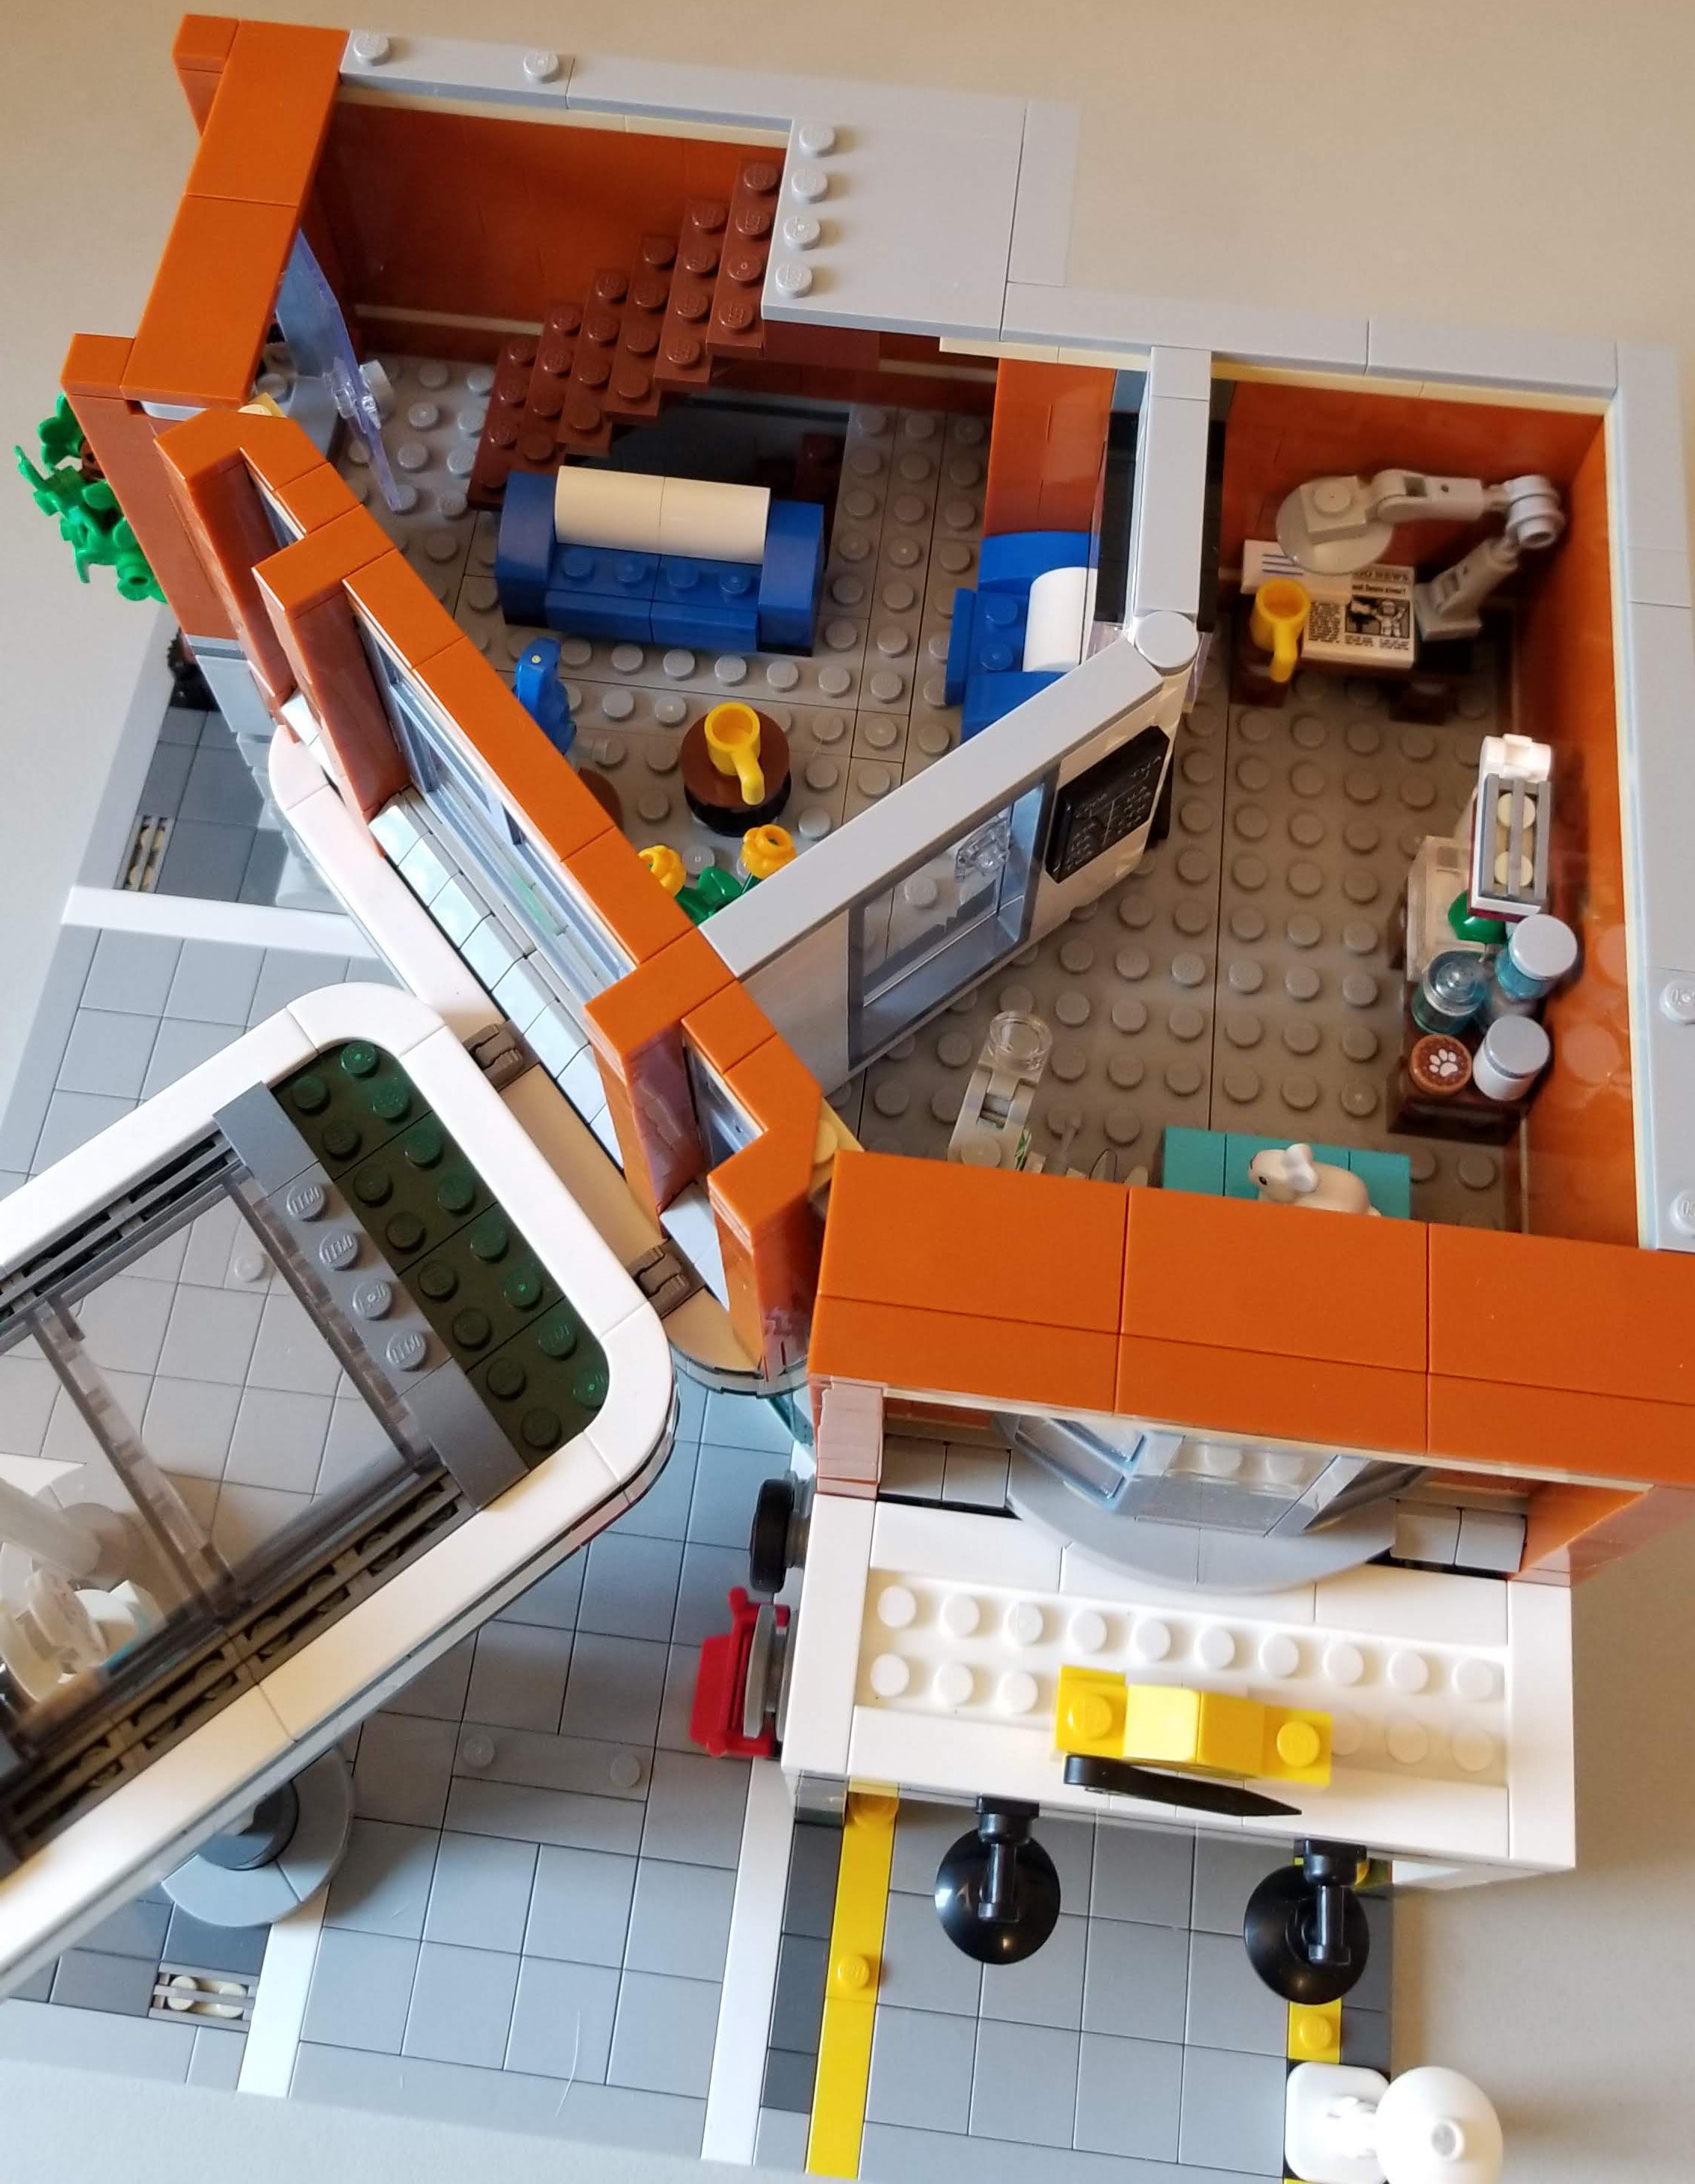
Bag 4 – The Vet
The veterinarian appears to be an older gentleman who is helping a little girl with any one of the various animals that come with this set. His office has a fish tank and a waiting room complete with parrot on a stand. I found it interesting that one of the many printed tiles that come with the set is a map of Heart Lake City Does this mean that the modulars should be considered to be in the same city as the buildings in the Heart Lake City line sets are? Conspiracies aside, I think that it is more likely the LEGO had extra of those printed tiles and someone thought it would be simple to add that in instead of creating a newly decorated piece for the wall. I would love know what the reasoning behind using this piece was though. One nice thing about this set is that there isn’t a single sticker used, all decorations are printed pieces. There are quite a few new printed pieces too including the main window that says “Dr. Jones Animal Care” and below that “No Snakes!”
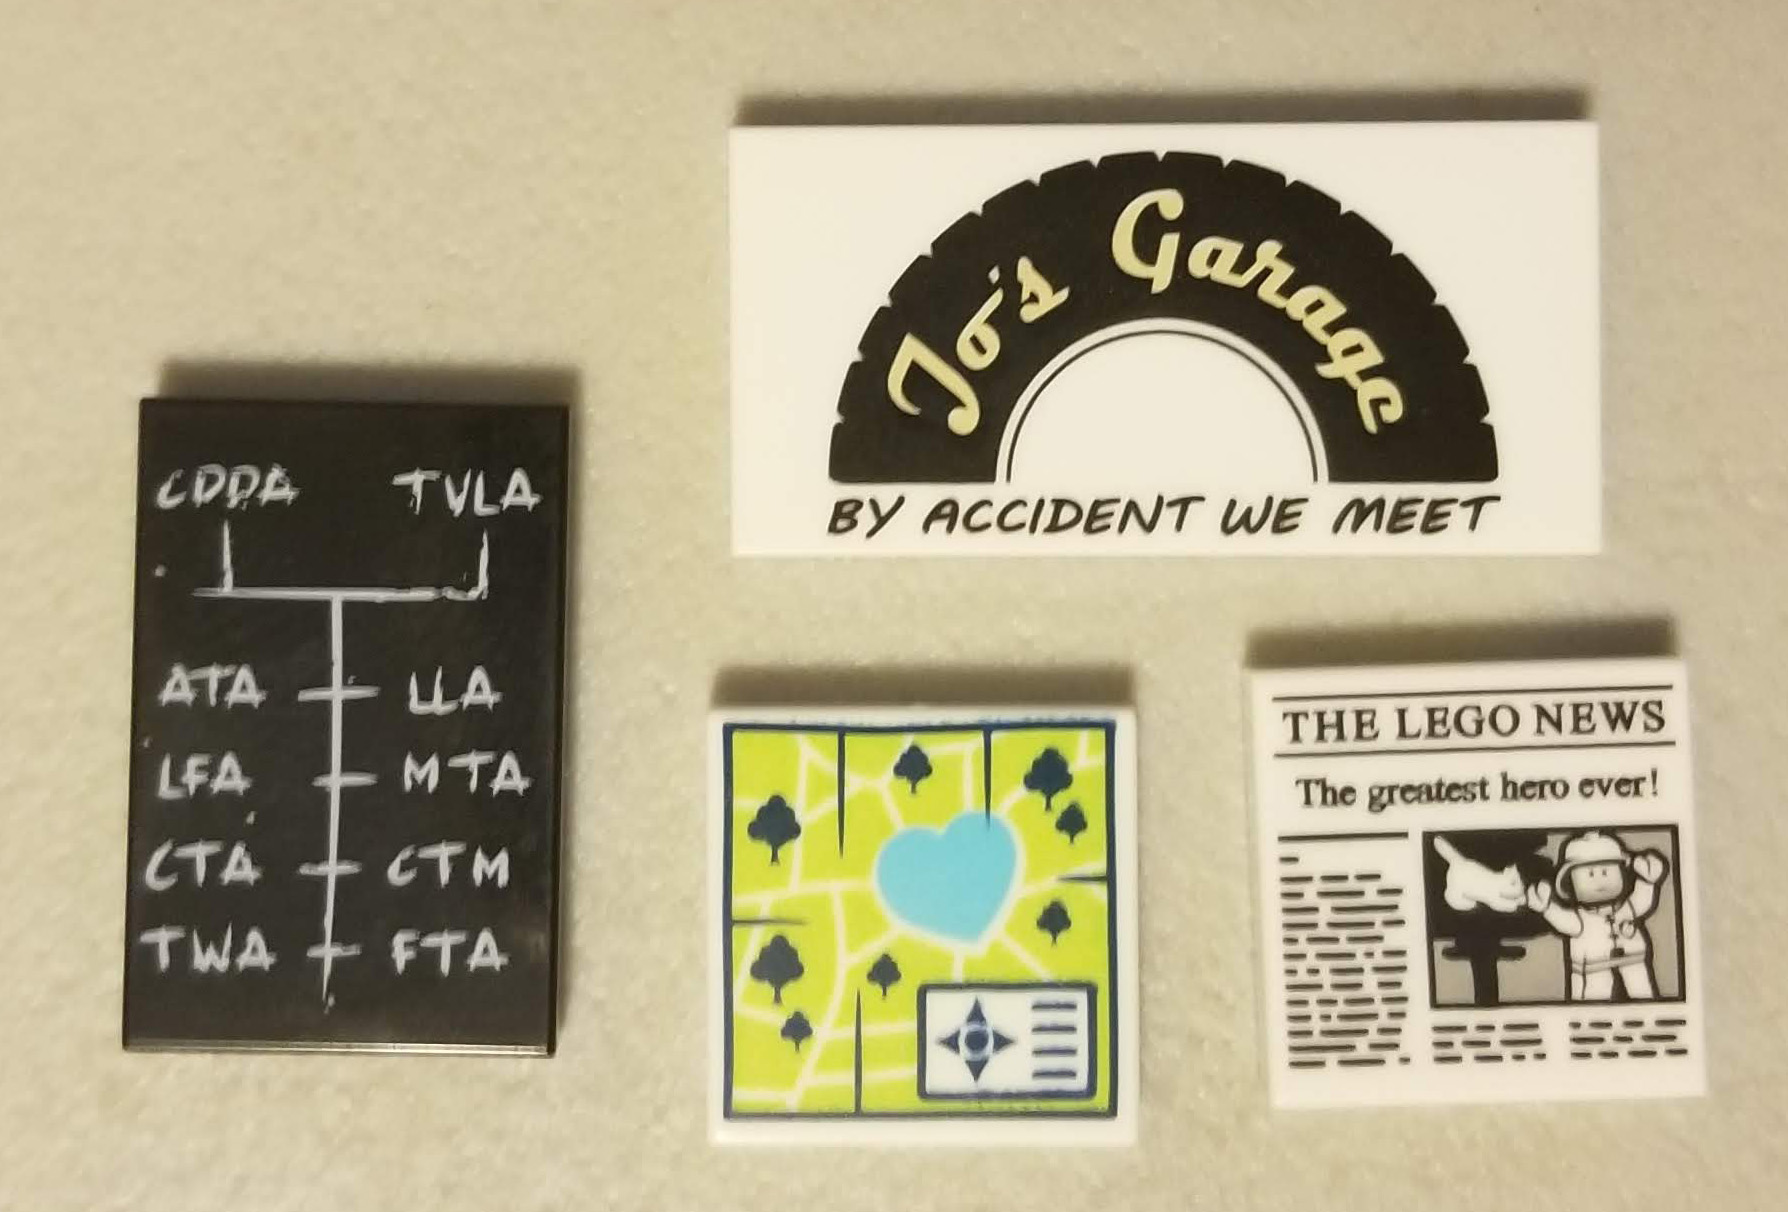
Printed tiles.
It is important to note that the wall between the vet’s office and waiting room starts off orthogonal and then turns so as to be perpendicular to the main façade wall at 45 degrees. This helps add additional stability to the frontage wall which again has few connection points.
One of the things that I enjoy seeing with modulars is how the designer has created the bay windows. In Bag 4 we hit upon that detail which has us using two standard clear pieces as well as two SNOT (Stud Not On Top) connected windscreens. I wondered if the designer did this on purpose as an homage to the fact that this is a garage and what better way to create a bay window than using a car’s windscreen.
At the other side of the 2nd floor is another staircase, again no wall or door here and a nice little Juliet balcony. There is a problem here though. You can’t open the door fully because the stair is in the way!
Second Story interior at end of Bag 4.
Bag 5 – The Apartment
On the top floor we have a nice studio apartment with zero privacy. Sleeping? No worries, one of the kids visiting the vets’ office or a car mechanic can sneak up into your bedroom here with nothing to stop them. This architectural design decision is really weird. Keeping with the 1950’s era theme here, the bed with its metal styled head and footer, bathroom, and even the old tube style TV are all reminiscent of that era while the kitchen could be taken right out of an Ikea catalog and looking very modern and modular. The kitchen is well equipped with everything from a cleaver to an ice cream scoop (if only there was a fridge or freezer to keep said ice cream in).
I love all the Dark Orange used in the second and third floors. The issue though here is many pieces don’t come in that color, so other colors are substituted like medium dark flesh for a 1×2 techinic brick or all the various gray bricks that are here and there throughout these levels. While I think the tan, dark orange and light bluish gray all work together to form a nice color scheme if I was the designer, I would have liked to pull in more of the sand blue used in the window frames or tan from the accent bricks. Simply put, in my opinion the designer did not make the necessary connection pieces in those colors so had to use a large amount of gray, highlighting the limitations in the LEGO piece color palate. Having them all be of a similar color value though does tie the room together nicely and is a nice contrast to the first floor white, dark green and reddish brown accents.
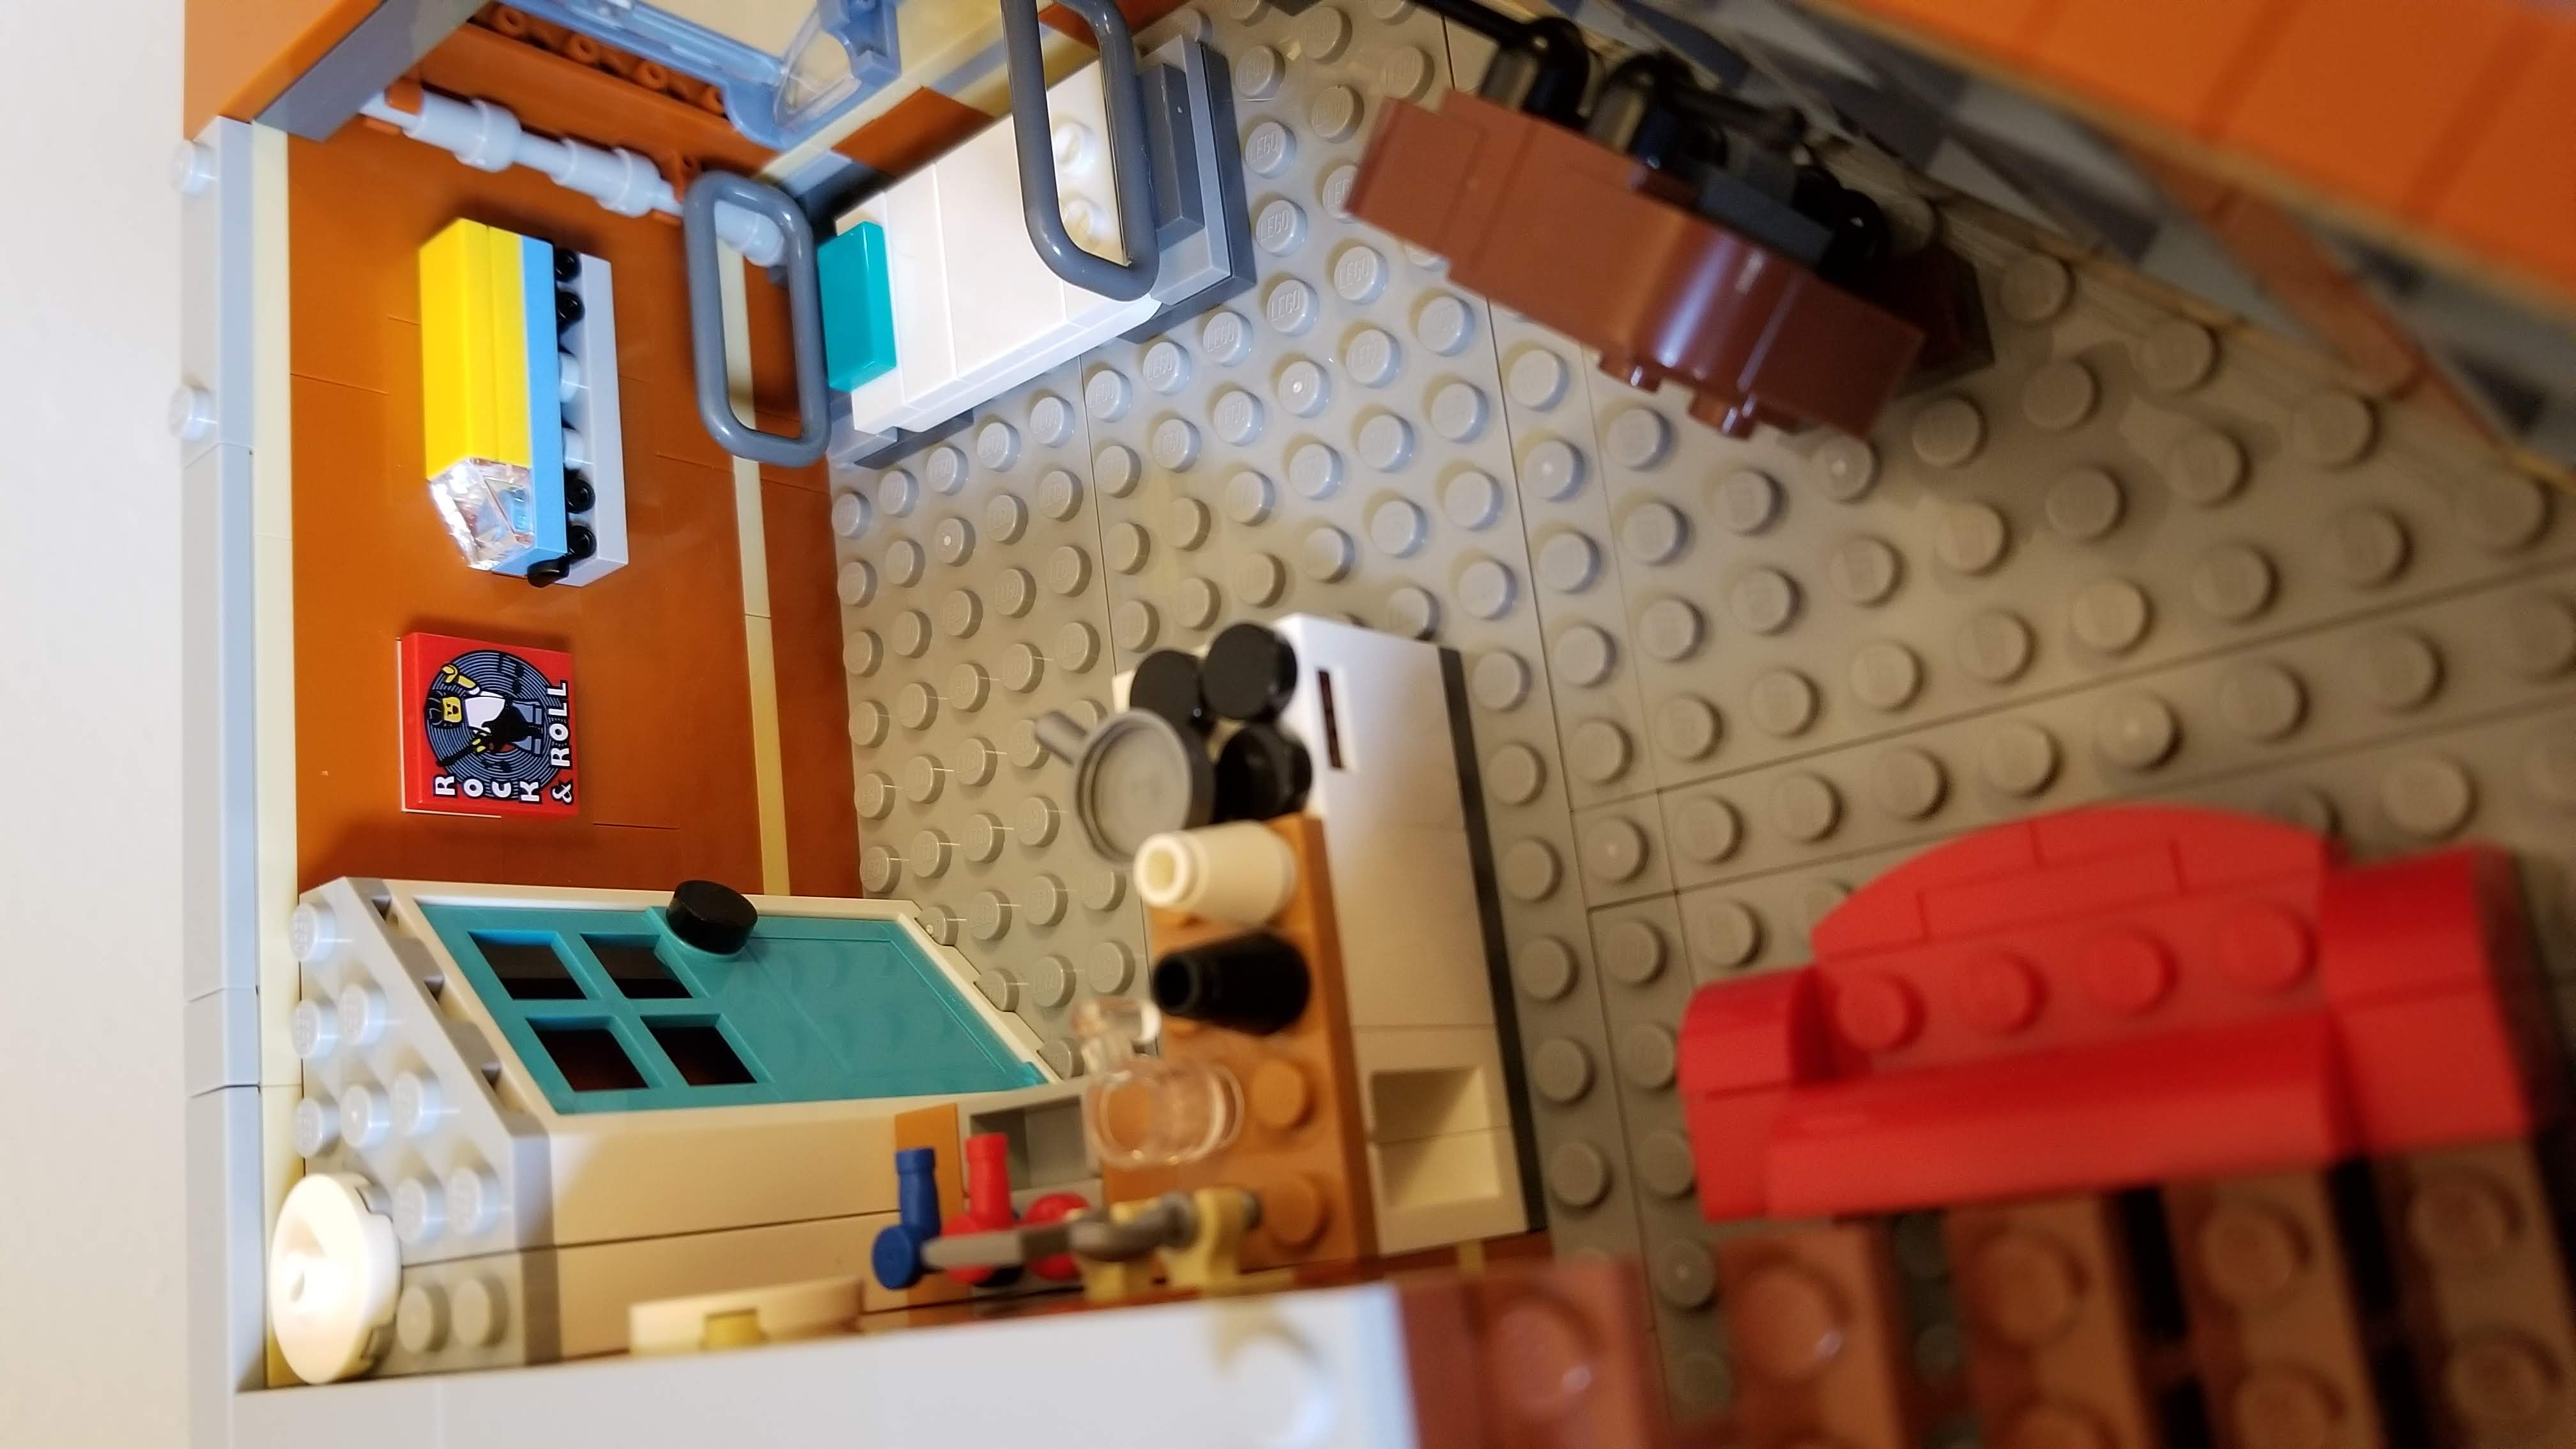
Apartment details in Bag 5.
The Juliet balcony detail on the second floor would have worked so much better in the apartment level where it would make more sense and have the flowers and window on the second floor at the animal clinic. No one waiting for the vet with a sick animal is going to go out on the balcony. This unnecessary addition would raise the rental rate on the apartment!

With a small modification, you can swap the second and third floor.
I should also note that if you flip a 1×6 tile with a 1×4 tile with 2 studs located at the top of the garage wall next to the staircase you can then have the second and third floors be interchangeable allowing for more playability.
Bag 6 – Up on the Rooftop
I always like to see what pieces the designers use when creating the parapet of sets in the modular building series.. While in the Brick Bank we had rabbit ears my personal favorite roof was that of the Detective’s Office where they went with gray cat tails and hero factory fists!
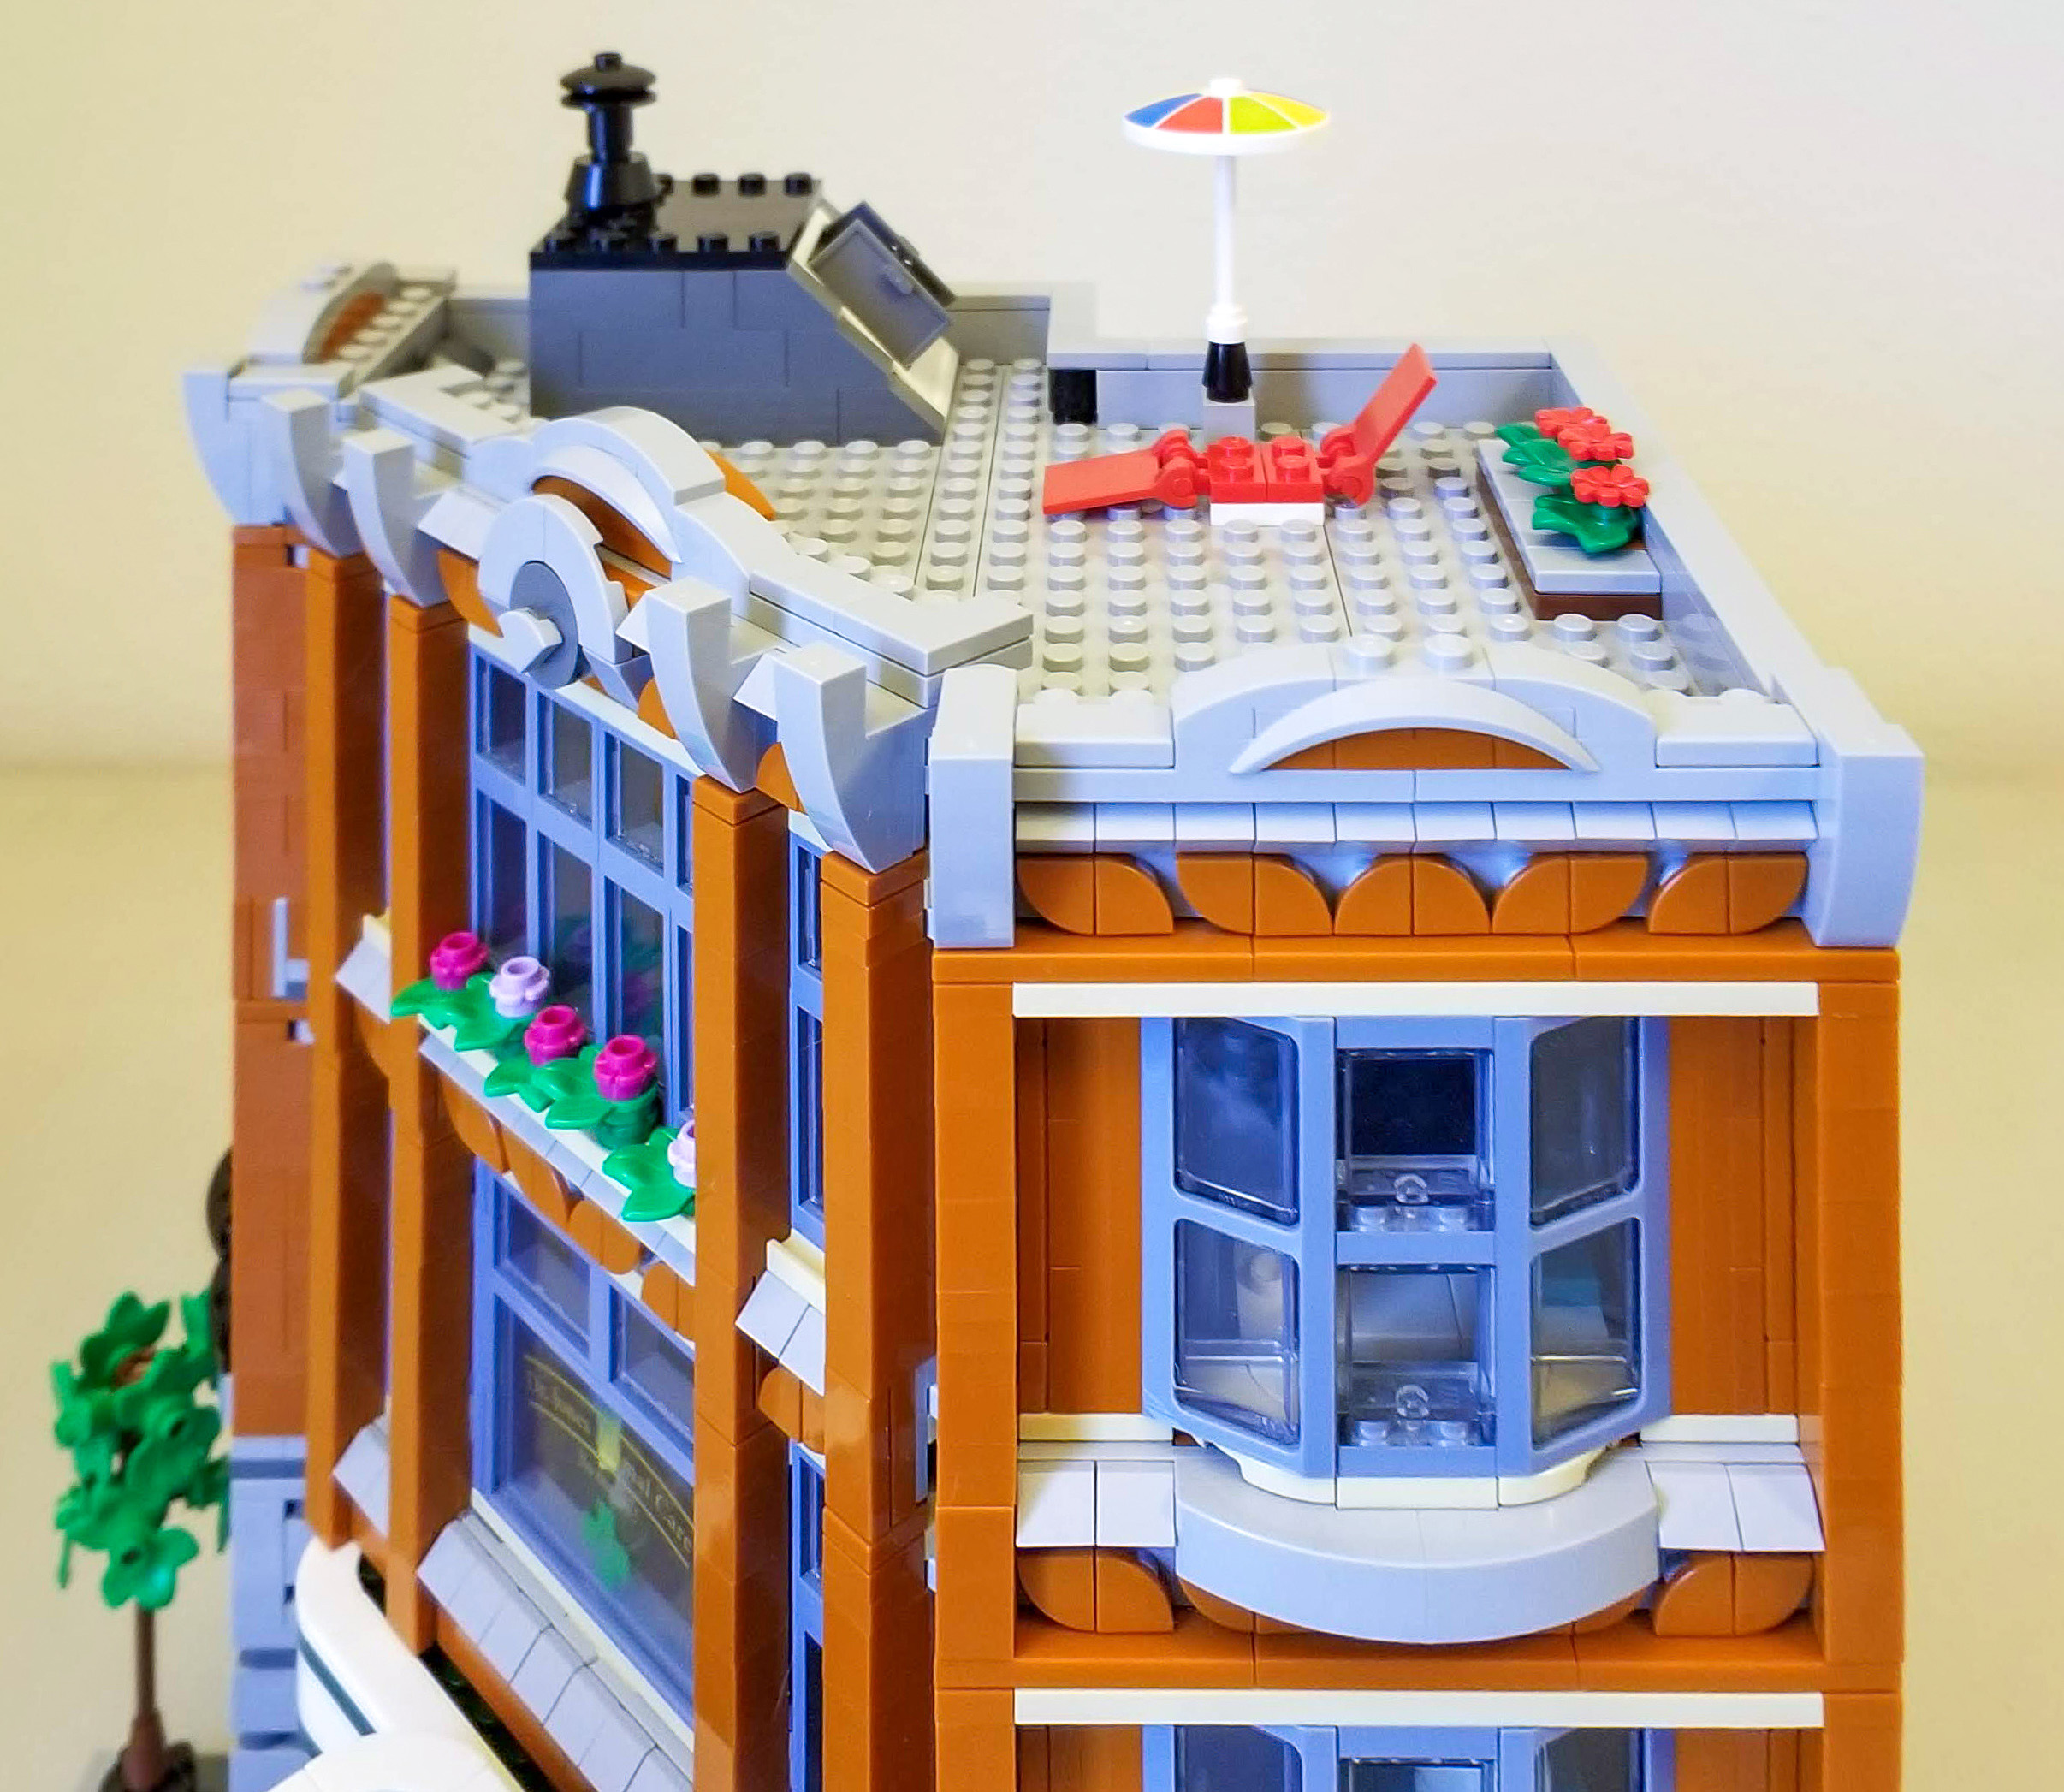
The model is now complete, with a nice looking rooftop.
In keeping with the theme of being a garage, the parapets used vehicle mudguards and curved slopes which are often used in LEGO on cars. Ok, so it’s not as inspiring as the hero factory fists but it does stay with the theme and looks nice. The rest of the roof is fairly plain. There is a small flower area and a recliner with an umbrella to sunbathe at. The hatchway to the roof though is simple but nicely done in line with that era’s style.
Conclusion
While I’ve skipped buying some modulars due to high price (such as #10255 Assembly Square or not enough going on inside (such as #10232 Palace Cinema), I was really looking forward to add this one to my collection. I like the set overall, and enjoyed seeing how they accomplished the 45-degree wall. I think we will see more interestingly shaped buildings in the future as they continue to leverage these new elements. I do plan to modify the garage doors and flip the balcony up to the third floor after completing this review.
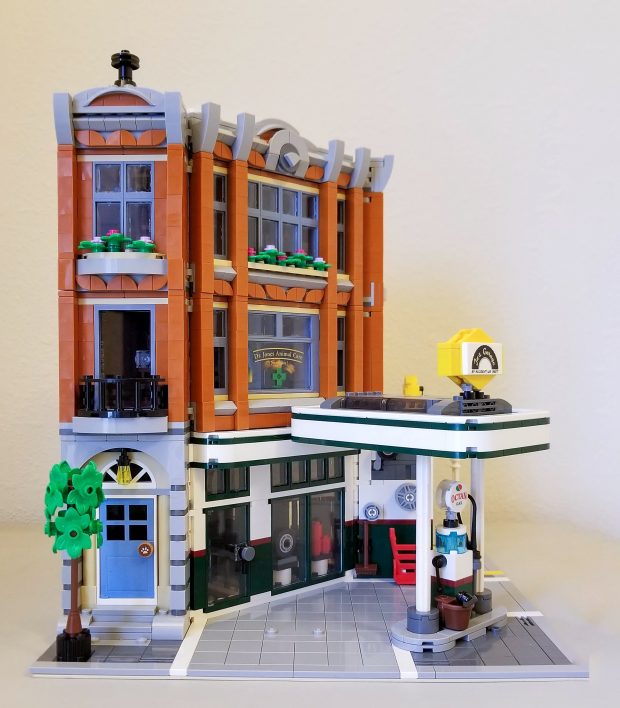
#10264 Corner Garage, the completed model.
While the build process is annoying at times, the finished model is surprisingly sturdy (and much sturdier than the Downtown Diner.) With 2,569 pieces for just $199.99, it’s a good buy at just shy of 8 cents per piece. The set earns our “Good” (3/5 Stars) rating thanks to a pretty good design, a good price-per-part, several animals and minifigs.