
Review: #10260 Downtown Diner
Can 2018’s entry into the Modular Building series overcome our many worries about the set?
I’m a fan of the modular building series, and have collected and built every one since #10218 Pet Shop – not including #10224 Town Hall which had been retired by the time I fully embraced this line.
Every fall, I eagerly await announcement of the following year’s Modular. #10260 Downtown Diner was announced in late November 2017, and there was an immediate backlash by many AFOLs. The design was too bright and modern, and didn’t fit with the first twelve buildings. Most controversially, the minifigures now sported stylized faces, rather than the classic smiley featured in previous Modular Buildings. I shared all of these concerns.
About the set
Downtown Diner was released on January 1, 2018. The set consisted of 2480 pieces with a retail price of $169.99 (USD). This is a bit more than the average number of pieces in a Modular set, which is 2358 pieces.
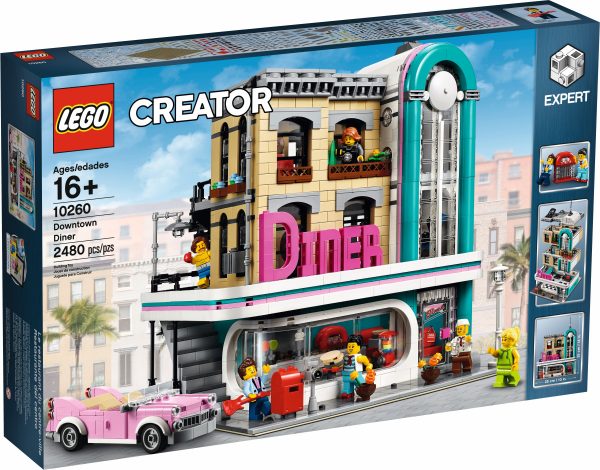
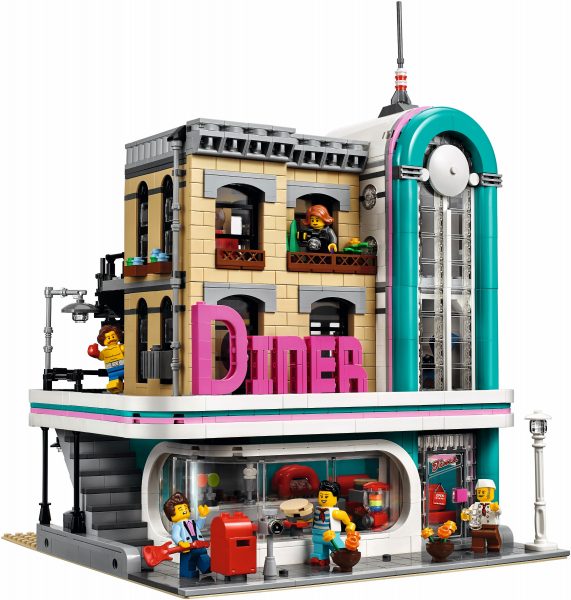
#10260 Downtown Diner. (Photo: The LEGO Group)
The set was designed by Mike Psiaki, who knew from the very start that he wanted an Art Deco style building, and began designing a car dealership. Mike struggled with that concept until a co-worker suggested a diner. (All of this info comes from the great designer video for this set, which I highly recommend!)
Streamline Moderne
The diner section of this building is a perfect example the Streamline Moderne architectural style, which grew out of the Art Deco movement. When the Great Depression hit, designers and architects moved from Art Deco’s rich colors and abstraction of natural forms to a colder, machine-like aesthetic filled with perfect curves, horizontal lines, and metal.

Club Moderne, 1937, in Anaconda, Montana, by Fred F. Willson. (Photo Jack Crossen, CC BY-NC-SA 2.0)
Other specific elements of Streamline Moderne include circular porthole style windows, curved canopies, corner windows, and the use of white as the predominate color. As you can see in this set, the designer effectively integrated many of these features.
Build Process
Like all Modular Buildings, this build is divided by floor. The bricks are in sets of five numbered bags, with the 32×32 baseplate and four 8×16 plates packaged separately. And, as is usual with Modulars, there are no stickers.
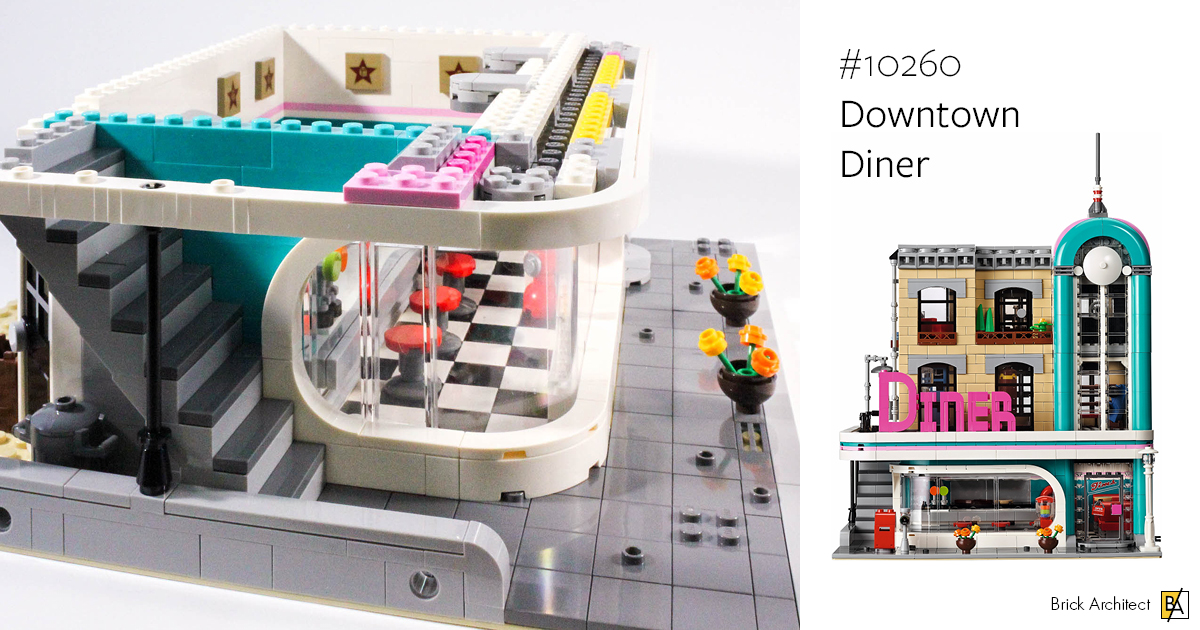
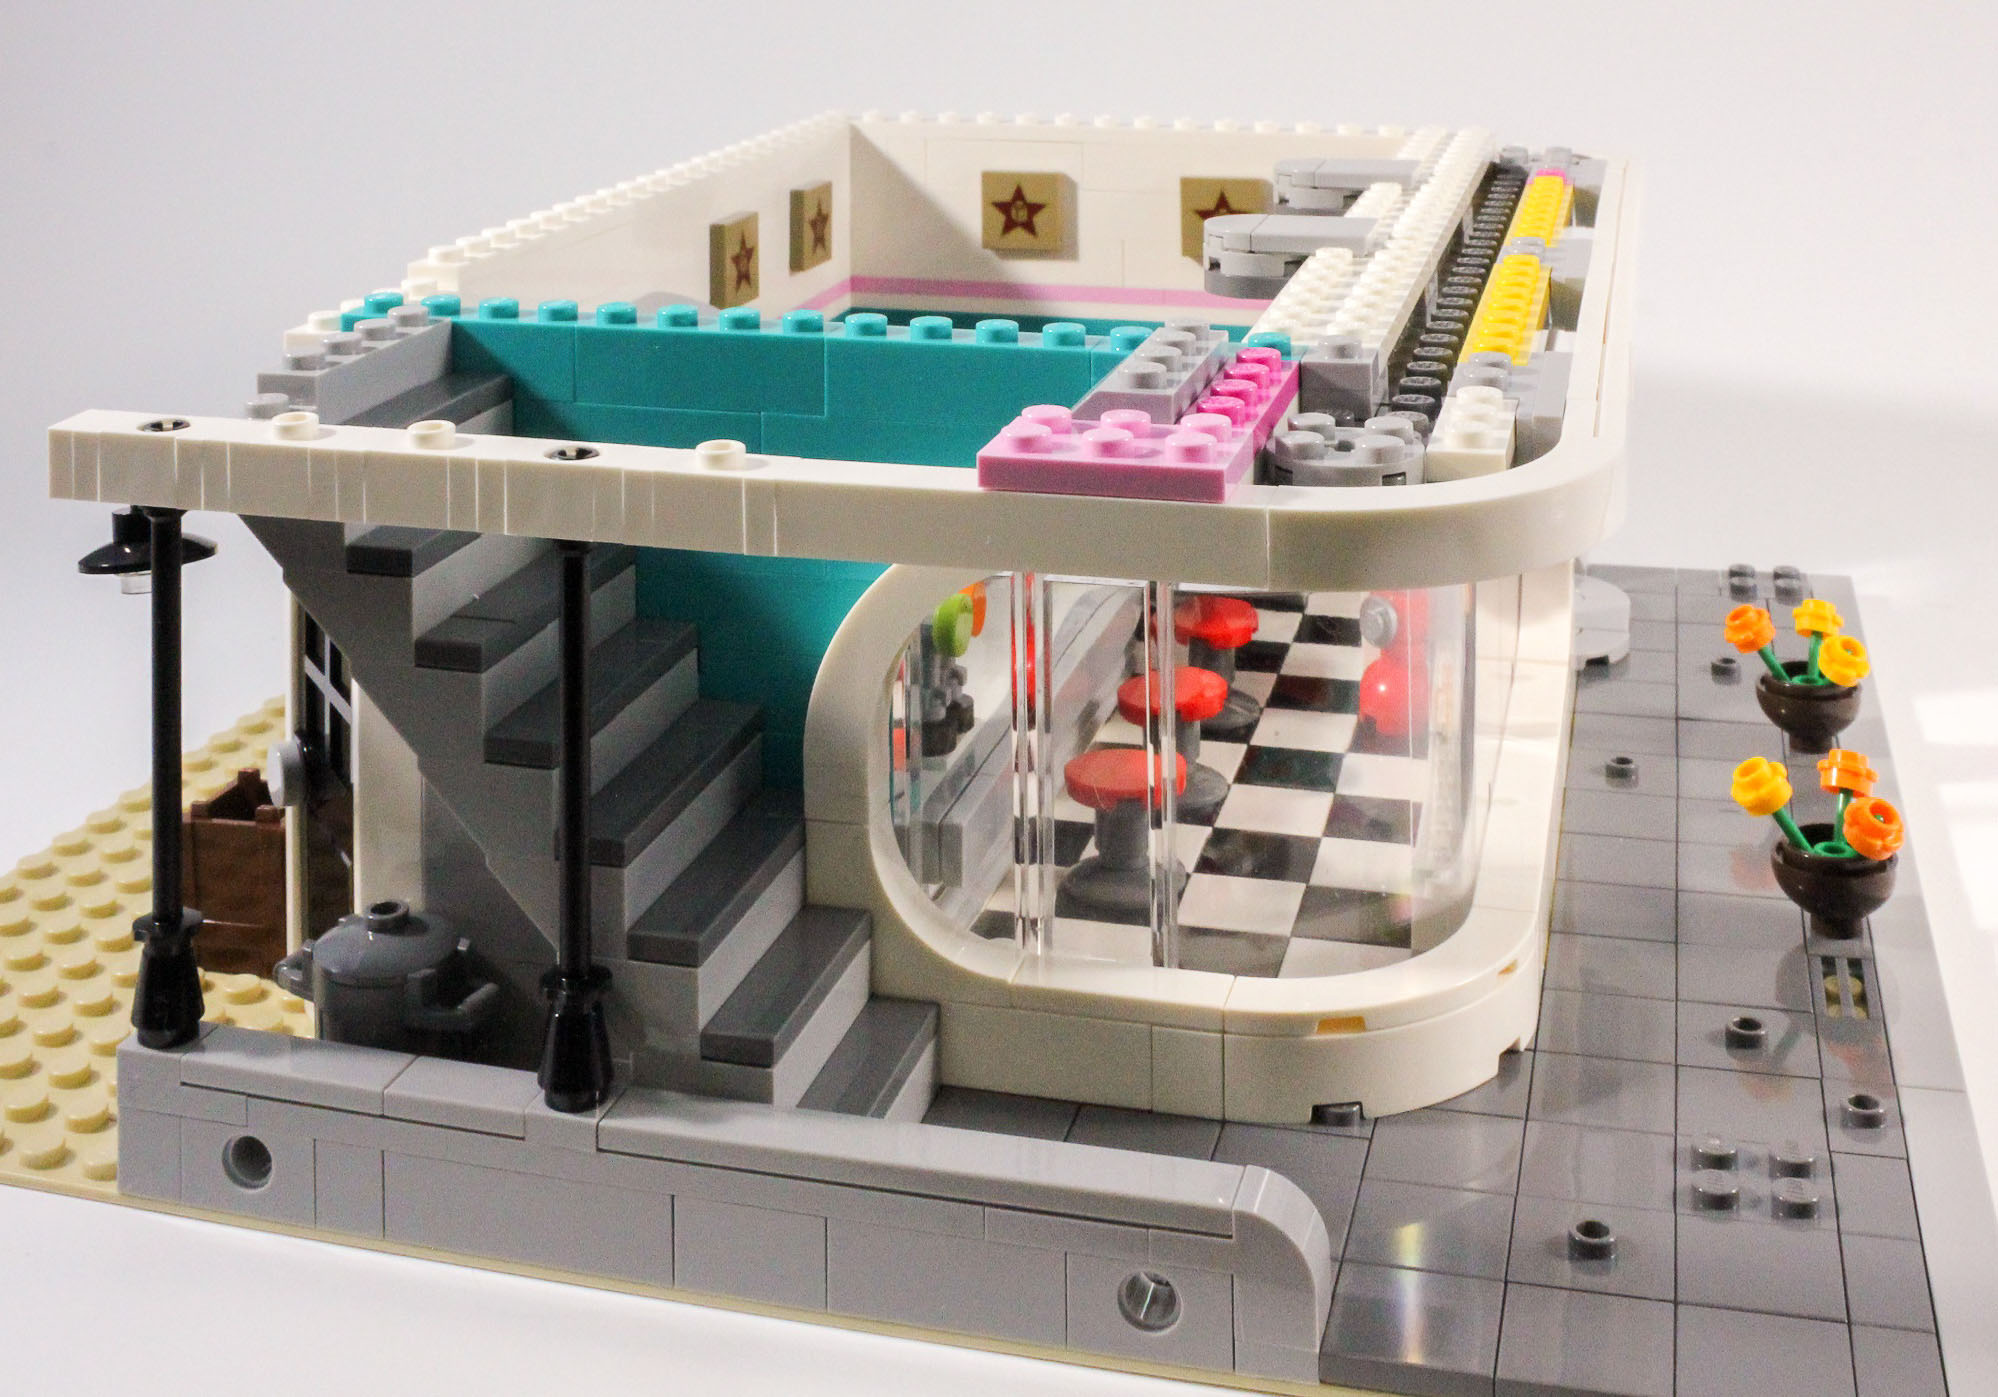
Level One – The Diner
Things on the street and first level start traditionally enough: the 199Dark Stone GreyDark Bluish Gray sidewalk, with silver grates; the walls of the building. But inside Jim’s Diner we have a classic black and white checkered tile floor, and two surfaces given curved edges by building them with SNOT. Both the booth table and the main counter are some the first places we see the fluid Streamline Moderne lines that define the diner portion of this set. The base of the counter is built first, and features a foot rail for any minifigs that want to perch on a stool. Recessed into the base are two 2×2 Plates with Click Hinge on Top (Part 92582). It’s those that make it so easy to attach the counter.
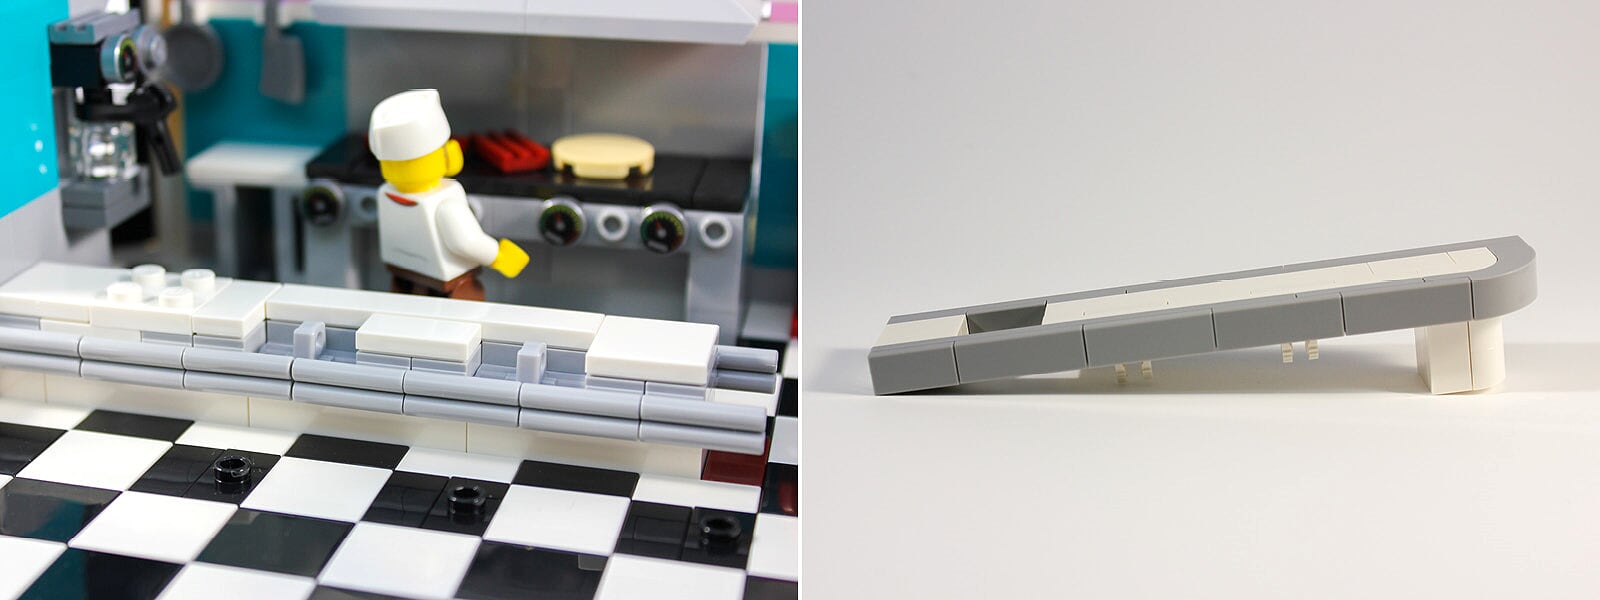
The curving SNOT built counter is attached to the base with click hinges.
One of my gripes with this set occurs here inside the diner. A few things (two mugs, and a pancake) are placed into the scene loose, not attached to any stud. It’s rare for a LEGO element to be placed loose onto a surface. It struck me as odd, especially since it could easily be remedied.
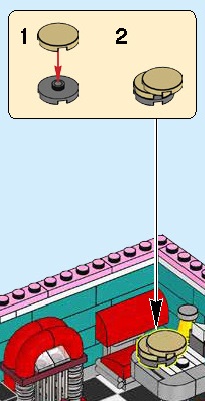
I was surprised that several items like the top pancake are placed loose into the set. (Photo: The LEGO Group)
The diner is enclosed by a huge curved wall of windows. In my opinion, this is one of the most striking parts of the design, especially the smooth, curving white window frame.
The Marquee and the Diner Sign
The rounded marquee, or overhang, is nicely designed, with recessed strips of teal and pink sandwiched between thicker white layers. This is a great detail that adds visual interest. The left side of the overhang, which attaches via two 8L Technic Bars (Part 2714b) to a low wall next to the stairs, is also created with SNOT. Though this persnickety builder spent a while trying to get the 1×1 bricks and plates lined up, I thought it was a nice technique.
SNOT building gives the marquee its smooth, curved look.
Now onto the Diner sign. Oh, that sign. I mentioned at the top of this review that I had concerns about this set. The sign was probably the biggest. While researching Streamline Moderne, I did observe that free-standing letters on top of a marquee were somewhat common. I know that brick-built letters, by necessity, need to be a certain size and are often clunky, but, to me, these are just an eyesore. They are created in 322Bright PurpleDark Pink, a color which does not appear anywhere else in the set, and they’re just so big. Online, there are several mods of Downtown Diner, but most keep the Diner sign intact. This may be something I tinker with in the future.
Level Two – The Gym
The boxing gym on the second has a few nicely constructed pieces, including the boxing ring and the punching bag. The ropes on the boxing ring are created with 6L Bars with Stop Rings (Part 63965) and Bar Holders with Clip (Part 11090). They surround a Red 6×6 tile (Part 10202), though I again wonder if this area would benefit from a few studs here and there, so the boxer minifig could get in the ring to spar. The punching bag swings freely from a Technic Steering Arm with Towball Socket (Part 15459). This piece has been around for 4 years, but has only appeared in 8 sets, which is probably why it’s new to me.
I’ve seen minifigure-scale staircases built in many different ways. But the back of the second floor gets what is probably the most unique and clever staircases I’ve encountered thus far. A mix of six different elements, including 1x4x1 Fences (Part 3633), 1×2 Plates with Pin Hole (Part 11458), and 2×1 Inverted Curved Slopes (Part 24201), combine to create each stair and railing section.
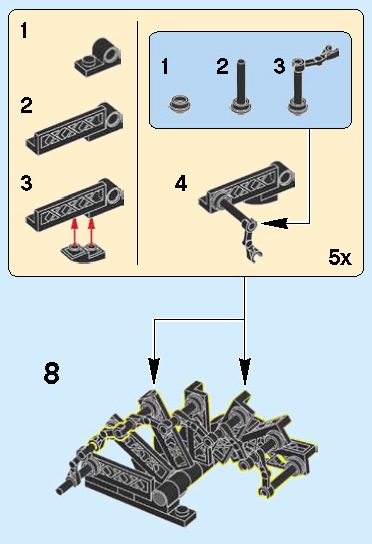
A clever technique for building the staircase gives the perfect wrought-iron feel. (Photo: The LEGO Group)
The finished piece perfectly mimics the kind of wrought-iron staircases you’d find on the back of old buildings.
Level Three – The Recording Studio
The third level features a recording booth, mixing board and a waiting area with chair and table. One wall of the recording booth is lined with 1×4 Technic Gear Racks (Part 3743), standing in for foam acoustic panels. Next to the mixing board is a reel-to-reel recorder, and there’s a gold record on the wall of the waiting area.
One of the recording booth’s outer walls features two round porthole-style windows. Again, I have to give the set designer kudos for his technique: slotting a 2×2 Round Plate with Rounded Bottom (Part 2654) backed with two 1×2 Plates (Part 3023) into two 1×4 Arch Bricks (Part 3659).
Another clever technique creates porthole windows. (Photo: The LEGO Group)
Level three also includes the last section of the large curved teal archway that occupies the right third of the front of the building. I know the color choice and the dominance of the design have drawn criticism – and I may have felt that way early on – but ultimately, I’ve come to appreciate its boldness and its whimsical quality.
The Roof and the Cadillac
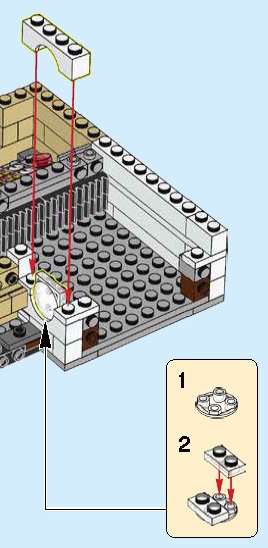
The final bags contain the pieces for the roof and for the pink Cadillac. The roof is pretty standard and uses a 1x4x6 Window Frame with Three Panes (Part 57894) as a skylight that can be vented for air. Like staircases, there are many different and interesting ways to create a building’s cornice, including Technic Hands (Part 93575) in #10246 Detective’s Office, and Thor’s Hammer (Part 75904) in #10255 Assembly Square. Much more common parts are used here: 1×2 Tiles with Handle (Part 2432) are placed over click hinges sticking out from 1×4 Hinge Plates (Part 44568). The elements may be common, but the finished effect is quite nice.
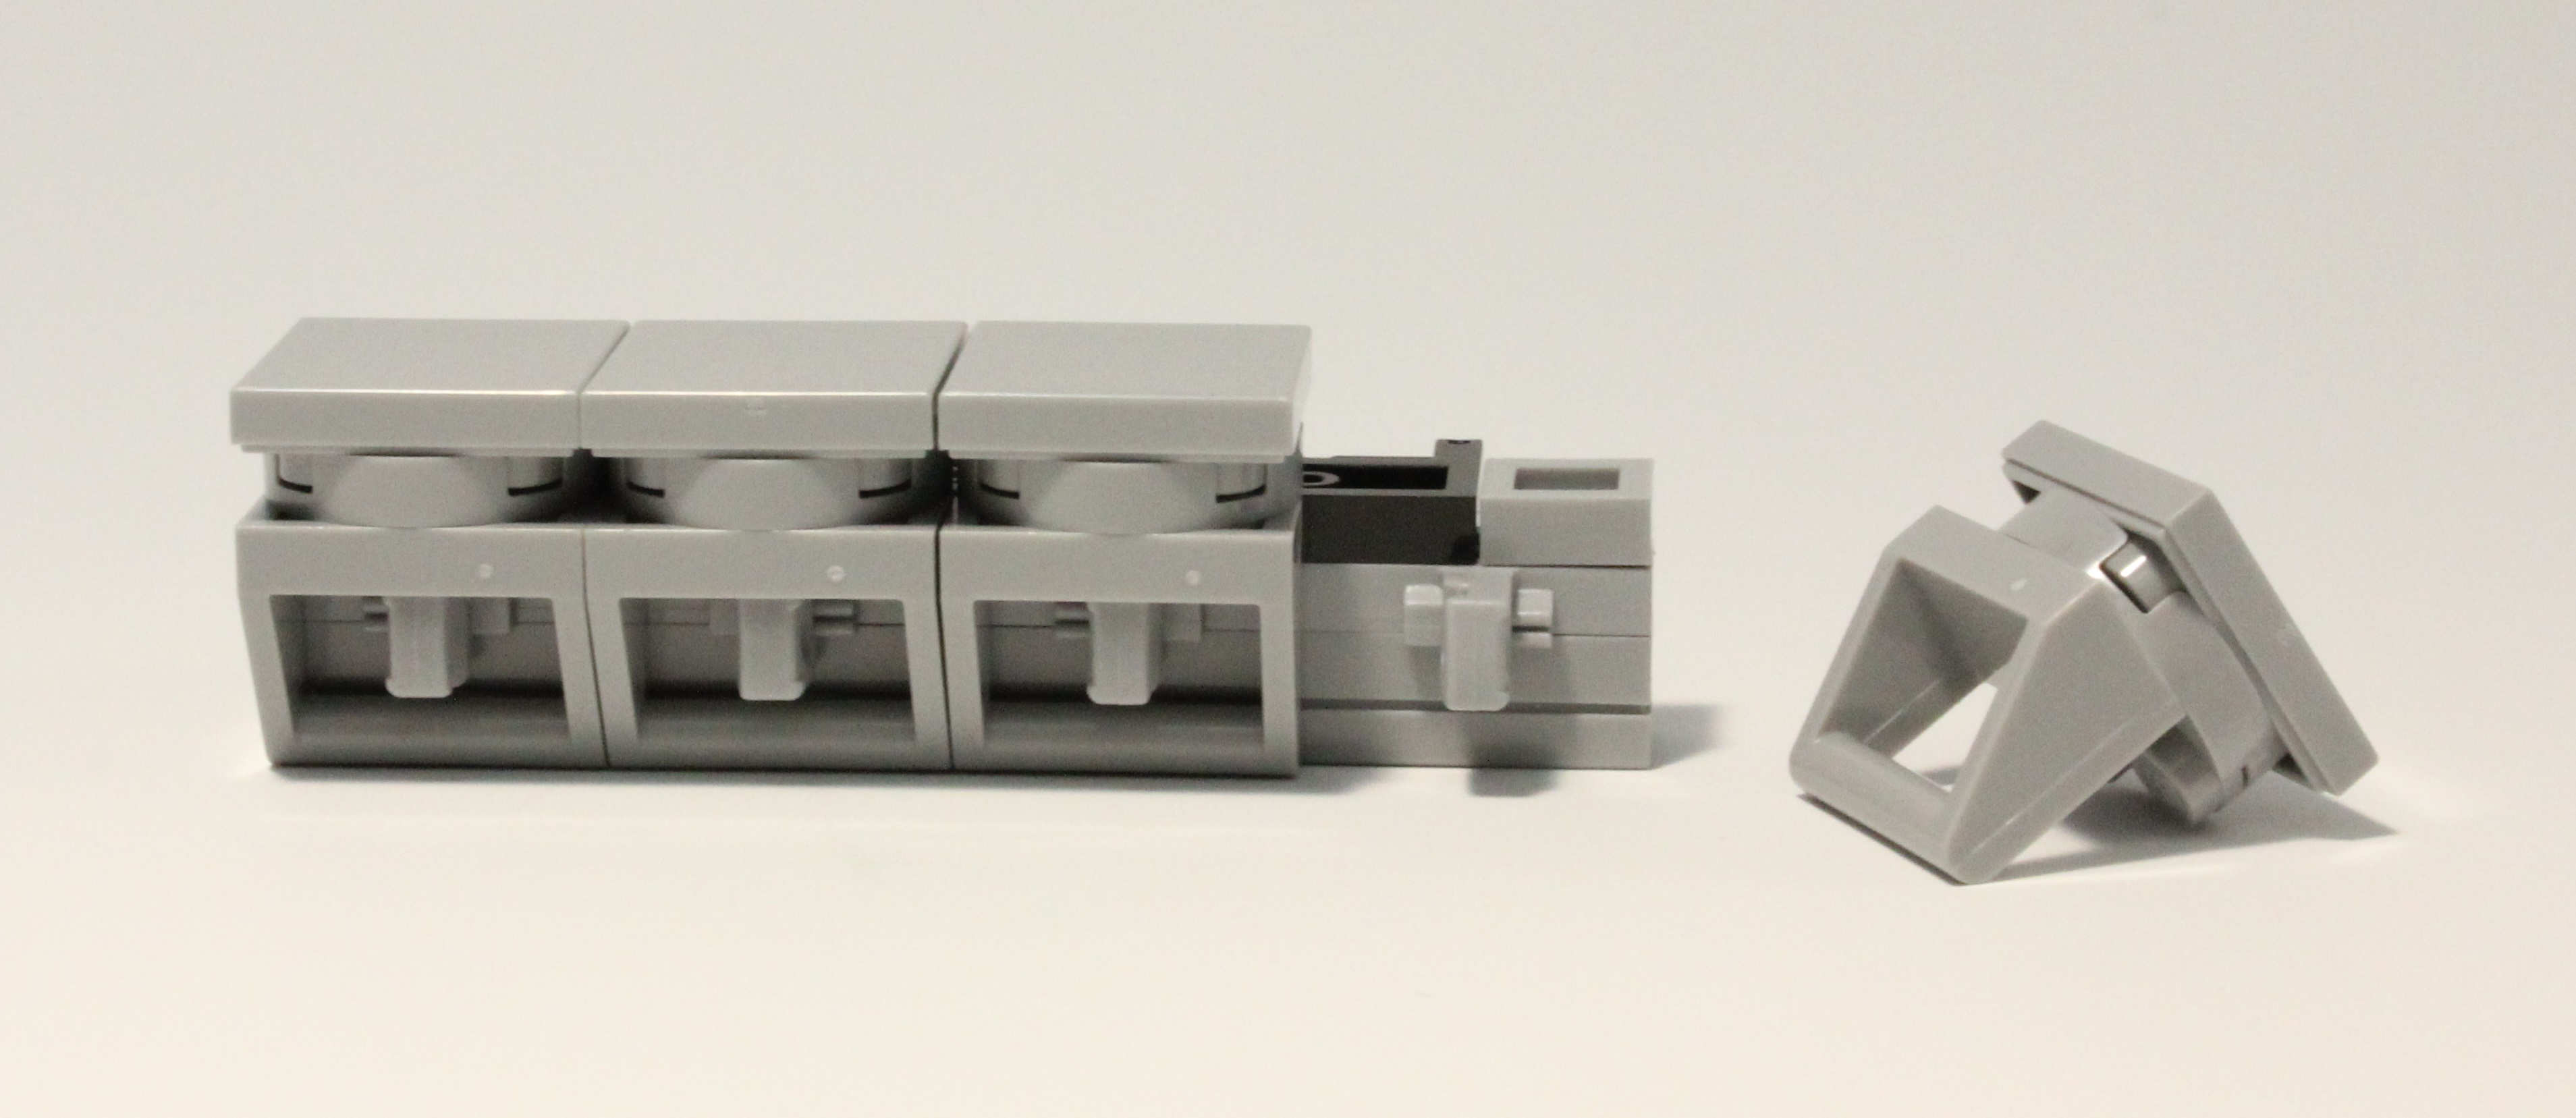
Simple pieces lead to a unique cornice design.
The pink Cadillac is a nice little build with a detailed grille and swooping tailfins. If only LEGO made whitewall tires!
The Building as a Whole
Another criticism of this set that I heard early on was that the 5Brick YellowTan façade of the second and third floors didn’t look good next to the 1White color of the diner.
#10260 Downtown Diner. (Photo: The LEGO Group)
At some point, partway through the build, it occurred to me that, in the “real world,” the diner had been added on to an existing building, hence the difference in color. I was pleased to see that theory confirmed during the second part of Brick Architect’s interview with Creator designer Jamie Berard.
About the parts
Any discussion of this set’s parts has to start with teal! Many AFOLs have heard the story of the LEGO designer who “killed teal.” Officially called 107Bright Bluish GreenDark Turquoise / Teal, this color came back to LEGO sets at the very end of 2017; appearing in only 6 sets before Downtown Diner. The return of this retired color was big news, and here we get 11 different elements totaling 104 pieces. Many of the pieces in this color appeared here for the first time.
This set comes in at $0.068 per piece, putting it at the cheaper end of the Modular Buildings, which range from $0.064 to $0.074 per piece.
Minifigures
While I was initially sad to see the classic smiley-faced minifigures replaced by more those with more expressions, ultimately it didn’t bother me. Downtown Diner comes with 6 minifigs; two for each floor.
Diner:
- Chef – with a jaunty white hat, previously used for other chefs or ice cream vendors
- Waitress – with a striped blue and white shirt, red scarf, and red roller skates
Boxing Gym:
- Bodybuilder – with a lime green tracksuit
- Boxer – this torso with red boxing gloves has only appeared previously in one of Toys R Us’s 2017 Bricktober sets
Recording Studio:
- Manager – this torso with a gray suit jacket and magenta scarf is exclusive to this set
- Rock Star – this powder blue tuxedo torso is also only found in this set
Conclusion
Maybe my low expectations set Downtown Diner up for success, but whatever the reason, I really love this modular. Building it was a wonderful experience, heightened by the several clever bits of element usage. The three floors of the building varied nicely, and I was glad to not see another apartment included as one of the upper levels. For these reasons I give this set our ‘Highly Recommended’ (4/5) rating. In this case, I was very happy to have my initial impression be proven wrong.
Photos in this article are by Michael Kindness unless otherwise noted. Visit the About page for more info about our journalistic standards and affiliate programs.
I have a question, do you like the lettering or not because it was hard to tell in this review