
Review: #21052 Dubai Skyline
The modern city that blossomed in the desert, Dubai has some amazing architecture to explore. Let’s see how well it translates into the LEGO Skyline series.
December 10, 2019 – Added photographs of each of the four original buildings, and a map showing their location within the city.
About the Set
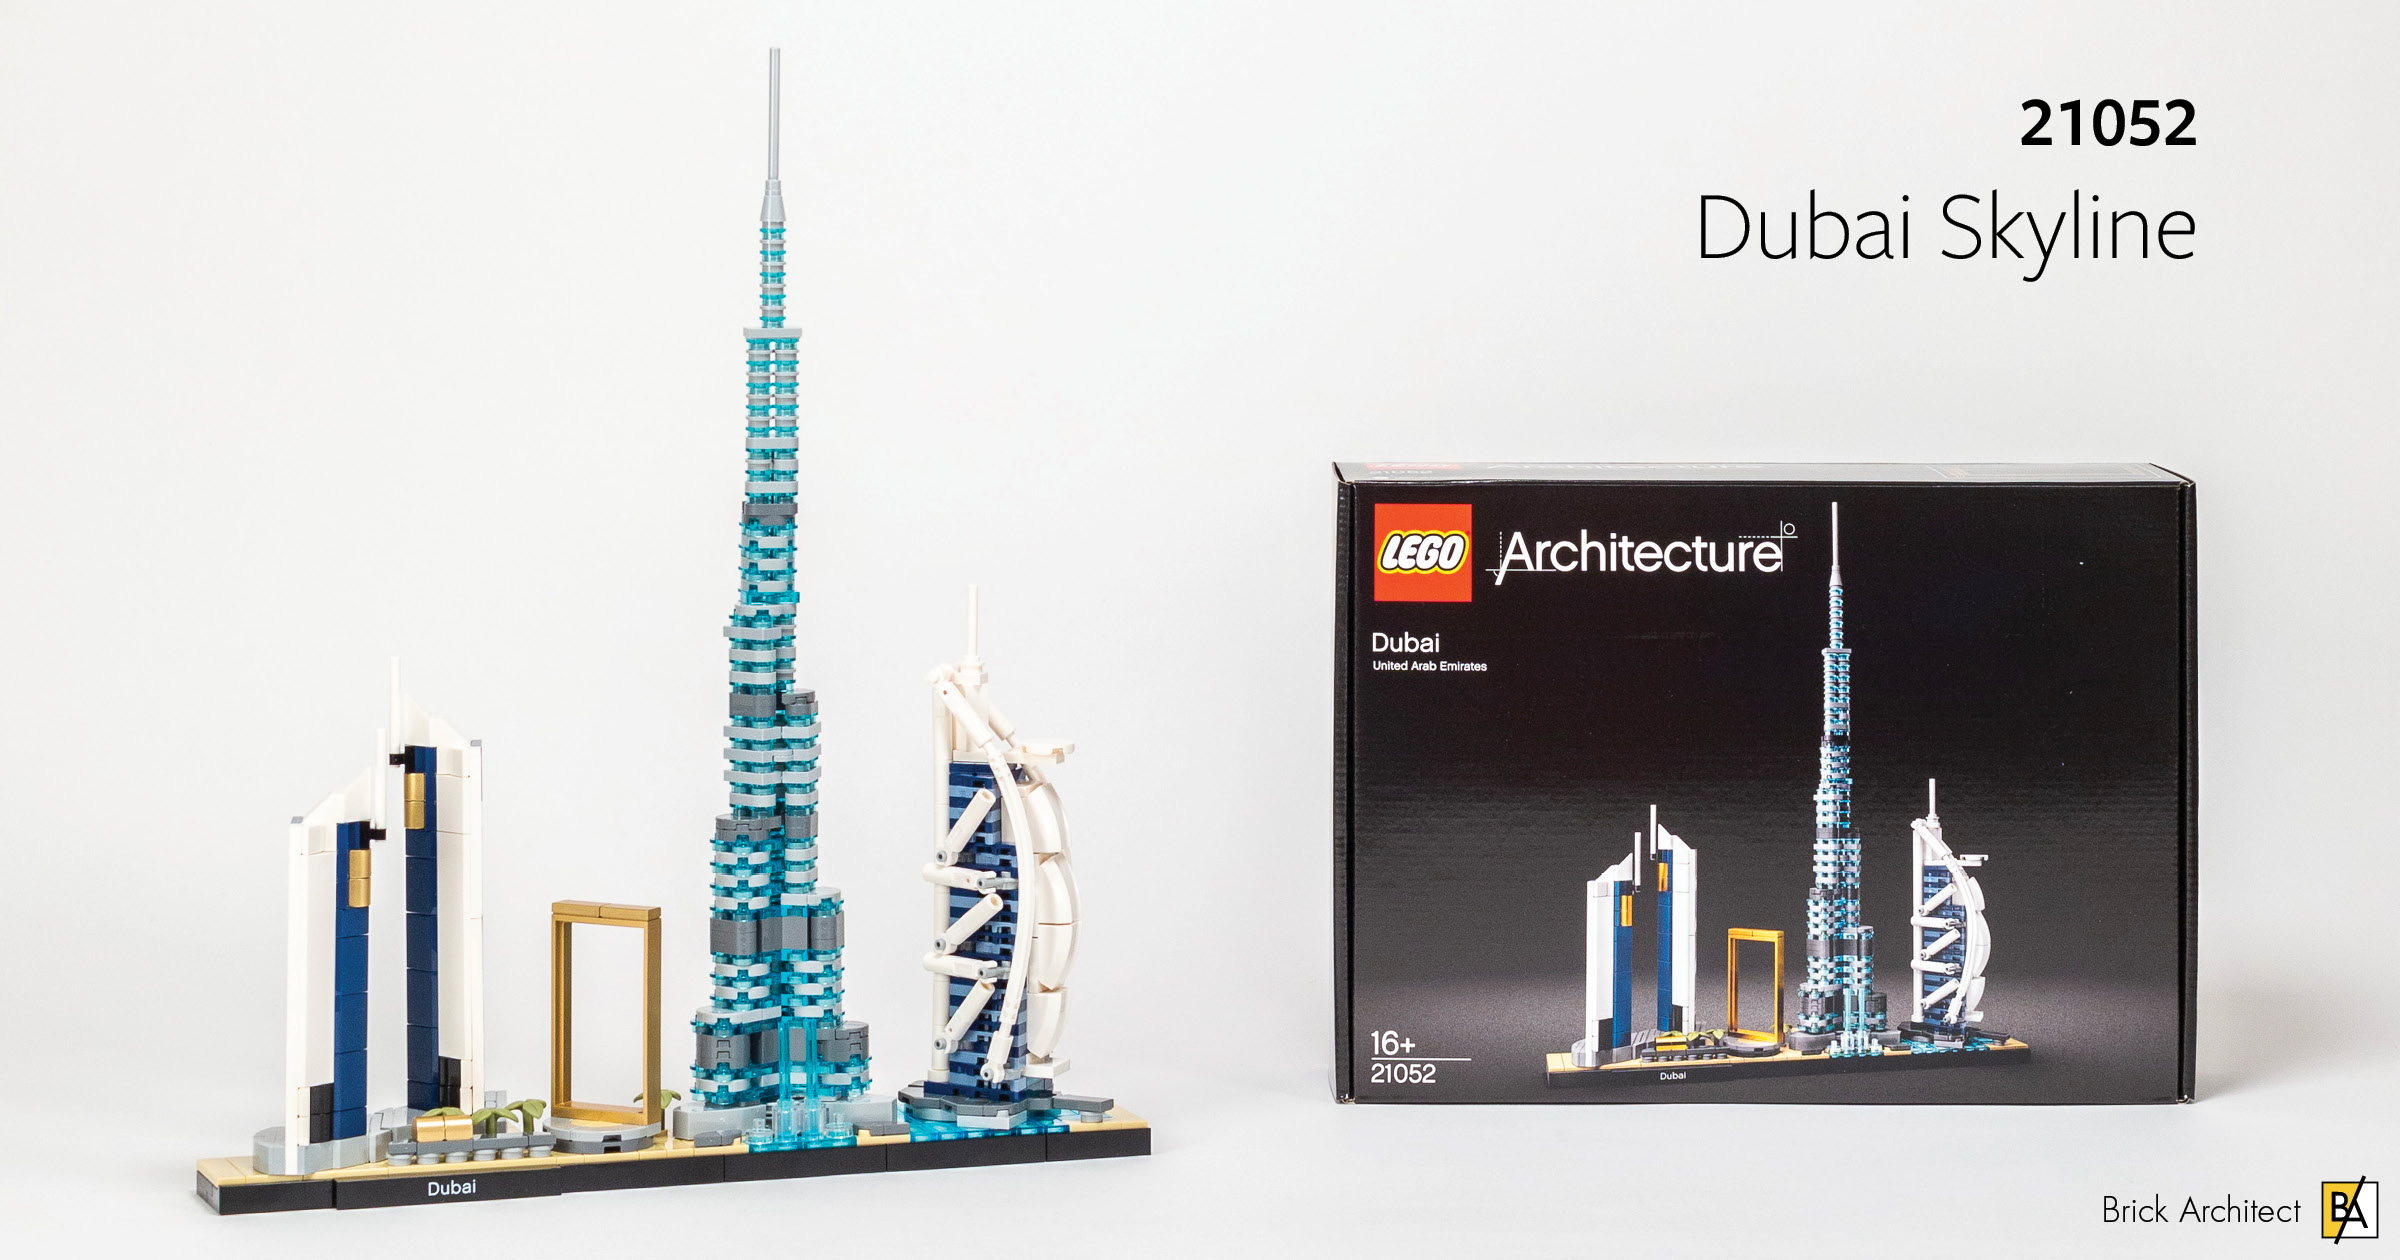
#21052 Dubai Skyline will cost $59.99 (£54.99 , €59.99) for 740 pieces when it is released on January 1, 2020. Brick Architect is excited to give you an early tour of the latest addition to the LEGO Architecture series!
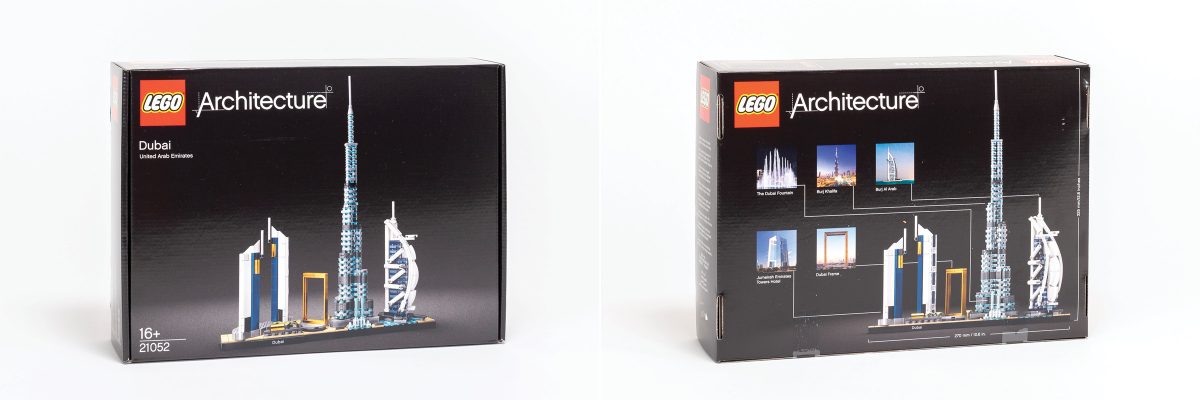
#21052 Dubai Skyline
As reported in my preview of these two new sets, my initial impression of this set was mixed. My first worry was that the four landmarks did not look like they were built to scale, but I calculated that in the previous article, and they are actually pretty close. I also expressed concern that the Dubai Frame doesn’t look right since the frame should be the same thickness on all four sides. Lastly, I wondered why they included the Jumeirah Emirates Towers since they aren’t as iconic as some other structures that they could have included (such as Atlantis on the Palm Jumeirah, or more traditional architecture in Bur Dubai like the Al Fahidi Fort or Saeed Al Maktoum House.)
On the other hand, my initial impression of this microscale rendition of the Burj Al Arab was extremely positive—It’s a very iconic building with complex curves, and I can’t wait to build it. As for the Burj Khalifa, I’m cautiously optimistic that recent additions to the LEGO parts library will result in a more convincing model than the two previous attempts… #21031 Burj Khalifa in 2016, and #21008 Burj Khalifa in 2011.
Build process
This set is assembled across three stages. The first two stages use only one bag each, numbered with code 143H9 in my copy. The third bag uses one large bag and two identical small bags (all of which have no visible bag code.)
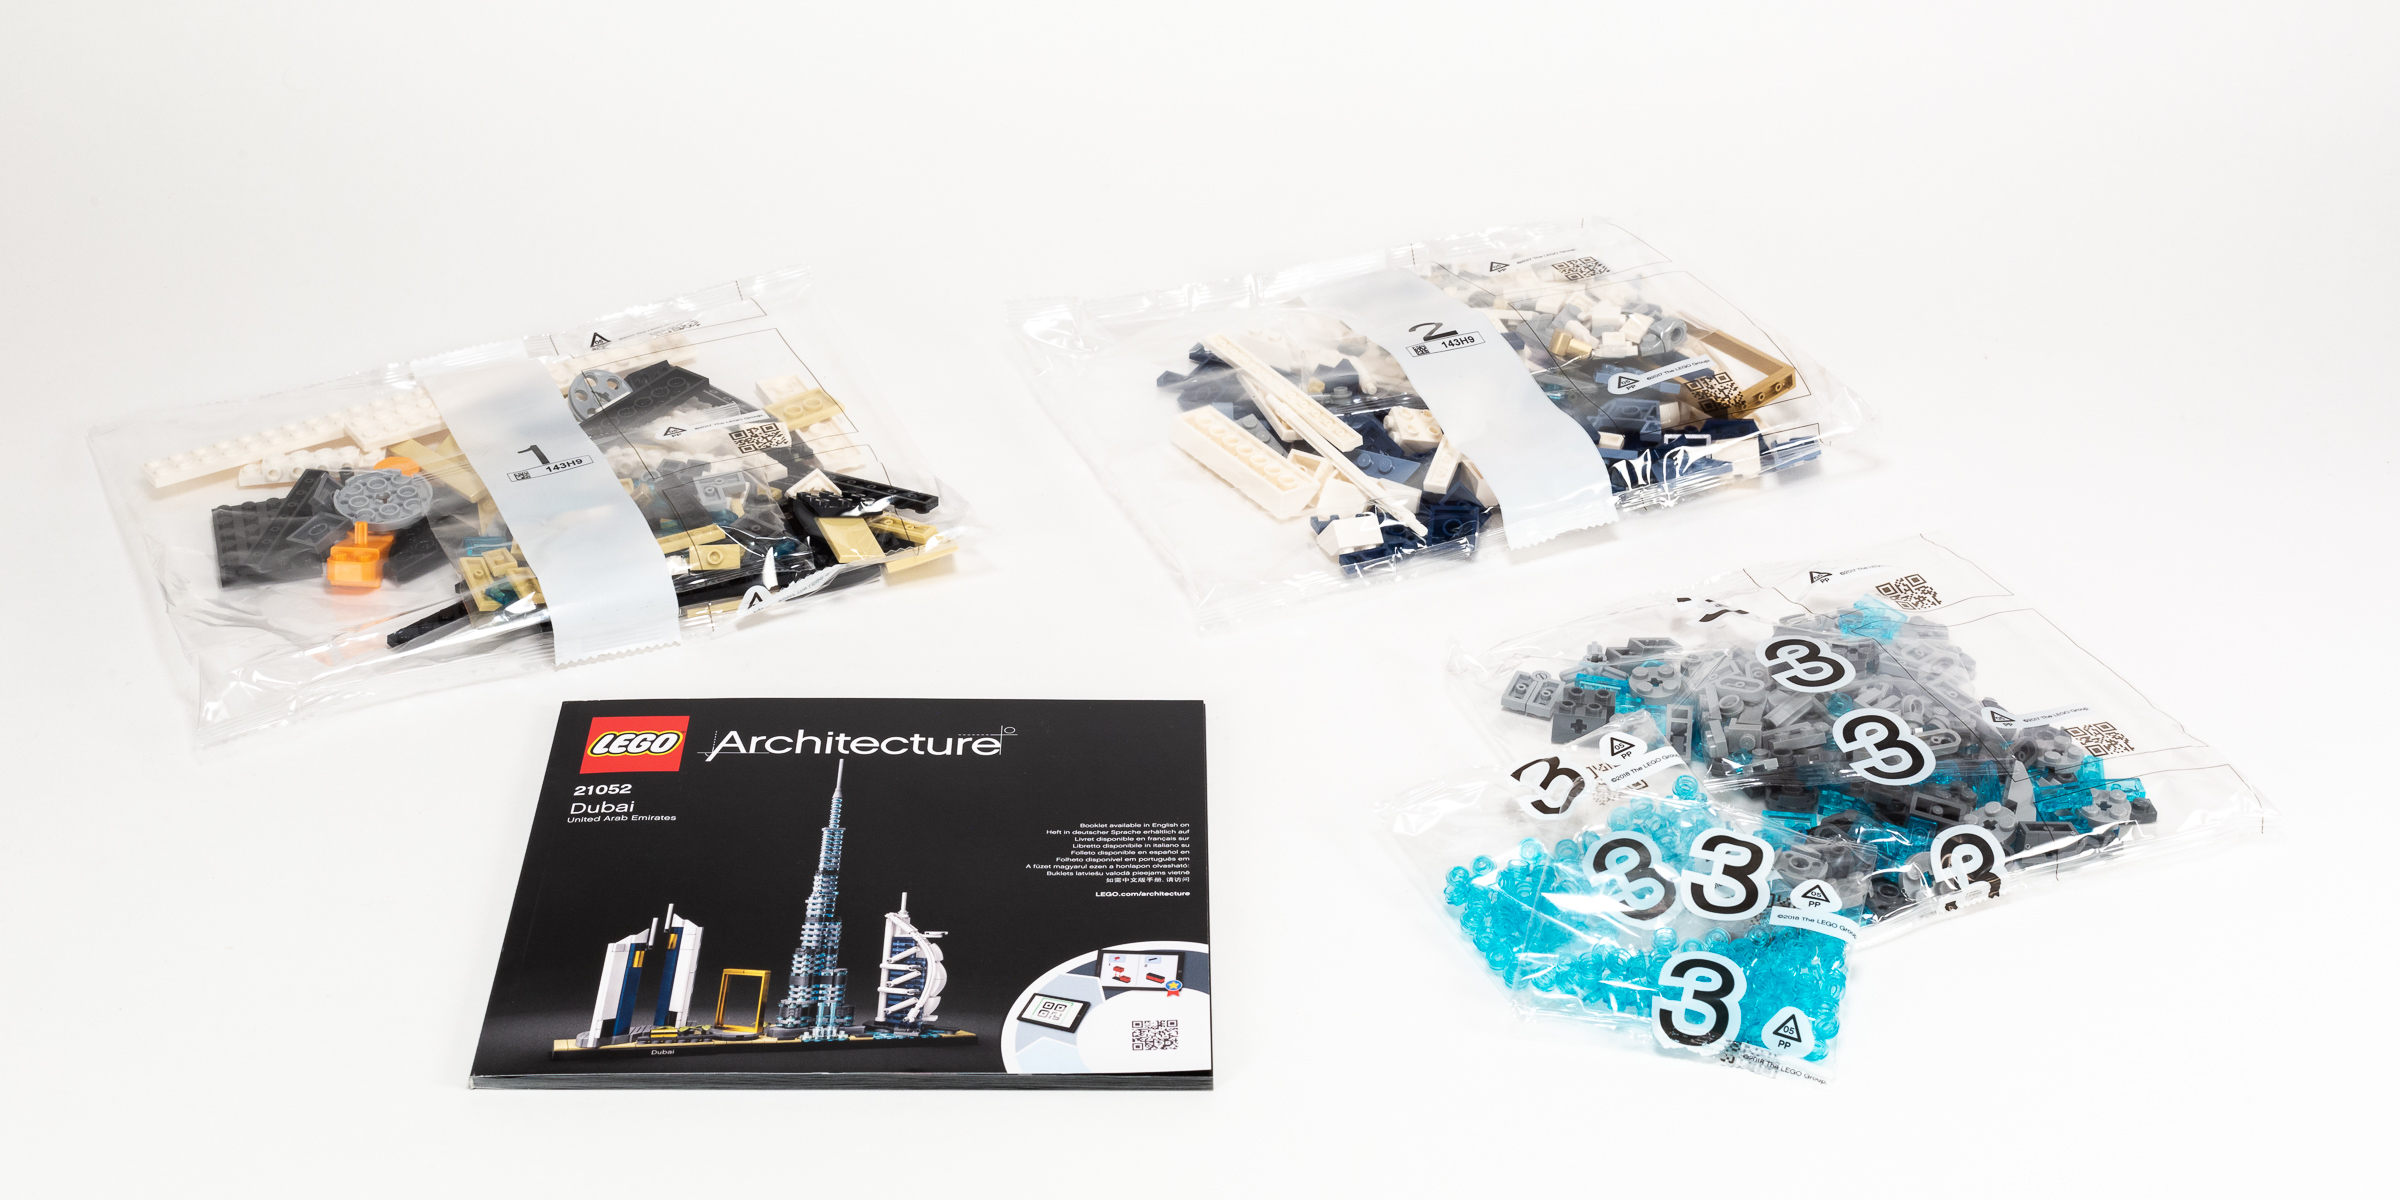
The set includes three numbered stages.
The instruction manual is typical for the architecture series, and contains 110 pages. It contains beautiful photos and text about each of the buildings, followed by detailed building instructions. I will say that the pages are thinner and harder to turn than earlier sets in the series. It is likely a cost-cutting measure (in both manufacturing and shipping), but it also aligns with their stated goals to decreases their environmental footprint. Nonetheless, the booklet feels cheap for a premium product.
Bag 1
The first bag contains lots of large plates, which are used to build a sturdy base for our model. The base is 34 studs wide and between four and nine studs deep (excluding the plates on the front.). It is typical of sets in the Skyline series to have a base of variable depth, so the base is not outside of the ordinary.
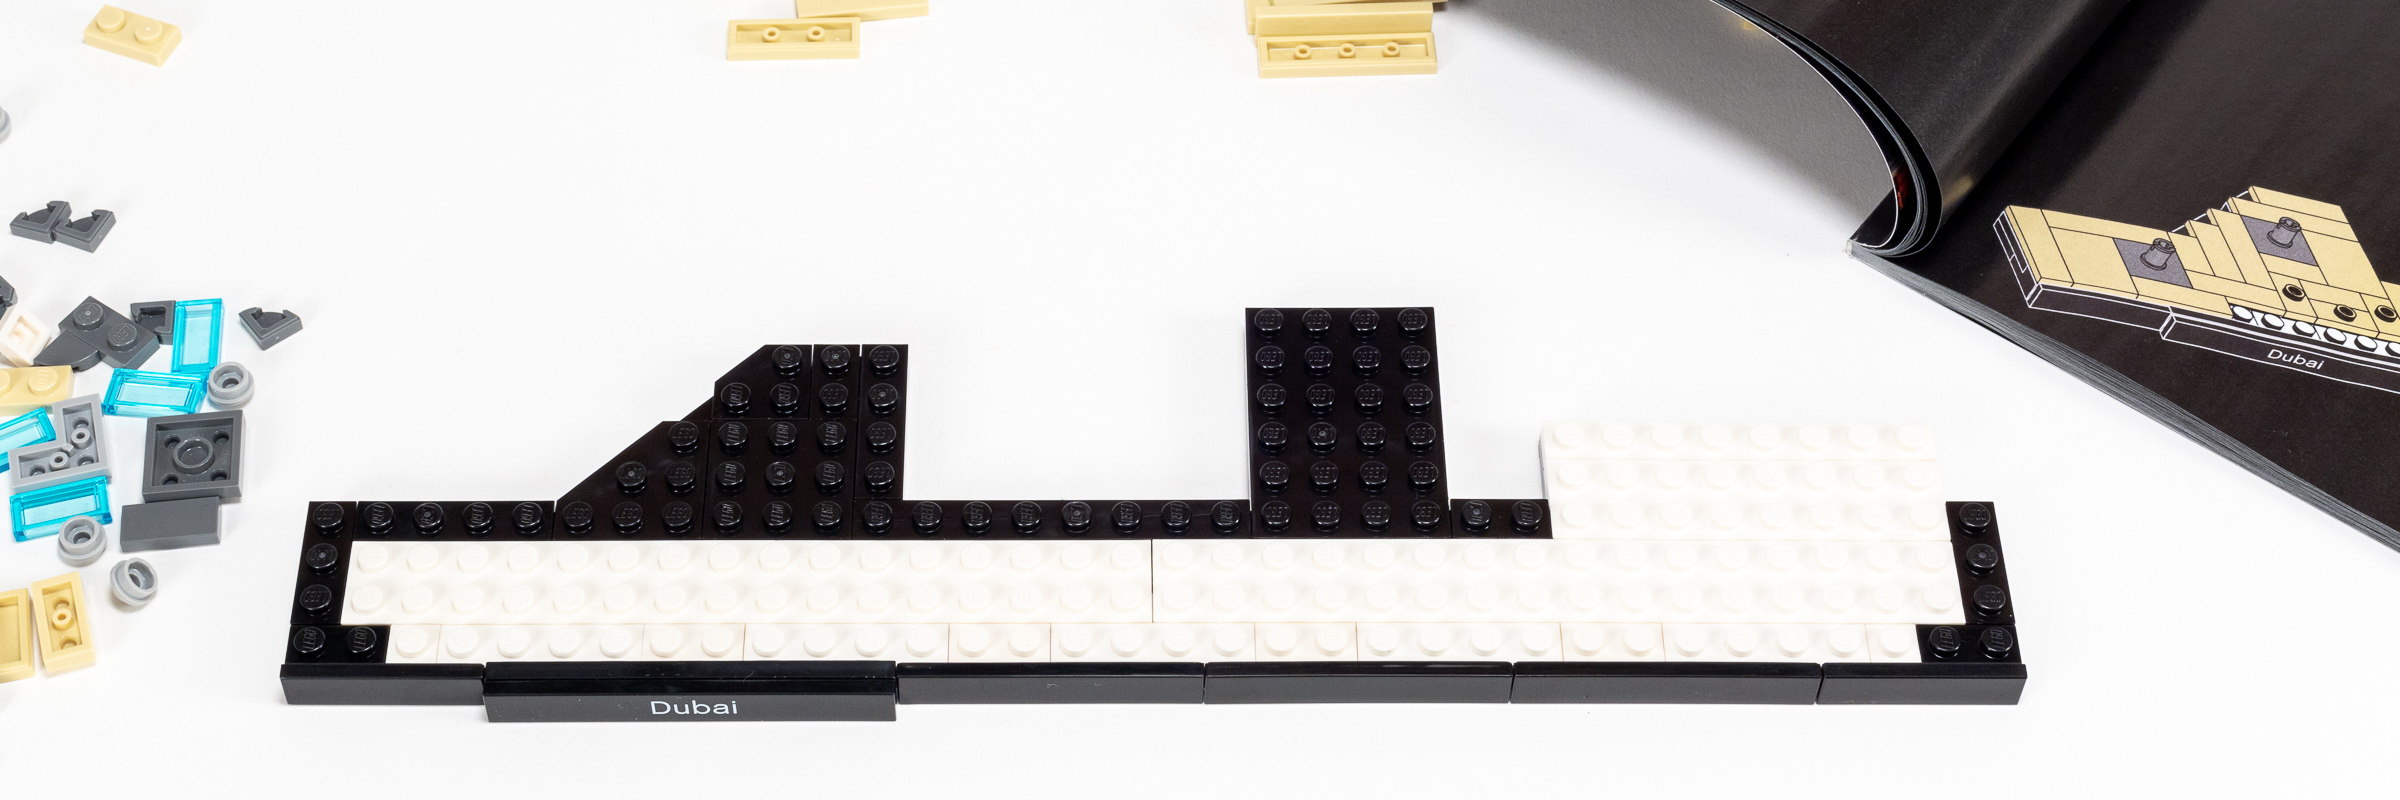
The first thing we build is a sturdy base.
After assembling a sturdy base using two layers of plate, we get to cover the base with tiles, forming the foundation for the four structures featured in this model. On the left, you will see a colonnade with a curved roof using the first of many parts in this set to feature the relatively rare 299Warm Gold Drum LacqueredMetallic Gold color.

Progress by the end of Bag 1.
As we move to the right, we add a round base where the Burj Khalifa will go. Lastly, we assemble the base of the small man-made island on which the Burj Al Arab is built just off shore. A 1×2 Tile evokes the gently curving roadway which connects the structure to the mainland in the front.
Bag 1, 15 minutes.
Bags 2 & 3
The second bag contains the parts you will need for Jumeirah Emirates Towers, the Dubai Frame, and Burj Al Arab. The third bag contains tons of small parts to build the Burj Khalifa. I’ve broken this section down by building.
Jumeirah Emirates Towers.
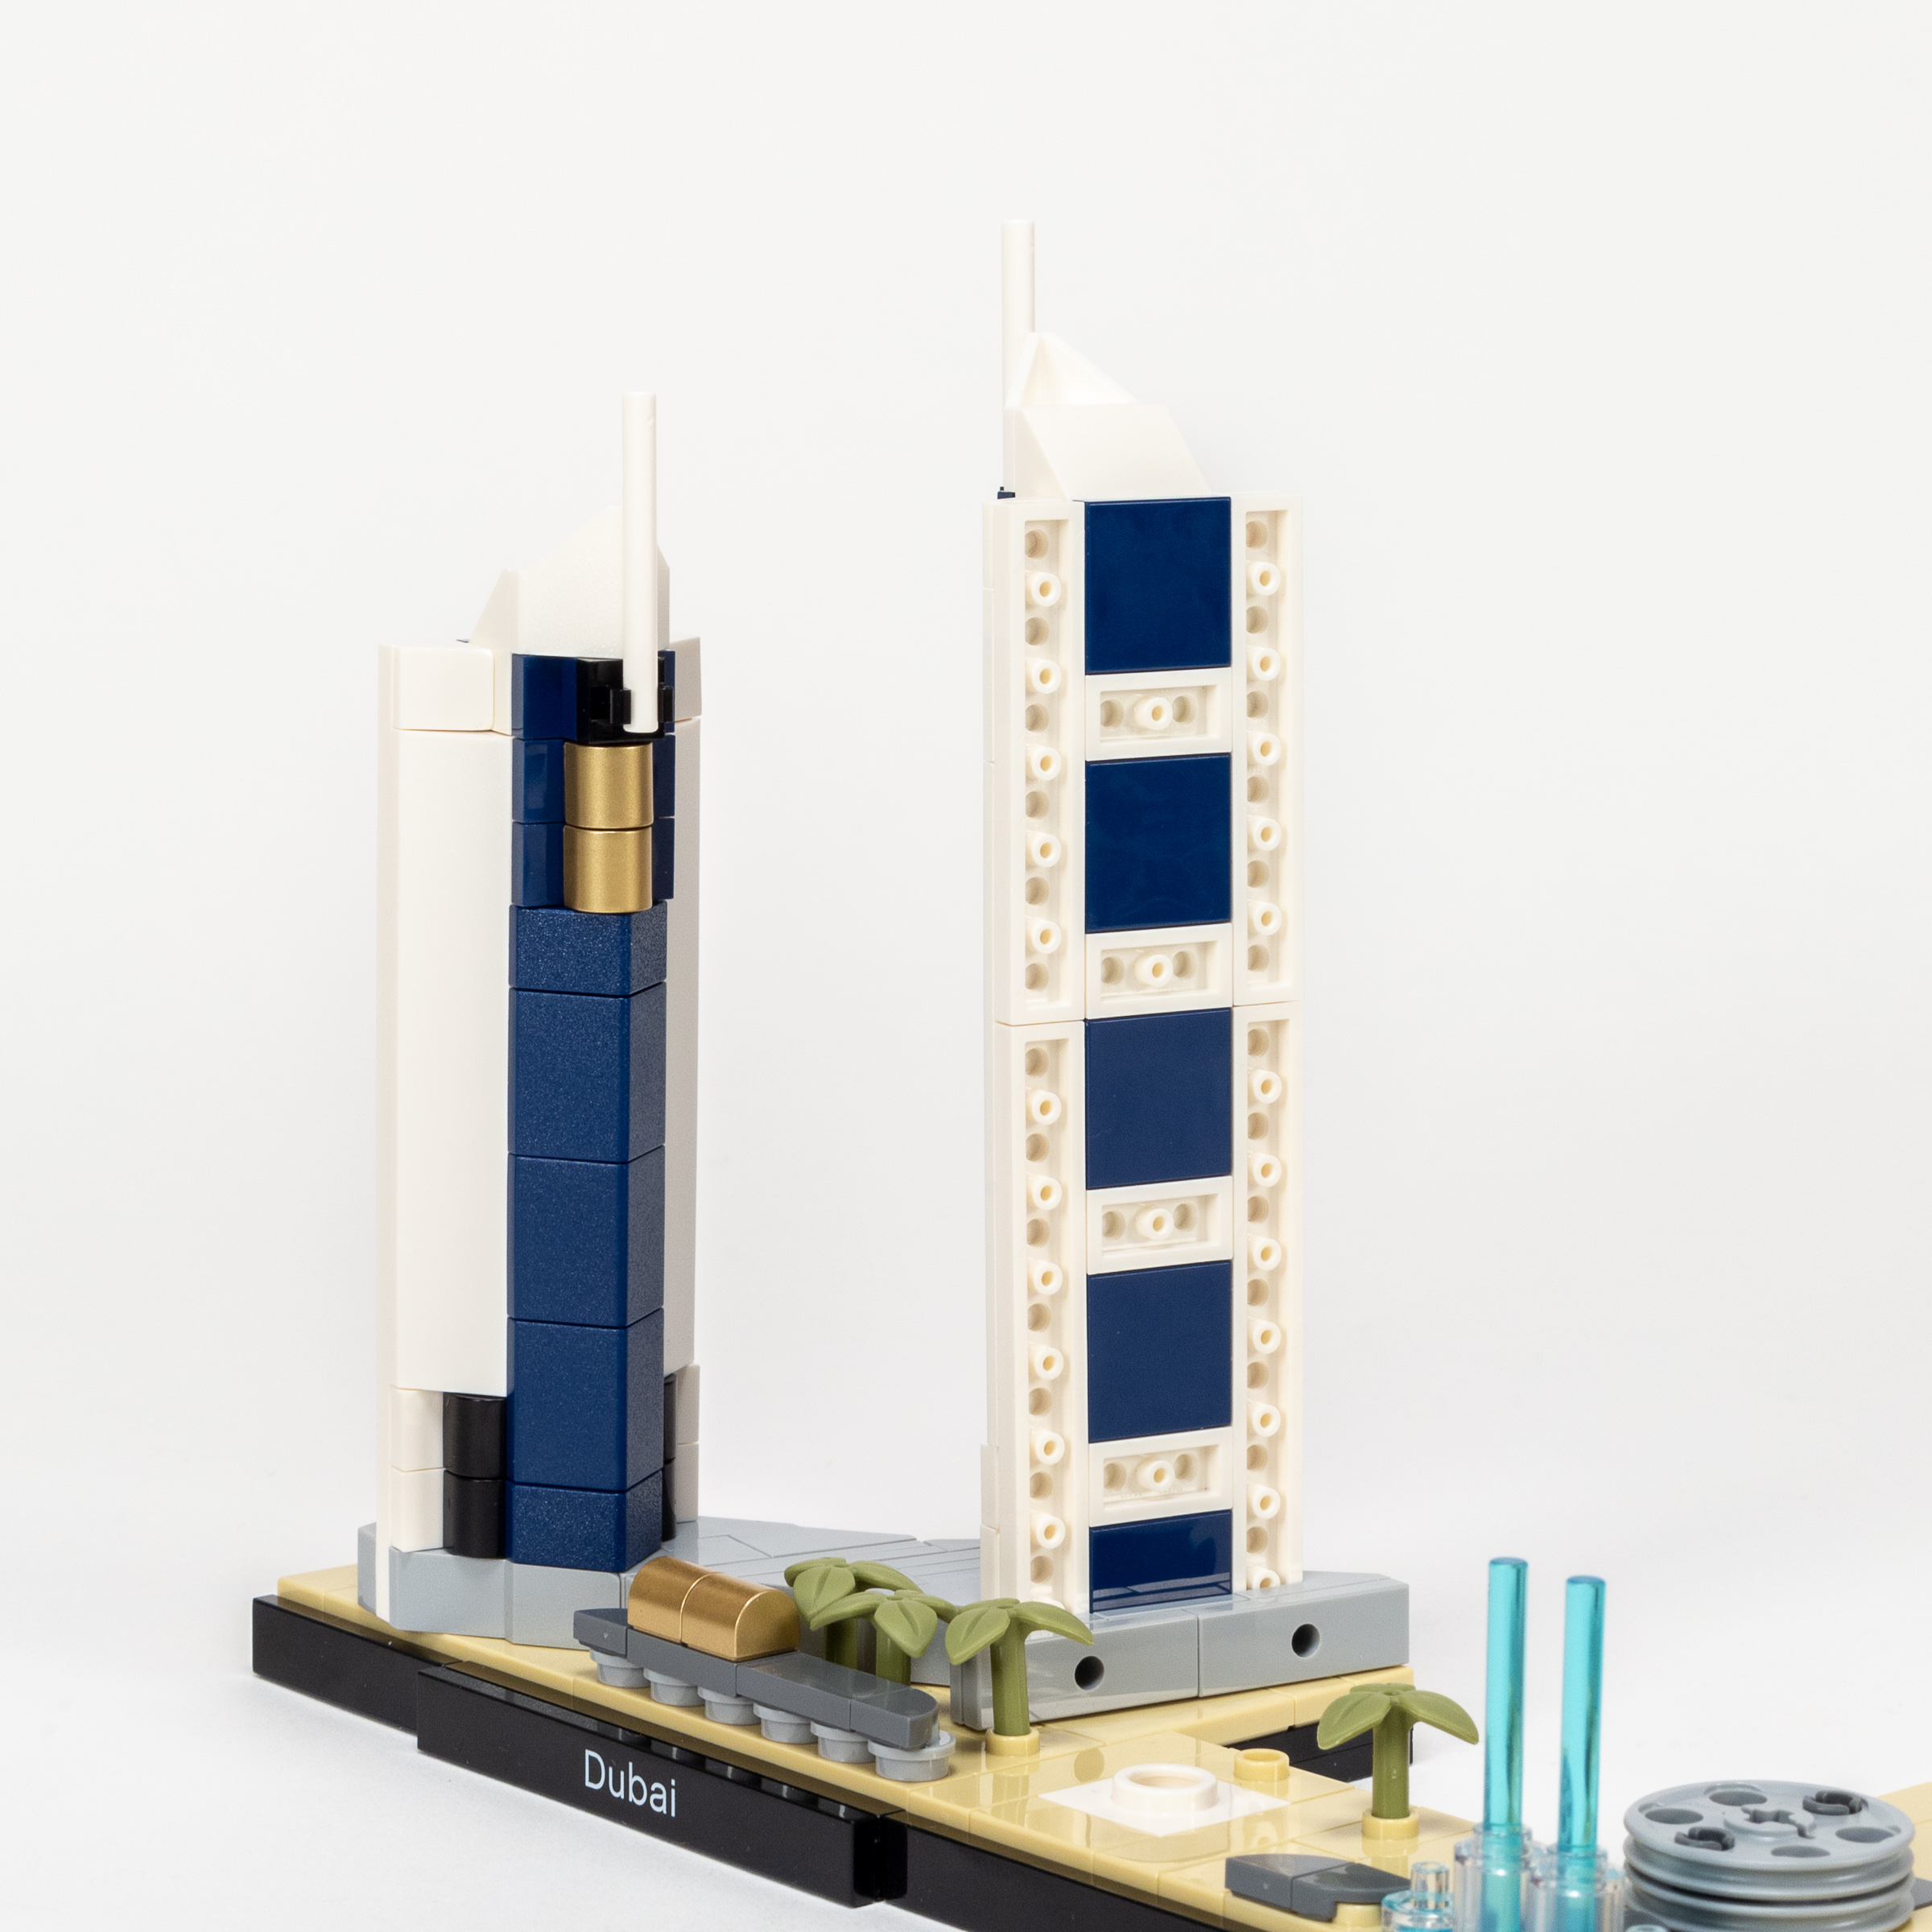
While I think they could have picked a more iconic building to include in the set, this pair of buildings is fun to build and looks great when it is finished. I appreciated the careful construction techniques, which included two small assemblies that slid into a pocket and are locked in place by additional bricks—a no stud connection.
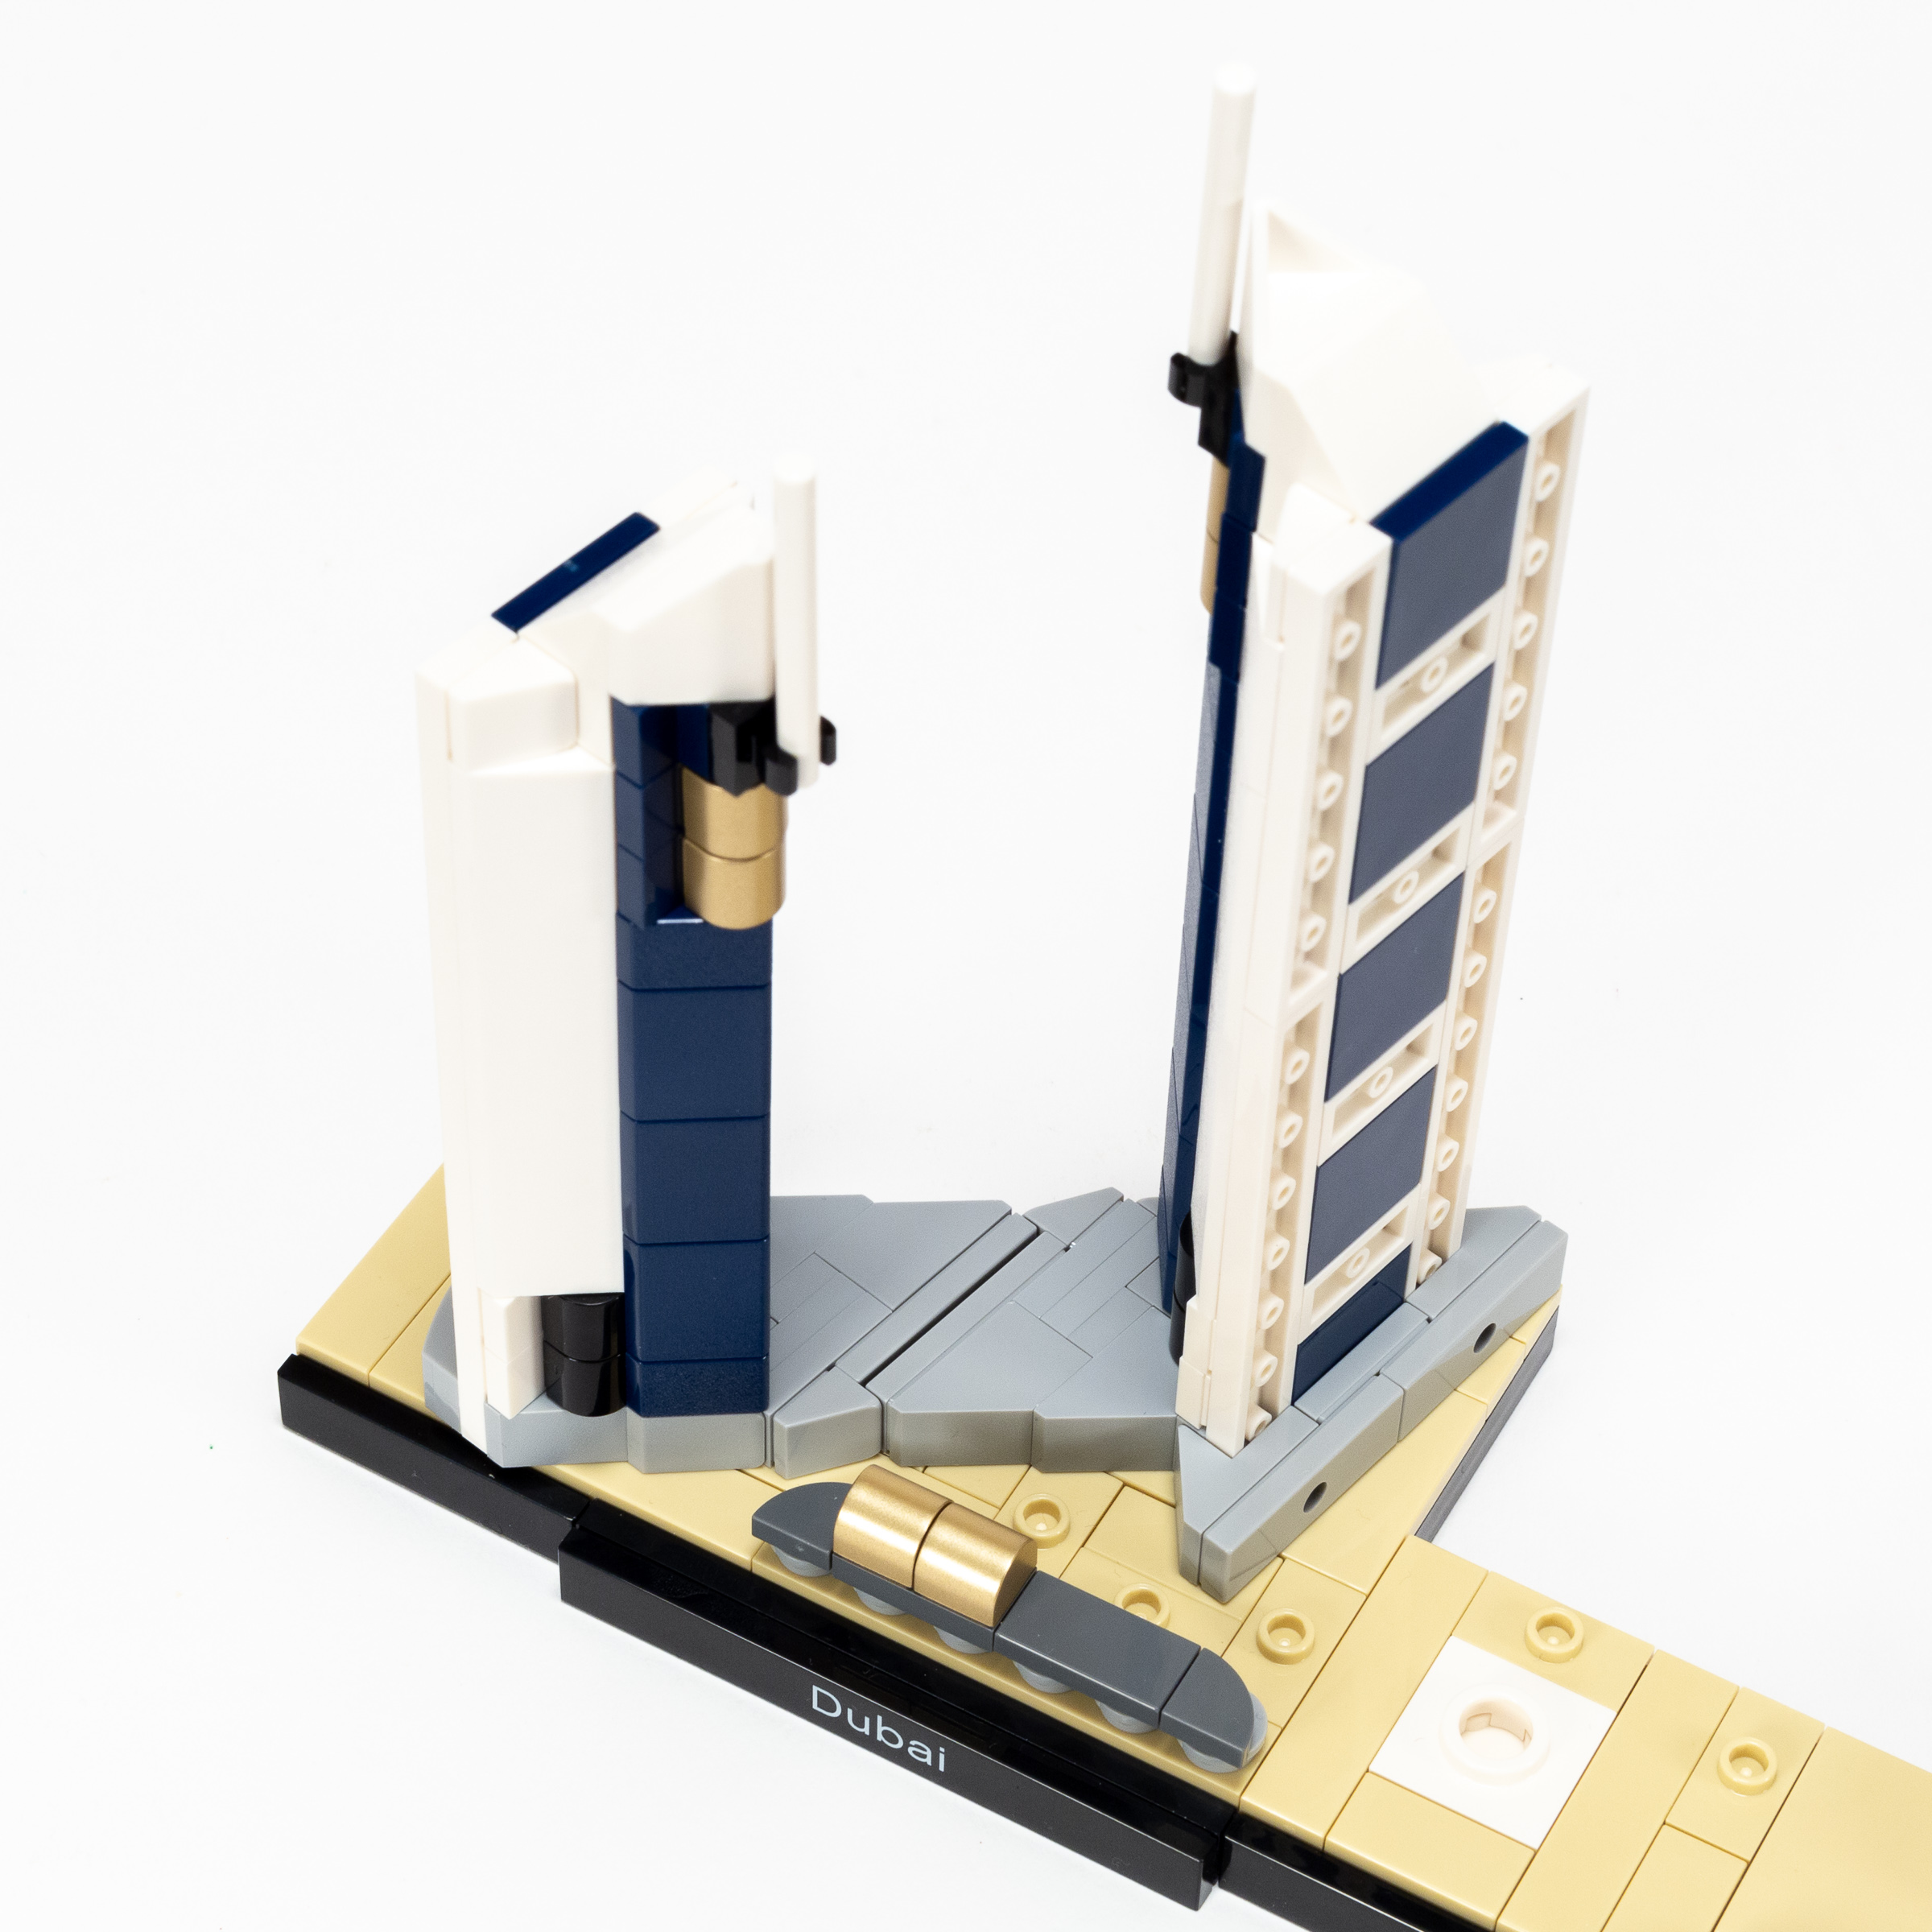
You can see the loose connection between the two modules when viewed from above.
The two buildings are placed at a small angle, and kept in place by the way the two bases are keyed to one another. As you can see in the photo, they are not interlocked very tightly, allowing them to rotate a few degrees.
When viewed from an angle, you can see how the underside of LEGO plates is clearly visible in the design.
Because each tower is assembled sideways and attached to the base using Technic pins, the designers took advantage of the exposed underside of LEGO Plates to give the outward-facing facades a high-tech structural aesthetic. This looks good when viewed from the front but is a bit overwhelming when viewed from the sides.
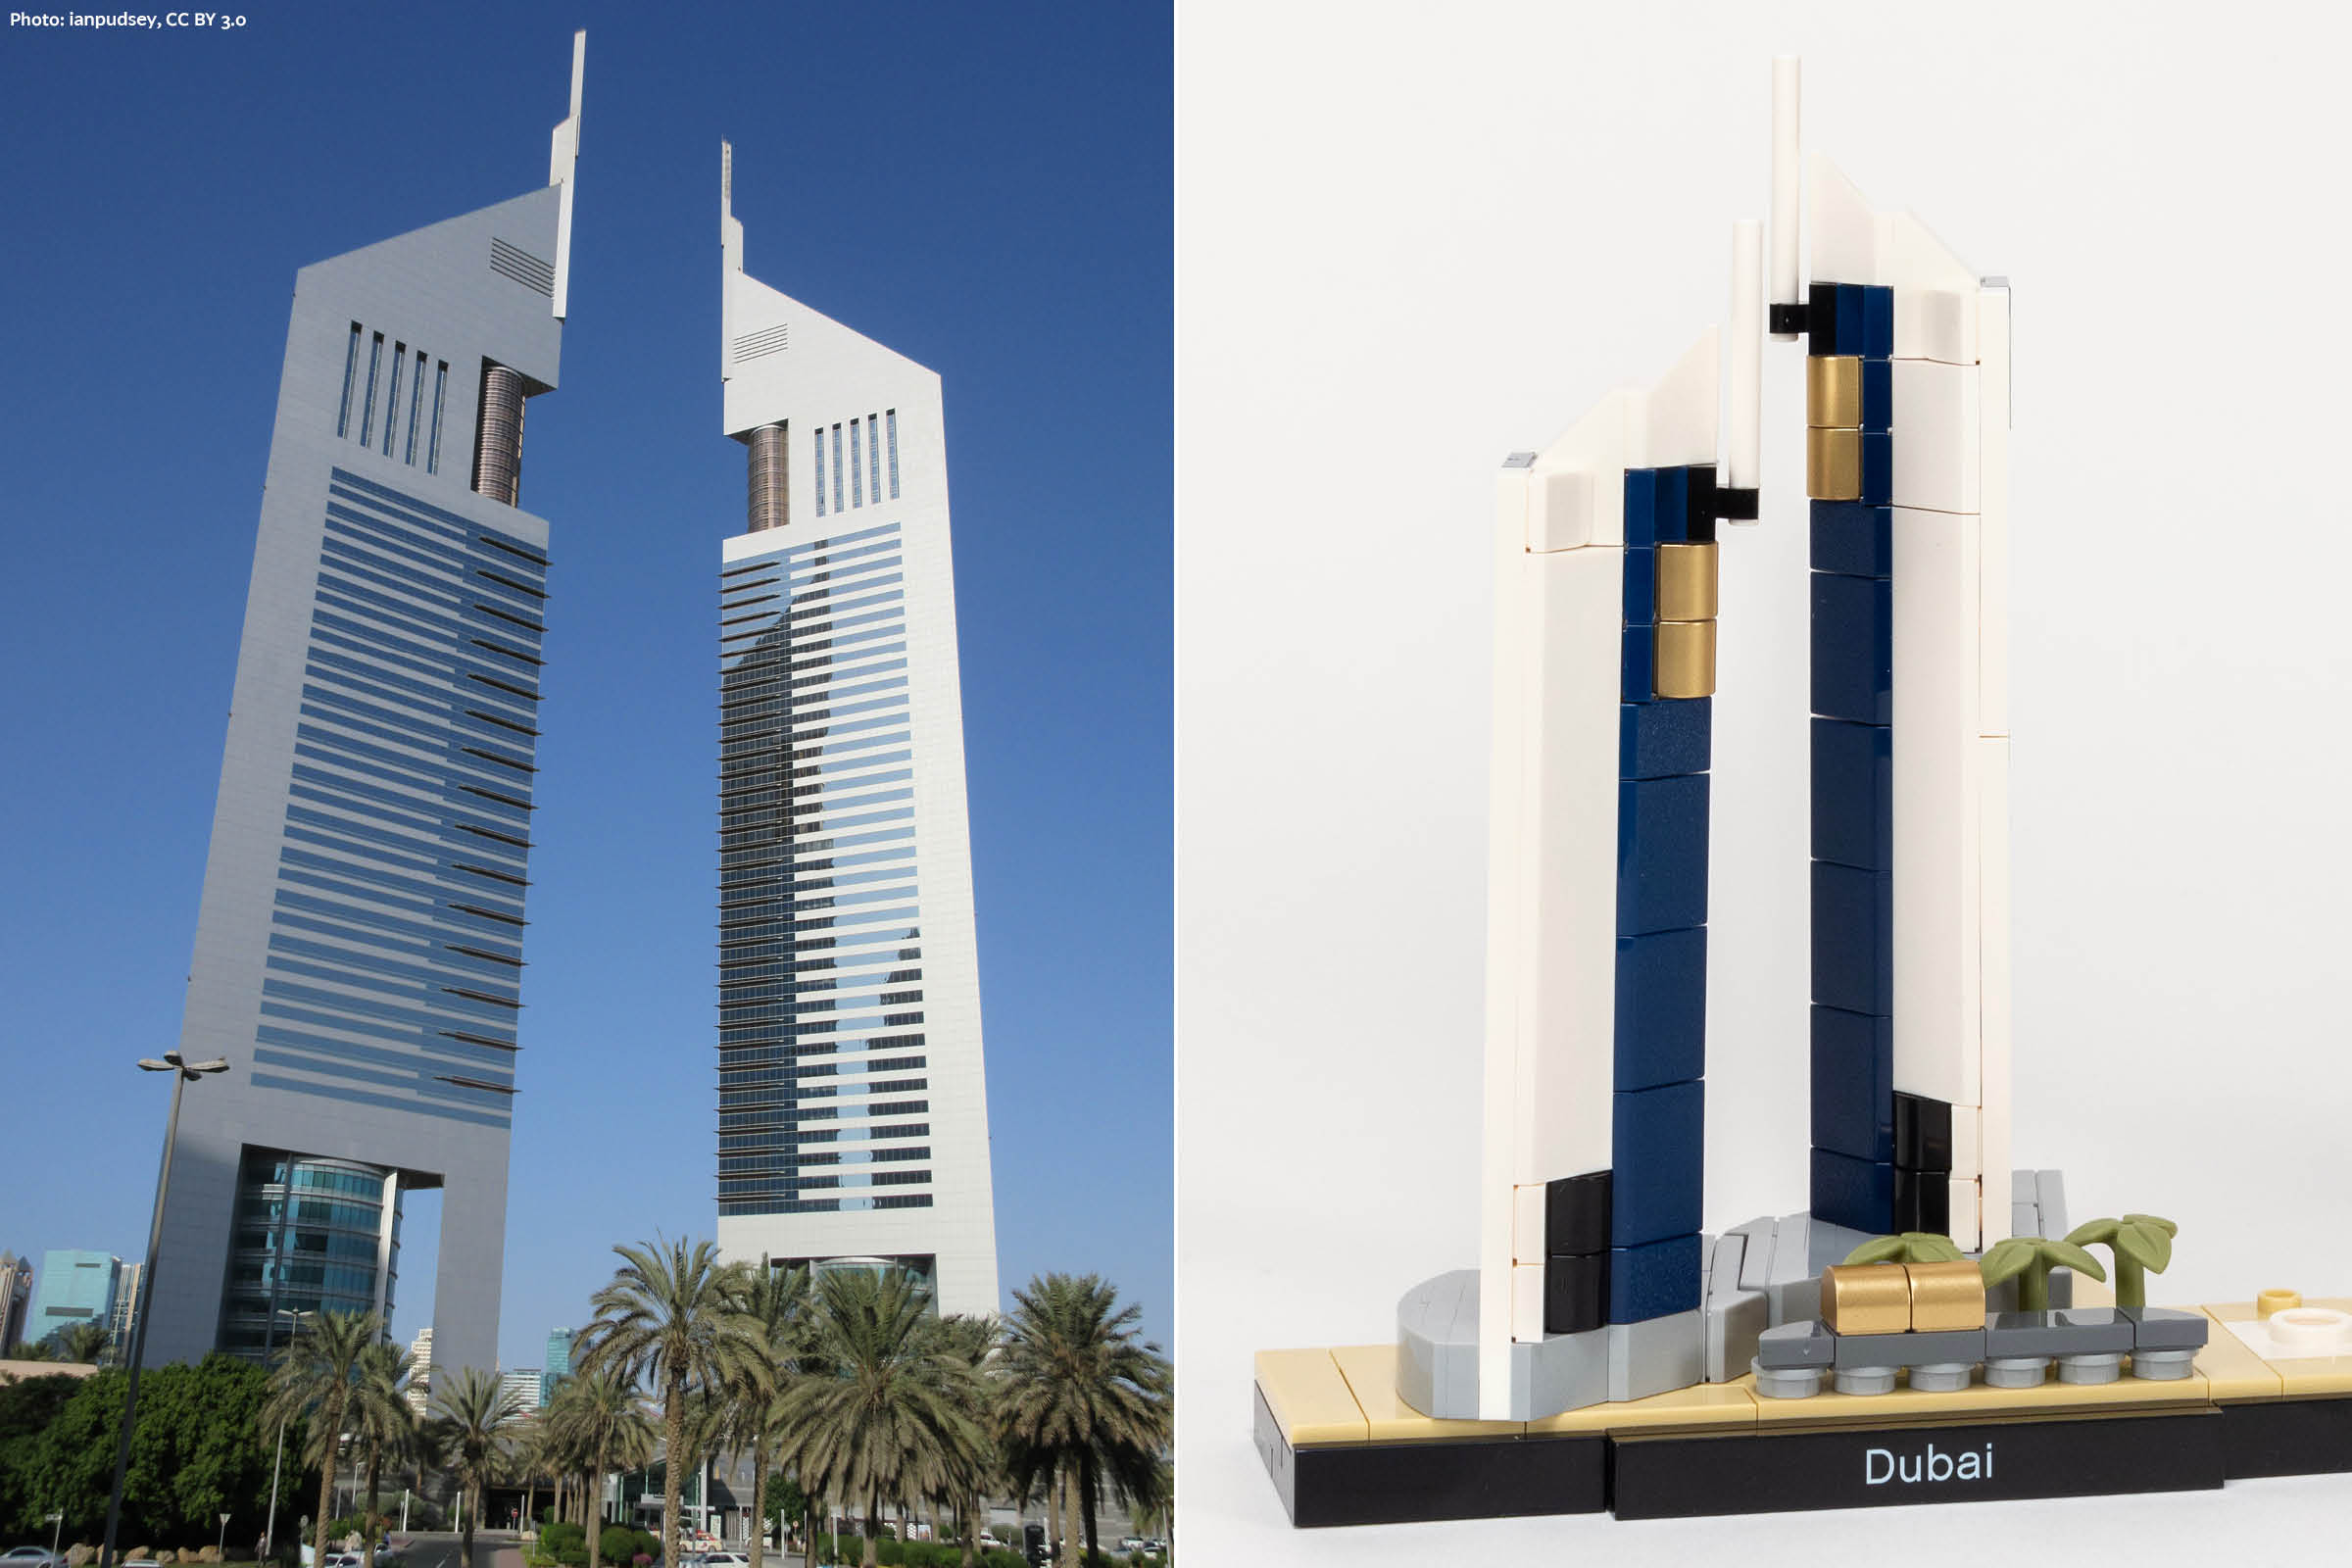
Jumeirah Emirates Towers. (Photo: ianpudsey, CC BY 3.0)
Build Time, 15 minutes.
Dubai Frame
Requiring just nine pieces, the Dubai Frame doesn’t have a lot to offer to in terms of building techniques. The highlight is how it is attached to the base using the new 2×2 Plate w/ Large Hole (part 27448) which was introduced in the Corner Garage.
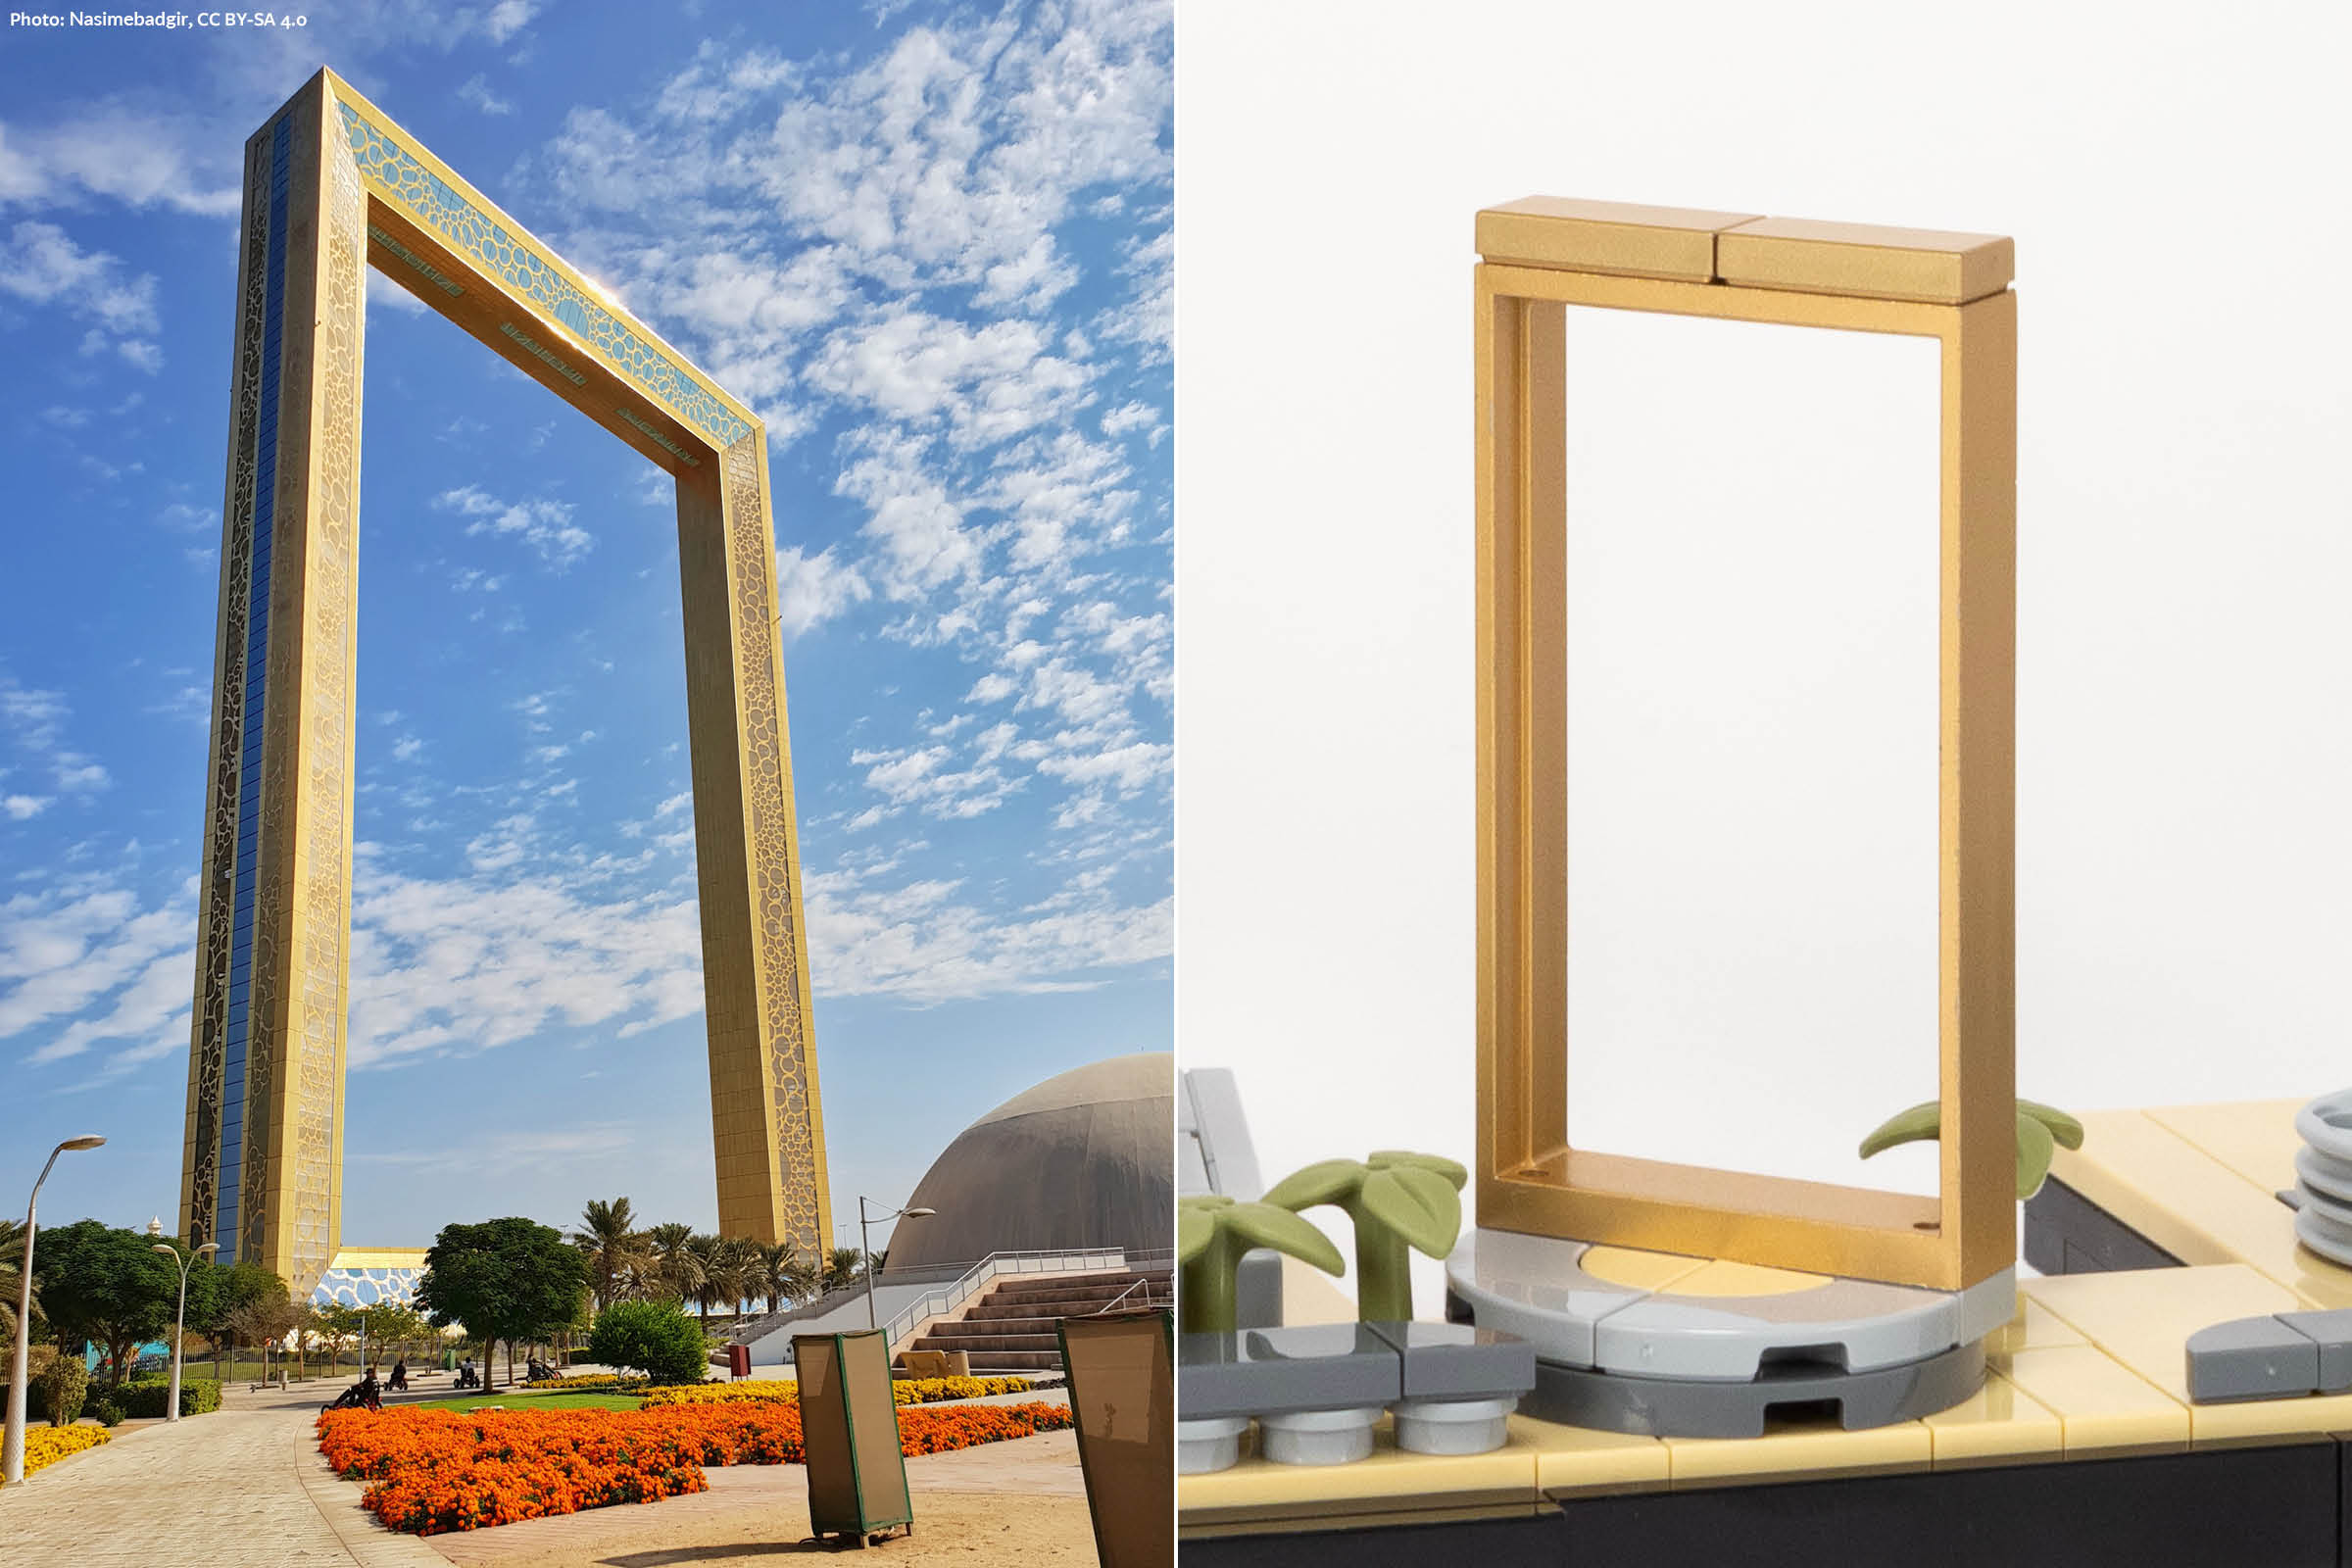
Dubai Frame. (Photo: Nasimebadgir, CC BY-SA 4.0)
I already mentioned my frustration that the thickness of the frame is uneven on all four sides—The top is about three times thicker than the sides, and twice as thick as the bottom. This does a disservice to the beauty of the real structure, but doesn’t negatively affect the set as a whole since it remains instantly recognizable in the overall scene.
Build Time, 1 minute.
Burj Al Arab
This was the moment I was waiting most for—the Burj Al Arab is one of the most iconic structures in the world; a marriage of the curvy sail-like form and the clearly visible structural supports on either side.
The LEGO model does not disappoint! I had so much fun assembling this model, which utilizes a huge stack of wedge plates in alternating 140Earth BlueDark Blue and 135Sand Blue forming the structural core. The outward-facing curve is captured effectively using four 2×2 curved w/ lip (part 30602) in 1White.
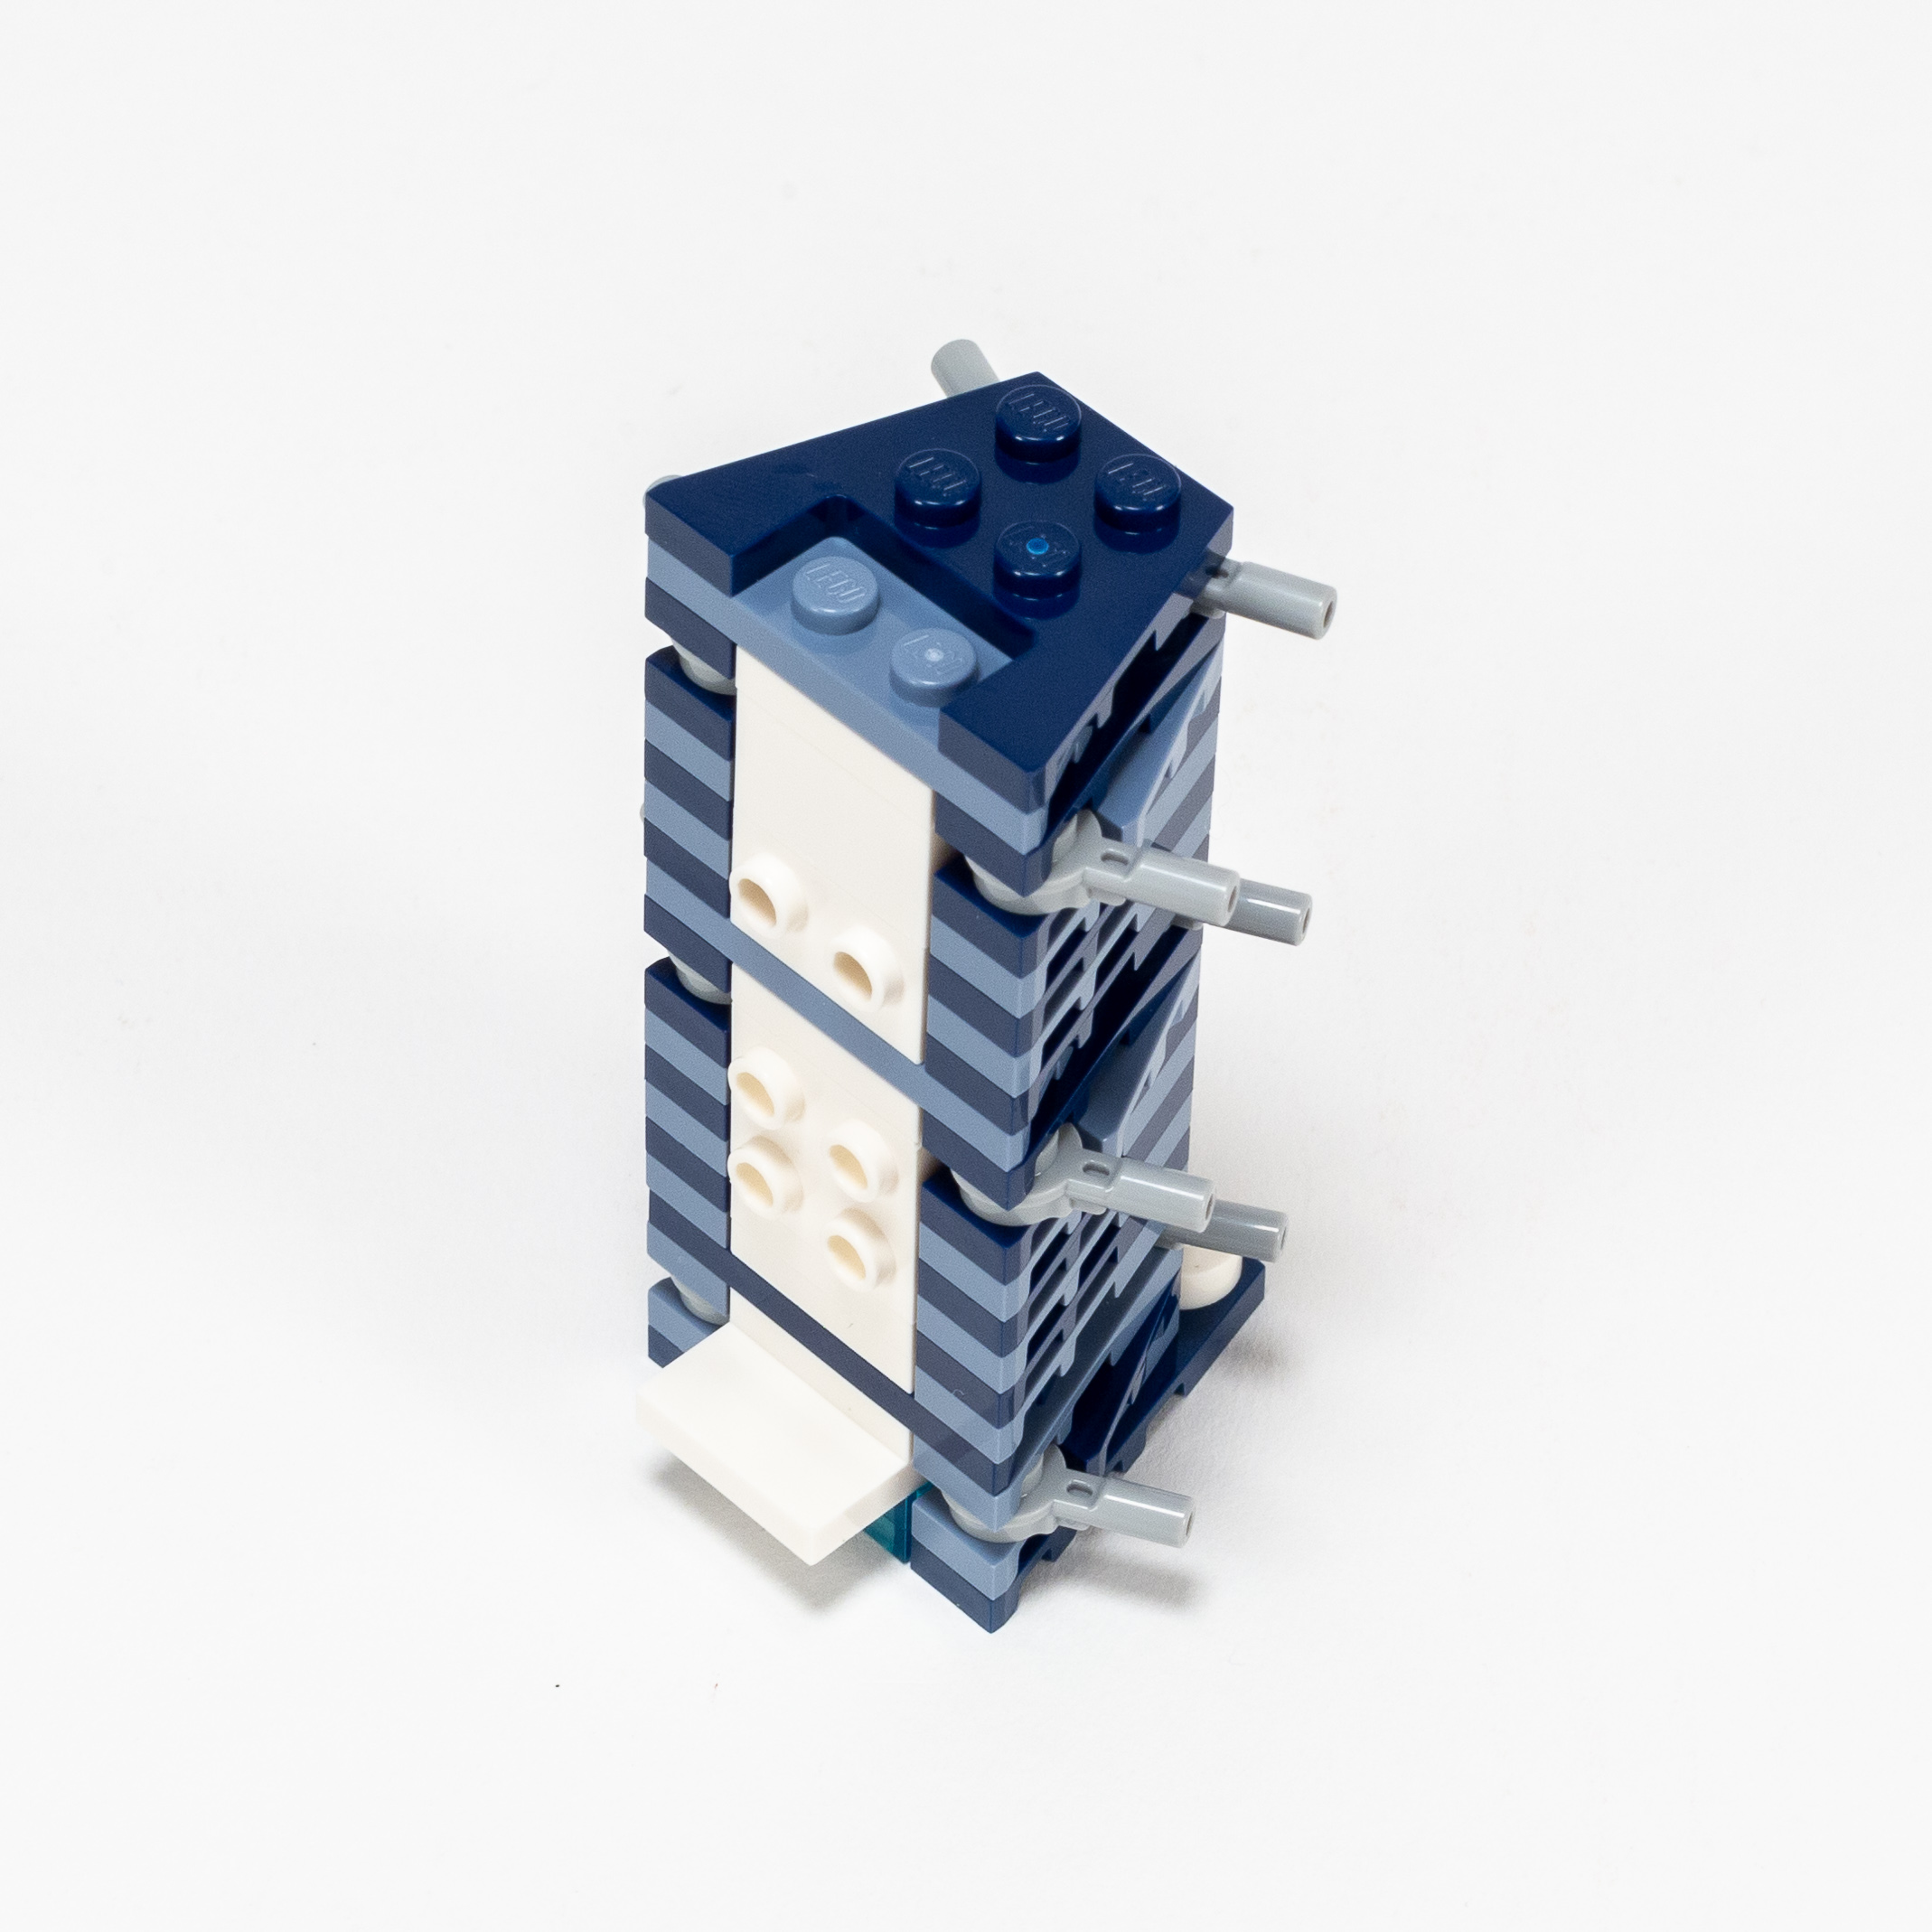
The central core of the LEGO re-creation of the Burj Al Arab.
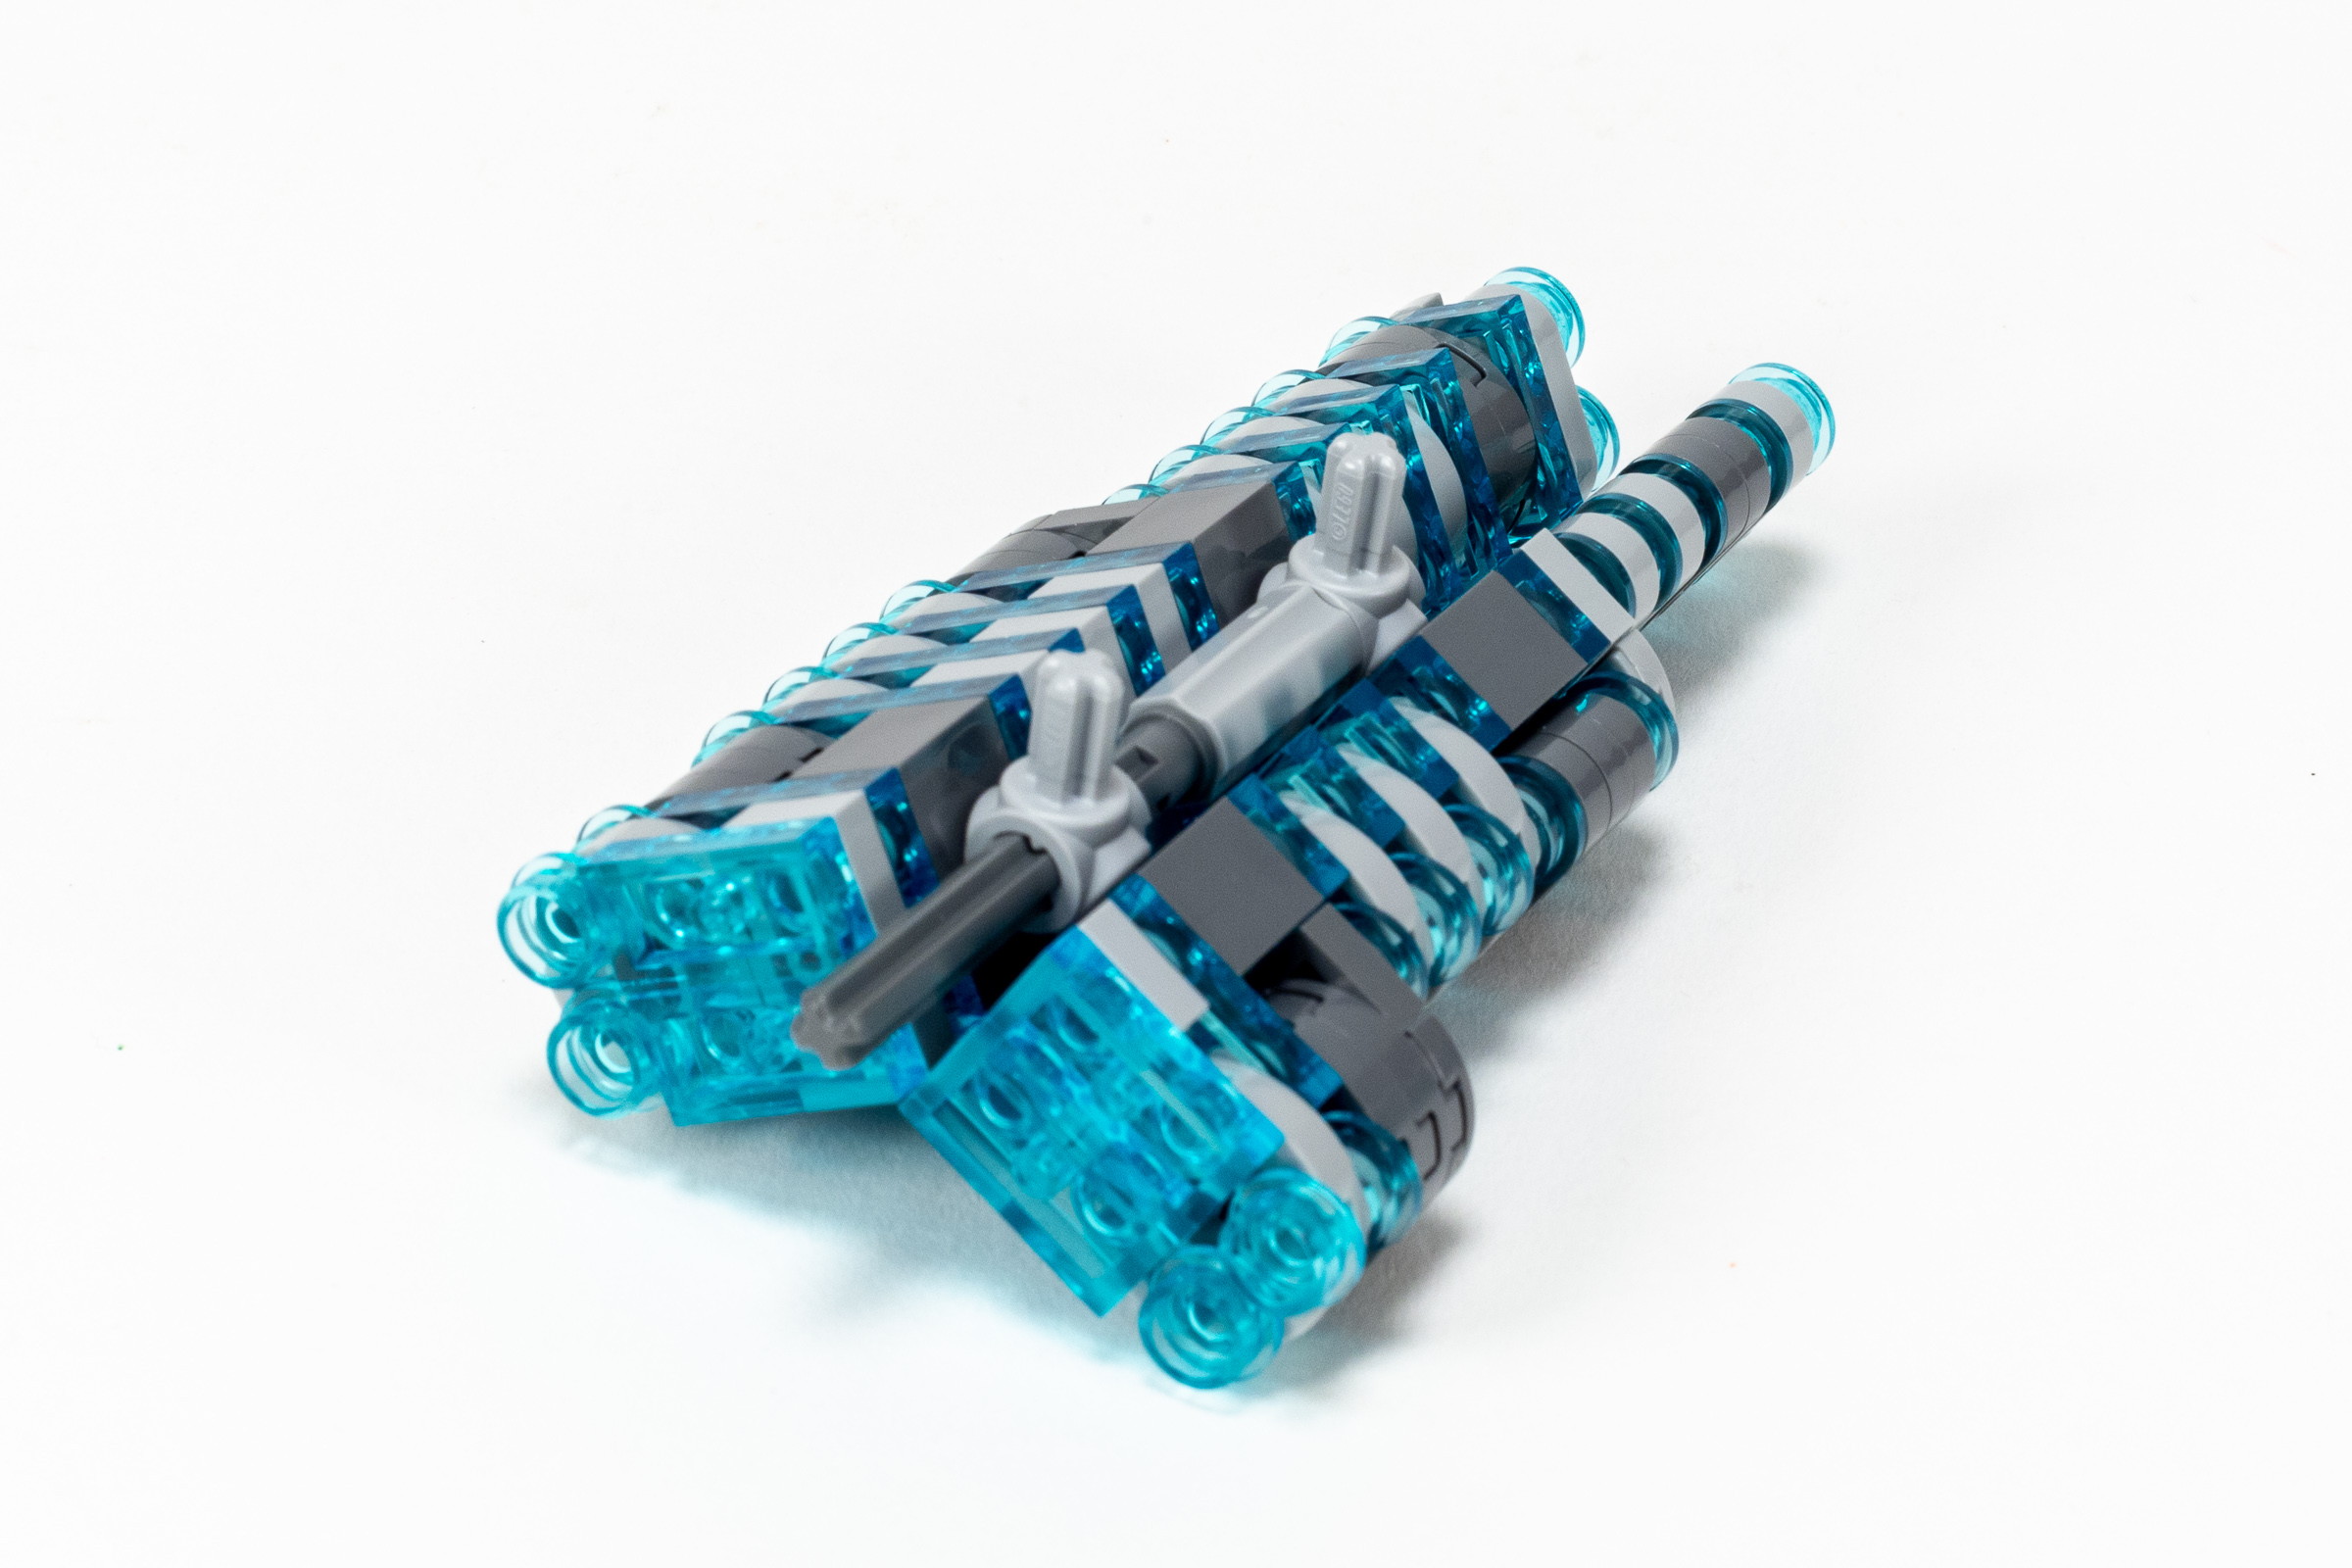
The structural elements of the exterior are artfully rendered using a lot of Bar Holder w/ Clip (part 11090) and Candlestick (part 37762) which was just introduced in 2018. While they are not load bearing in the same way as the real building, they create this unusual shape very effectively. Lastly, two Soft Axle, 12L (part 32200) create the gentle curve which is visible on both sides of the building.
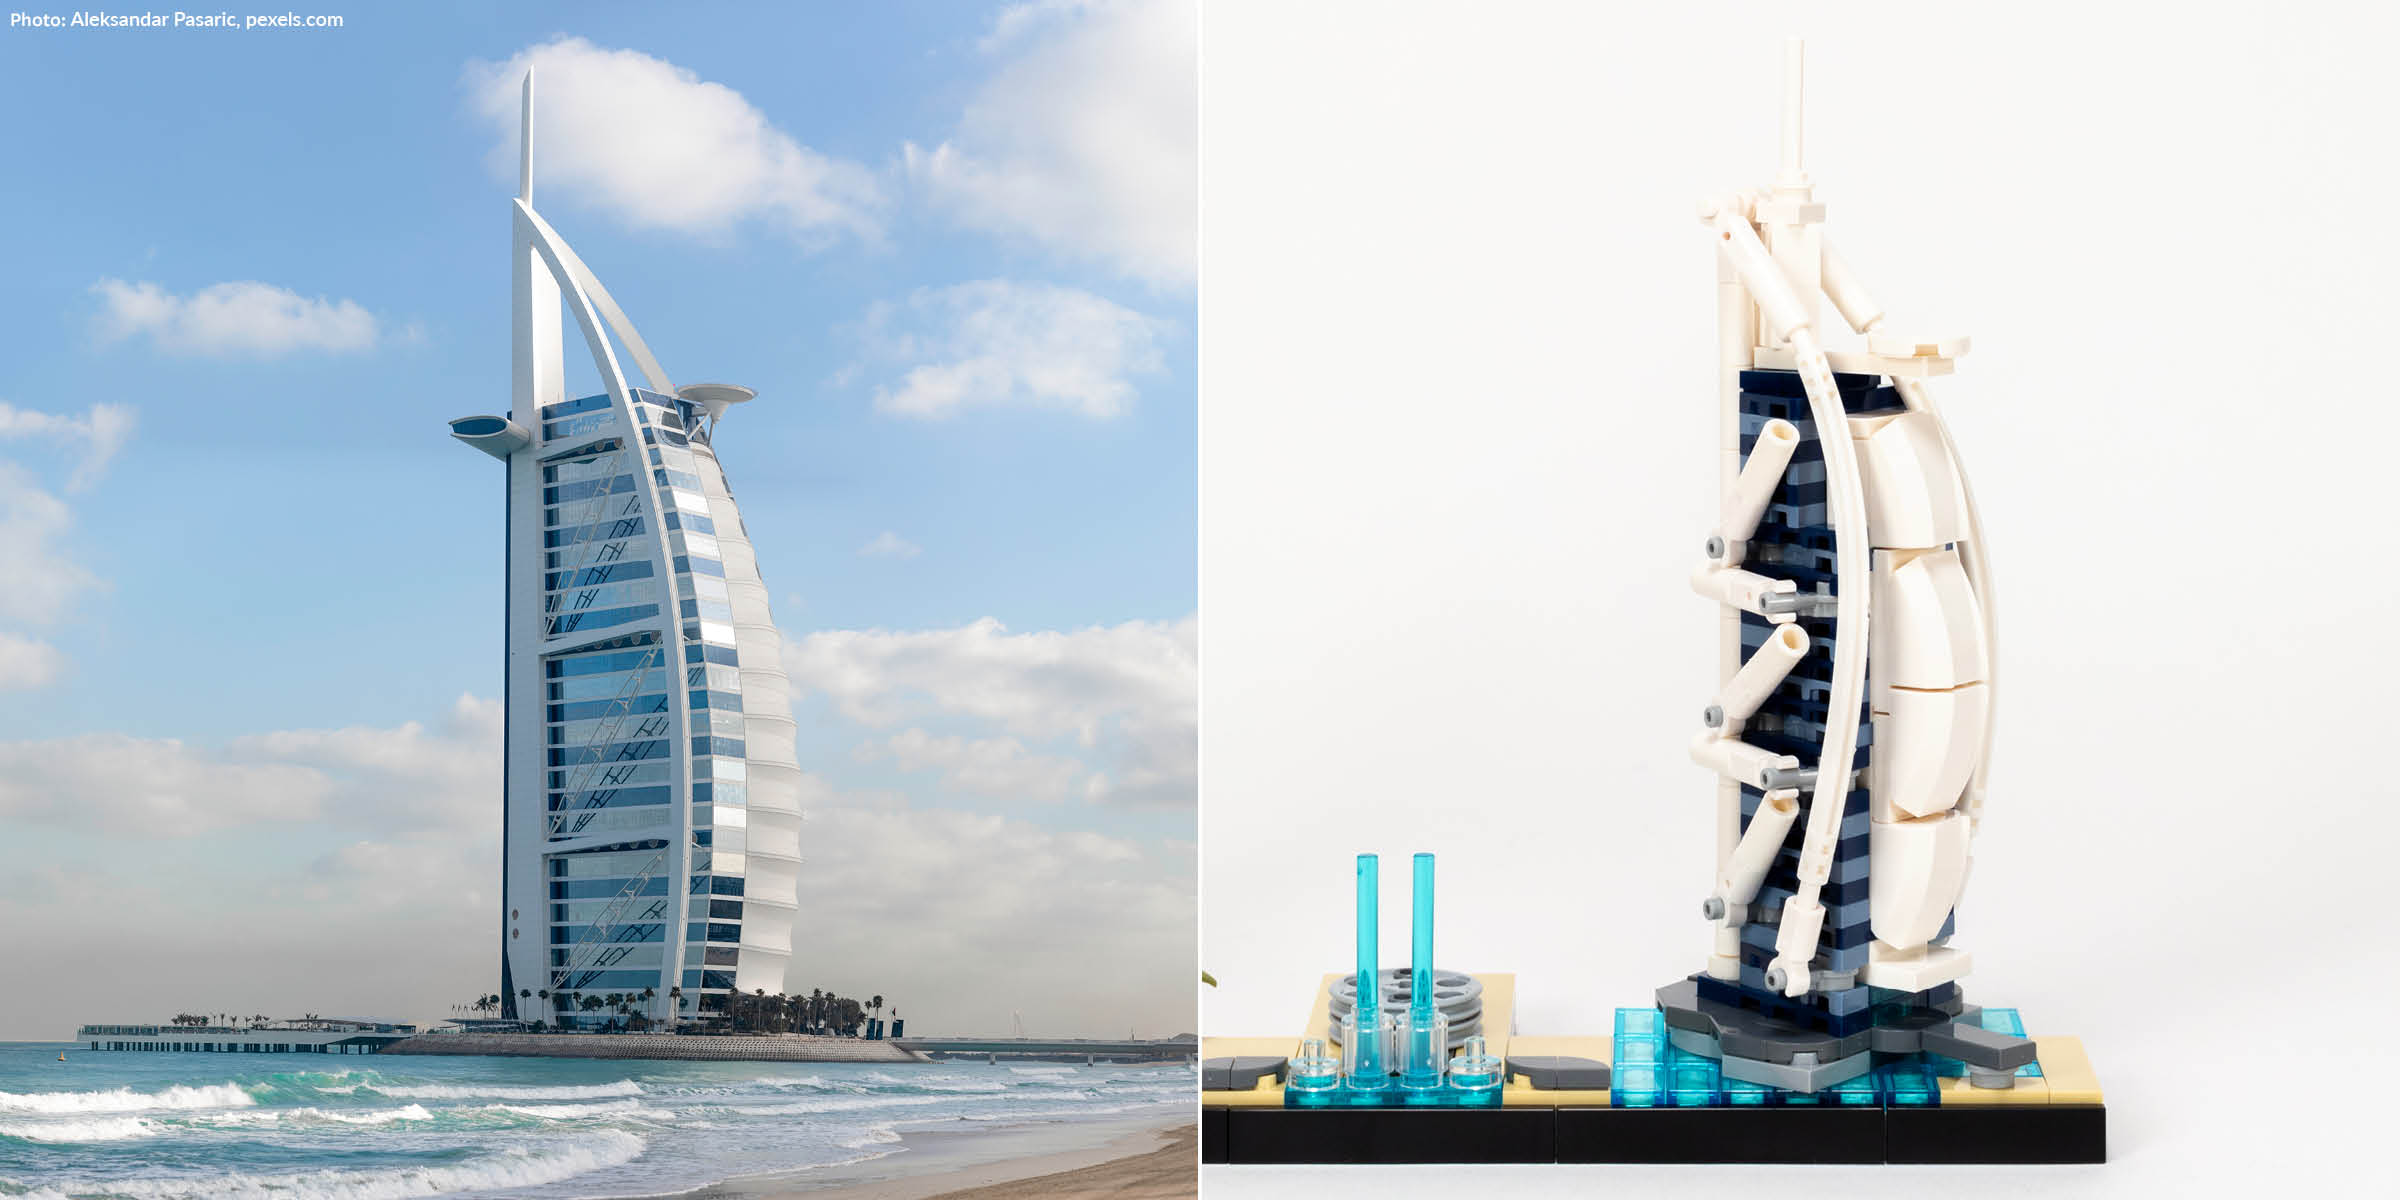
Burj Al Arab. (Photo: Aleksandar Pasaric, pexels.com)
I am not ashamed to say that this was one of my favorite buildings to re-create using LEGO in a long time. Relatively few curvaceous buildings have been included in the LEGO Architecture series for a good reason, but they look so good when it works well.
Build Time, 15 minutes.
Burj Khalifa
For reasons I can’t quite understand, the instruction booklet highlights the Dubai Fountain as a separate structure, and you assemble it during Bag 2. In practice, it is right at the base of the Burj Khalifa and they are both part of a larger shopping complex. Nonetheless, the fountain is a nice touch that adds a sense of scale to the larger building behind it.
With so many tiny parts used to build the Burj Khalifa, it uses all of the parts in Bag 3. The build process relies heavily on 1×1 round plates in 42Transparent Light BlueTrans-Light Blue, which alternate with 194Medium Stone GreyLight Bluish Gray and 199Dark Stone GreyDark Bluish Gray plates to create the striped pattern of floors.
The bottom section uses a Technic core to achieve the required angles.
The lower half of the building accurately depicts the triangular arrangement of the three wings, relying on two Axle Hub w/ 3 axles (part 57585) attached to 1×2 Brick w/ axle hole (part 32064) to achieve the 120° angle. This is not a particularly complex building technique, but I always enjoy when Technic is used in the structural core of LEGO Architecture sets.

Getting ready to install the bottom assembly.
The top half breaks with the triangular arrangement of wings, approximating it using an l-shaped arrangement of plates. The transition near the center of the model is especially problematic, since you can see right through a gap in the middle of the building when viewed from just 45° to the right.
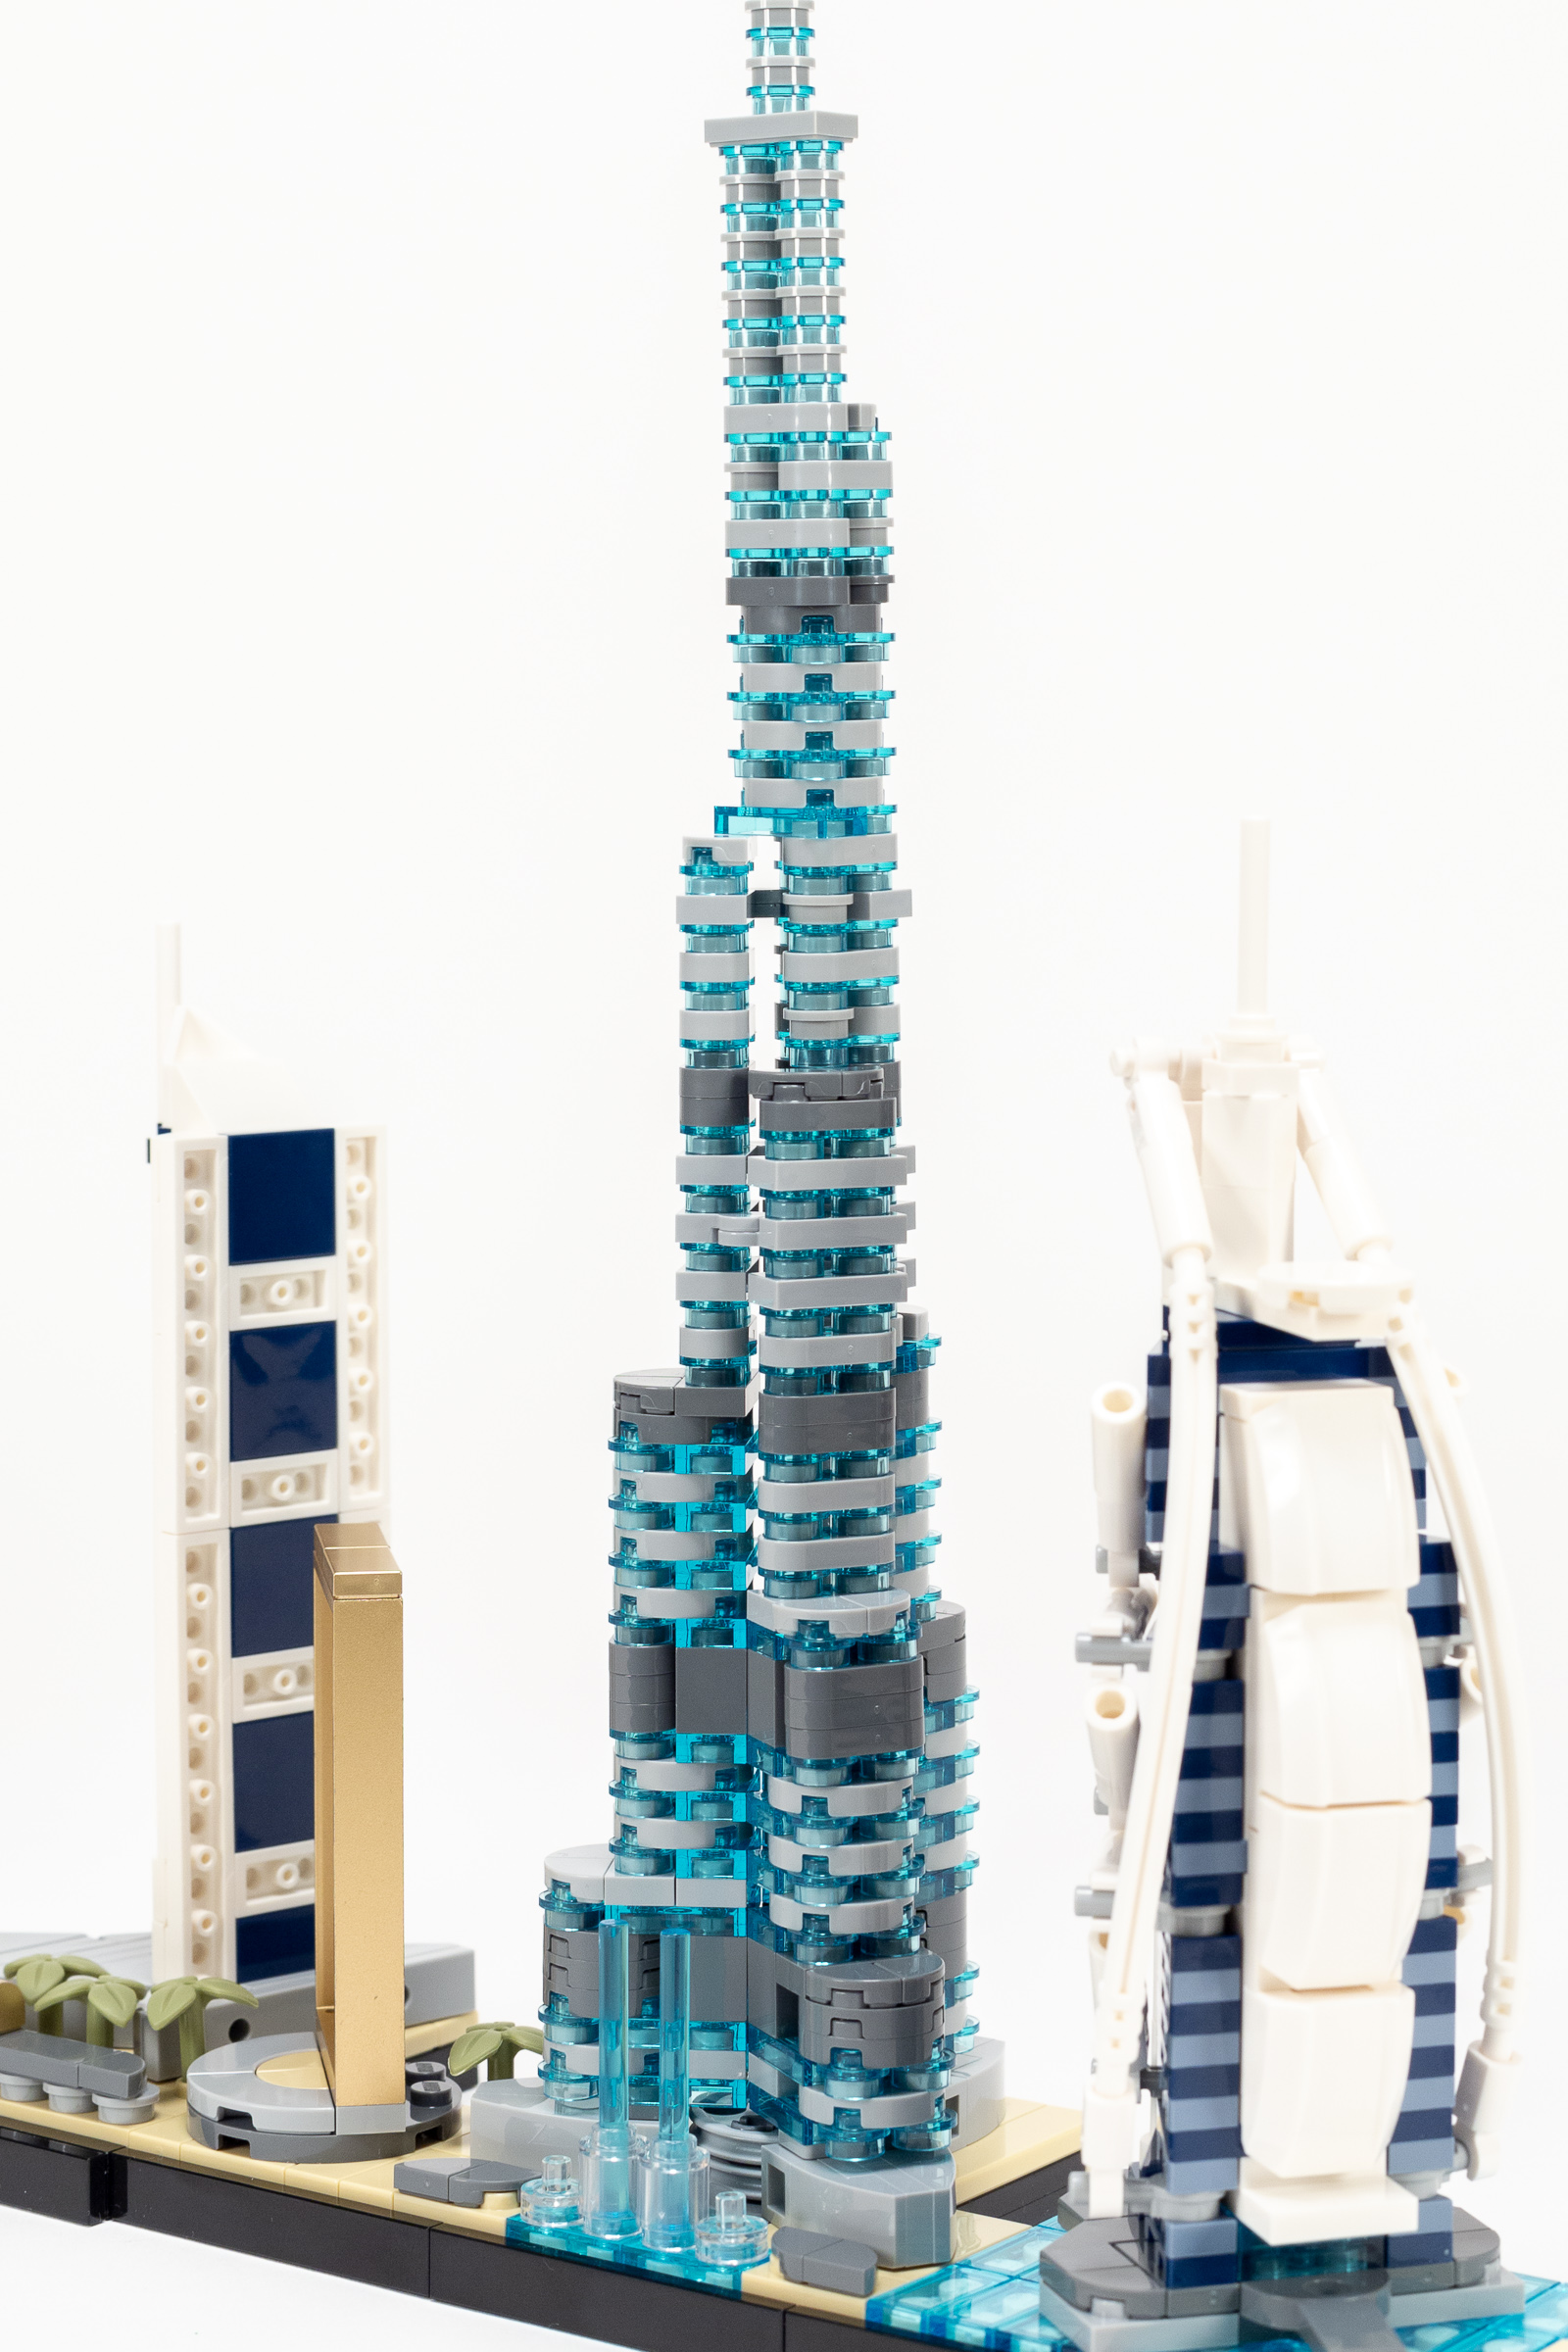
A gap in the structure is clearly visible from this angle.
I also find the round profile on the end of each wing a bit disappointing, as it alternates between 1×1 round plates, which have a ½-stud radius, and 2×2 plates which have a 1-stud radius. This isn’t terribly visible when viewed from afar, especially since the smaller plates are translucent, but I would have liked to see a consistent 1-stud radius all the way up each wing. Thankfully, the relatively new 1×1 corner tile (part 25269) is used at each setback, reducing the visibility of this issue.
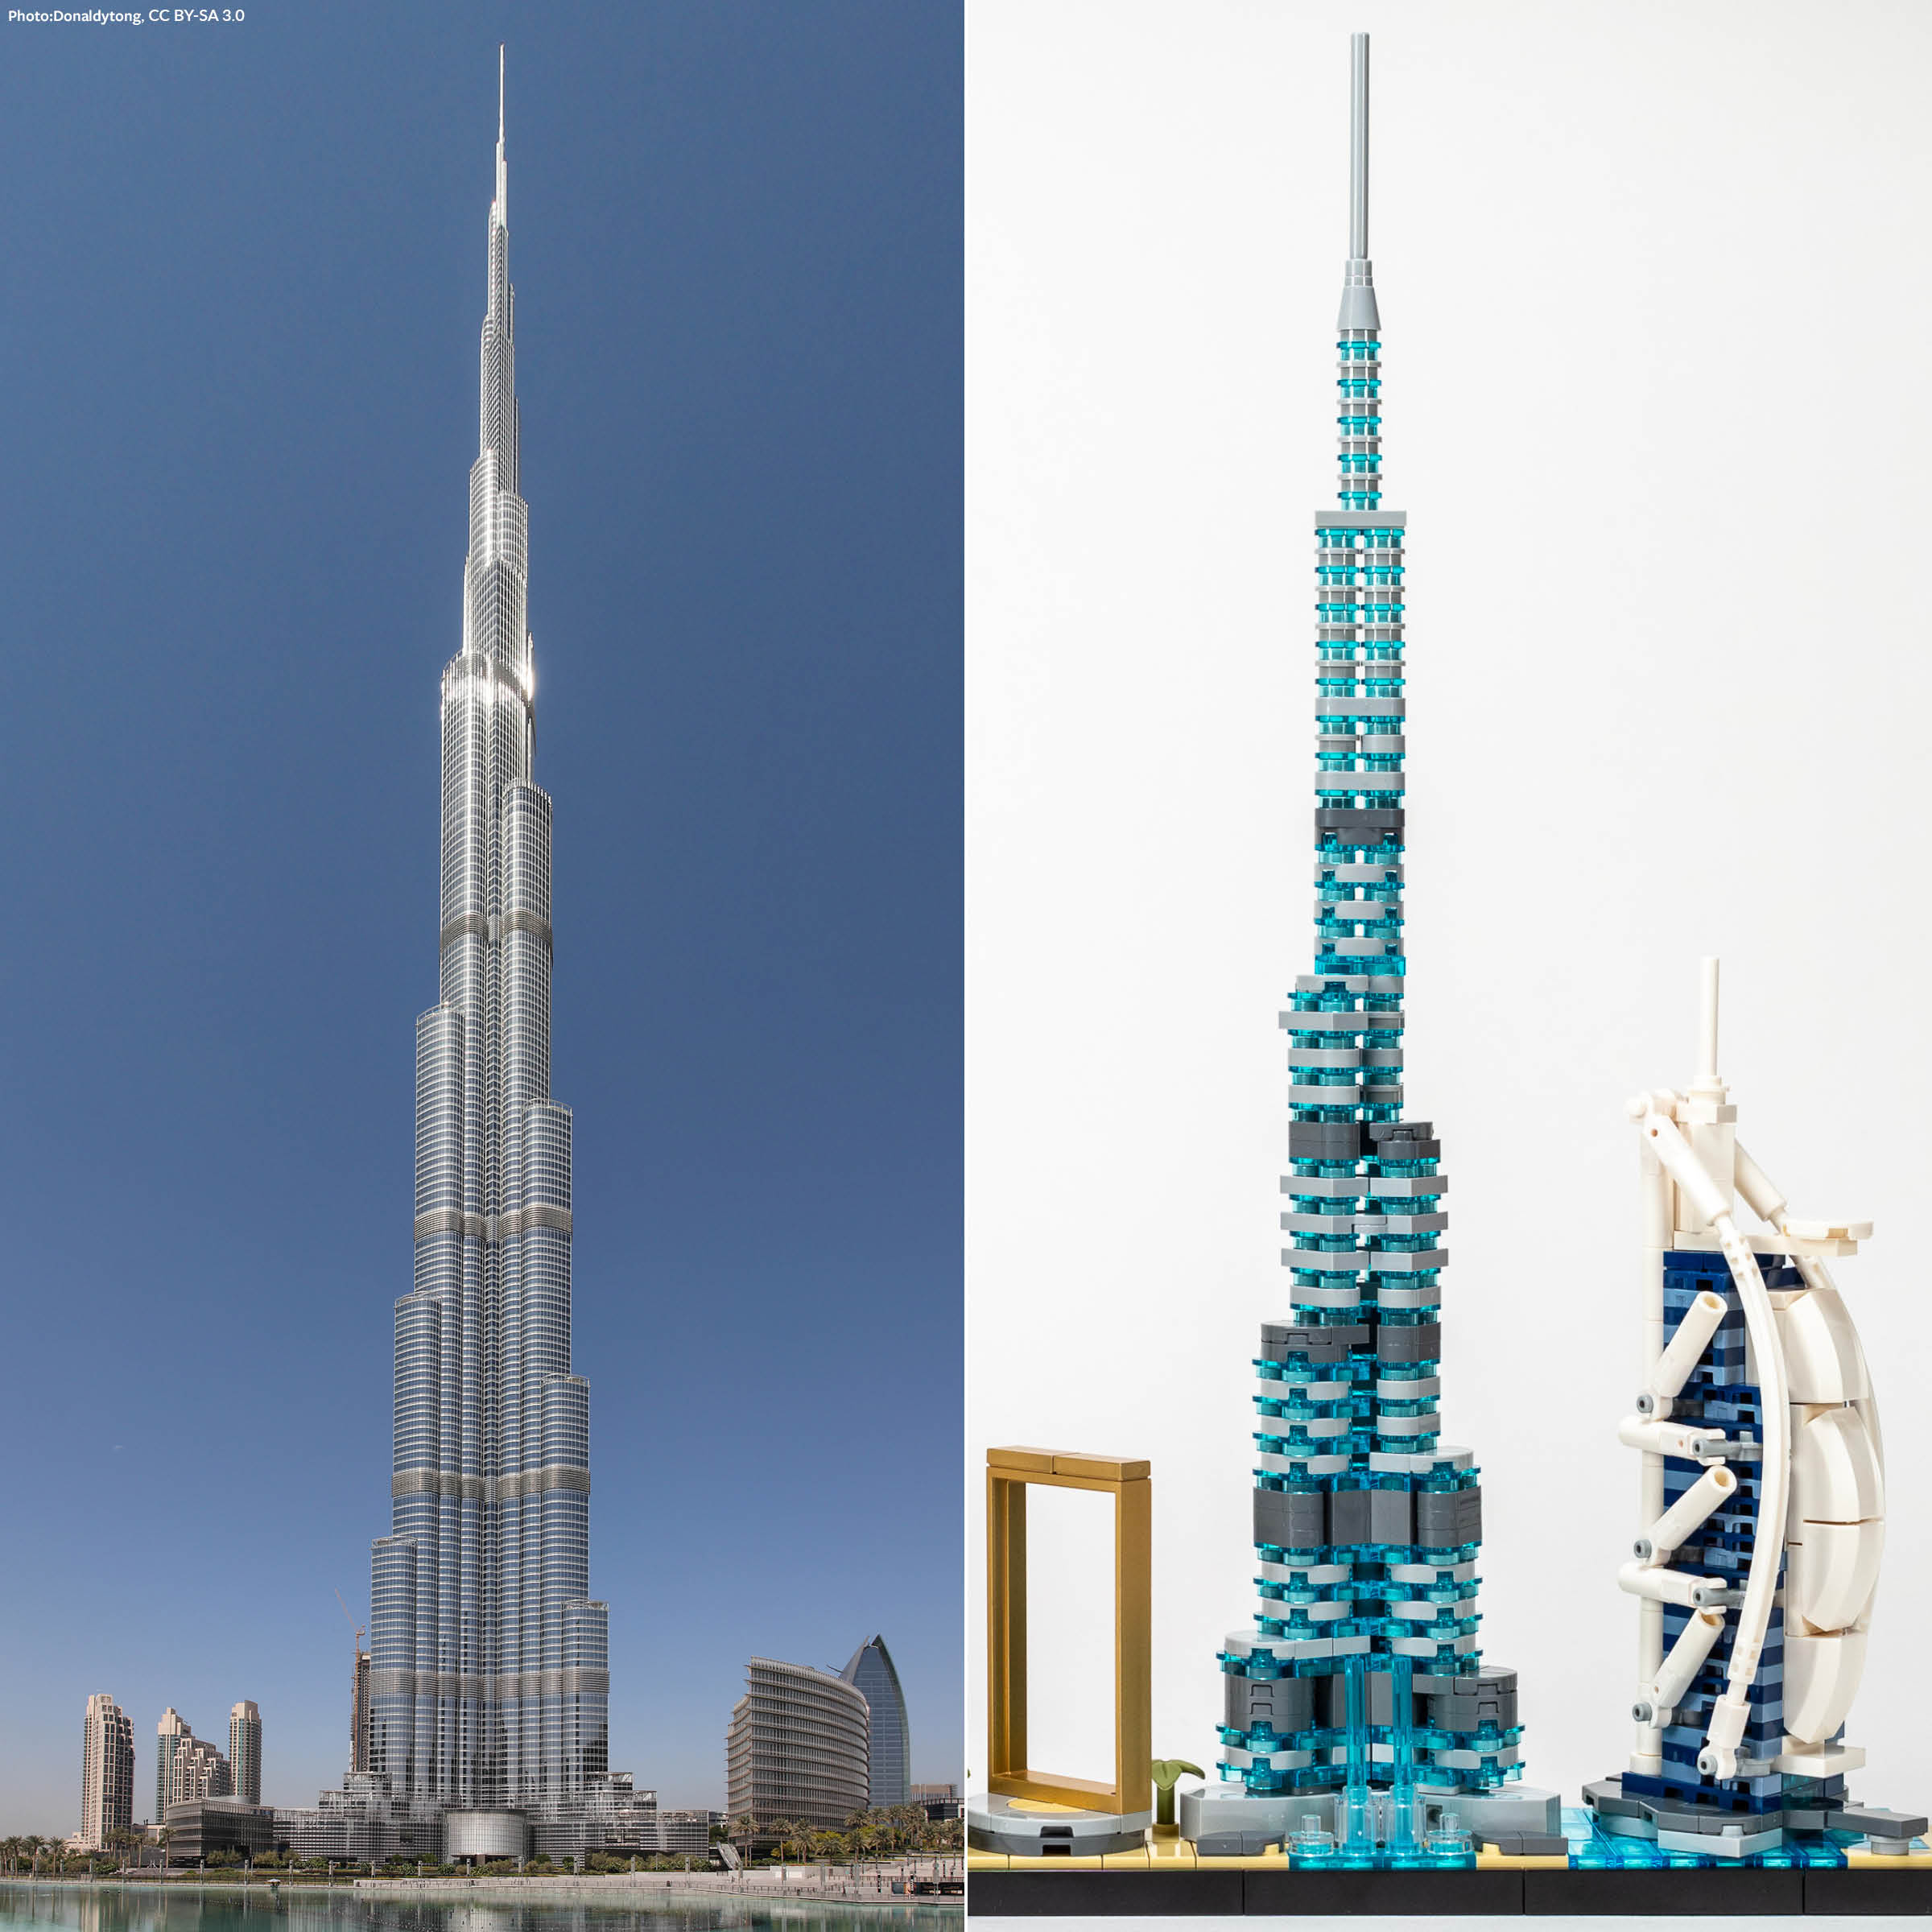
Burj Khalifa. (Photo: Donaldytong, CC BY-SA 3.0)
Build Time, 30 minutes.
About the Parts
The set features a fair number of parts in a three relatively rare colors: 299Warm Gold Drum LacqueredMetallic Gold, 140Earth BlueDark Blue, and 135Sand Blue.
A few of the existing parts in new colors:
- 6x 1×1×⅔ Curved Top (part 49307) in 299Warm Gold Drum LacqueredMetallic Gold.
- 1x 1×4×6 Door Frame (part 60596) in 299Warm Gold Drum LacqueredMetallic Gold.
Conclusion
My overall impression of this set is mixed; it has exceeded my expectations based on the initially released photos, but those expectations weren’t especially high to begin with. I should start with the obvious highlight—the LEGO rendition of the Burj Al Arab significantly exceeded my expectations for what was possible at this scale and was a joy to build. Likewise, Jumeirah Emirates Towers exceeded my expectations due to excellent building techniques, even though I would have chosen a more iconic landmark to include instead.
#21052 Dubai Skyline, viewed from above.
The Dubai Frame is satisfactory, and the choice to position it at a 45° angle makes for a much more interesting composition. That said, I do not like that the Dubai Frame is placed out-of-order as compared to the cities real geography. (It should have been on the left of Jumeirah Emirates Towers, when viewed from the water.)
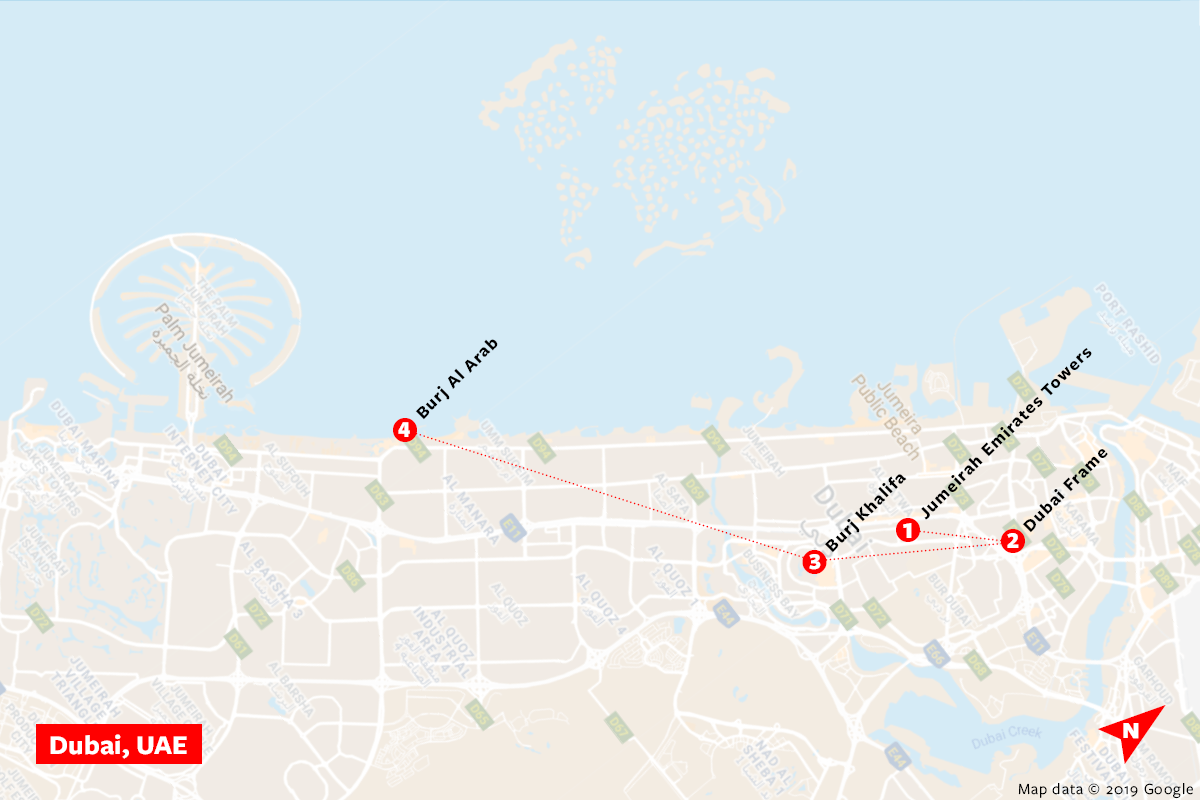
Map of Dubai showing location of the four landmarks.
Sadly, the tallest model in the set is the least satisfying. The transition from the lower section which accurately reflects the building’s triangular plan to the upper section is not handled very smoothly. Having a visible gap in the structure when viewed from the wrong angle ruins the effect for me. It’s also repetitive, and doesn’t offer any interesting building techniques.

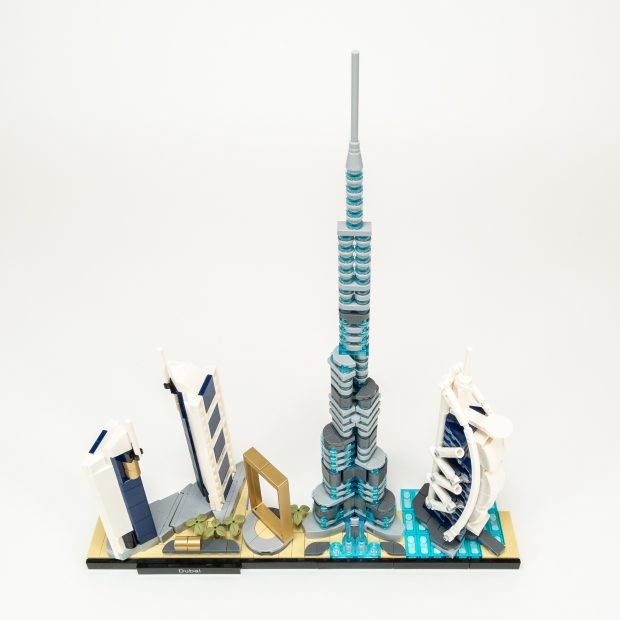
#21052 Dubai Skyline.
It is particularly difficult to apply a single numeric rating to sets in the Skyline series, as you can have wildly different impressions of each model featured in the set. That’s definitely the case here—In isolation, the Burj Al Arab would have earned top marks, but I need to give lower marks for the set as a whole. Overall, #21052 Dubai Skyline earns our “Recommended” (4/5 Star) rating.
Great review as always! I’m going to purchase it but likely not on release date and likely not for the RSP.