
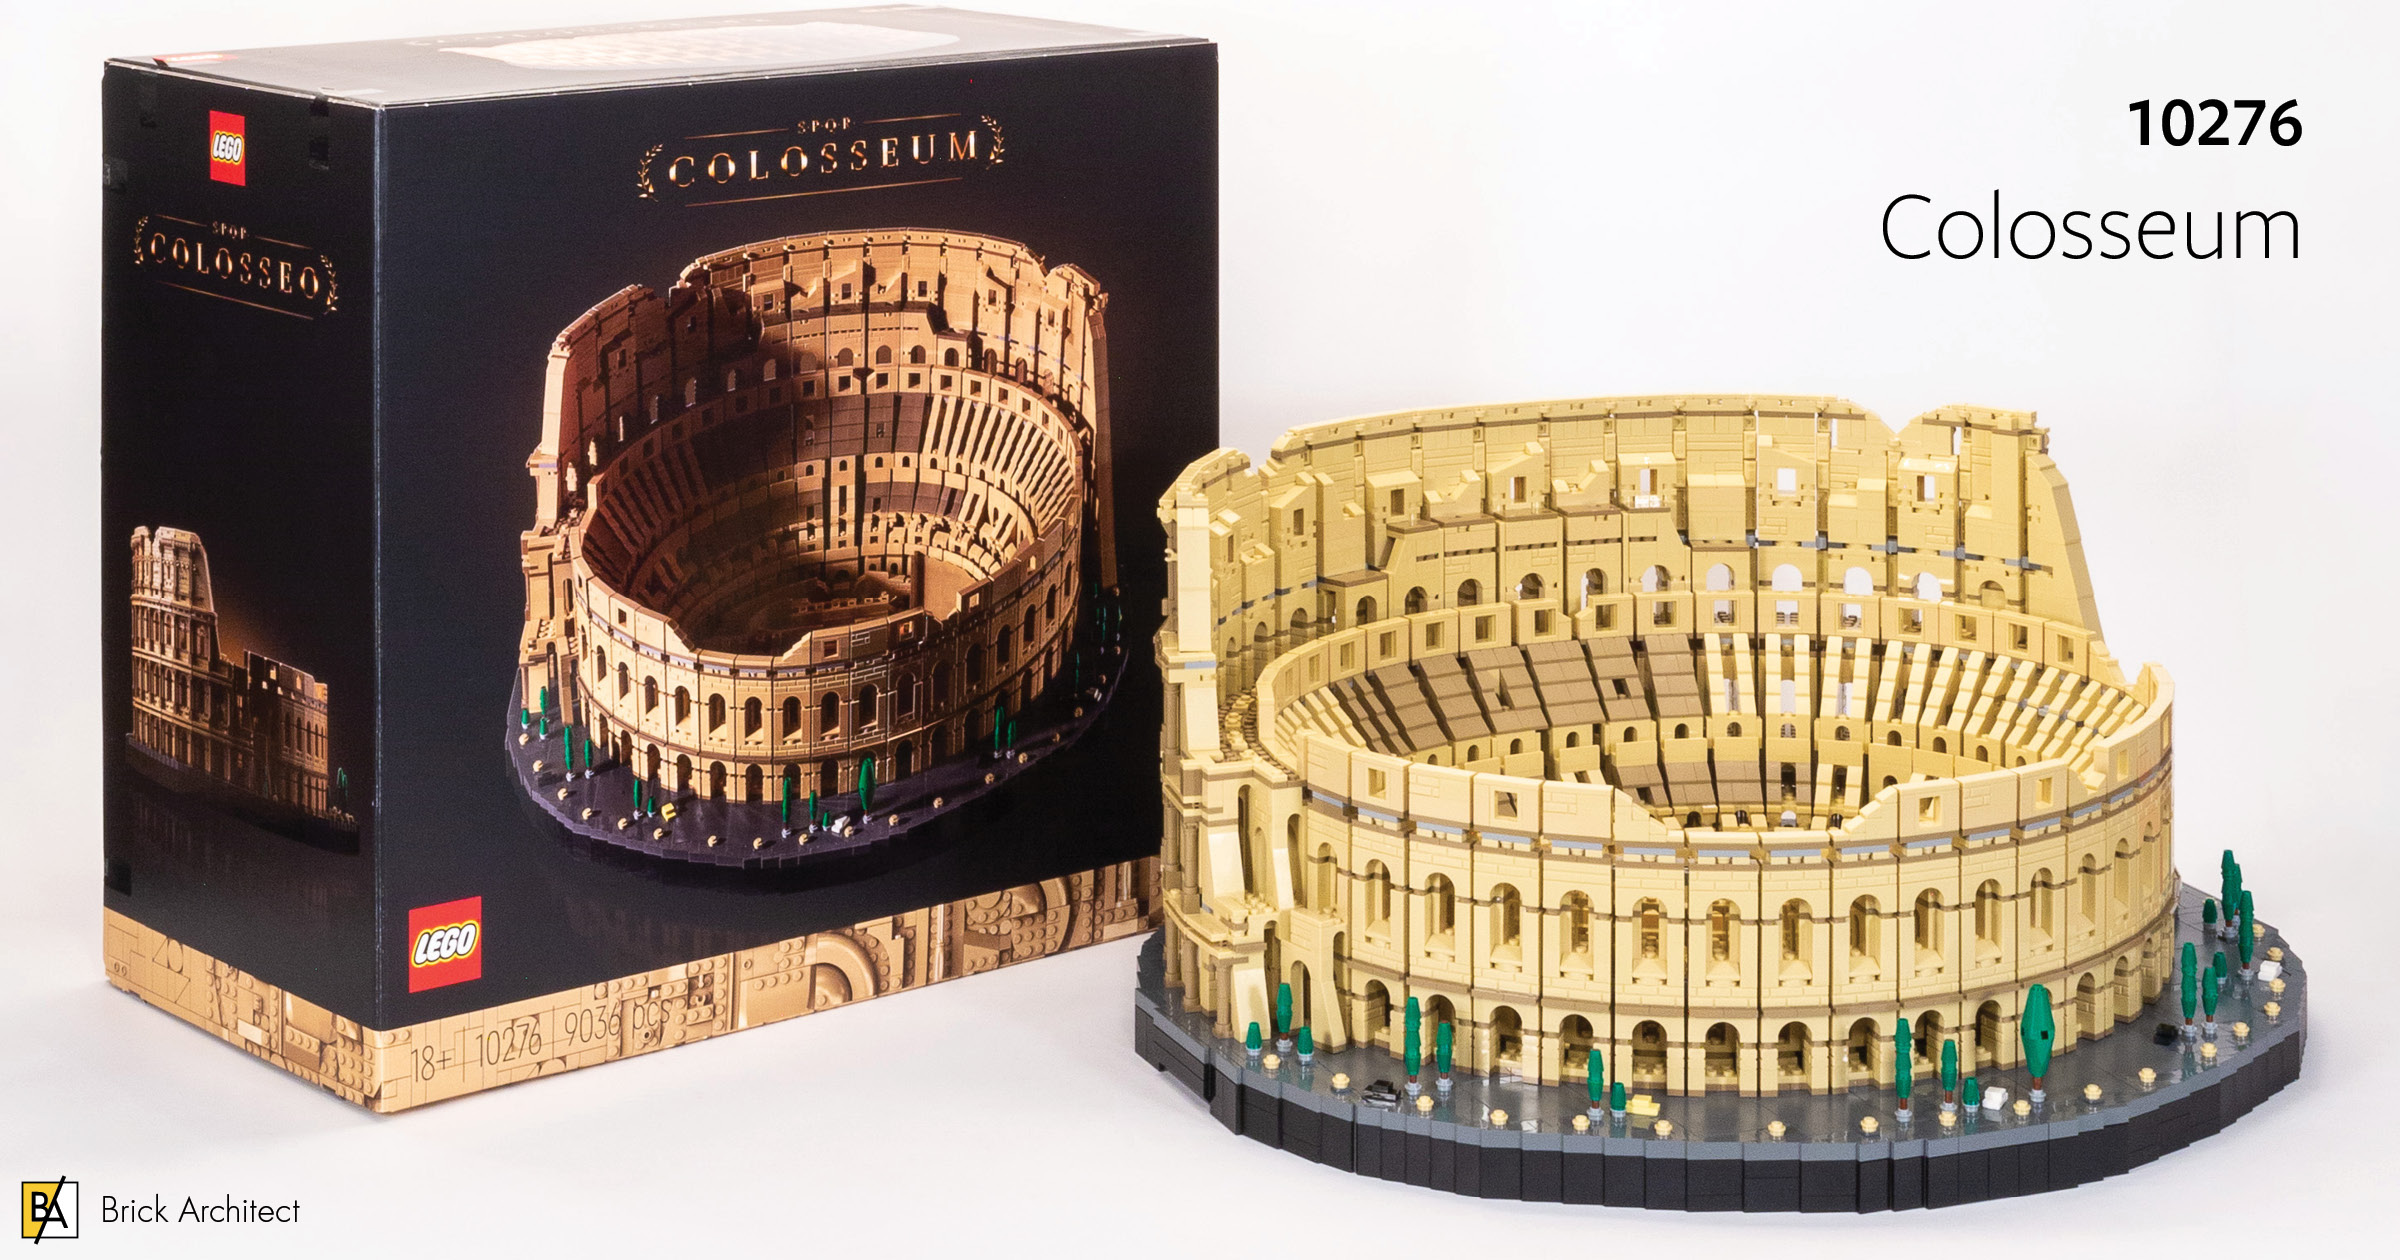
Review: #10276 Colosseum
They say Rome wasn’t built in a day. As you will learn in this review, neither was the largest LEGO Set ever released—at 9,036 pieces you’re going to need a large table and a (very) long weekend!
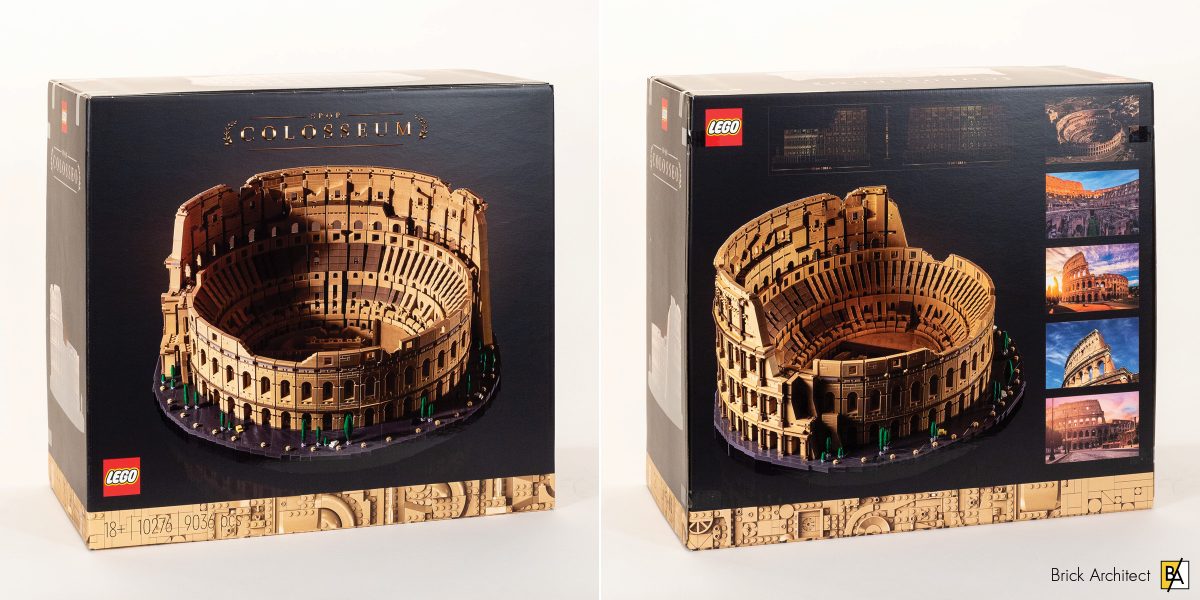
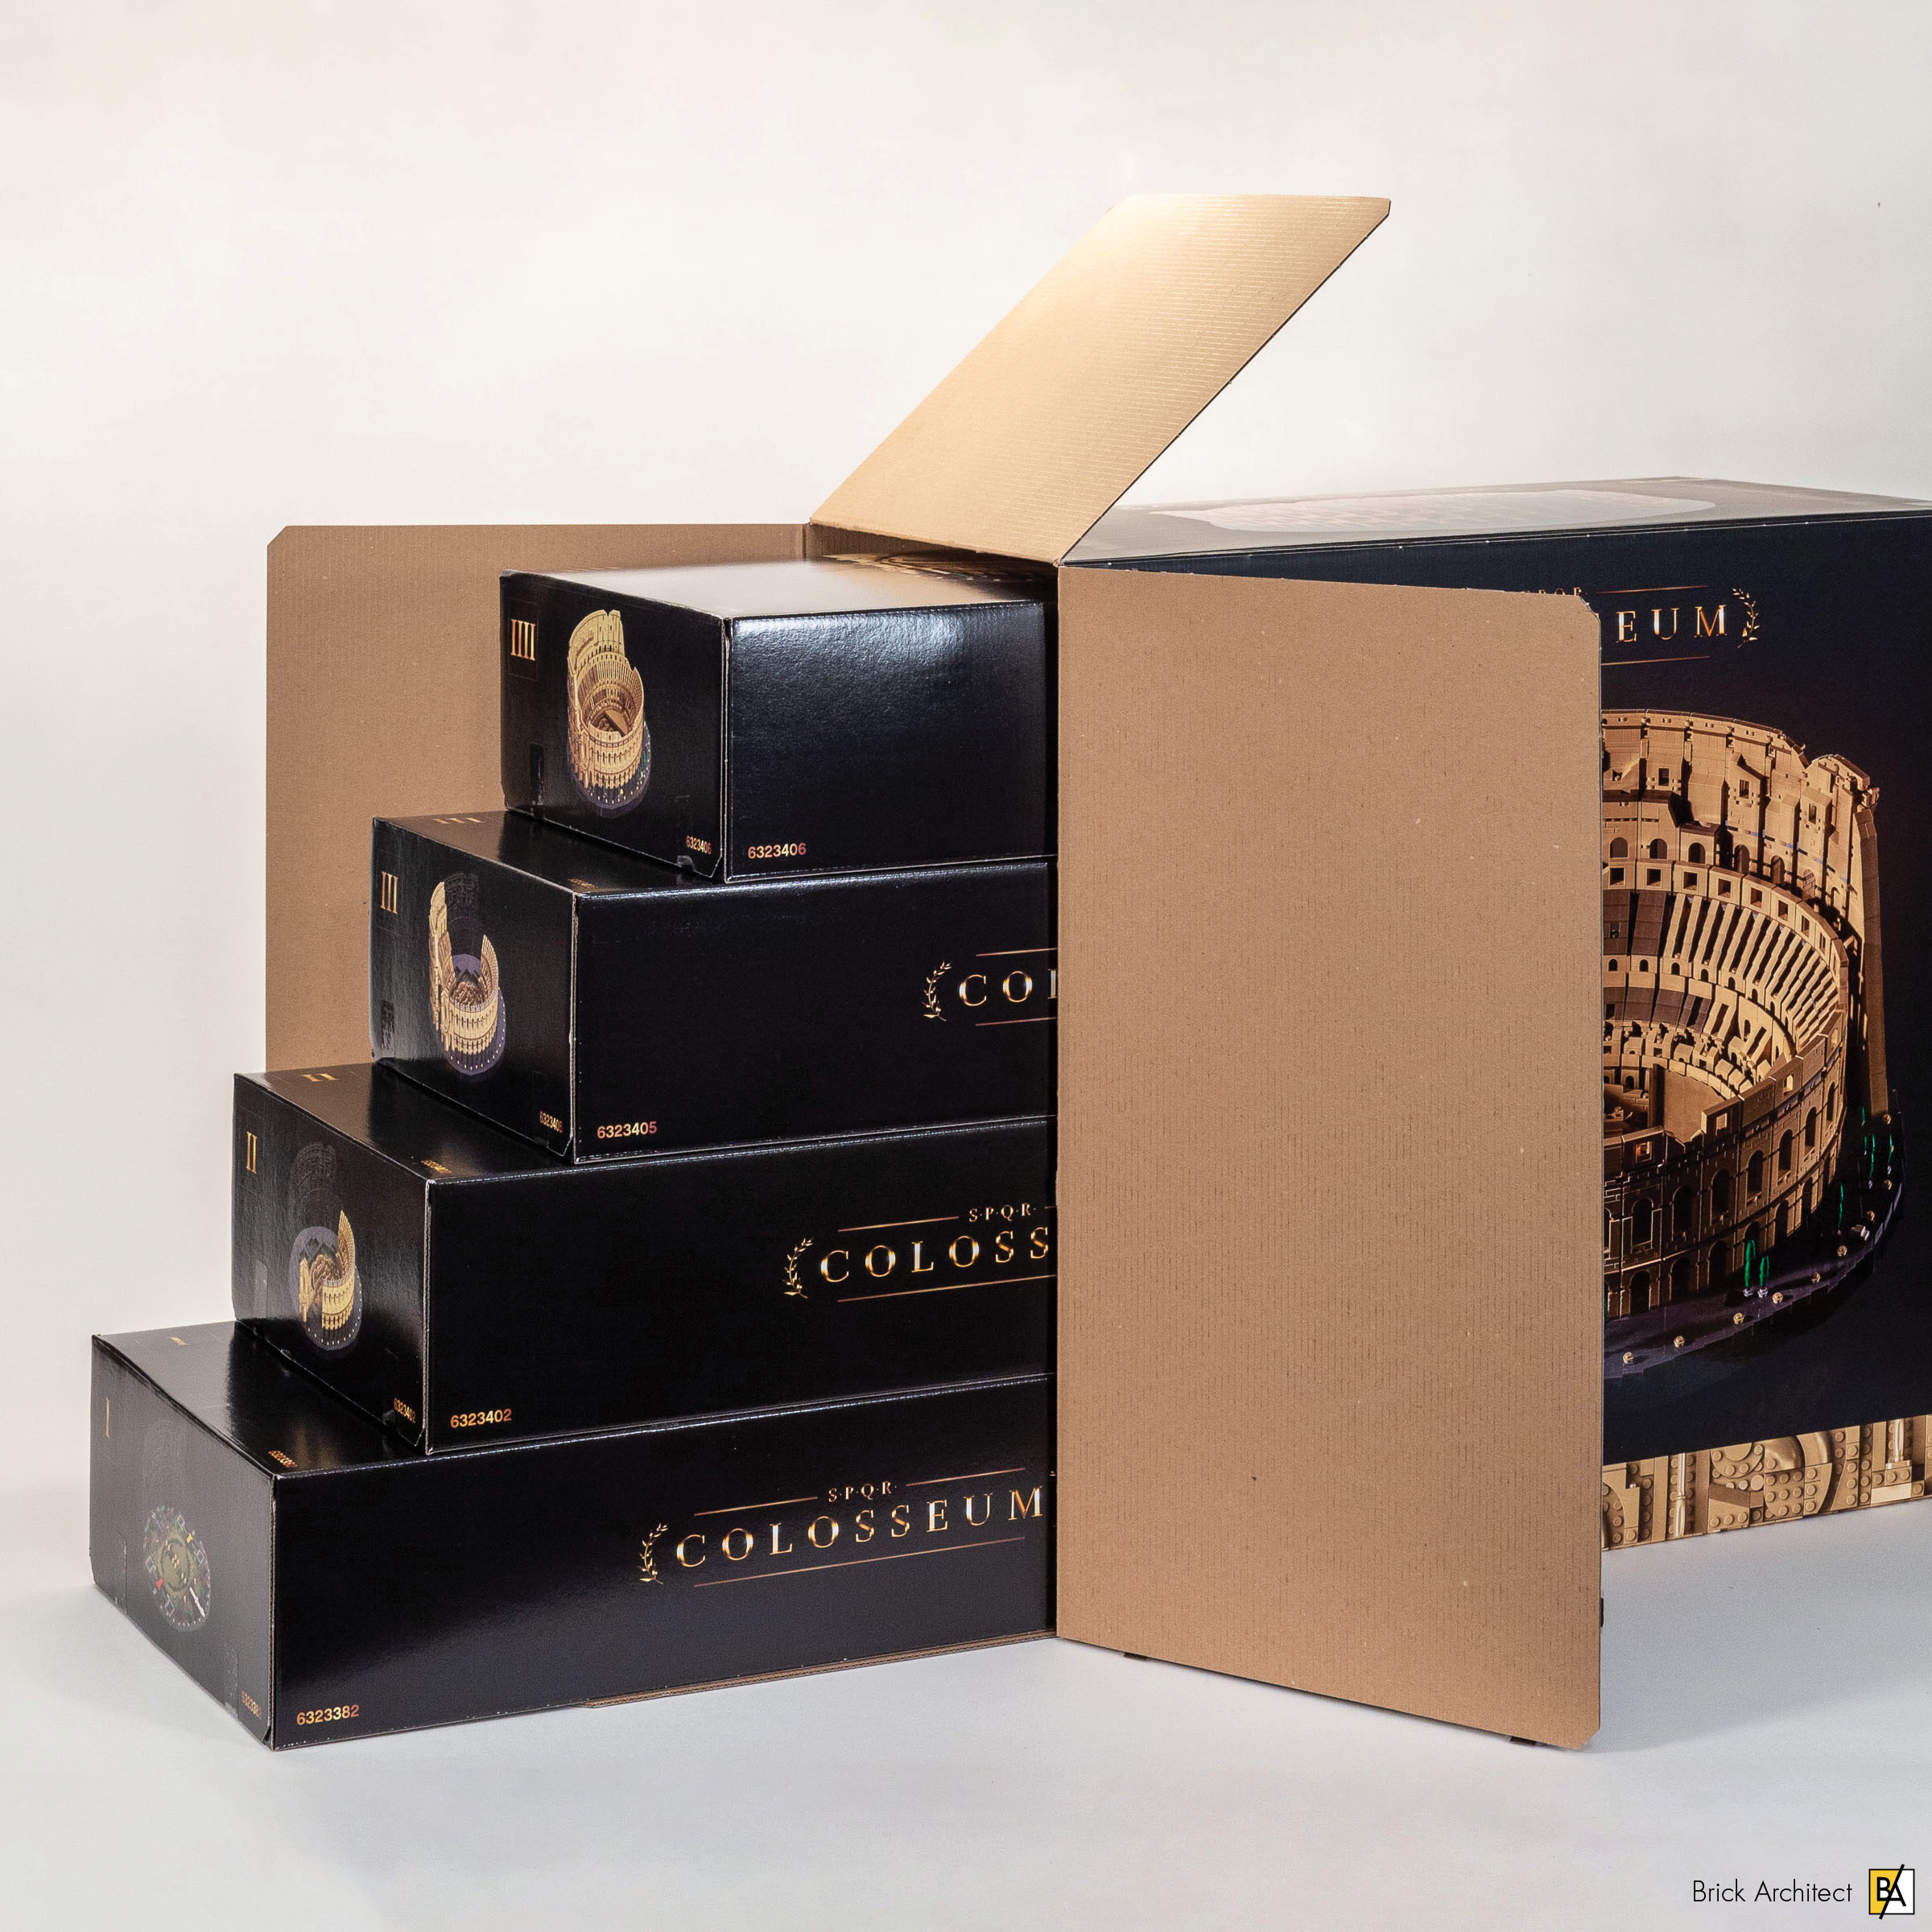
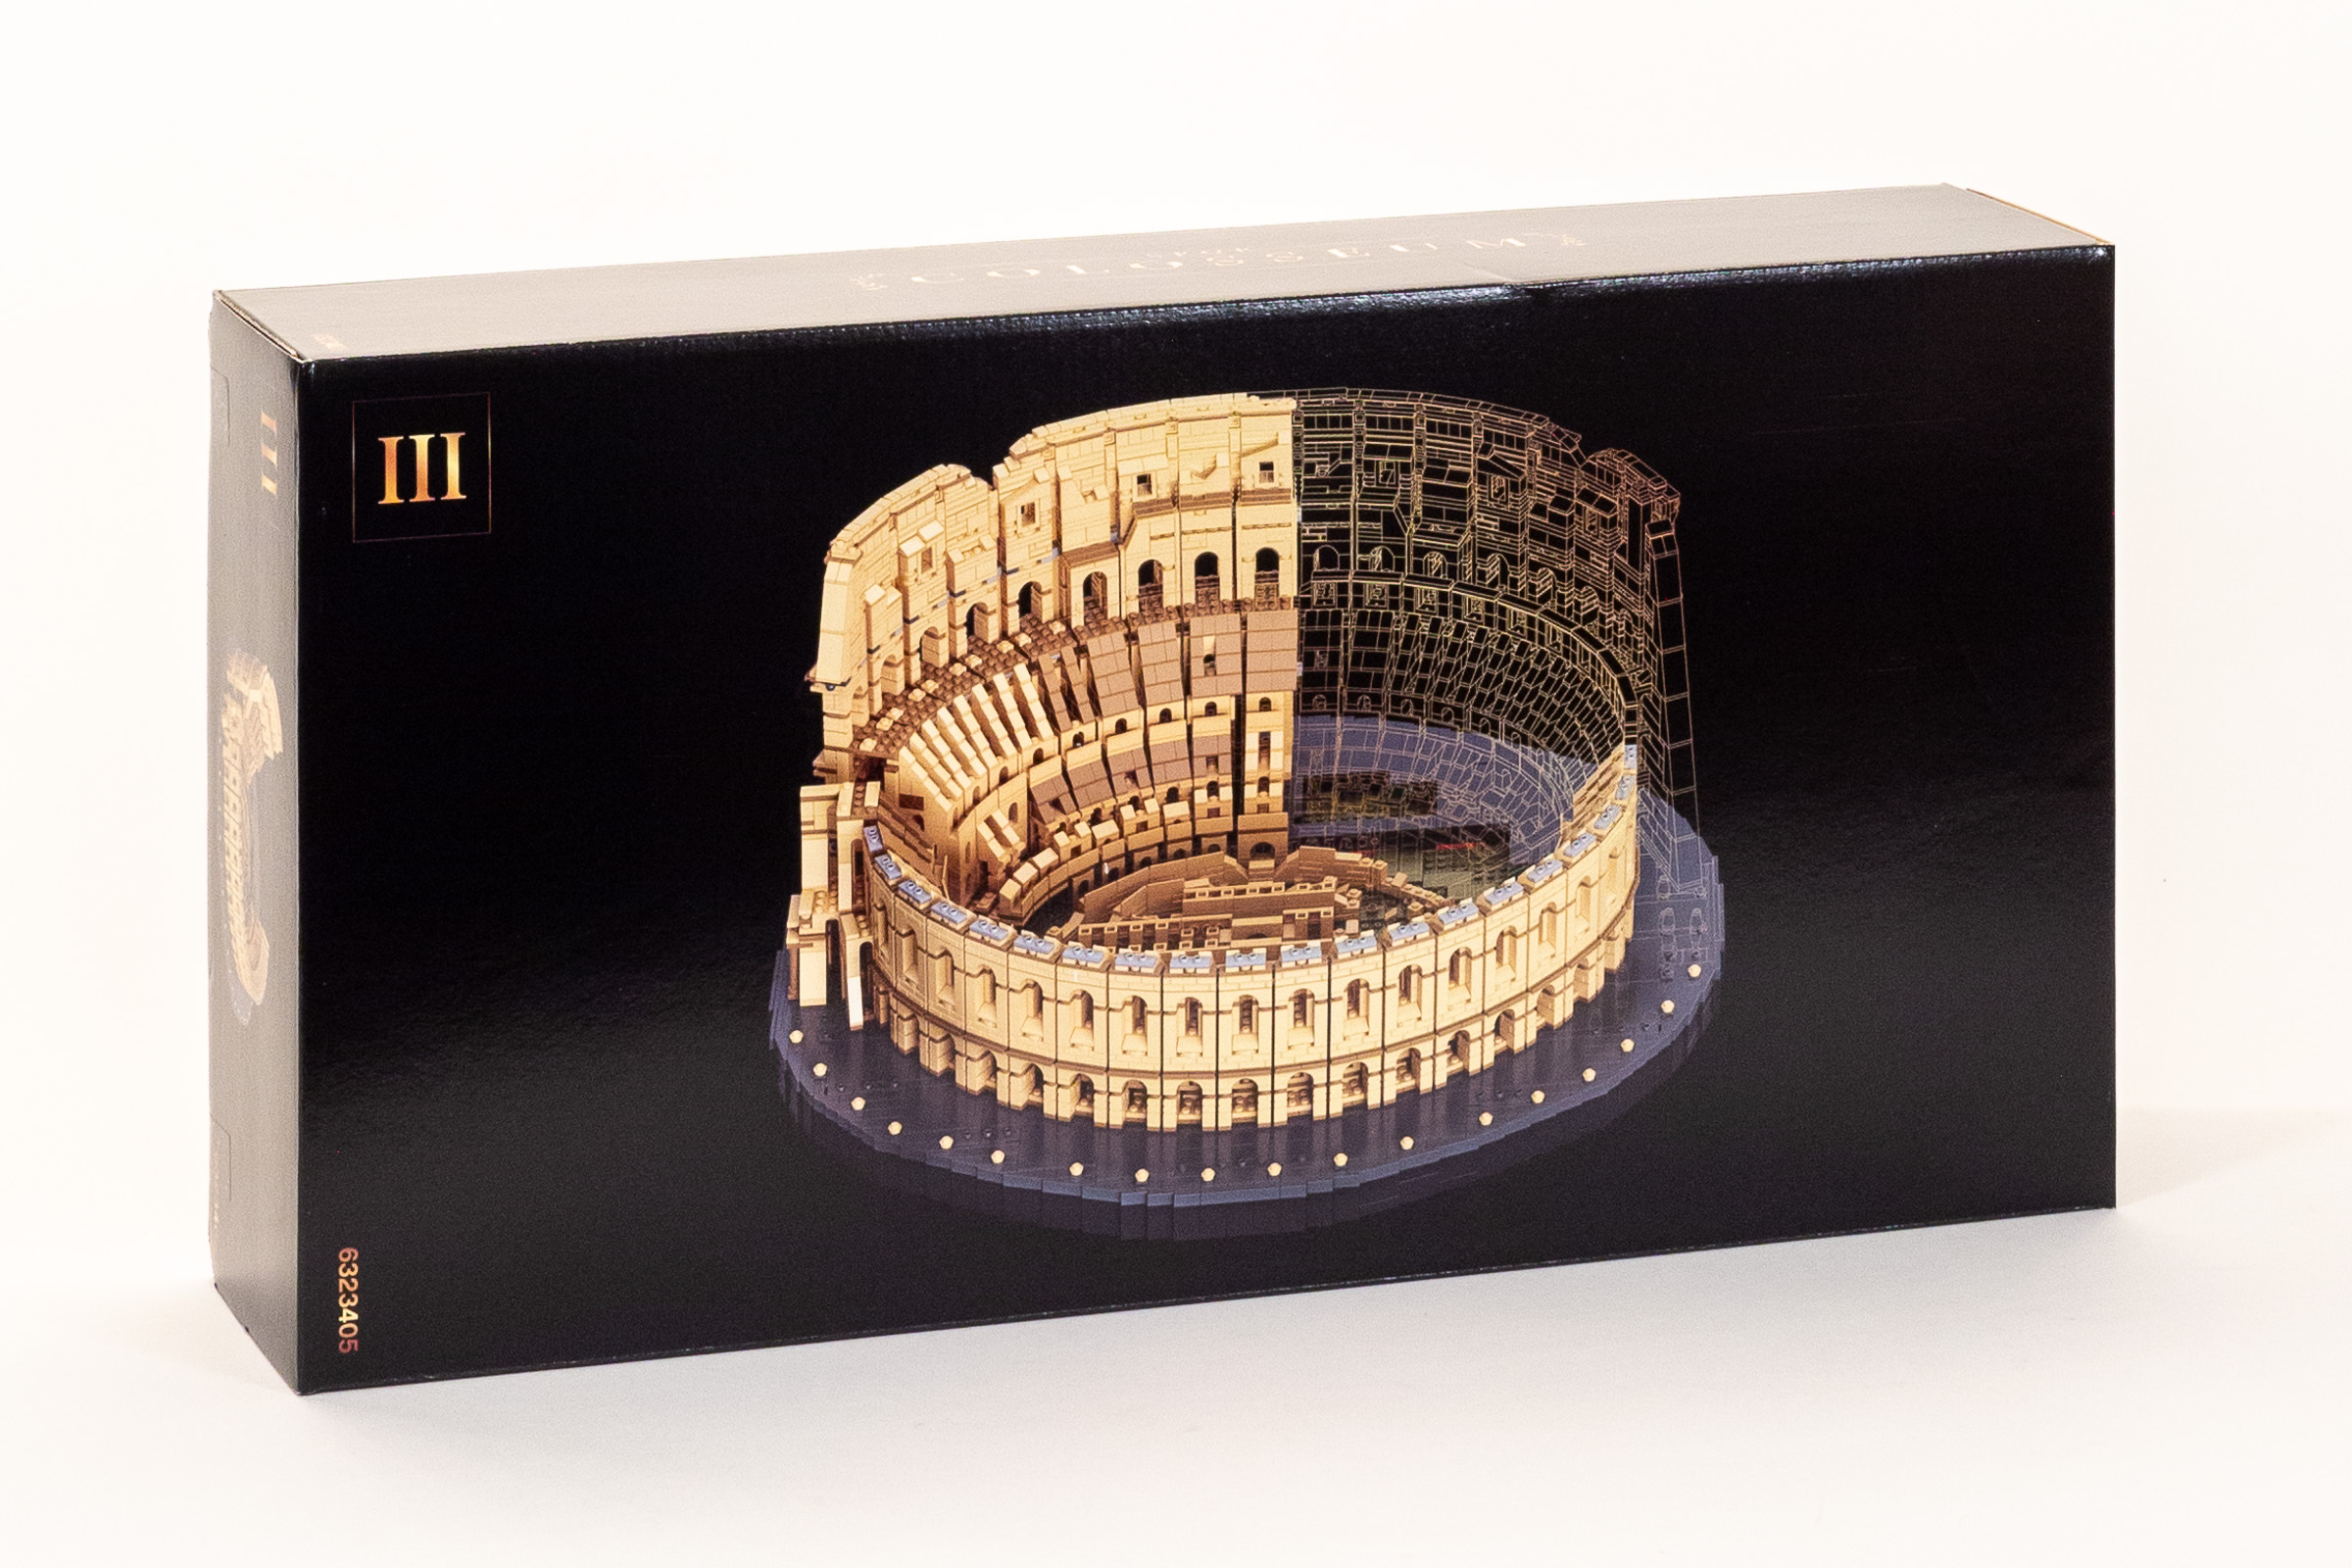
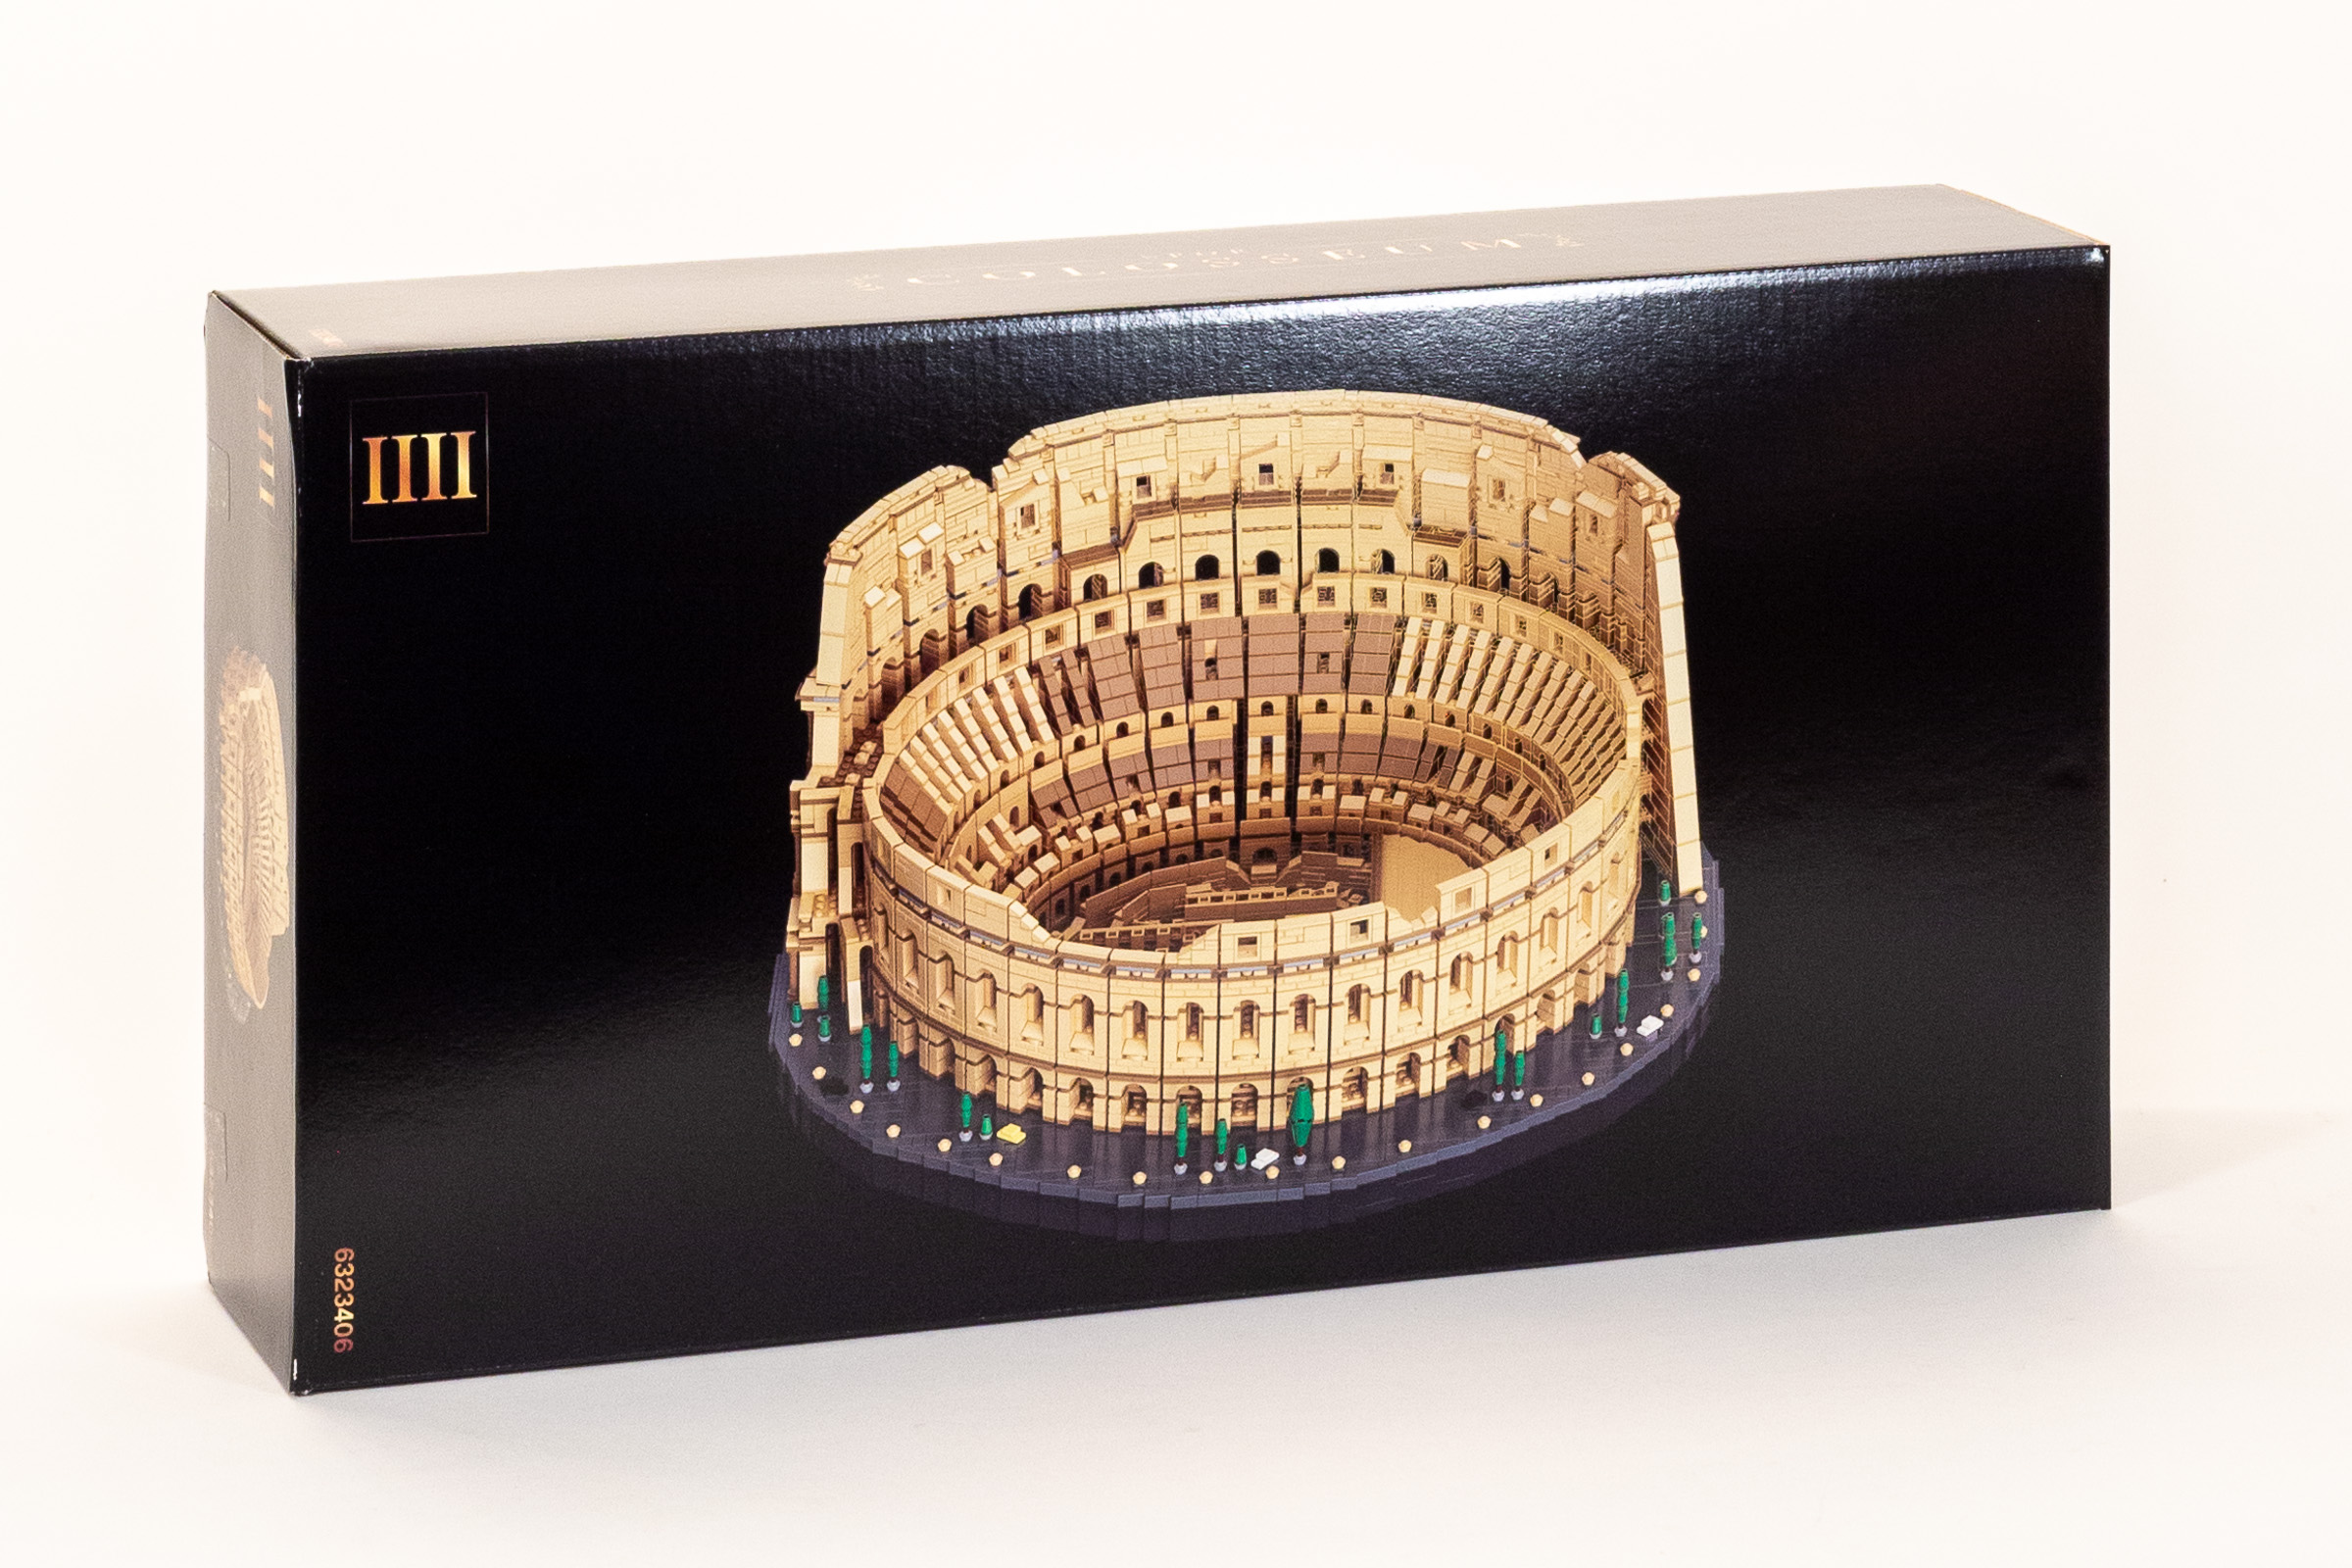
#10276 Colosseum comes in a massive, premium box.
The “big” news is that this is the largest LEGO set ever released! With 9,036 pieces, it exceeds the 7,541 piece #75192 Millennium Falcon by 1,495 pieces (despite a price that’s $250 lower.) This perfectly illustrates the well understood reality that licensed sets (and sets with highly sought minifigures) command a higher price.
The adult fan community has been extremely eager to learn more about this set. I believe that this set represents the strongest evidence so far that The LEGO Group fully acknowledged the importance of adult fans to their business in 2020.
The box ends feature photos of the model from multiple angles and a tan mosaic matching the style of the new 18+ sets.
Naturally, the set features the new 18+ age rating and more mature packaging design featuring darker images and a border along the bottom of the box which launched earlier this year. The packaging is a bit hard to photograph because it uses a semi-matte finish for the black background and a glossy finish for photos of the model. The overall effect is quite striking; I’m confident that it will stand out in a retail setting as a premium product.
It should be no surprise that #10276 Colosseum comes in a very large box: 53×48×28 cm (21×18⅞×11”)—that’s 71.2 liters (2.5 Cubic Feet)!
Because comparisons to the previous record-holding set #75192 Millennium Falcon are inevitable, I measured the massive Star Wars set too: 53×45.5×39.5 cm (21×17⅞×15⅛”), which works out to a 95.3 Liter box (3.4 Cubic Feet).

#10276 Colosseum includes 20% more parts, a 25% smaller box, and a 30% lower cost (versus #75192 Millennium Falcon).
In summary, the Colosseum has 20% more pieces, but the Millennium Falcon box is 33% larger. This may be caused by the larger bound instruction manual in the Star Wars set, more bulky pieces in the Millennium Falcon, or simply more air in the box. Very likely, all three of these are true, especially given The LEGO Group’s recent attempts to reduce packaging size and waste.
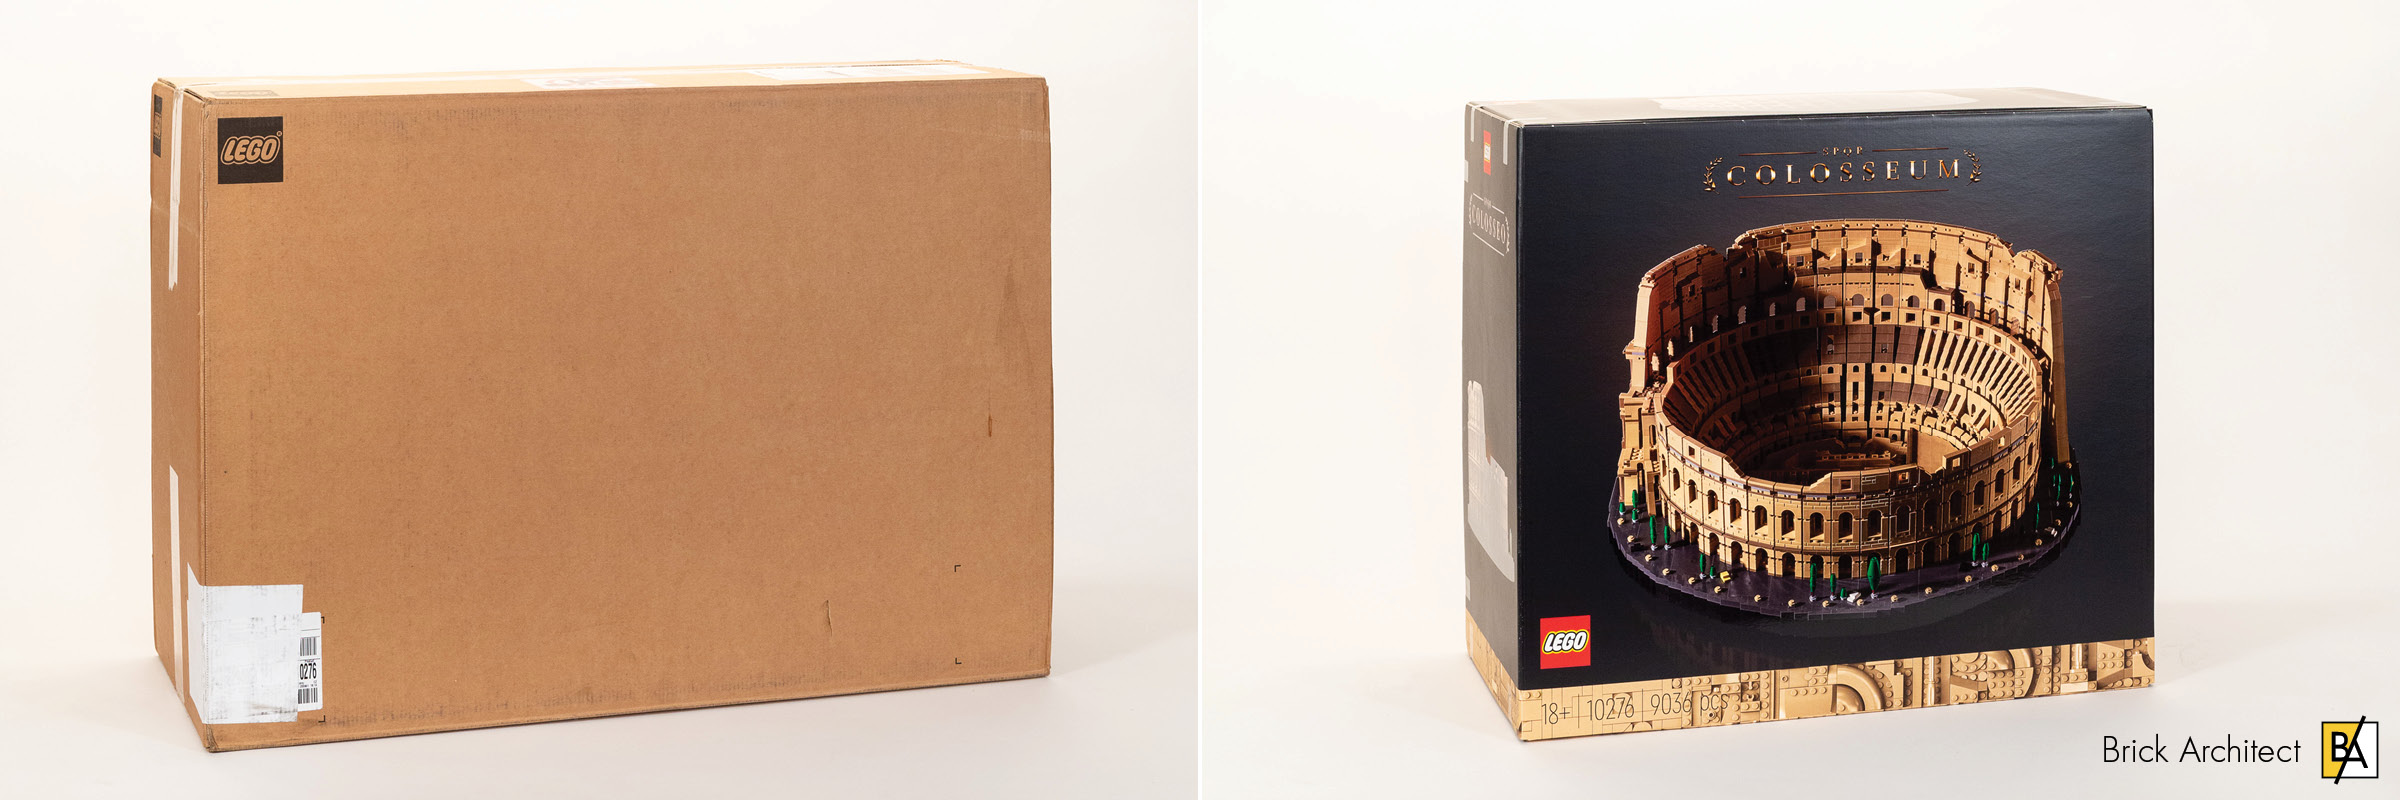
The set was shipped in a larger box to reduce the risk of damage.
As this is going to be a collector’s item, I was pleased to see that the outer shipping box included an 8 cm (3”) padded cardboard insert on the left and right side, which should give extra protection against crushed corners of the actual set box.
First Impressions
As an aficionado of the core LEGO Architecture series, I am extremely familiar with that style of building. Sets in the series aim to capture a building’s essence using a minimum of parts. This set is clearly on the other end of the spectrum, revisiting the past glory of large-scale Creator Expert sets like #10256 Taj Mahal, #10253 Big Ben, and #10234 Sydney Opera House. These sets attempt to capture as much of the fine details as possible, resulting in a model that is more realistic (and bigger) than the smaller models in the LEGO Architecture series.
I have to admit up front that I found the very idea of building a 9,000+ piece set to be daunting. In fact, I still haven’t finished building my Millennium Falcon even though it was a day-one purchase for me, largely because I found the exterior greebling too time consuming because it required a lot of attention to do it right.
That said, I was hopeful that three factors would make this come together in a more reasonable timeframe: my fondness for architectural detailing, hoping that the repetitive looking model might be faster to assemble, and the time pressure to finish this review before the embargo date… I was cautiously optimistic to get started!
Build Process
As we have grown accustomed with the very largest LEGO sets (like the Millennium Falcon), this set also includes four smaller boxes. What’s different is that each box contains everything you need for that part of the model, including both the parts and one of four smaller instruction manuals.
As we open the box, we discover four smaller boxes that are the same size and numbered 1-4.
This feels much less daunting than a huge box with a single massive instruction booklet. (Besides, even ¼ of a 9,000-piece set is a pretty massive project, similar to building four sets in the Modular Building Series in a row.)
Box I (1)
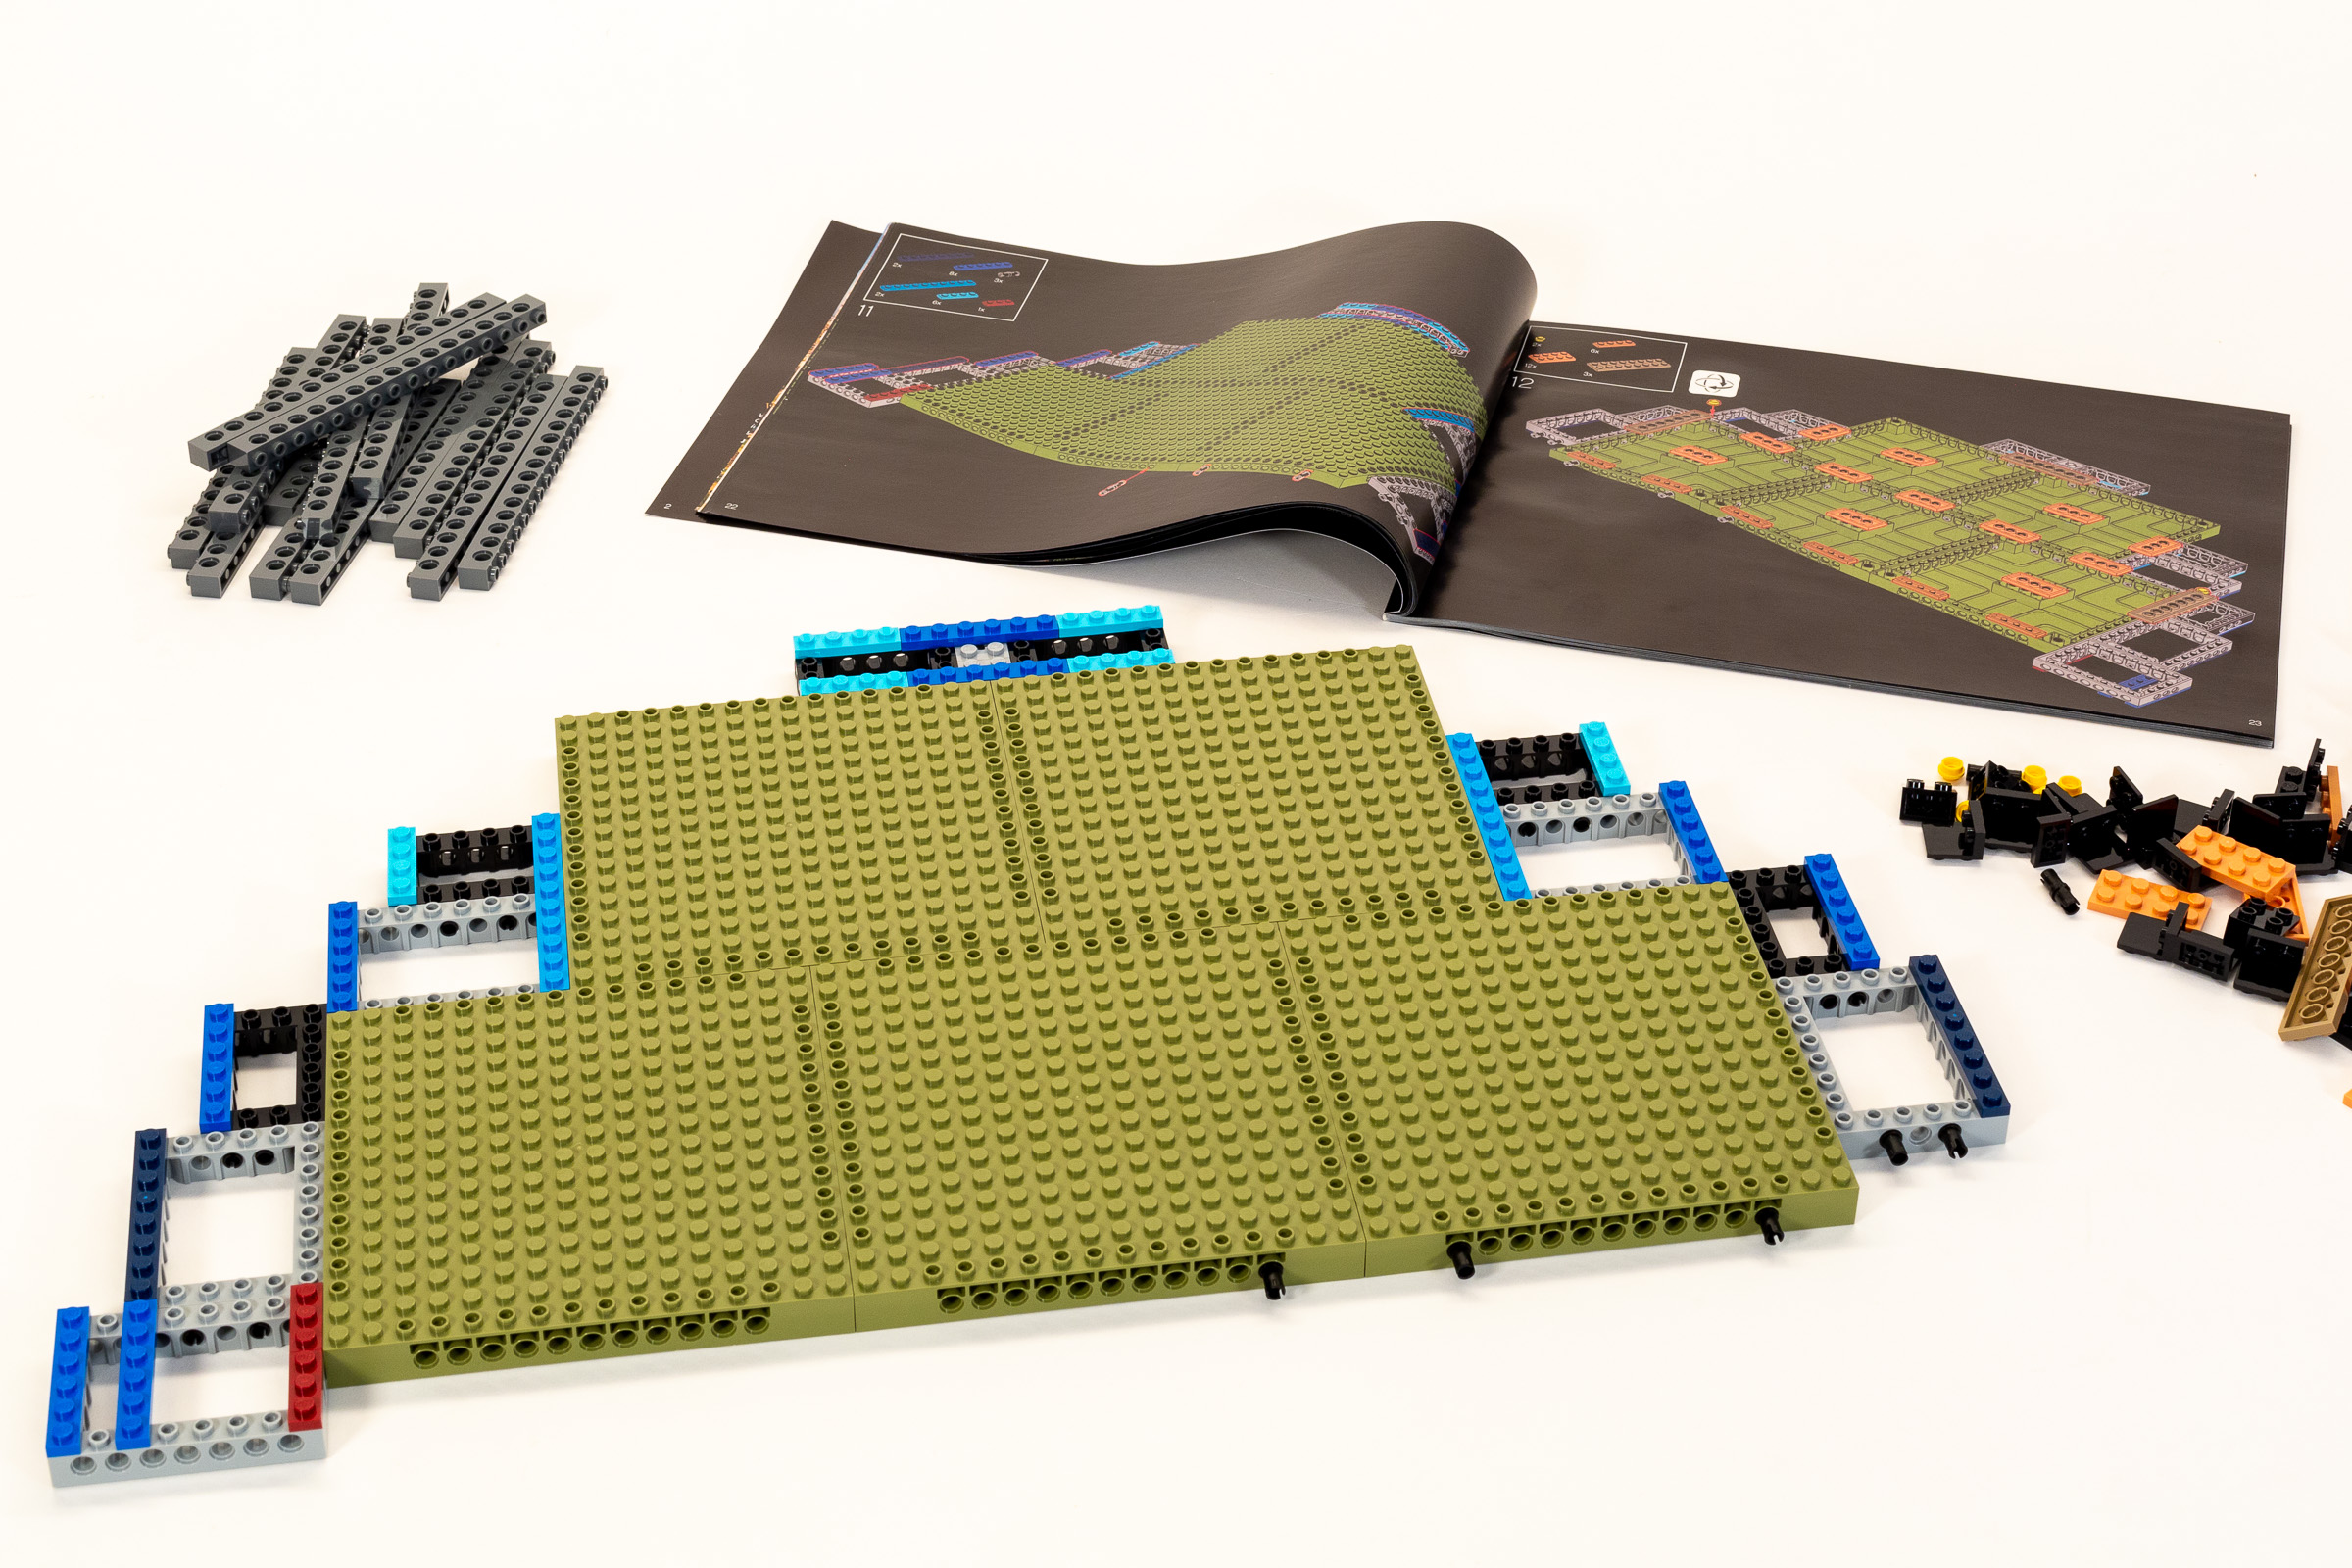
In the first of four boxes, we build the base of the model across 5 numbered stages. (Each stage contains one or more numbered bag). The first three stages result in two halves of the oval-shaped base. They are connected and reinforced in the fourth stage, and we begin to create a smooth edge for the base in stage 5.
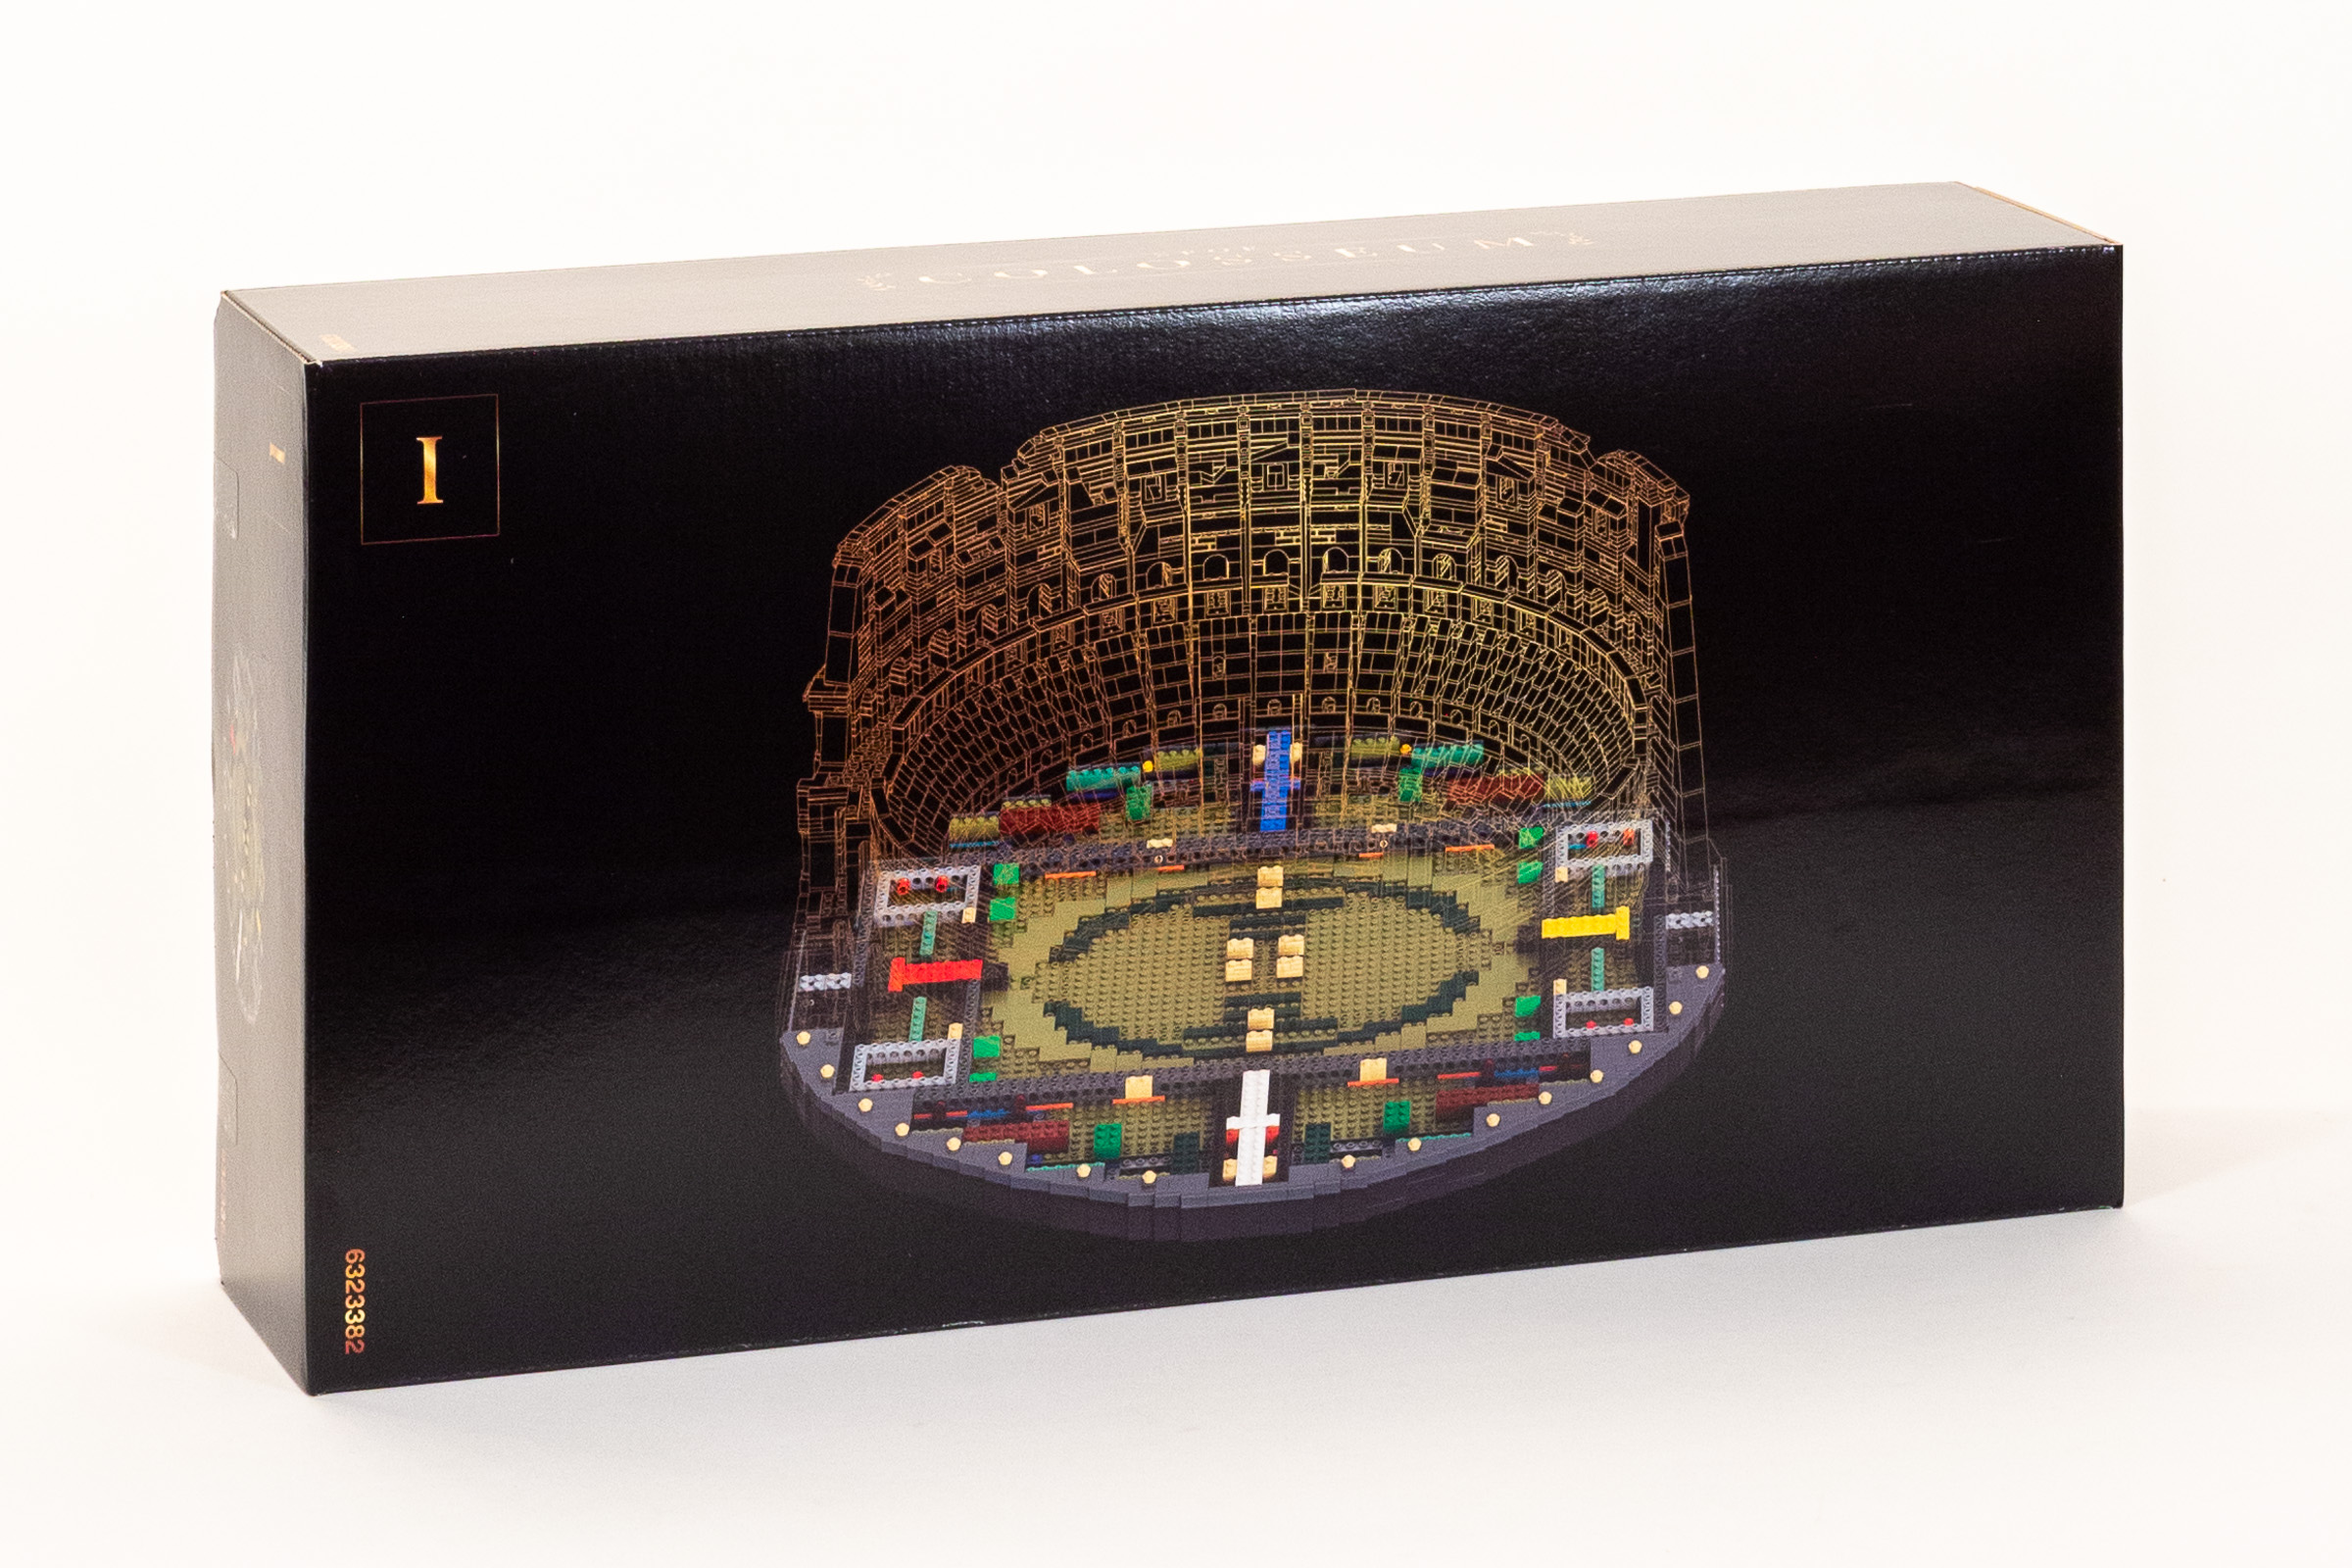
The first (of four) sub-boxes is marked with the roman numeral ‘I’.
What’s in Box I?
- Instruction manual.
- 4 un-numbered bags. (3 Large bags containing three 16×16 technic plates and two 1×16 Technic bricks, and 1 large bag containing one 16×16 technic plate and eight 1×16 Technic bricks.)
- Stage 1: 2x Large bags (both marked 335S0, contents are not the same).
- Stage 2: 1x Medium bag (marked 335S0), and 1x Small unmarked bag.
- Stage 3: 1x Medium bag (marked 335S0), and 1x Small unmarked bag.
- Stage 4: 1x Large bag (marked 335S0).
- Stage 5: 1x Large bag (marked 335S0), and 1x Medium unmarked bag.
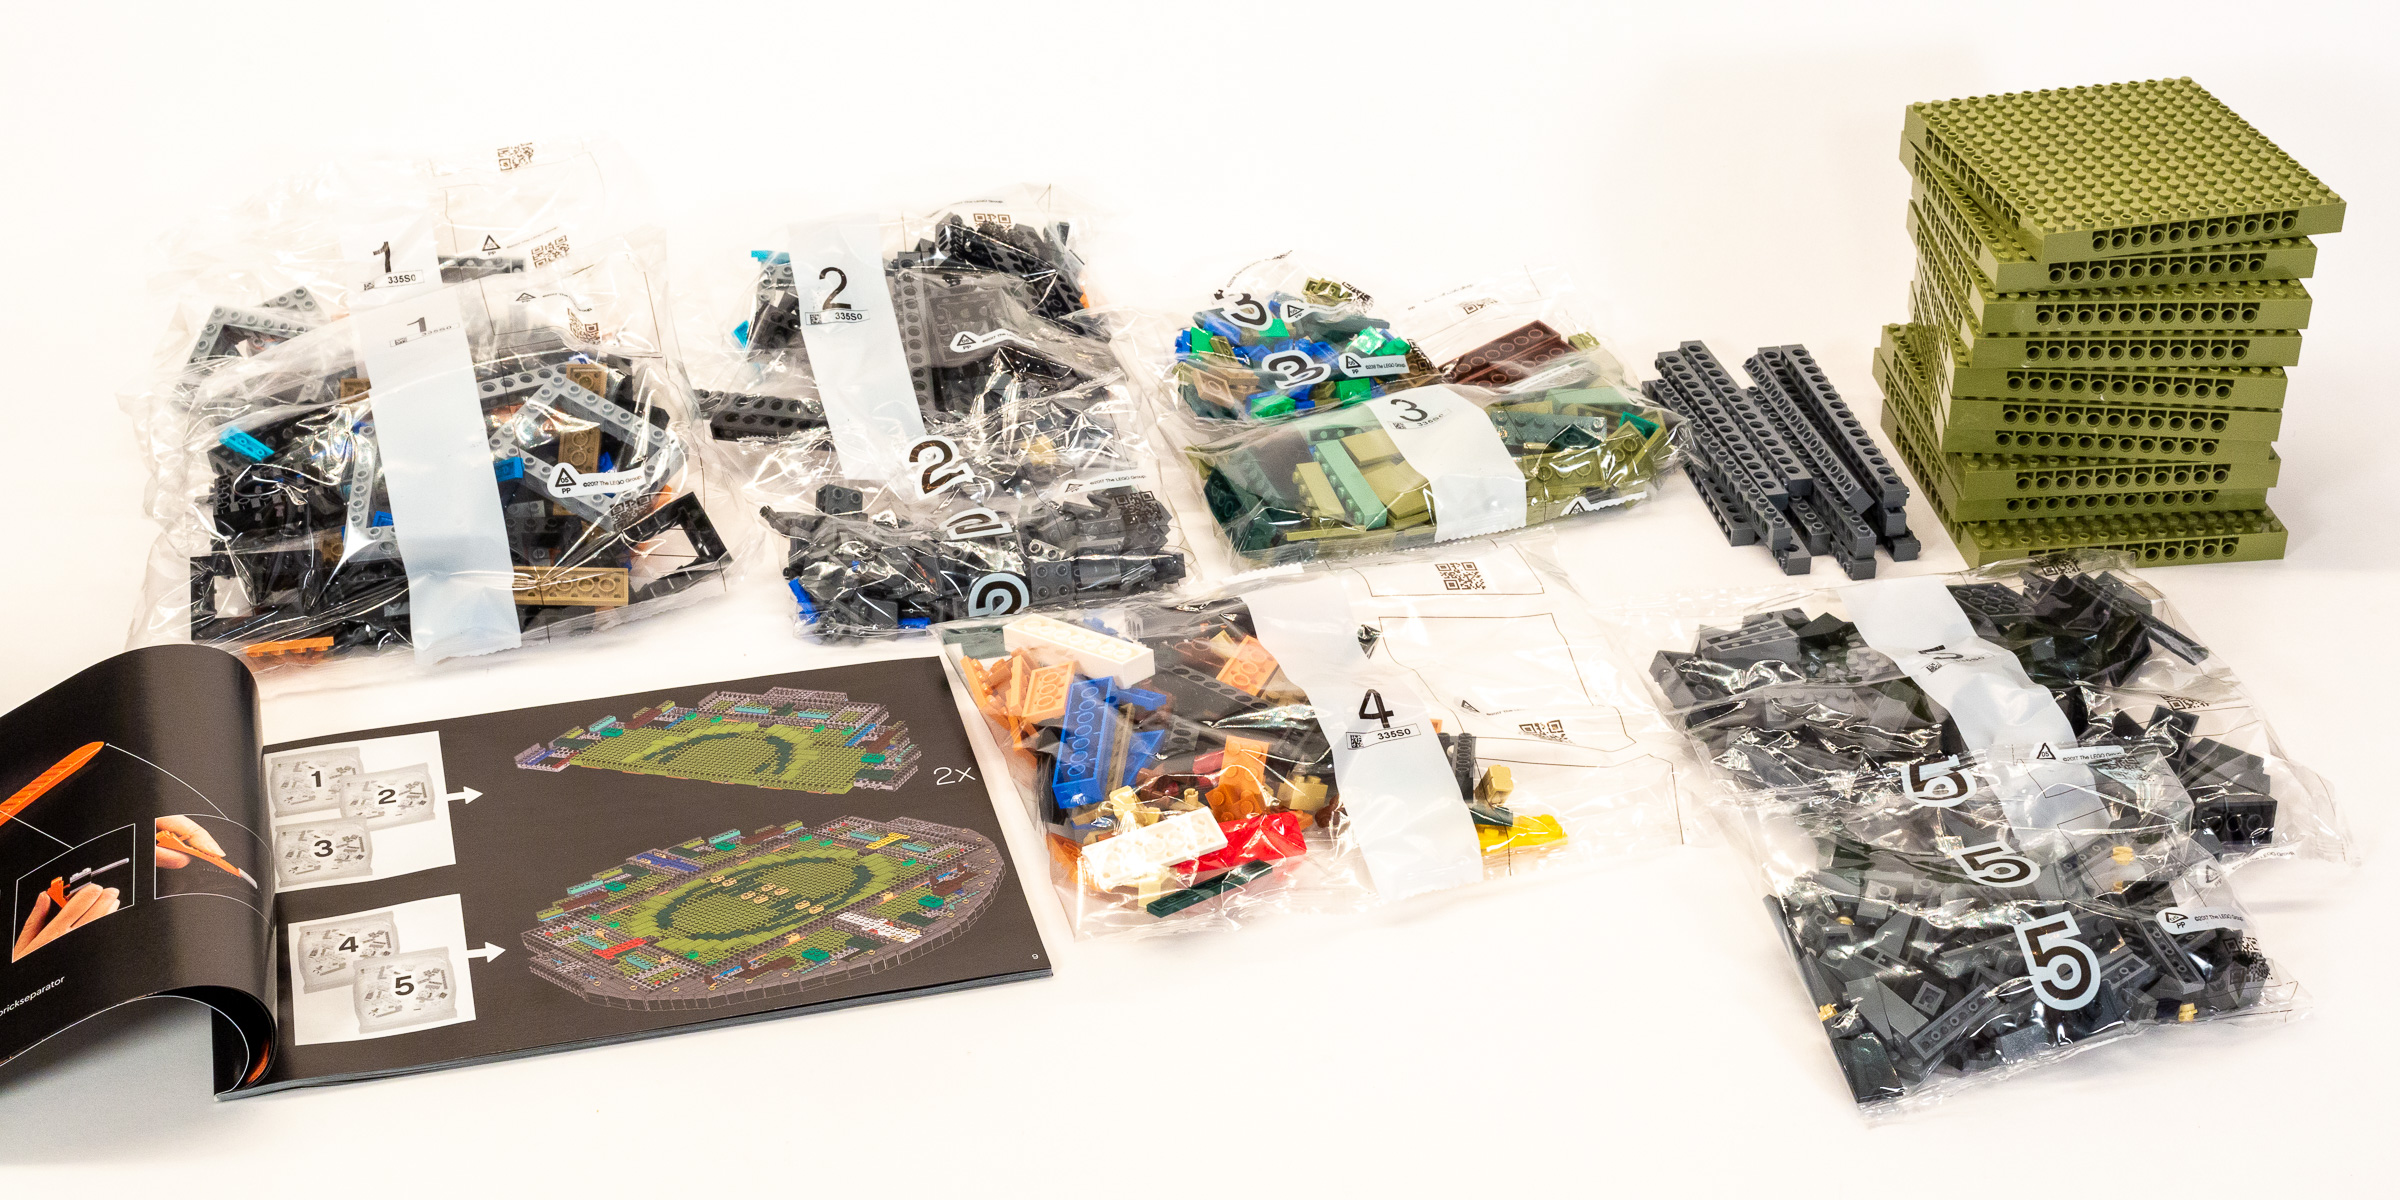
Box 1 contains bags for five numbered stages and a separate instruction booklet.
At well under two hours (1:40), this is a surprisingly quick process!
Stage 1
In a very short time, we build two massive semicircle platforms ringed with SNOT brackets. The main structural element is the same new 16x16x 1⅓ Brick w/ Technic Pins (part 65803) introduced in the LEGO Art series,except this time in olive green rather than black. There are a total of 10 of them in the set. These “mosaic bricks” are quite light and fairly rigid, especially when attached to one another using Technic pins.
The base comes together quickly thanks to the large 16×16 Technic plates.
This was the first time that I noticed what became a consistent problem throughout all four booklets; It’s often difficult to see the instructions because they are printed too close to the spine. One of the worst examples of this issue is on step 11, where you cannot see some of the parts at all, and have to hope that the model is following a mirror-imaged pattern to put them in the right place. (Either that or risk flattening the open booklet and ruining the binding—perhaps there is a case to be made for following along with a PDF version of the instructions at the same time.)
Instructions are difficult to read when they are printed too closely to the spine!
Naturally, the process is a bit repetitive, but it moves along quickly enough. (Since the two modules are identical, I built them at the same time because it is a little faster that way.)
Build time: 30 minutes.
Stages 2 & 3
Stage 2 is a very quick stage. It begins by adding 46x 2×2 Inverted Bracket (part 99207) to each side. This is followed by a quick Technic module which adds rigidity to each end of the model.
Progress by the end of Stage 2 on one of two identical modules.
Stage 3 is a bit more time consuming. We begin by adding some 2×6 and 2×8 bricks around the edges of the model to make it even stronger. This is followed by an oval pattern of tiles in 330Olive Green and 141Earth GreenDark Green. Aligning the tiles correctly takes some patience, as the building instructions aren’t as large as I would have liked.

The sheer scale of the model is beginning to make its presence known.
Finally, we get to attach the two half-ovals at the very end of stage 3, which is both satisfying, and offers a first real glimpse at the sheer size that this model will be!
Build time. Stage 2: 10 minutes, Stage 3: 20 minutes.
Stage 4
While ten Technic pins are enough to connect the two halves of the base, we need a lot more structural integrity before making this thing any taller. Thankfully, we are about to build a solid box structure on top of the base.
Technic beams with two plates separating them are locked tightly in place.
More importantly, the Technic bricks above and below ground level are locked together using an increasingly common trick involving part 15461, which contains two pins that are 3-studs apart. This exactly matches the vertical distance between two Technic bricks with two plates in-between them. They are difficult to install into small portals at either end of the oval shaped structure, but everything feels very solid once they are in place.
The stage is wrapped up by adding clear indicators of the model’s orientation using blue, red, yellow and white bricks forming cardinal directions.
Build time: 20 minutes.
Stage 5
The speedy progress in the first four bags begins to slow as we enter the fifth and final stage of the first box. It’s time to give the base a nice, rounded shape using about a dozen 4-stud wide modules that snap into place using SNOT techniques.
Each module is pretty simple to build, but you do need to pay some attention during the assembly since only the top layer uses 199Dark Stone GreyDark Bluish Gray slopes, with the three remaining layers clad in 26Black slopes. Everything seems sturdy enough once attached to the base, but some of the modules feel a bit flimsy before they are attached. (I chose to build all of the modules then attach them to the base for a better photo, but the instructions encourage you to attach them to the base while you go.)
The rounded base is approximated using three different angles of slopes.
I do not know if it is intentional or not, but this felt like an incomplete ending for the first box, since we still need to cover the back edge of the model with the same snot assemblies. This did have the possible benefit of encouraging me to start on the second box after just a short break.
Build time: 20 minutes.
Box 2 (II)
Opening the second box is quite a shock after completing box I, which contained just 5 numbered steps. The second box contains a lot more bags, numbered 6-18. Things are about to get serious! At 4 hours and 20 minutes, you are going to need a lot of time to build this box.

The second sub-box is marked with the roman numeral ‘II’.
What’s in Box II?
- Instruction manual.
- Stage 6: 1x Large bag (marked 335S0), and 1x Medium unmarked bag.
- Stage 7: 1x Large bag (marked 335S0), 1x Medium unmarked bag, and 1x Small unmarked bag.
- Stage 8: 1x Large bag (marked 335S0).
- Stage 9: 1x Large unmarked bag.
- Stage 10: 1x Large bag (marked 235S0).
- Stage 11: 1x Large bag (marked 335S0).
- Stage 12: 1x Large bag (marked 335S0).
- Stage 13: 1x Large bag (marked 335S0).
- Stage 14: 1x Large bag (marked 335S0).
- Stage 15: 1x Large bag (marked 235S0), 1x Medium unmarked bag, and 1x Small unmarked bag.
- Stage 16: 1x Large bag (marked 335S0), and 1x Small unmarked bag.
- Stage 17: 1x Large bag (marked 335S0), and 1x Small unmarked bag.
- Stage 18: 1x Large bag (marked 335S0), and 1x Small unmarked bag.
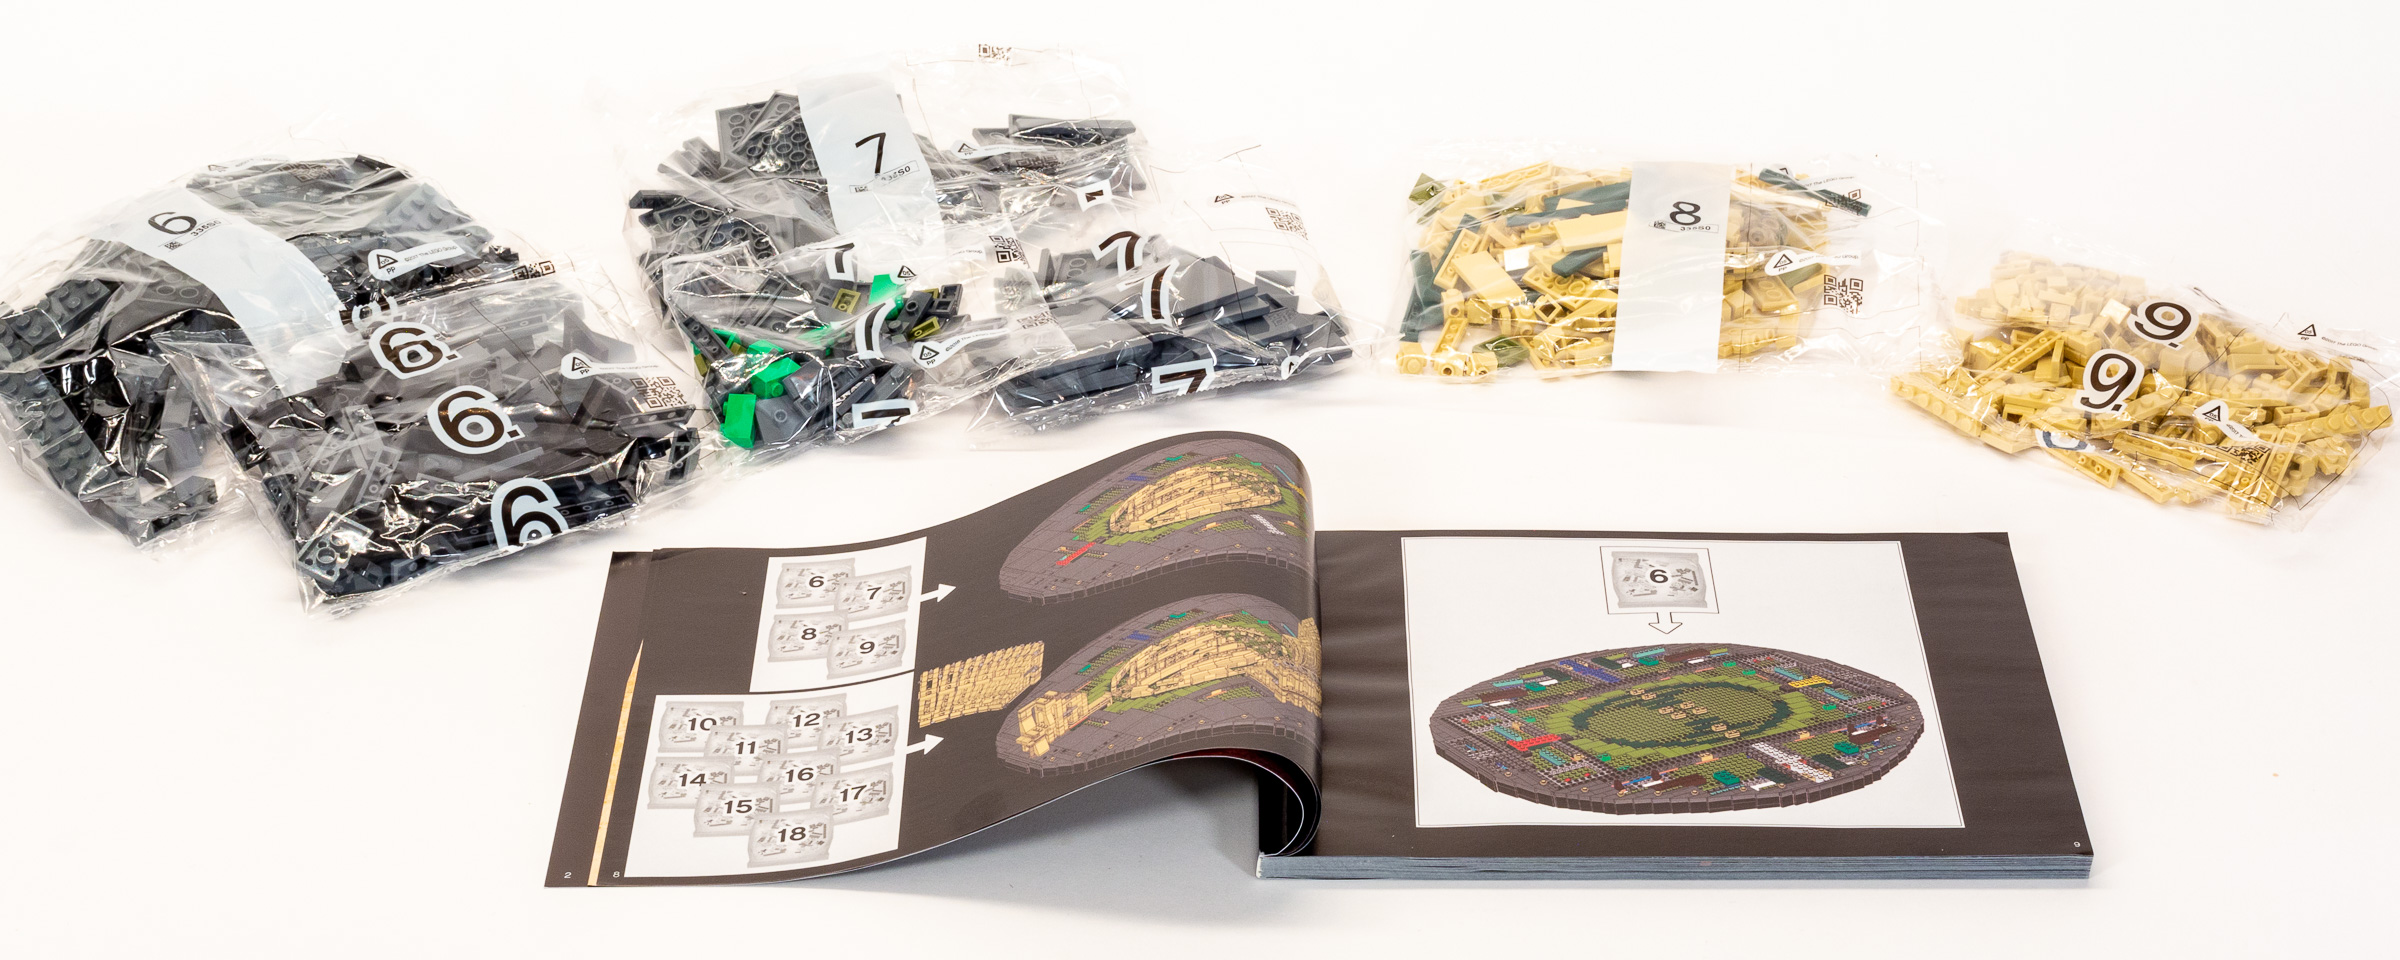
Bags for stages numbered 6-9.
The instruction booklet groups this box into two phases; stages 6-9 to finish the base and build the central hypogeum (underground) and stages 10-18 to begin assembling the Colosseum itself.
Stage 6
Since we only finished one side of the rounded base by the end of Box I, it is no surprise that it is time to finish the rounded base.
This is nearly identical to the previous stage, with one noteworthy addition—the ends of each side are designed with slopes along the bottom edge to make it easier to get your fingers under and lift the completed model off the table. Yes, if you give up now, you can use what you built as a giant dinner tray! (While it isn’t very heavy yet, I’m confident that this will be relevant very soon.)
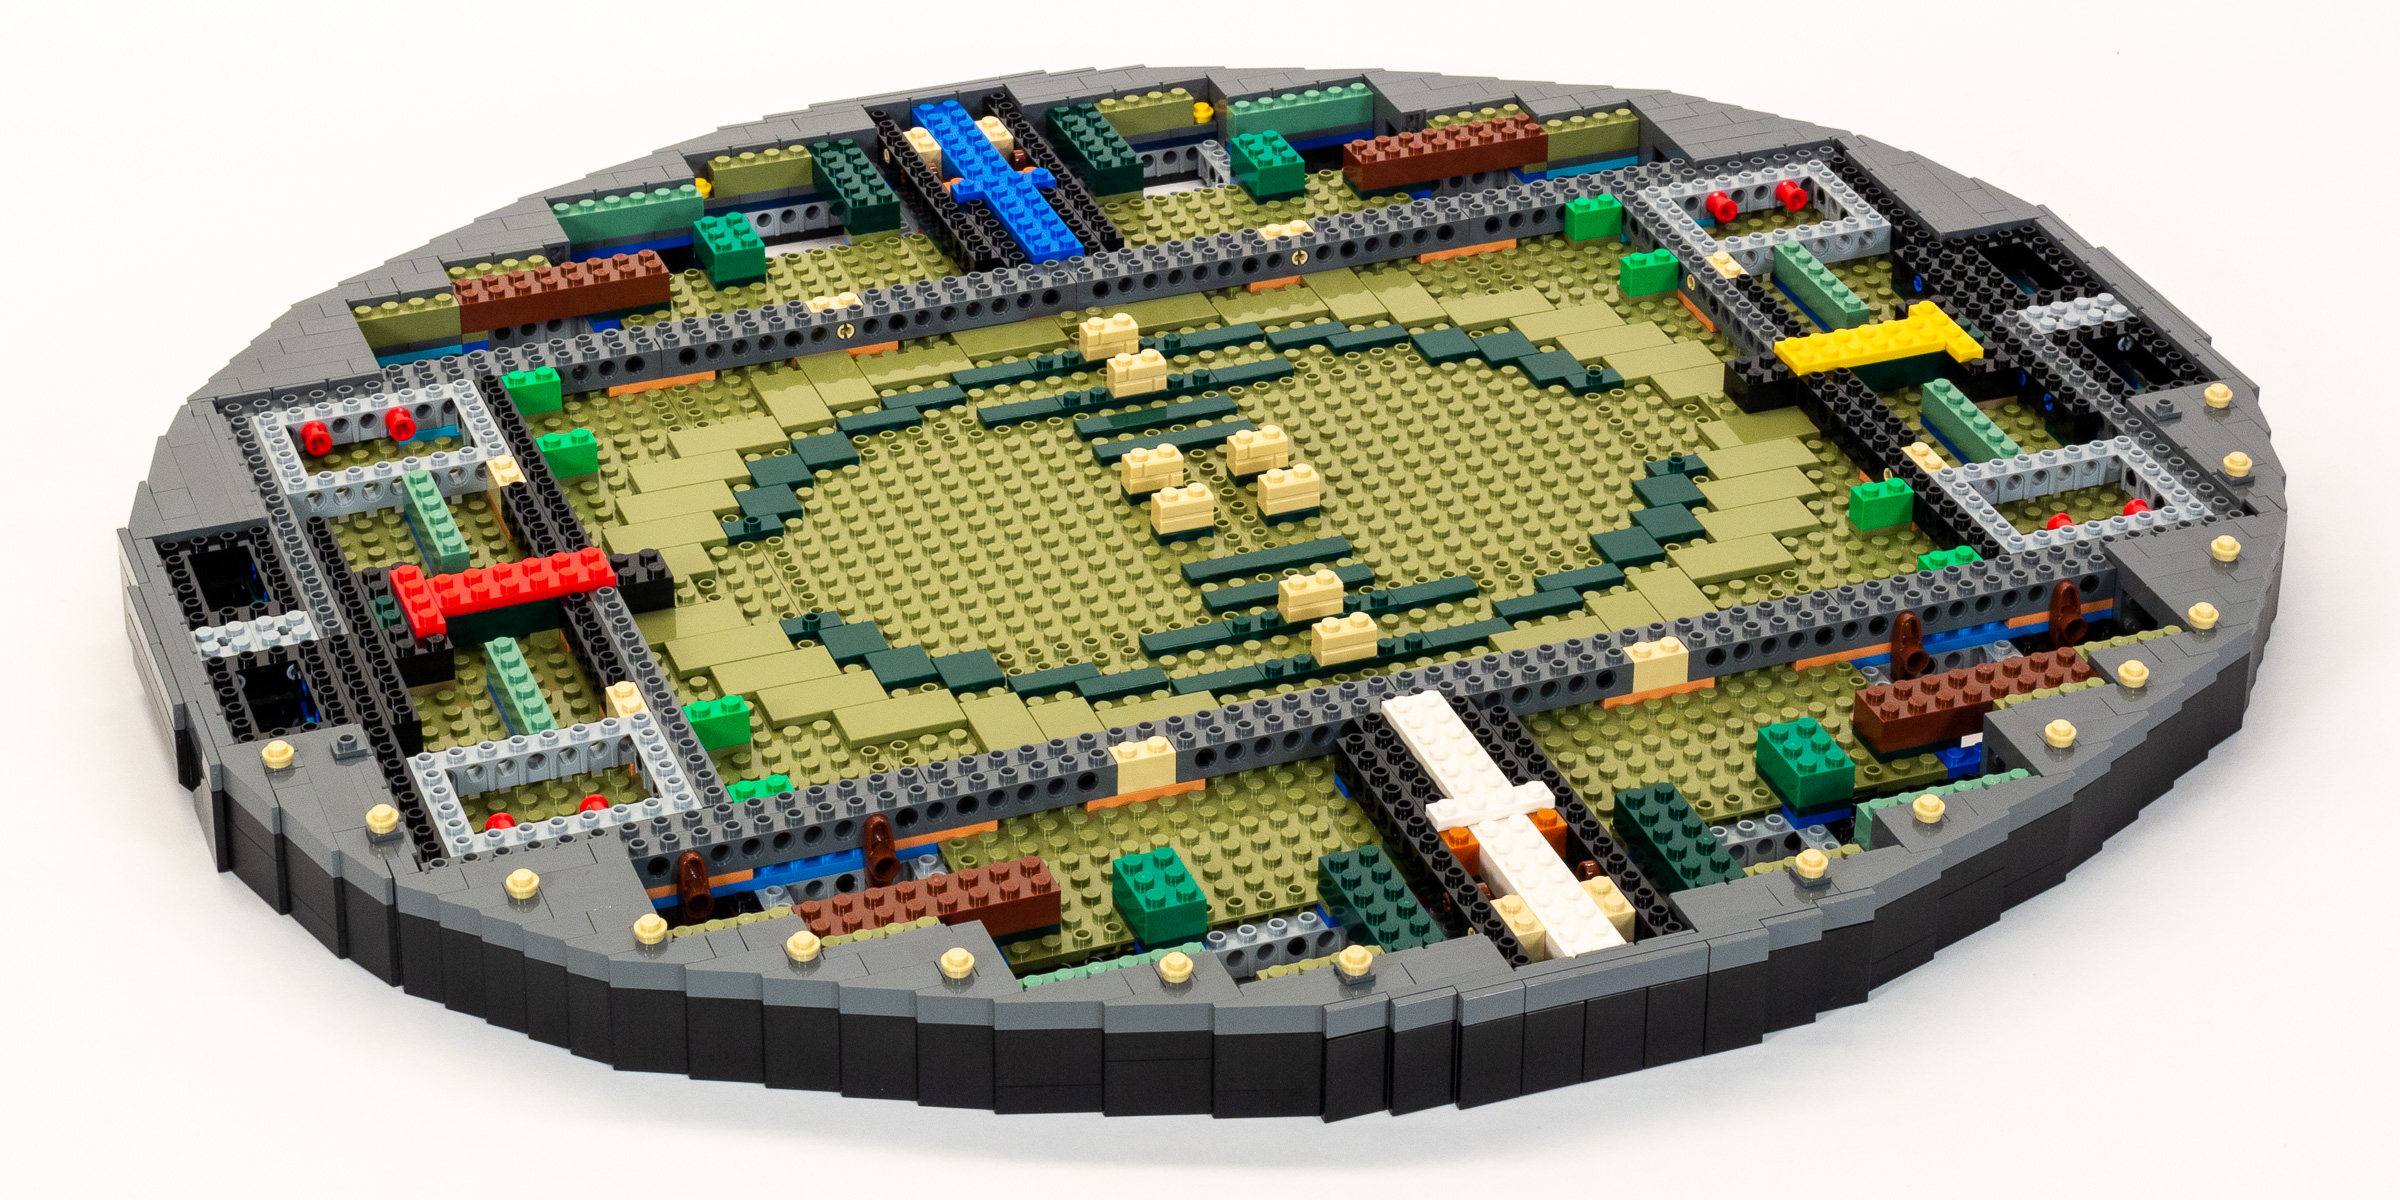
Progress by the end of Stage 6.
The oval base measures 59.4×52.7 cm (23 3/8” × 20 ¾”), which give it a similar footprint to the Millennium Falcon. If you have both sets, you’ll need a second coffee table (or you’ll need to get Emmett to make a double-decker coffee table for you)!
Build time: 25 minutes.
Stage 7
This is another stage that feels quick, as we work clockwise around the base, covering it with smooth 199Dark Stone GreyDark Bluish Gray tiles. The set employs many 6×6 tiles which are not terribly common. I do prefer the look of smaller tiles as they more closely resemble stone or the gaps in poured concrete, but this is much faster to install (and the set already has plenty of pieces).
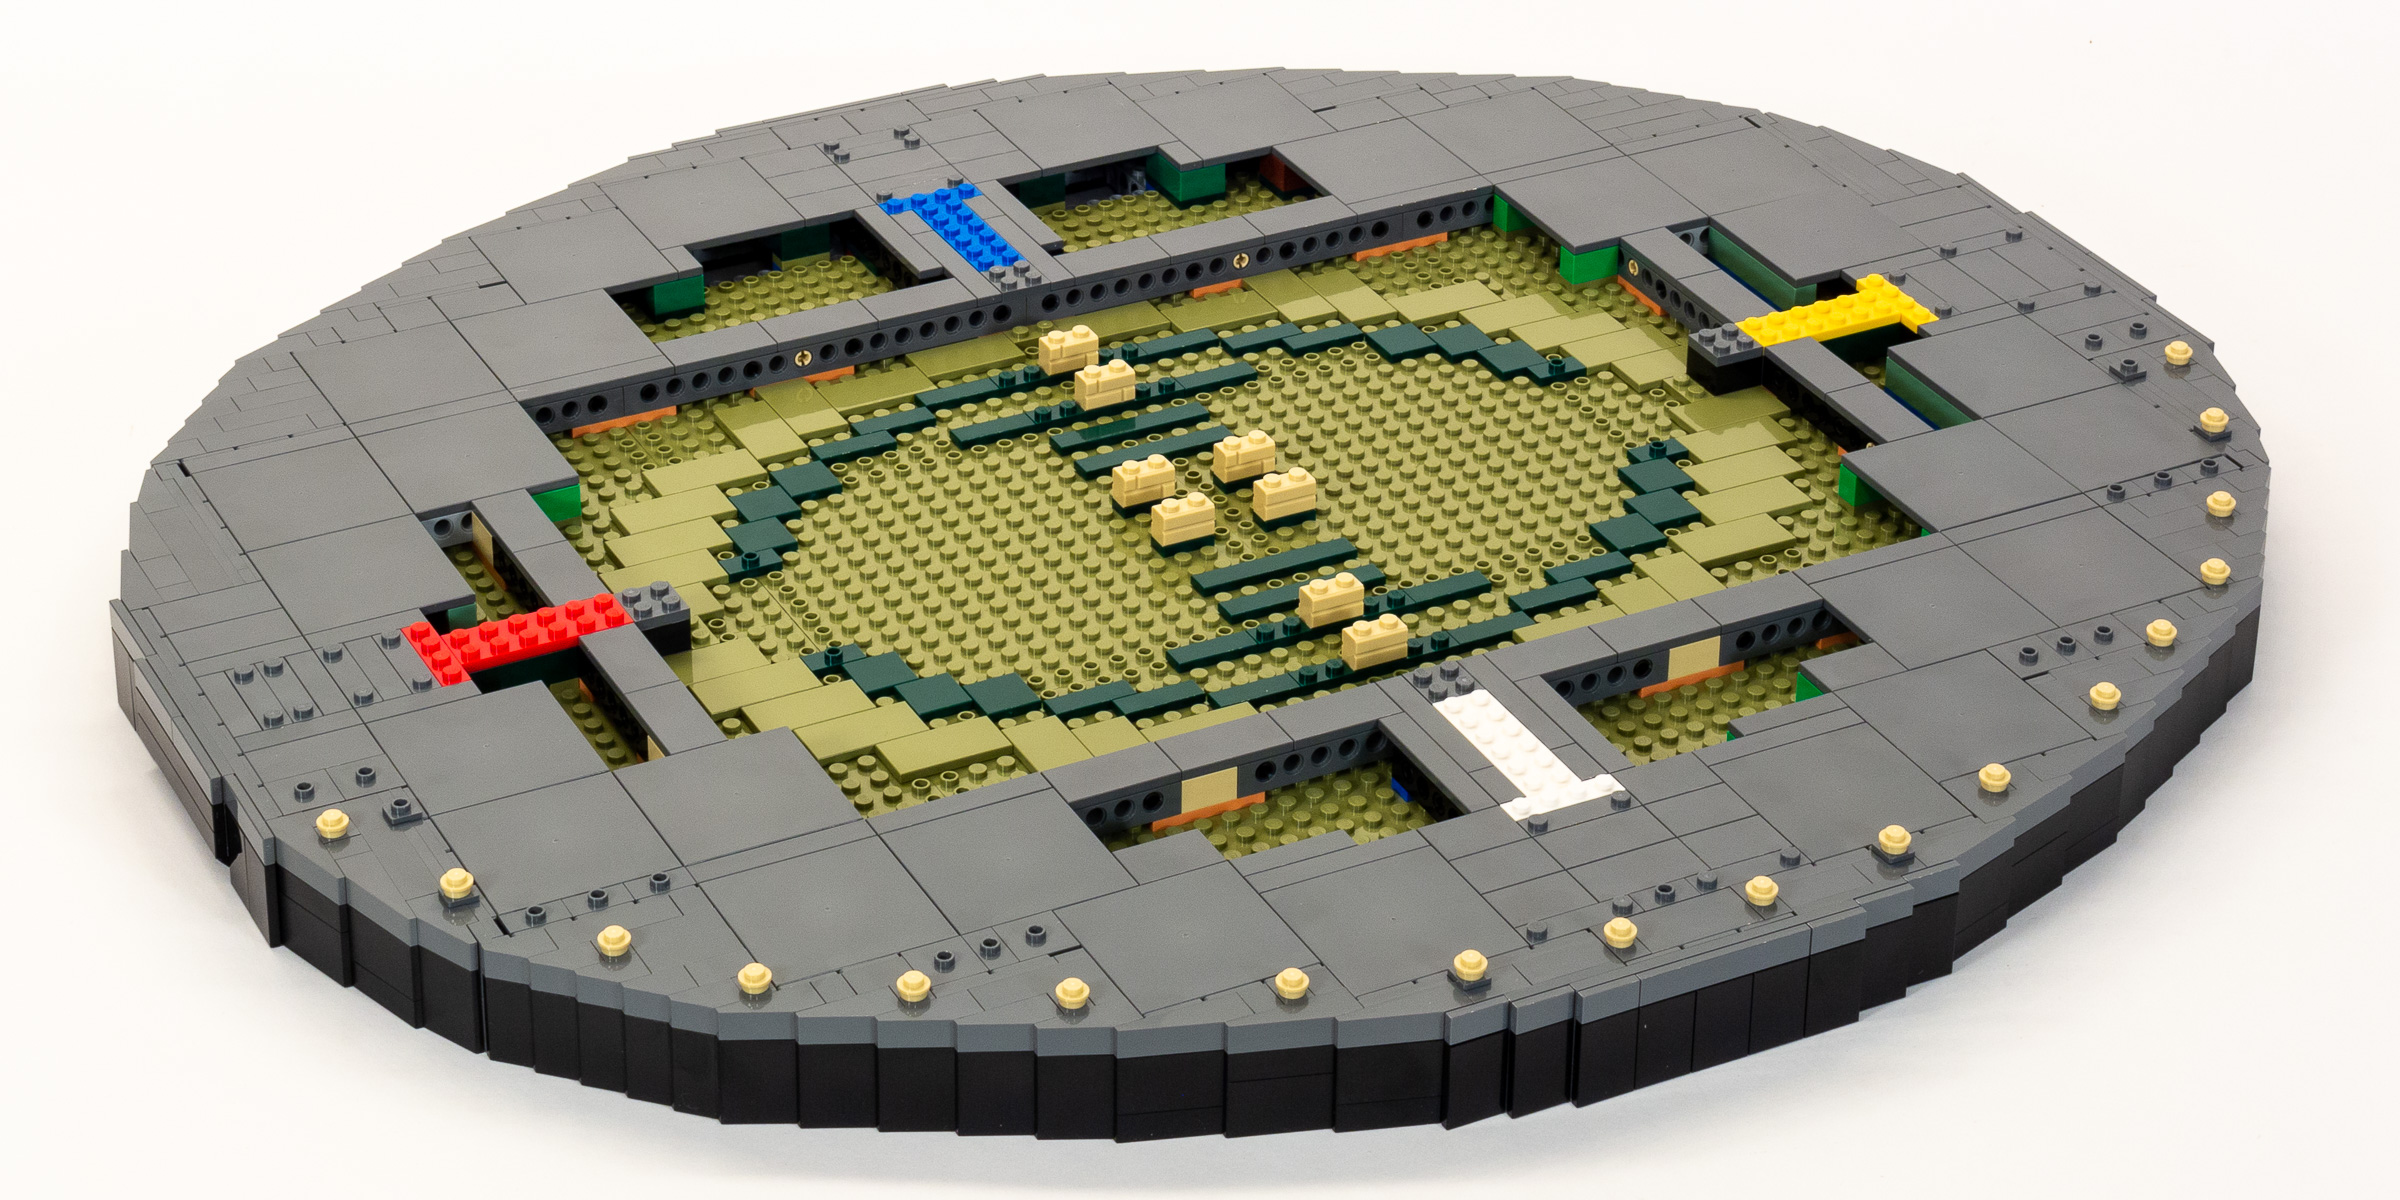
The surface is smoothed over in Stage 7.
One thing that stands out are a few ½ plate thick gaps in the surface. It’s not all that visible in the instructions but are quite visible in real lighting conditions.
Build time: 20 minutes.
Stages 8 & 9
Here we go—let’s build some ruins! I was both eager and a bit concerned to start building the actual Colosseum part of the model. Eager because that’s what we’re here for—but concerned that the build process might become boring and extremely repetitive.
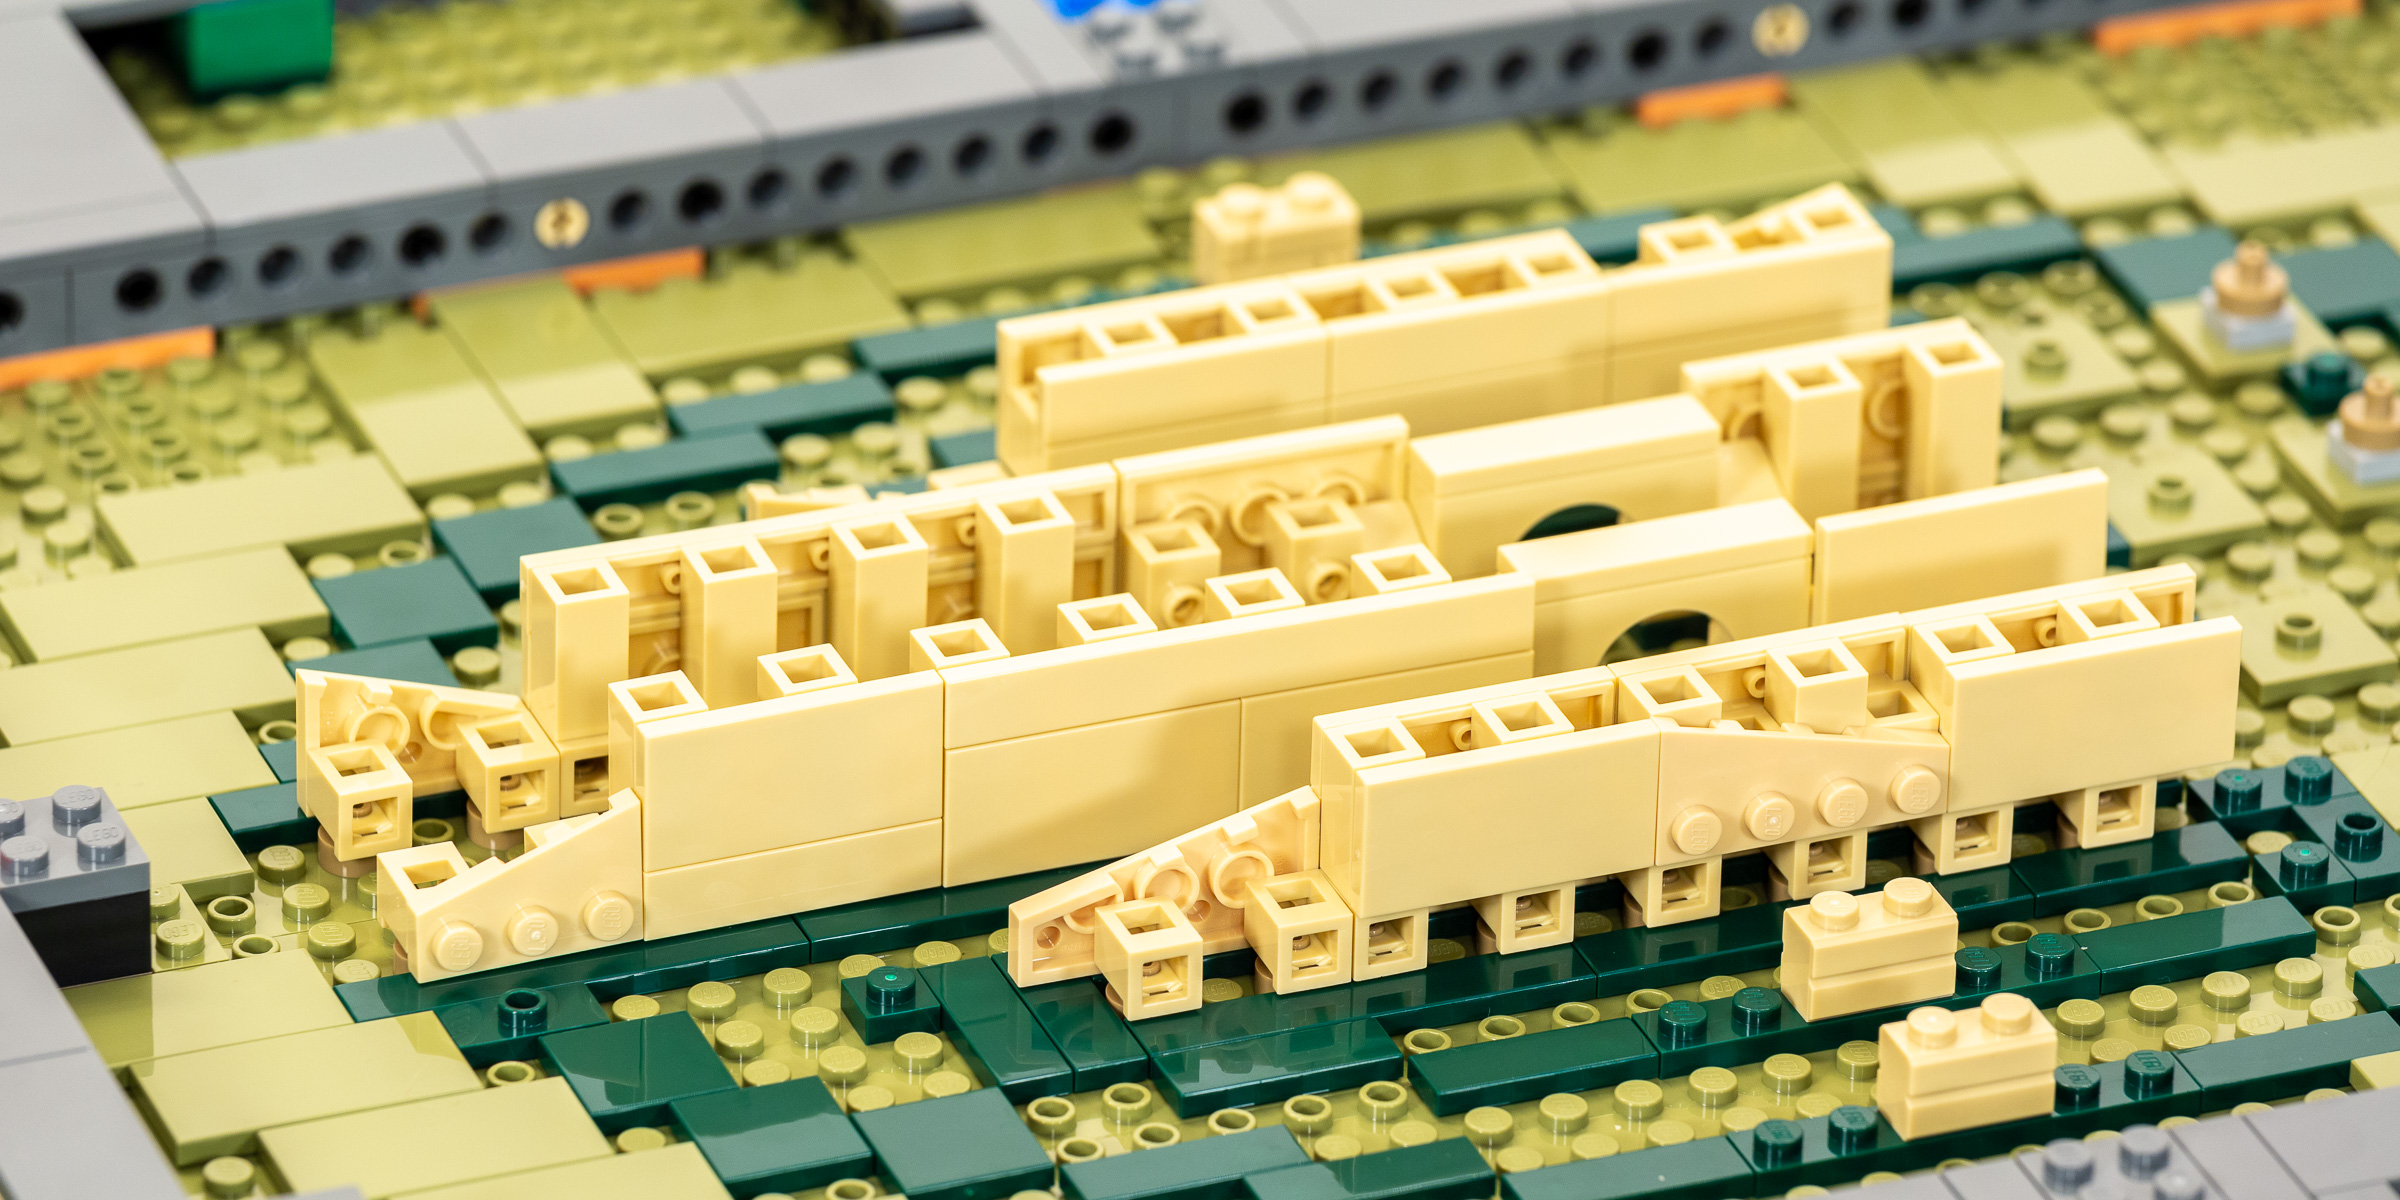
Assembling the ruined Hypogeum in the center.
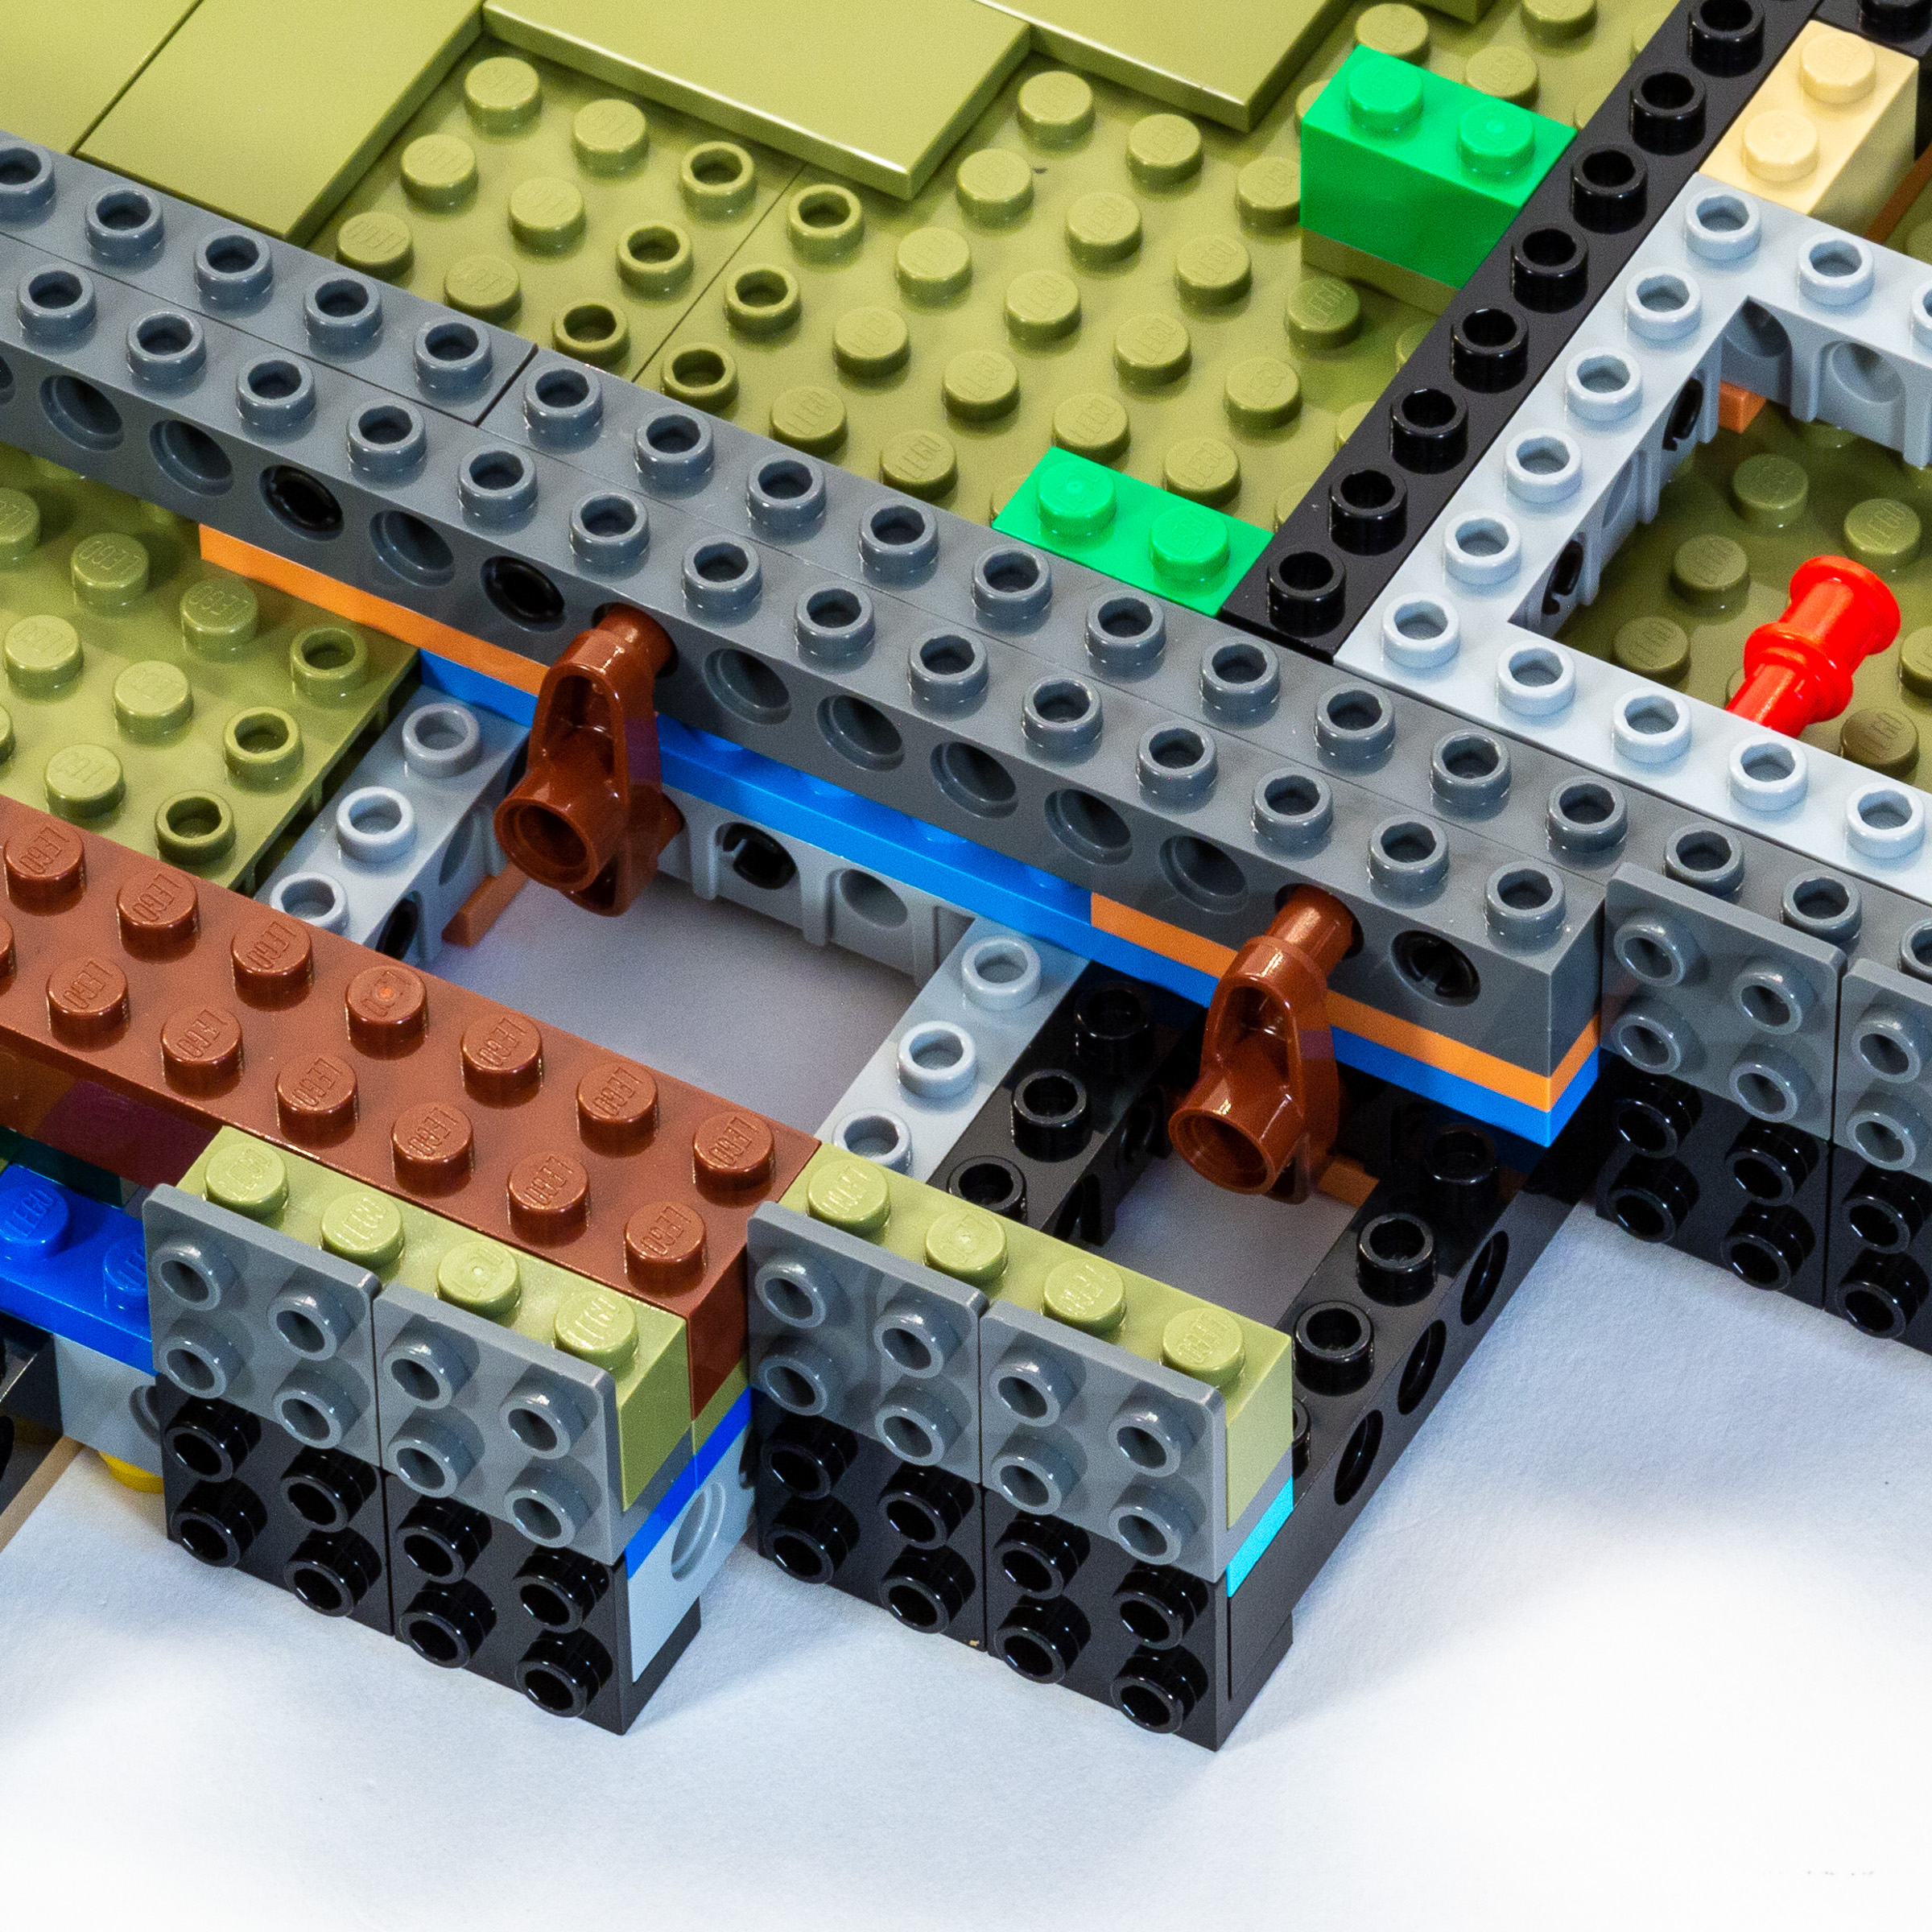
At least in this first bag, I was pleased to see that it wasn’t too repetitive, and the building techniques used to re-create the central ruins were very clever, with a lot of upside-down bricks revealing the hollow profile of the underside of a brick. This does a decent job of mimicking crumbling masonry!
We continue building the central ruins in stage 9, which focuses on the oval-shaped central ruins. To achieve that shape, we build several modules which employ 1×4 hinge plates to achieve the appropriate shape. I was pleased to see that the bent modules are securely attached to plates on both ends.
Build time. Stage 8: 25 minutes, Stage 9: 20 minutes.
Stage 10
Things are getting a lot taller now. In stage 10, we build the east and south sections of the structure, presumably to be filled in with a semicircular section in a future step. There are some nice ½ stud offsets used in this section, achieved using 1×2 and 1×3 jumpers.
Adding the south and east ends of the structure in Stage 10.
Build time: 20 minutes.
Stages 11-14
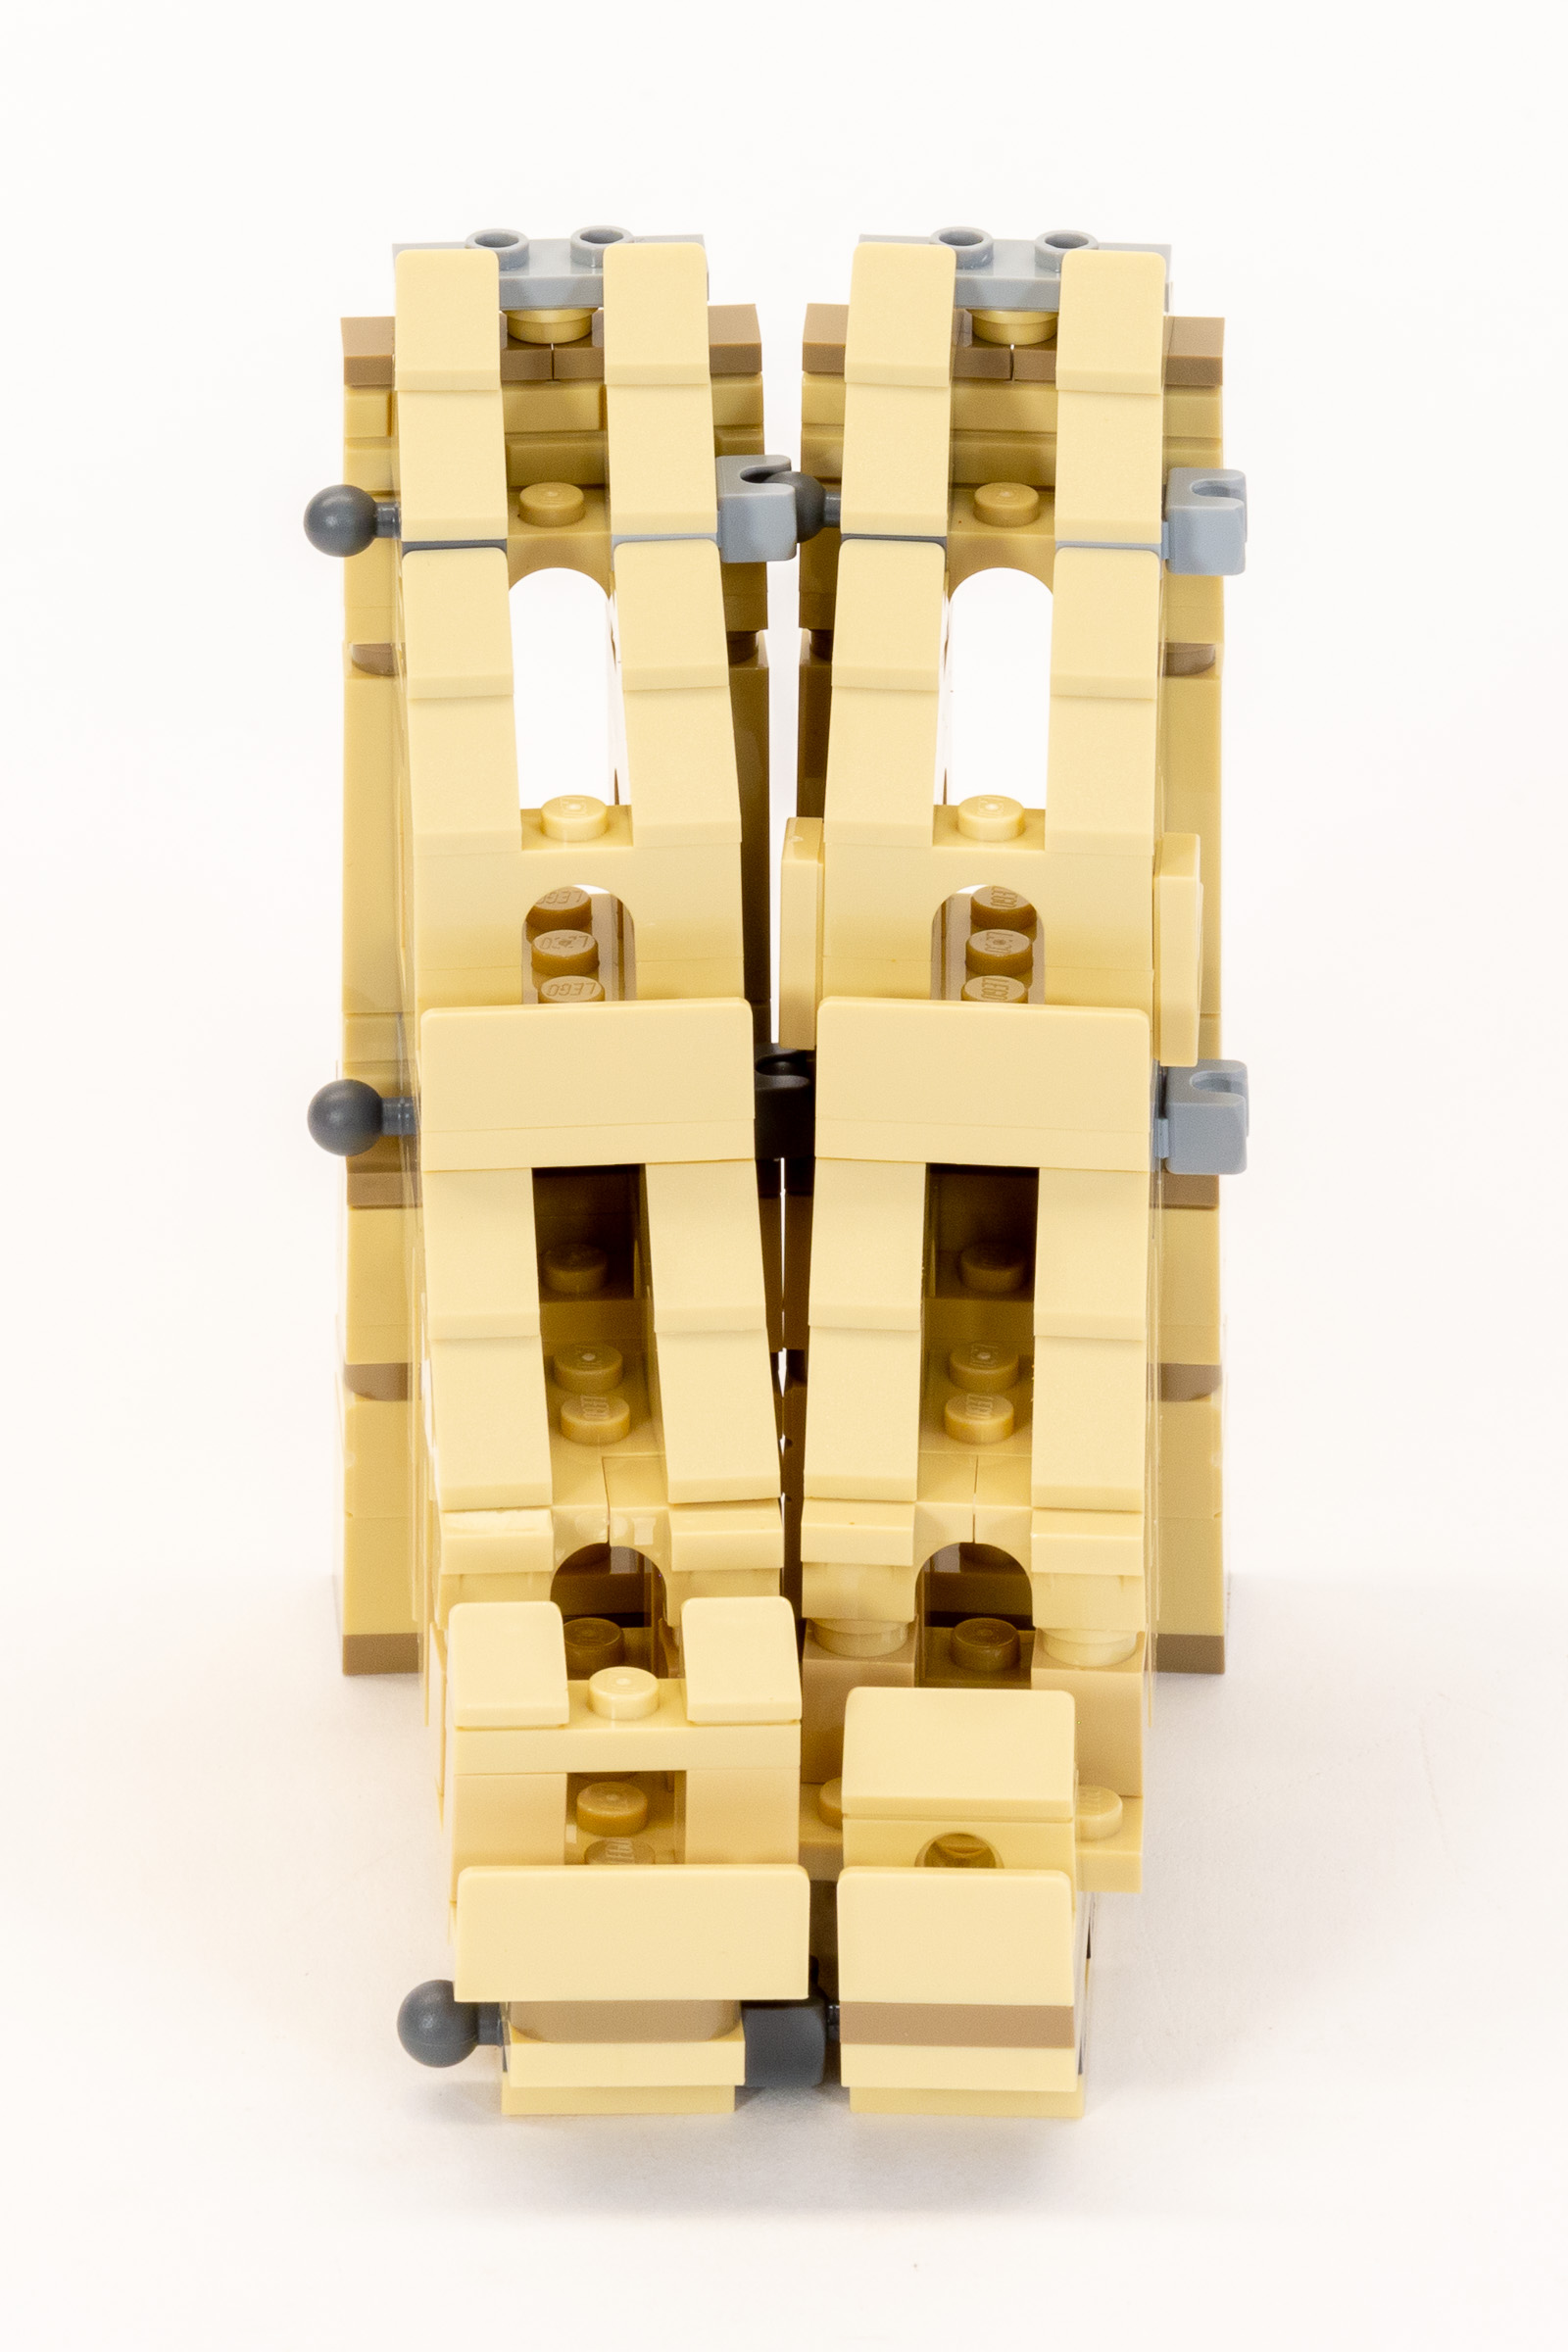
Now things are starting to get a bit repetitive… To achieve the gently curved stands, we have alternating narrow and wide sections which attach using ball and socket joints. With a socket-to-socket width of 4-studs in the back and 3 studs in the front, a very gentle curve is achieved when we snap each module together.
Curved seating is created using alternating wide and narrow modules.
Build time: 75 minutes (about 20 minutes per bag).
Stage 15
Each of the previous four stages added two modules. With one more module in this stage, the completed assembly includes a total of 9 modules. Finally, it snaps into place forming the southeast quarter of the ring—a real sense of progress!
Progress at the end of Stage 15.
After that, we are given a brief reprieve from the monotony of the previous four stages. It’s time to build the west end of the building! Naturally, the construction techniques are similar to the south and east ends of the building which we built earlier.
Build time: 25 minutes.
Stages 16-18
Now we’re moving on to the southwest corner of the Colosseum. As with the southeast corner, each stage contains parts for one slender and one wider module. That means that we will only build part of this assembly before the end of Box II. Naturally, I am getting a bit faster having built a ton of these modules already!
Progress at the end of Box II.
Build time: 50 minutes (about 15 minutes per stage).
Box 3 (III)
Box 3 contains a whopping 11 numbered stages, and a separate instruction booklet. The 4-hour build time was about the same as the previous box.
The third sub-box is marked with the roman numeral ‘III’.
What’s in Box III?
- Instruction manual (248 pages and 597 steps).
- Stage 19: 1x Large bag (marked 235S0).
- Stage 20: 1x Large bag (marked 335S0).
- Stage 21: 1x Large bag (marked 235S0), and 1x Medium unmarked bag.
- Stage 22: 1x Large bag (marked 235S0), and 1x Medium unmarked bag.
- Stage 23: 1x Large bag (marked 235S0), and 1x Medium unmarked bag.
- Stage 24: 1x Large bag (marked 235S0), and 1x Medium unmarked bag, and 1x Small unmarked bag.
- Stage 25: 1x Large bag (marked 335S0).
- Stage 26: 1x Large bag (marked 235S0), and 1x Medium unmarked bag.
- Stage 27: 1x Large bag (marked 335S0), and 1x Small unmarked bag.
- Stage 28: 1x Large bag (marked 235S0), and 1x Medium unmarked bag.
- Stage 29: 1x Large bag (marked 335S0), and 1x Medium unmarked bag.
Note: The Instruction manual for Box 3 (III) indicates that the bags for stage 29 should be in this box. In my set, the two bags numbered 29 were in Box 4 (IIII). This was confusing, but at least I had all of the parts that were needed to complete Box 3.
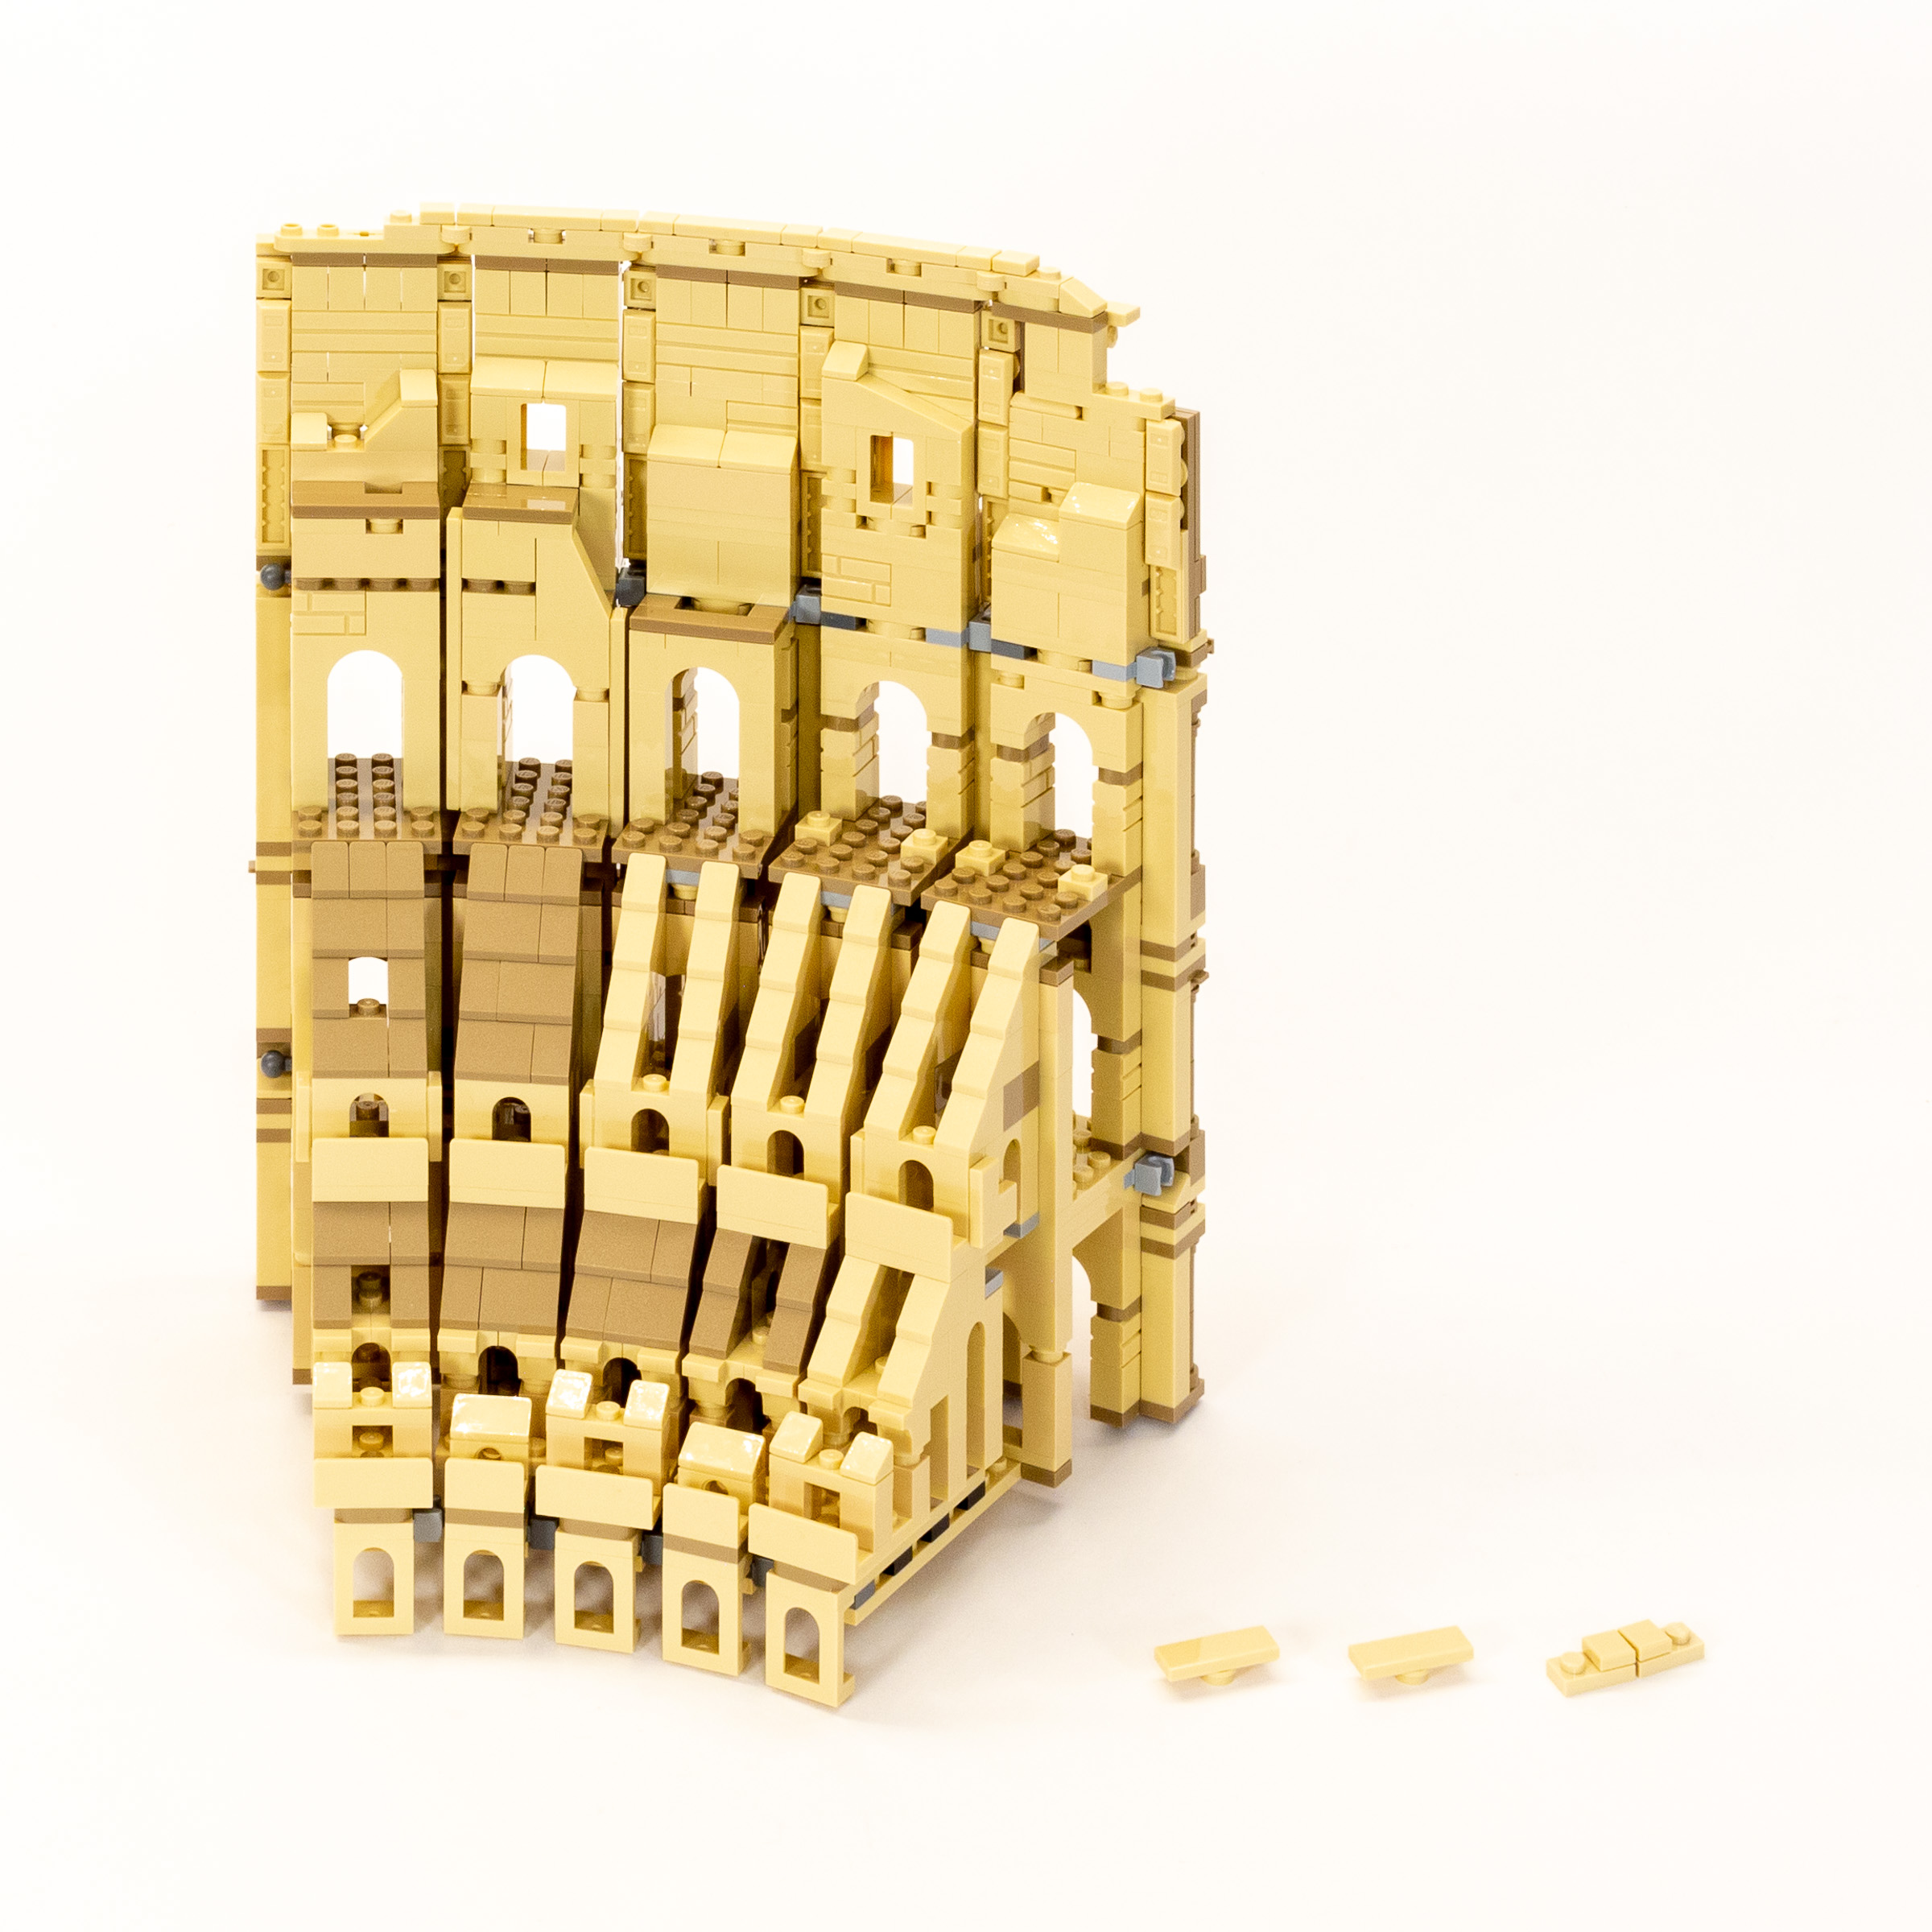
Stages 19-20
As noted earlier, we still need to build three modules to complete the assembly placed in the southwest corner of the model. Stage 19 competes two more modules. After that, a very quick Stage 20 builds the final module, and finally attaches everything in place. These moments where a large module snaps into place are really satisfying!
The south side of the model is finally complete in Stage 20.
Build time. Stage 19: 20 minutes, Stage 20: 15 minutes.
Stage 21
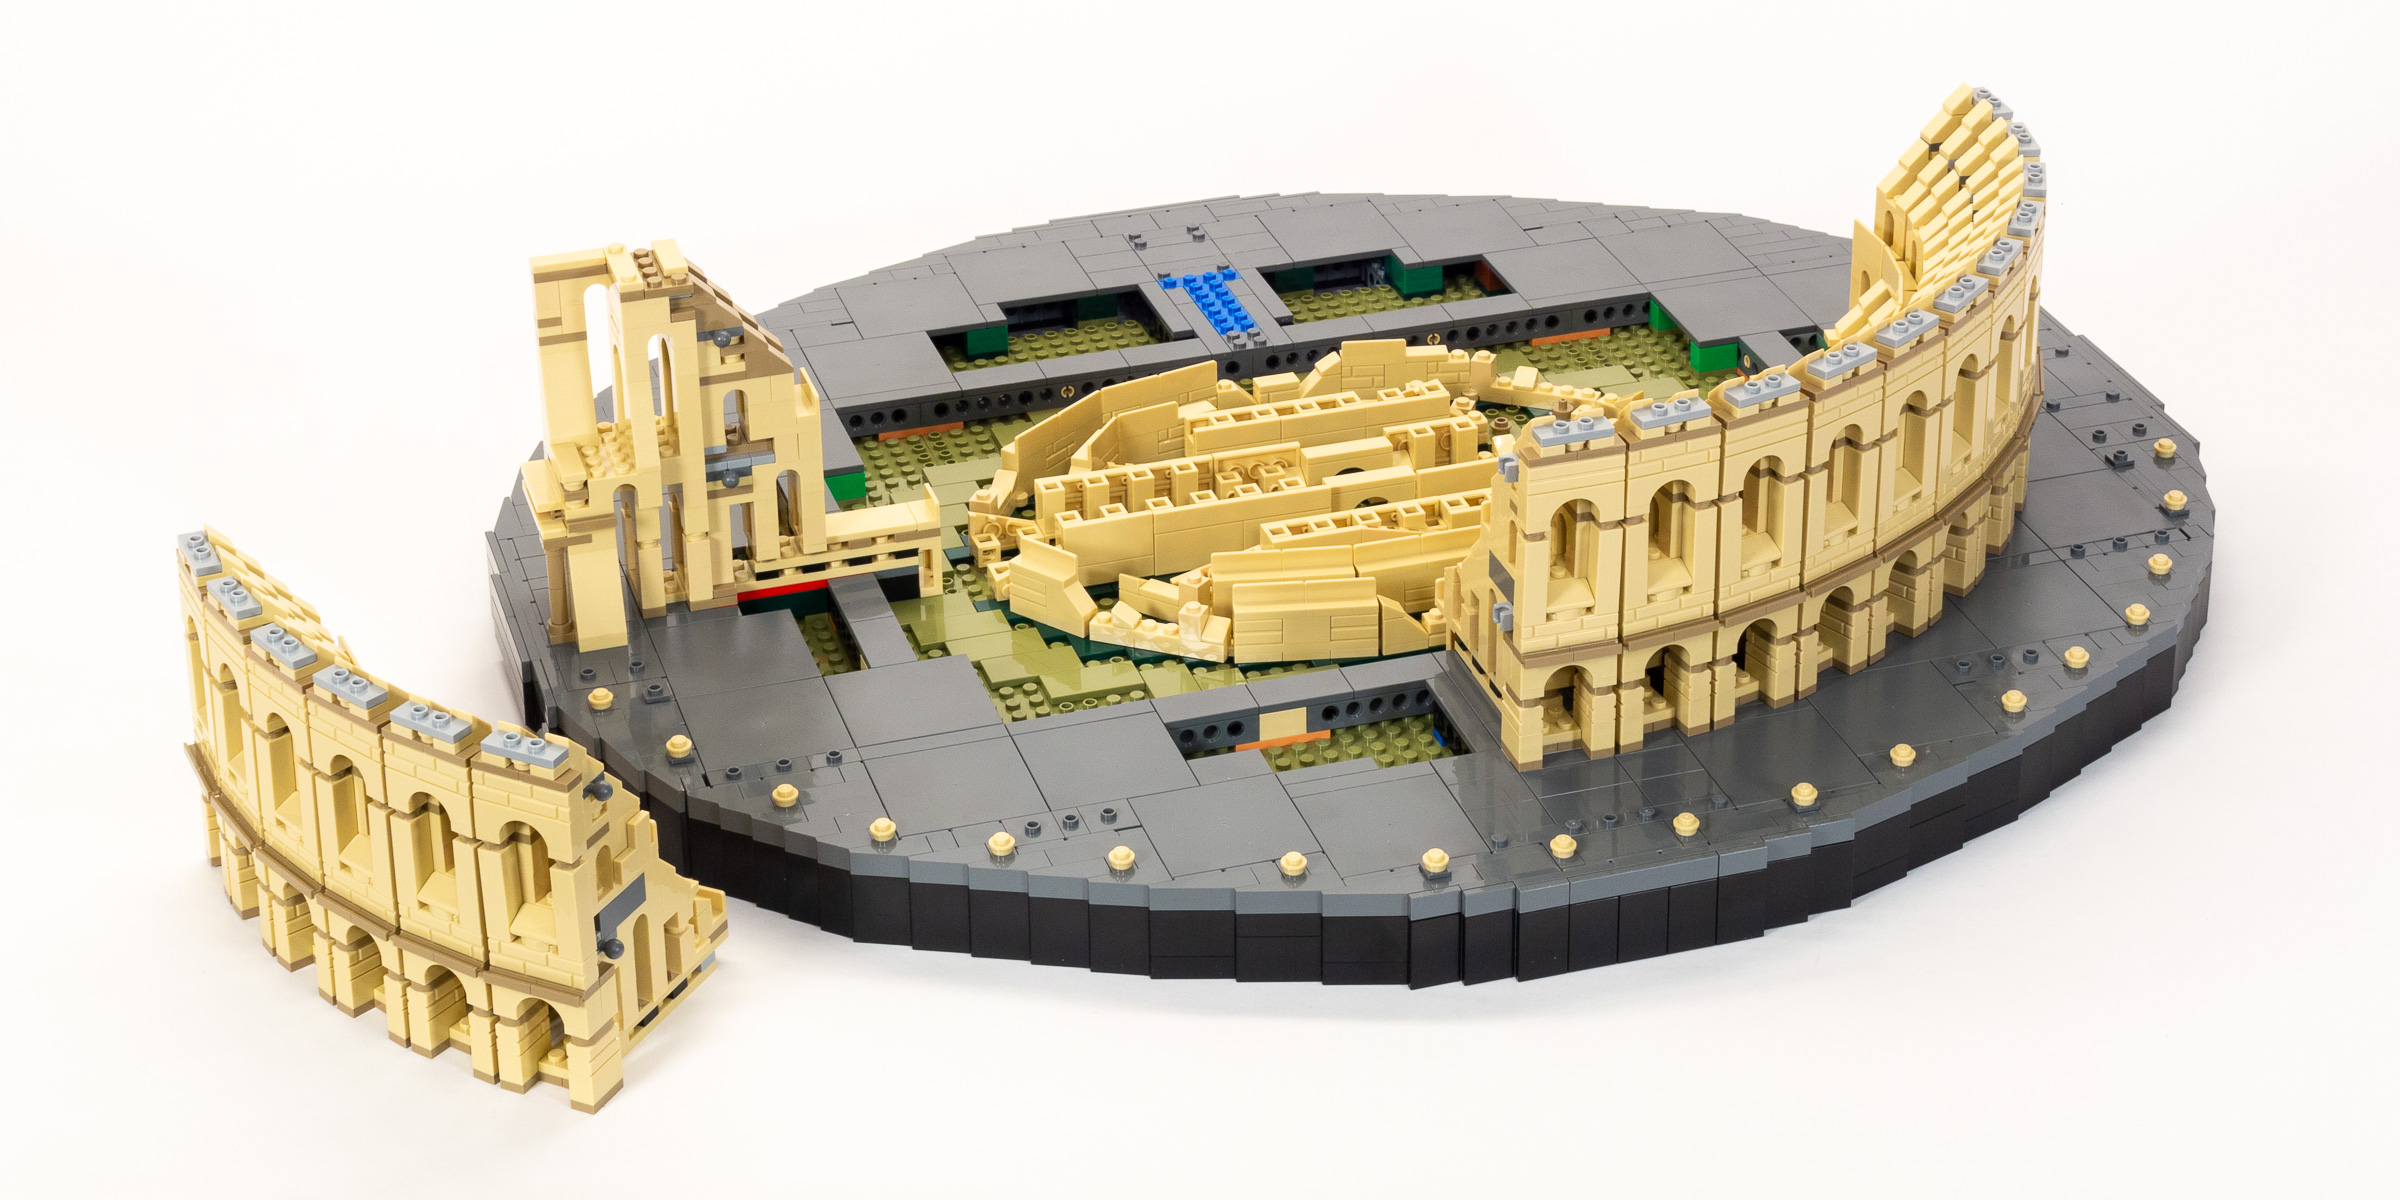
The full scale of the model makes its presence known as we build this stage. More specifically, the full height of the model which we discover in this stage is much taller on the northern side than on the southern side. (True to its real life counterpart, the building is better preserved on this side.)
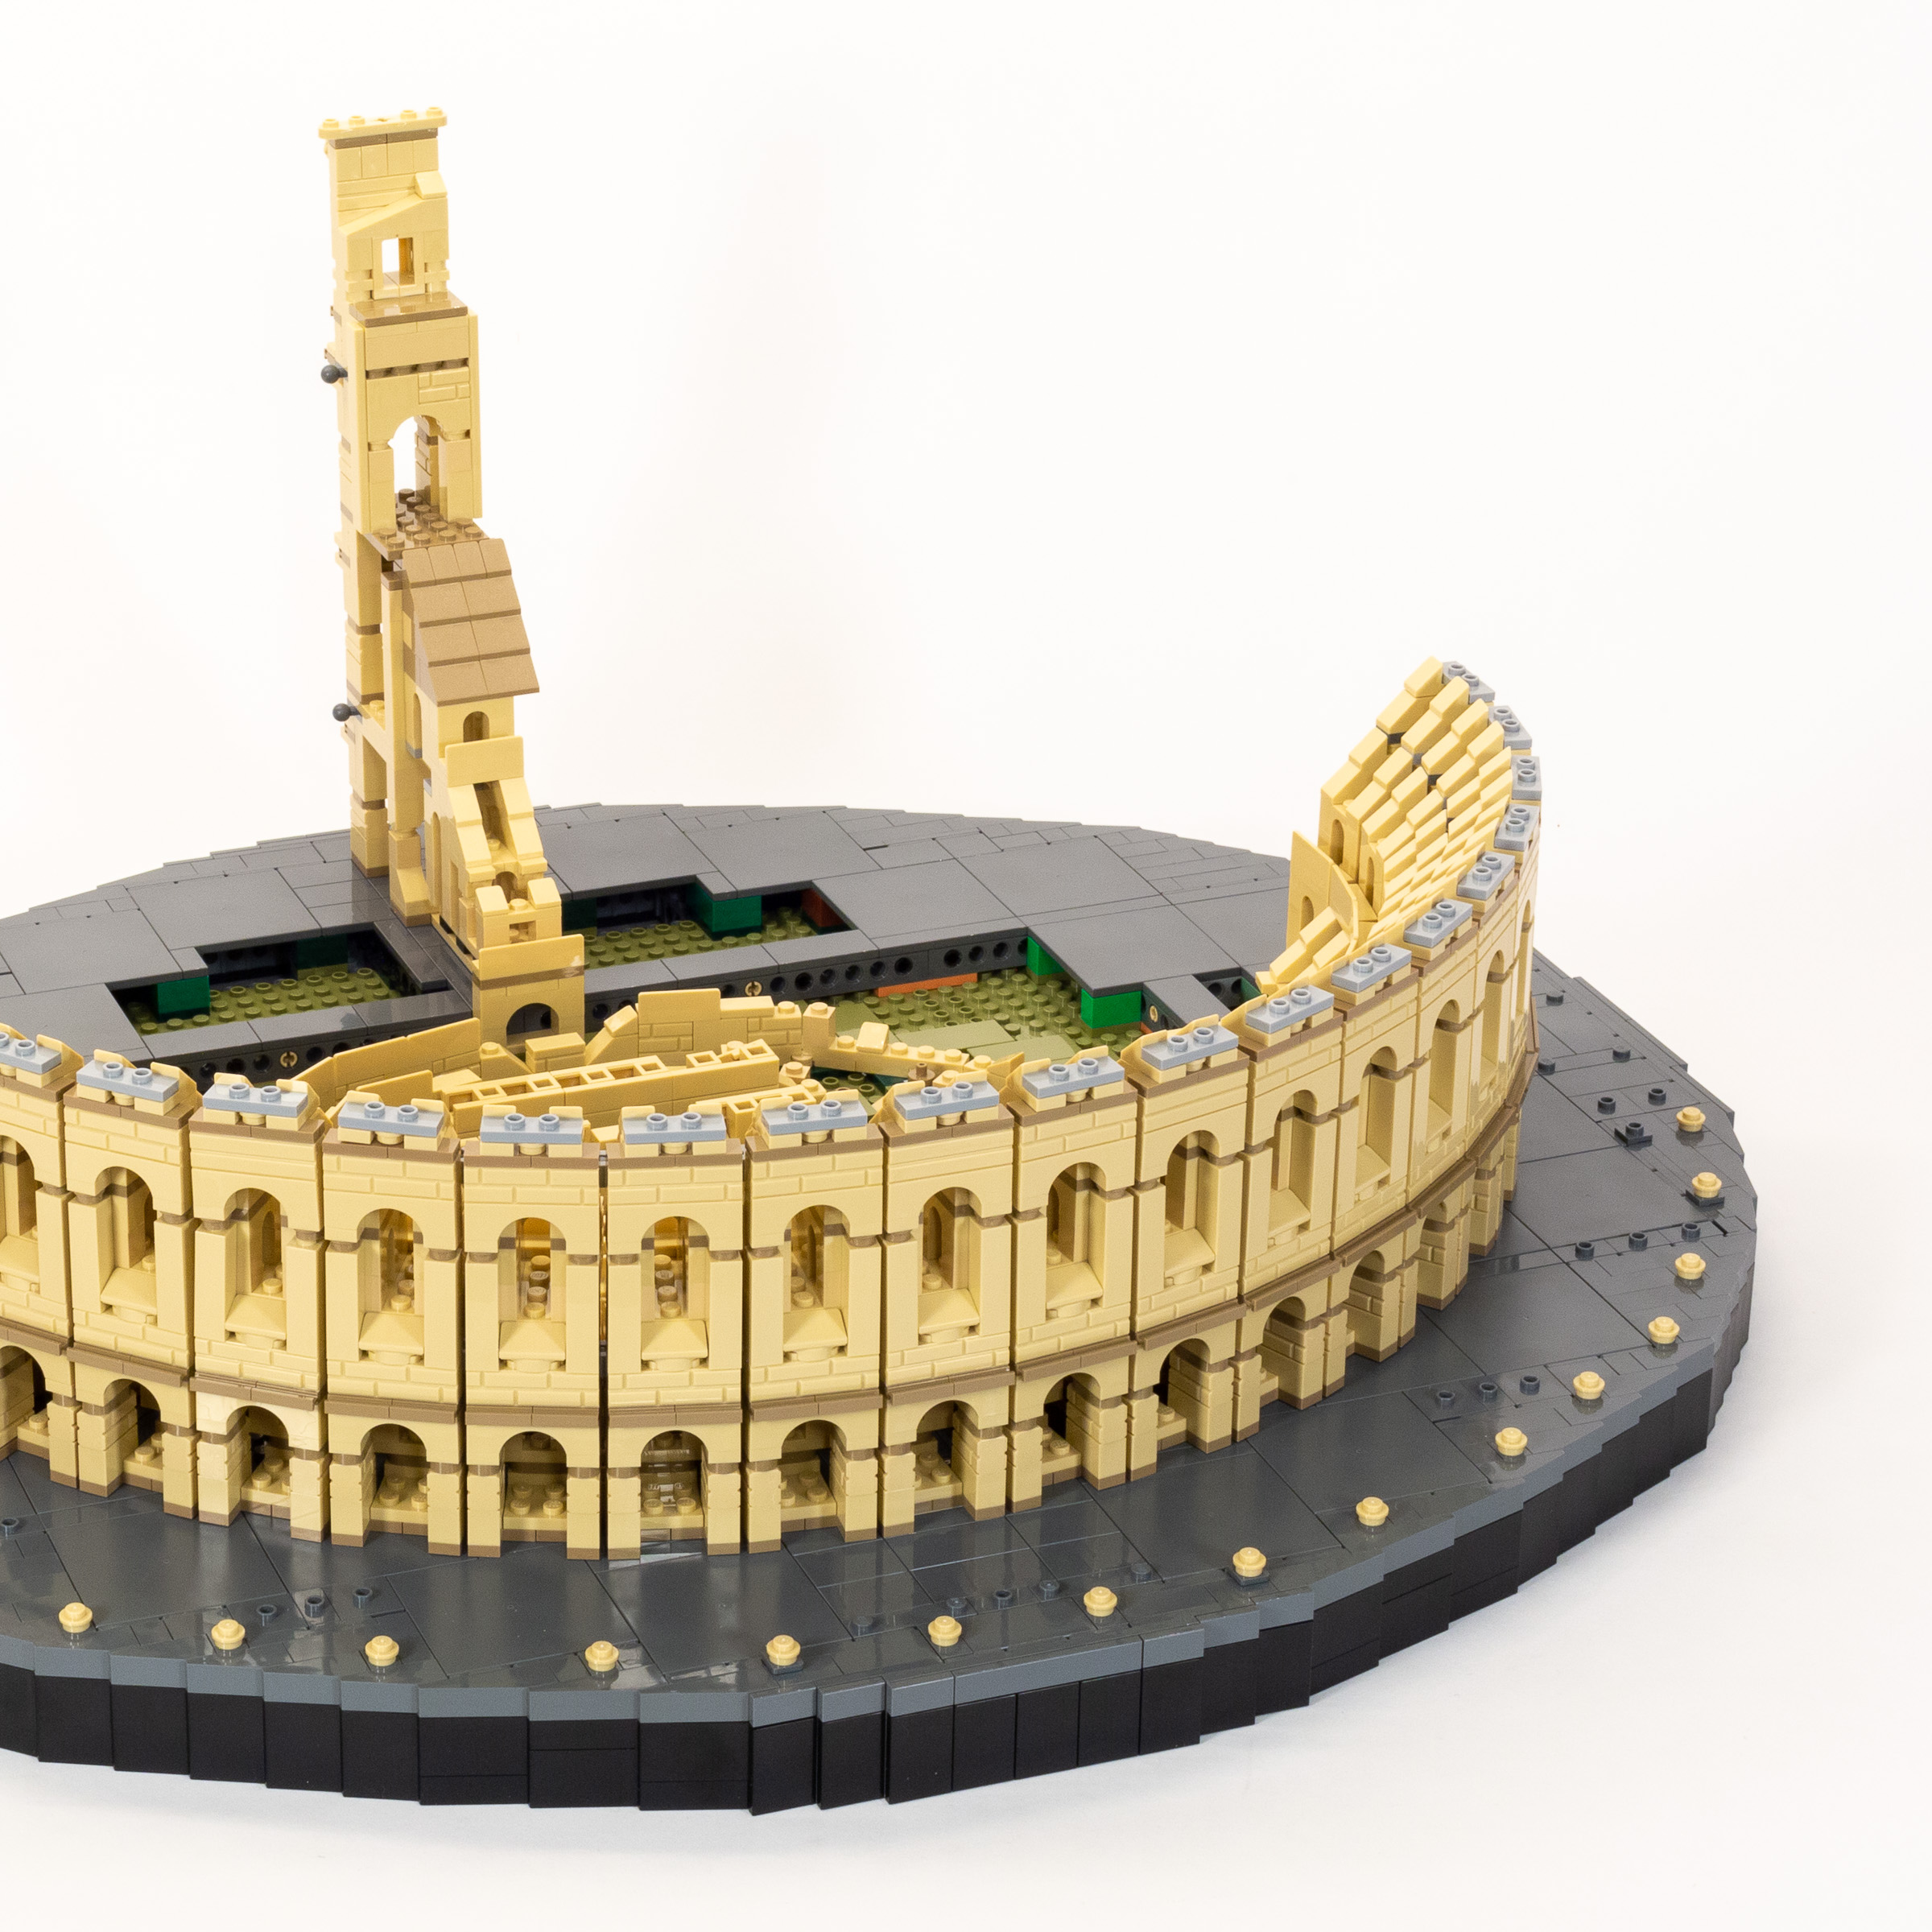
Adding the north end of the building reveals the final height of the model.
We learn on page 6 that a technique called “vertical exaggeration” is employed with this model. The reason for this is that the model will be viewed from above, whereas the real building is viewed largely from ground level. This vertical exaggeration makes the model look as tall as it feels when visiting it in real life. This module forms the northernmost corner of the build and is attached firmly to the base.
Build time: 25 minutes
Stages 22-26
From this point onward, we only build one module per bag. That’s because each module is deeper, taller, and more intricately detailed than on the other side of the model.
These additional details are quite satisfying to build, including more intricately detailed columns featuring columns in the Doric, Ionic, and Corinthian orders (The orders describe the type of decoration on the top of each column, also known as the Capital.) For example, the scrolls of the Ionic columns are cleverly re-created using Roller Skates (part 18747).
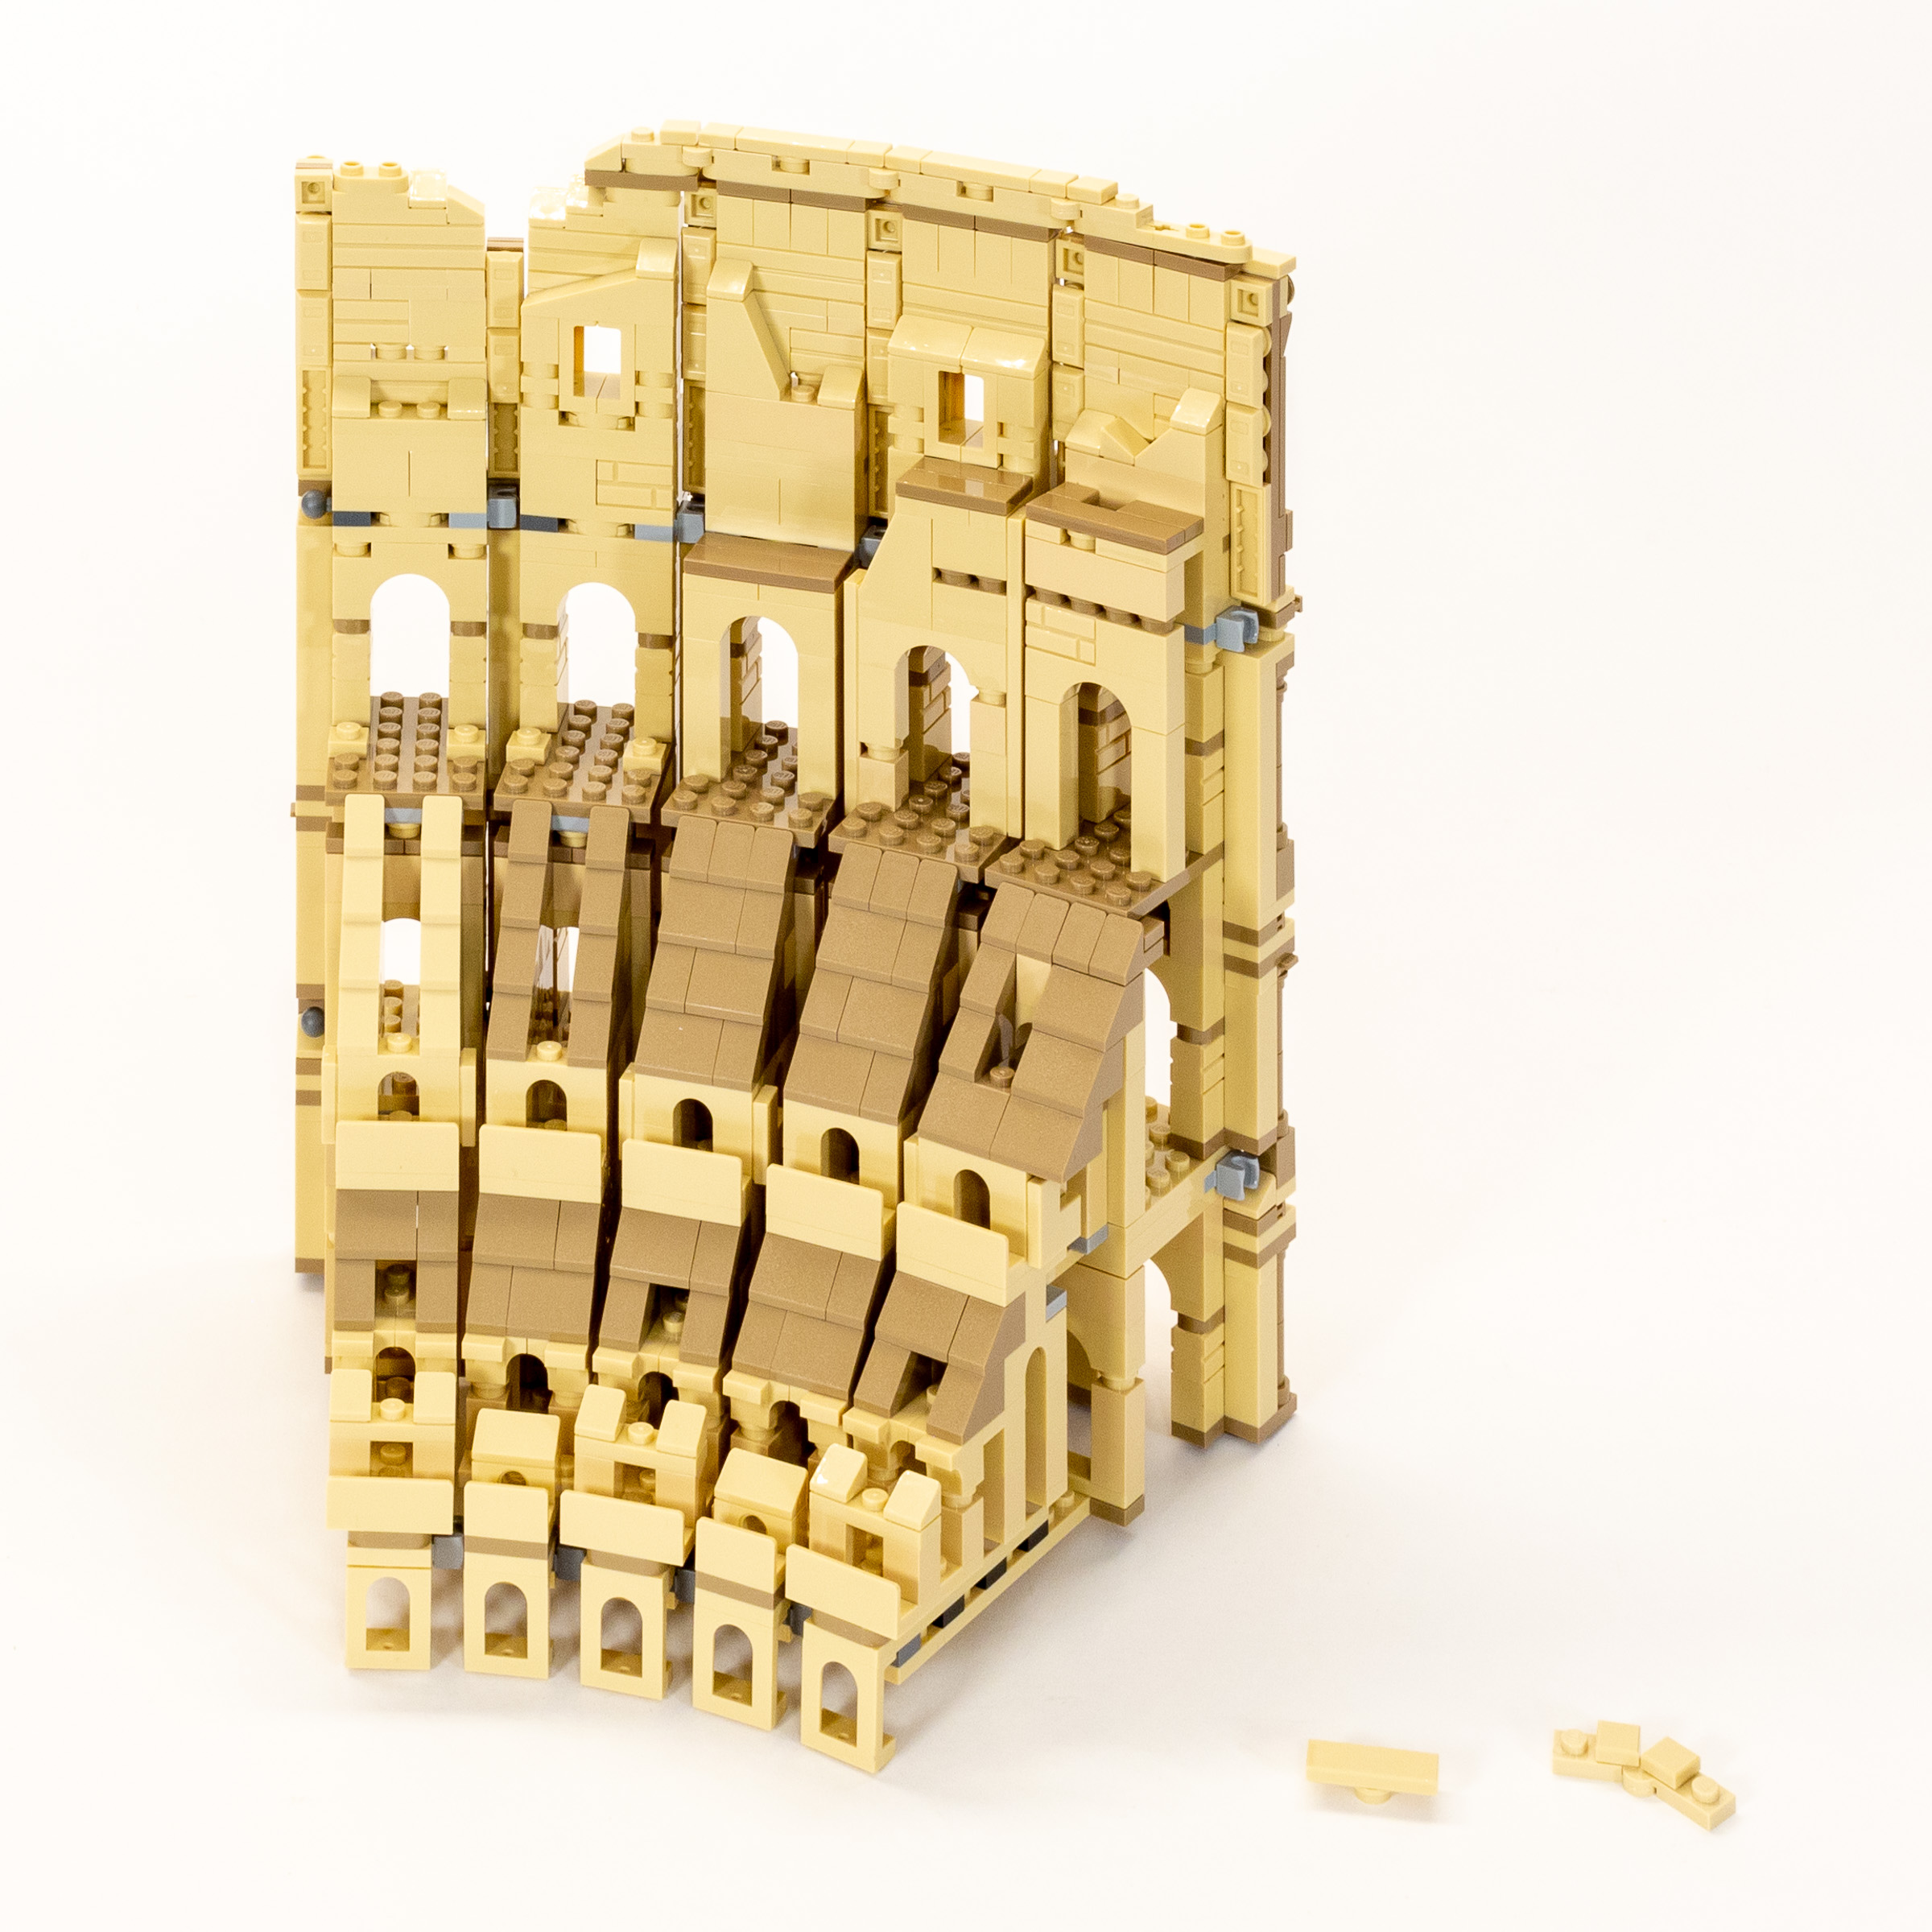
The module assembled in stages 22-26.
The larger size and intricate detailing results in a much slower building experience. You may want to take a break between each bag or two! At the end of these five bags, we attach this assembly (containing 5 modules) on the left side of the northern pillar that we built in Stage 21. This leaves two gaps which we will need to fill in later.
Build time: 120 minutes (about 25 minutes per bag).
Stages 27-29
The last three stages of box 3 are very similar to the previous five stages, with one module per bag. A pattern throughout the model is that the modules alternate between a narrower and wider back, which is necessary to fill the gaps which occur due to the one-stud difference in width in the front and back connections.
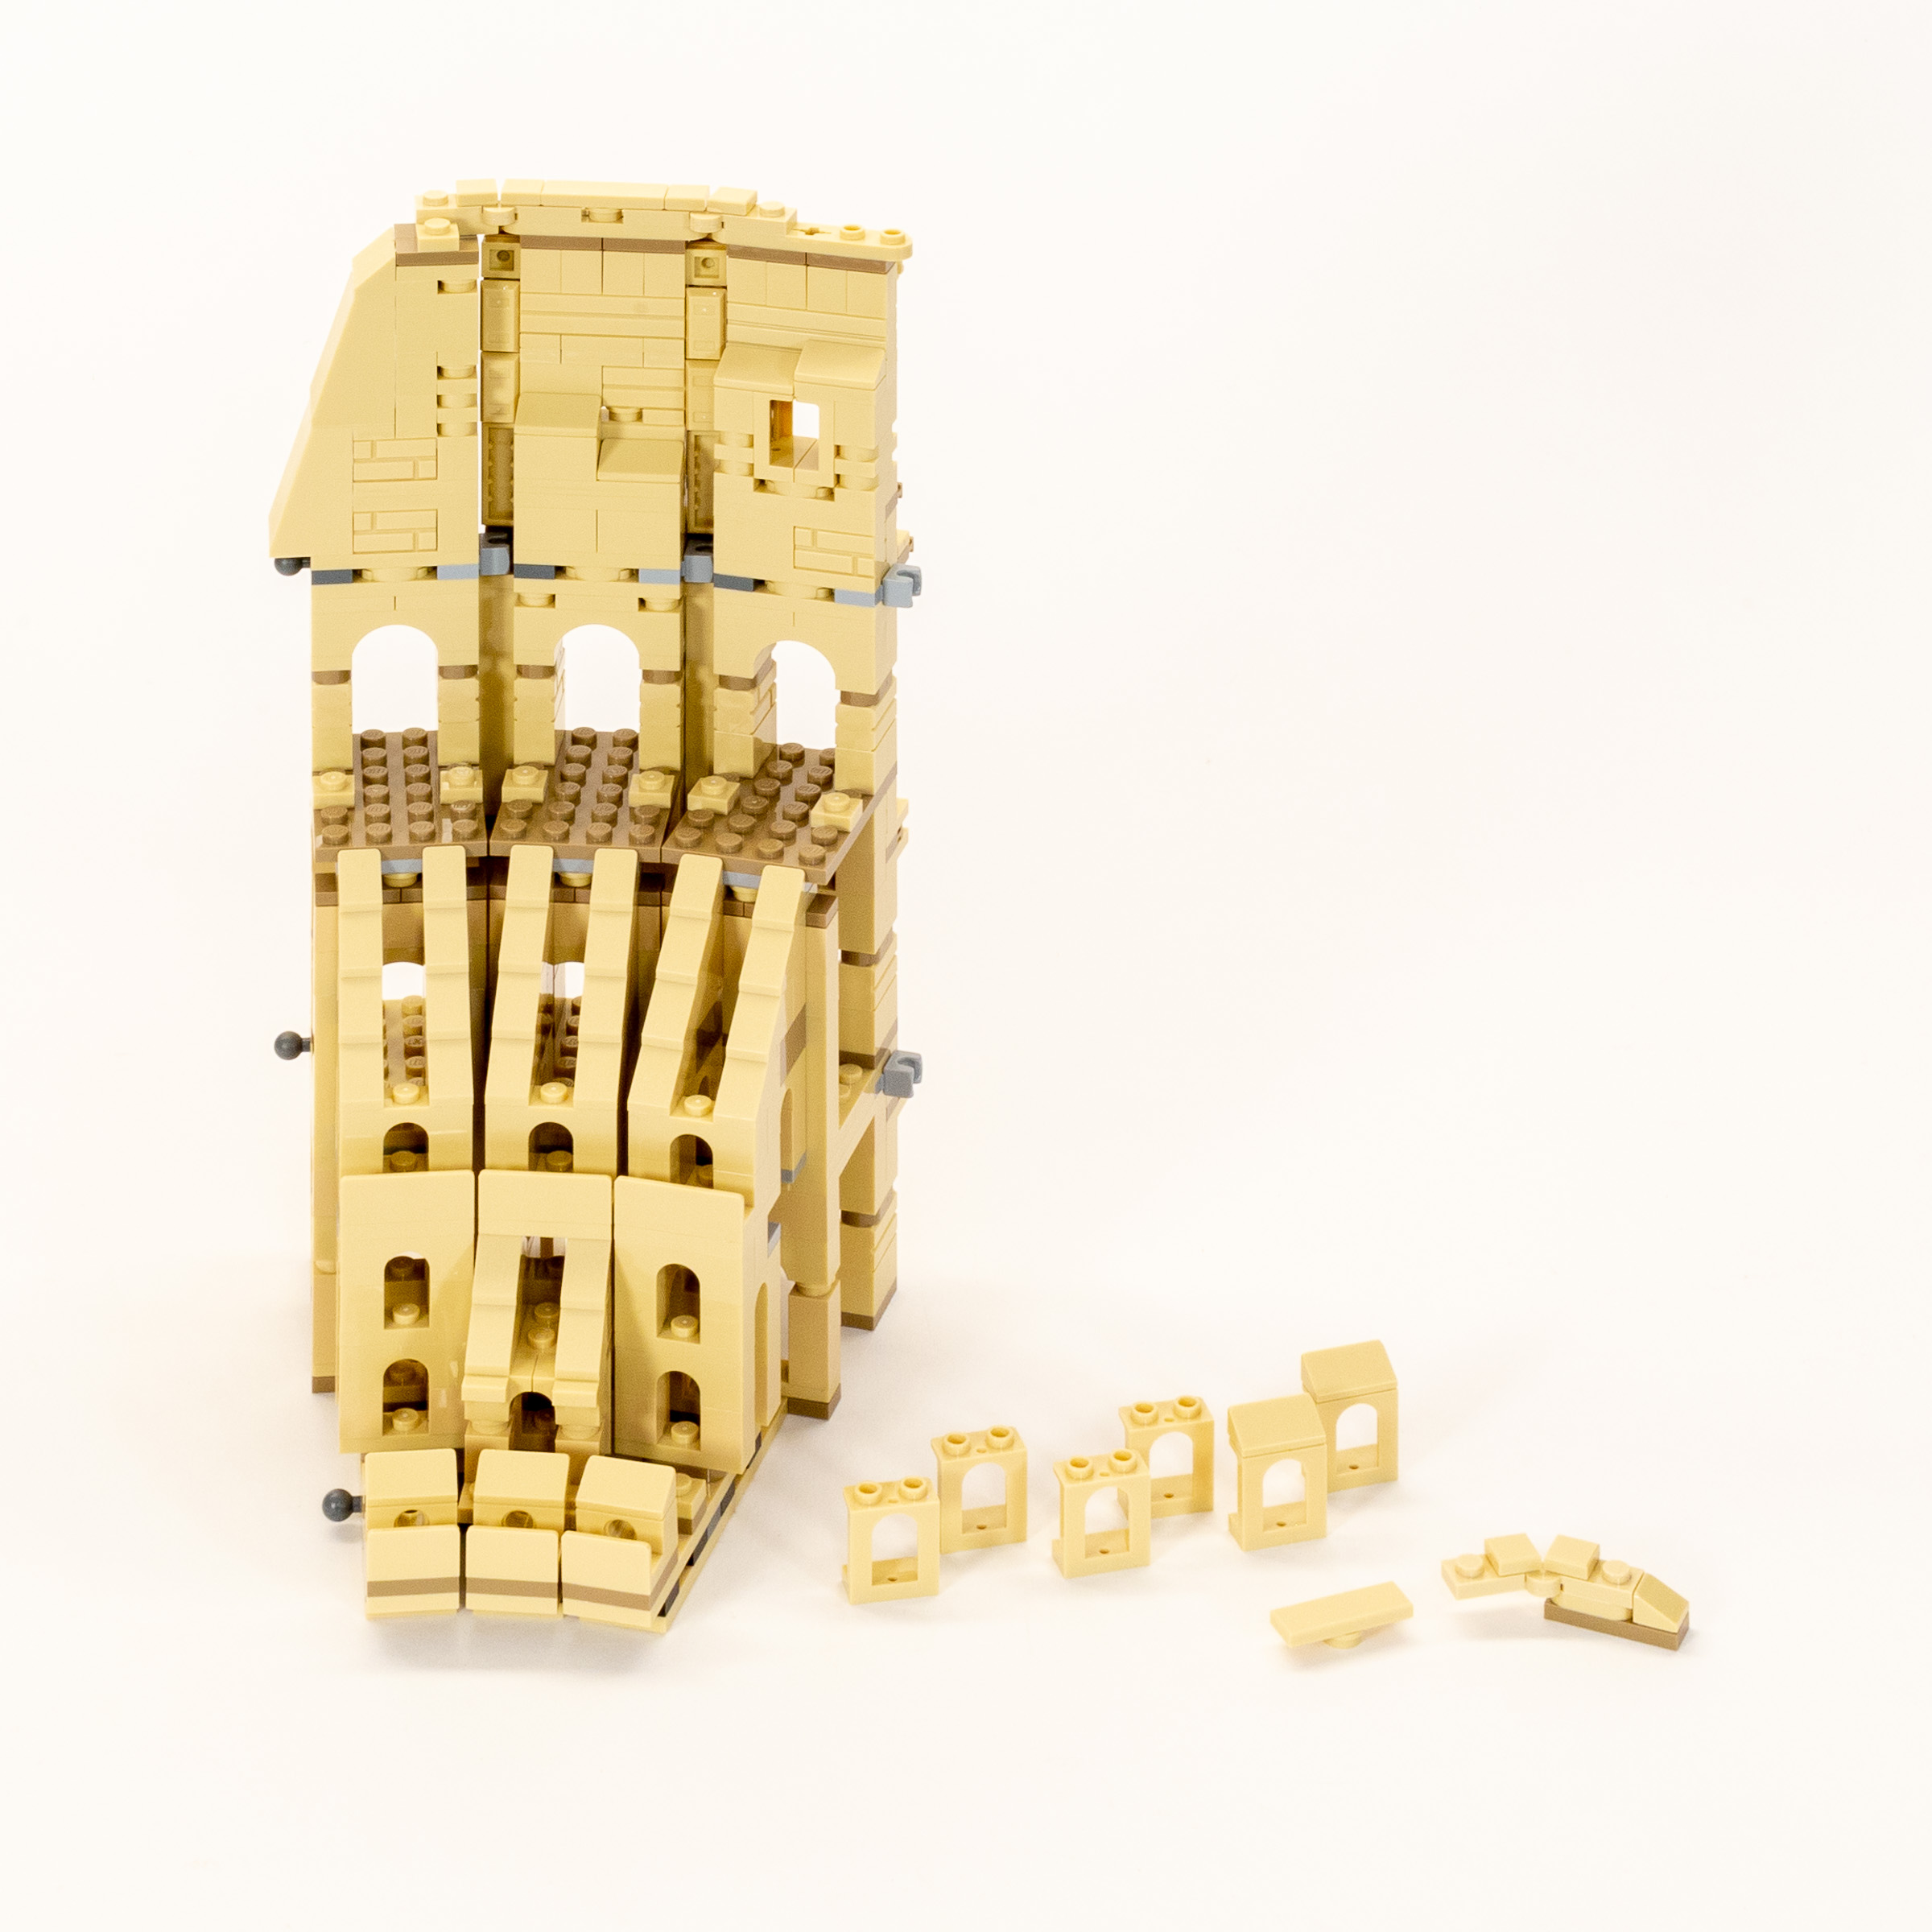
The module assembled in stages 27-29, only to be completed and installed in the final box.
This also results in a significant difference in build time; the larger modules like the one in Stage 28 take almost twice as long to build as the narrower modules in stages 27 and 29. Unfortunately, again we will need to open Box 4 to finish this assembly and add it to our increasingly impressive model.
Build time: 60 minutes (15 to 30 minutes per bag).
Bag 4 (IIII)
You might ask, since when was “IIII” the roman numeral for 4? Thankfully, on page 30 they explained “Why IIII and not IV? Actually, the Romans used both, sometimes even in the same document!”
The last sub-box is marked with the roman numeral ‘IIII’ (rather than the more common ‘IV’).
Enough of that; what’s in this final box? You will find another 11 numbered stages from 30 to 40. That’s 9 bags to finish modules used to build the North side, and two more bags to finalize the model. Let’s make it happen! (But not in a hurry; it took another 4 ½ hours to complete!)
What’s in Box IIII?
- Instruction manual (248 pages and 597 steps).
- Stage 30: 1x Large bag (marked 335S0), and 1x Medium unmarked bag.
- Stage 31: 1x Large bag (marked 235S0), and 1x Medium unmarked bag.
- Stage 32: 1x Large bag (marked 335S0), and 1x Small unmarked bag.
- Stage 33: 1x Large bag (marked 335S0), and 1x Medium unmarked bag.
- Stage 34: 1x Large bag (marked 235S0), and 1x Medium unmarked bag.
- Stage 35: 1x Large bag (marked 335S0), and 1x Medium unmarked bag.
- Stage 36: 1x Large bag (marked 235S0).
- Stage 37: 1x Large bag (marked 335S0), and 1x Medium unmarked bag.
- Stage 38: 1x Large bag (marked 335S0), and 1x Medium unmarked bag.
- Stage 39: 1x Large bag (marked 335S0), and 1x Medium unmarked bag.
- Stage 40: 1x Large bag (marked 335S0).
Stage 30
While I would have loved to finish the northwest flank of the Colosseum in box 3, we needed one more bag to get it done. This is most likely due to packaging issues because I know most instructions designers would prefer the parts for each substantial section to be contained within each box. This and the previous module create the iconic left sloping edge where the tallest part of the ruins on the north side of the model end.
A satisfying before-and-after when installing the module built in stages 27-30.
Build time: 25 minutes.
Stages 31-35
We’re finally ready to build the last quadrant of the model! For stages 31-35, we build 5 very similar modules that snap together to form another large assembly. (This is similar in scope and time commitment to bags 22-26, which also built a large assembly out of five modules.)
Module created in stages 31-35.
Build time: 120 minutes (about 25 minutes per bag).
Stages 36-38
The last four modules are built using three bags, resulting in the eastern end of the taller north façade. Bag 37 is especially involved, resulting in a large diagonal-flaring support to help keep the structure upright. It’s pretty exciting to see the complete structure coming together like this!
Attaching the final module in place is a triumphant moment in this massive build.
Build time. Stage 36: 15 minutes, Stage 37: 25 minutes, Stage 38: 40 minutes.
Stages 39 & 40
It’s time to put some finishing touches on the Colosseum itself, in the form of a row of windows around the center of the model. I’m not quite sure why these weren’t added as part of each of the modules we built in the previous two dozen bags, but I suspect it has to do with reducing the number of unique parts in each prepack bag. Since each module would need exactly one 1×2×2 Window (Part 60592), it is easier to package them all together since only a few of the modules already required that part.
Last but not least, it’s important to add some trees and cars around the south-facing “front” of the model. You will notice an uncommon color here, 226Cool YellowBright Light Yellow which is used for one of the cars. This is a deliberate nod to the Fiat 500 set released earlier this year, which as we noted introduced that color into a large number of new parts. The box for the Fiat 500 also featured the Colosseum in the background which is either one of the most obvious Easter Eggs ever or just a lovely coincidence. With the inclusion of the microscale Fiat 500 in this set, I lean toward the former.

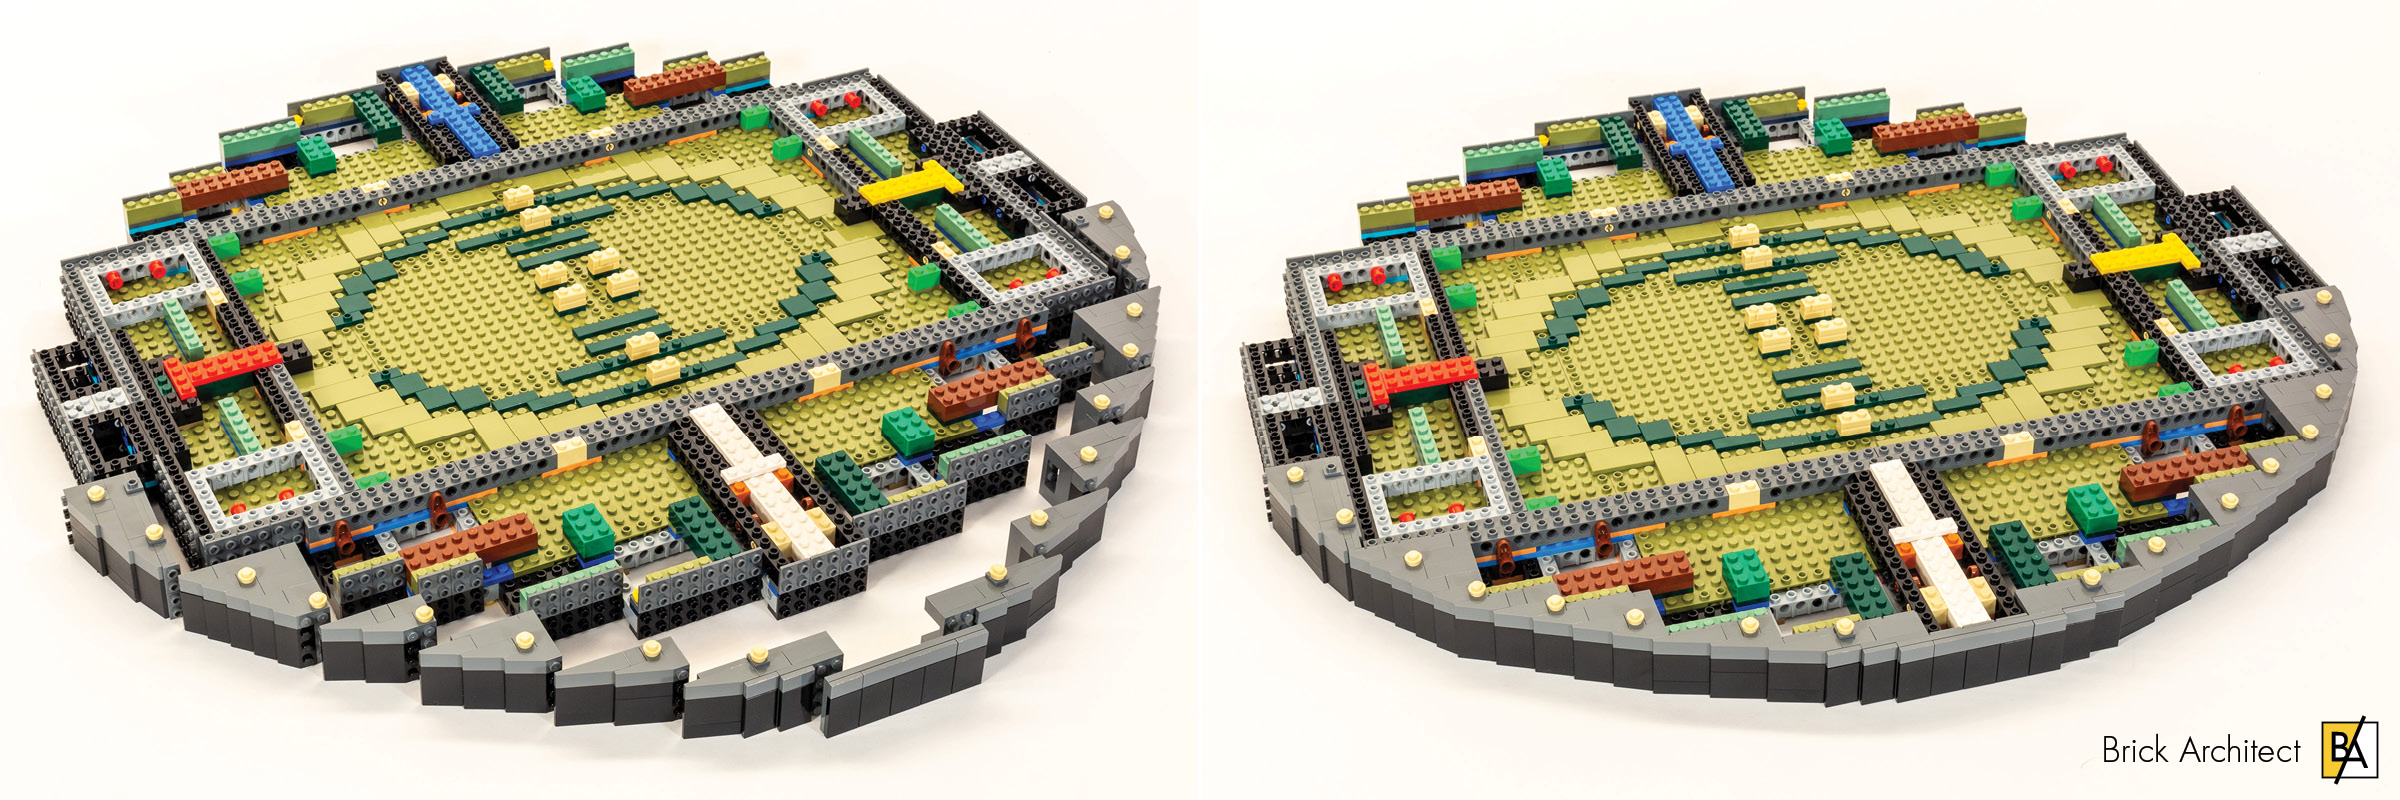
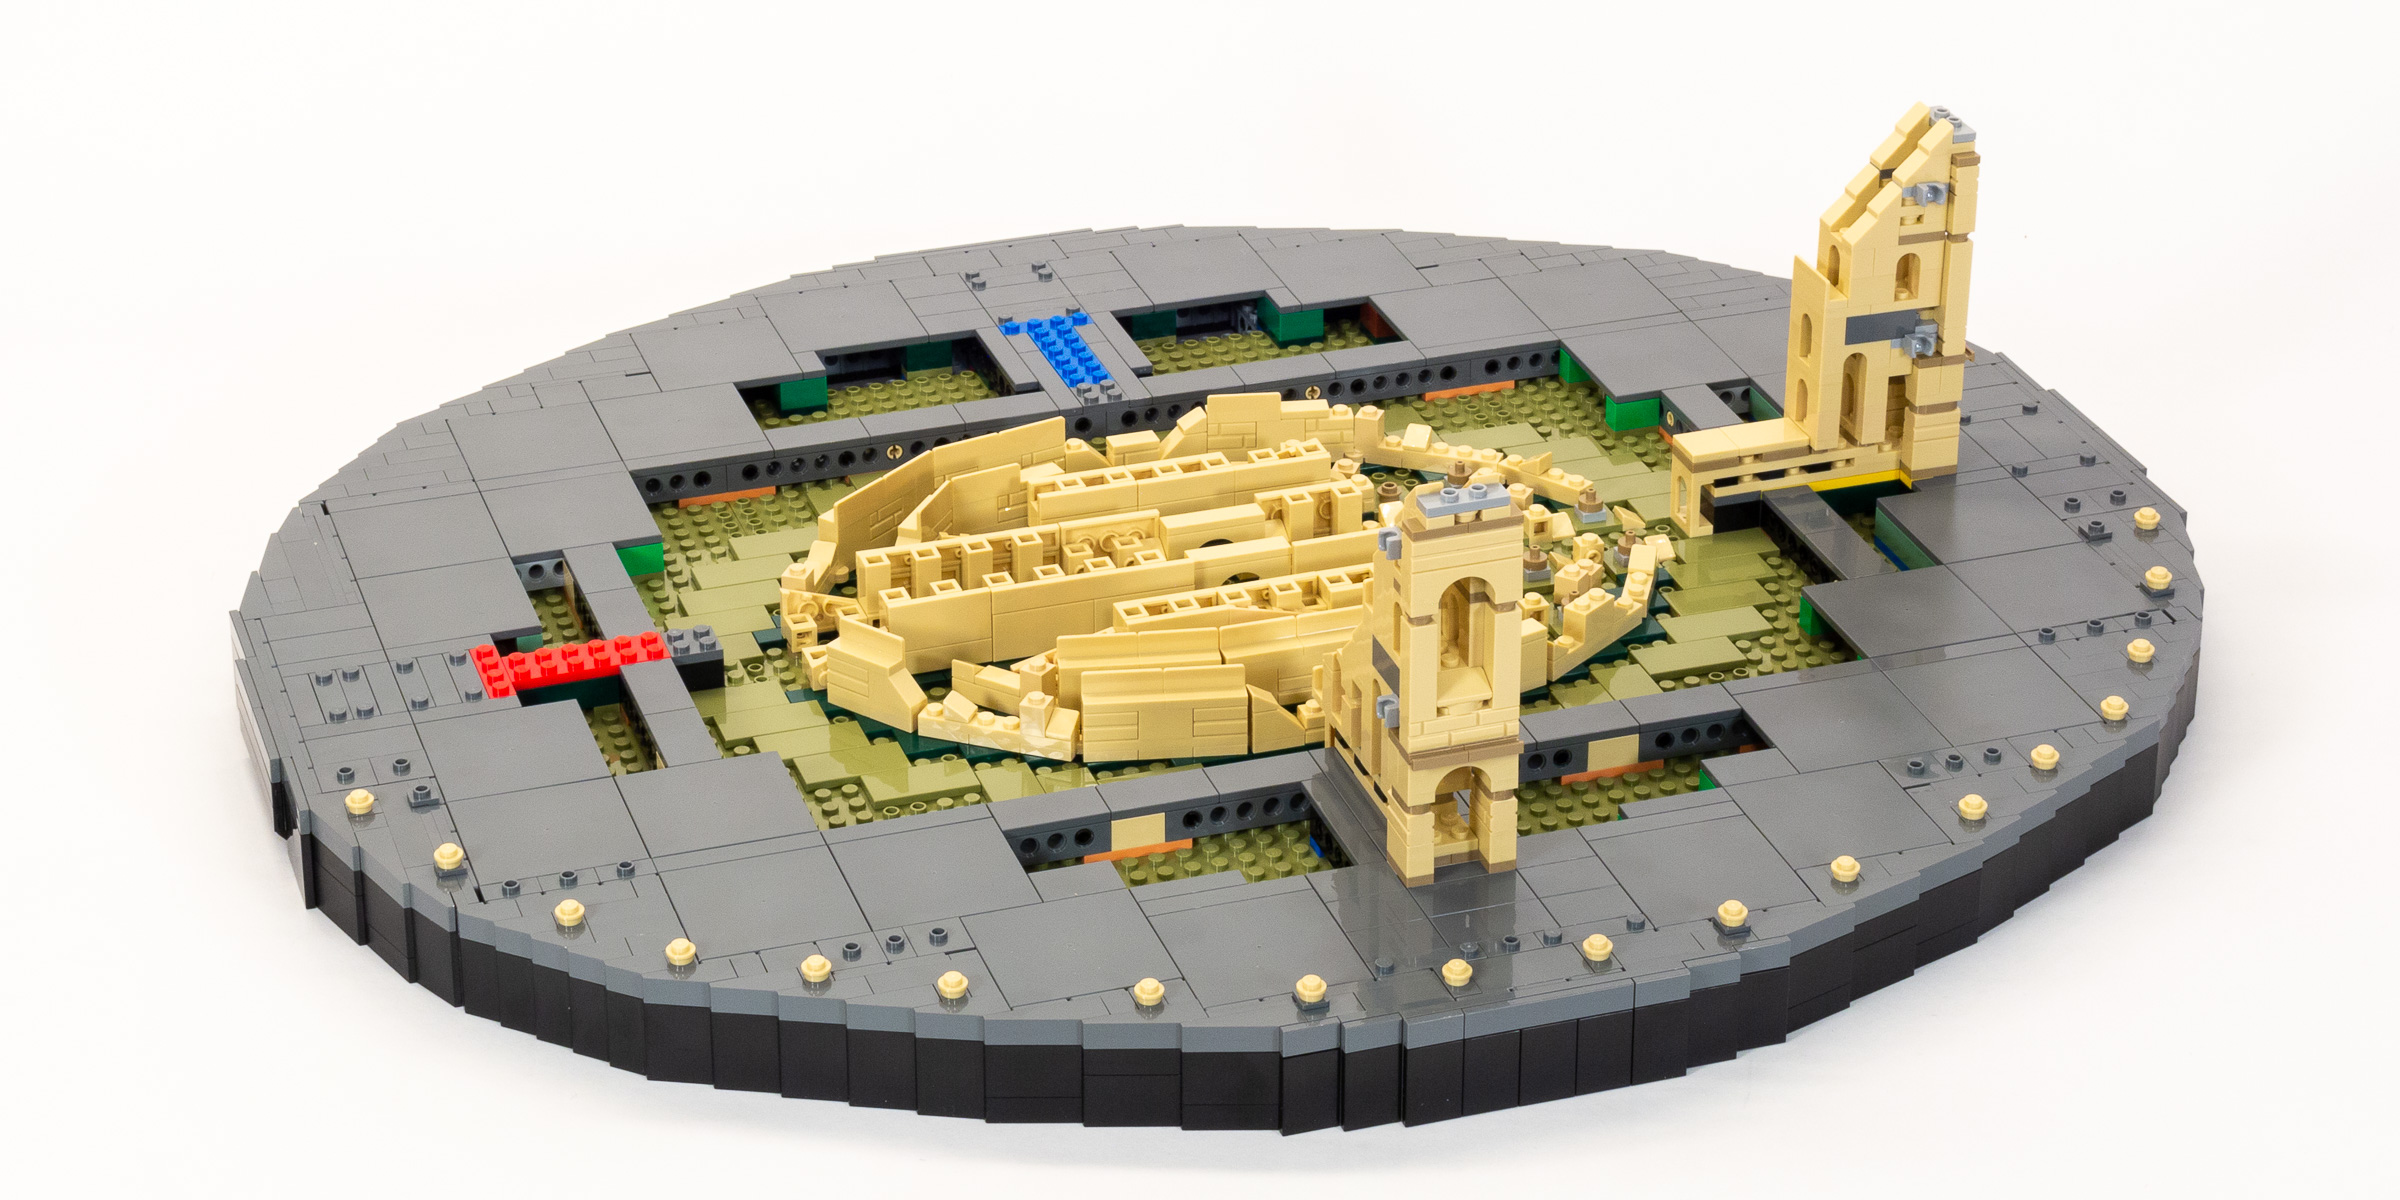
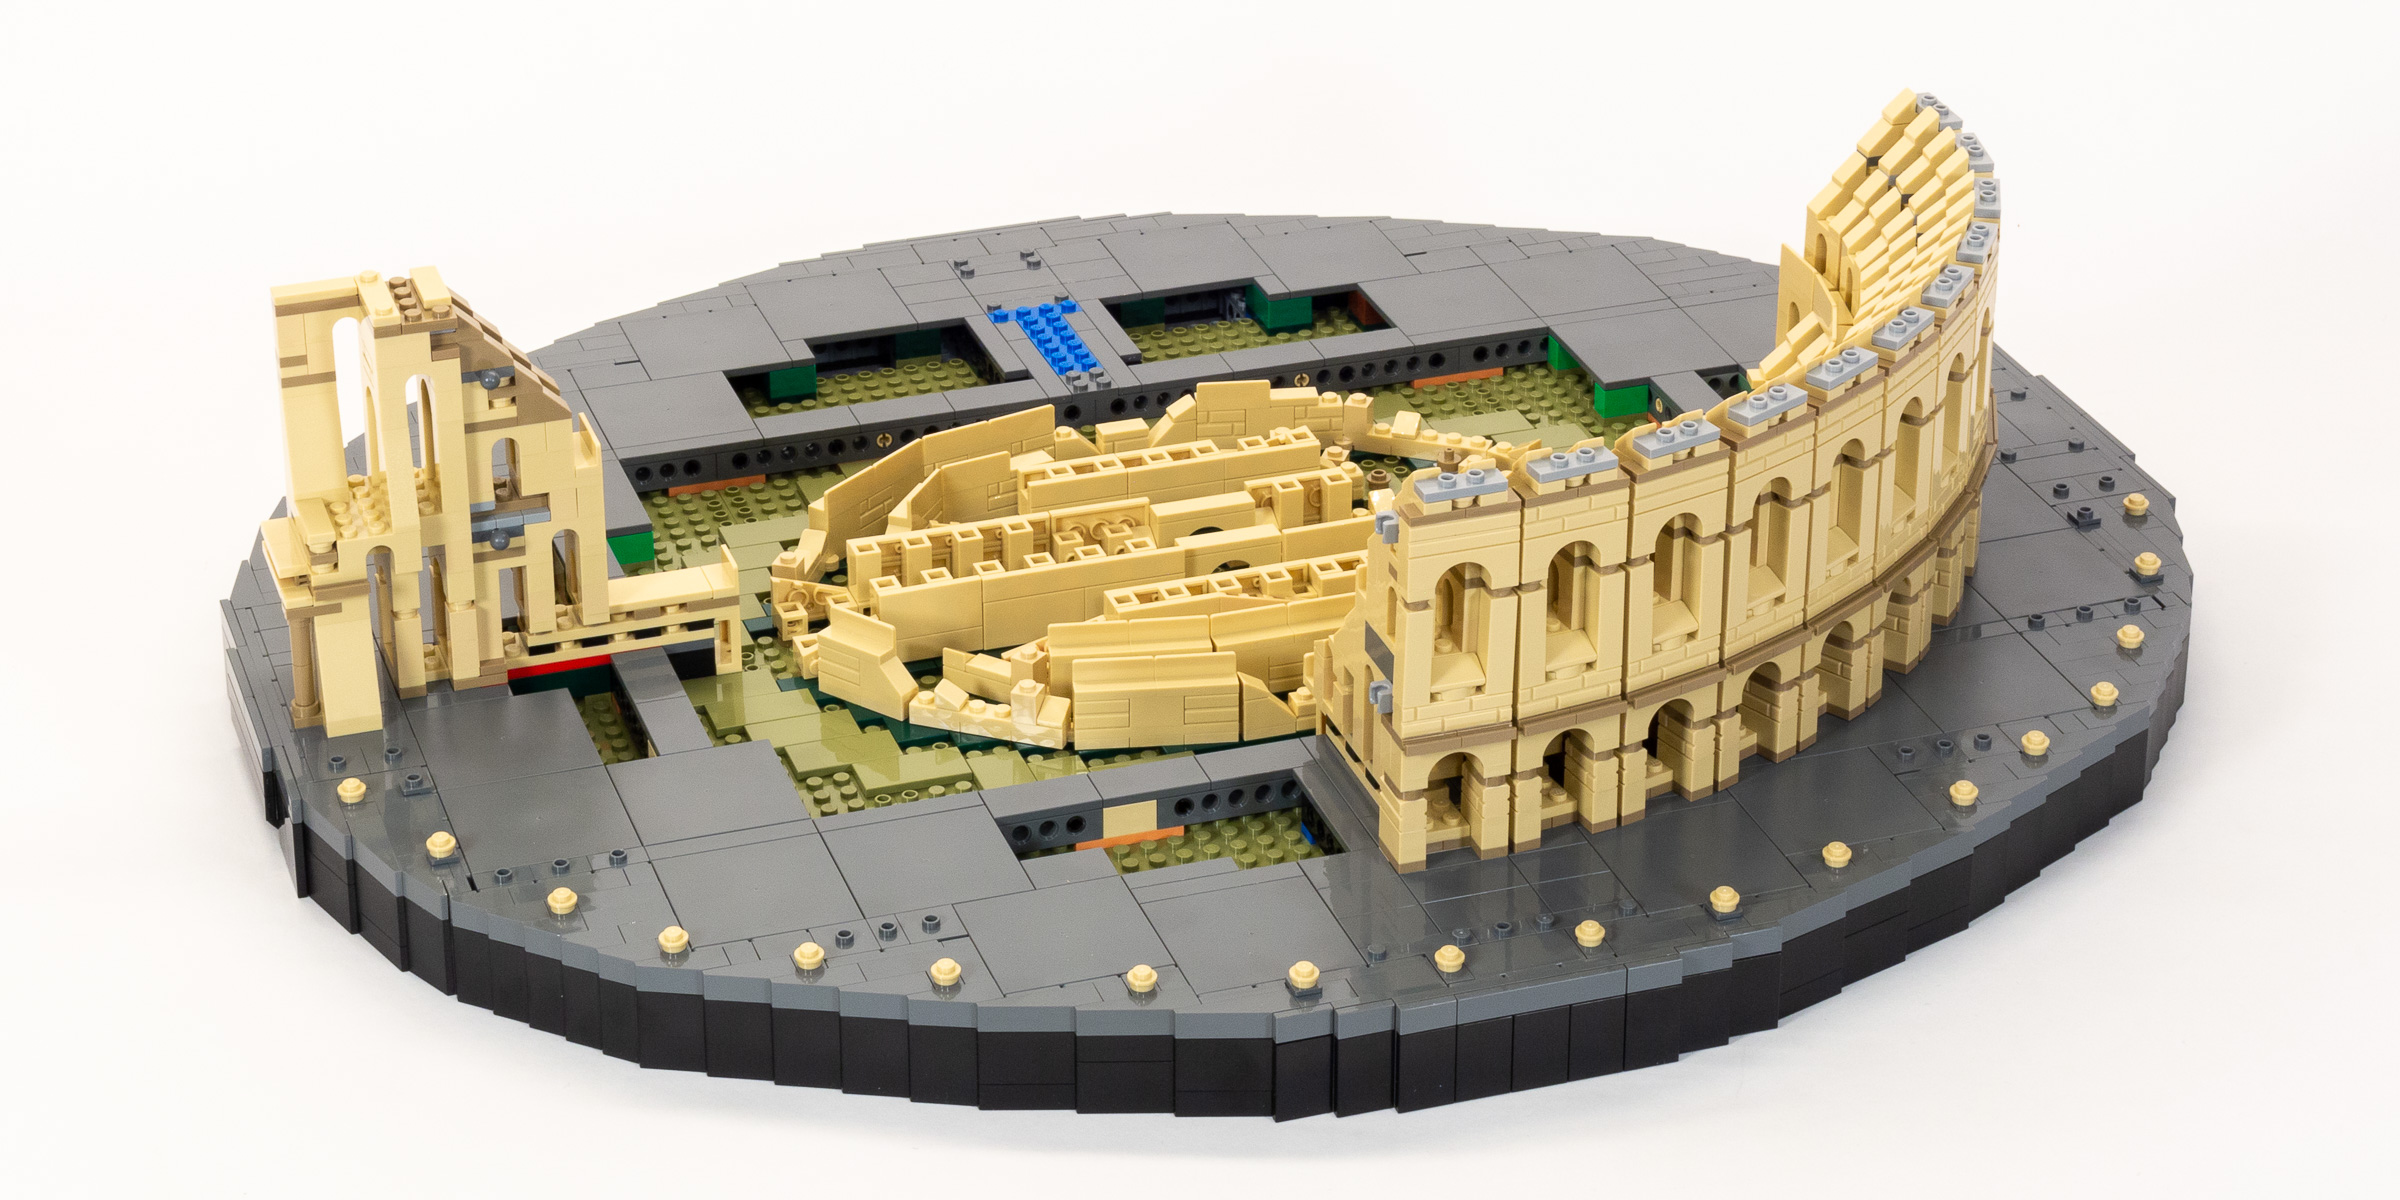
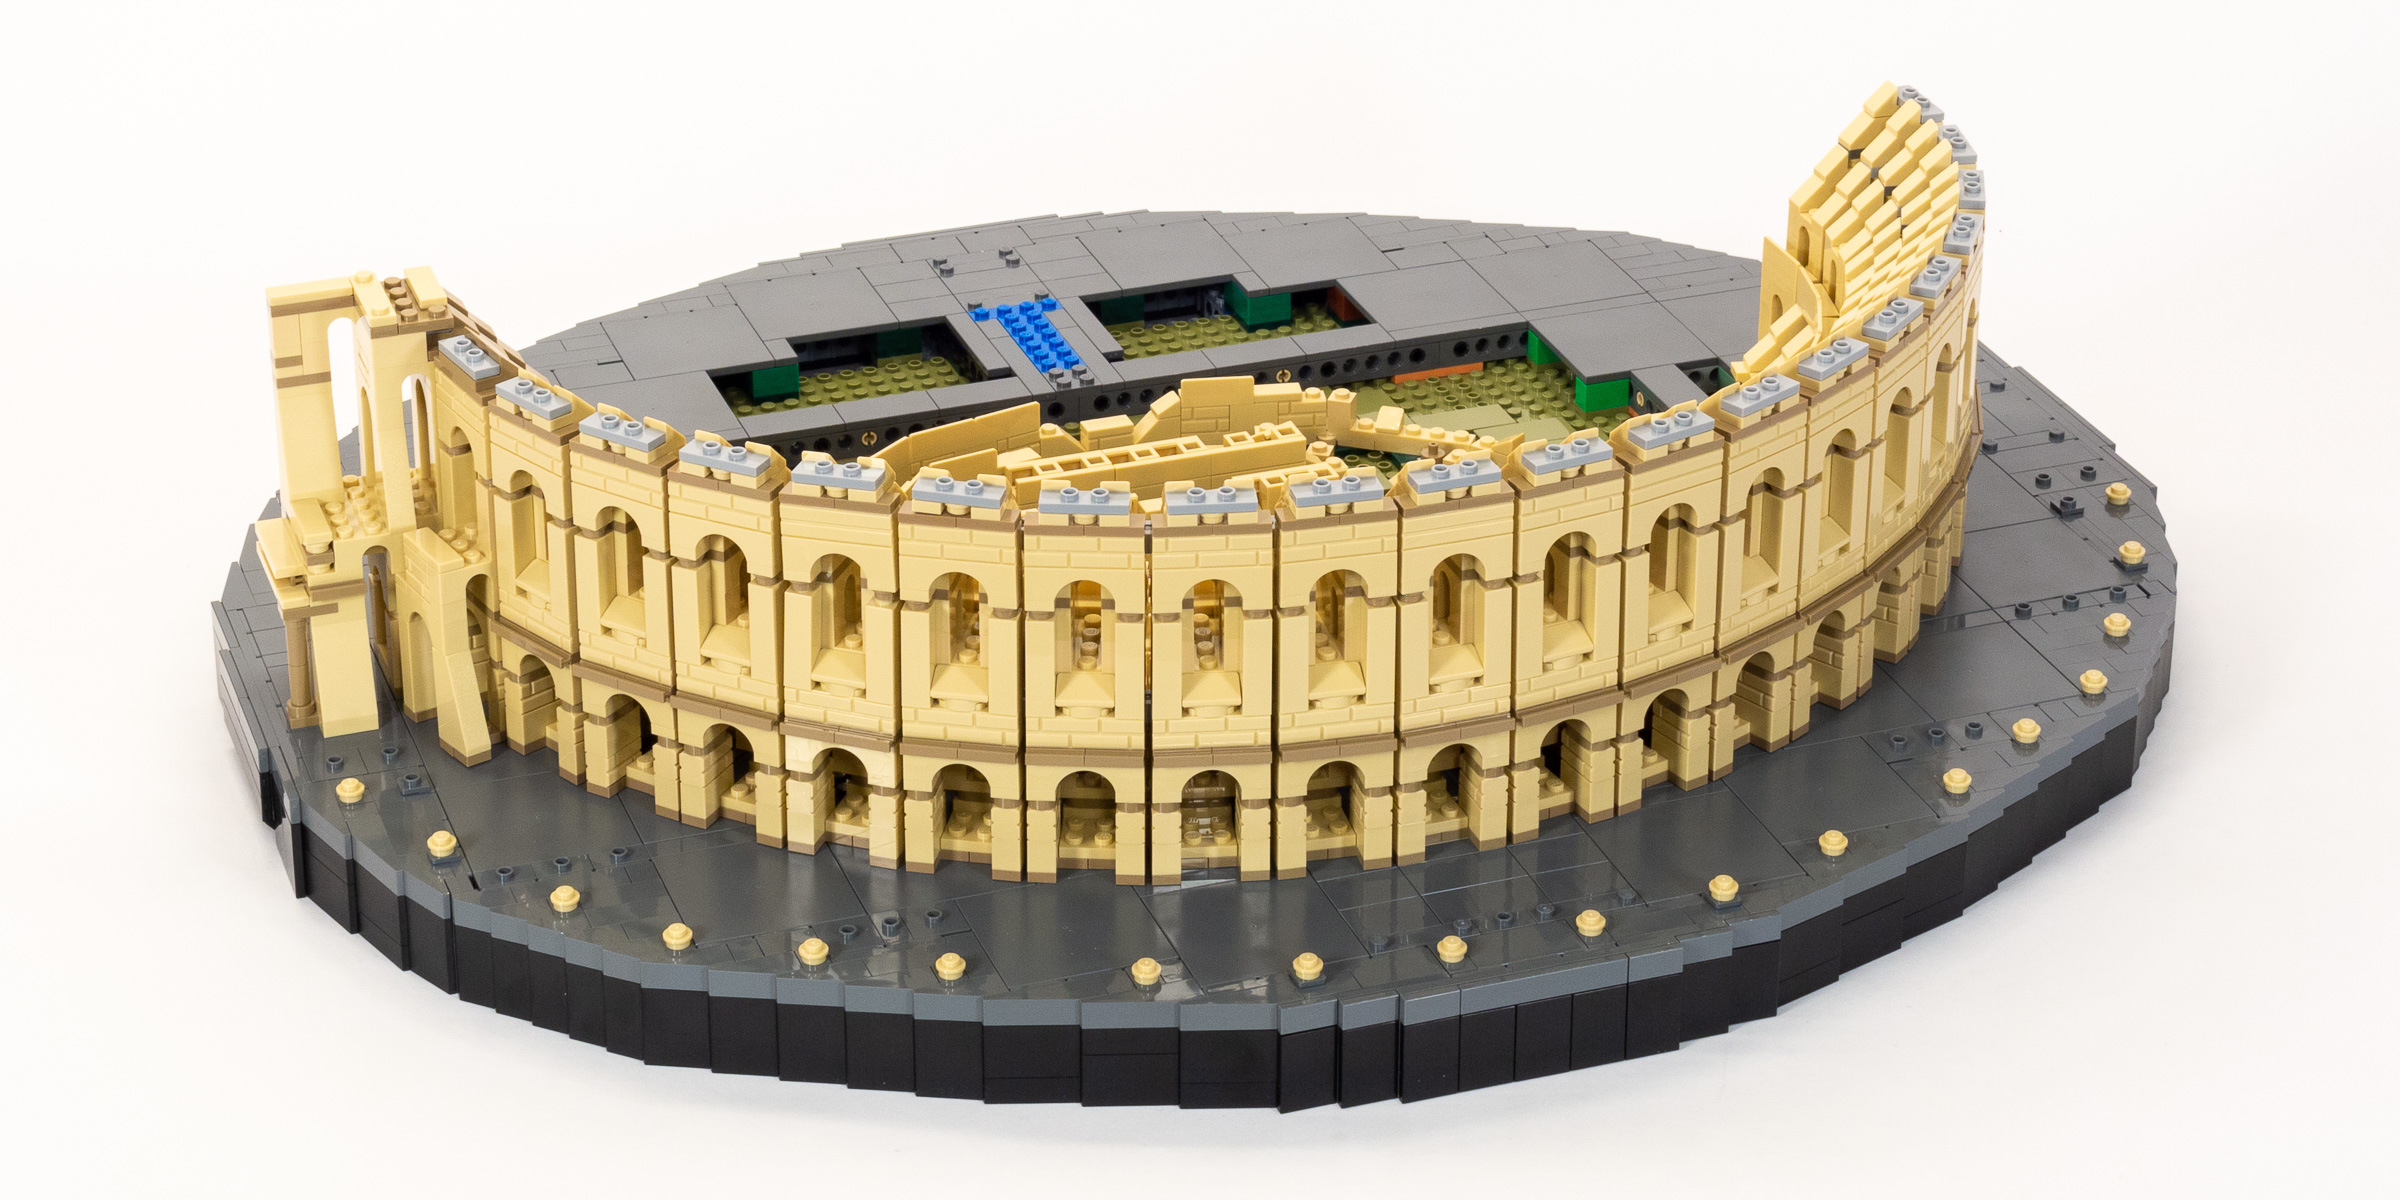
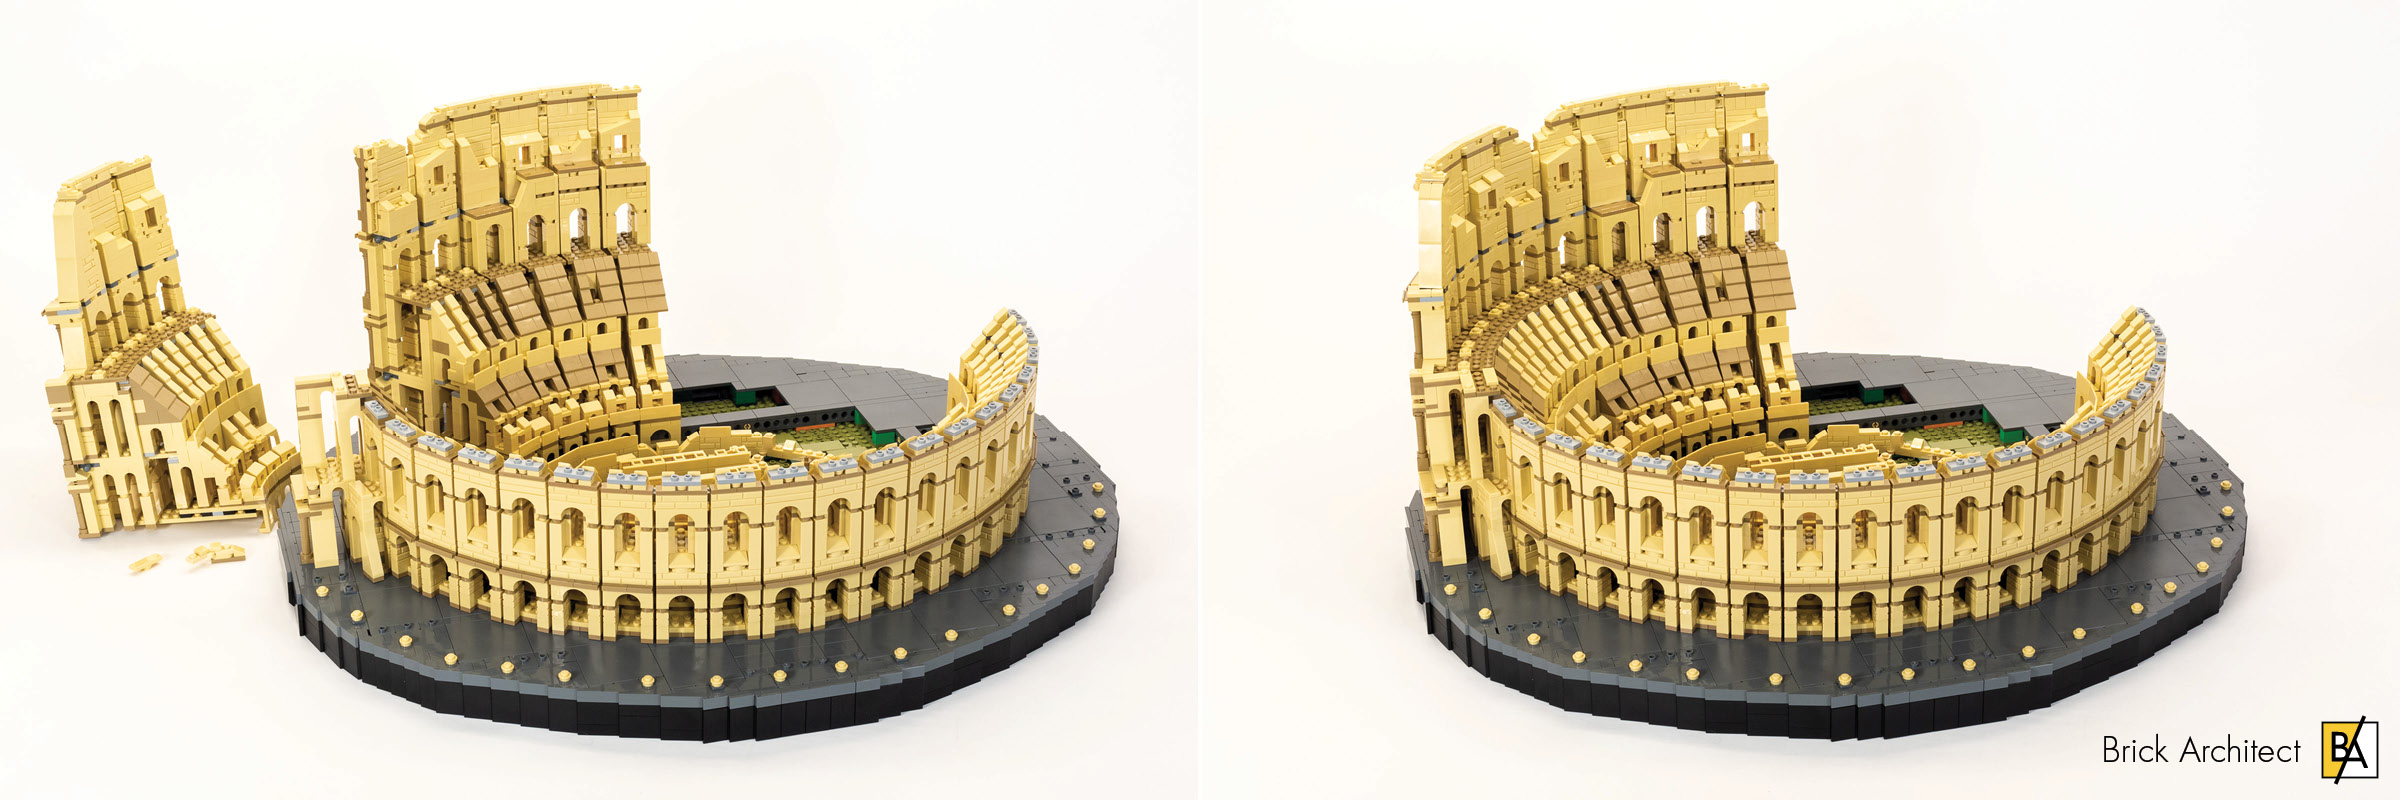
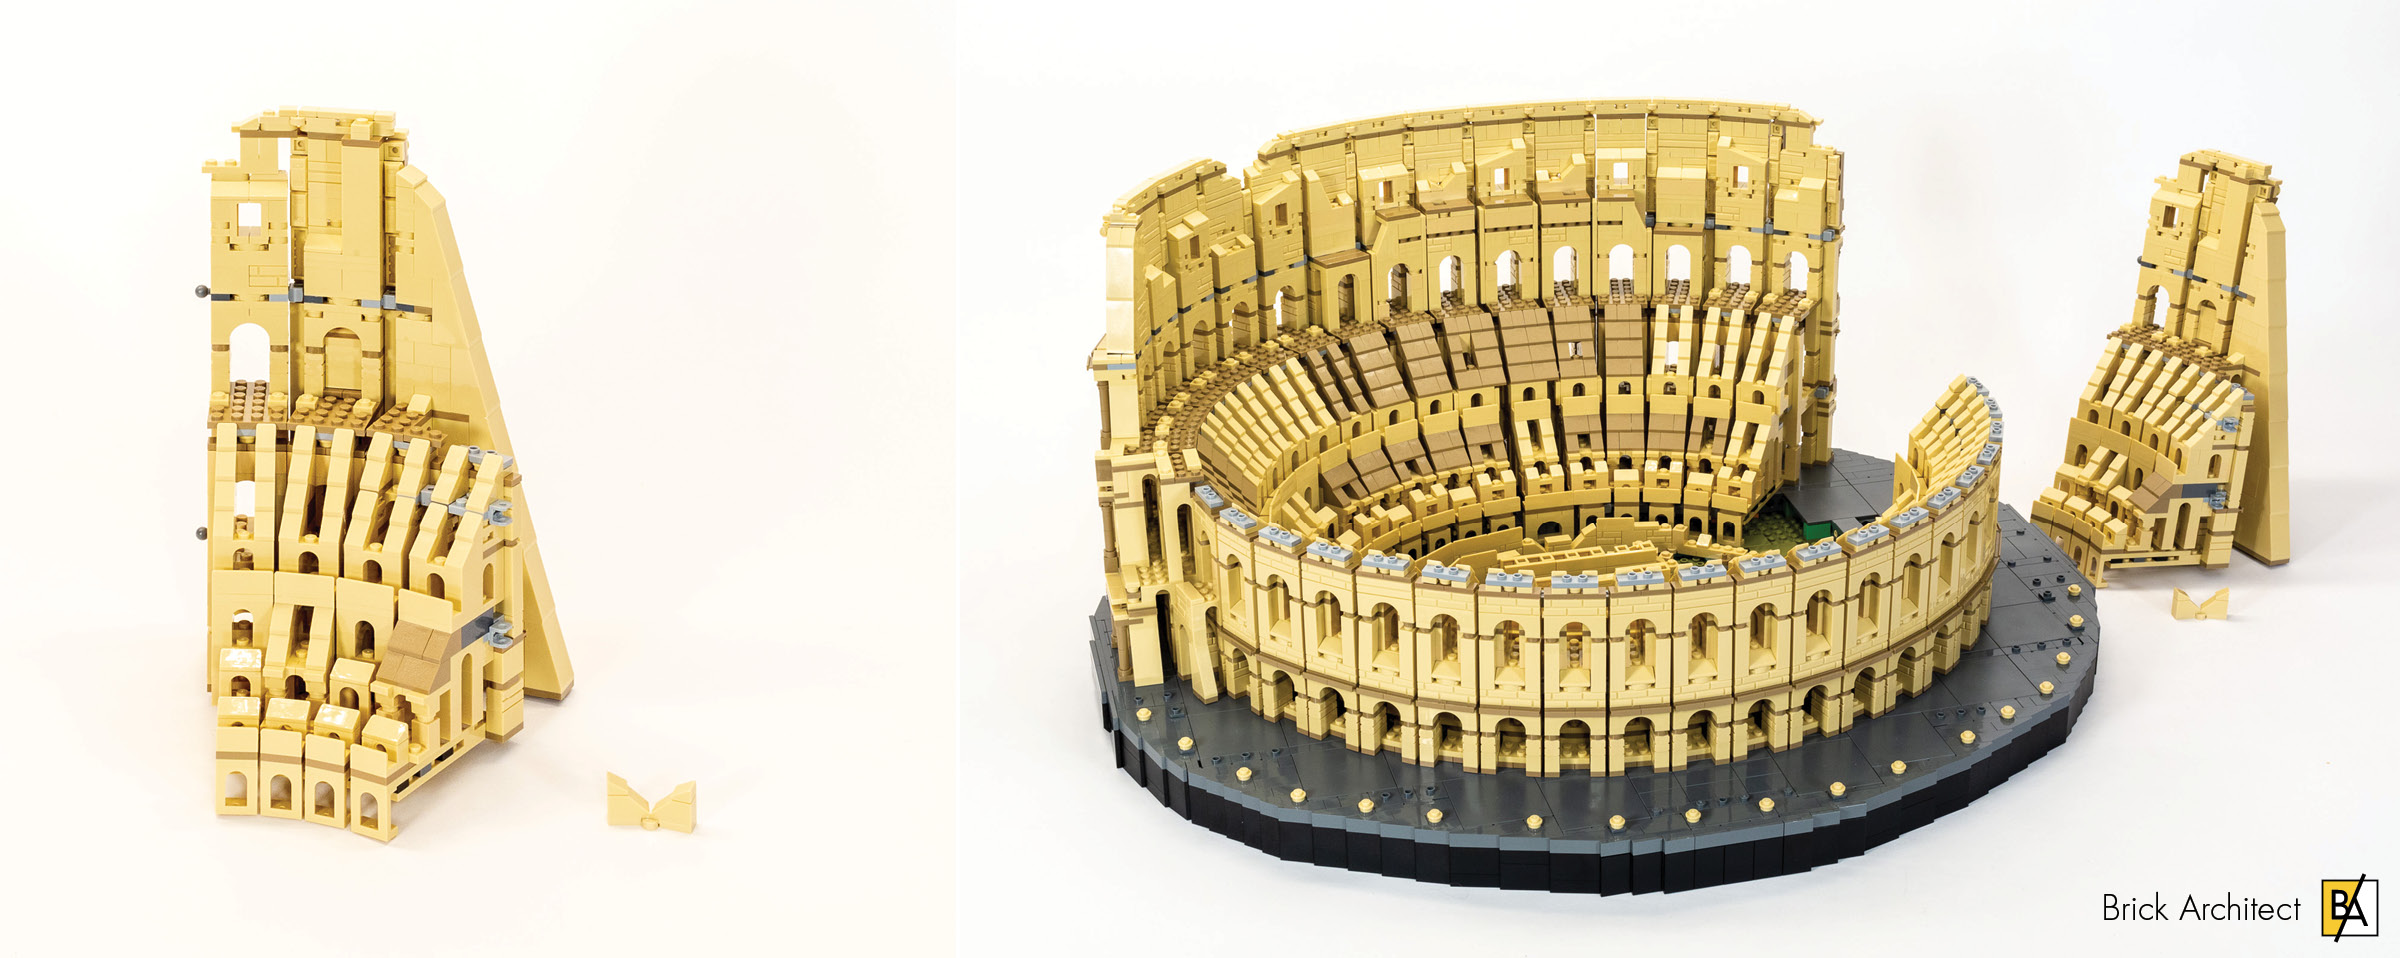
#10276 Colosseum – Finished Model!
Afterwards, we assemble a removeable module that covers the east side of the Colosseum floor. This is a modern addition to provide a viewing platform that covers part of the hypogeum (the tunnels beneath the floor which housed animals and slaves which was added after they decided to stop using the Colosseum to host naval battles.)
Build time. Stage 39: 20 minutes, Stage 40: 25 minutes.
New Parts
We already talked about the great price-per-part with the set, but haven’t had a chance to talk about the parts themselves. The first important note is that there aren’t any new printed parts, because the set doesn’t use any printed parts or stickers whatsoever! All of the detailing is achieved using LEGO parts themselves (which as a LEGO purist of sorts, I really appreciate).
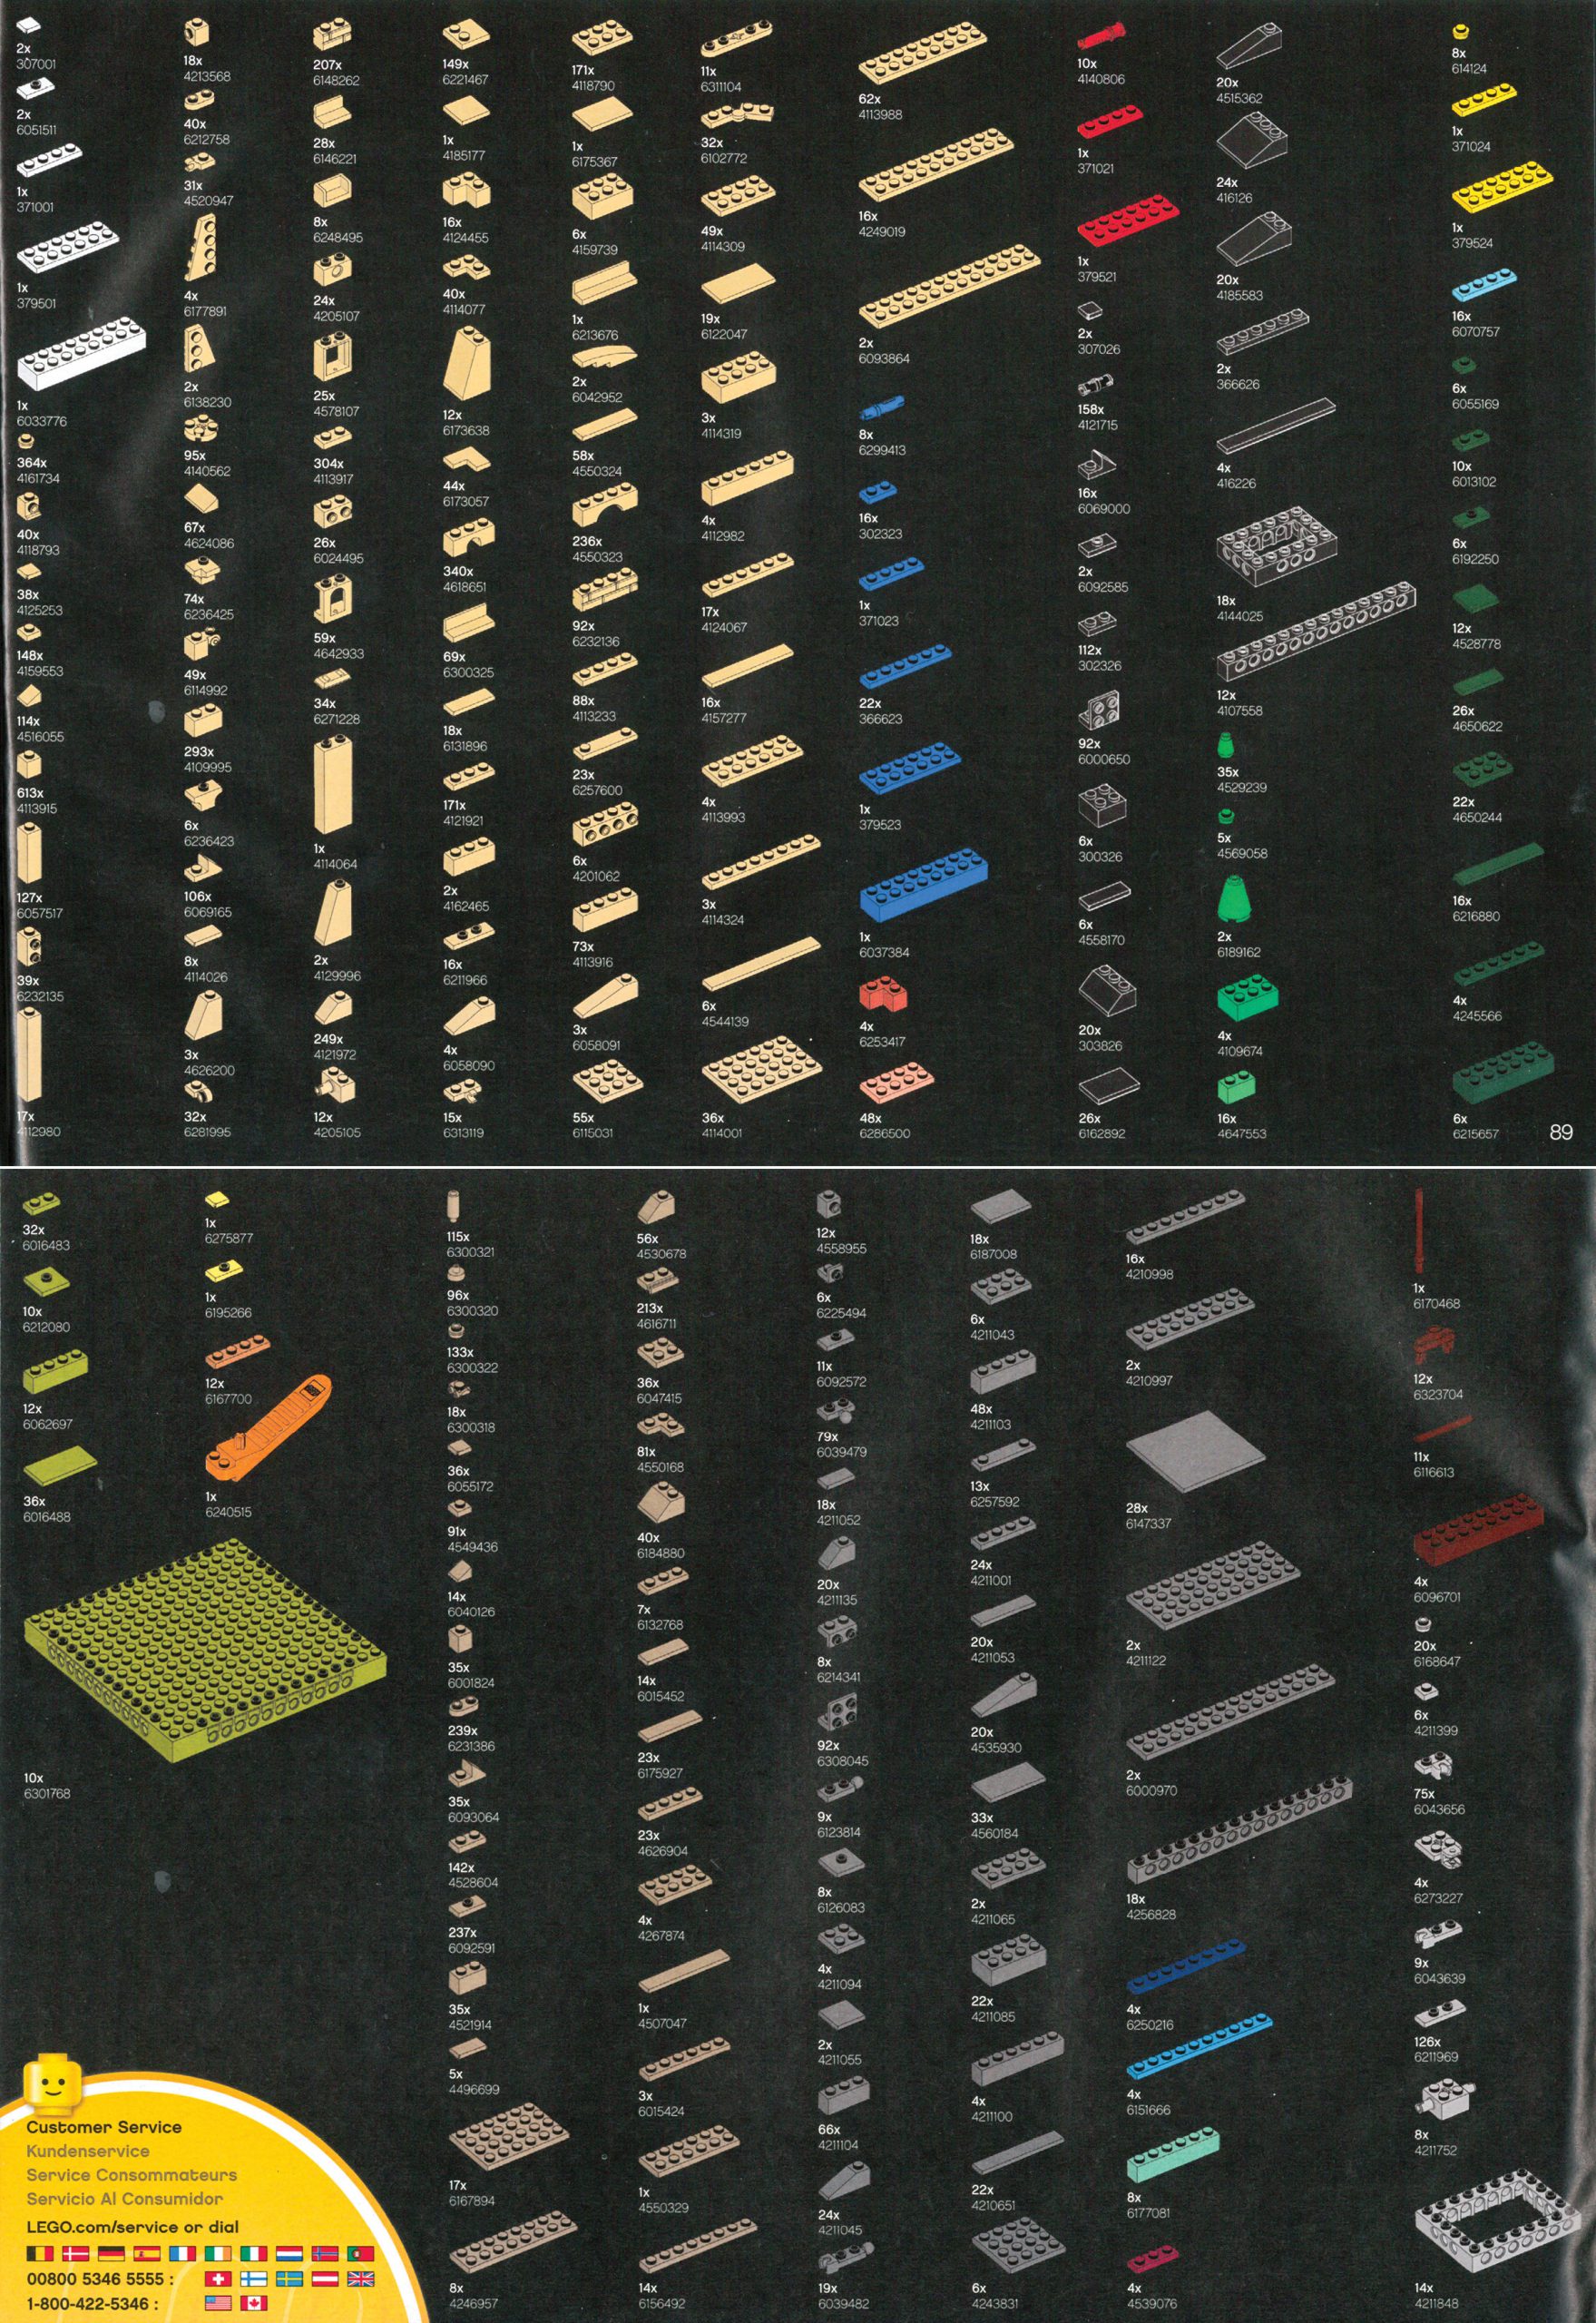
Scanned partlist reveals only 220 unique parts in the 9039 piece set.
Existing parts in new colors
While there are no new parts (moulds) in this set, I’m pleased to report that you will get some highly-sought existing parts in new colors. Here are the elements that I’ve identified so far!
- 10x – 16×16×1 1/3 (part 65803) in 330Olive Green.
This is the first time that this part was used outside of the new LEGO Art series. - 69x – 1×3×1 Panel (part 23950) in 5Brick YellowTan.
- 115x – Candlestick (part 37762) in 138Sand YellowDark Tan.
- 96x – 1× 1 w/ Pin (part 20482) in 138Sand YellowDark Tan.
- 18x – Roller Skate (part 11253) in 138Sand YellowDark Tan.
While that’s hardly an overabundance of recolors, it’s always great to see versatile parts becoming available in versatile colors like 138Sand YellowDark Tan.
More like this?

Subscribe to the Brick Architect newsletter for early access to exclusive content, the latest articles, and updates to the Printable LEGO Brick Labels, LEGO Storage Guide, and my book The LEGO Architect.
Conclusion
After 14½ hours of building, not to mention time spent researching, photographing, writing and editing this article, I’m eager to share my thoughts on the largest LEGO set ever produced!
Size
The most important thing to understand before embarking on this project is that it is quite repetitive, with a total of fourty wedge-shaped modules creating a very close approximation of the building’s elliptical shape.
This is not a criticism, so much as a statement of fact. It’s important to consider whether this is appealing to you or not before buying the set. Most folks will probably want to take their time with a project like this, building one or two bags each evening to unwind. I’m sure there will also be plenty of folks who race through the build as fast as they can. (I built it across 7 days, the fastest I could accomplish with a day job and a toddler.)
While there are some exhaustingly long and repetitive parts, the moments when you attach an assembly that took several hours to build to the base are extremely satisfying, and leave you wanting to build more.
Detailing
Overall, the mix of light and dark tan colors were effective at creating a weathering effect. The extensive use of SNOT and other techniques created believable ruins. And the impressively effective elliptical shape was created using just Mixel joints, with most attachments including not just 2 but 3e joints for a rigid connection.

#10276 Colosseum in a nice clean room with no two-year-olds. (Photo: The LEGO Group)
Closing Thoughts
#10276 Colosseum earns our “Excellent” (4/5 star) rating for the target audience of Adult Fans who are willing to spend a huge amount of time and money to create an impressive display piece. That said, this is a very different building experience from sets in the LEGO Architecture series which, while also repetitive at times, can usually be completed in a single one or two-hour session.
One of the main things that keep it from being even better include the awkward stopping points for each box which make it harder to set aside for a few days before returning to the project. I also have to admit that it does get a bit boring at times, especially when building the seventh of nine nearly identical assemblies, and being unable to really see your progress until the giant module is complete.
Loved this review, Tom!
I was actually building the set while reading this (opened bag 6 – started reading the bit about stage 6) and I loved it (both the review and the set itself)
:3
Thanks for the timely review Tom ! I can’t wait to buy and build this — thought I was going to build some bookshelves and office fix-ups during the Christmas break — but I’ll be building the Colosseum ! I’ll put this right next to my Wange Colosseum — but the Lego one will provide a much more substantial presence !
That was a fantastic read Tom. Appreciate the time and effort put into writing it. I don’t think this model is for me, but I do truly appreciate your insight. I felt like I was part of the process reading this article!
I’m glad you enjoyed the review… Yes, my goal was to give folks enough of a window into the build process to decide for themselves if they should add it to their collection. Glad I could help!
Great review! What are the dimensions of the finished model?
Thanks for asking. It’s mentioned in the section for Stage 6, but since you are the second person to ask, I’m going to put this information in a more prominent place in the article.
The oval base measures 59.4×52.7 cm (23 3/8” × 20 ¾”)
Fantastic article and review. Looking forward to actually getting this and building it myself.