
Review: Taliesin West (The Atom Brick)
The second of three new architecture sets by The Atom Brick (using ¾ sized LEGO-like bricks), this model explores the more complex geometries from a latter period of Frank Lloyd Wright’s career.
The bulk of this review focuses on the model itself, comparing it to sets from the official LEGO Architecture series. Along the way, I will touch on things that make this set different from an official LEGO set, such as the packaging and design, and the smaller ¾-sized bricks which are manufactured by a company called LOZ. (Learn more about LOZ bricks in our previous article Three new models by LEGO Architecture founder Adam Reed Tucker).
About the set
The Taliesin West set by The Atom Brick costs $134.99 for 1763 pieces. That’s just under $0.08 per piece, which would be a good price for genuine LEGO bricks (but remember that this set contains ¾-sized bricks that are not produced by LEGO and are not LEGO compatible.)
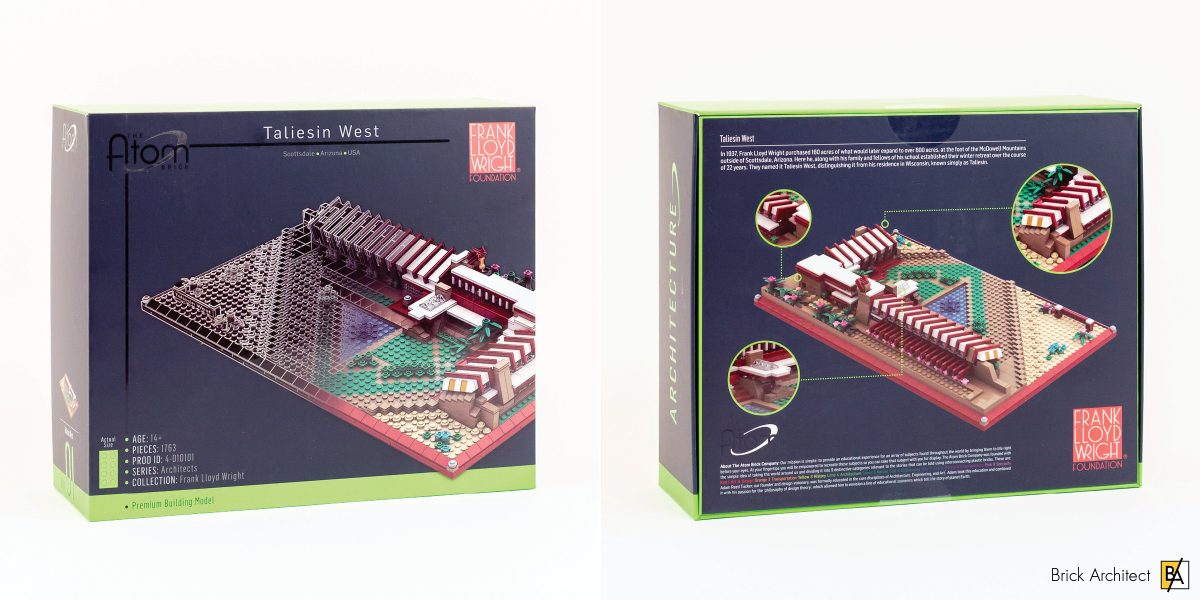
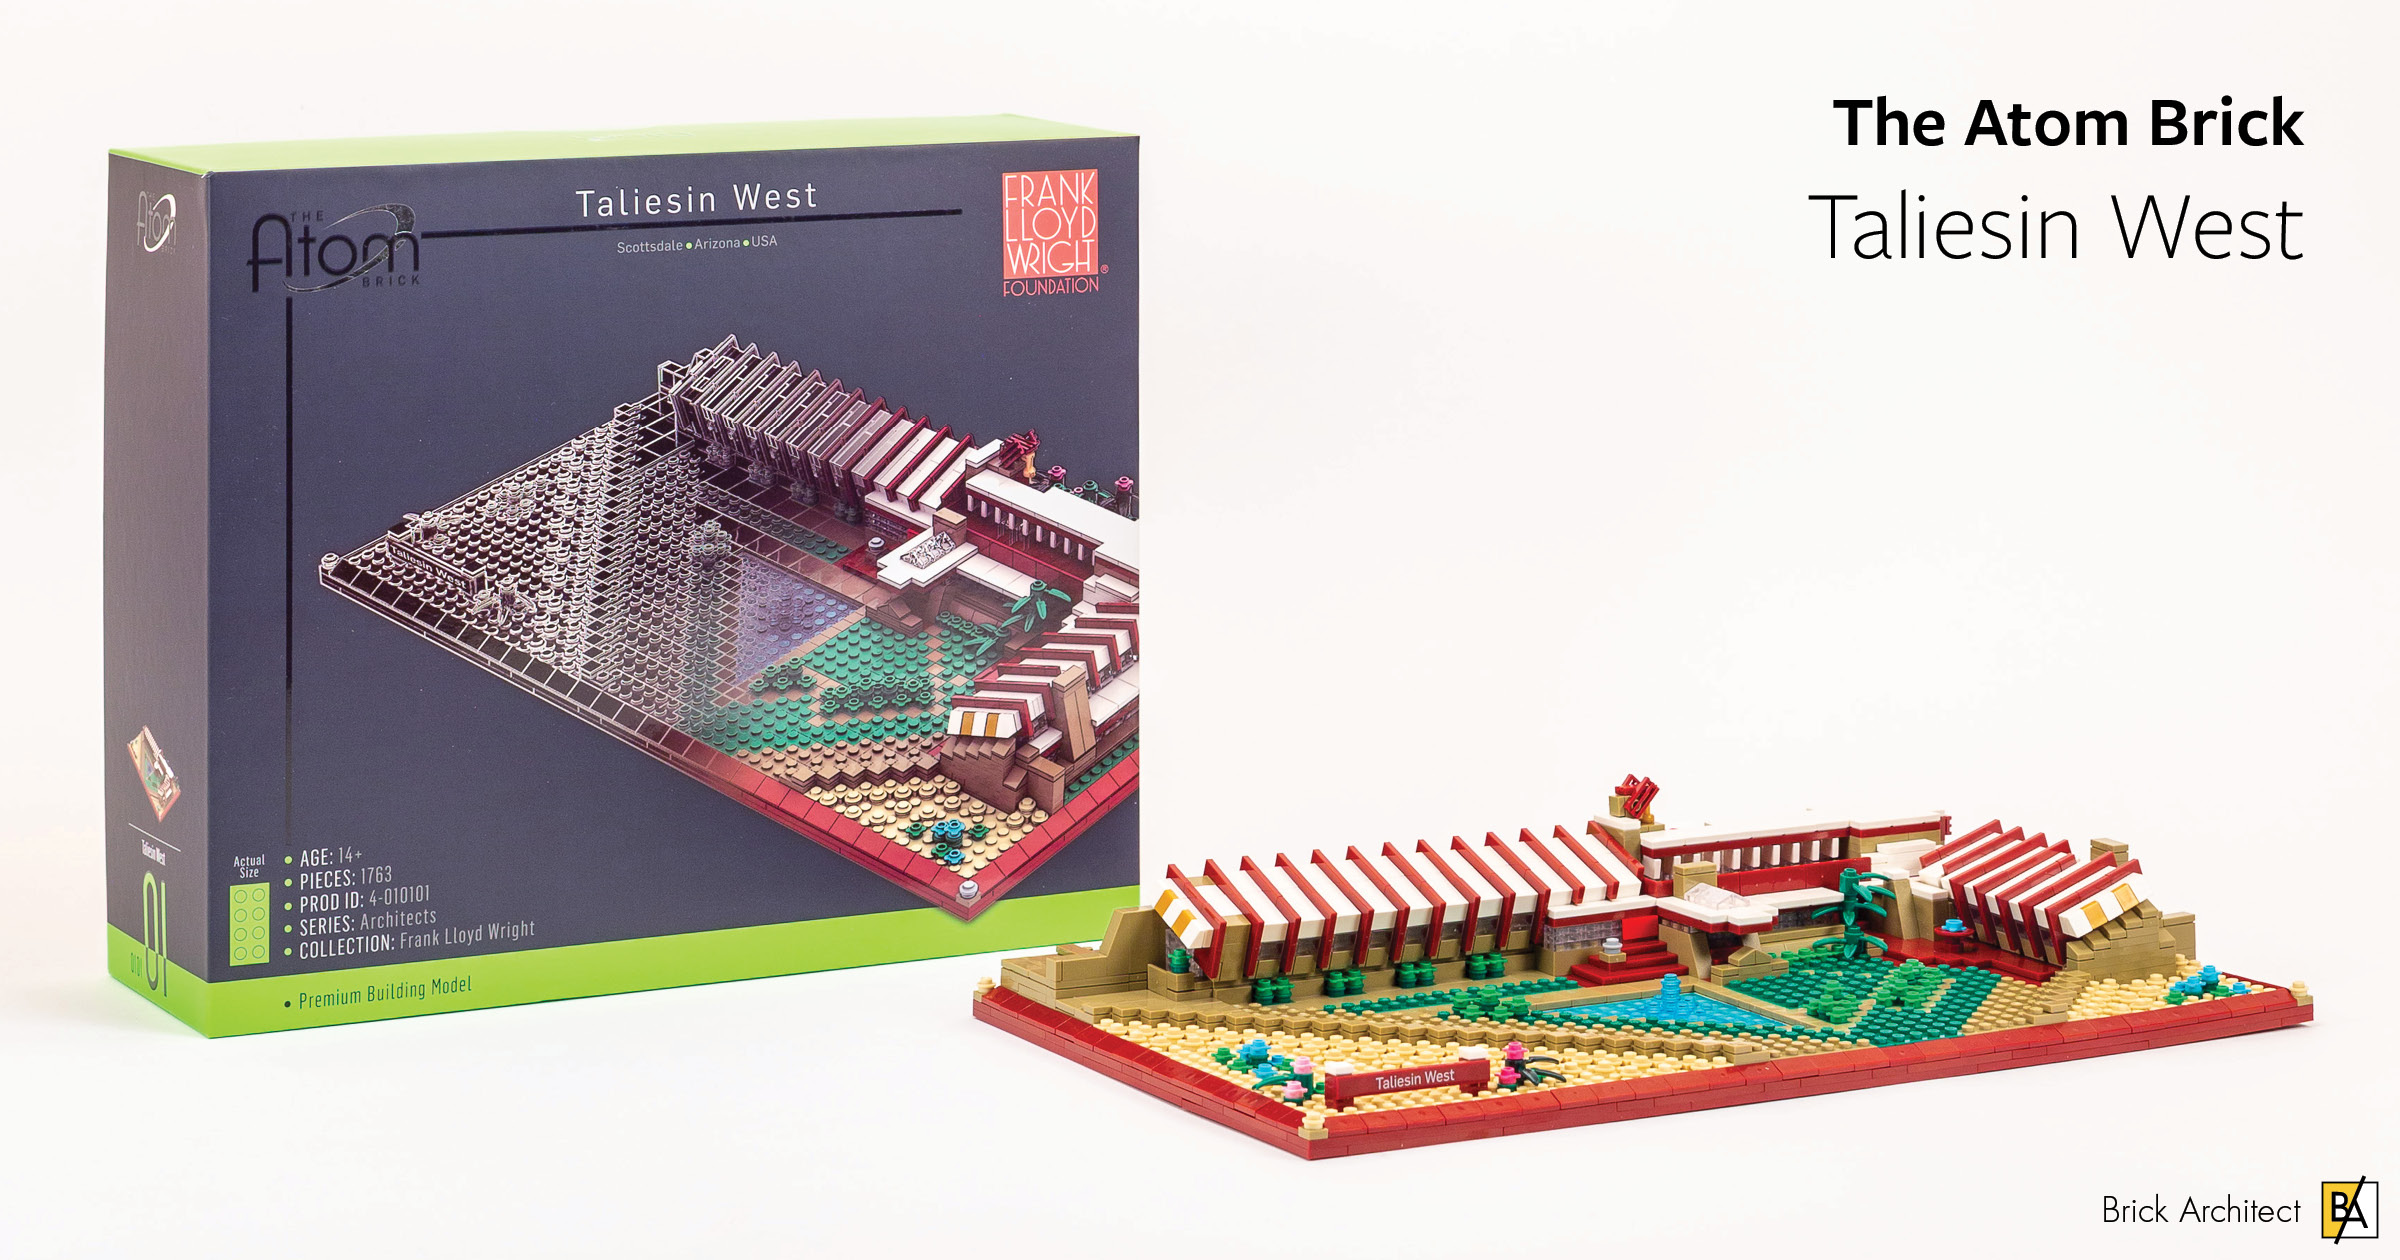
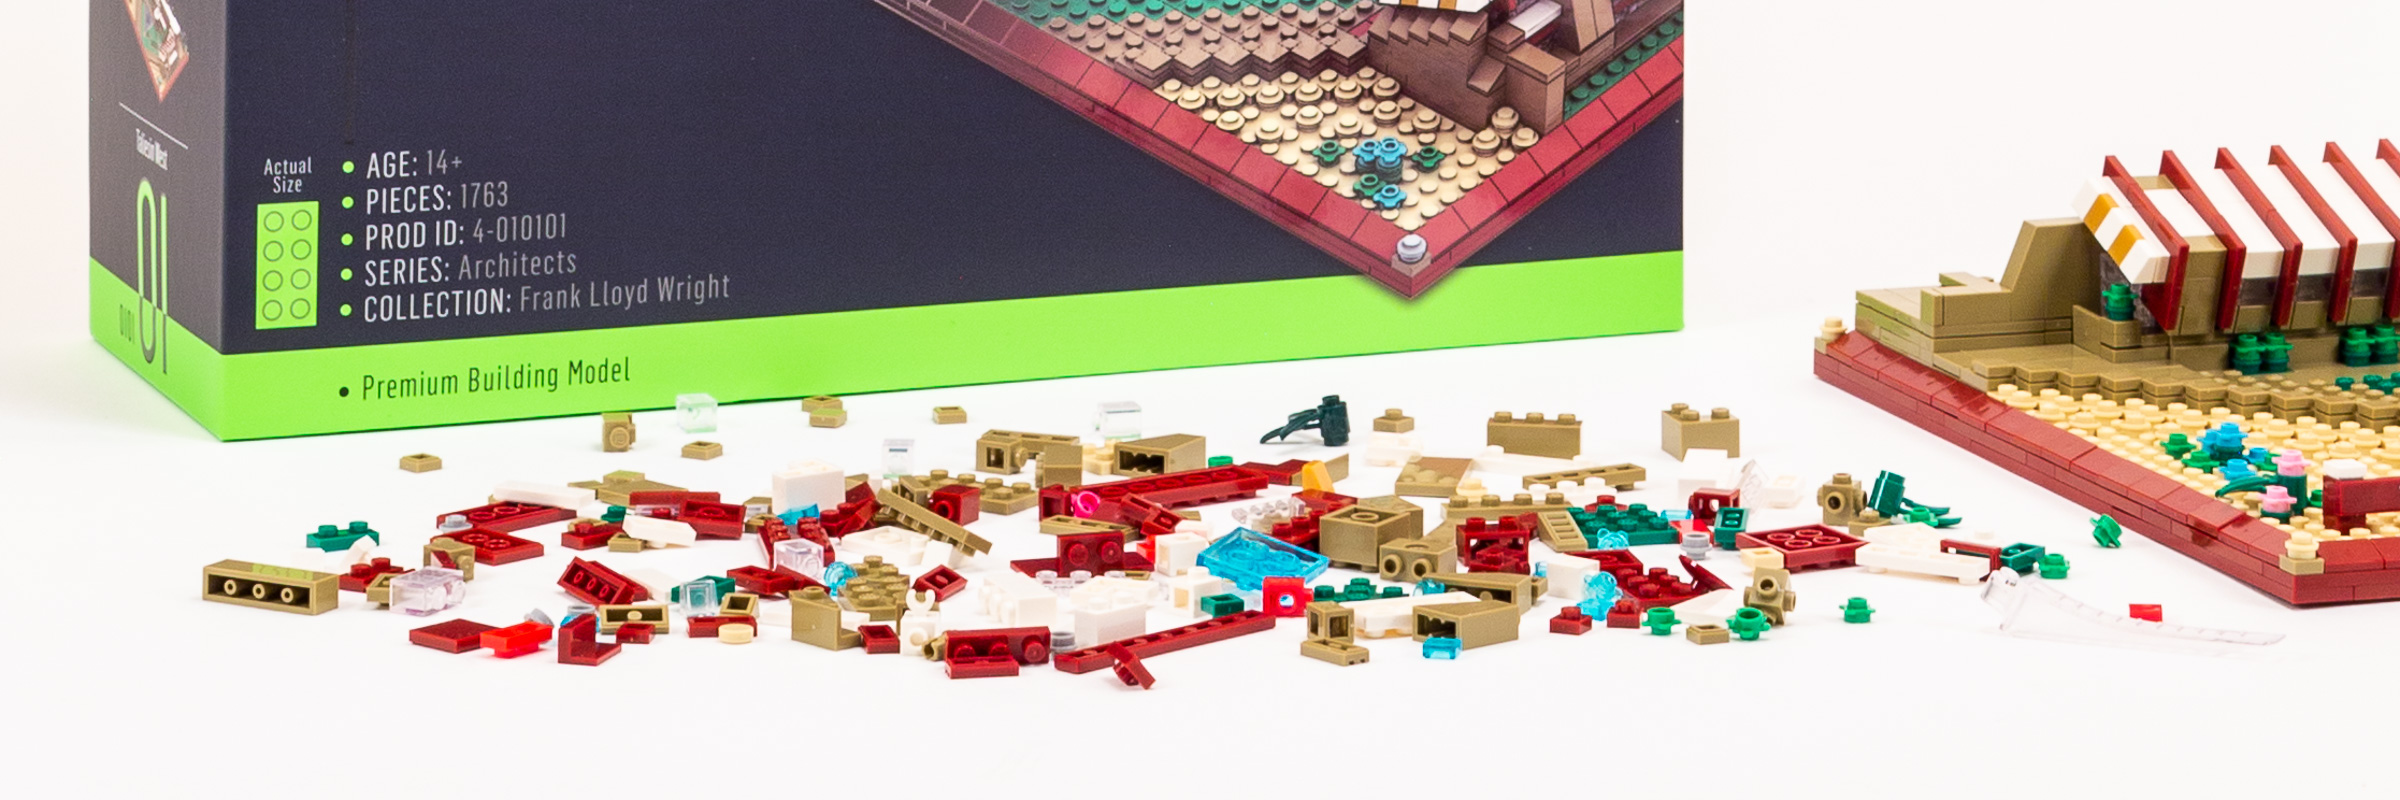
Taliesin West, by The Atom Brick – Box Cover.
Of the three new sets by The Atom Brick, this model of Taliesin West is the one that captured my imagination most. (While I have seen more than 50 Wright buildings (and taken tours of 23 of them), I’ve sadly not yet visited Taliesin West.)
Build process
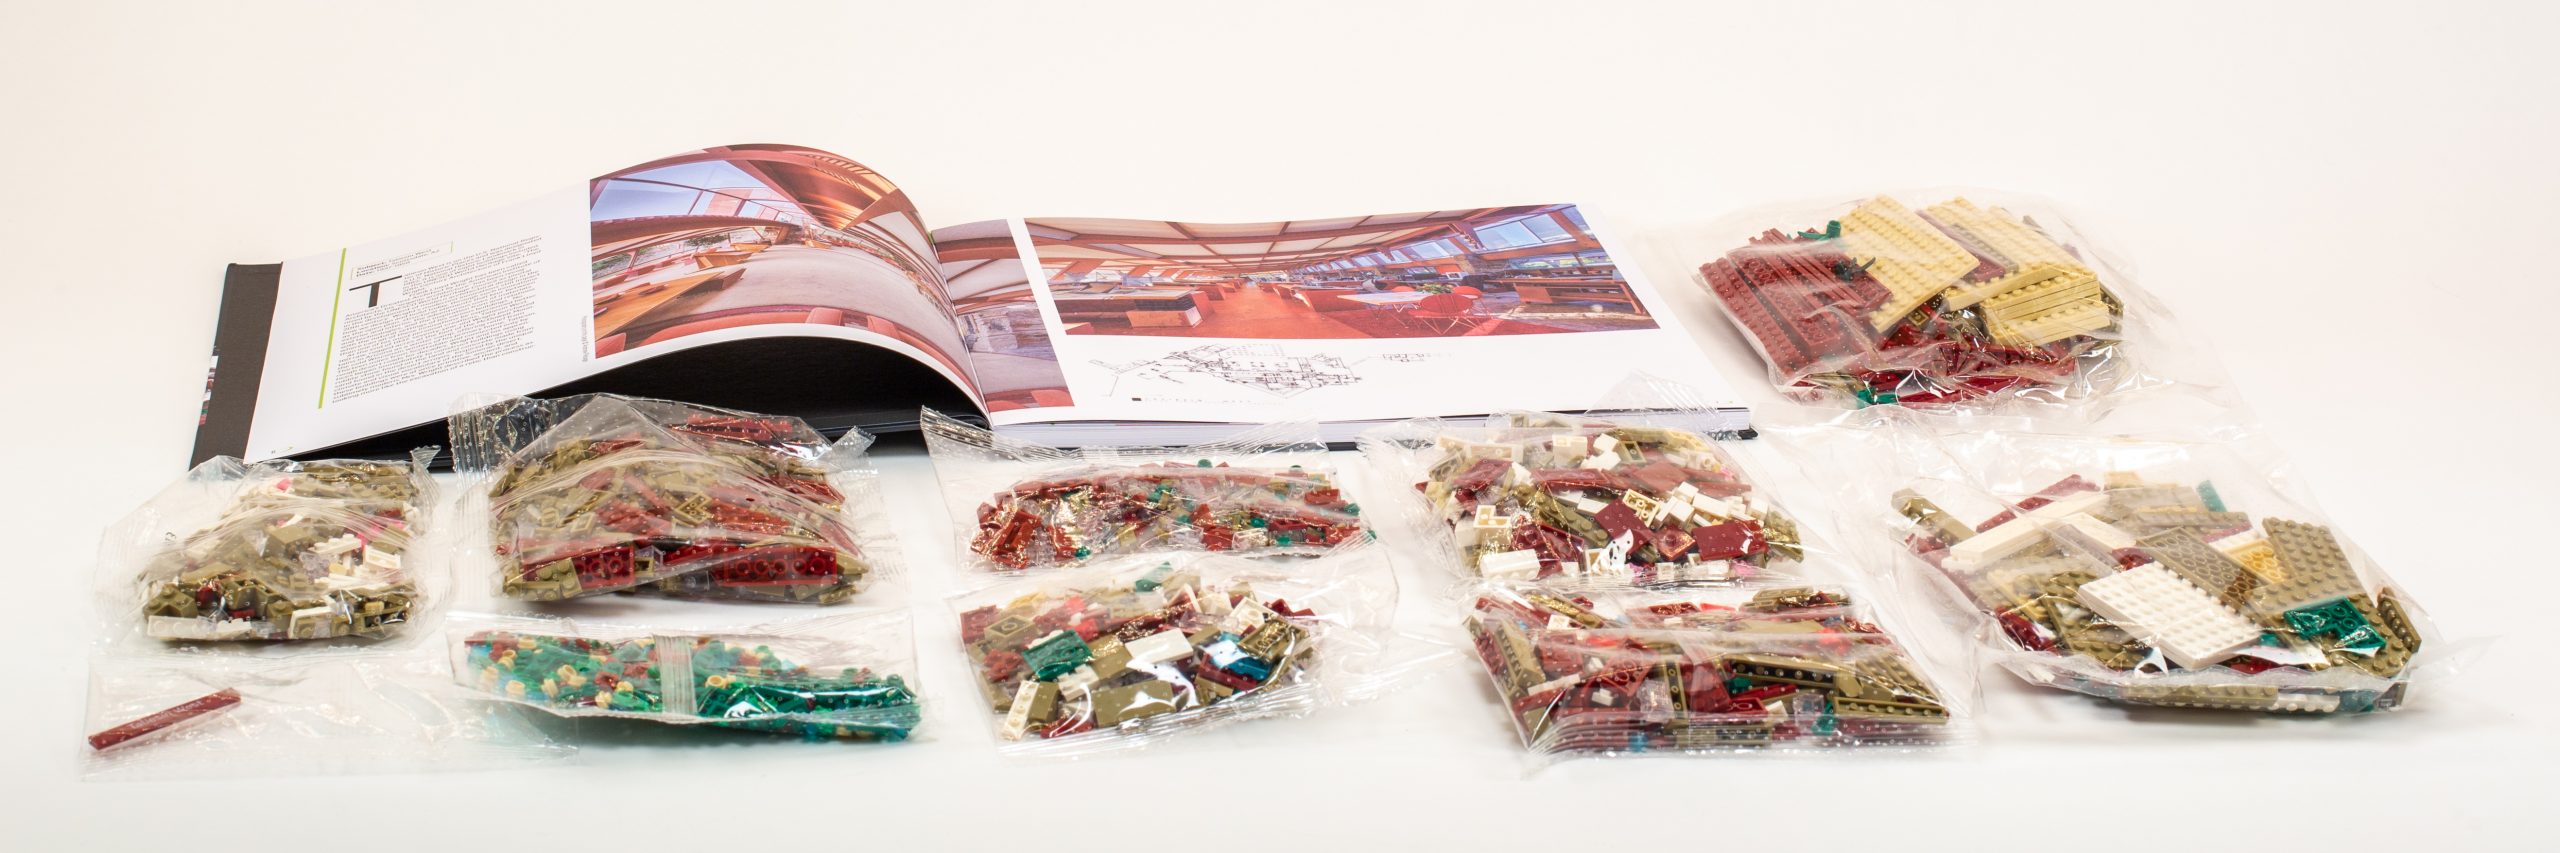
The set contains 10 bags of parts, but they aren’t numbered.
Base and fountain (Steps 1-13)
As we discovered in our review of Unity Temple set, the base of this model also begins by assembling a lattice of two layers of plate. The lattice is challenging to assemble for two reasons. The first issue is that the we need to carefully arrange the first layer of the lattice on the table, then connect all of the parts using a second layer of plate. This is easier said than done; I kept bumping the first layer of parts while attaching the second layer, causing everything to go out of alignment.
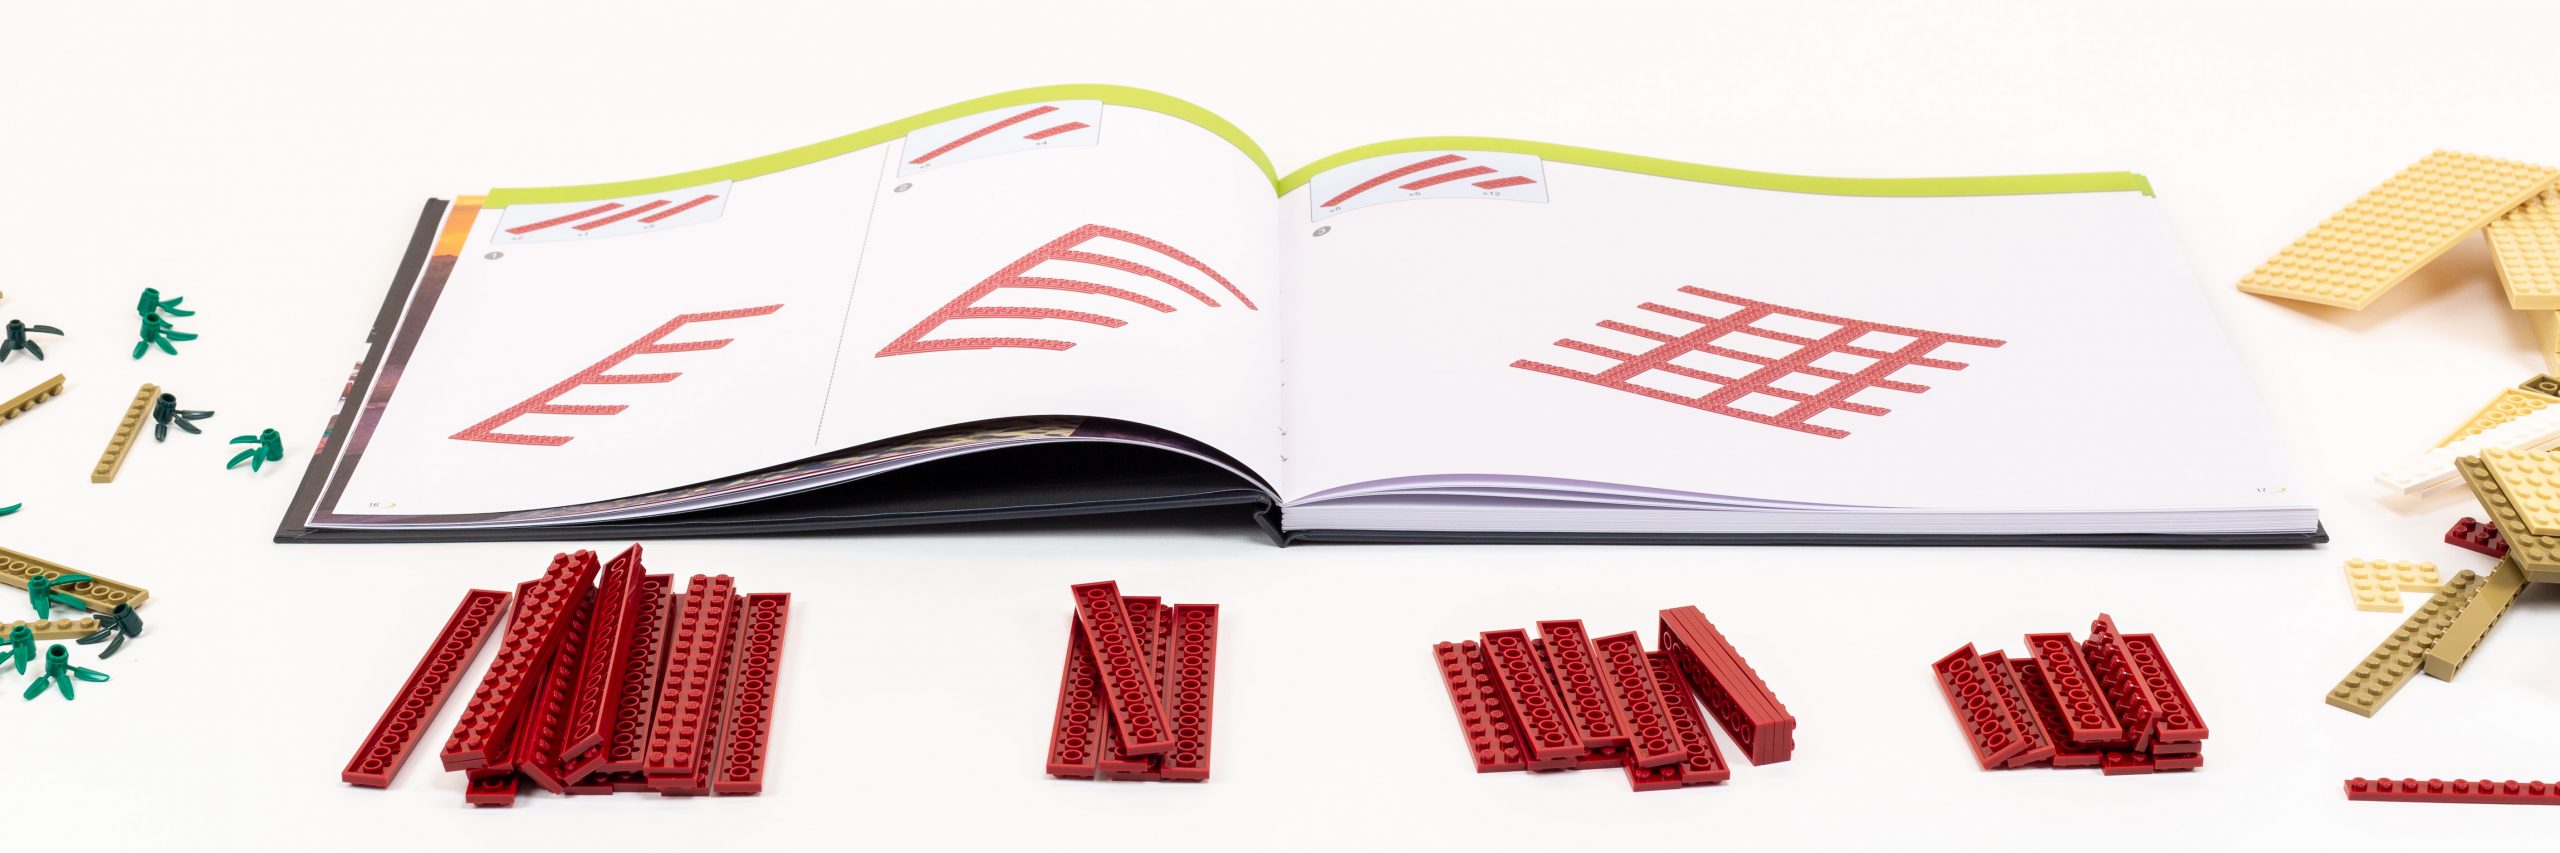
The instructions would be easier to follow if the set didn’t use every possible size of 2× plates, which are very hard to tell apart in the instruction booklet.
The second challenge is that the model uses far too many similar parts in the same color, leveraging 2×16, 2×14, 2×12, 2×10, 2×8, 2×6, and 2×4 pieces. It’s really hard to tell the difference between a 2×16 or a 2×14 part on your table or in the instruction booklet without counting the studs. They very easily could have modified the lattice design to use fewer unique sizes, or to use a different color for parts which will not be visible in the finished model.
Unlike Unity Temple, part of the lattice is just one layer thick, since two white plates are embedded in part of the second layer, allowing a 42Transparent Light BlueTrans-Light Blue fountain to be built on top if it.
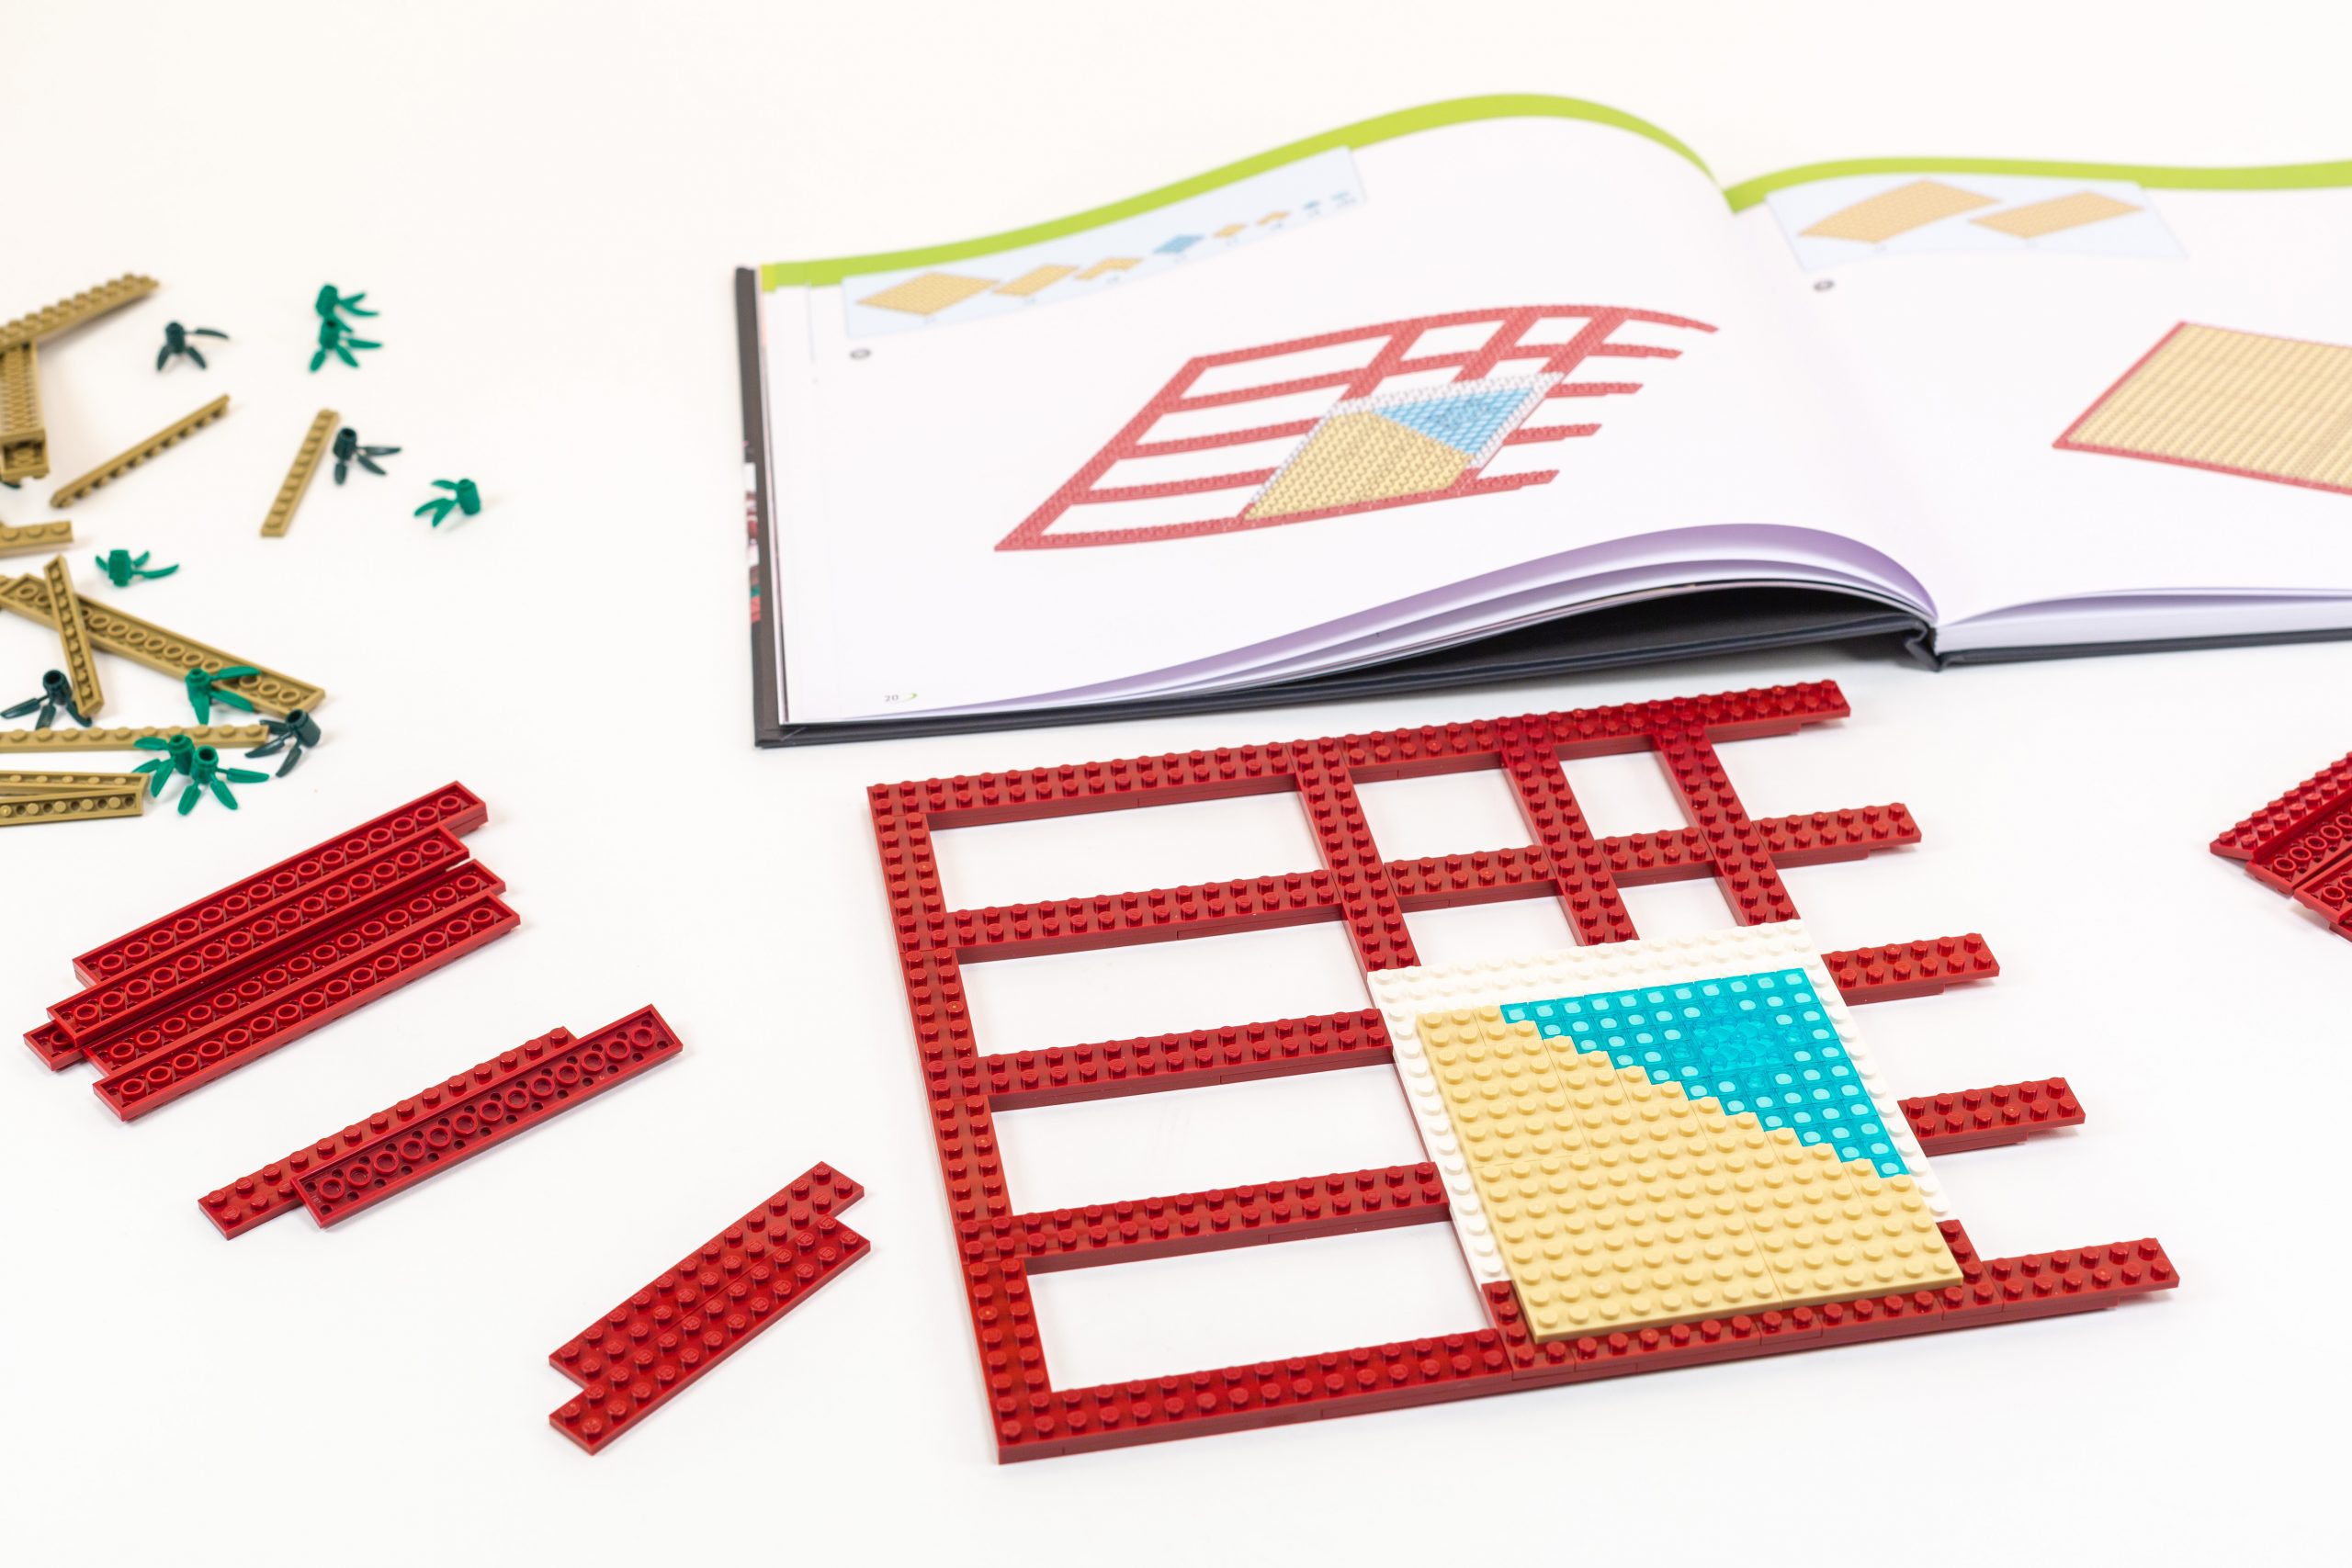
White plate is used beneath the transparent fountain.
After building the lattice in three sections, they are attached to one another, and covered by large plates. This is also when we assembled the triangular fountain, which uses a mind-numbing quantity of 1×1 Tiles. In the past I’ve found this extremely time consuming and annoying (such as in the Farnsworth House set), but it’s actually slightly easier with LOZ bricks… Because of the slightly lower clutch power, it’s easier to align the parts correctly—I used the included LOZ tiny 1×1 Brick Separator as a straight edge.
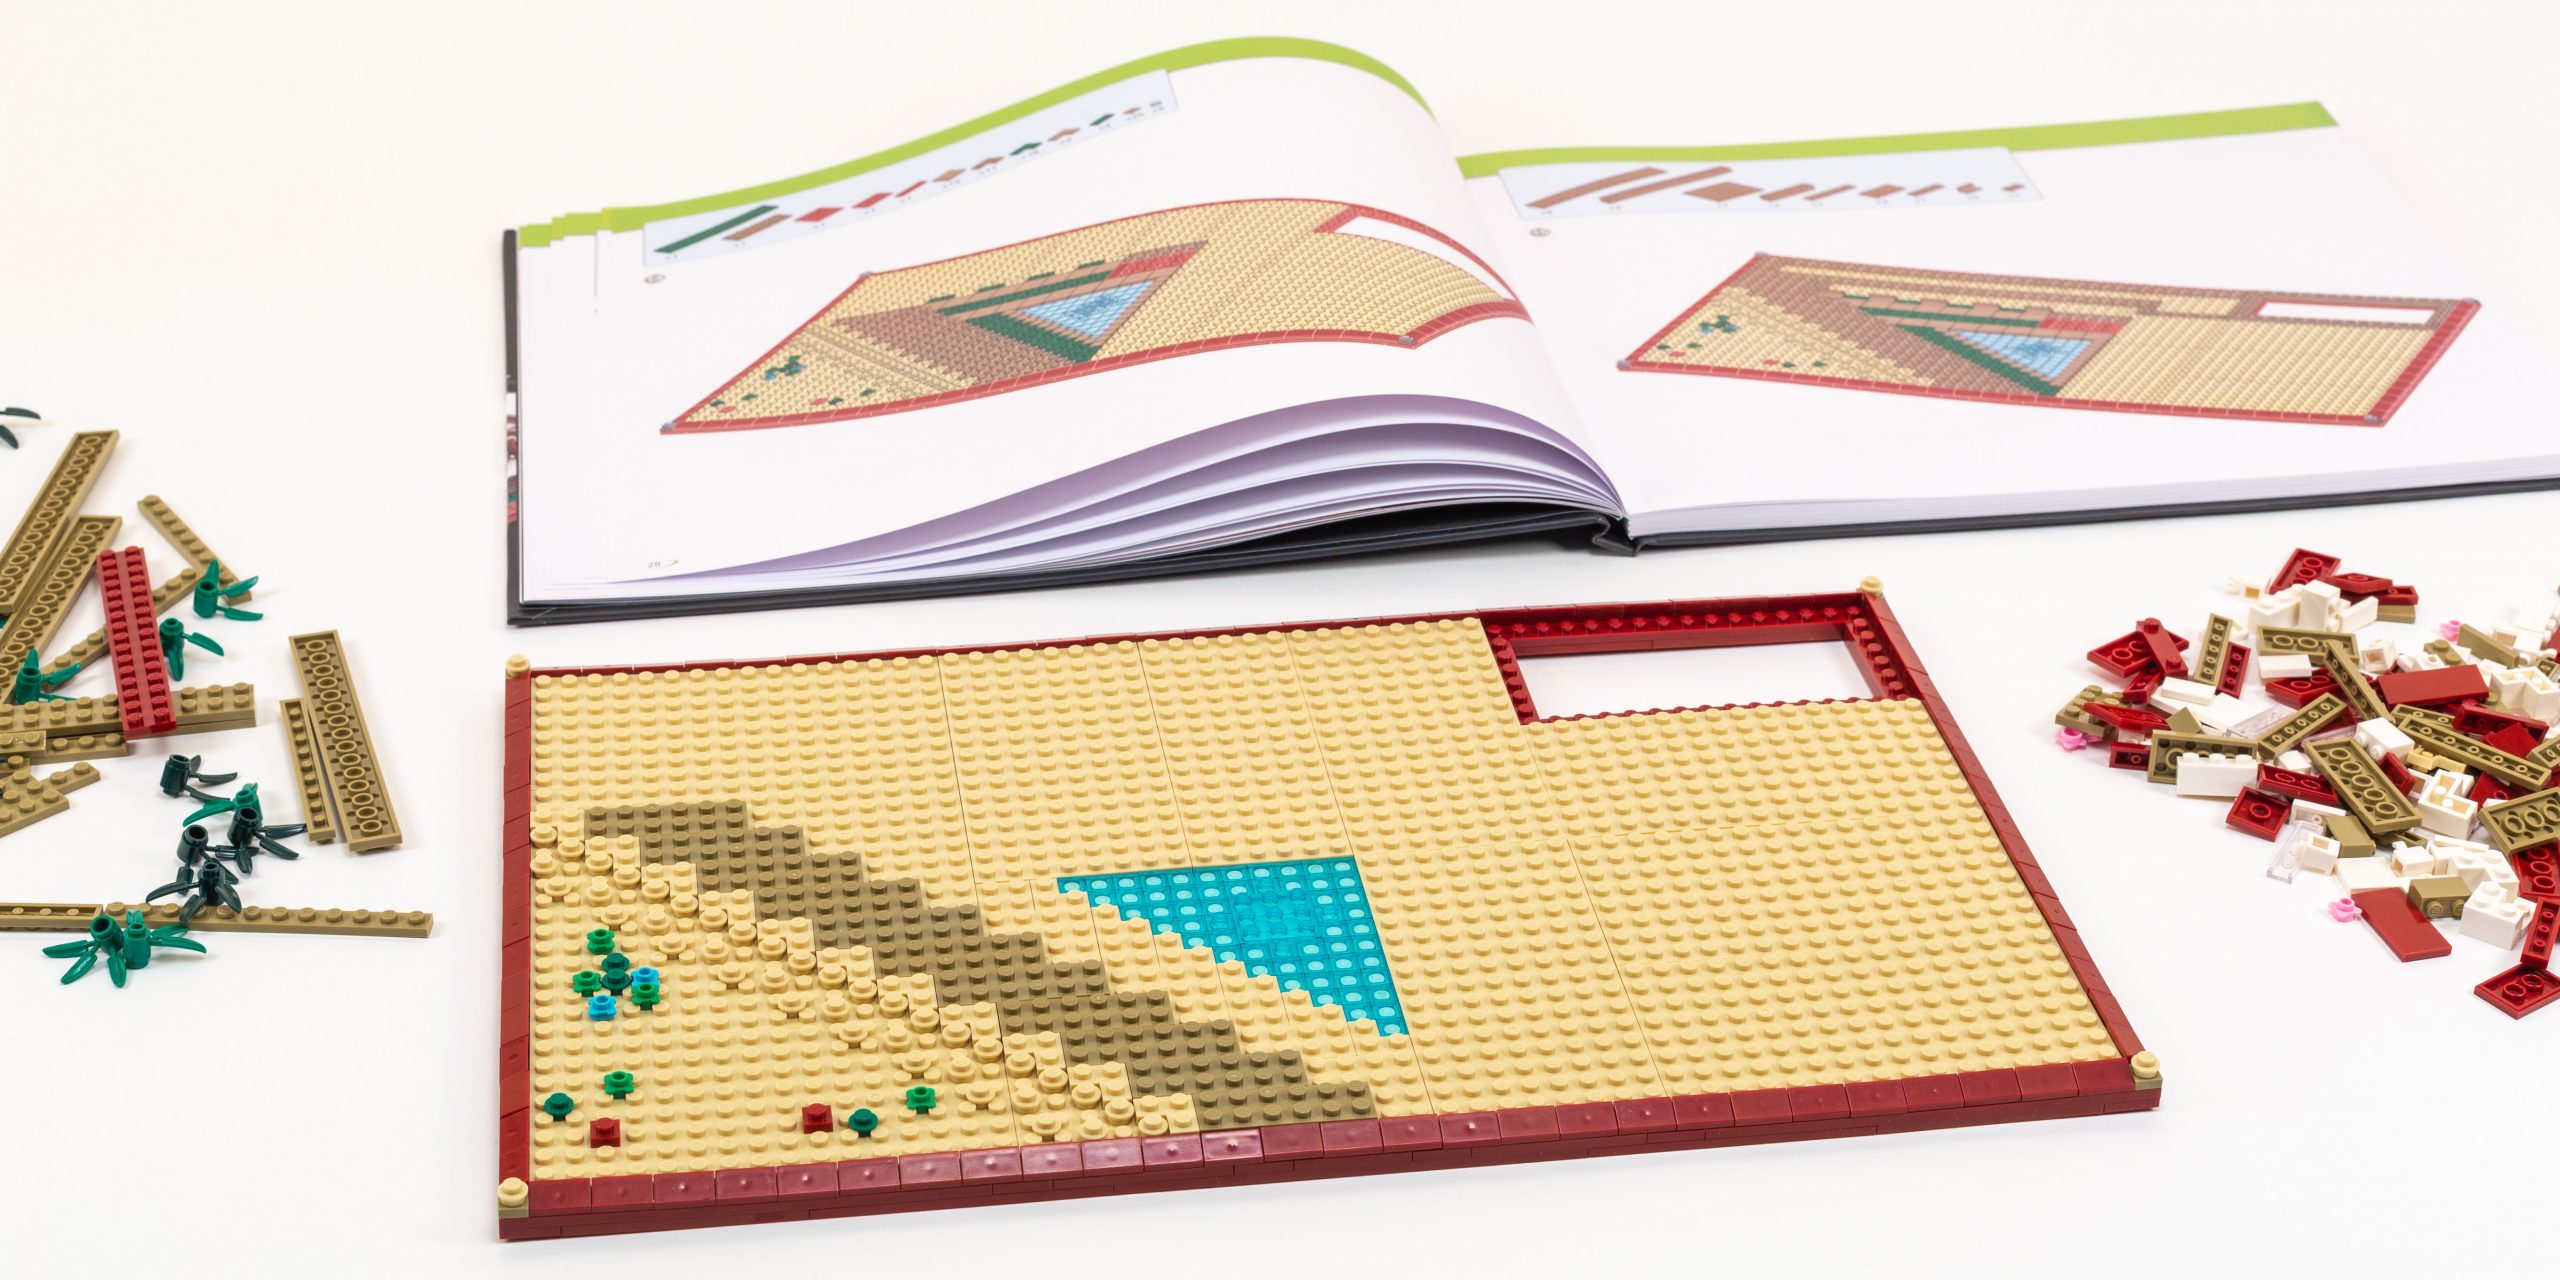
Progress at Step 13.
This is also when we attach 86x 1×2 Double Cheese around the entire edge of the model. This is more time consuming than sets in the LEGO Architecture series, which rely on black 1×8 tiles for the border instead, but creates a different looking edge. I decided to stop here, since the next step builds the paved pathways and foundations for the buildings.
Build Time, 0:45 hours.
Foundation (Steps 14-26)
While there isn’t a clear separation in the instructions from building the base/landscaping, and beginning to assemble the structure, the building’s foundation begins to take form in step 14. This makes sense architecturally, since Wright’s vision of Organic architecture included a gradual transition from interior to exterior spaces.
By Step 26, we have completed the landscaping and created a foundation for the building.
With such a large base covered with plate and tile, we’re just barely beginning to assemble the building’s foundation at the end of the first hour. The landscaping is more involved than I expected based on the photos, stacking [green] 1×1 round plates to create bushes with some depth and variety, versus just one plate thick groundcover. Nonetheless, after two hours of building, I’m pretty anxious to start exploring the architectural features!
Build Time, 1:15 hours.
First Floor (Steps 27-54)
At least for me, this is where the fun finally begins! Rather than building one area at a time (which I would have preferred), it is still a lot of fun to see the tiled pathways emerge, followed by walls and the decorative features that surround them.
I noticed that the instructions began to slow down at this point, too, adding fewer parts to the model in each step, increasing the feeling that you are “making progress” with every turn of the page. Nonetheless, minor challenges with the building instructions continue including difficulty distinguishing colors; most notably 28Dark GreenGreen and 141Earth GreenDark Green plants, and 1White versus 40Transparent Trans-Clear parts. I also would have liked to see the instructions zoom in and focus on a specific section for a few steps. This would make it easier to see where the new parts go.

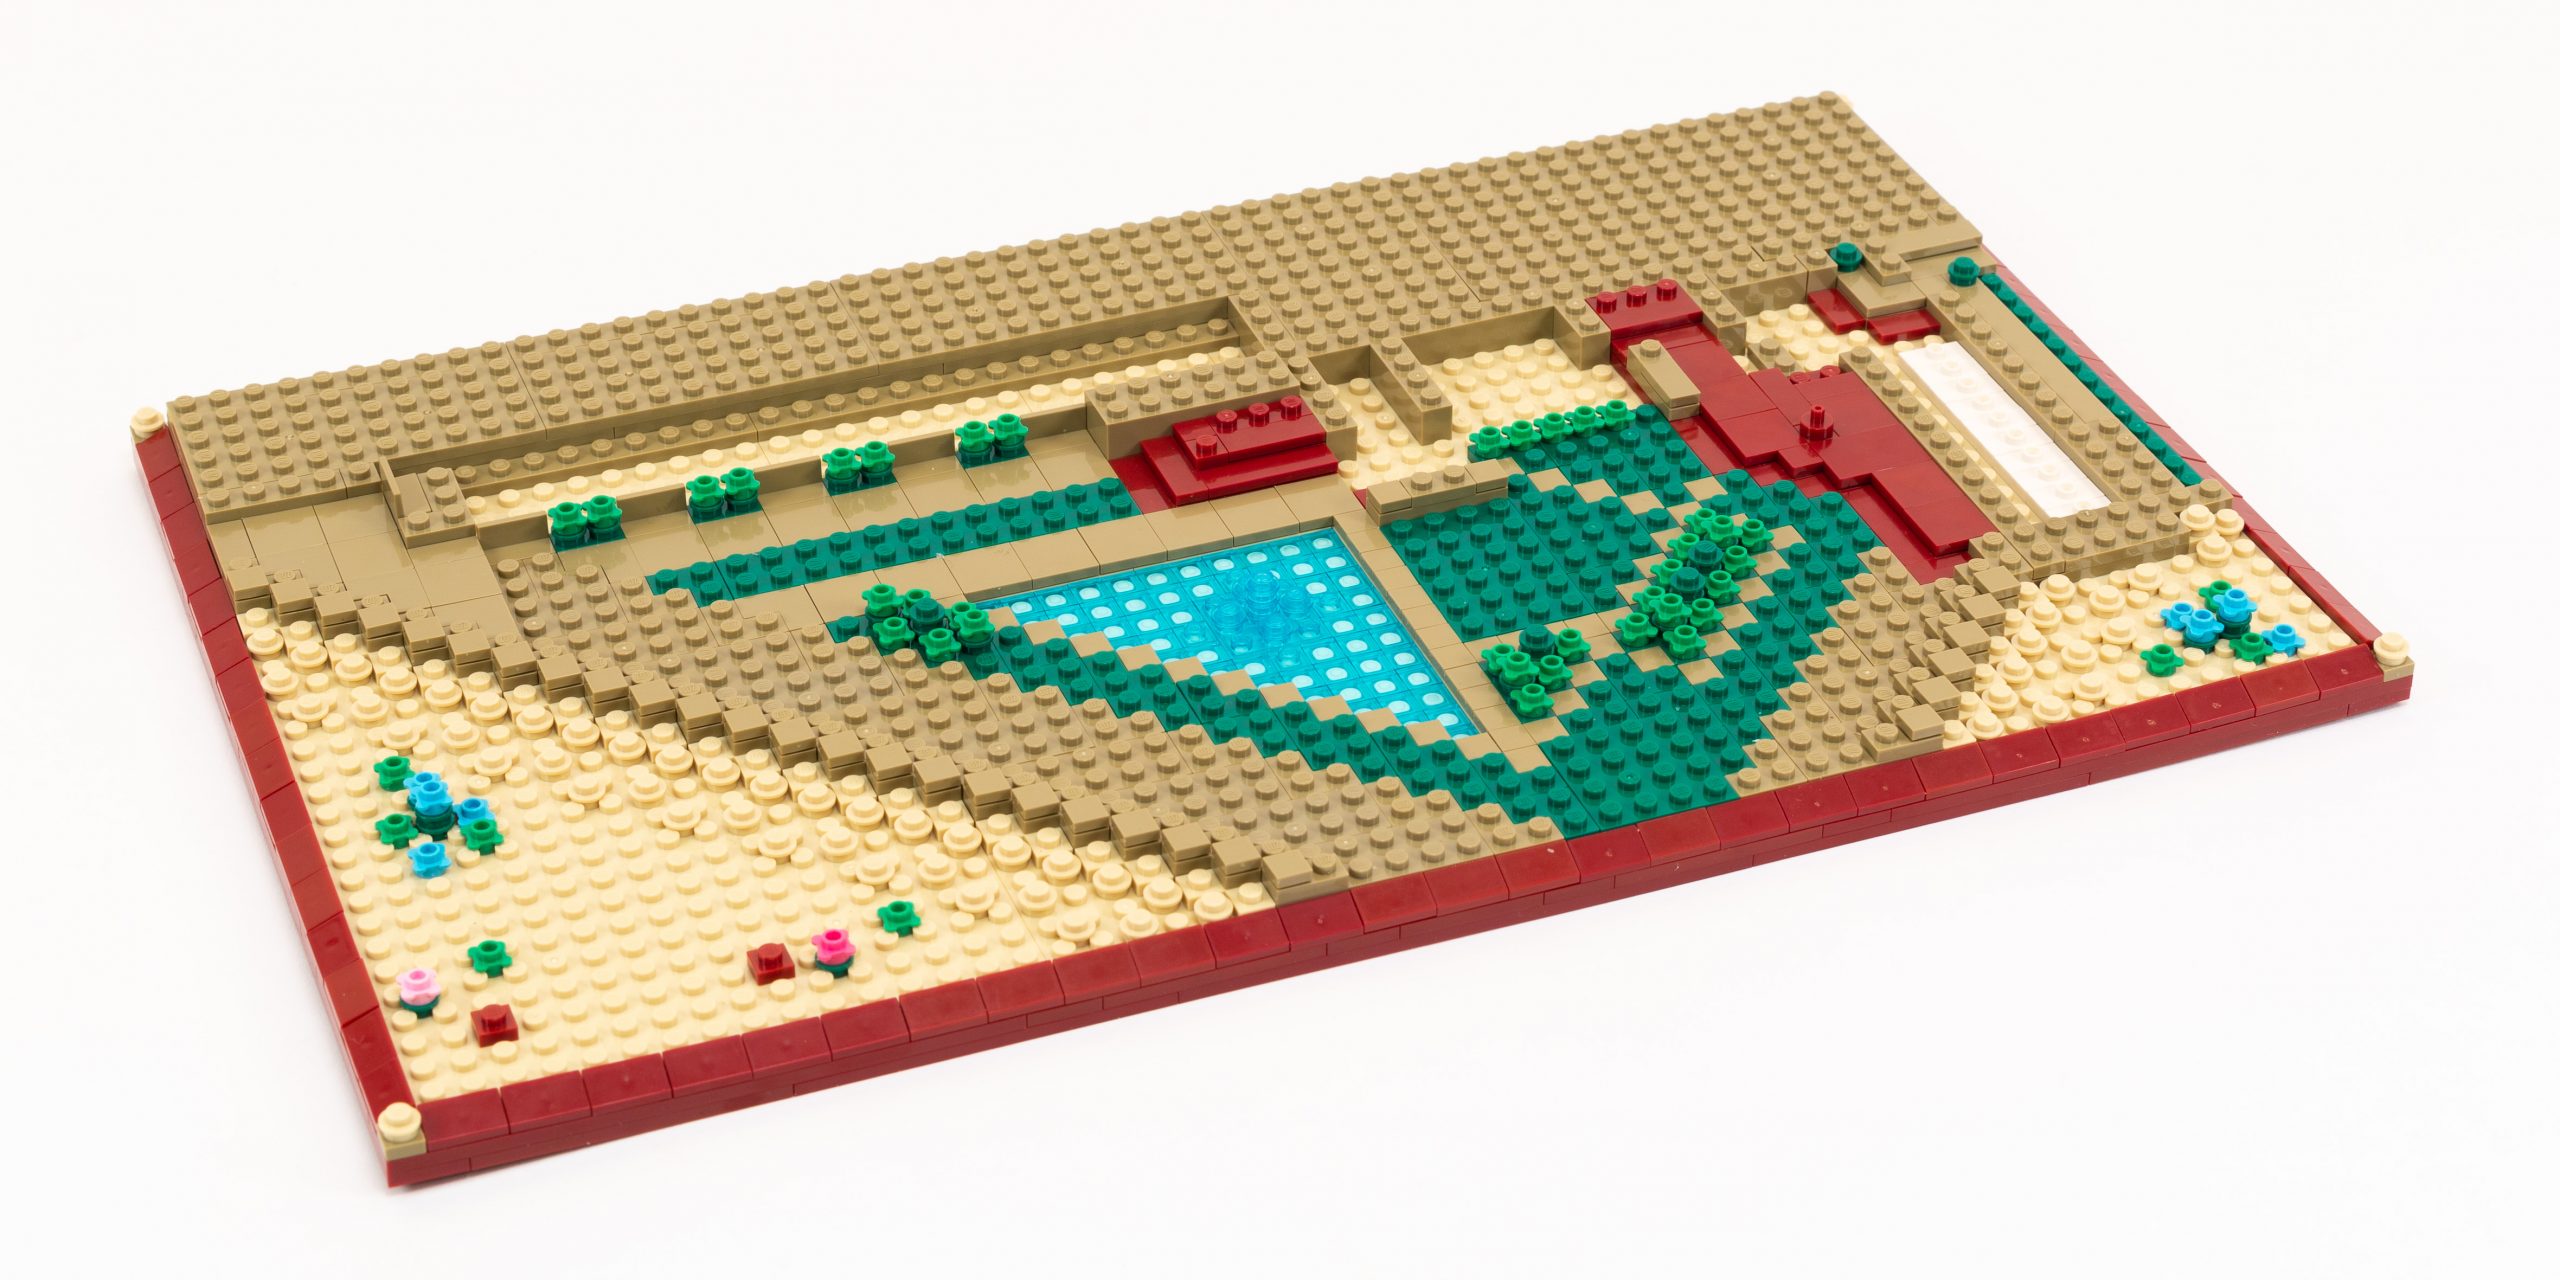
Progress by the end of step 54.
As I am learning, the building has multiple elevations, so there is no clear delineation between the end of the first floor, so I kept working until it felt like we had finished the lower section of the building. By step 43, we had created a small covered area with a pathway beneath it, and by step 54 we had included several sections of sloping walls and bays of windows.
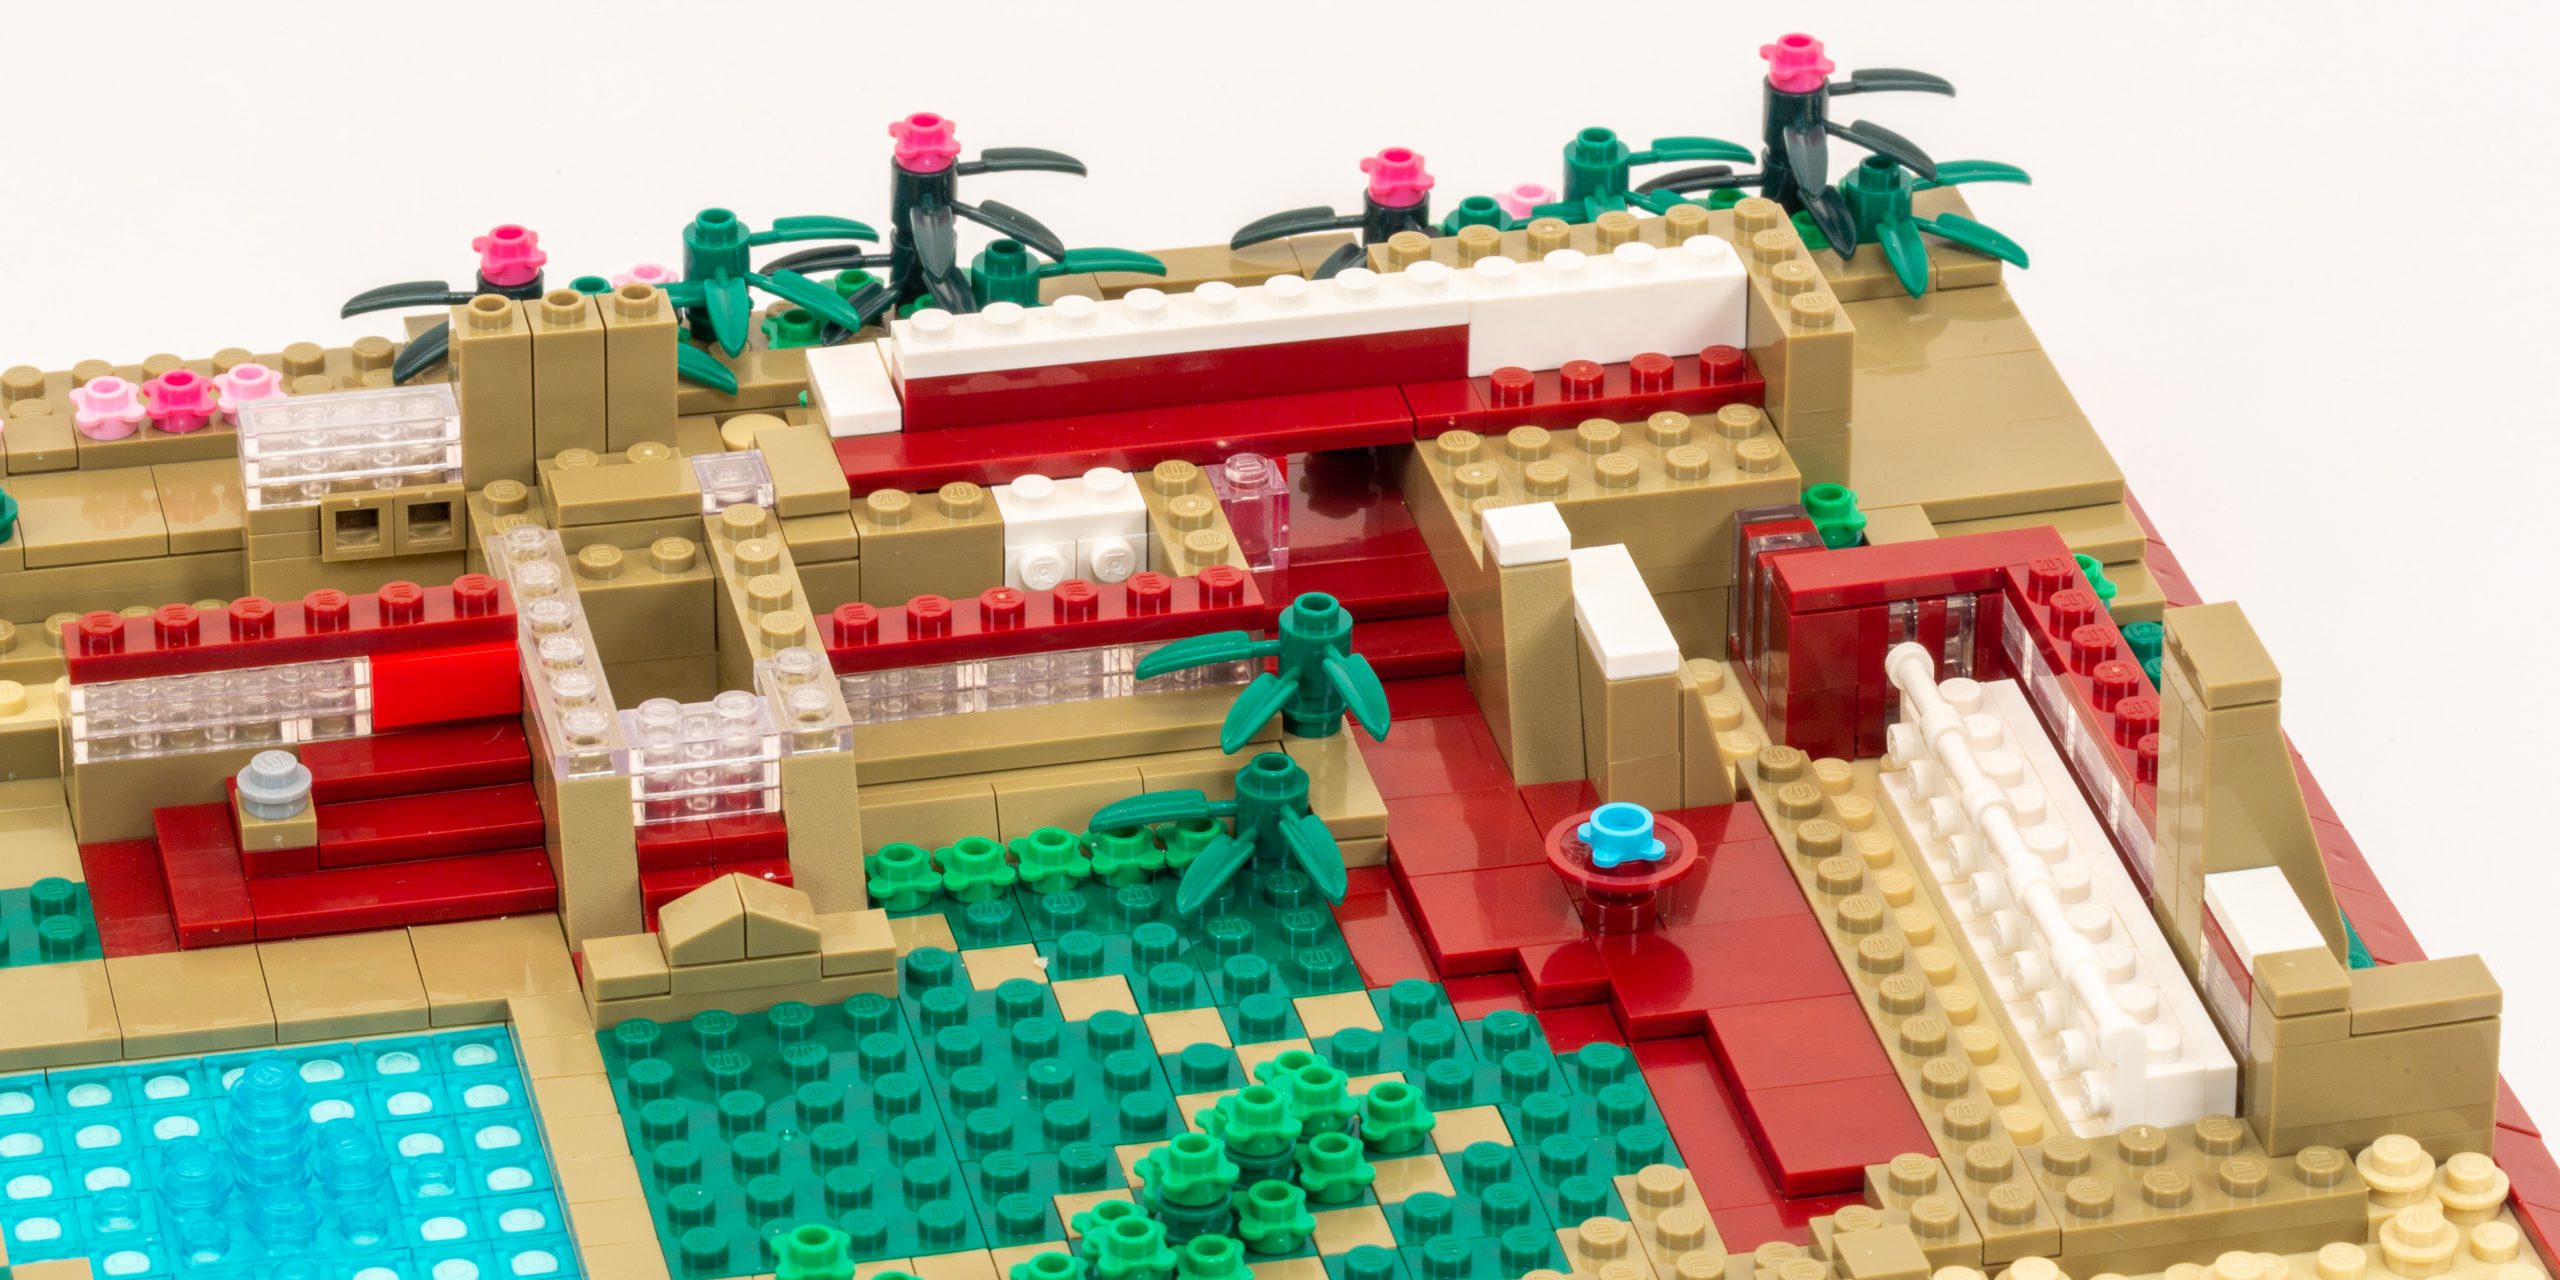
Detail photo showing the architectural features.
It was fun to see several examples of SNOT techniques used in this part of the build, including a complex section which relied on 1×1 Cheese Slopes to hold two assemblies in place, until attaching them from above a few steps later. The only problem here is that the tolerances on the LOZ version of 2×4 Bracket (part 93274) aren’t quite right; the front-facing section should be ½ plate thick, but is clearly a little thicker than that, preventing perfect alignment for the parts attached later.
Build Time, 1:15 hours.
Upper Floors (Steps 55-90)
This is the section of the build where the architecture’s expressed structure is revealed, with lots of exposed horizontal support elements in the 154Dark Red color that is a close match for Frank Lloyd Wright’s favorite ‘Cherokee Red’ color.
I did notice a common but illegal building technique on Step 63, which is caused by the subtle difference in height of a Technic pin hole and the outward-facing stud of a SNOT brick. (This is noteworthy, since this set is built using LOZ bricks… LOZ had the opportunity to fix this “bug” when desninging their 3/4 size micro bricks, but they copied the glitch, too.) I also noticed a bug in the instructions on step 63: it indicates that you should use Part 3065 (1×2 brick w/out bottom tube) in 40Transparent Trans-Clear but the set includes Part 3004 (1×2 Brick w/ bottom tube) in 40Transparent Trans-Clear instead.

A large assembly including a long open-air pergola is slotted into the left-hand side of the model.
In step 69, we build a massive assembly that attaches within a slot on the left hand side of the model. That’s followed by a second delicate assembly that slides into a slot right behind the first assembly. Between the very narrow tolerances and potential imperfections of the LOZ bricks, this is a very snug fit, and is very difficult to install without breaking the assemblies in the process. There are some more questionably legal techniques here (see similar content about the lettering on studs in Unity temple article). Nonetheless, you can’t argue with the final result—it captures Wright’s spirit beautifully.
Conclusion
As I mentioned in my review of Unity Temple, I was excited to review these new sets as a way to continue my exploration of Frank Lloyd Wright’s legacy through plastic bricks. I was cautiously optimistic about the LOZ bricks, and found that they were too small for my taste, but of acceptable quality. I am impressed with the presentation—the very heavy box and hardbound instruction booklet are sturdy, but are excessive as we look to reduce our environmental impact.
The set included about a hundred extra parts (but was missing a 1×2 Trans-clear Plate that I needed).
Reviewing non-LEGO products is always a challenge. This set reminds us that it is difficult to create building instructions that match the quality of official LEGO sets. Further, the main benefit of the internal review process at LEGO is that it simplifies the part selection and revisits the building techniques to make sure everything is interlocked tightly and there aren’t any “Illegal” building techniques. Lastly, we do have to acknowledge that the LOZ bricks included in this set do not have quite as good tolerances as official LEGO bricks.

The smaller details are the highlight of this model.
Realistically, the finished design of this model is excellent. If the challenges I already discussed were fixed (many of which could be easily remedied) and it used genuine LEGO bricks to resolve some of the tolerance issues, I think this would be one of my favorite Architecture sets. As it stands, it is still a really impressive set, and one that you should consider adding to your collection.

Taliesin West, by The Atom Brick.
The finished model is so good that it earns our 4/5 star (Recommended) rating despite these misgivings. (I would feel even better about the 4/5 star rating if they improve the building instructions and improve the part tolerances in the future.)
While my earlier reservations against the deliberate choice of incompatible 3/4 bricks still stand, I have to agree that this model looks great. The slanted roof with the tiles sticking out is a really neat design that captures the original very well.