
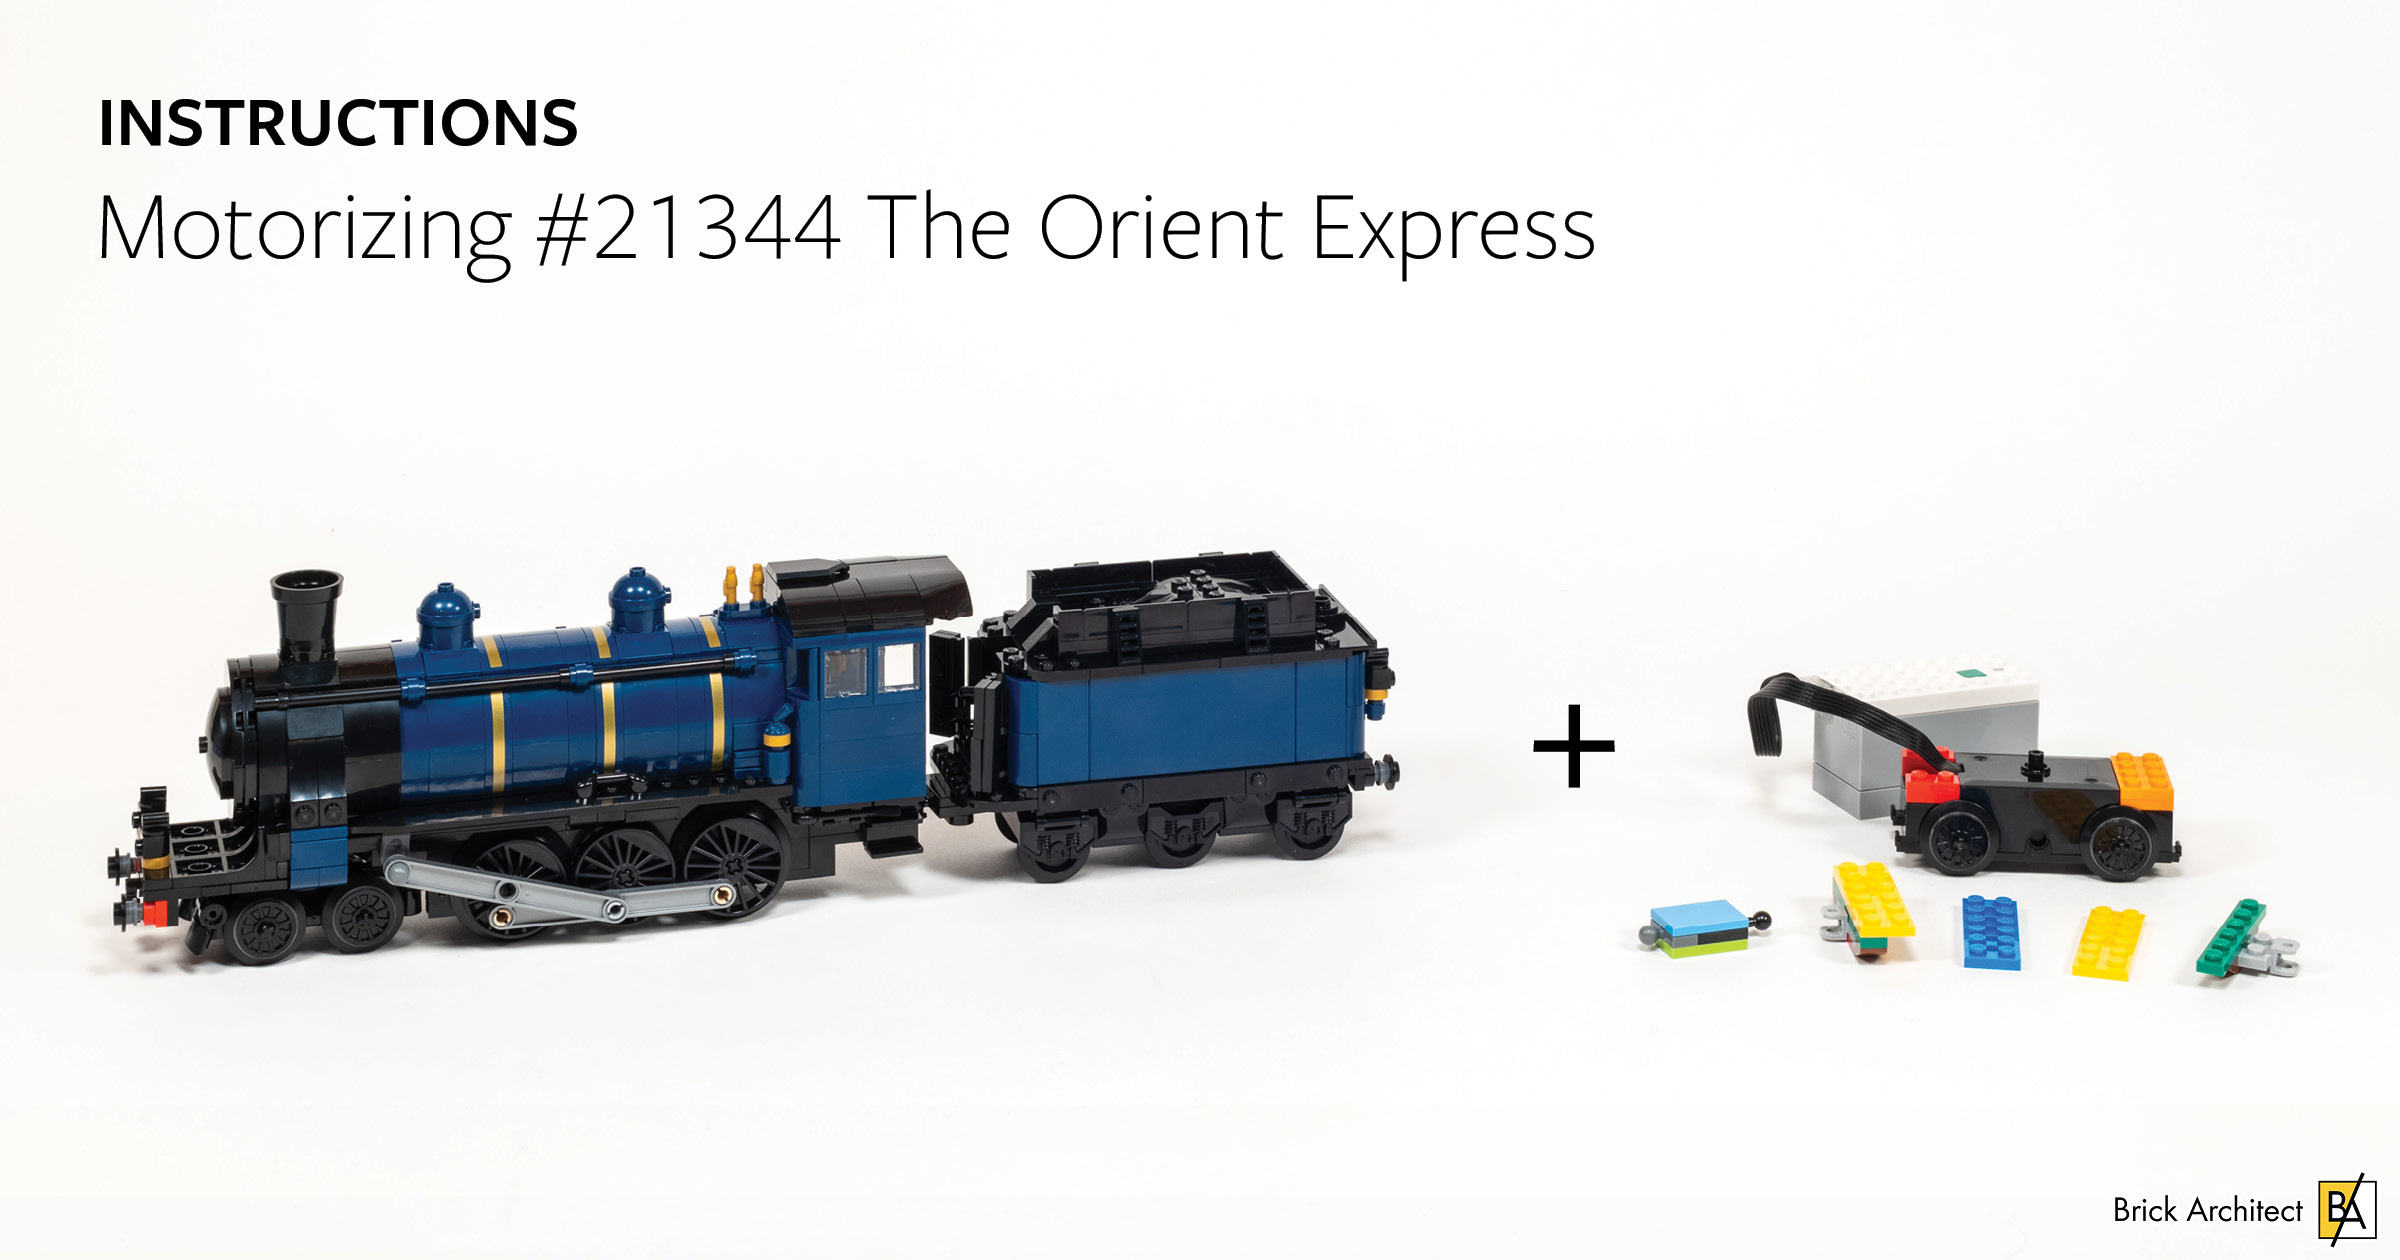
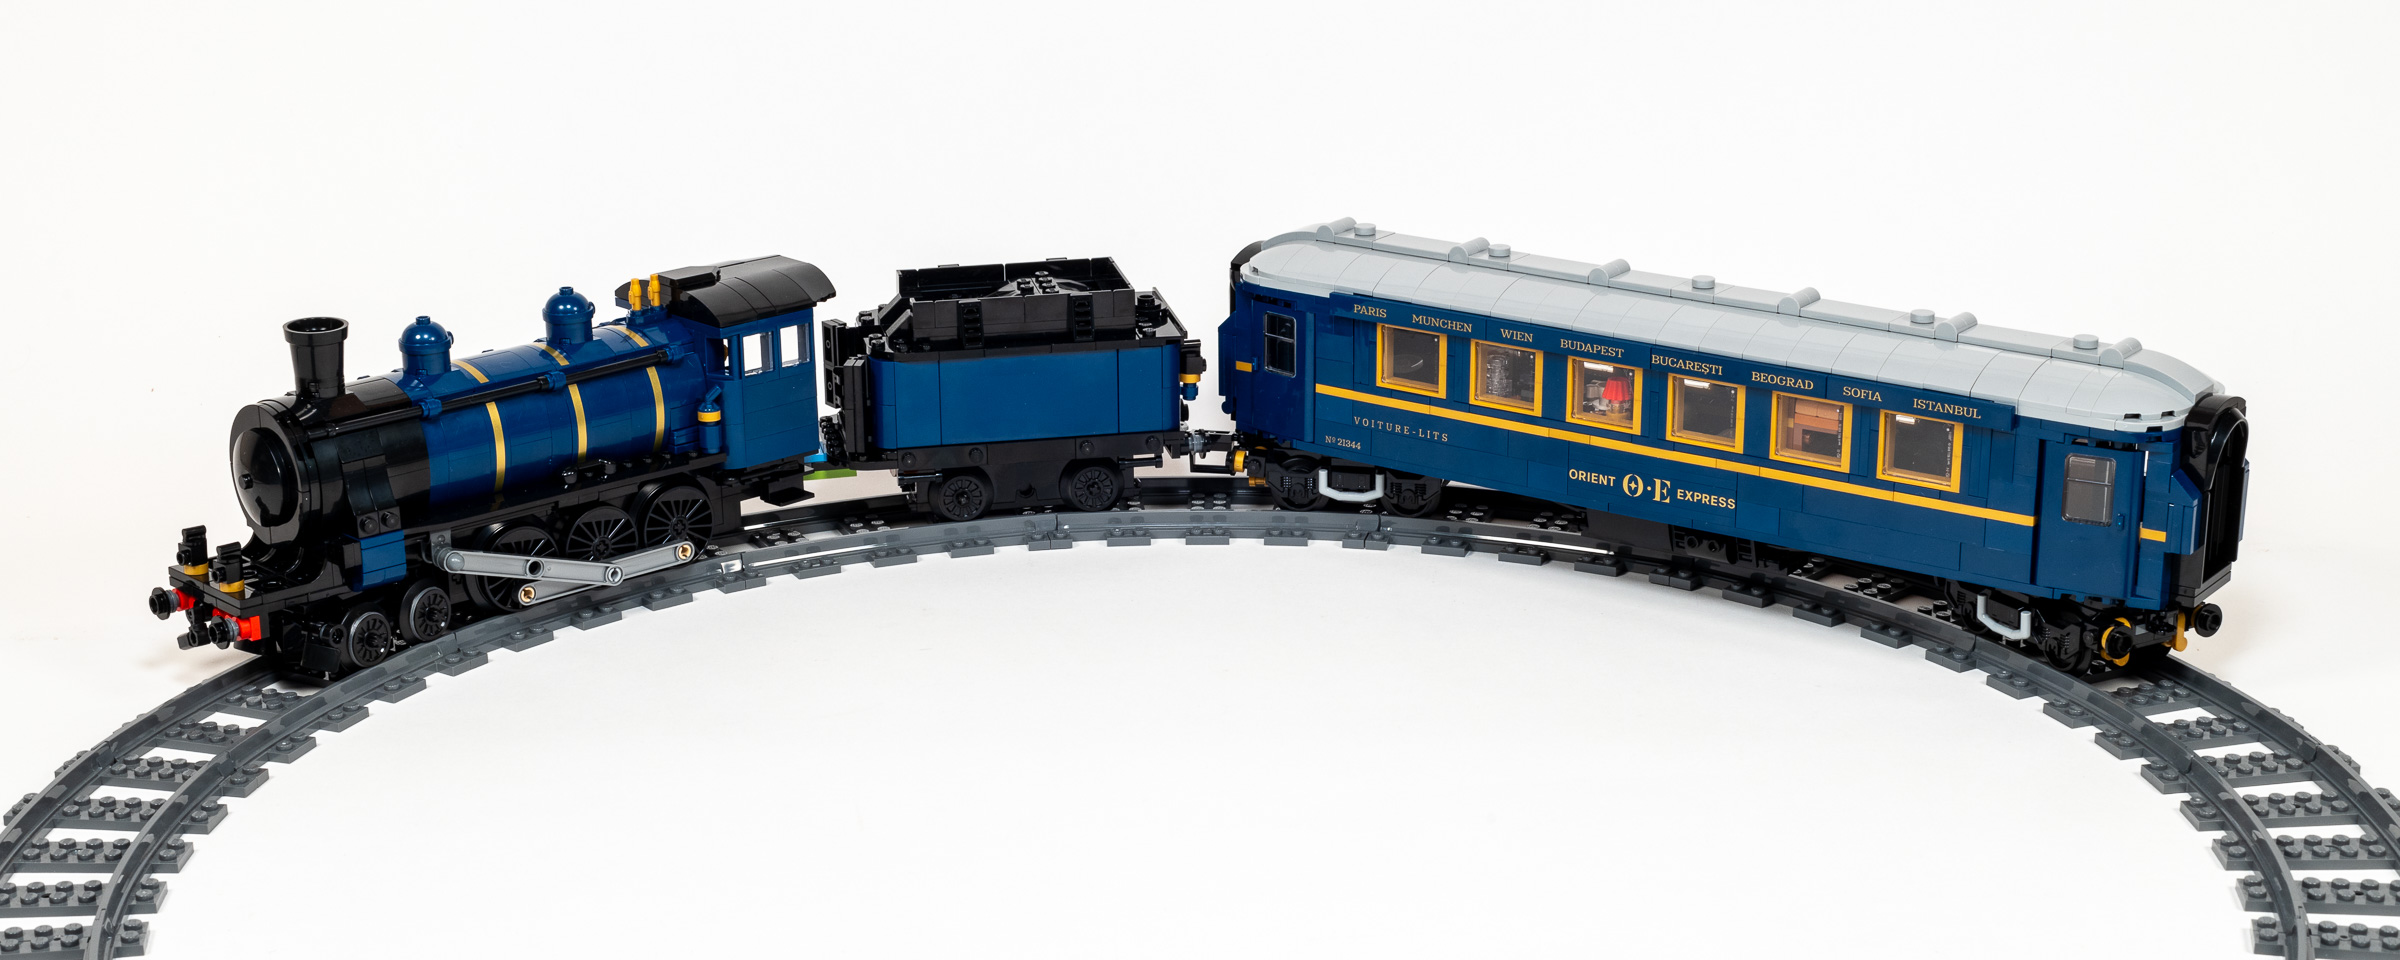
Motorizing #21344 The Orient Express
This set did not include instructions for adding a motor to this set, but here they are — and it only requires a few common parts.
This article offers a very short follow-up to my recent review of #21344 The Orient Express. It is a pretty short article because, as you will see, it is pretty easy to motorize the Orient Express using only a small number of parts that you probably already own.
Why was it so easy?
- The set might have been designed to be motorized, but the power functions were removed late in the development process. The most likely cause was to reduce manufacturing cost and/or maintain a healthy profit margin on this set.
As noted in my review, the set is wildly overpriced — the same 300$ price tag would have been a lot more palatable if it included power functions. - They may have made a last minute decision to remove power functions because they determined that the motor was not quite powerful to sustain a heavy train without damaging the motor or resulting in unacceptably short battery life.
- They may have discovered in focus group testing with adult builders that it was more important to focus on displayability, hence the long section of straight track.
- What I think ultimately happened is that it was always intended as a display model, but the designers ensured it would be easy to modify if people wanted to motorize it later.
Some of these theories are corroborated by this article on Brick Fanatics which indicates that they did explore power functions, but the train is too heavy. What baffles me most is why they did not include instructions and the very small number of extra pieces needed to motorize this set right in the box, even if the instructions recommended removing one of the carriages when doing so.
Looking Back: #10254 Winter Holiday Train
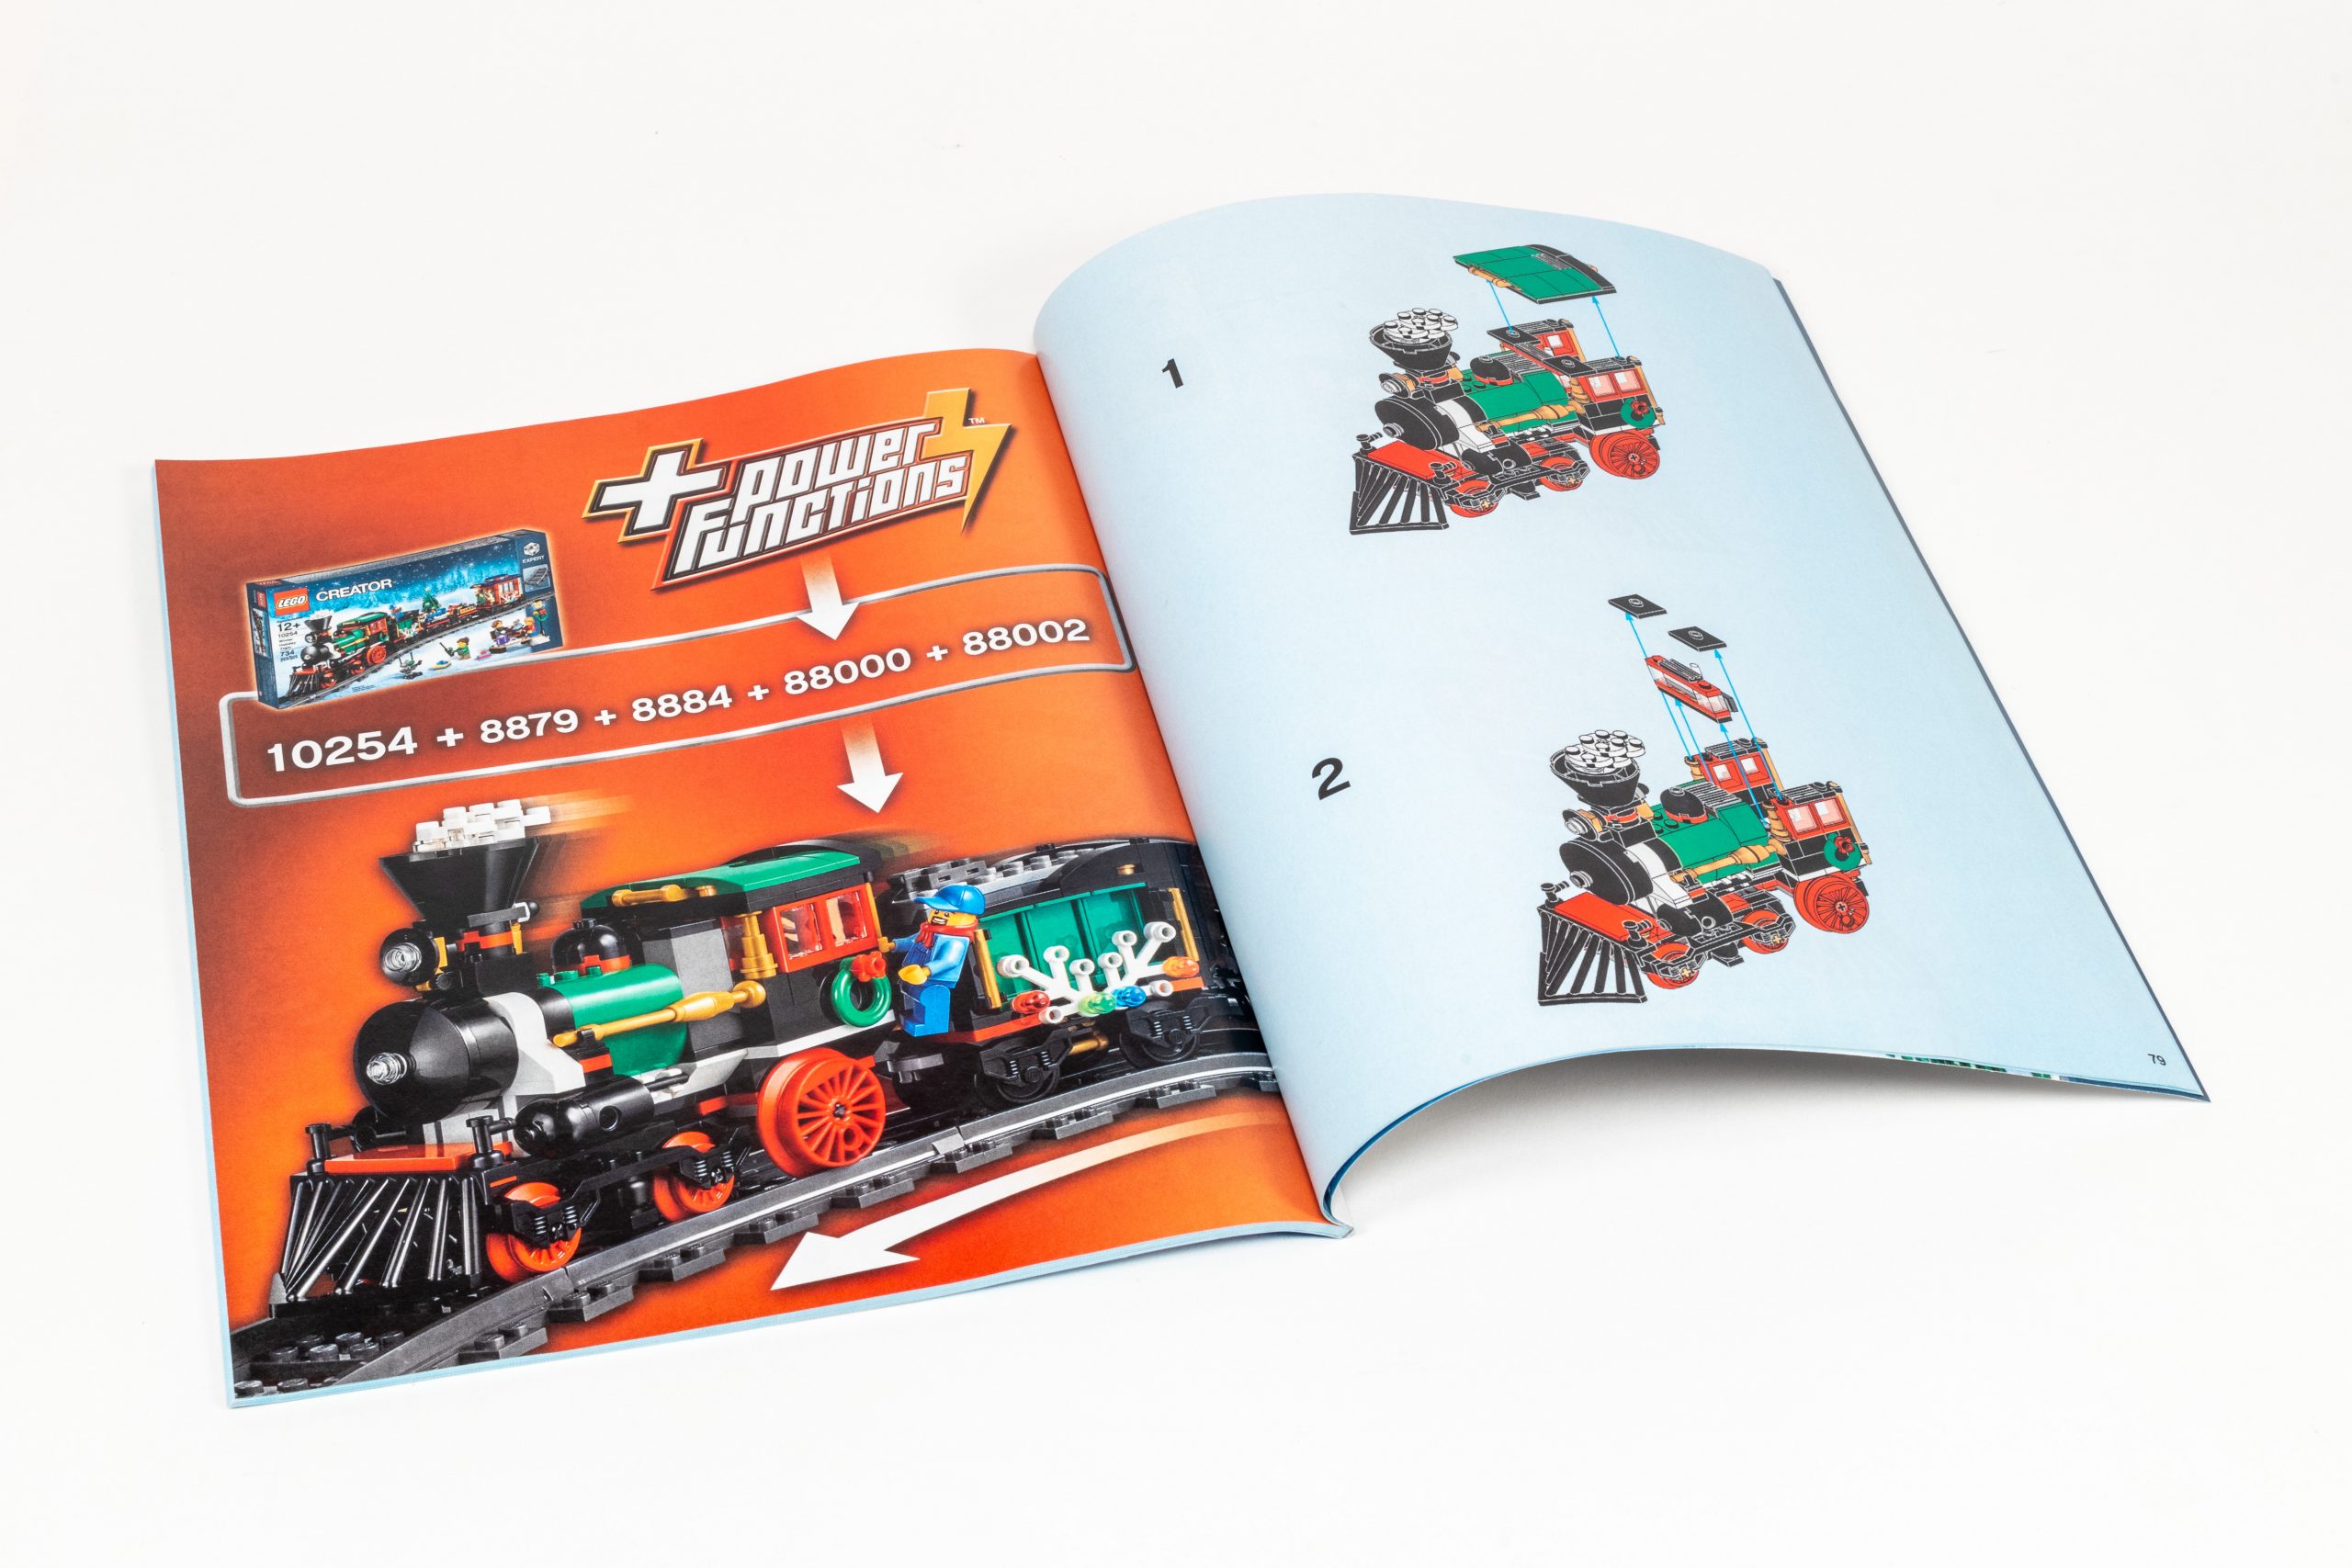
#10254 Winter Holiday Train included a partlist and instructions to add Power Functions in the main instruction booklet.
There is even a precedent for including instructions in the set! #10254 Winter Holiday Train included instructions to motorize the set by adding just a battery box and train motor.
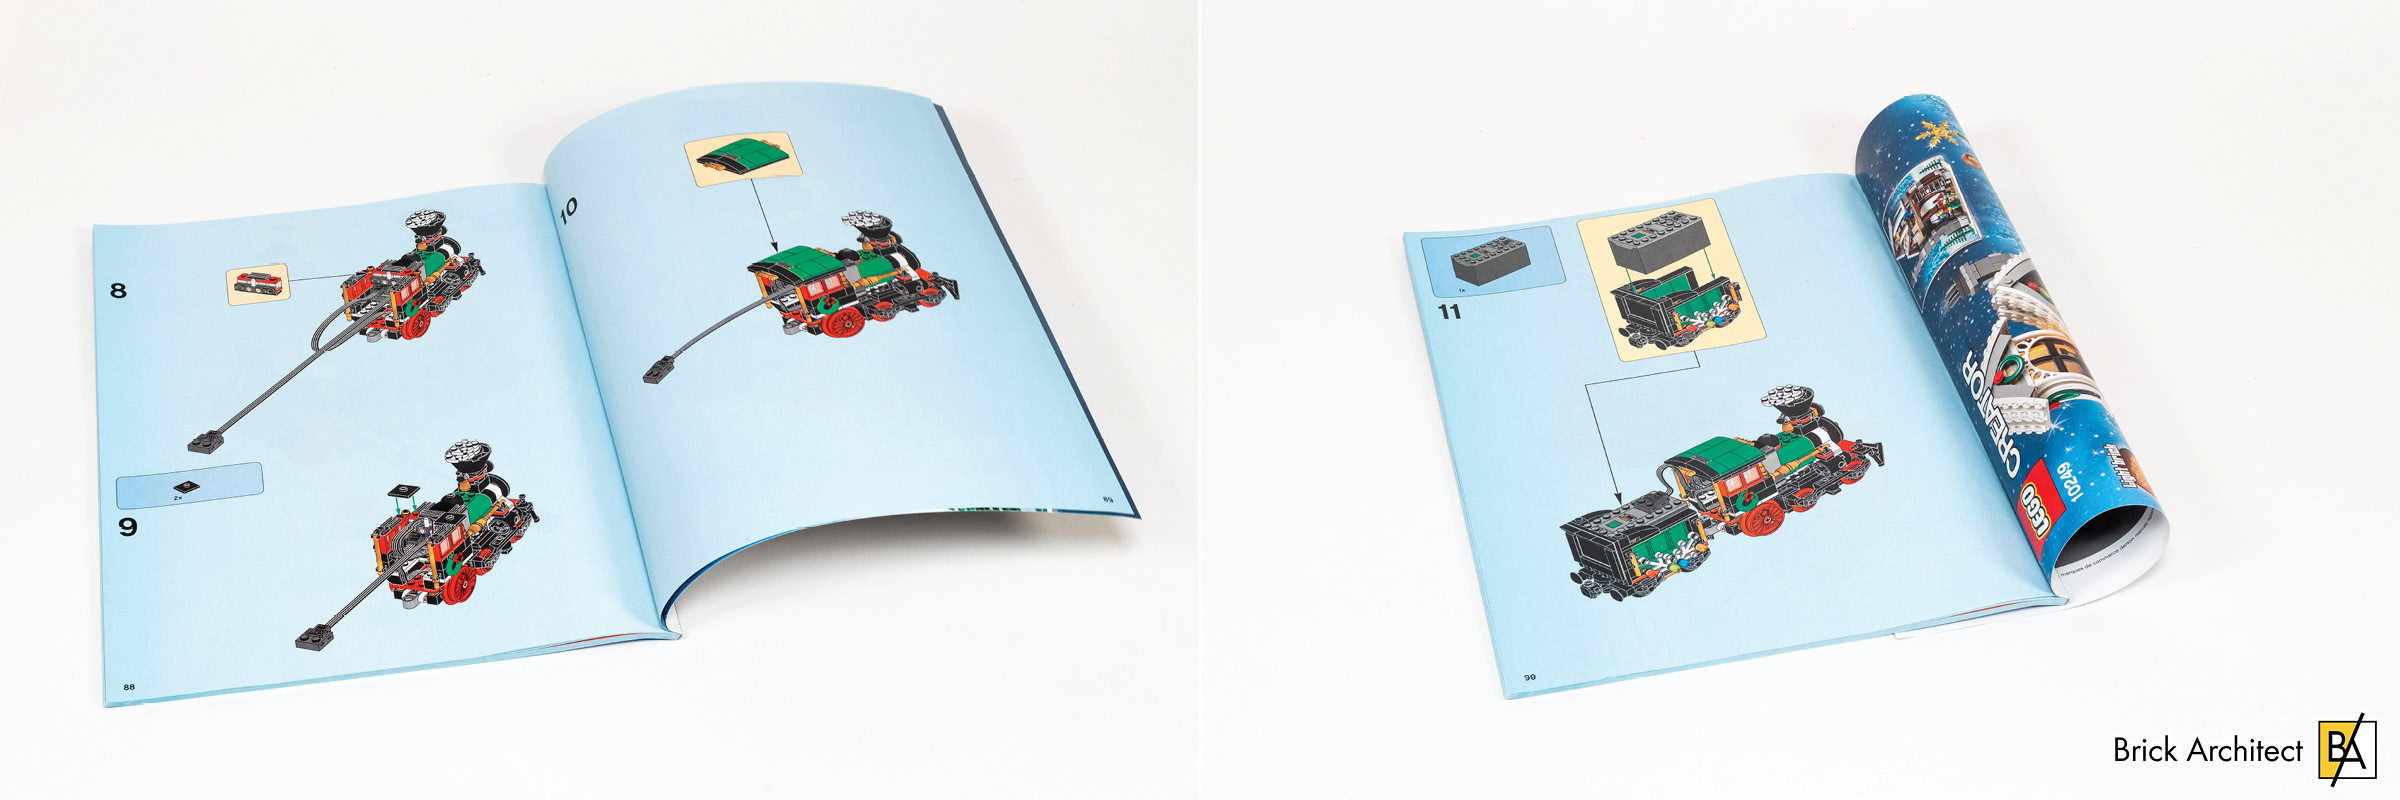
The instructions show you what to remove and what you need to motorize it.
In my experience, The LEGO Store retail locations even had the motors on hand for people to purchase alongside the set. This is one of the ways that LEGO Brand Retail can differentiate itself from other places to buy LEGO sets.
Motorizing the Orient Express
The good news is that this is not a very complex project and only requires a few parts that you may already have in your collection. While I encourage you to use black or gray elements, I used a rainbow of bright colors to make the building process more clear.
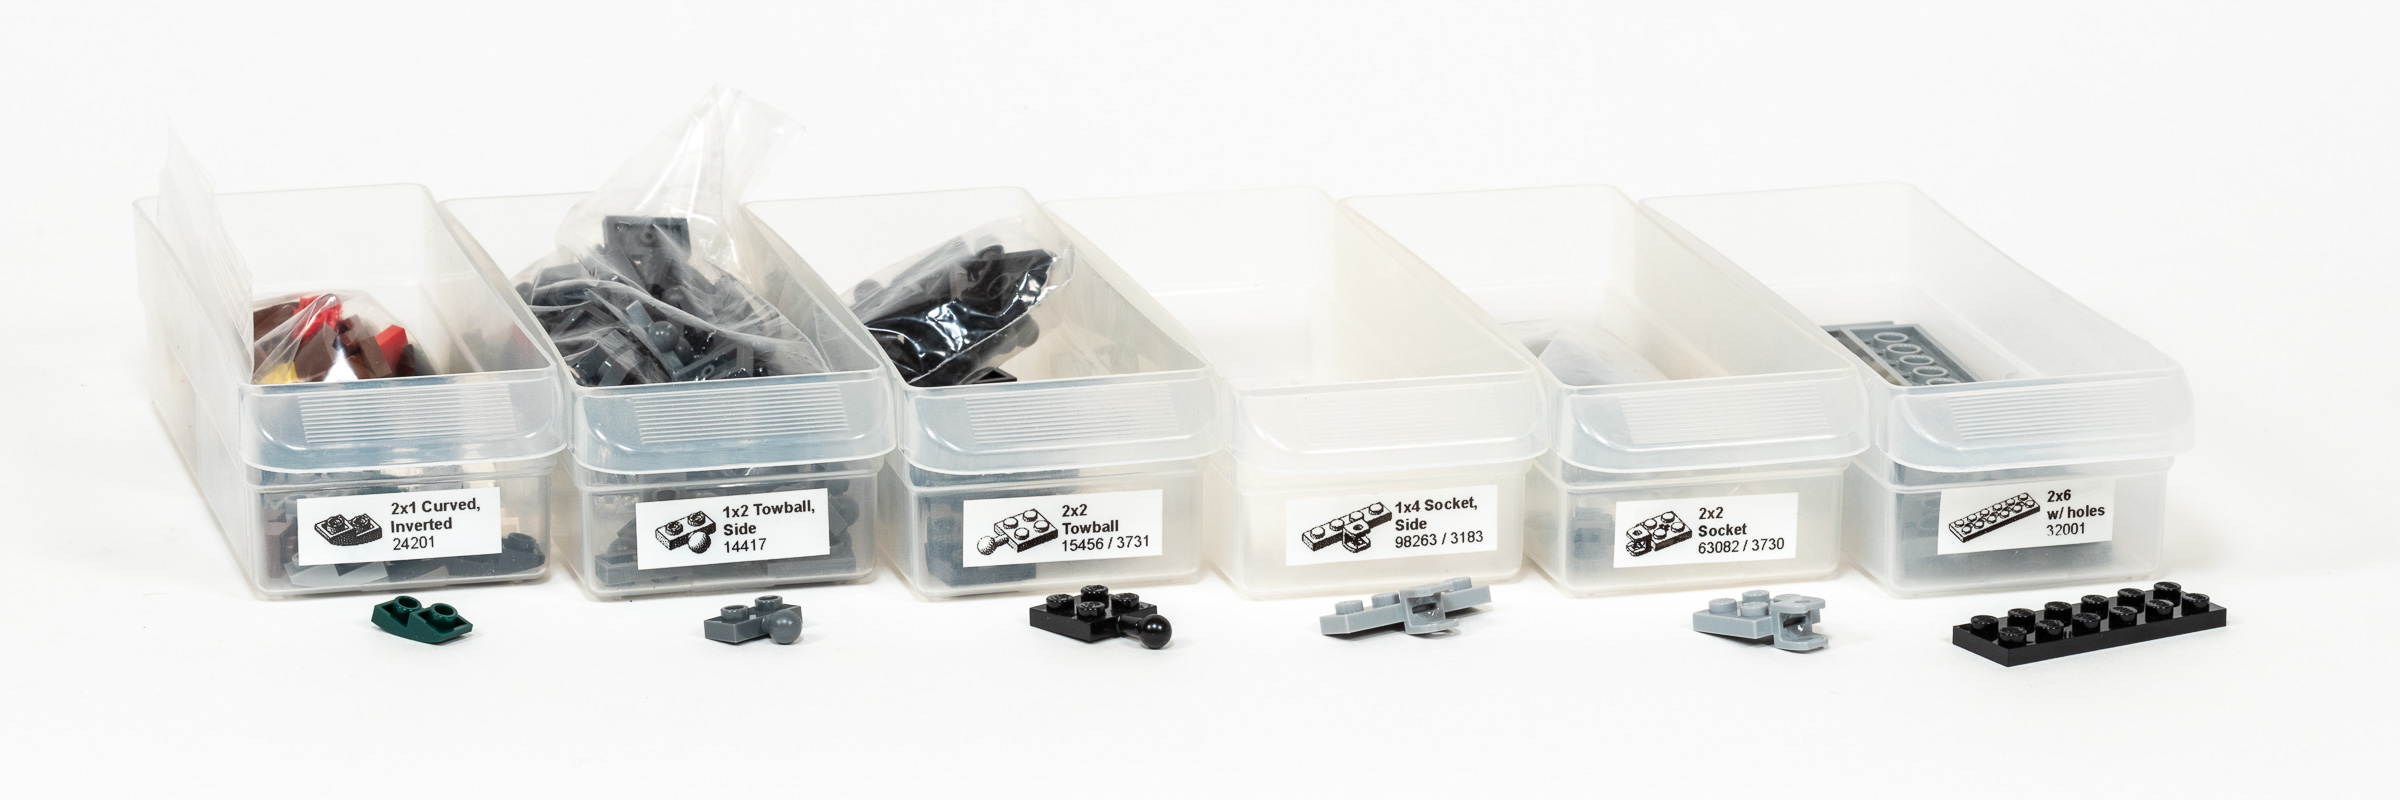
Besides the motor and battery, you only need these parts and basic plates.
Thankfully, these are pretty common parts, and I am confident that you could substitute some of these parts with similar ones from your collection. (Labels are from my LEGO Brick Labels collection, which includes about 1800 labels for common LEGO parts.)
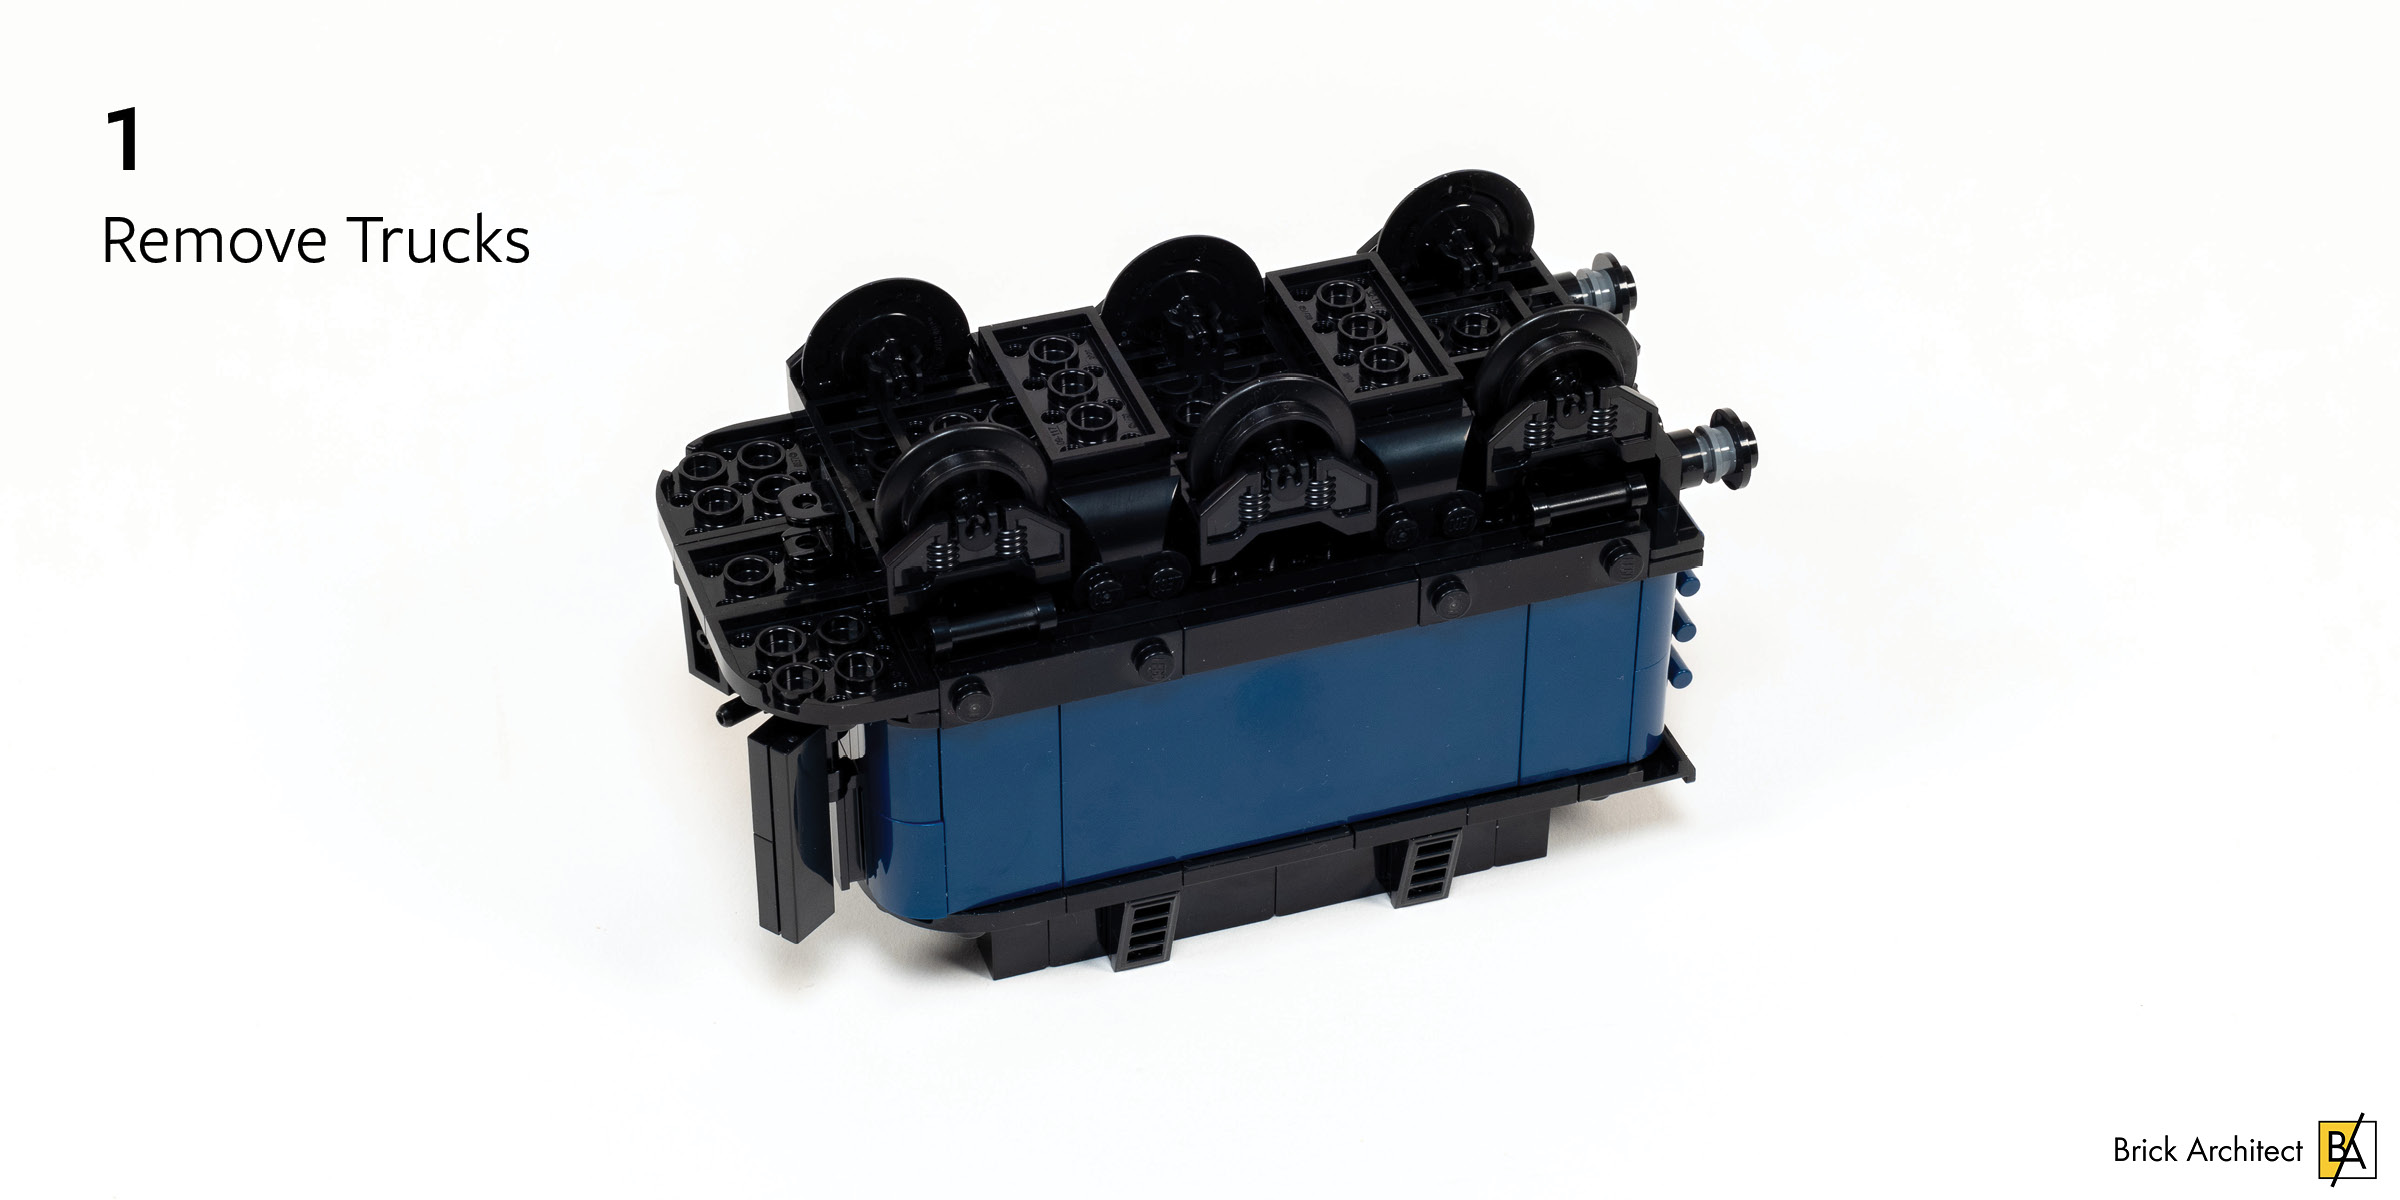
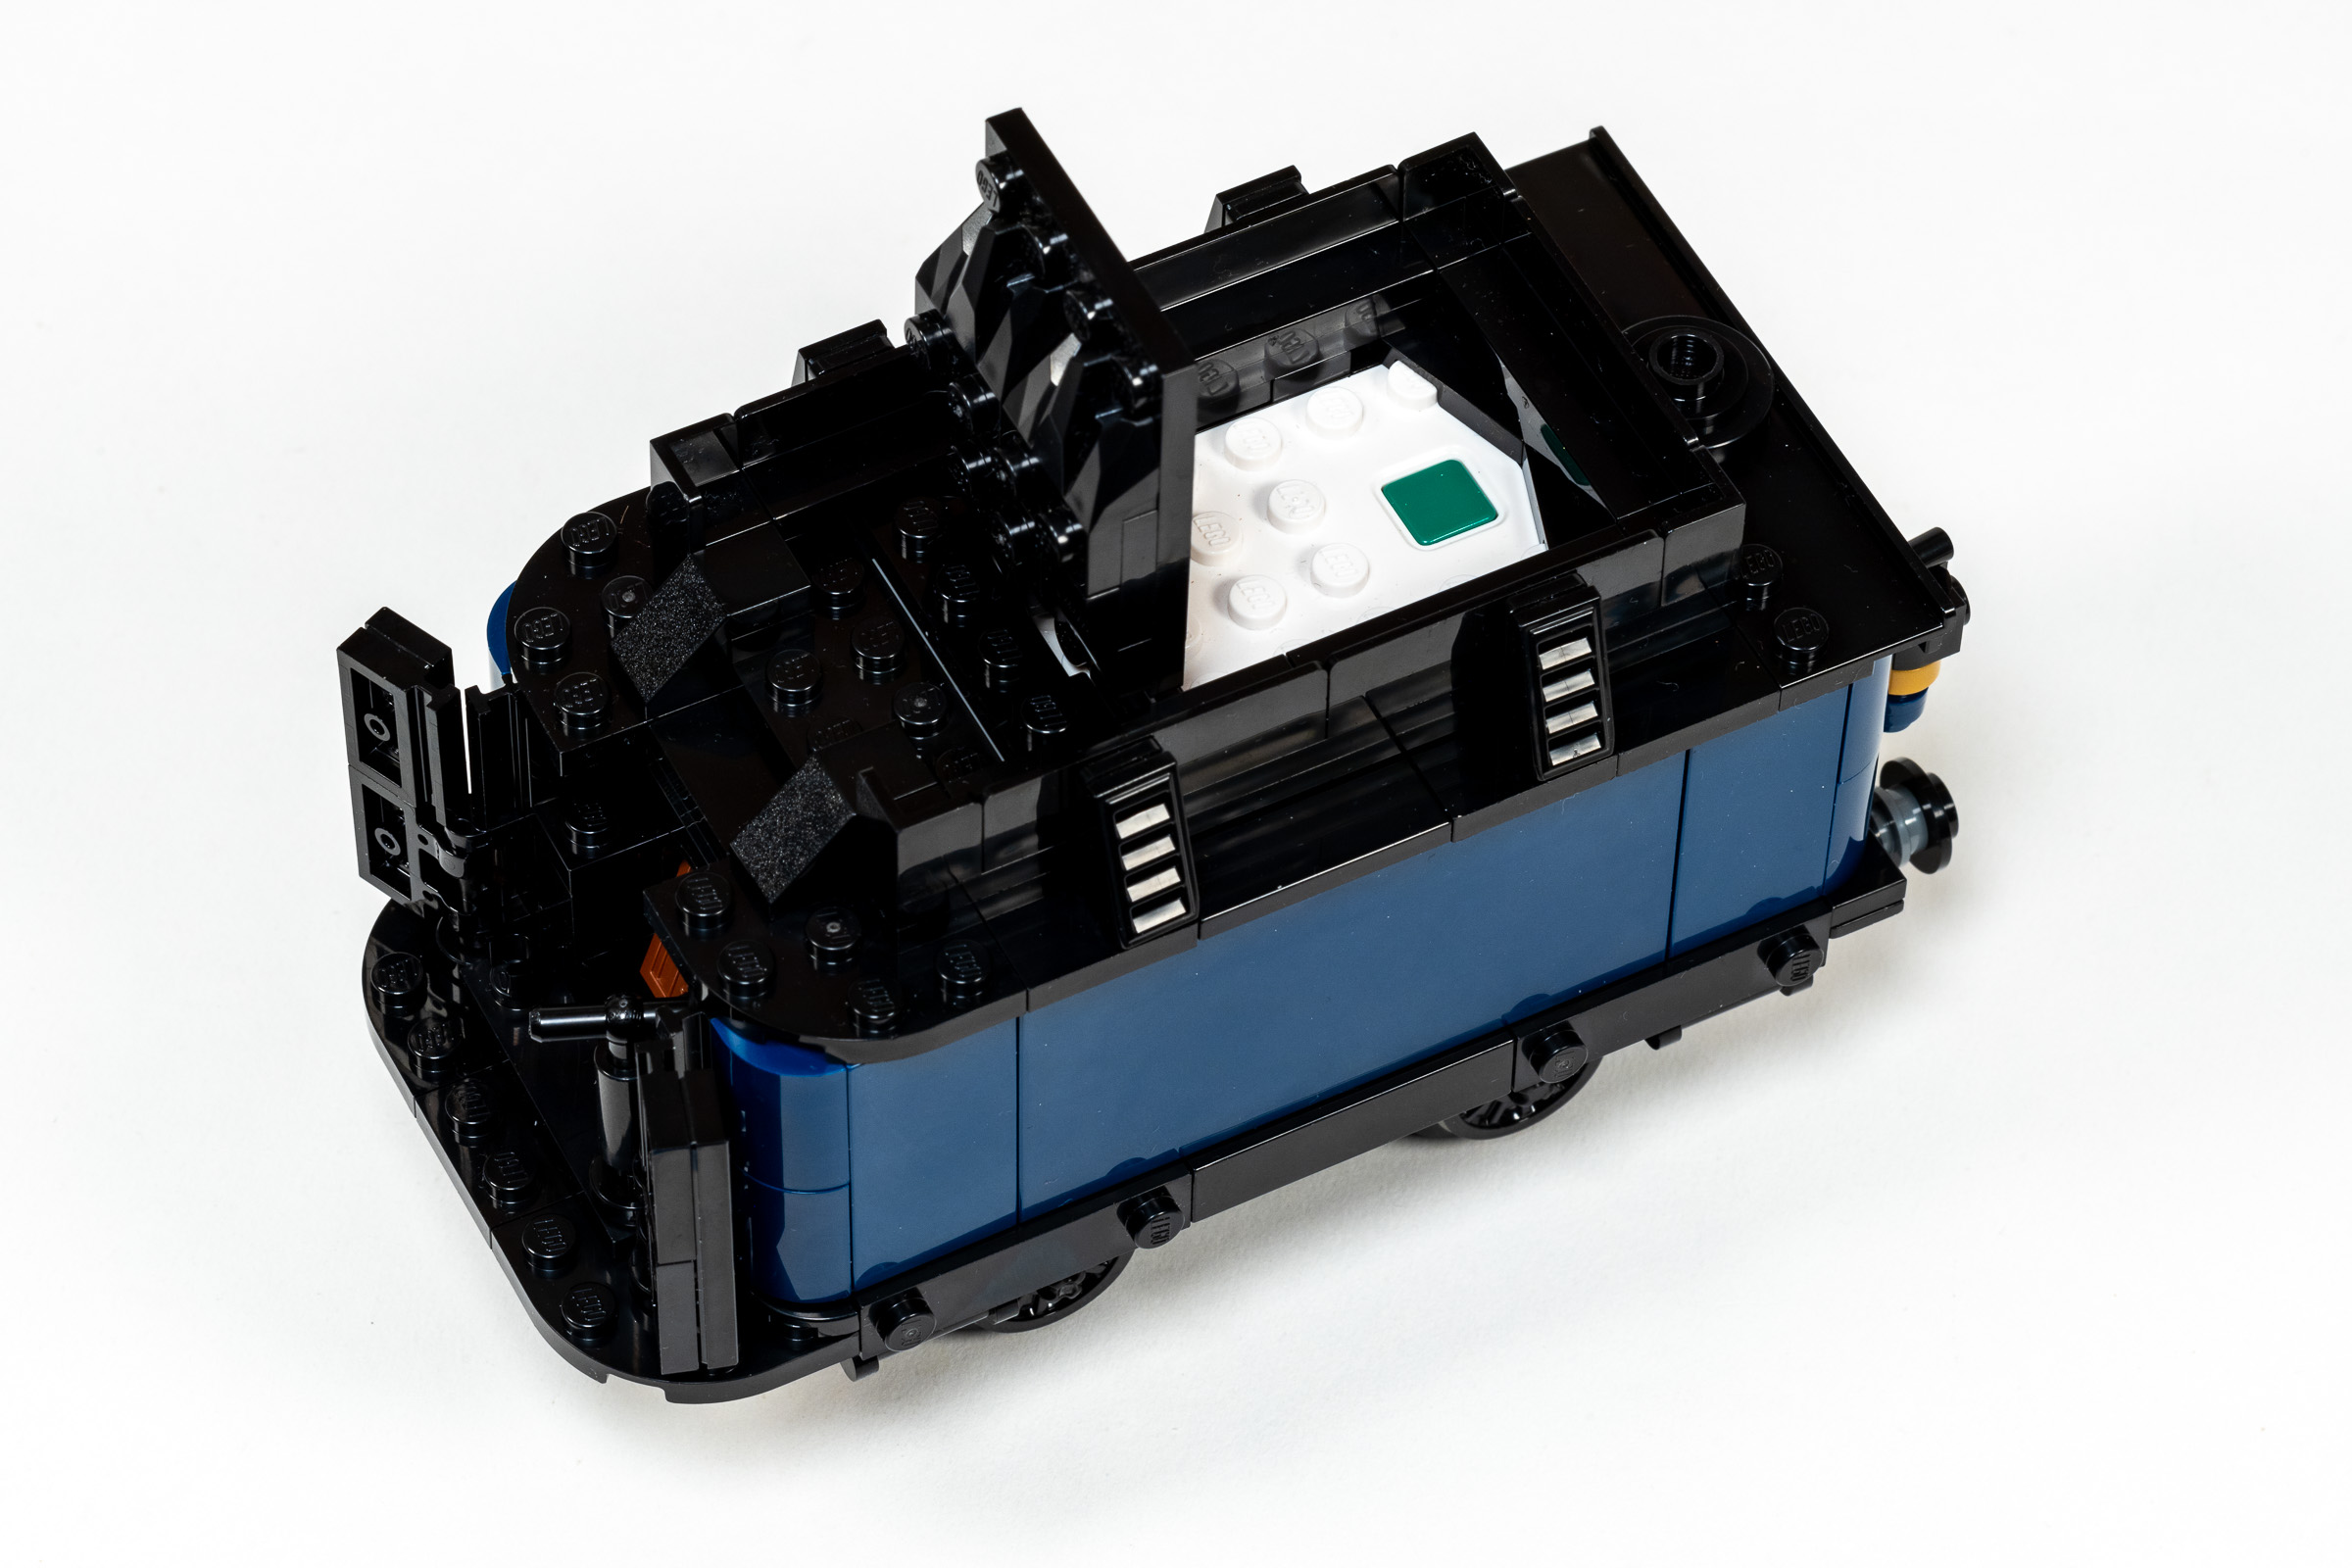
Flip the tender upside-down and remove the trucks.
Removing the trucks is easy, since they are only attached with four double-jumpers (8-studs total). Do take note of the use of jumpers, since the trucks are offset 1/2 stud from the base, and we are not able to do that with the motor. We will touch on this later when we need to re-attach it to the engine.
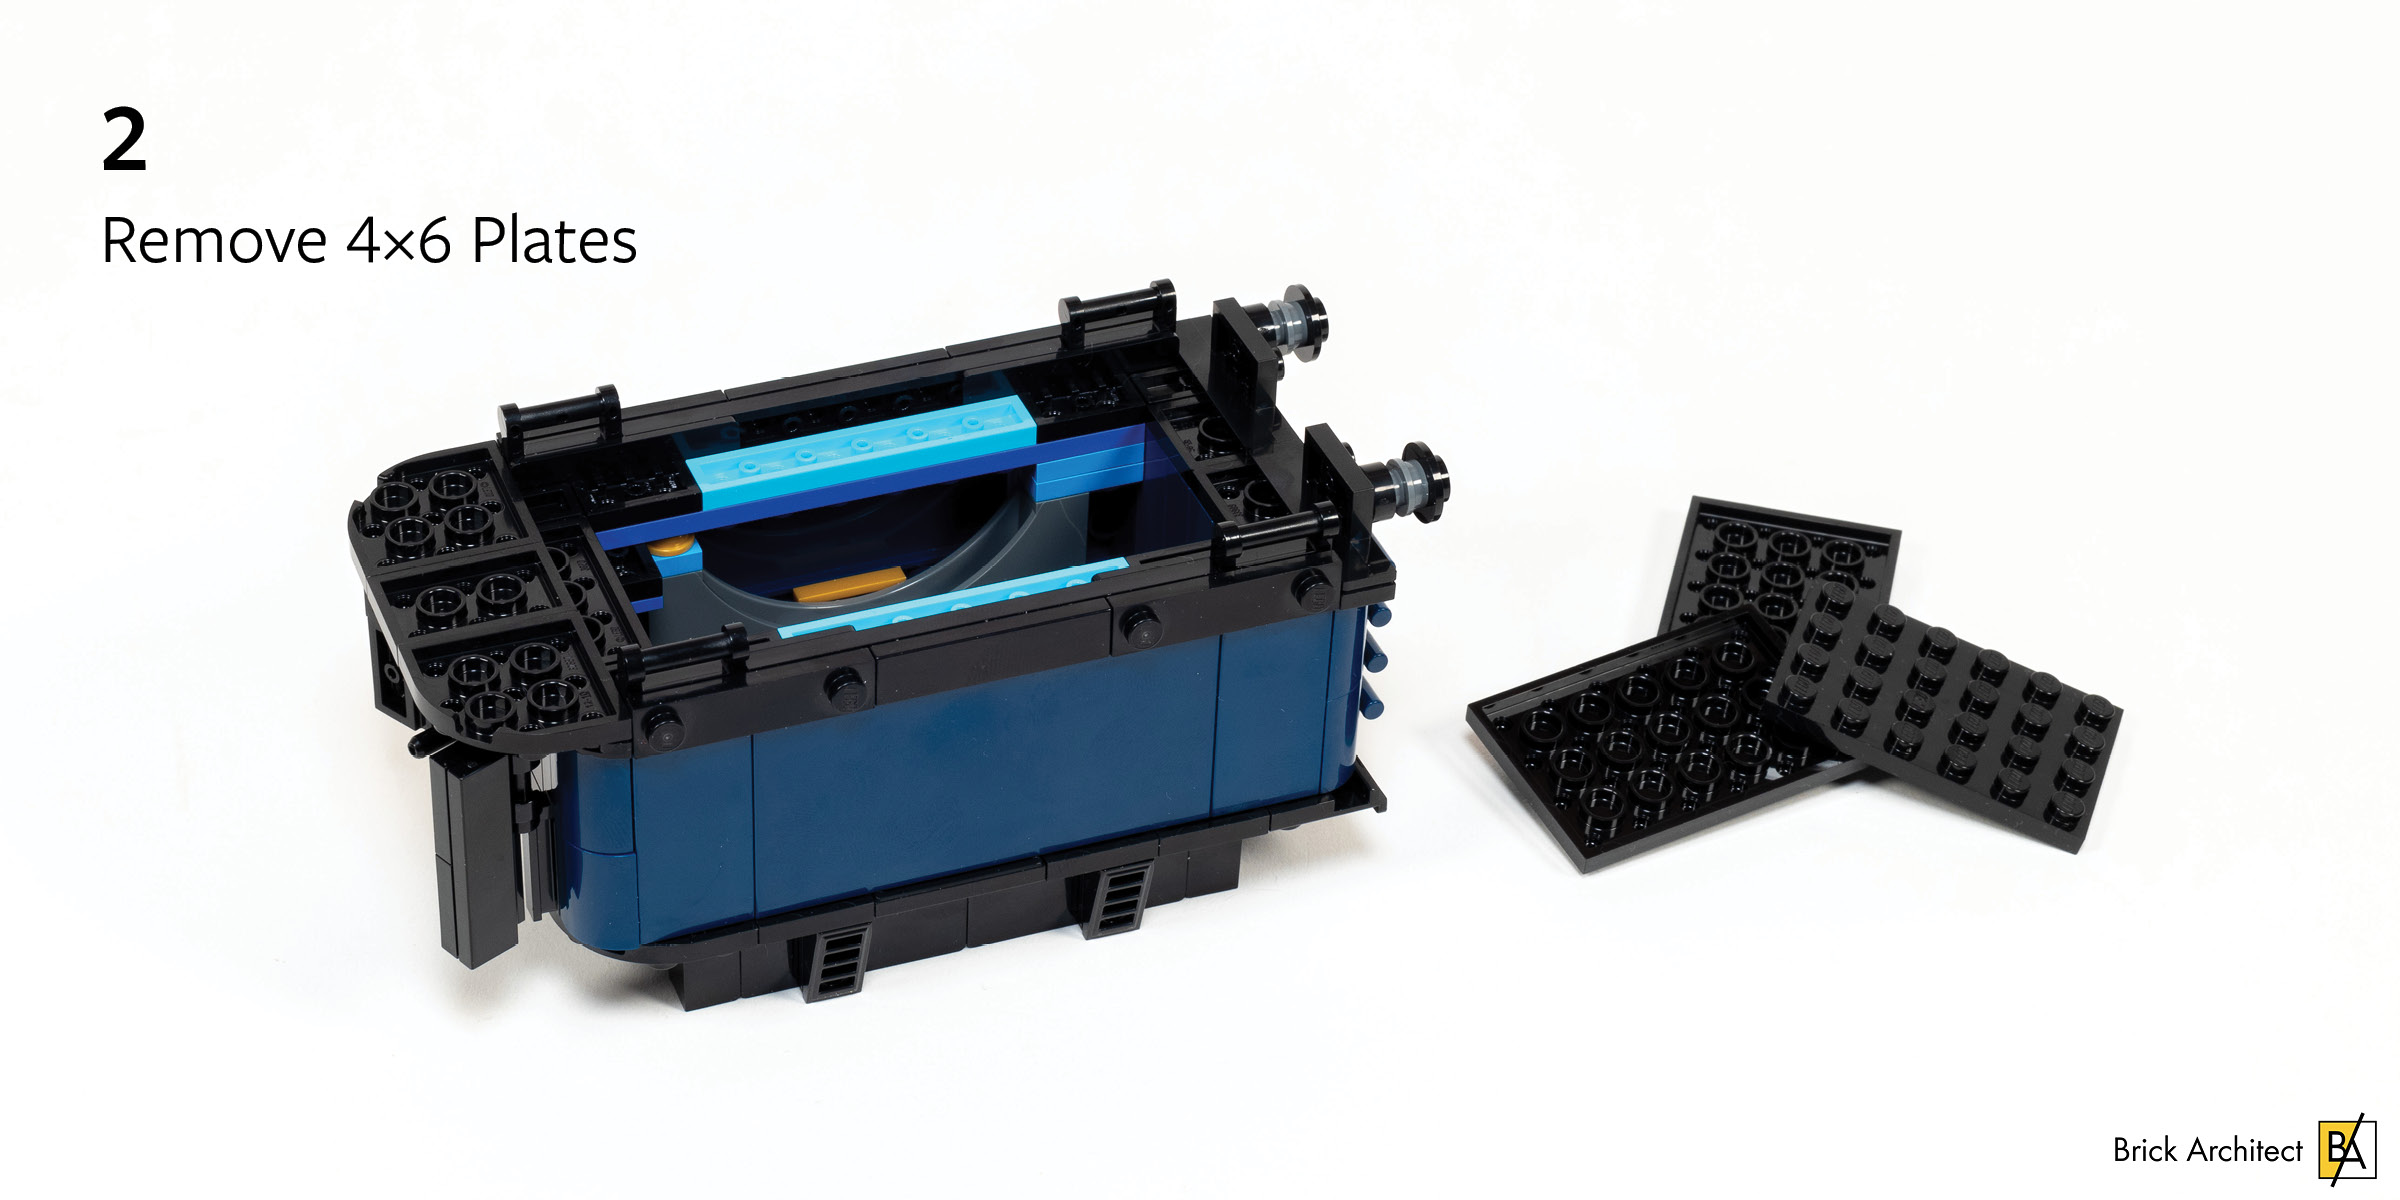
Remove the three 4×6 plates from the bottom.
After removing the trucks, we need to remove the three 4×6 plates from the bottom. The easiest way is to carefully pick it up, open the flap on the top, and apply pressure on the plate in the middle. Once it is removed, the other two come off easily. Do note that this is the only thing holding the back of the hopper in place, and it may fall off once removed.
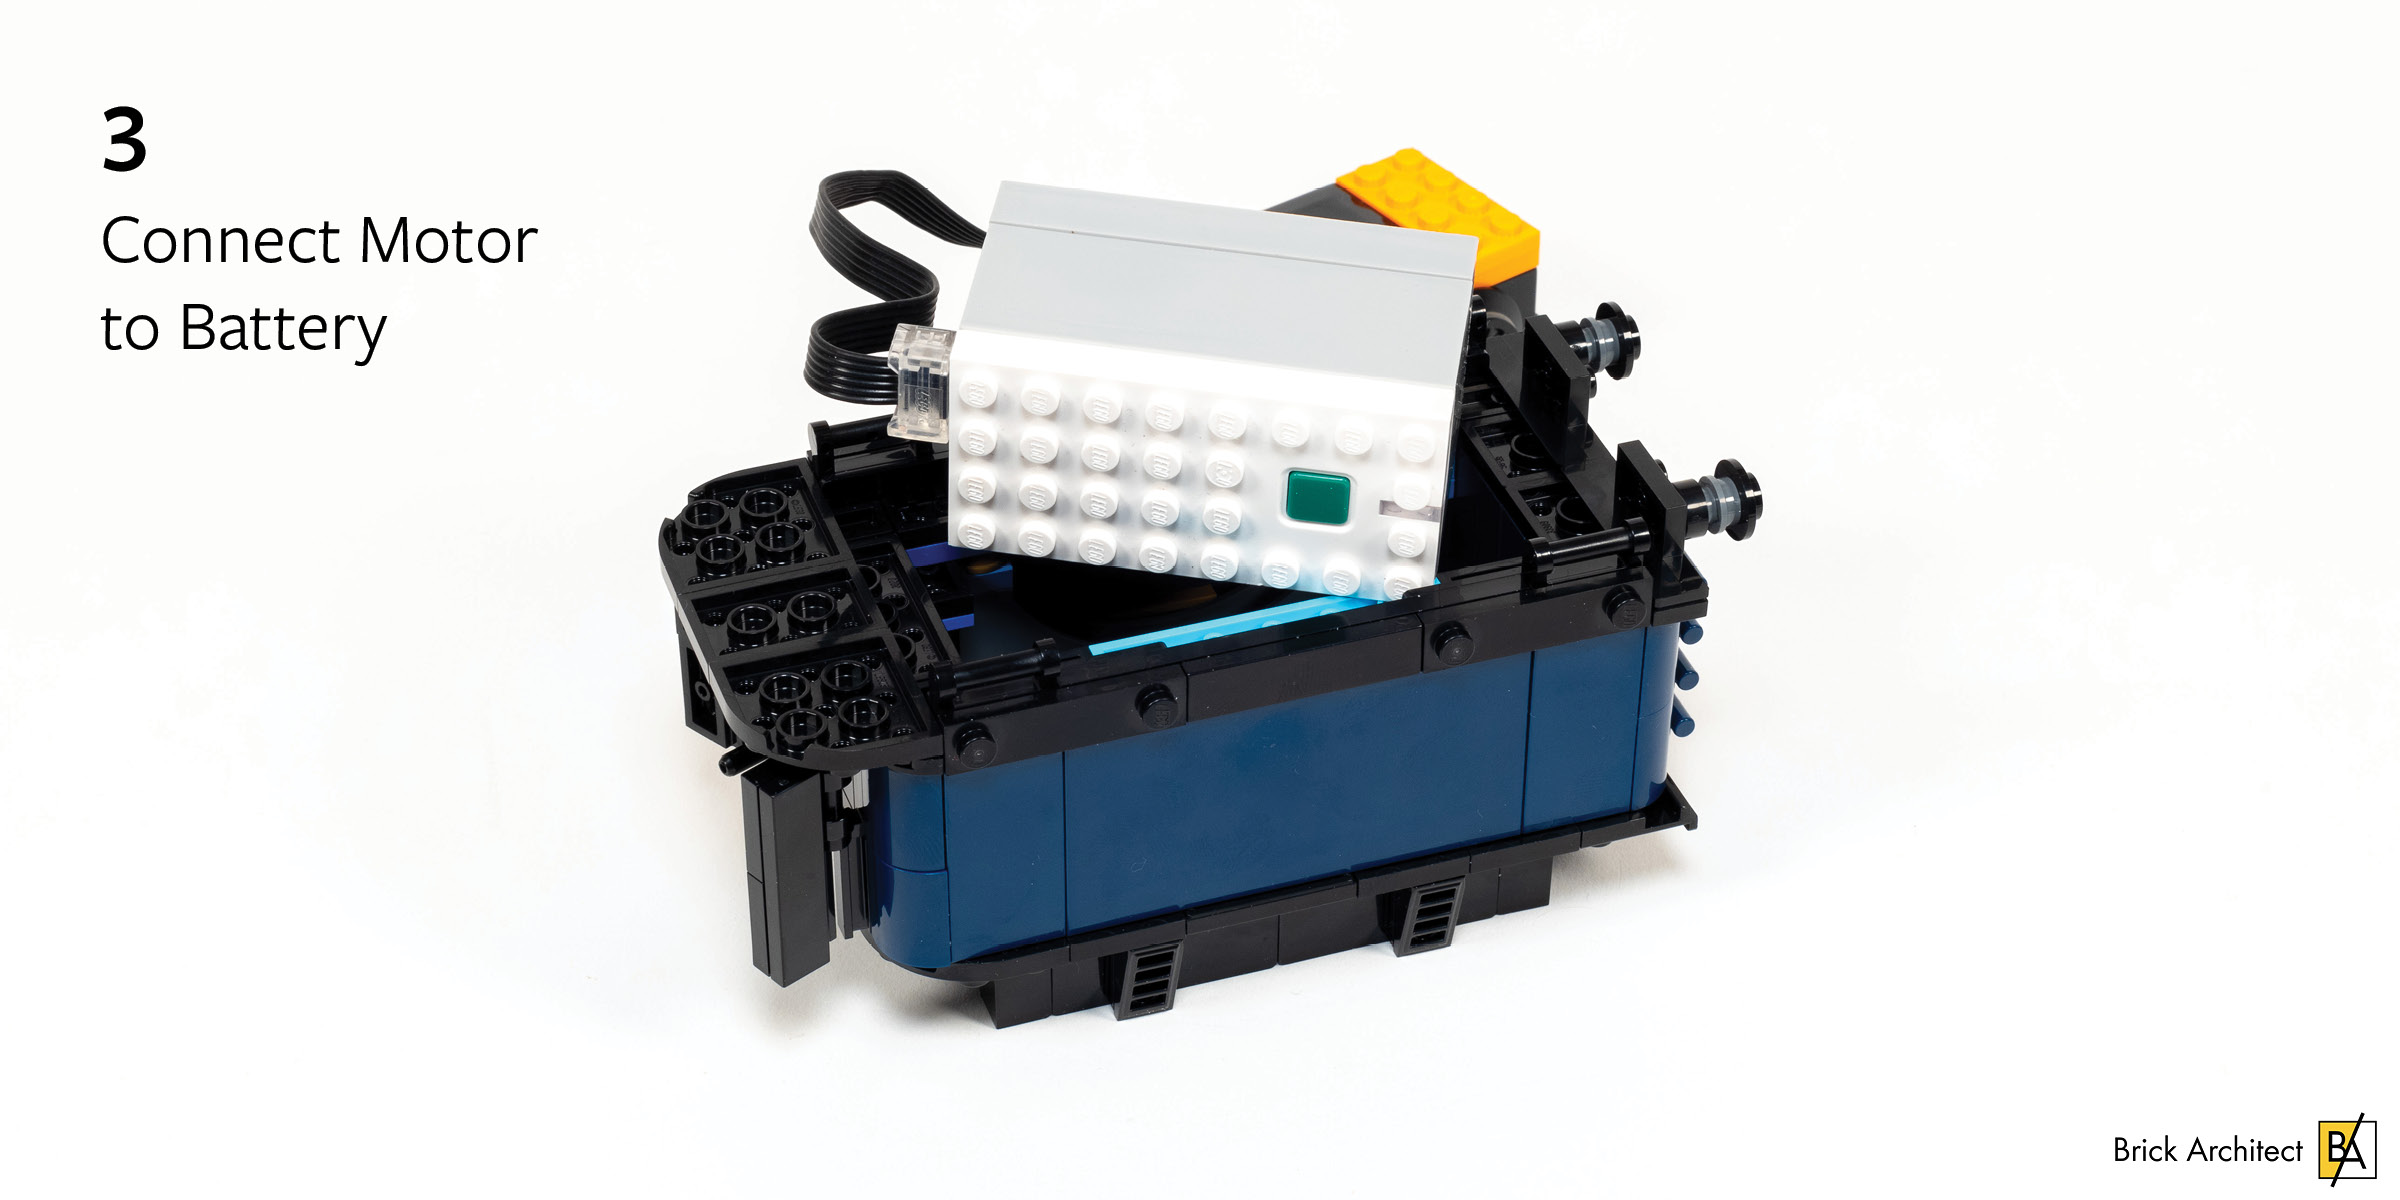
It’s time to get your motor and battery pack ready.
Now it is time to add wheels to your motor (if they had been removed in the past) and attach it to the battery box. Don’t forget to insert batteries now, since you will need to take this apart to replace them. You should also note that I added a stack of two 1×2 plates on either side where the cord comes out of the motor, and two 2×4 plates on the other side.
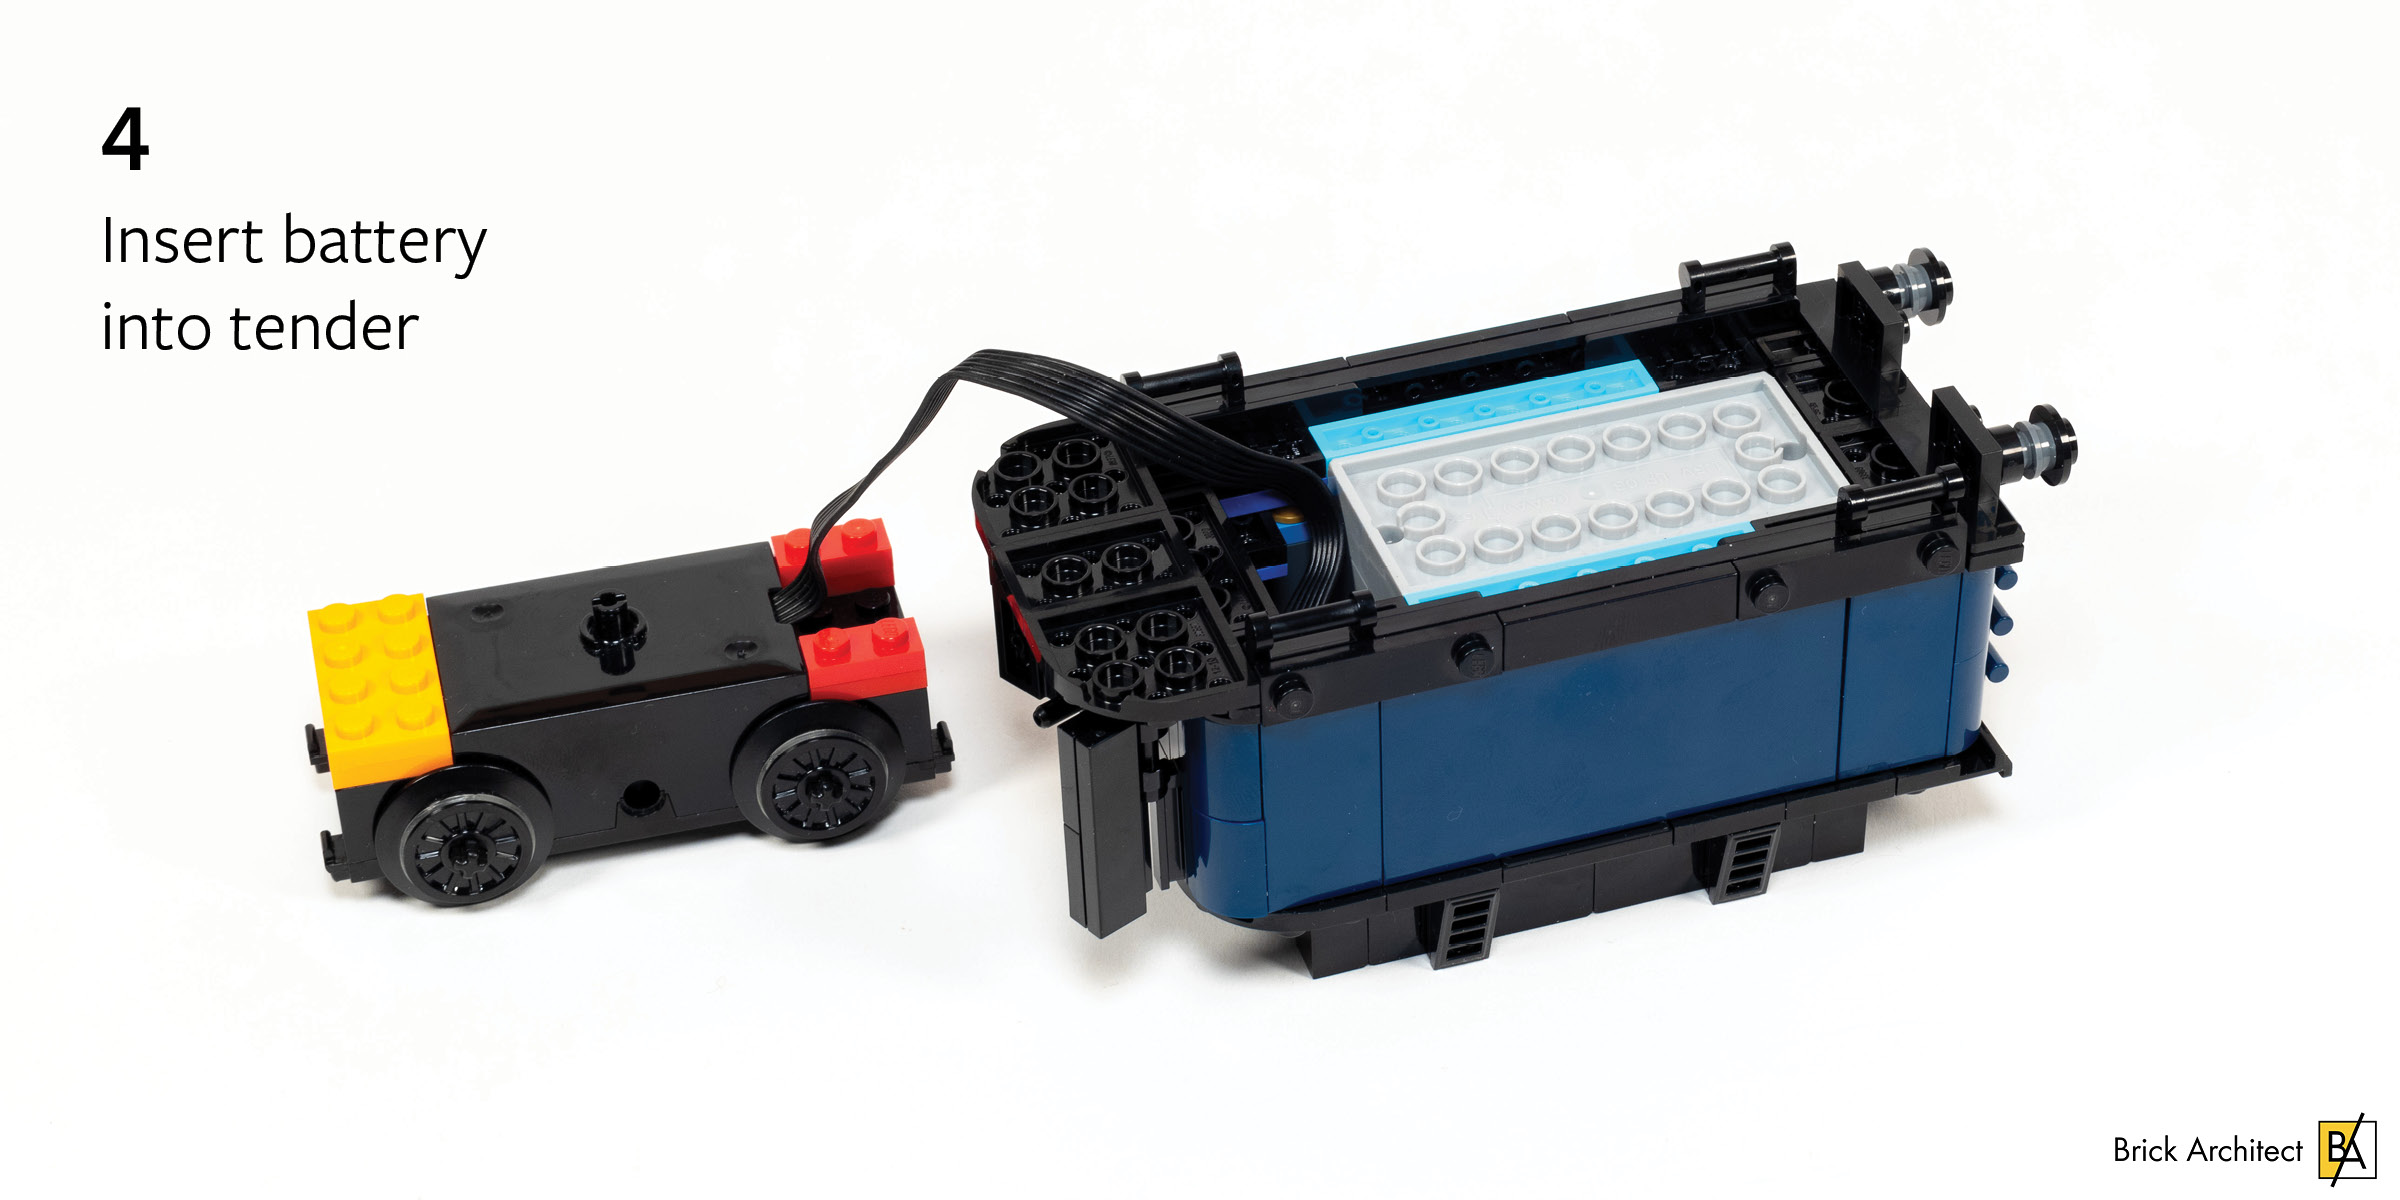
It is very easy to attach the battery box inside the empty space within the tender — almost like it was designed this way on purpose!

Attach plates to keep battery in place.
Now we need to add plates to keep the battery in place. This also re-connects the back of the tender so it stops falling off. Notice that the blue plate in the middle is a 2×6 with holes (part 32001). This is necessary since the motor has a pin on the top.
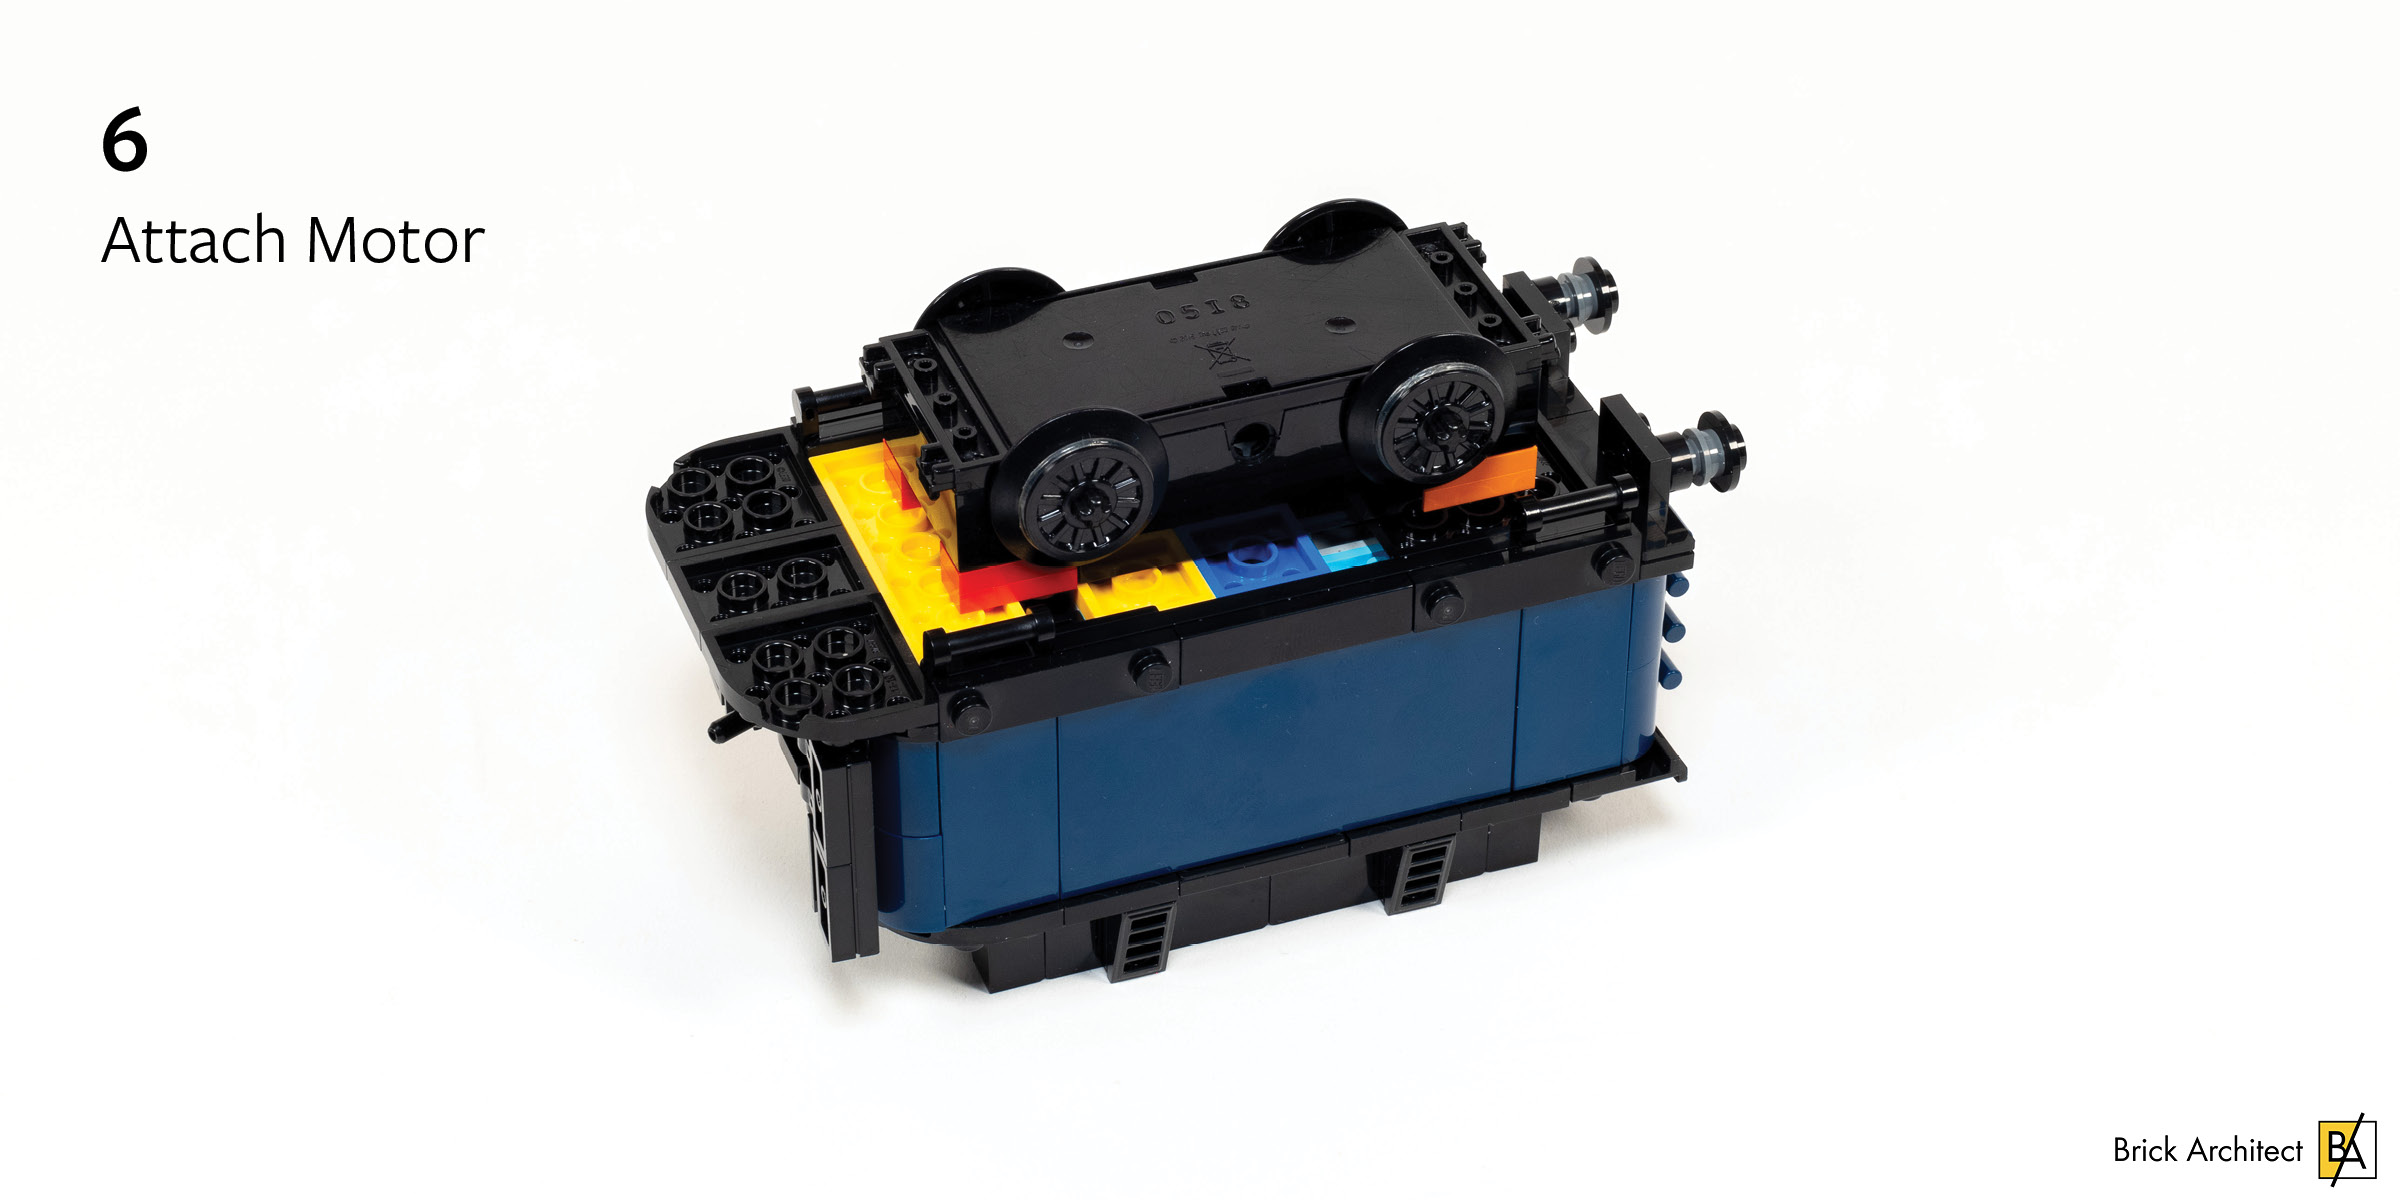
Attach the motor to the bottom after tending to the excess cable.
With the plates installed, we need to carefully push the extra cable into the narrow slot, then attach the motor to the bottom. It is firmly attached to the plates we installed in the previous step, and will not spin. (You can remove them to allow the tender to move more naturally, but it is a very loose connection and I have not found that the rotation is needed in practice.)
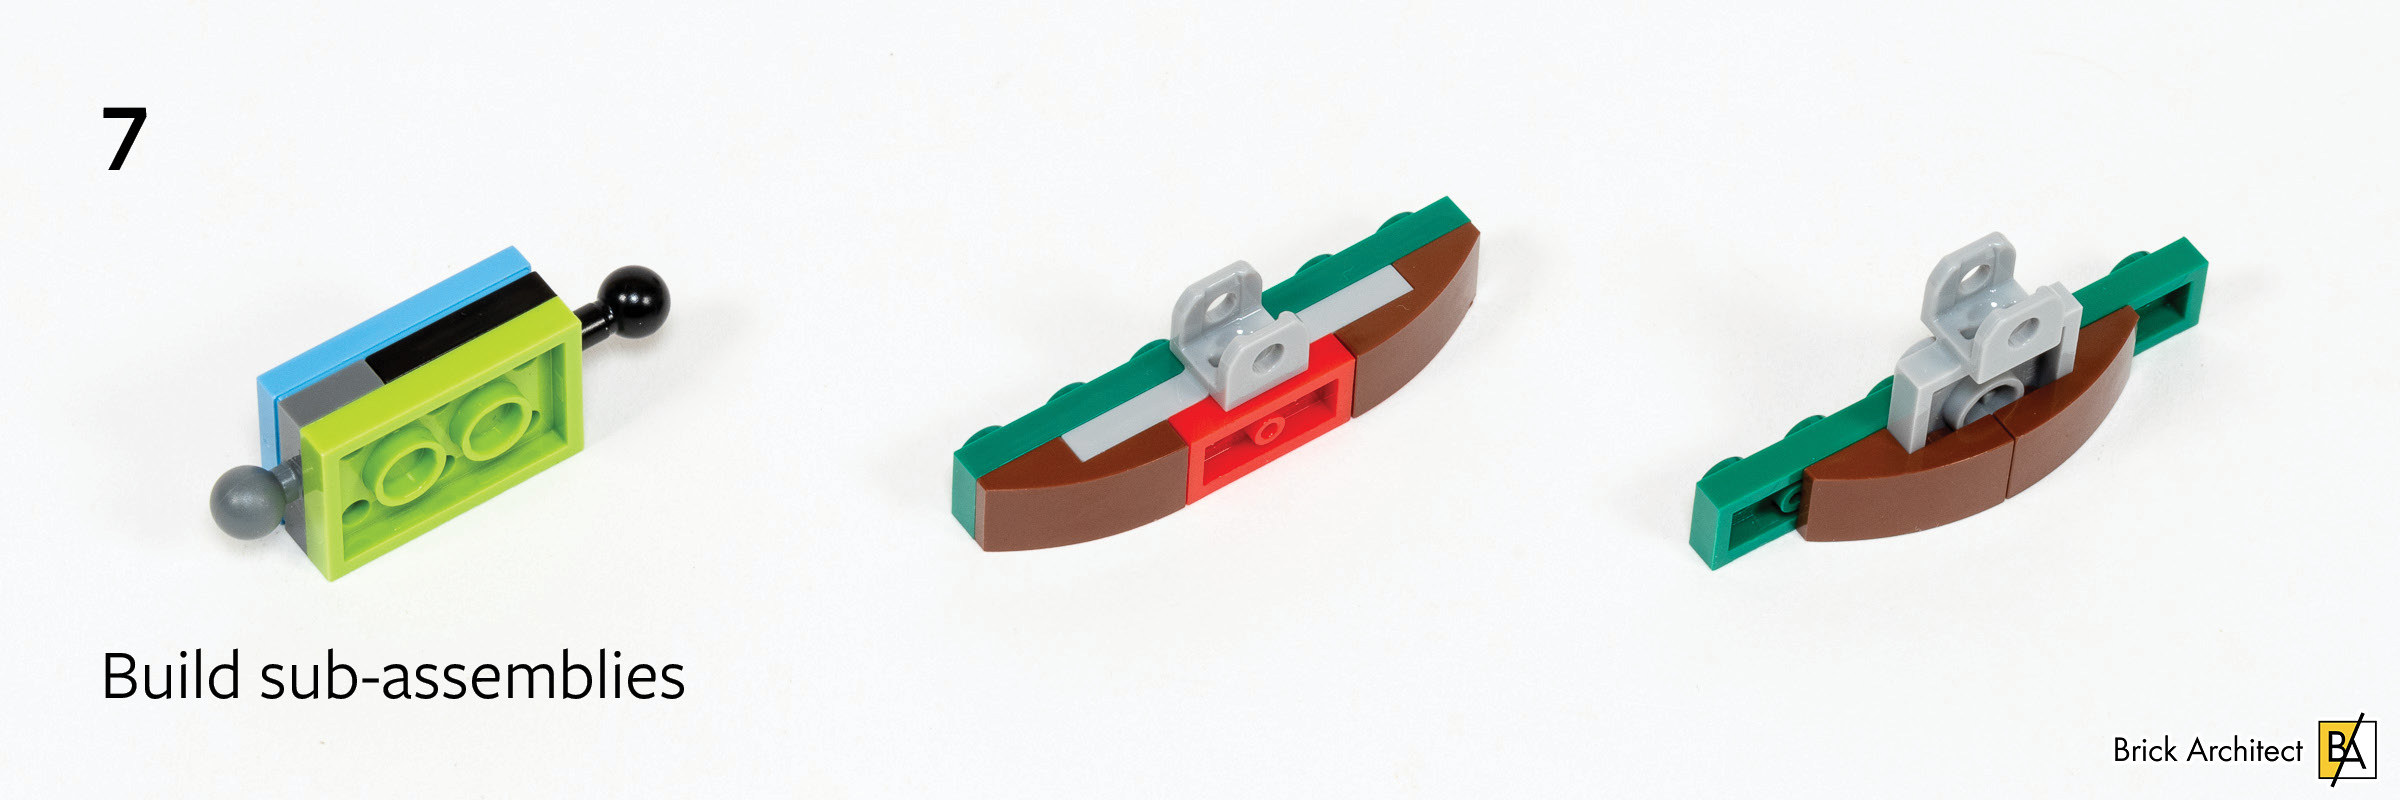
Build three small sub-assemblies using common parts.
Now we just need to build three small sub-assemblies using common parts. The hardest part to find is likely the 1×4 Socket, Side (part 98263) which has been in 52 sets since 2005.
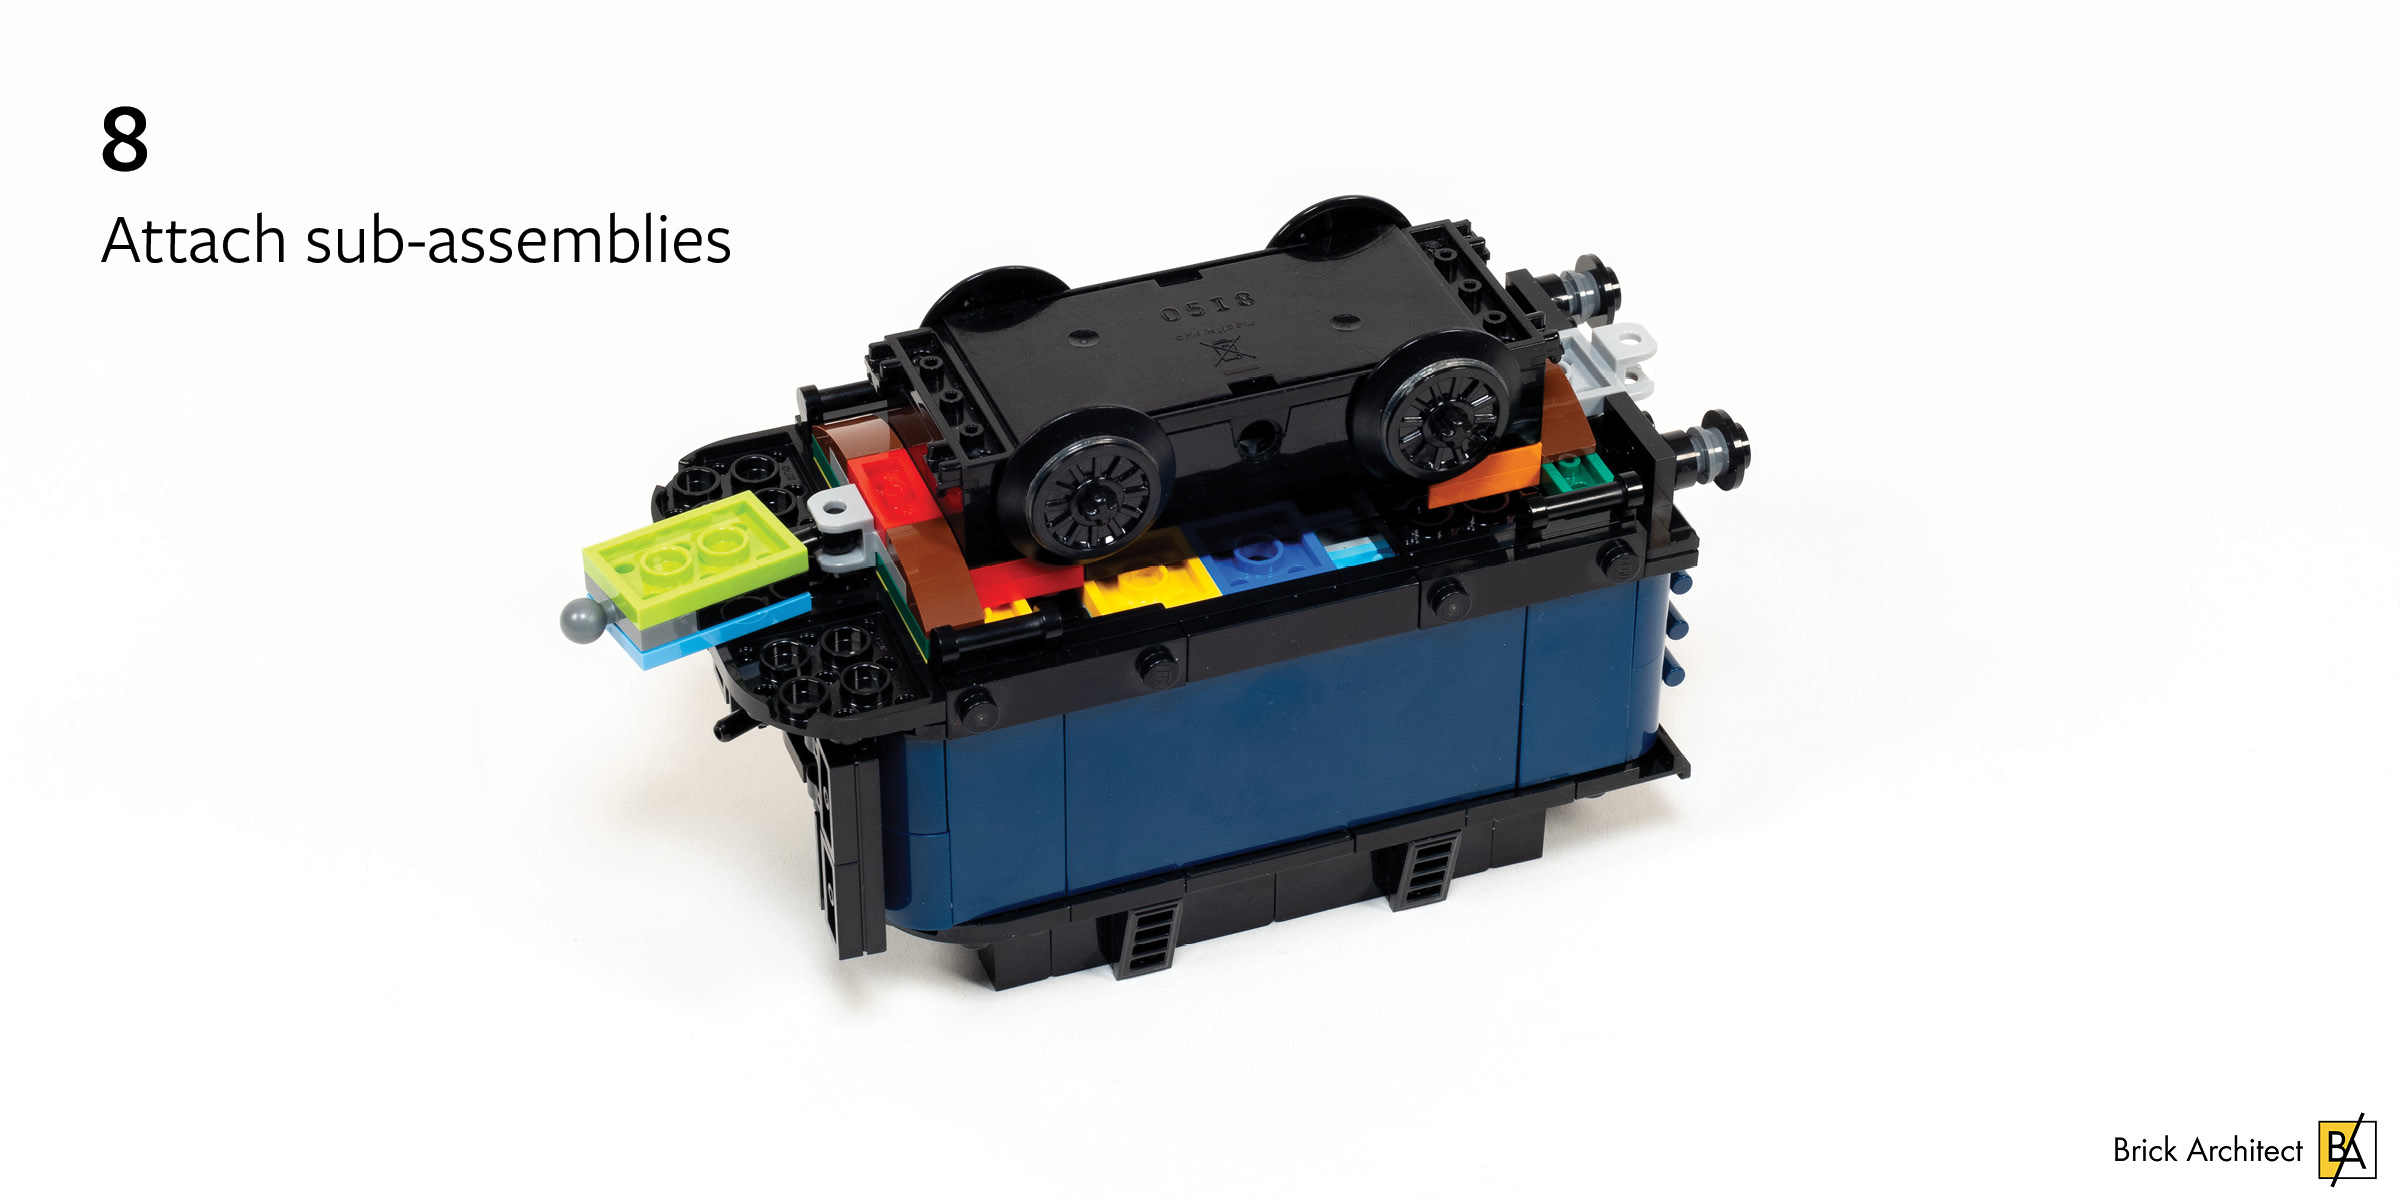
Attaching the three sub-assemblies.
Pay attention to which module you use on the front and back… The back needs the longer 2×2 clip, while the front needs the shorter 1×4 clip.
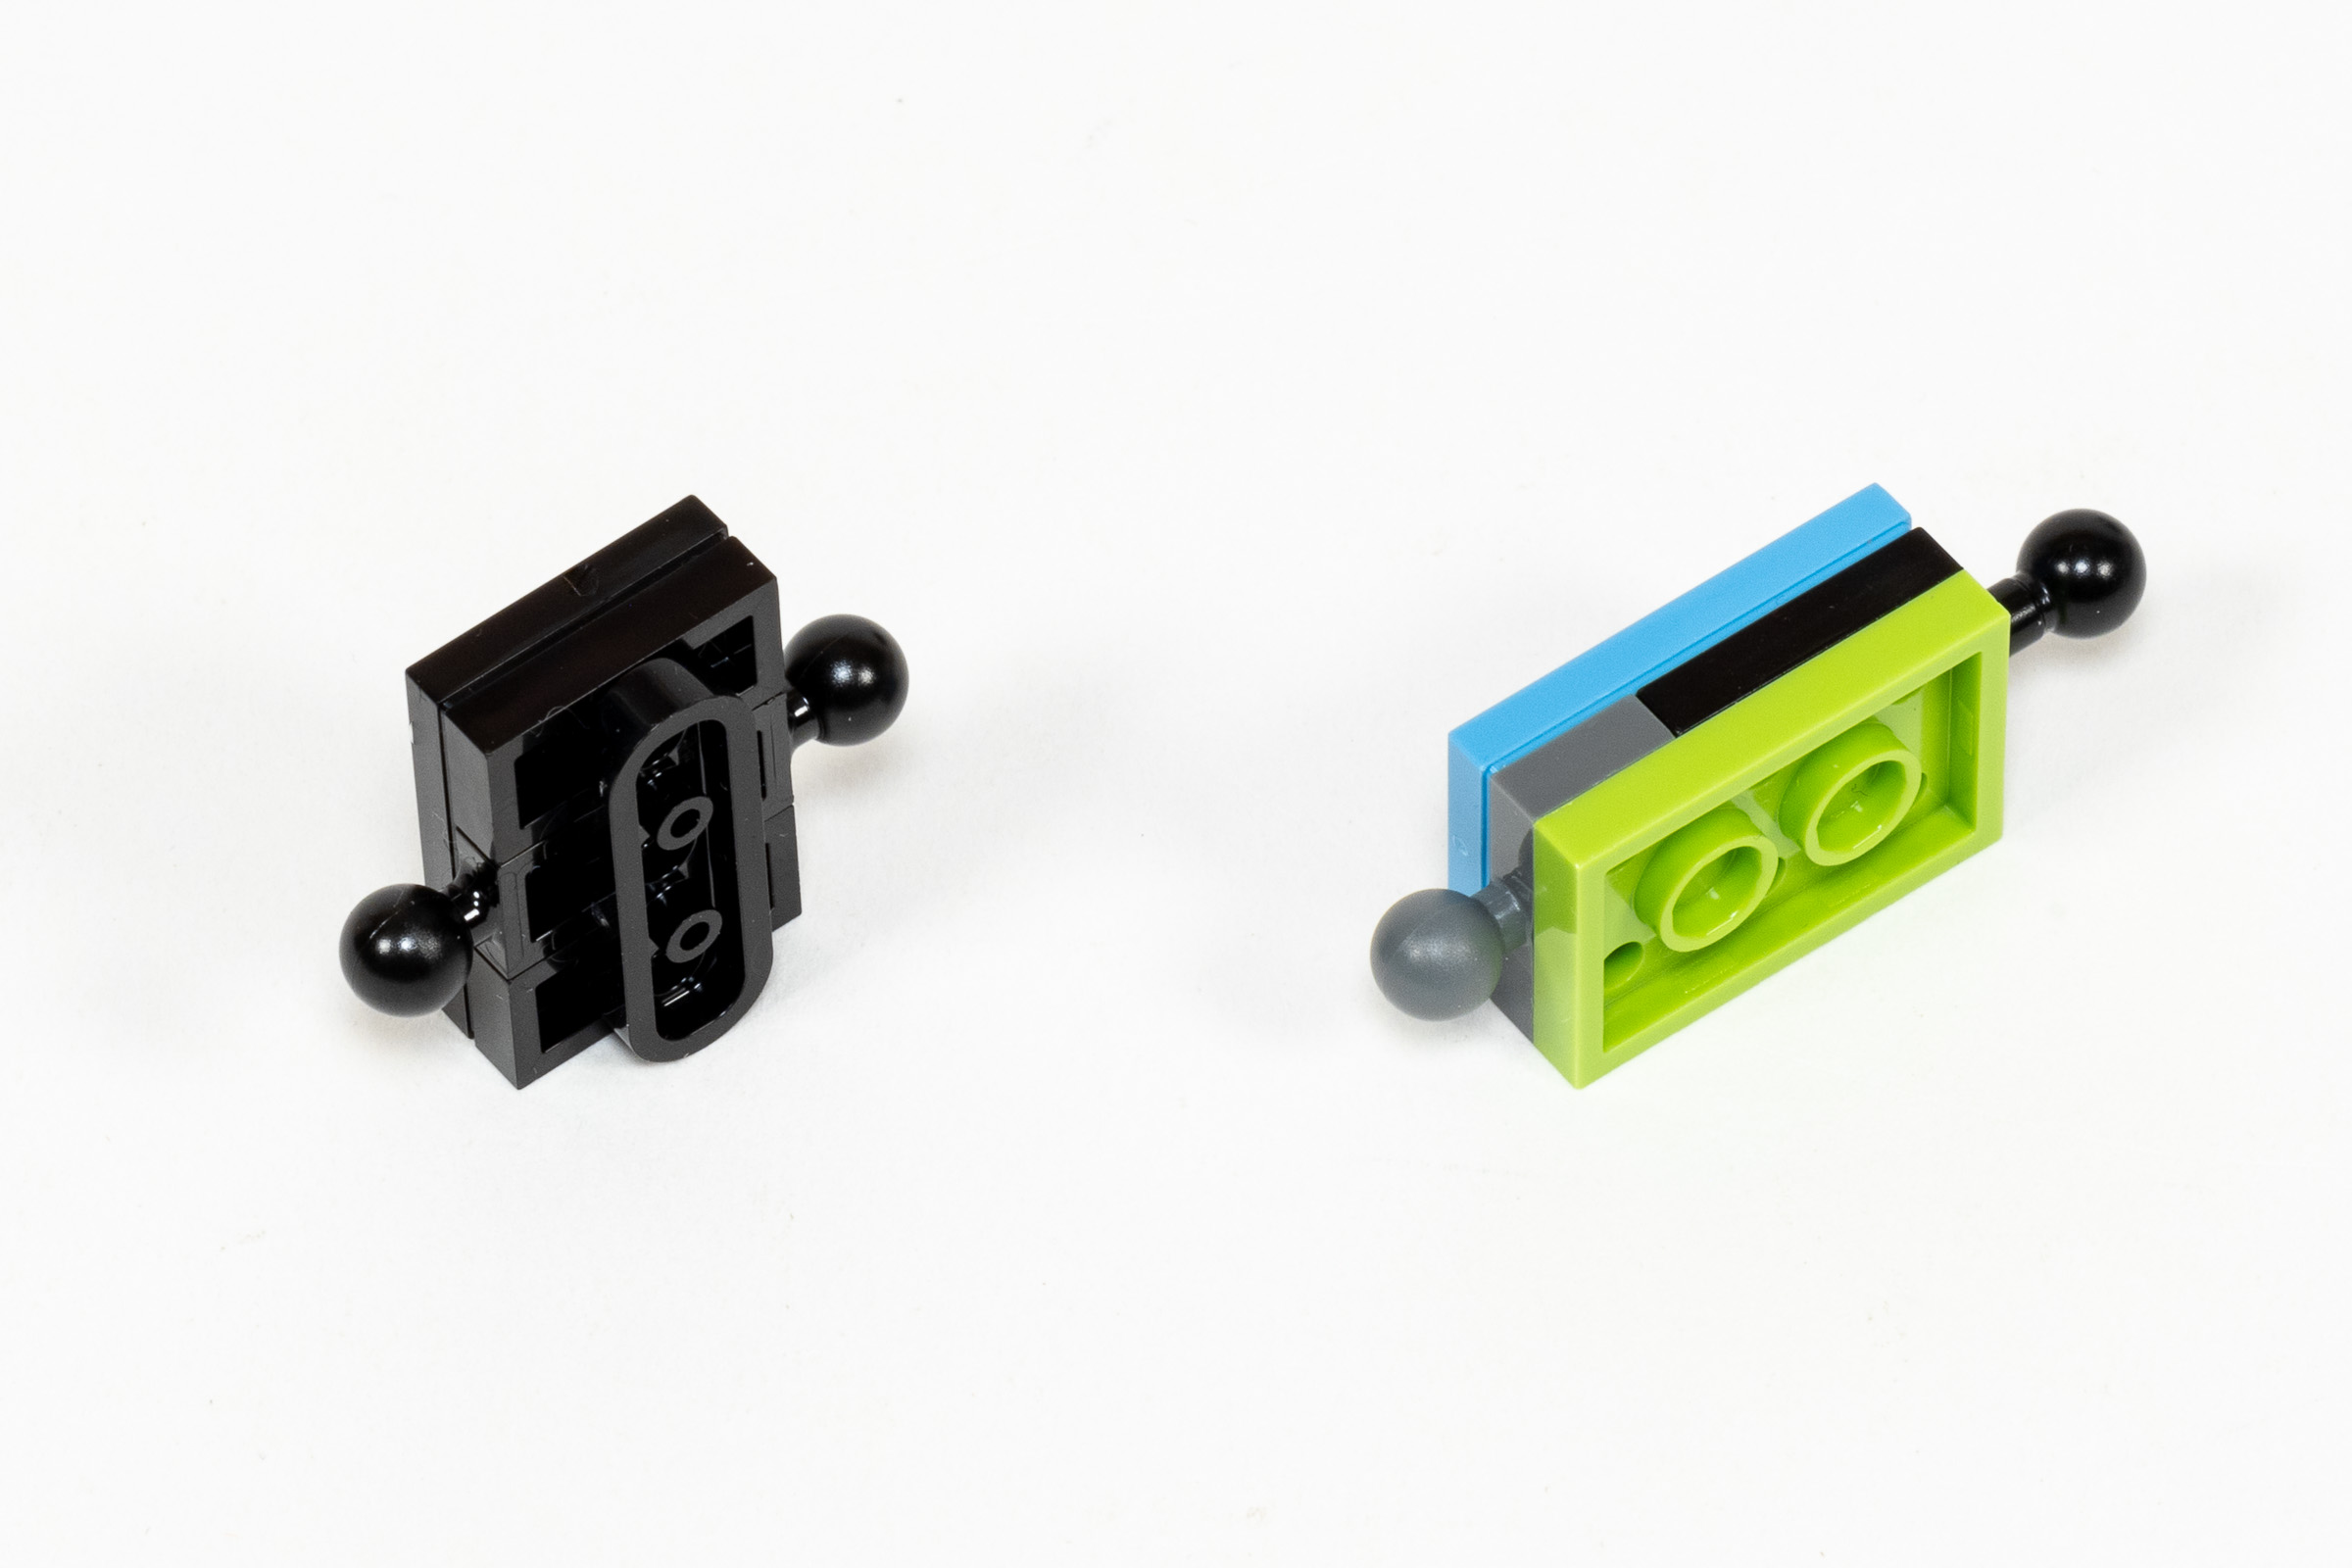
Shorter linkage included with set (left) and longer linkage that is needed for this mod (right).
After installing the three sub-assemblies, your train is ready to go for a drive. You may be wondering why we created a different linkage between this car and the Engine, and it all comes down to that 1/2 stud offset I mentioned earlier. The smaller 2-stud long linkage which is provided with the set is unable to make turn around the standard radius of LEGO track. The additional stud of length gives enough play for it to make the turn.
It’s suspicious how well the power button fits inside the tender.
Reinforcing my theory that this set was designed to be motorized, check out how nicely the power button fits under the flap on the top of the tender. Thanks to the notches, it is easy to press the power button.
As you can see, the train makes the tightest radius comfortably with this modification.
And there you have it! I’m happy to report that it took less than an hour to modify #21344 The Orient Express to work with a standard LEGO Train motor and LEGO City Hub. My son and I played with the train on a mix of straight and curved track for about 15 minutes earlier today without any issues. That said, I am very eager to see how more experienced LEGO Train enthusiasts motorize this set.
I’ve already seen at least one builder (Nick Dombi) who already has plans to put a standard motor inside the engine itself, instead of using the standard train motor.
i added 2 x 9v motors and works good, one in the coal cart and one in the front of first wagon.
I am working on creating this train to run on a track above my kitchen cabinets. I have included the motor. But I have a problem. It only works on straight pieces. The train stops running on turns. Any idea why that is?
The motor is barely powerful enough to power this train, so you might need to modify the coupling between cars to be longer, or even just get freshly charged batteries.
I am building the Orient Express just now and it occurred to me as I am a train nerd that a prototypically short fourgon or baggage coach which has few windows and big doors could have two power bogies like a locomotive. It’s the one with the kind of observation tower on it’s roof.
I tried this with 12v and 9v motors, putting a couple of weight bricks in the tender instead of a battery box. The 12v motor just spun its wheels, but the 9v was able to shift the train, at least for a couple of circuits.
Is it possible to add a third set of wheels on the motor just so it matches the original three sets of wheels on the tender?
Not easily, since there isn’t a Technic Pin Hole in that location on the motor.
Thank you for publishing this.
I like the way the train looks and might eventually buy it, but my hobby is focused on doing shows, so it would have to run. I’m still on Power Functions, too . . .
So would adding more motorized tenders allow it to pull more cars?
I have not tested this, but I expect that a second motorized tender would increase power and speed to a more acceptable level and would also allow a slightly longer train.
Hi. Thanks for those instructions. I was wondering if someone could tell me the item number for the train motor wheels. I got the motor but I forgot to order some wheels. Thanks.
I believe you need these:
https://brickarchitect.com/parts/57999
You can buy from LEGO directly using the “Pick a Brick” link on that page (or from Bricklink).
—tom