
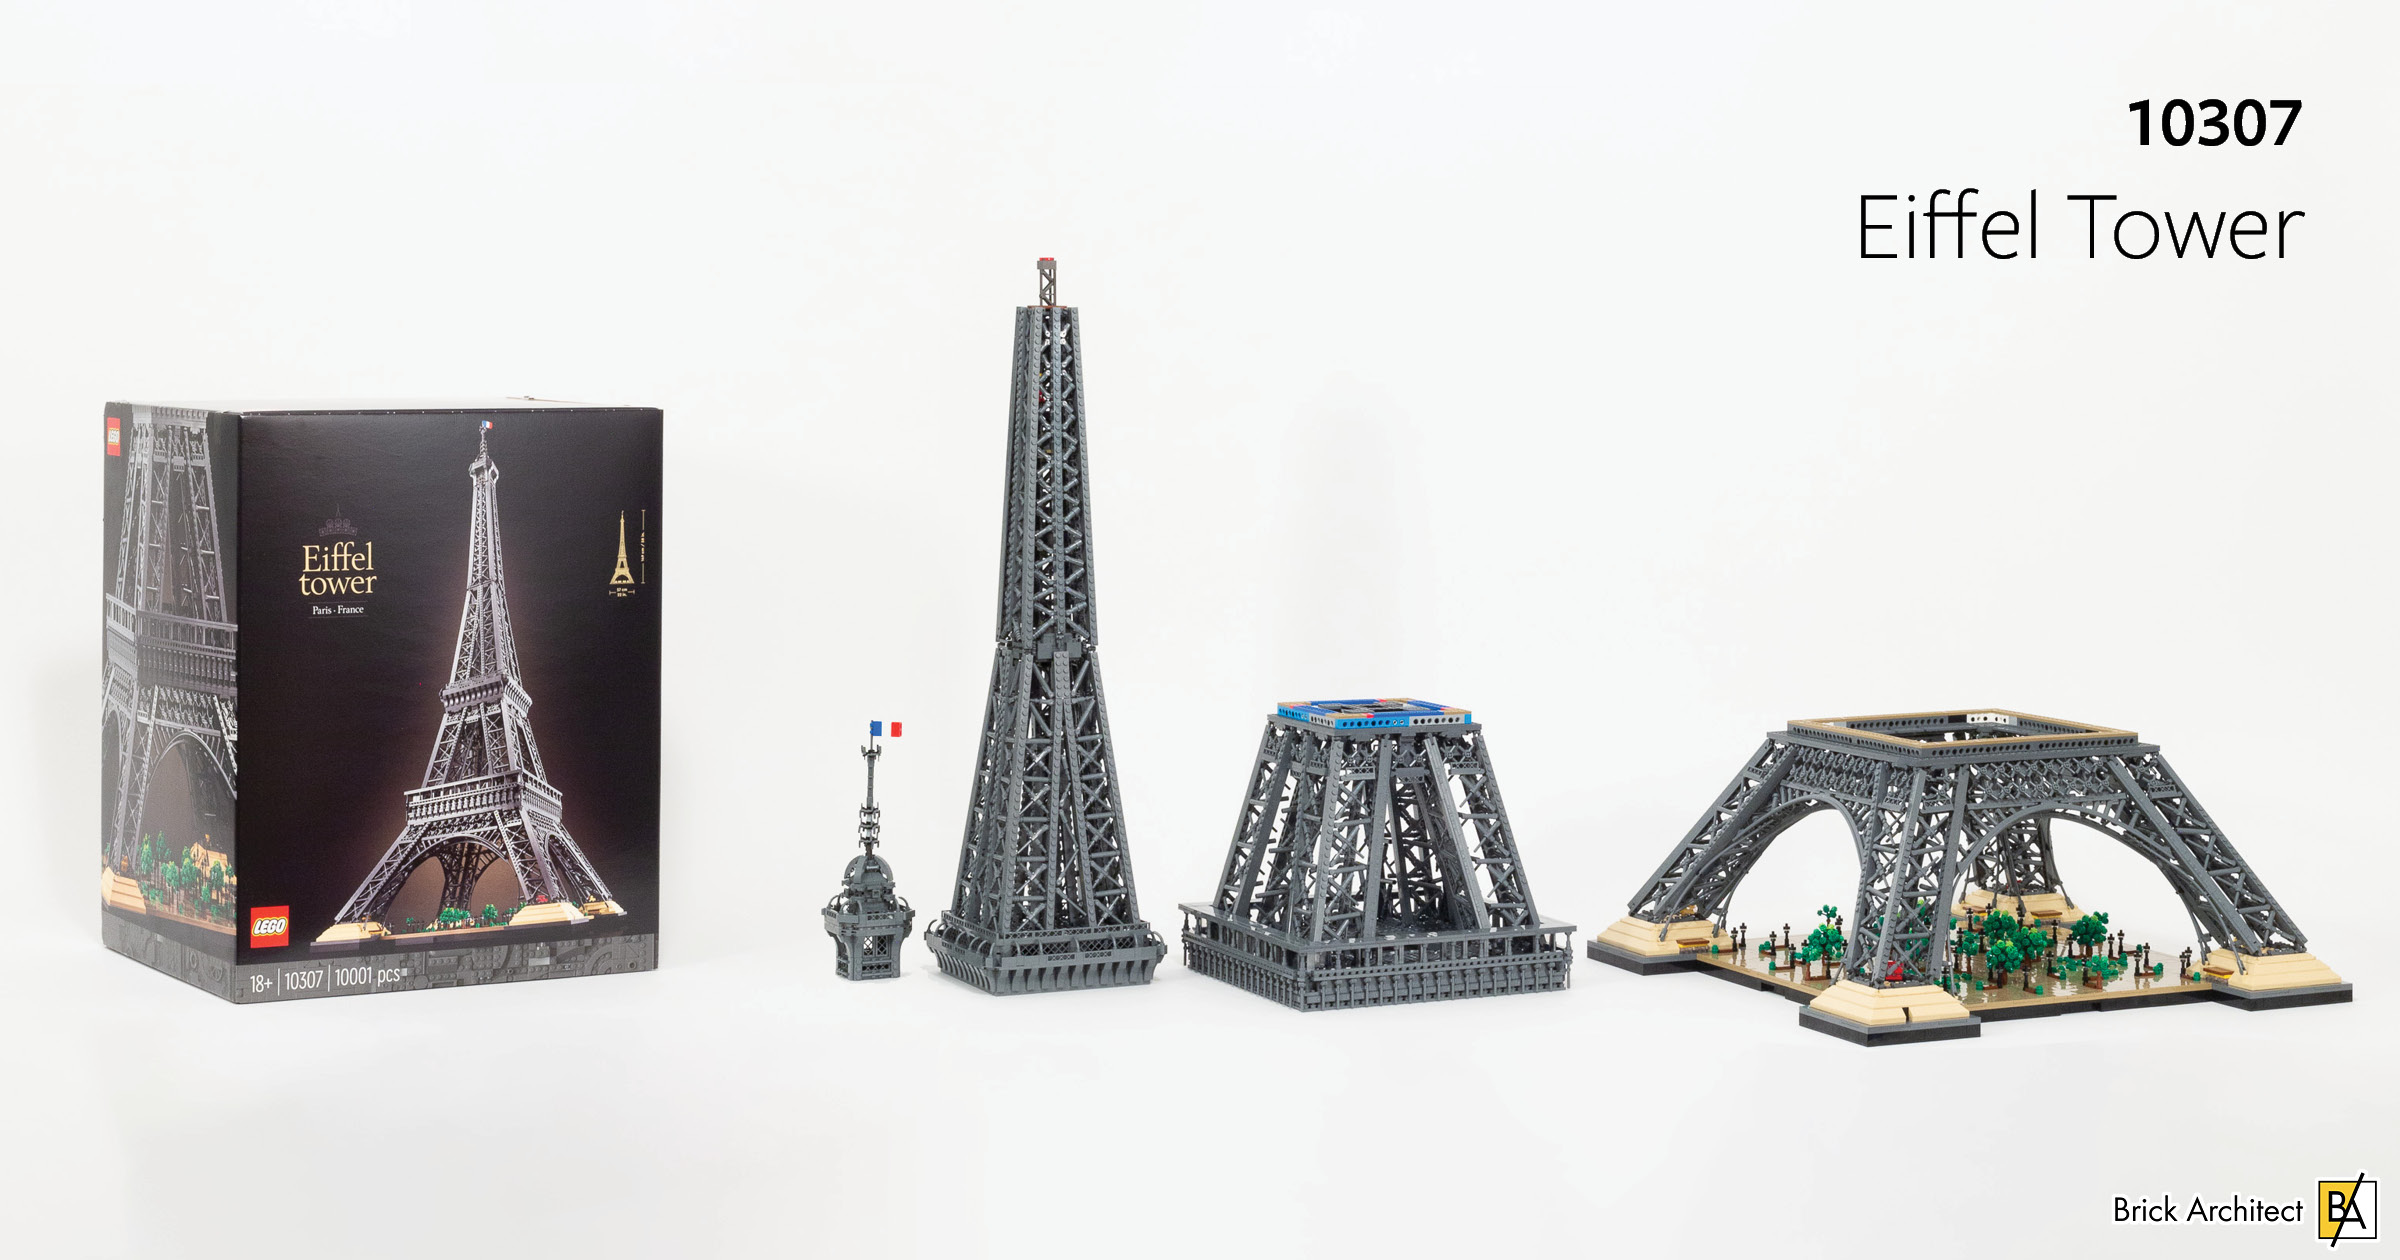
Review: #10307 Eiffel Tower
The tallest LEGO set ever produced is arguably the largest LEGO set ever created when you consider the overall volume. But can it possibly be worth the $630 price or the time commitment — and where will you put it?
The Eiffel Tower is arguably the most iconic tower in the world, and has been immortalized in many different LEGO sets over the years. LEGO fans around the world are excited to see what a massive, modern take on this iconic landmark will offer. Let’s find out together!
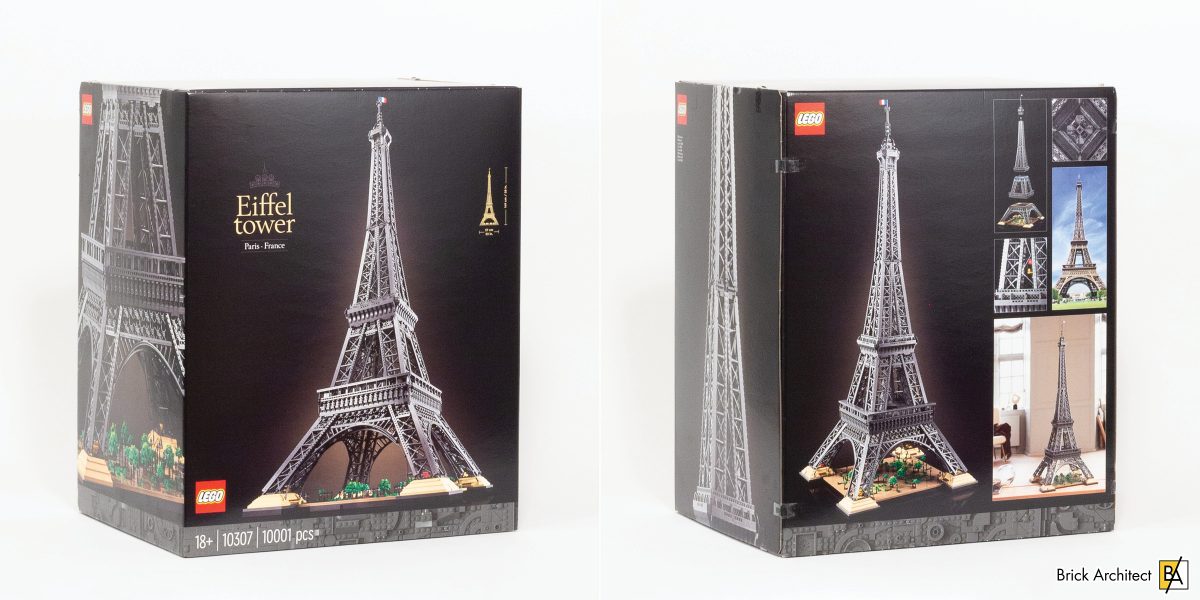
#10307 Eiffel Tower – Box Front and Back.
First Impressions
Before seeing photos of the set or receiving the package, I can only guess about the scope and scale of this upcoming LEGO set based on previous sets in the Creator Expert series (now under the “Icons” / 18+ Adults Welcome branding). The most recent previous set in the series was #10276 Colosseum, which with 9036 pieces is one of the largest LEGO sets ever released.
My expectations for the Eiffel Tower are a similar part count, but a much taller model than The Colosseum because that model is quite dense and parts-intensive. The Eiffel Tower’s airy lattice of iron will take up a lot more space – vertical space in particular. My best guess is a 64×64 stud base, likely using 16 of the same 16×16 stud LEGO Art panels used for the Colosseum. This would result in a model that is between 3 and 4 feet tall. That’s about 1/2 the scale of the gigantic version which was on display at BrickCon this year.
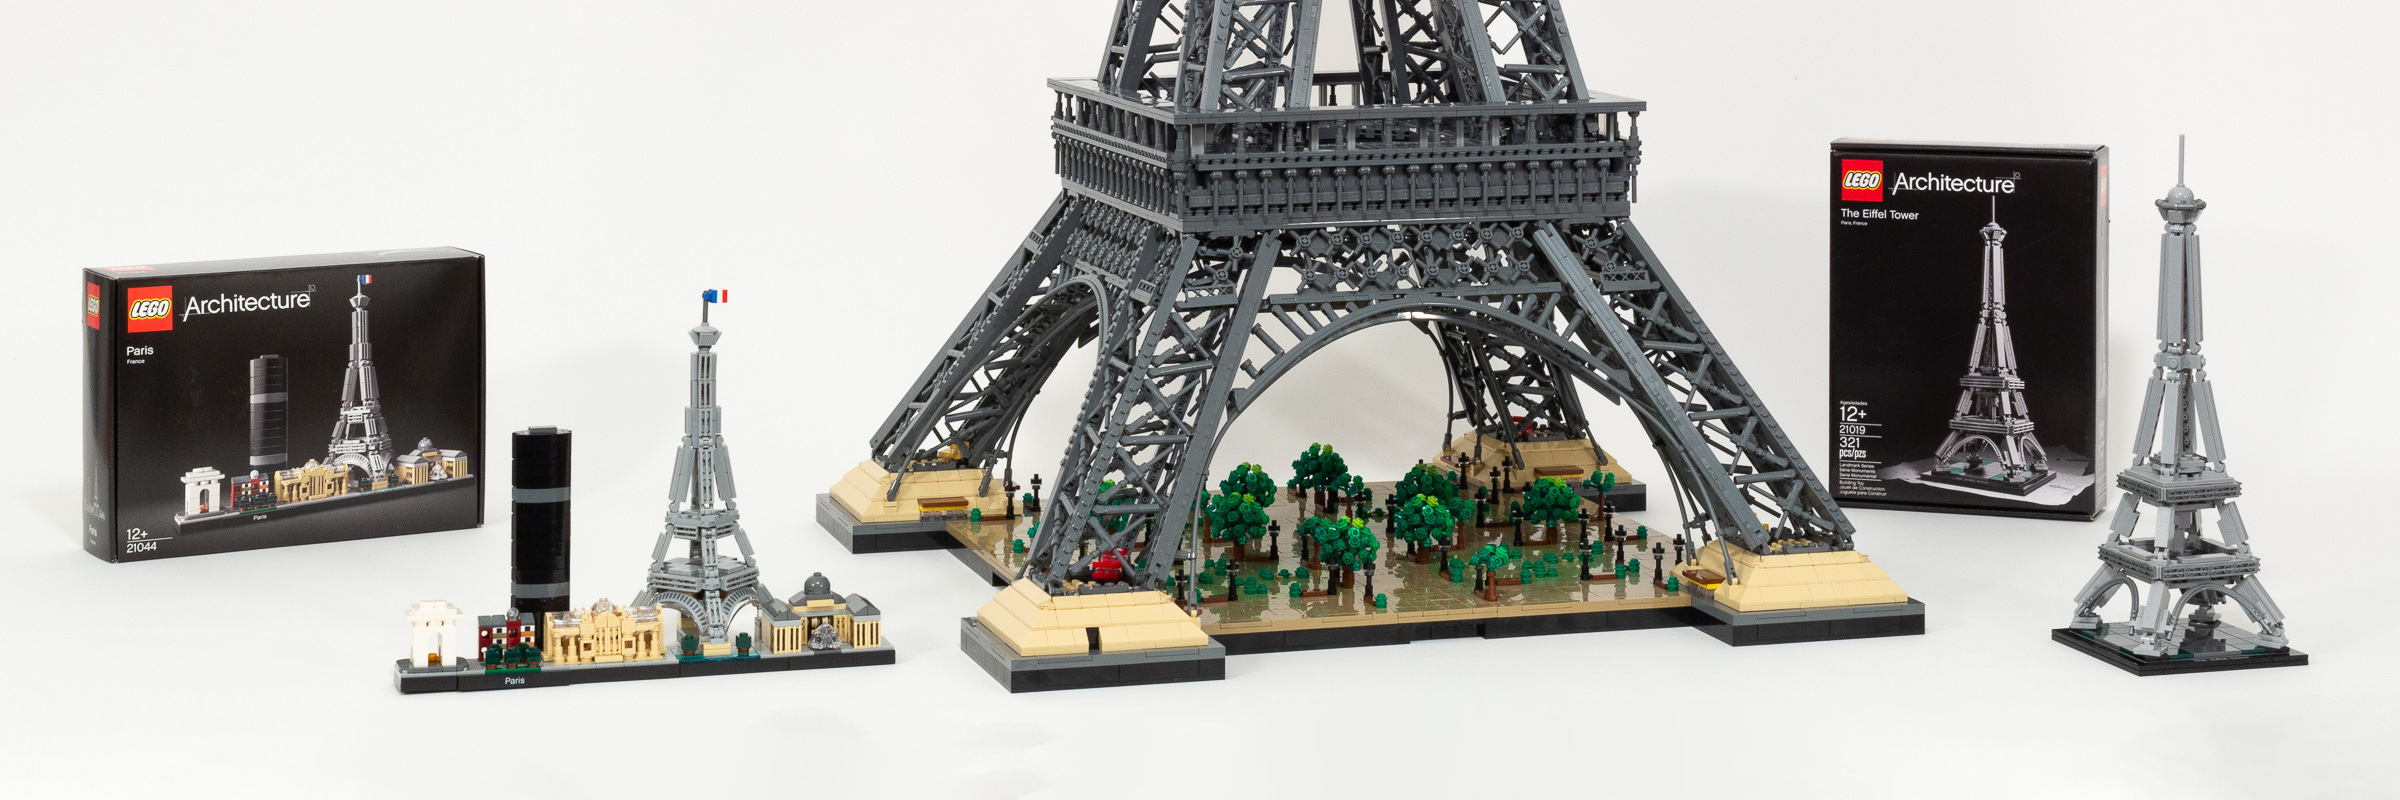
#21044 Paris Skyline (left) and #21019 Eiffel Tower (right).
Because it will be larger than previous LEGO sets based on the iconic building, I am hoping to see building techniques that better capture both the intricate interlocking iron supports and the graceful curves of the real building. They could employ Flex Tubes to achieve the gentle curves, or Technic beams to re-create the trusses of the real building, but I suspect it will be largely brick-built and attached using clips to achieve the necessary angles, since this is the most common approach to achieve angled construction — as used for the diagonal supports for the recent #10303 Loop Coaster.
It would be even cooler if the build process mirrors how the actual building was built in some way. I do not know whether a central support structure was employed or not, but I hope we learn detailed information about the real building in the building instructions.
As you will learn in the review that follows, some of my predictions came true and others weren’t quite right…
Box Impressions
Even just trying to carry the box into the house gave me a lot more information about the scope of this set. The box is very heavy and very large. I couldn’t tell for sure without measuring it, but it seems slightly larger than the massive Millennium Falcon set.
The pictures on the box reinforce the inevitable hugeness of this model! On the front of the box, we can see a small photo of the completed model, but as we look at the top and sides, we see a zoomed in photo which allows us to see the individual bricks, which reveals a high level of detail all the way up and down the tower.
Contents
The box is absolutely huge and features the 18+ / ‘Adults Welcome’ branding along the bottom edge — which seems very appropriate for size of this scale. The color of that band is 199Dark Stone GreyDark Bluish Gray, which makes sense since almost every piece inside the box is in that color!
Shipping Box:
- Box Size: 59.4 x 40.0 x 49.8 cm (23 3/8” × 15 3/4” × 19 7/8”)
- Box Weight: 12.7 kg (27.4 lbs)
- Box Density: 107 g/L
Set Box:
- Box Size: 47.0 x 38.1 x 58.1 cm (18 1/2” × 15” × 22 7/8”)
- Box Weight: 11.2 kg (25.0 lbs)
- Box Density: 108 g/L

An inspirational quote is included on the hidden box flap.
Opening this massive box is an exciting moment… I was quite curious to see how this large box is organized. Previous experiences with other massive sets suggest that it is likely that we will see at least four smaller boxes inside this very large box. Right behind the first flap is a photo of Gustave Eiffel, alongside the following quote:
There is an attraction and a charm inherent in the colossal that is not subject to ordinary theories of art … The tower will be the tallest edifice ever raised by man, Will it therefore be imposing in its own way?
Gustave Eiffel
Beneath the remaining flaps we reveal just three boxes, each of which is actually quite large – they are each 7 3/8” thick!
- Box 1 (marked 6418318) – 7.0 lbs
- Box 2 (marked 6418319) – 7.0 lbs
- Box 3 (marked 6418326) – 7.8 lbs
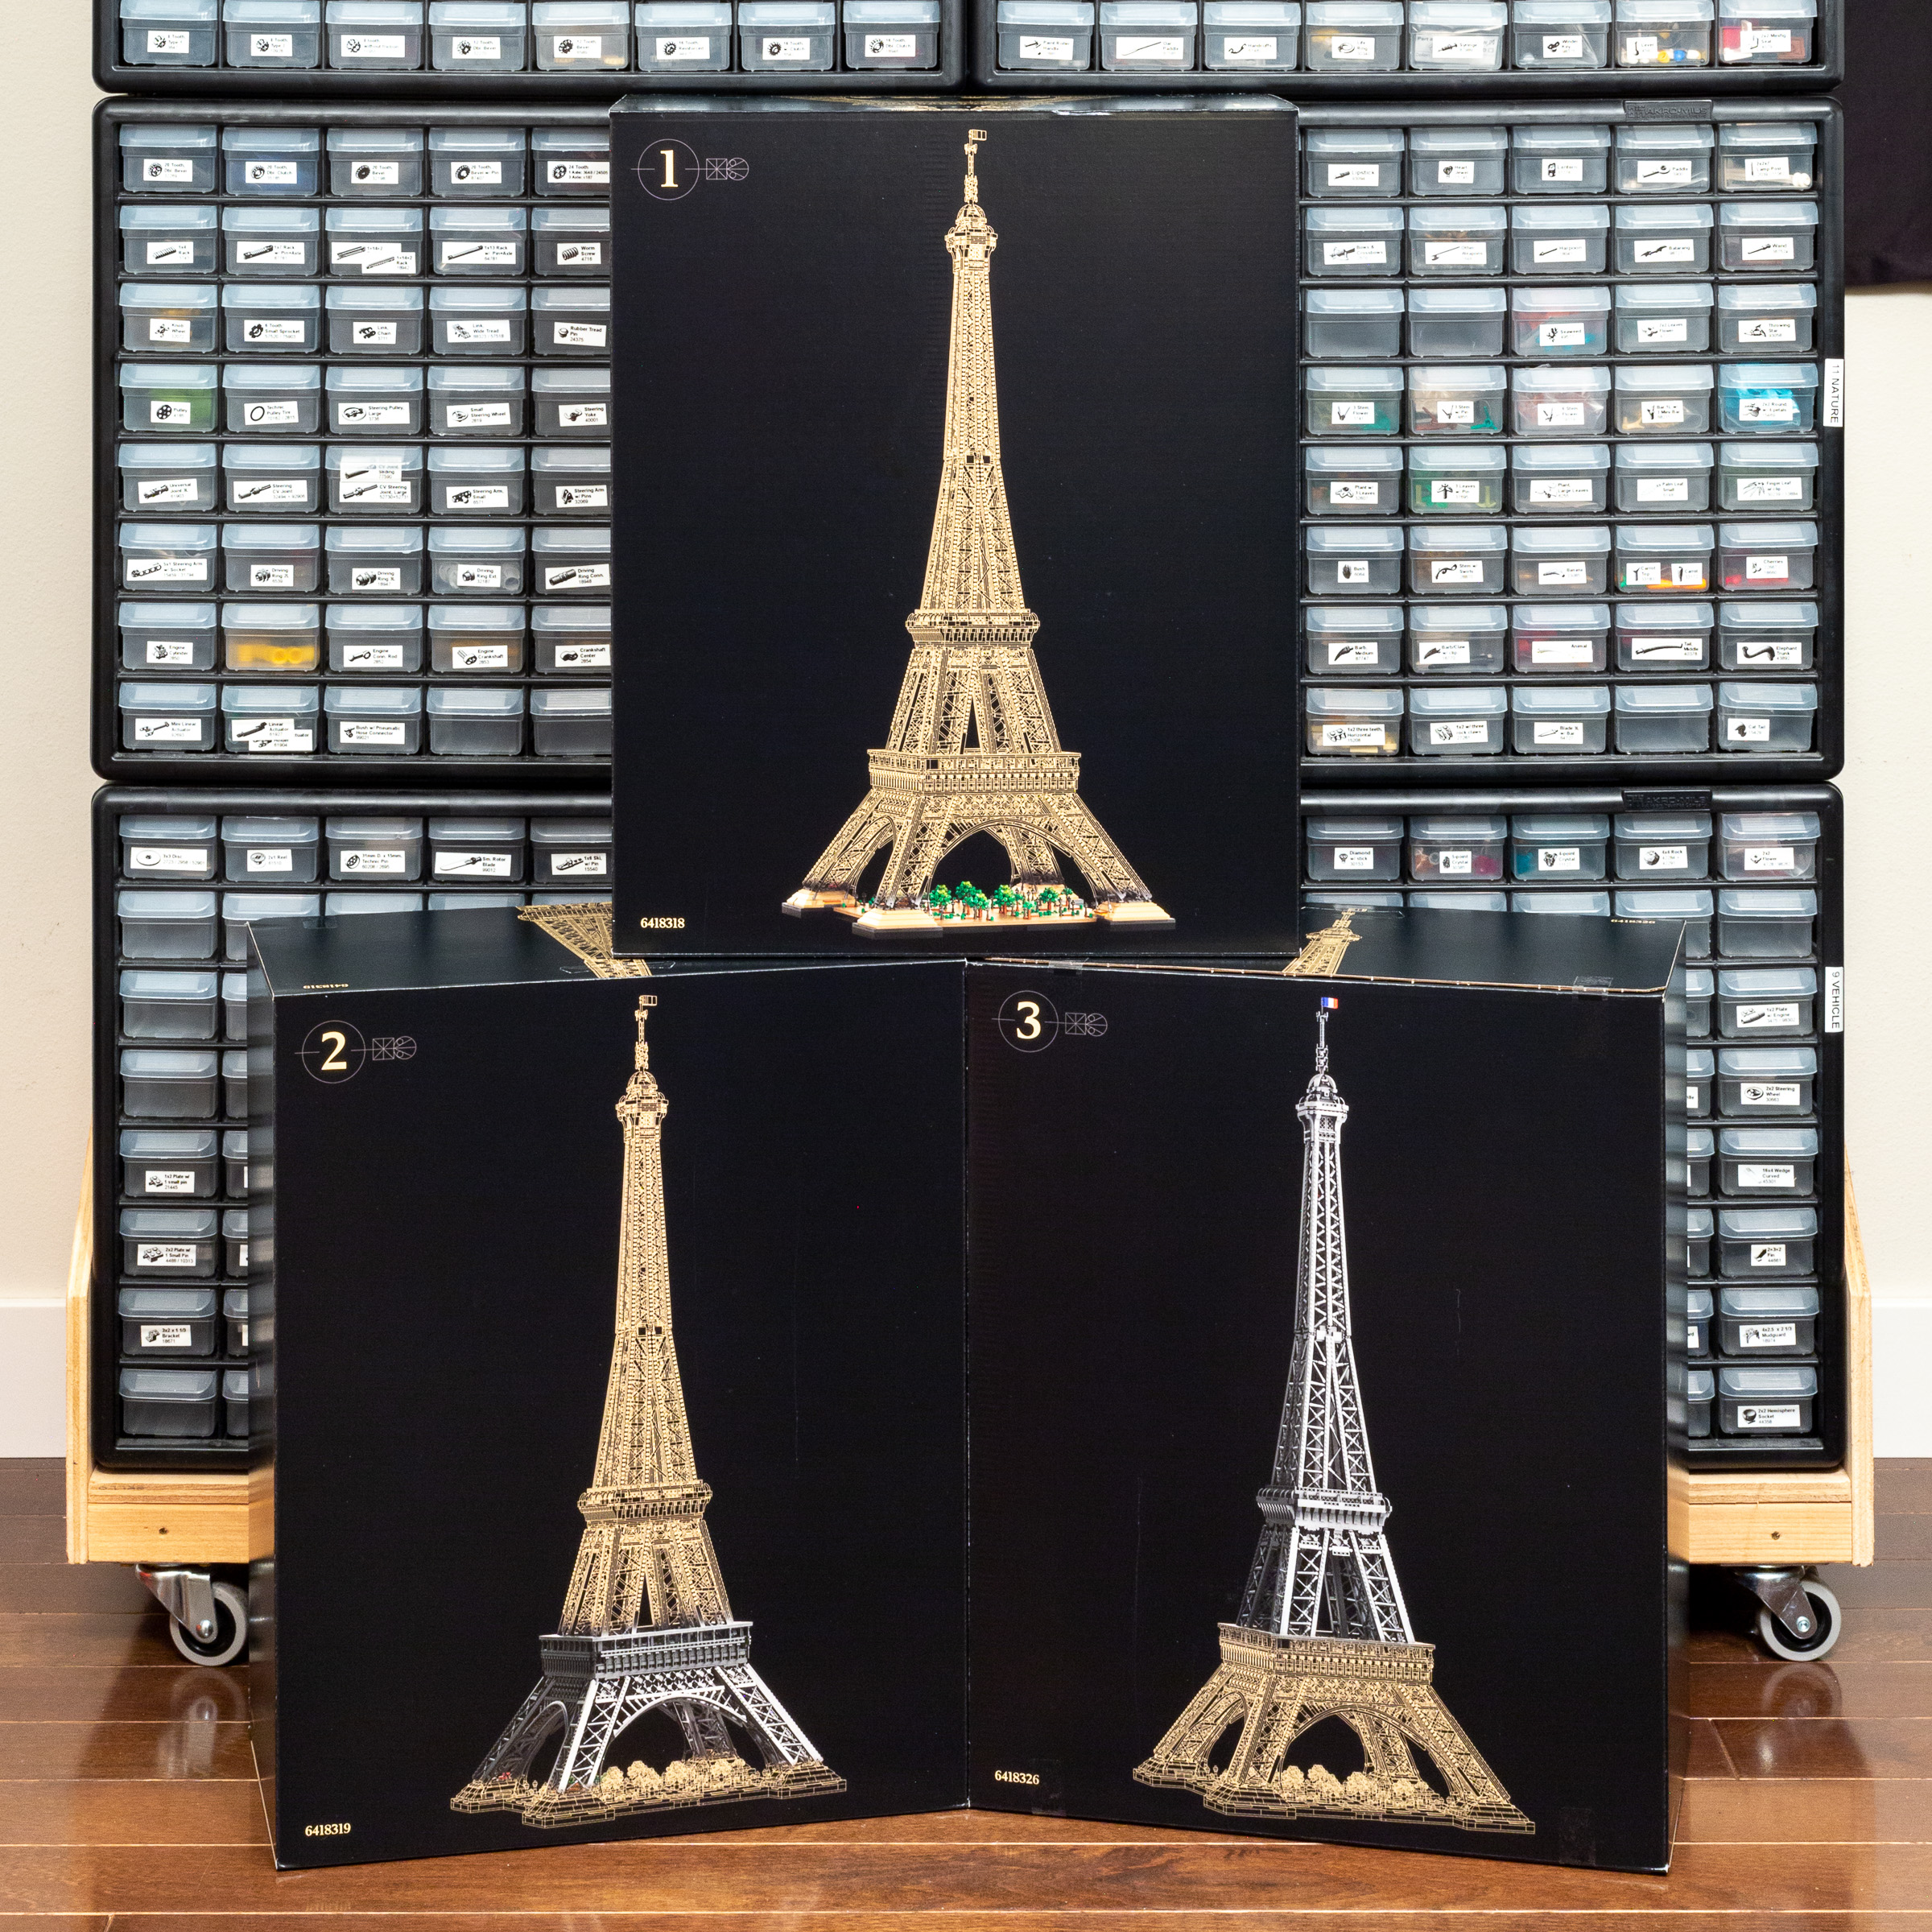
Each of the three smaller boxes focus on one ‘layer’ of the build process.
Build Process
Because the larger box is organized onto three smaller boxes, I have organized this article in the same way. Roughly speaking, the first box includes just the base, the second box includes the the tower up to the lower observation deck, and the third box includes the rest!
Box 1 (of 3)
As indicated on the front of the smaller box, we begin the project by just building the base and the foliage. It looks like we will need to wait until the second box to actually start building the Eiffel Tower itself. This feels like a big investment in just the foundation, but we saw something similar with the Colosseum model.
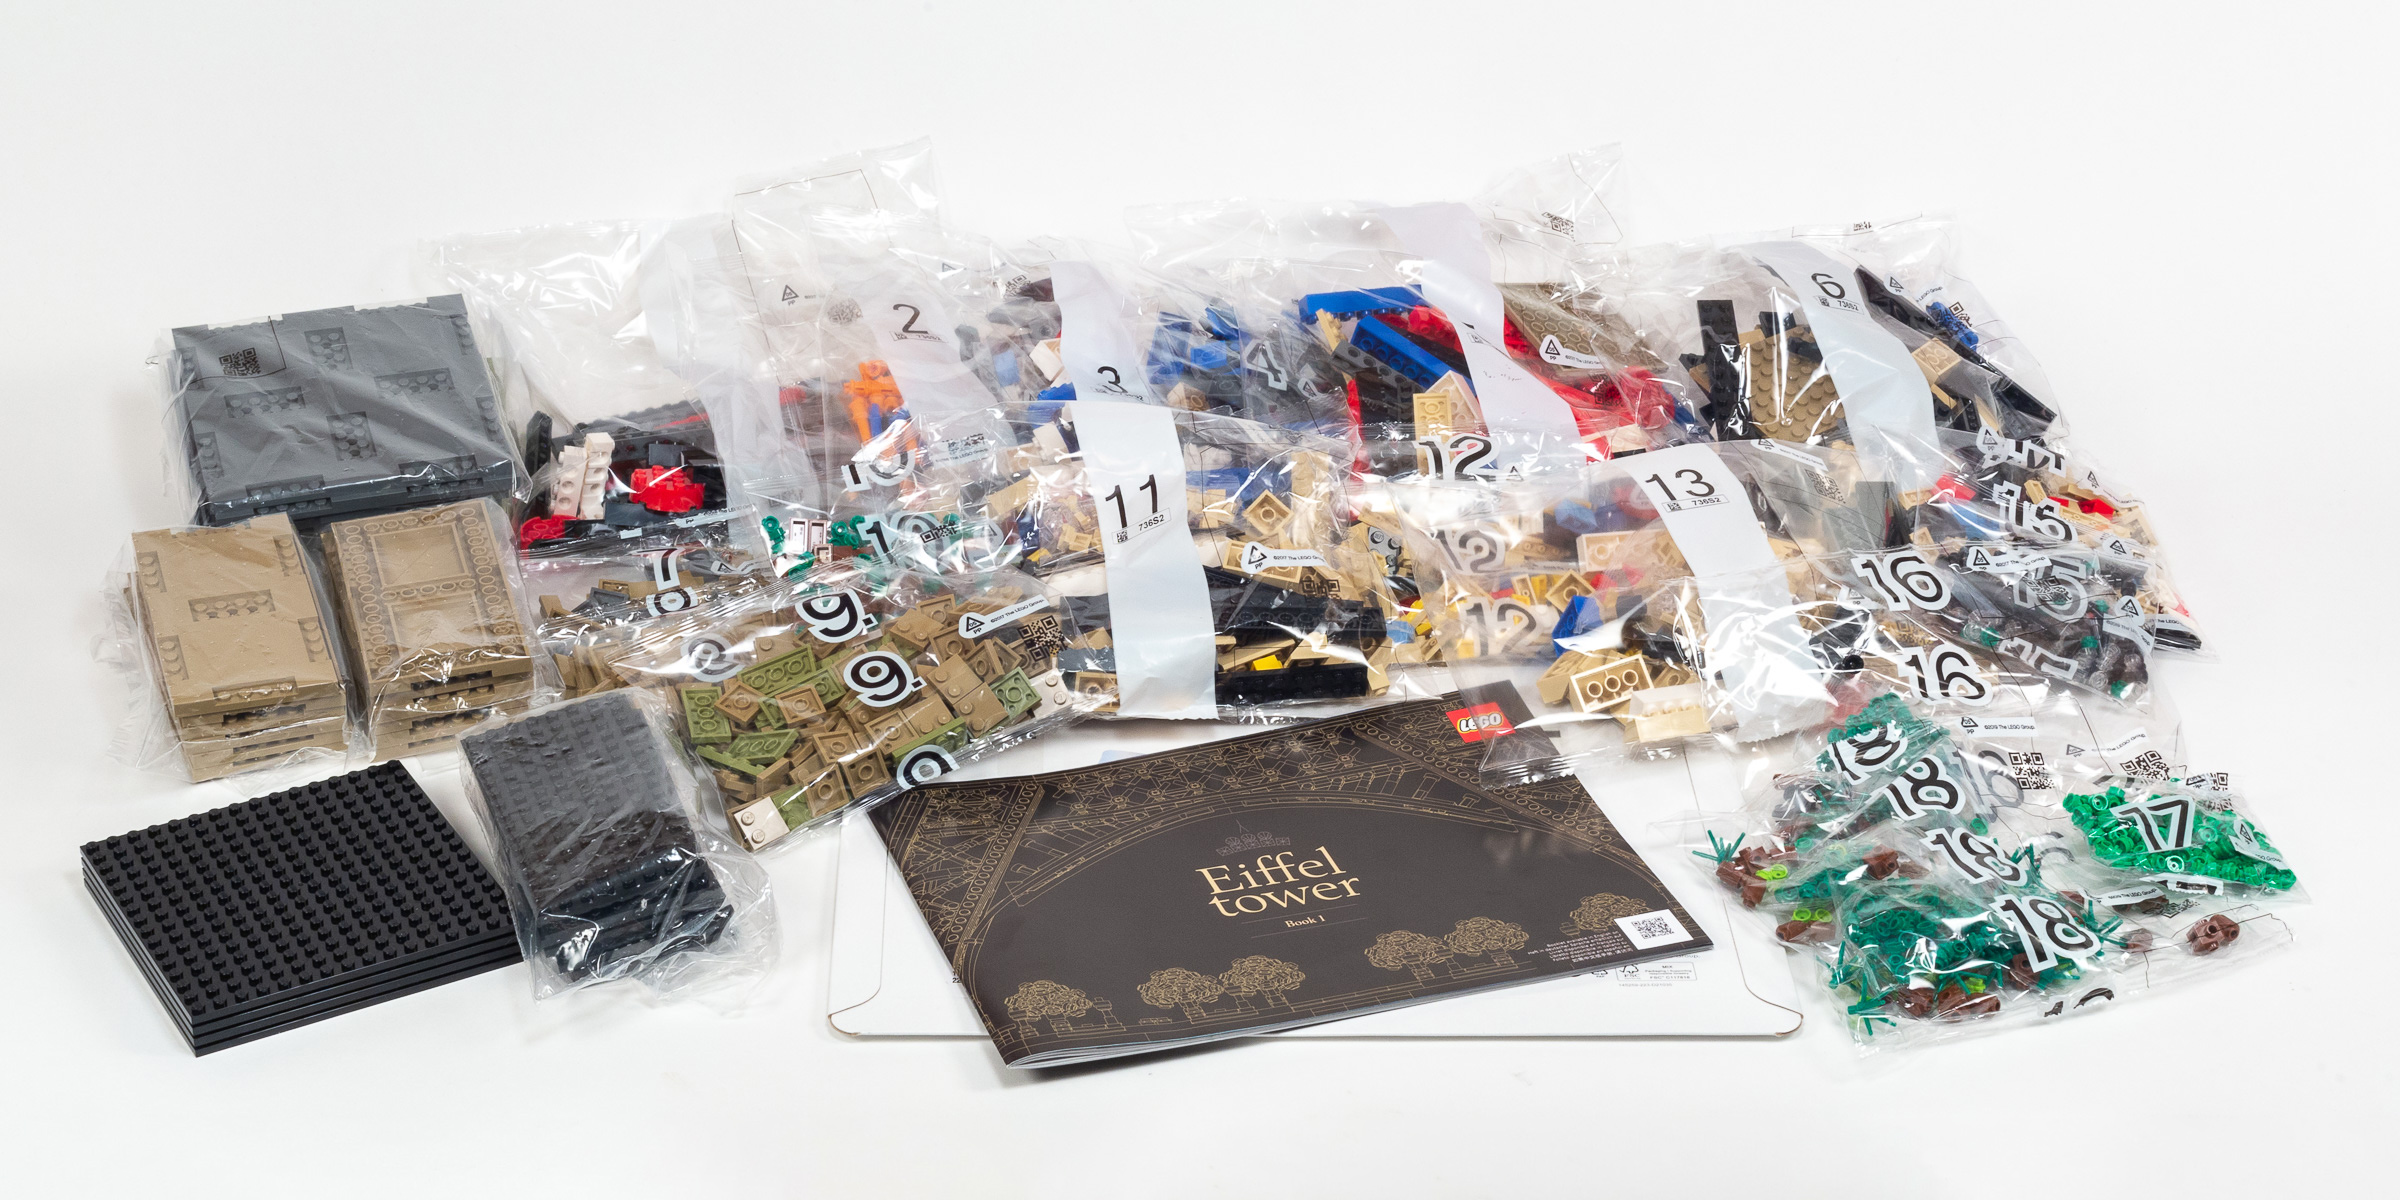
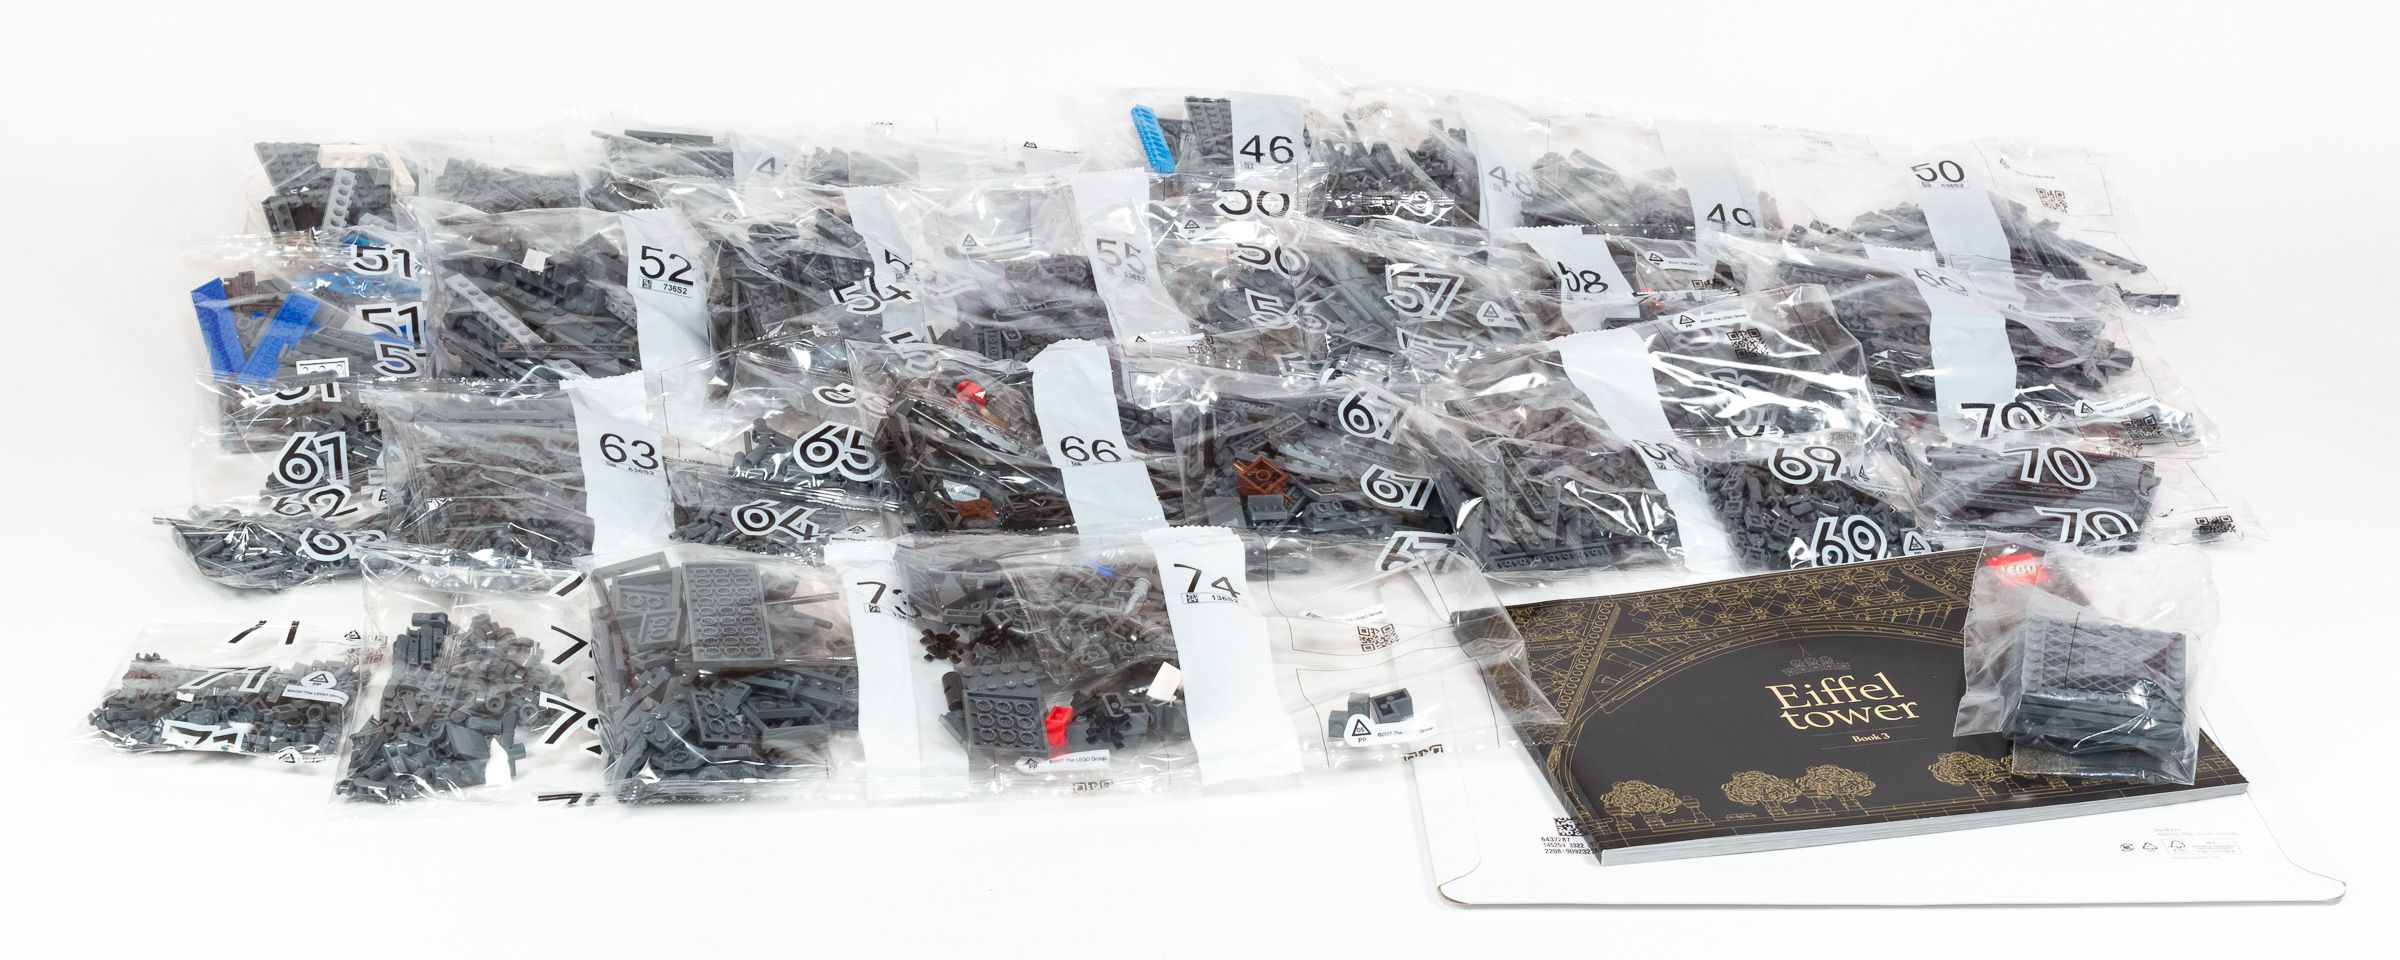
The first box includes several loose parts and unmarked bags, plus numbered bags for the first 18 stages of the build.
Contents of Box 1:
- Bag 1: 1x extra-large bag (marked 636S2).
- Bag 2: 1x large bag (marked 736S2).
- Bag 3: 1x extra-large bag (marked 736S2).
- Bag 4: 1x medium unmarked bag.
- Bag 5: 1x extra-large bag (marked 736S2).
- Bag 6: 1x large bag (marked 736S2).
- Bag 7: 1x small unmarked bag.
- Bag 8: 1x small unmarked bag.
- Bag 9: 1x medium unmarked bag.
- Bag 10: 1x extra-small unmarked bag.
- Bag 11: 1x large bag (marked 736S2).
- Bag 12: 1x small unmarked bag.
- Bag 13: 1x large bag (marked 636S2).
- Bag 14: 1x medium unmarked bag.
- Bag 15: 1x small unmarked bag.
- Bag 16: 1x large unmarked bag.
- Bag 17: 1x extra-small unmarked bag
- Bag 18: 1x large unmarked bag.
- 1x large unmarked bag: containing 8x – 8×16 plates in 26Black.
- 1x large unmarked bag: containing 4x – 16x16x2/3 road plates in 199Dark Stone GreyDark Bluish Gray.
- 1x large unmarked bag: containing 4x – 16x16x2/3 road plates in 330Olive Green.
- 2x large unmarked bag: each containing 6x – 8x16x2/3 road plates in 138Sand YellowDark Tan.
- 1x Cardboard pouch (marked 6437245): containing 92-page “Book 1” instruction booklet. 27.0 x 19.2 cm (10 3/4 x 7 1/2”).
Bags 1–10: Base
Before we lay a single brick, I was pleased to see several pages of information about the history of the Eiffel Tower, as well as a page about the design process for this set, featuring a great photo of LEGO Designer Rok Zgalin Kobe.
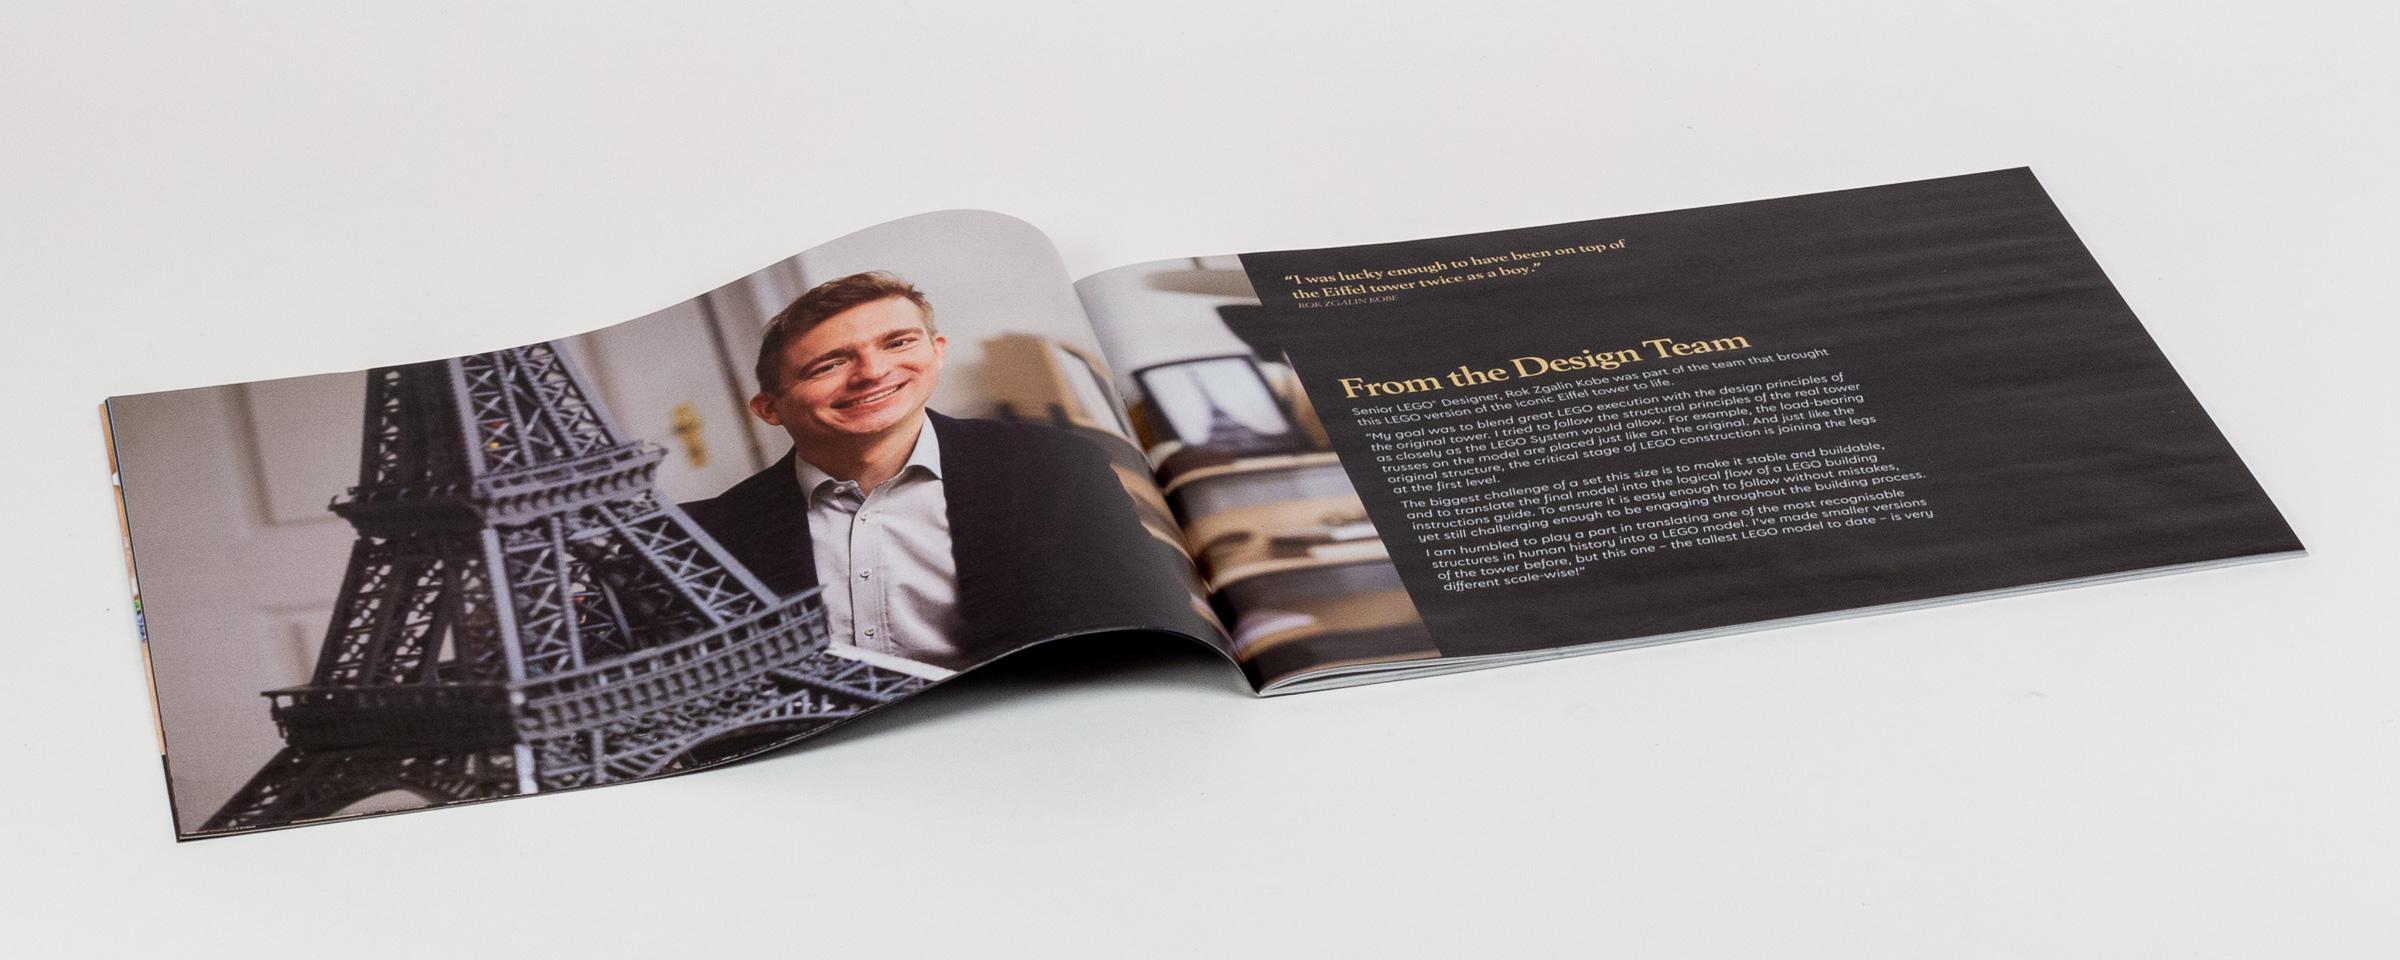
Instruction booklet includes background info on the building itself, and the LEGO set designer.
While I love having this background information, I was surprised to see that it is only in English — also including French would have been a respectful design choice given where the building is located!
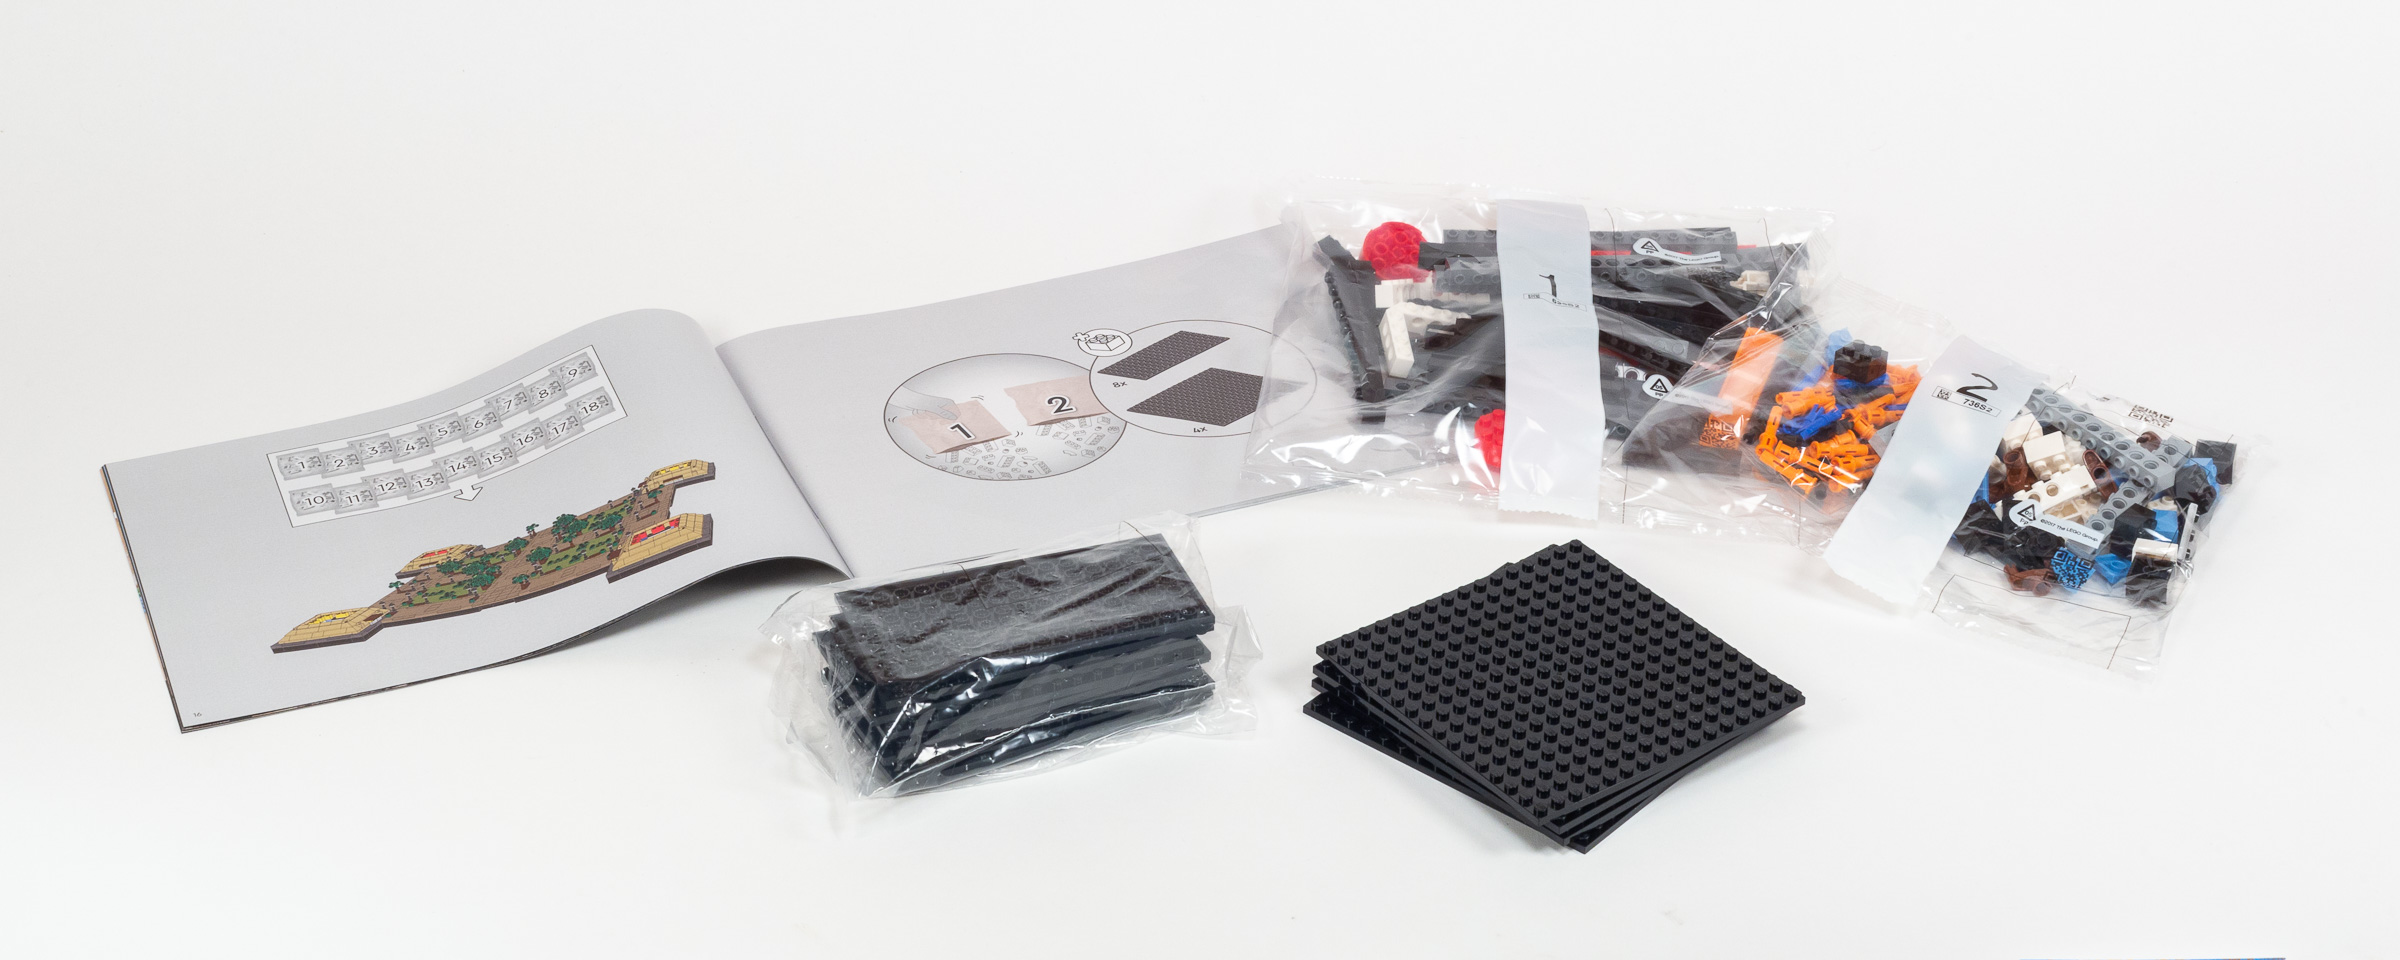
How do you start building one of the largest LEGO sets ever created? By combining Bag #1 and #2 of course!
As we move to the actual building instructions, we see something that I’ve never experienced before – the instructions ask us to dump out both Bag #1 and #2 at the same time. I suspect that they decided to use a unique number for each bag (instead of multiple bags with the same number) to help with inventory management.
A Technic substructure with corner bracing should result in a no-nonsense, super strong base.
Right from the beginning of bags 1+2, we are building four identical modules. I am extremely pleased to see a mix of LEGO Plates and Technic components that I’m confident will be very strong once completed. In particular, we see two 5×5 Technic corner elements (part 32555) strengthening the model.
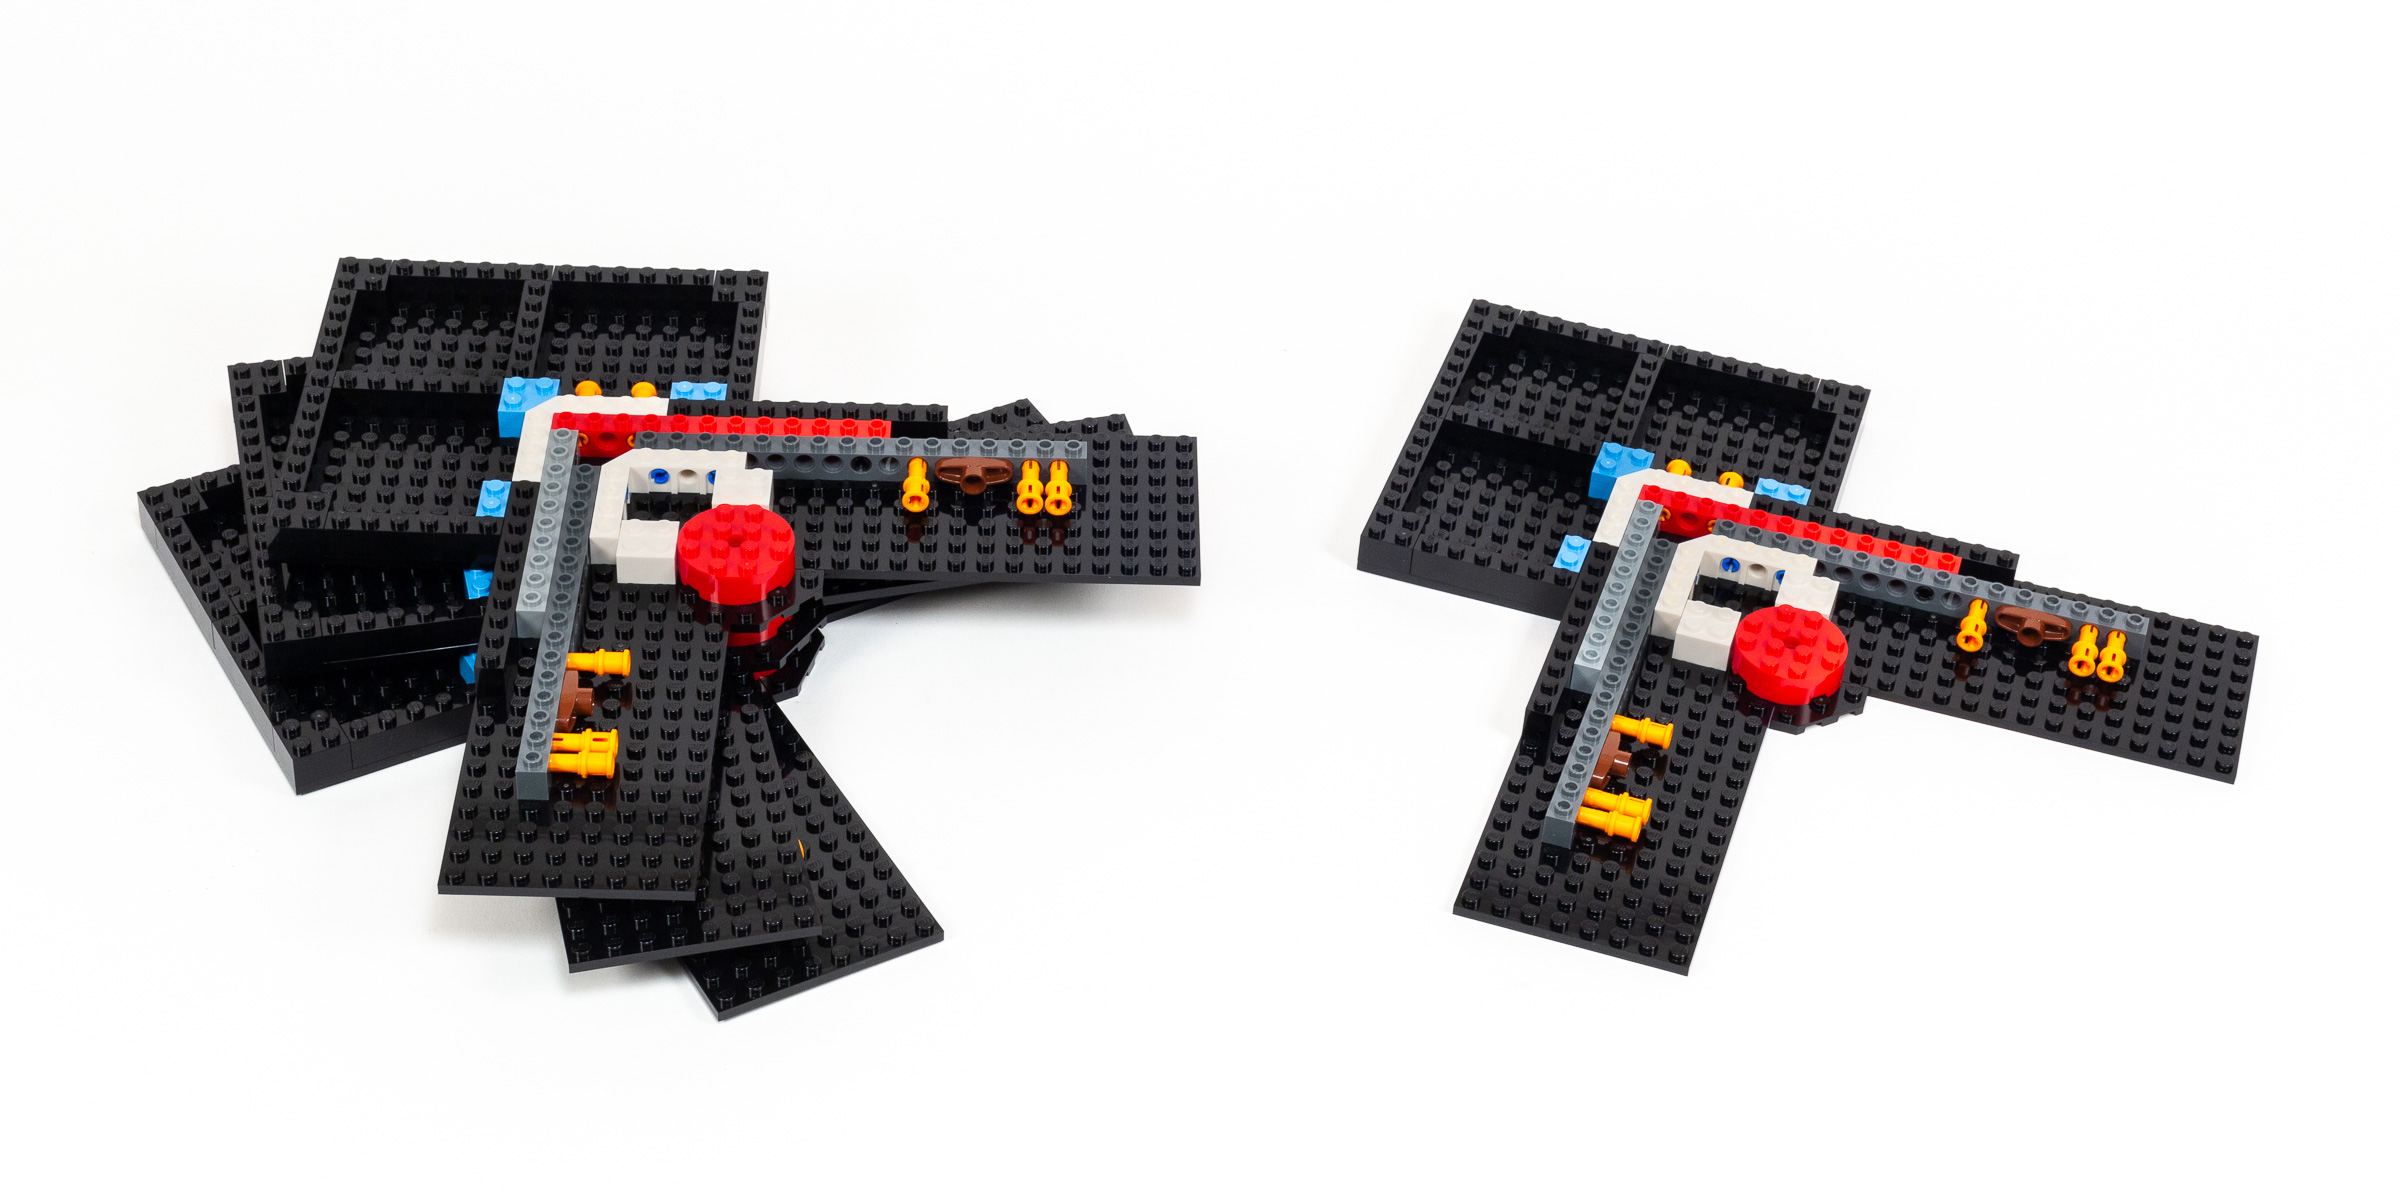
Progress at the end of Bags 1+2.
Moving on to bags 3+4, we are continuing to build up the four corners by adding a lattice extending the base towards what I believe will be the center of the completed model. We wrap up this quick stage of the build by adding the 16×16 x 2/3 Road Tiles (part 69958) on the corners.
Even stronger corners by the end of bags 3+4.
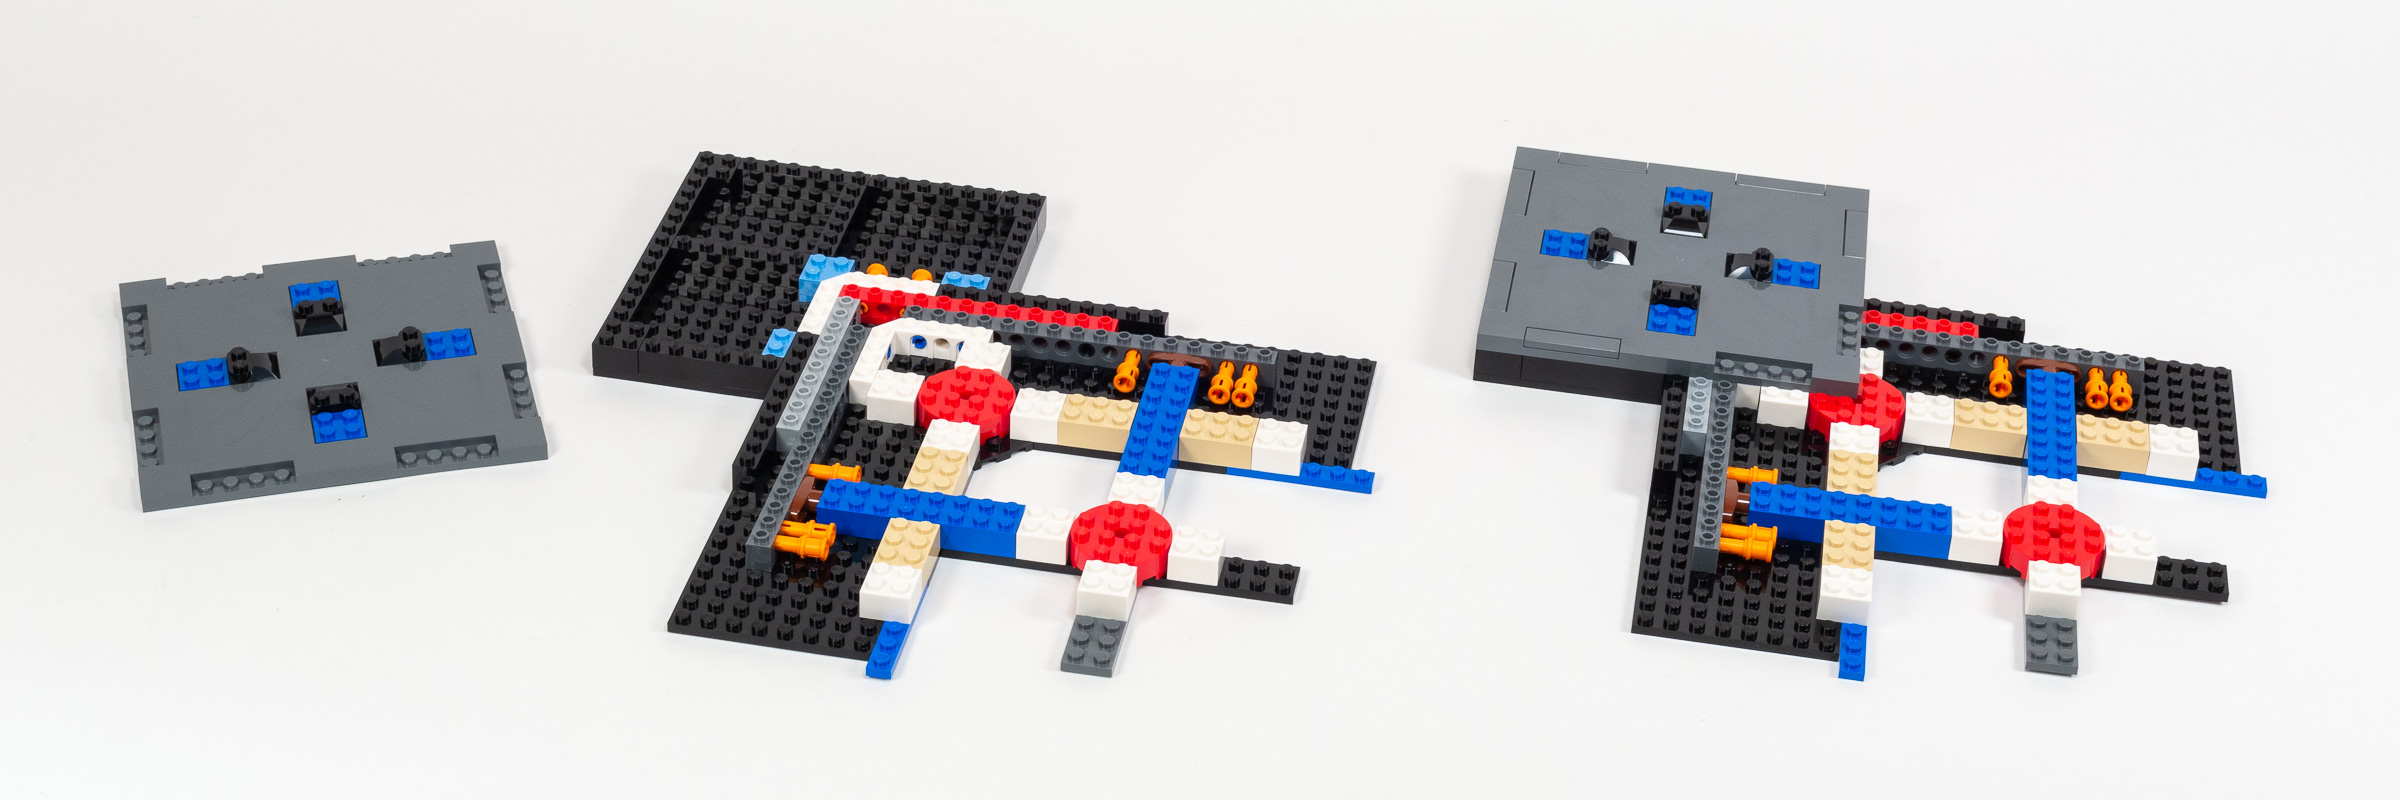
Bags 5+6 connect these four corners into a single strong (but unwieldy) base. I can already tell when roughing-out their relative position that this isn’t going to fit on my normal workbench without some changes… Sure enough, the wedge-shaped modules built in this stage connect the four corners we had already built.

Attaching the corners using four wedge-shaped modules.
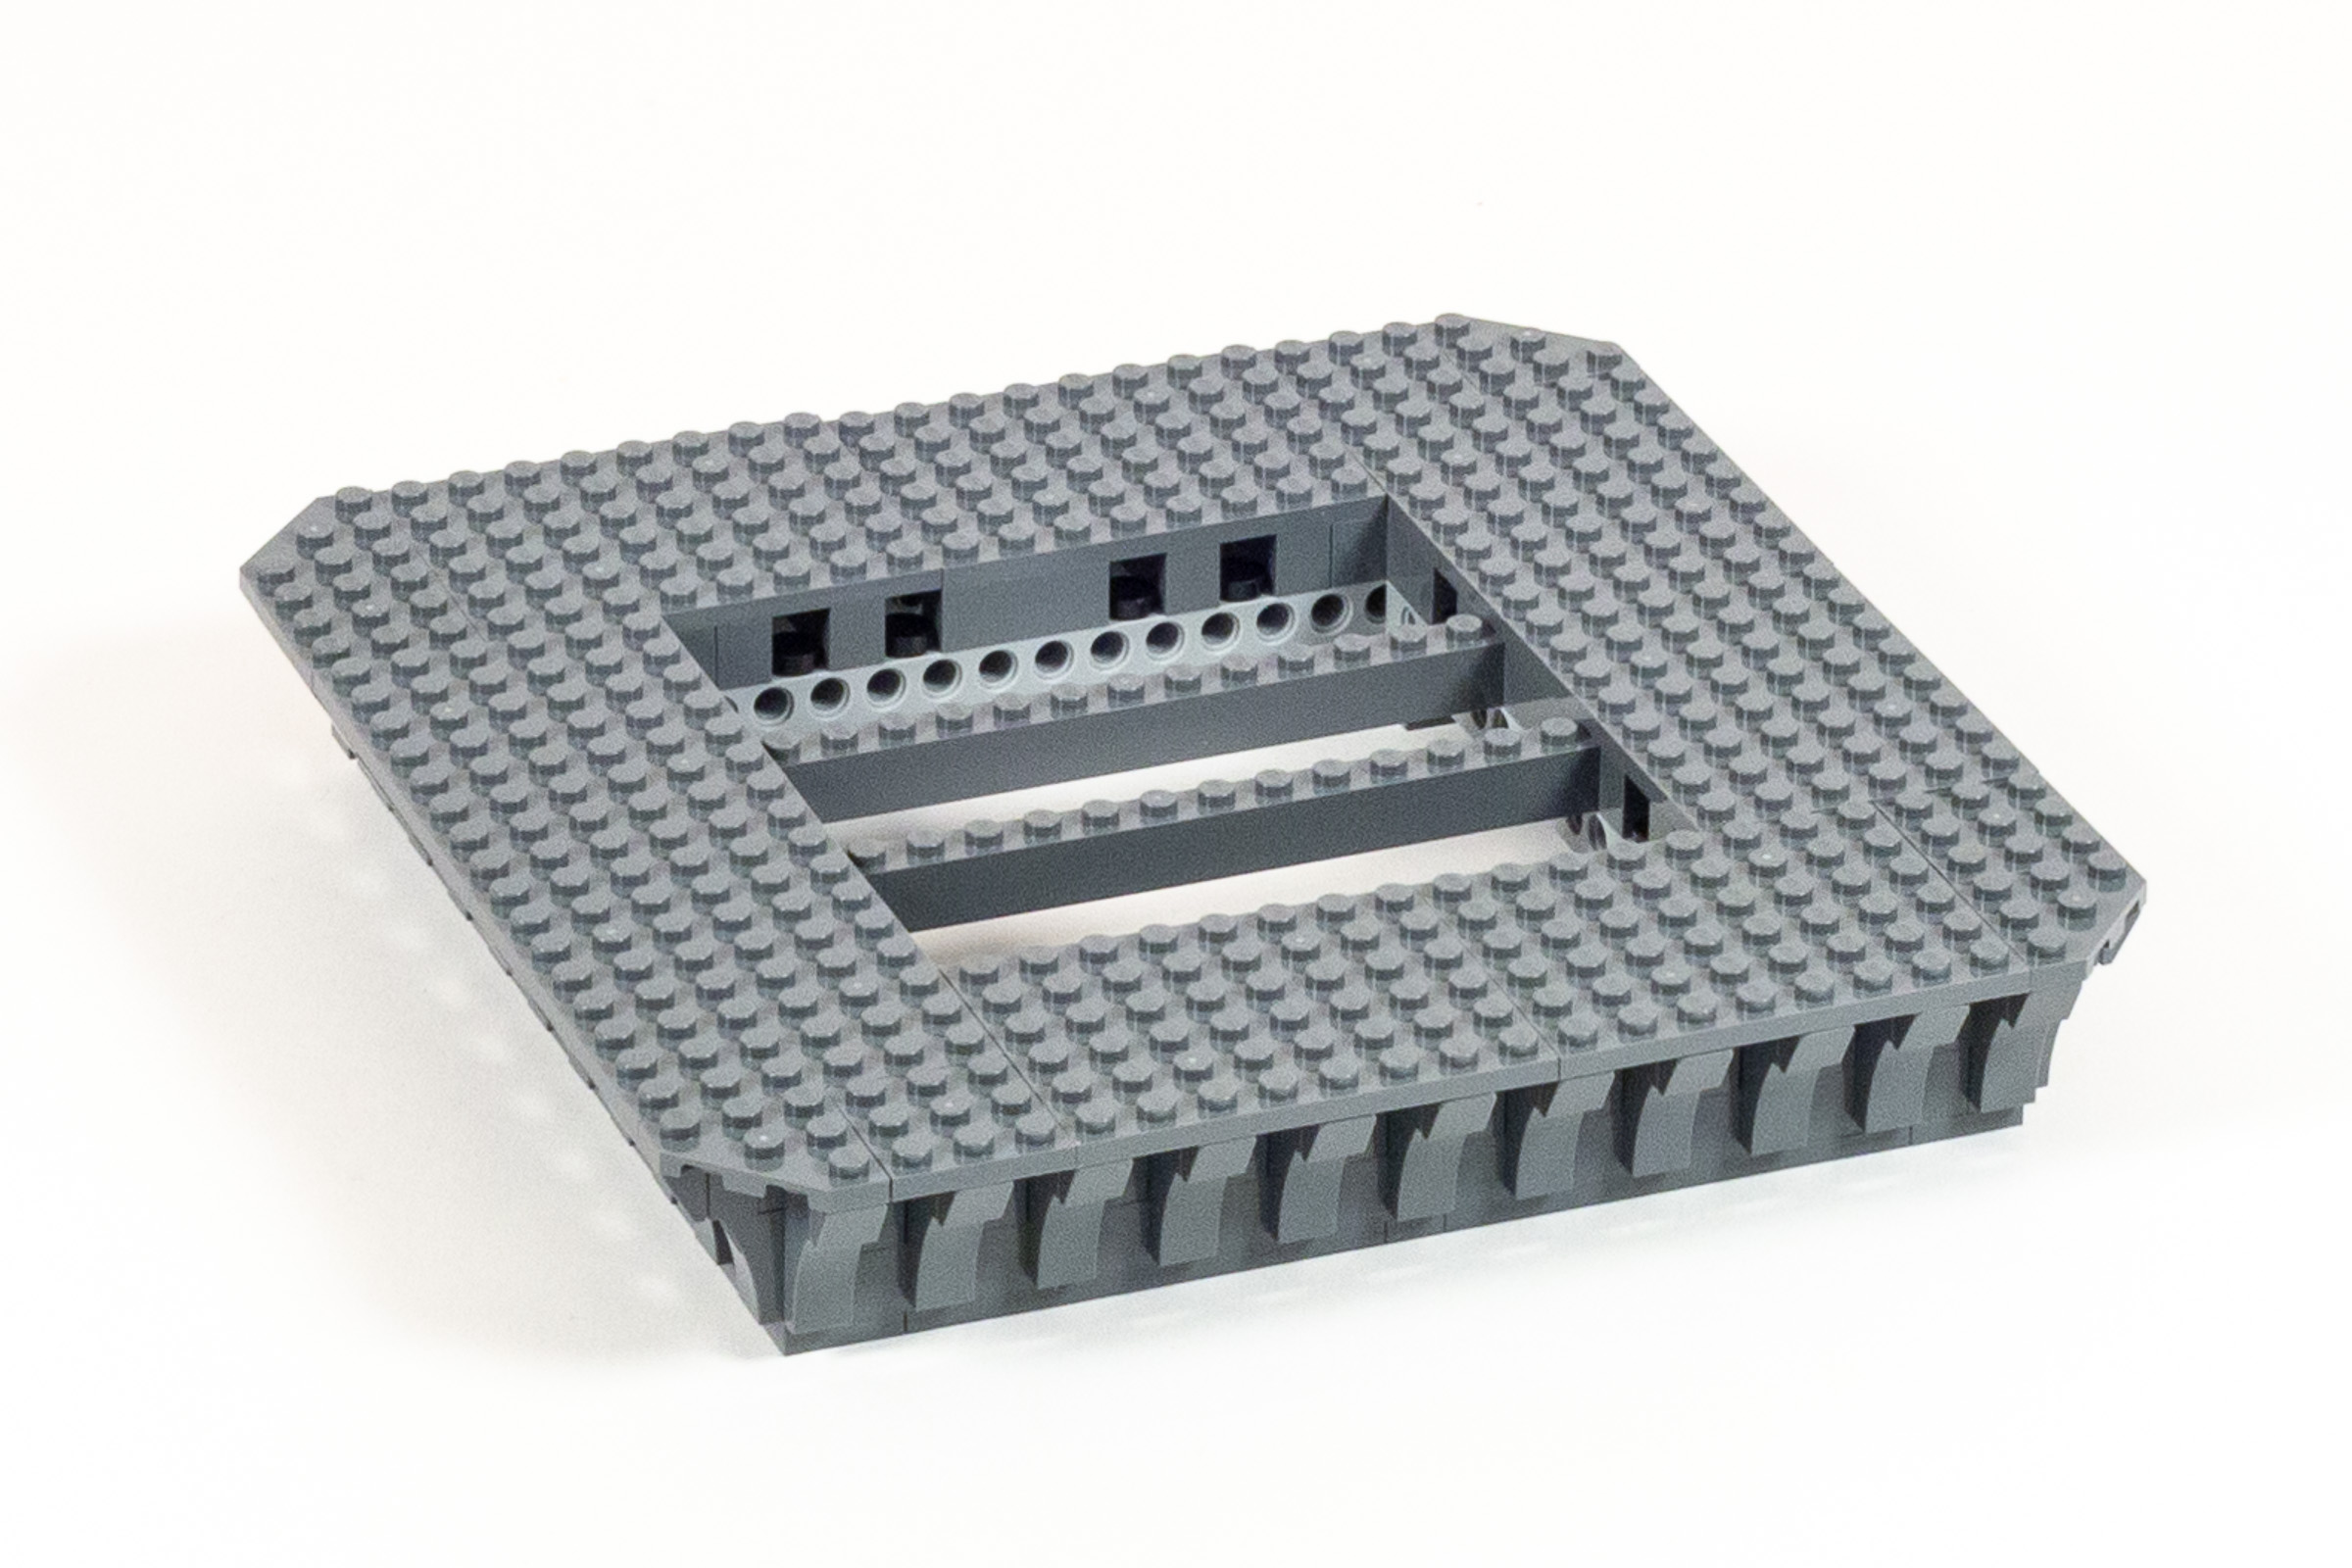
The resulting base is huge! I had been naively expecting a total size of 64×64 studs, but the base is a bit larger than that — 72×72 studs.
Progress at the end of Bags 5+6.
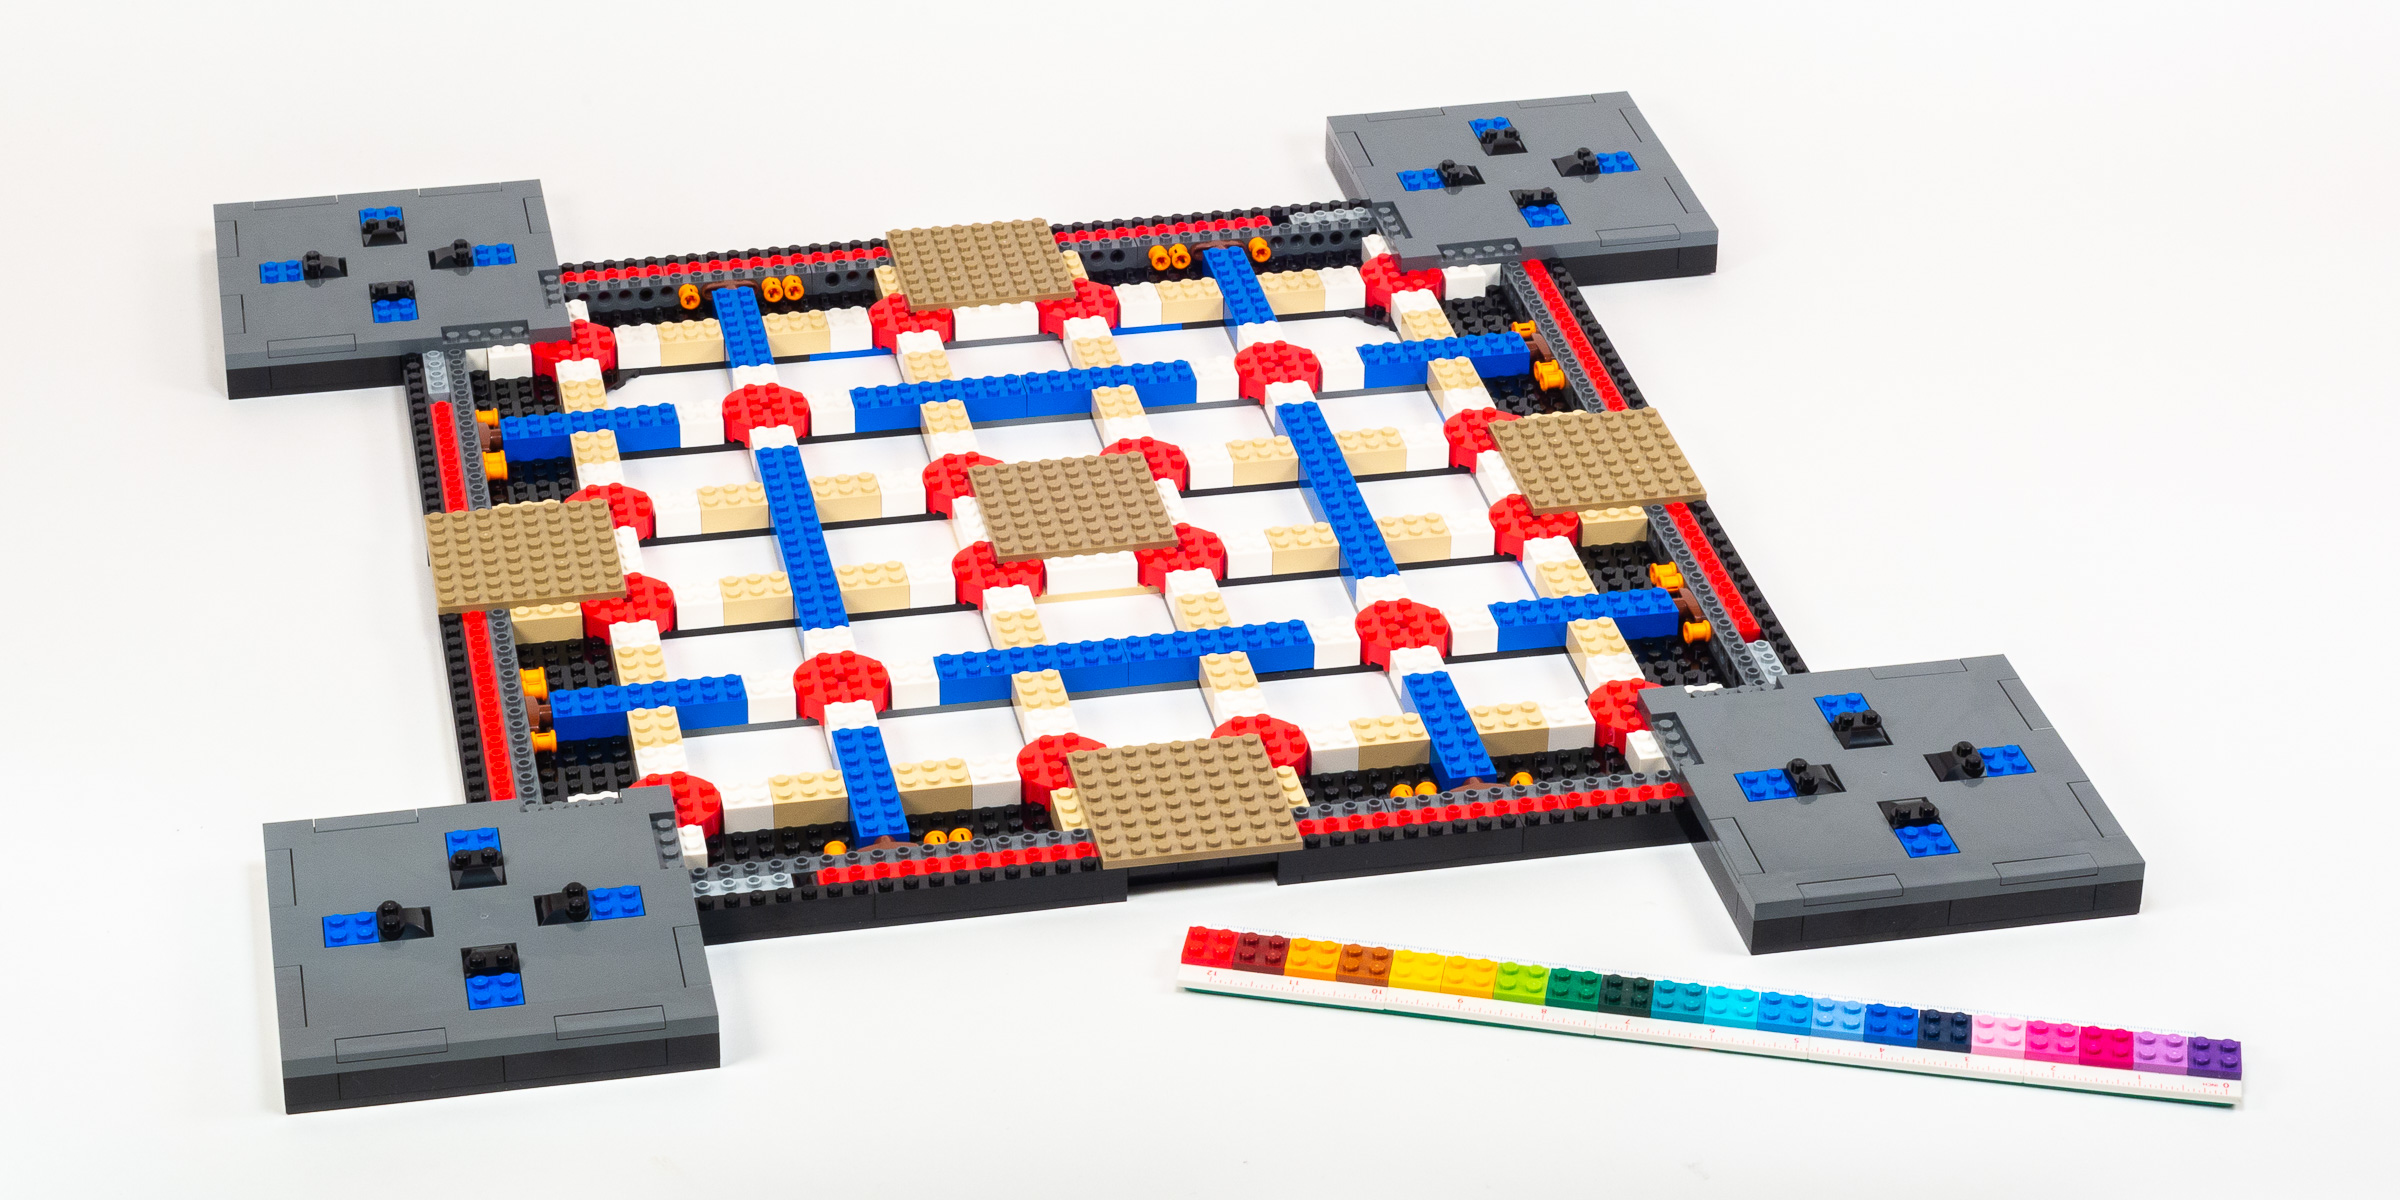
We continue to Bags 7+8 where we start covering up the lattice structure quickly using 6x12x 2/3 Road Plates. Those parts have studded indentations on each side, so we spend the rest of the time covering most of the outstanding surfaces with 138Sand YellowDark Tan 2×2 and 1×4 tiles.
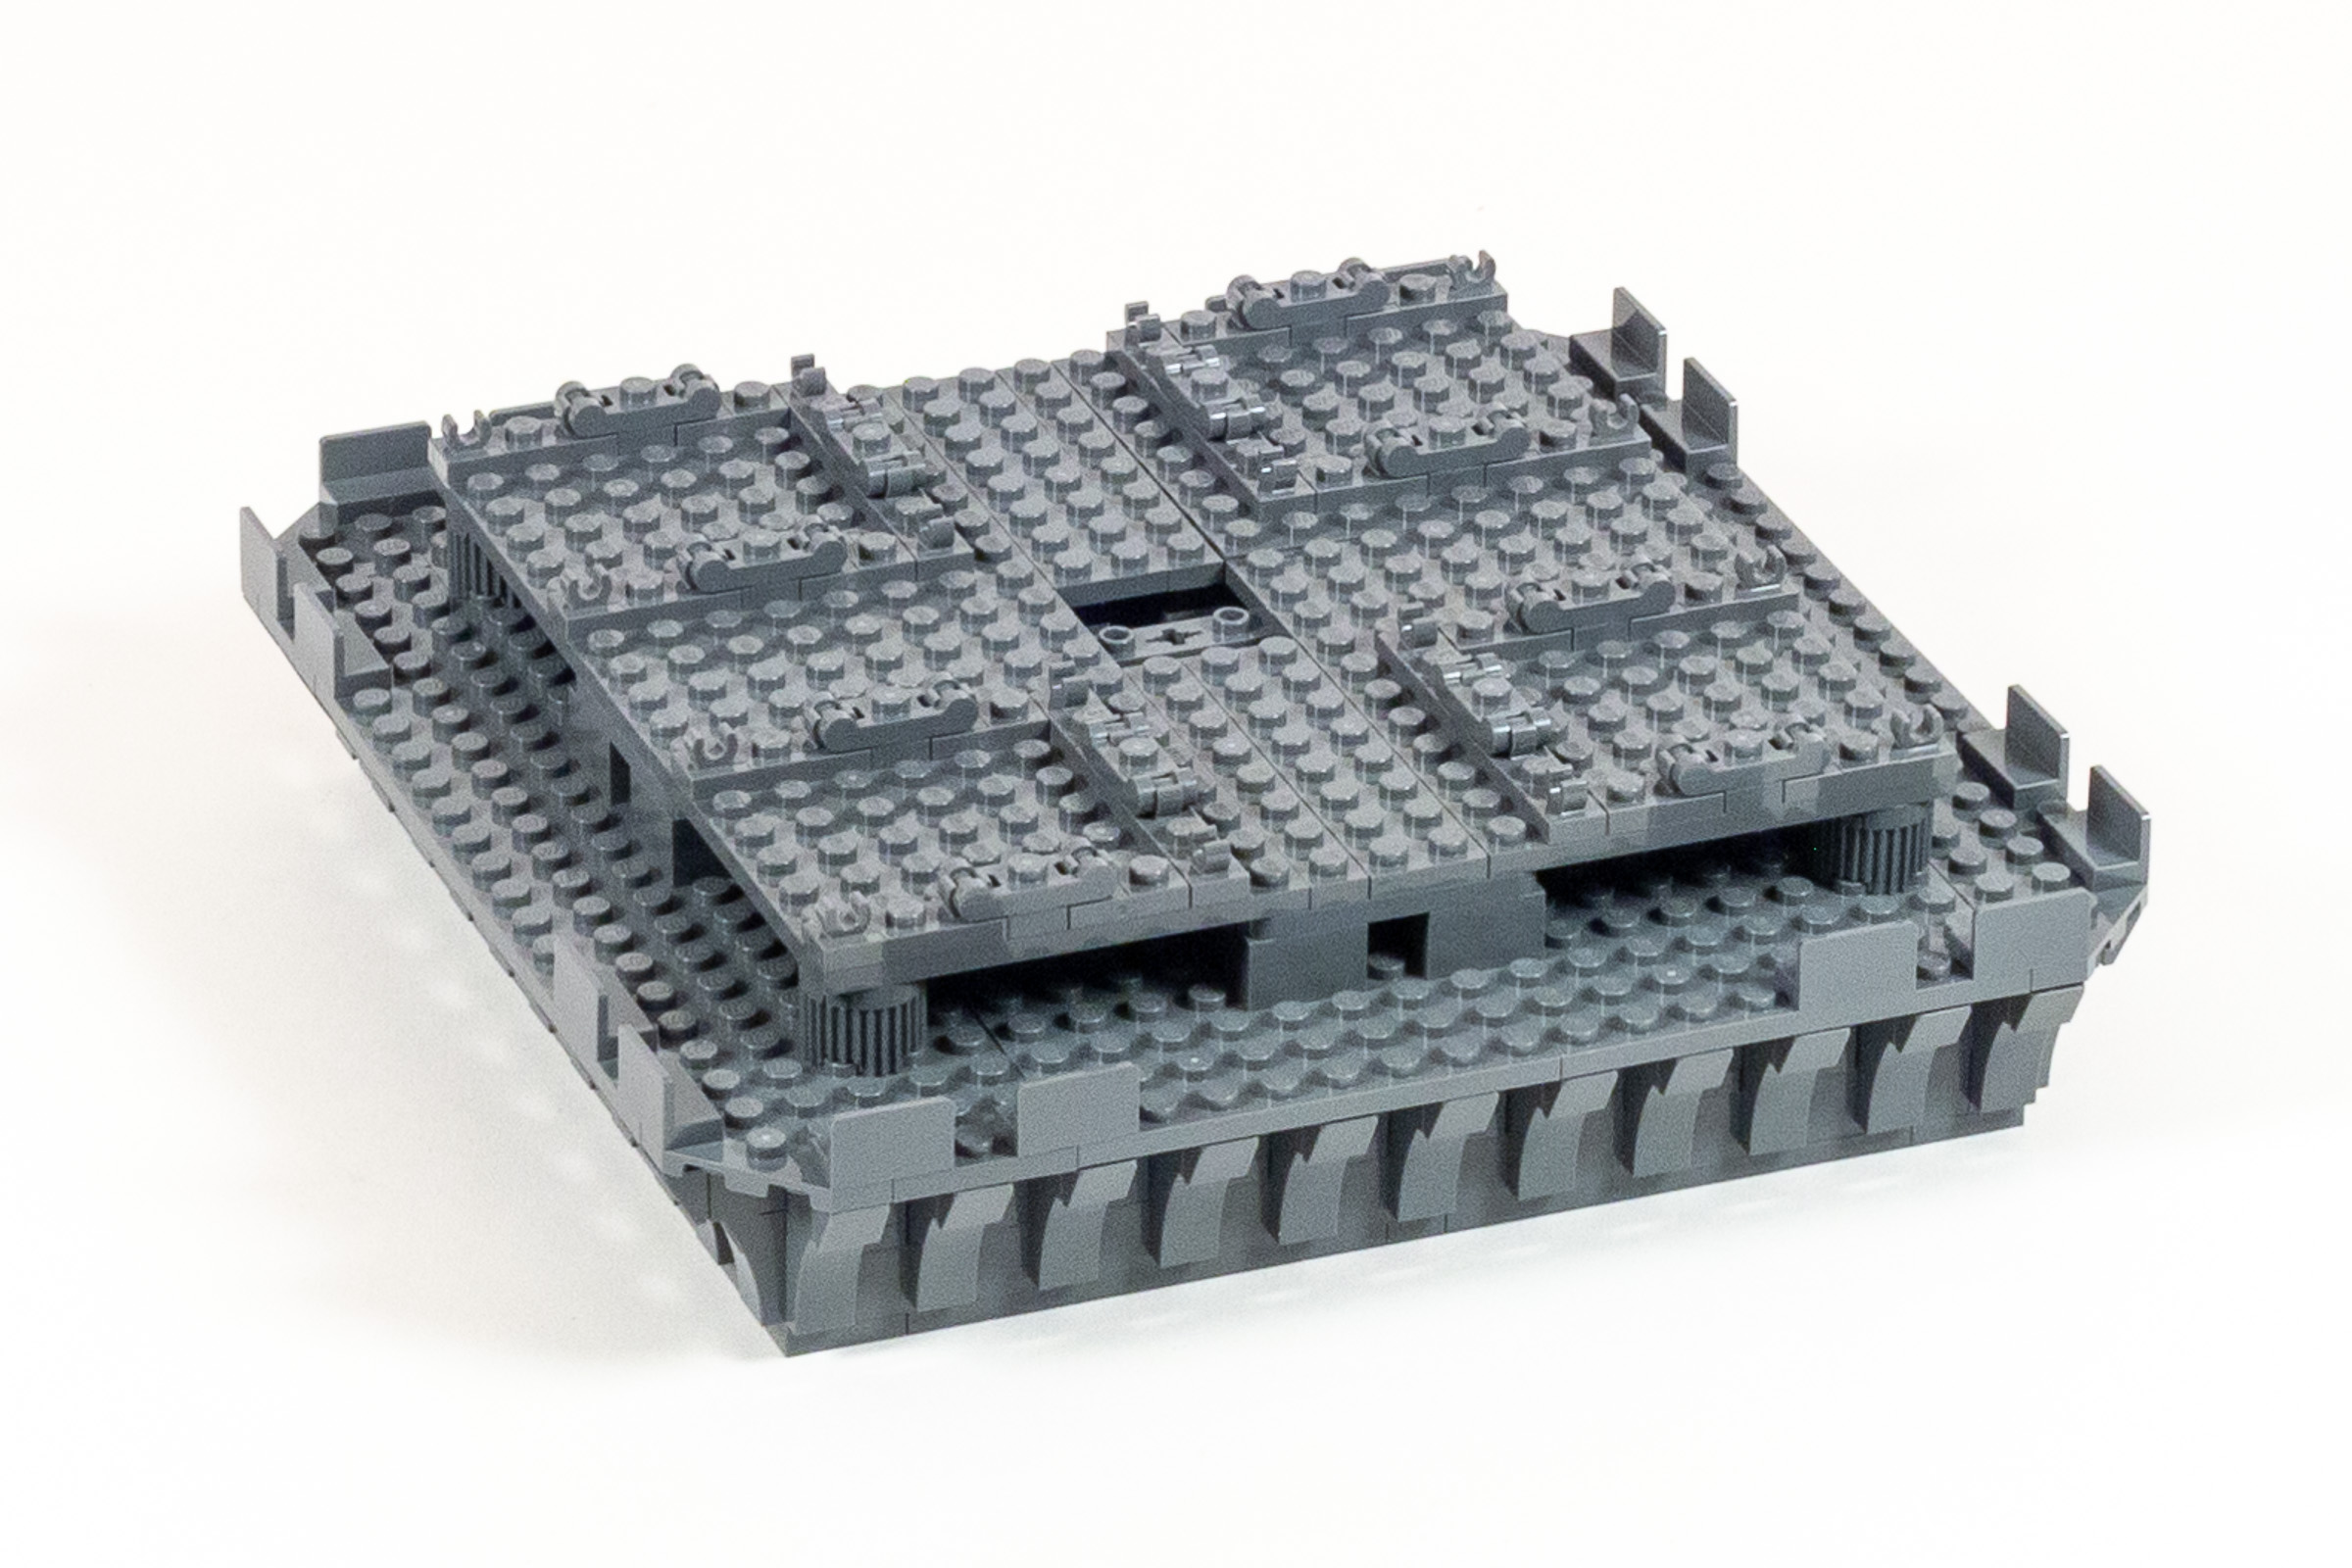
Progress at the end of Bags 7+8 (left) and Bags 9+10 (right).
Completing a smooth base is one of the first milestones in every LEGO Architecture model, which is why I was looking forward to completing bags 9+10. The last four holes in the base are covered by four more16×16 x 2/3 Road Tiles (part 69958) in 330Olive Green. The rest of the studded gaps are finally covered with a lot more tiles, and 1×2 tiles in 192Reddish Brown which I believe are meant to represent park benches.
Build time: 61 minutes.
Bags 1+2: 18 minutes, Bags 3+4: 9 minutes, Bags 5+6: 12 minutes, Bags 7+8: 10 minutes, Bags 9+10: 12 minutes.
Bags 11-18: Piers and Foliage
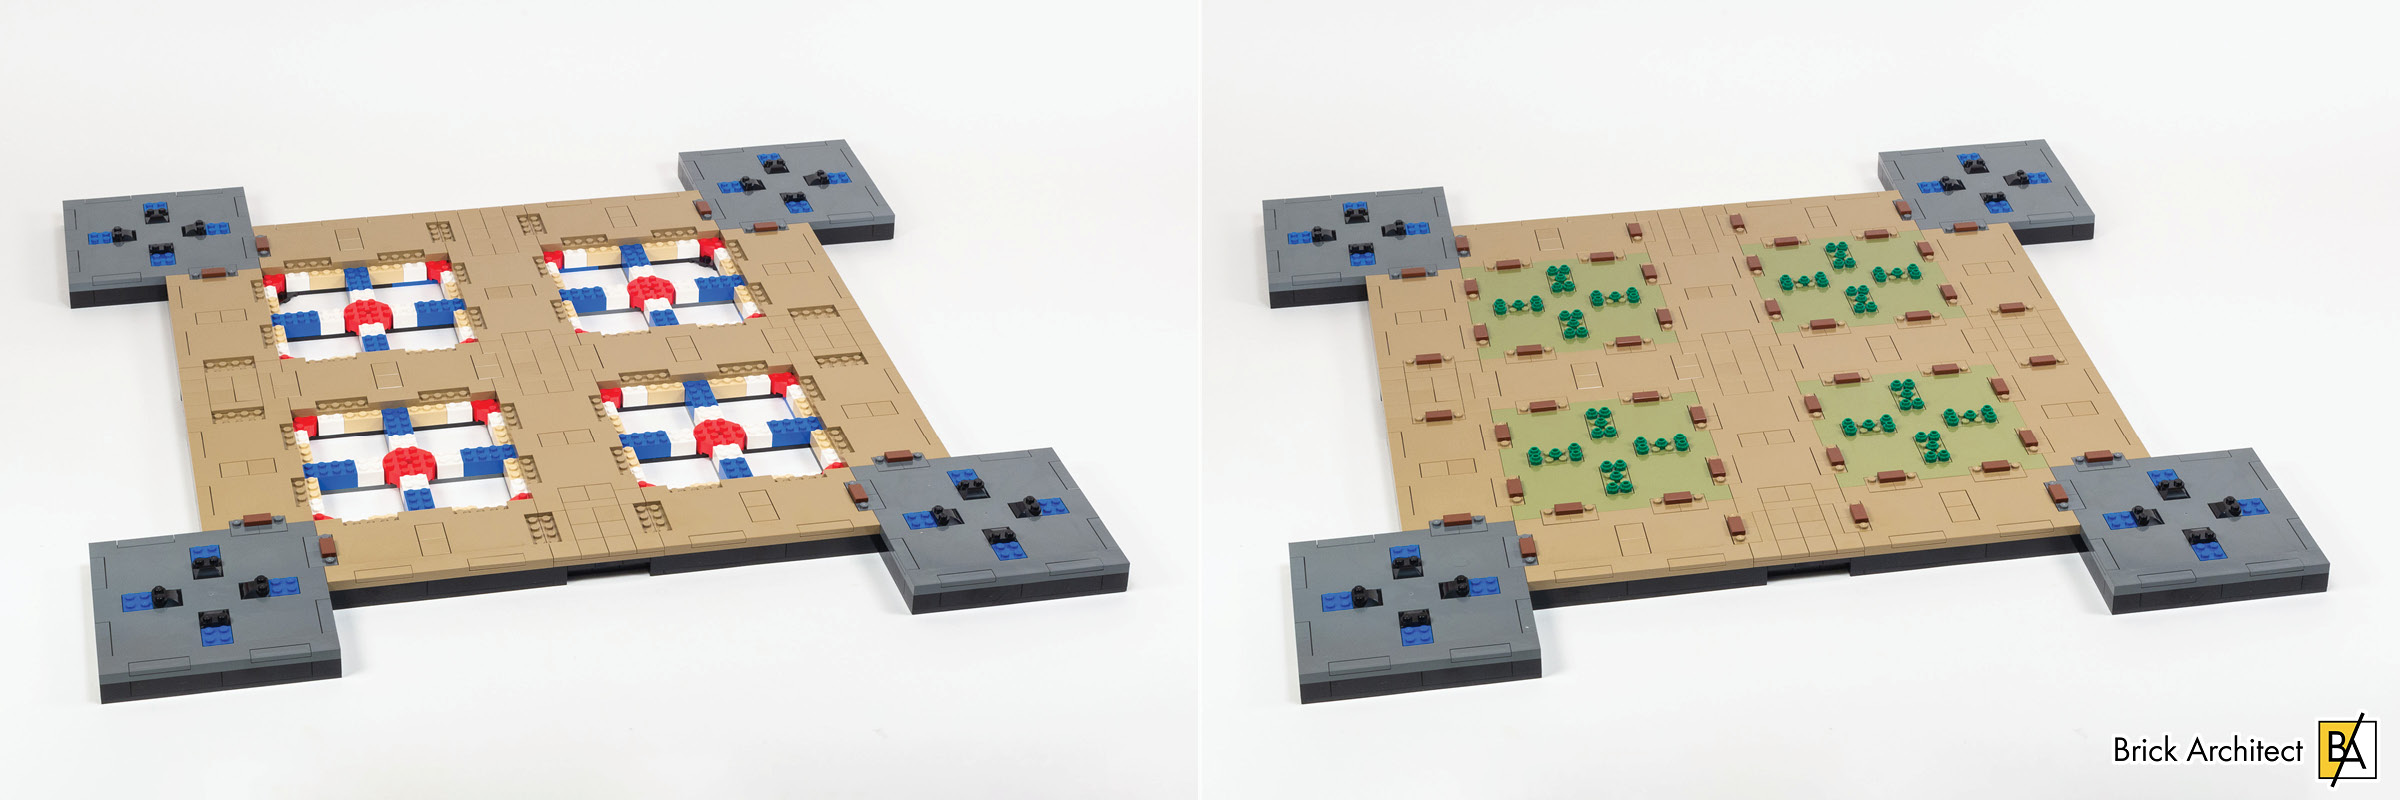
In Bags 11+12 and Bags 13+14, we build four corners of the tower which are pyramidal in shape and have 5Brick YellowTan on the exterior. The internal structure is simple and brick-built, with some offset work needed to build the two awnings and glass entrances on each corner. To help keep track of the orientation of the model, yellow and red colors are hidden in alternating corners.
With the four corners in place, it’s time to decorate the park beneath the Eiffel Tower. Bags 15+16 involve bushes using a stack of two 1×1 Flower elements (part 24866) in 28Dark GreenGreen, small trees using six of those parts in two different shades of green, and lamp posts which are next to all 48 of the tiny benches from the previous stage.
Bags 17+18 wrap up the first box. This involves painstakingly building eight large trees (with 30 green ‘flower’ elements for each tree) and scattering them around the scene. These last two stages are finger-numbing and slow going, but it adds a nice visual texture to the base.
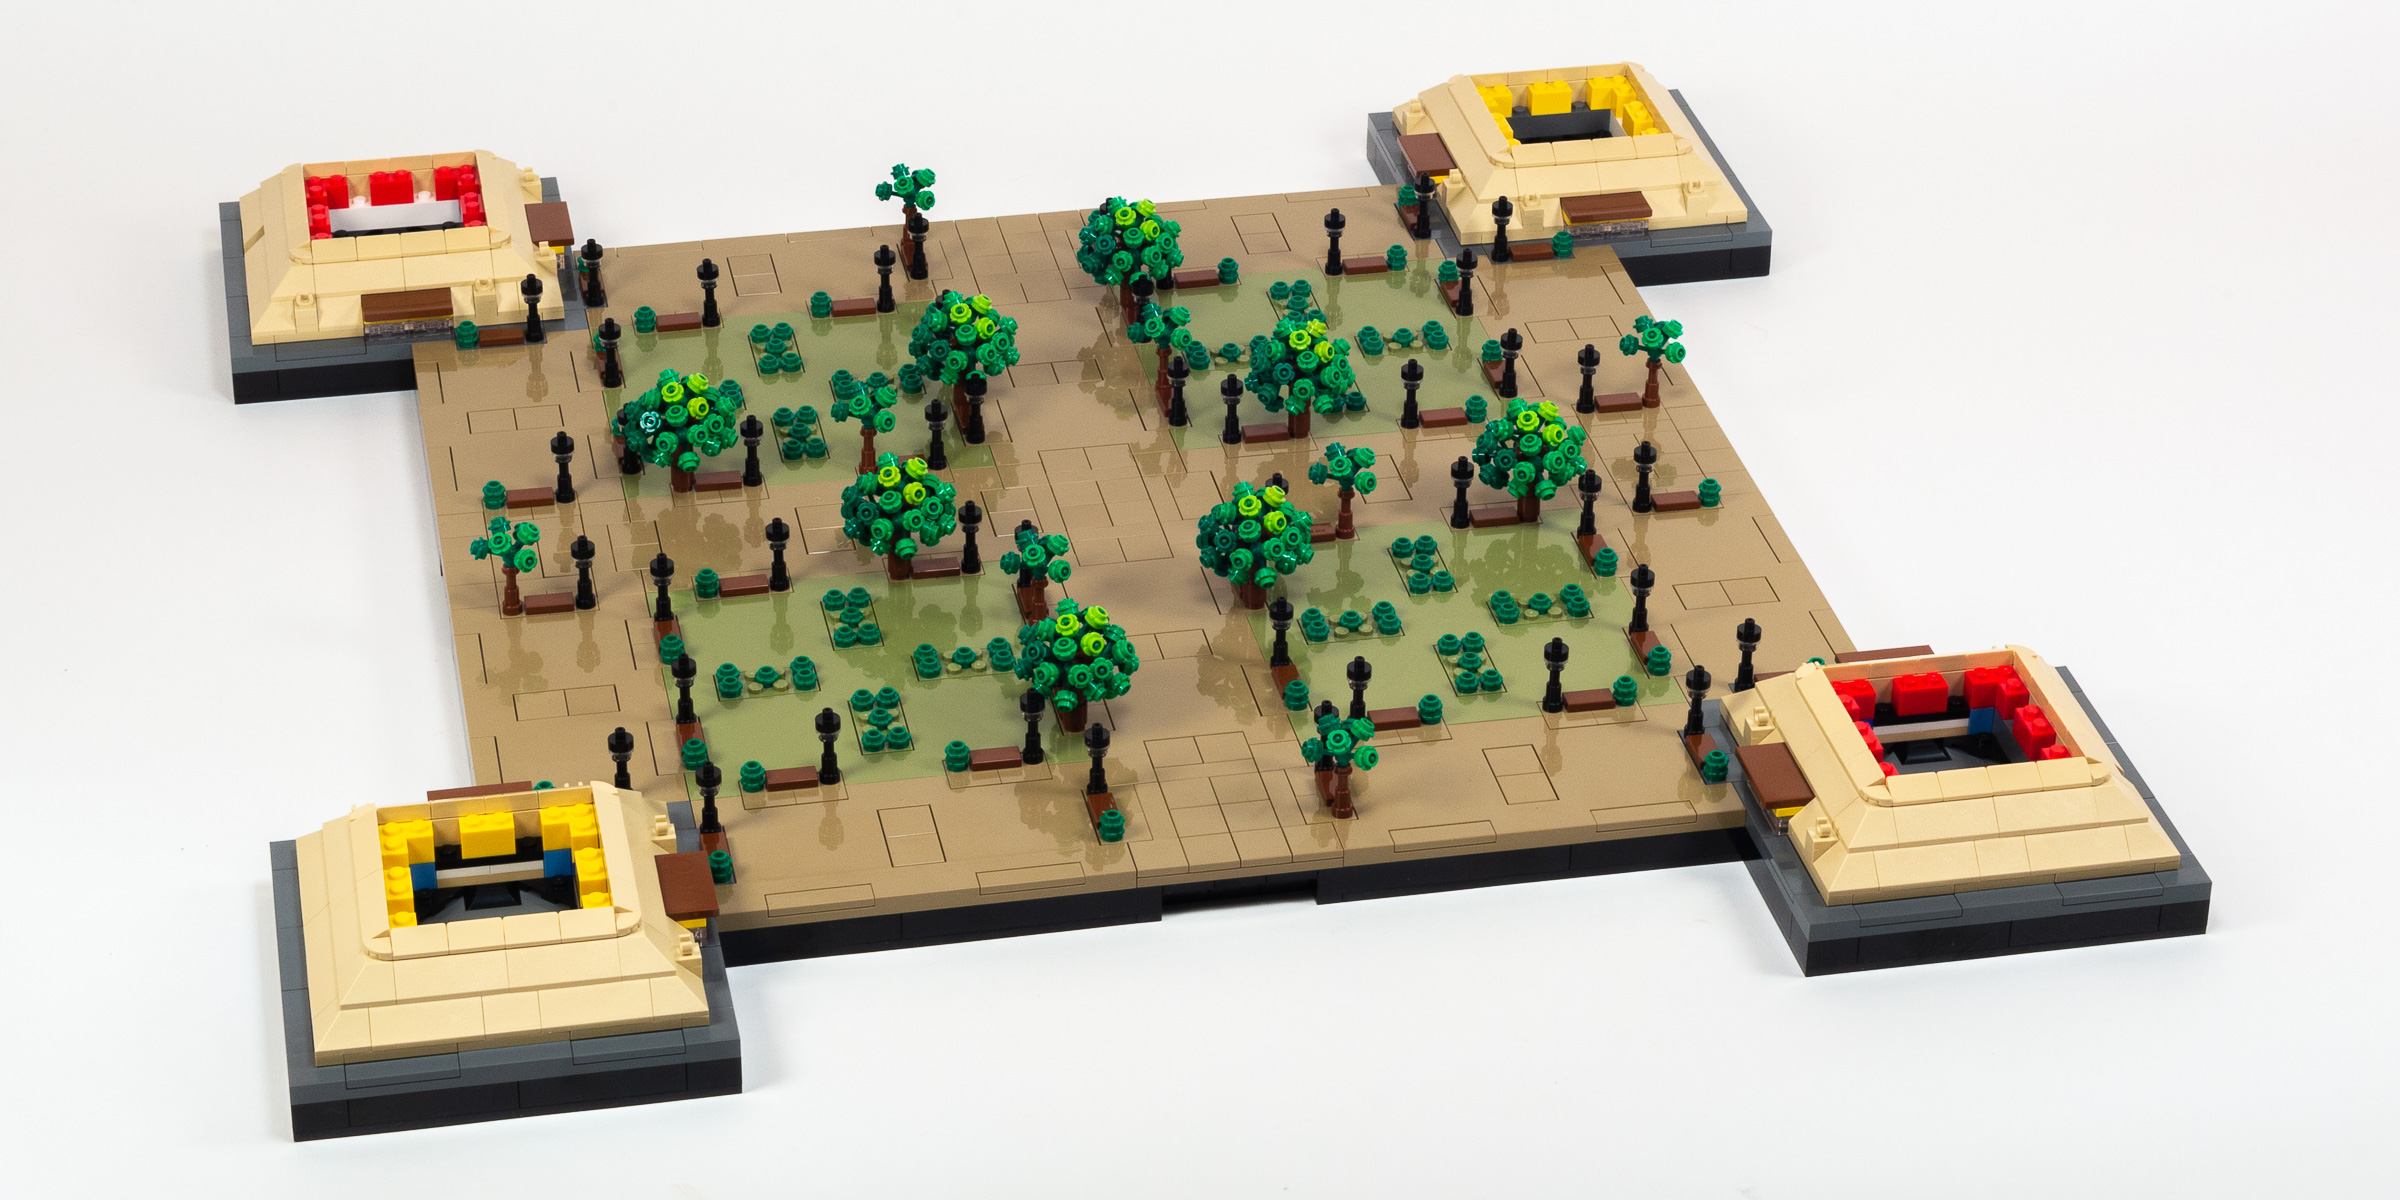
Progress at the end of Box 1.
Build time: 78 minutes.
Bags 11+12: 18 minutes, Bags 13+14: 16 minutes, Bags 15+16: 22 minutes, Bags 17+18: 22 minutes.
By the end of the first (of three) boxes, we have a solid base with some nice foliage. At just 139 minutes so far (2 1/3 hours), there’s no chance that we are anywhere close to 1/3 of the way done, though. This makes sense, since this stage used a lot of large and thusly heavy pieces compared to the more intricate techniques that I anticipate going forward.
Box 2 (of 3)
Judging from the size and complexity of the Eiffel Tower, I am expecting that things are about to get serious. While the second box is the same weight as the previous one, that box included a lot of large and heavy parts (such as the eight 16×16 road tiles and large Technic elements) and this box is packed with small intricate parts.
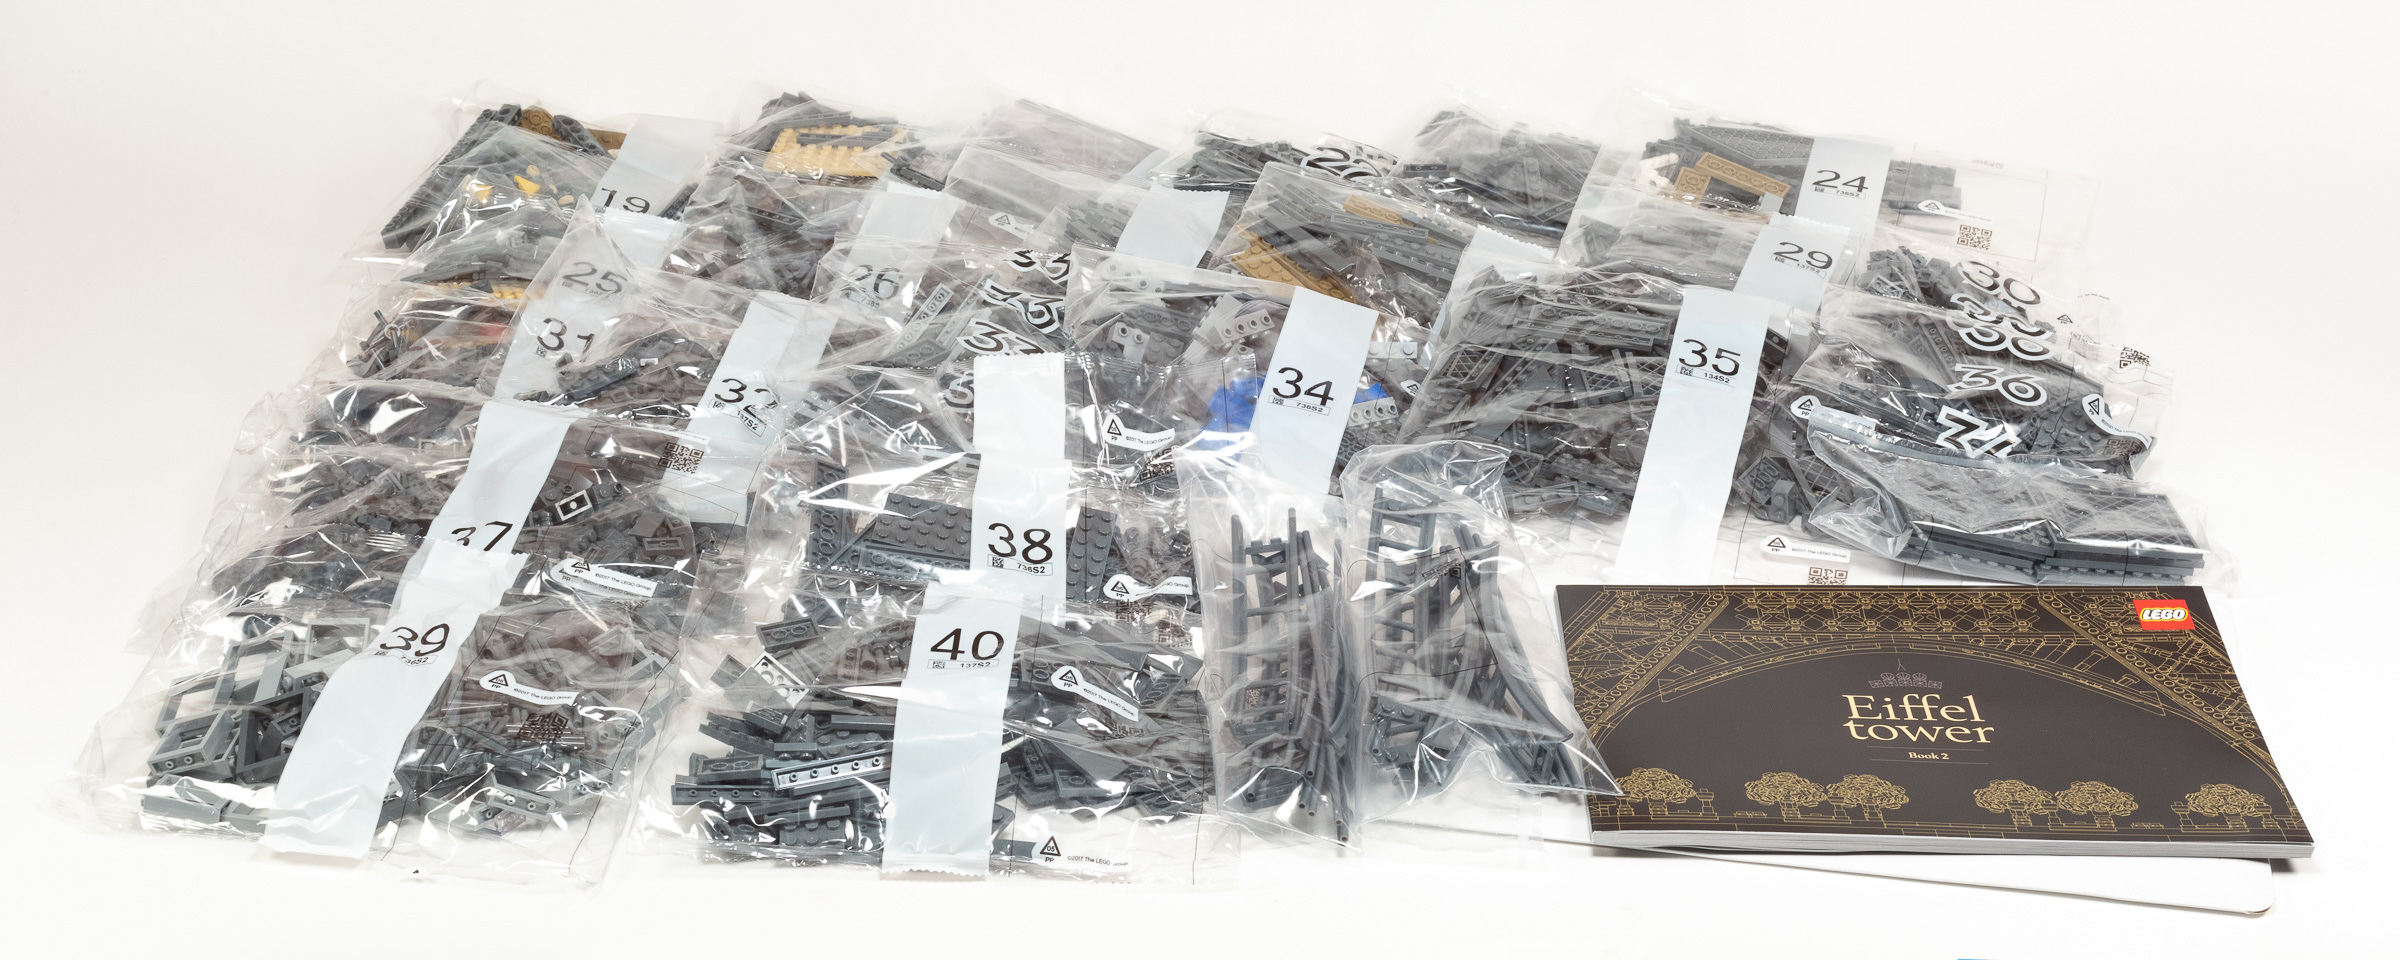
The second box contains bags numbered 19-40.
Contents of Box 2:
- Bag 19: 1x extra-large bag (marked 736S2).
- Bag 20: 1x large bag (marked 736S2).
- Bag 21: 1x large bag (marked 137S2).
- Bag 22: 1x medium unmarked bag.
- Bag 23: 1x large bag (marked 736S2).
- Bag 24: 1x extra-large bag (marked 736S2).
- Bag 25: 1x large bag (marked 736S2).
- Bag 26: 1x medium bag (marked 736S2).
- Bag 27: 1x medium bag (marked 736S2).
- Bag 28: 1x medium bag (marked 137S2).
- Bag 29: 1x large bag (marked 137S2).
- Bag 30: 1x small unmarked bag.
- Bag 31: 1x medium bag (marked 736S2).
- Bag 32: 1x large bag (marked 137S2).
- Bag 33: 1x medium unmarked bag.
- Bag 34: 1x large bag (marked 736S2).
- Bag 35: 1x extra-large bag (marked 134S2).
- Bag 36: 1x medium unmarked bag.
- Bag 37: 1x large bag (marked 736S2).
- Bag 38: 1x medium bag (marked 736S2).
- Bag 39: 1x large bag (marked 736S2).
- Bag 40: 1x large bag (marked 137S2).
- 1x medium unmarked bag: containing 8x – 8×8 plates with grille (part 4151) in 199Dark Stone GreyDark Bluish Gray.
- 2x large unmarked bags: each containing Flex Tube & Coaster Track in 199Dark Stone GreyDark Bluish Gray.
- 1x Cardboard pouch (marked 6437278): containing 200-page “Book 2” instruction booklet. 27.0 x 19.2 cm (10 3/4 x 7 1/2”).
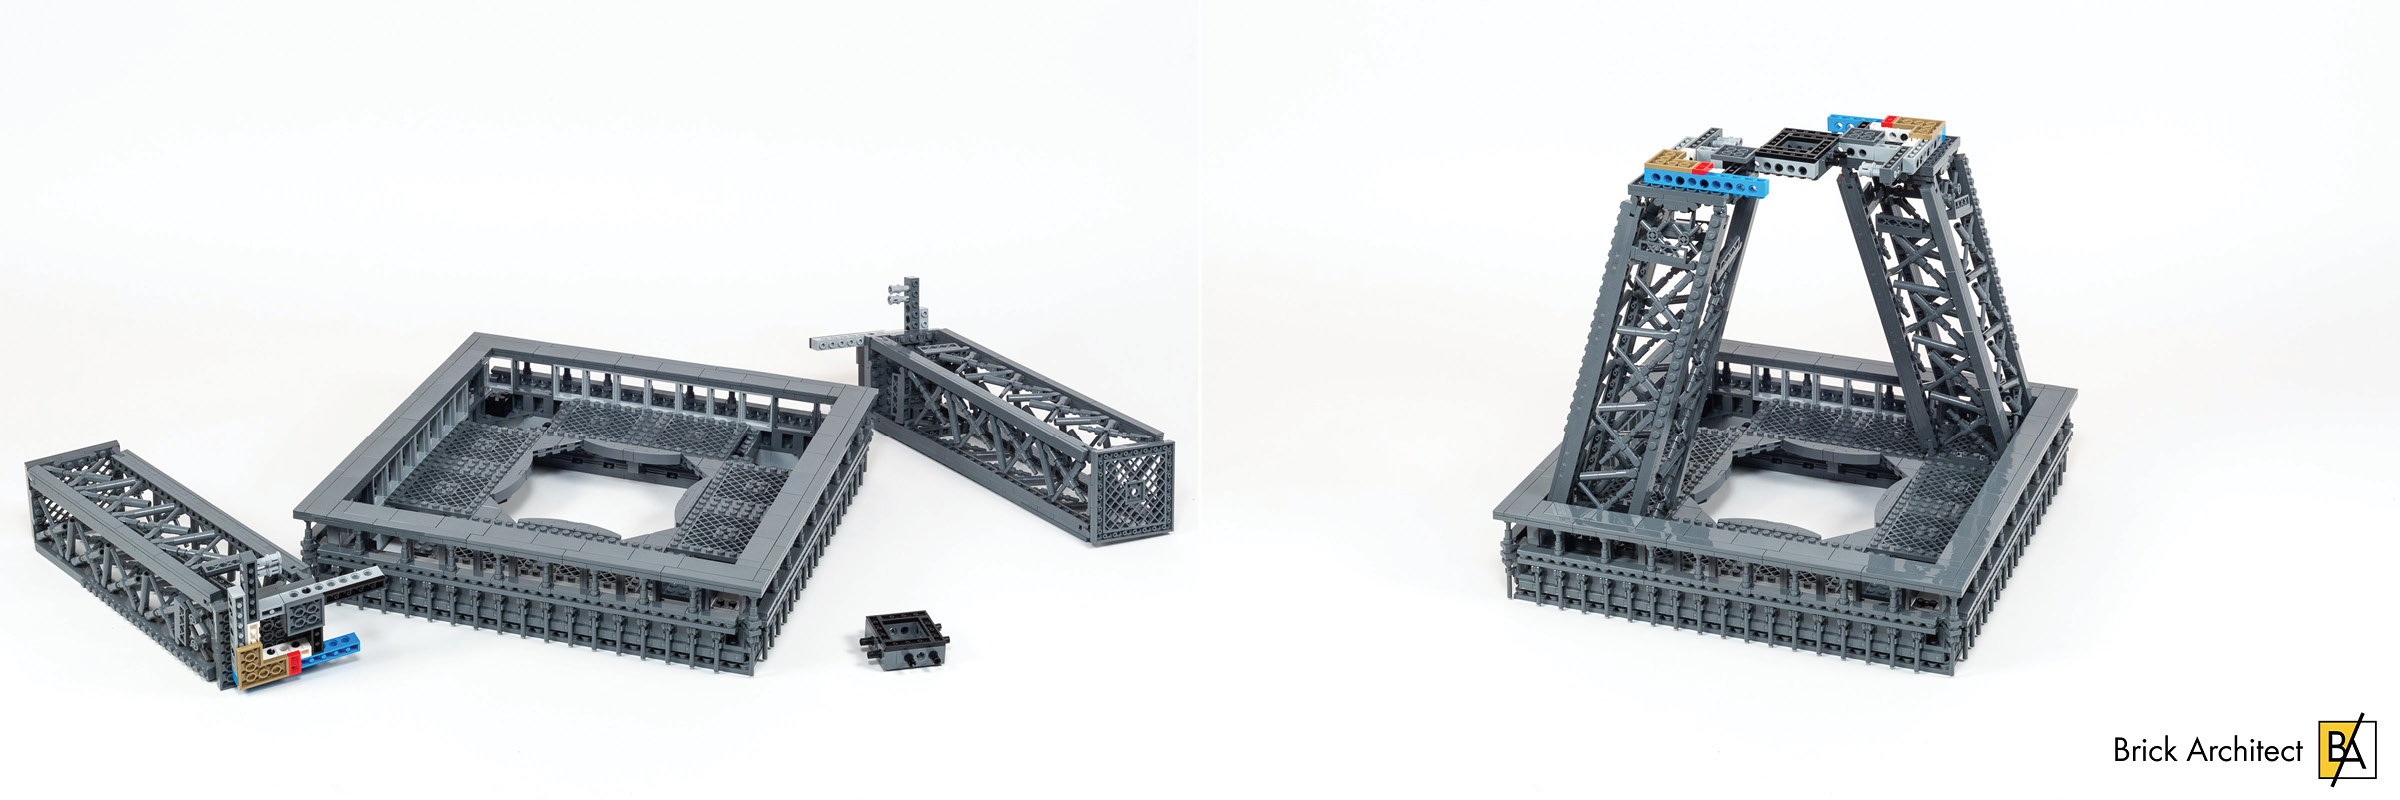
Bags 19 – 28: Tower Legs
In Bag 19, we build two L-shaped assemblies with reinforced Technic corners. An 8×8 plate with some exposed clips are present on both sides. Bag 20 builds our first section of latticework for the legs of the tower. It is built using bar elements attached using clips to a long straight beam, which is built using a lot of 1×6 plates. As I had expected, we are not using Technic elements for the structural elements.

We build the two L-shaped modules in Bag 19, and the lattice assembly in Bag 20.
Attaching the second side of the latticework in Bag 21 helps make the shape of the legs more clear. The panels are only attached with two clips which seems awfully fragile, but I suspect it will become stronger as we continue reinforcing the legs.

Getting ready to attach the second panel of lattice in Bag 21.
The legs continue to get stronger with Bag 22 where we add the third panel of latticework. The general approach is the same as the previous two. I’m excited to finish the first two legs in the next bag.
Attaching more latticework in Bag 22.
After adding the final panel of lattice in Bag 23, we are encouraged to set aside the two legs near the front left, and rear right corners of the base; and wait to install them until later. I couldn’t help myself, so I went ahead and attached them to the two corners to get a better sense of the scale — As I already knew, it’s going to be really big!
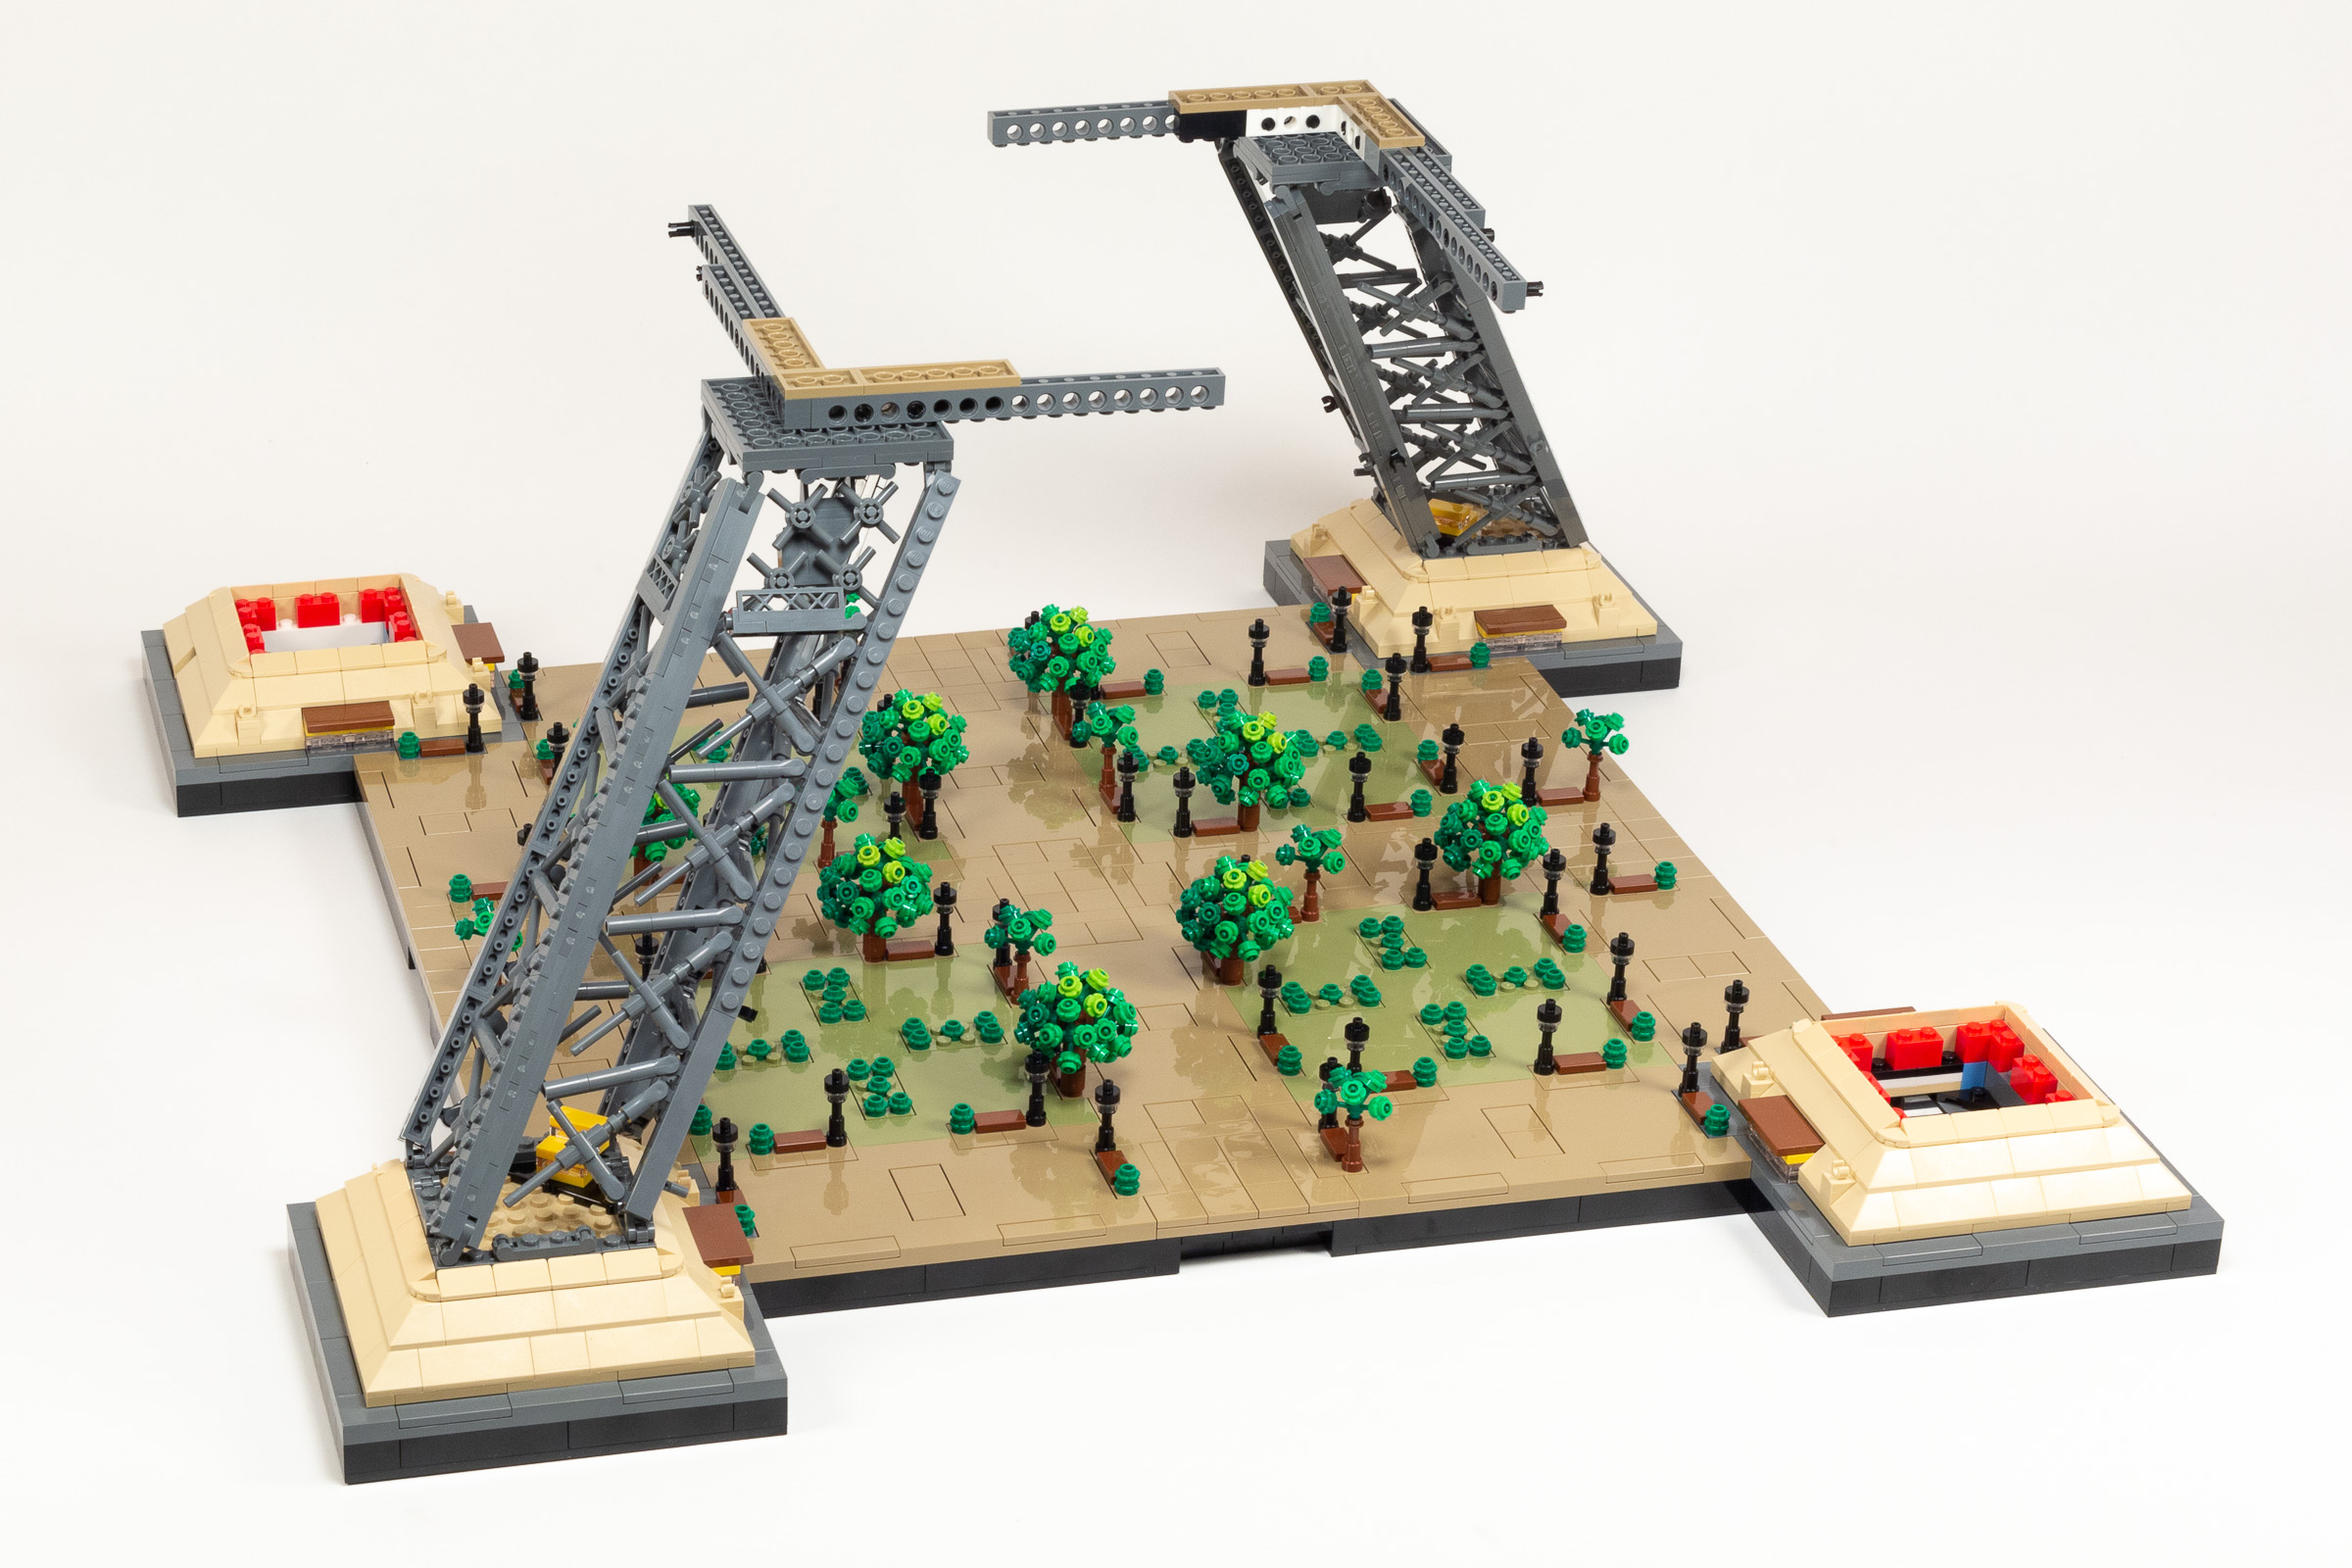
Photo with the first two legs attached. (The instructions encourage us to wait and install all four at the same time.)
Bags 24-28 follow the same build process as these past four stages, so I’m not including a detailed description of these steps of the build process.
All four legs are attached to one another at the end of bag 28.
Build time: 130 minutes.
Bag 19: 6 minutes, Bag 20: 24 minutes, Bag 21: 18 minutes, Bag 22: 11 minutes, Bag 23: 10 minutes, Bag 24: 5 minutes, Bag 25: 17 minutes, Bag 26: 17 minutes, Bag 27: 11 minutes, Bag 28: 11 minutes.
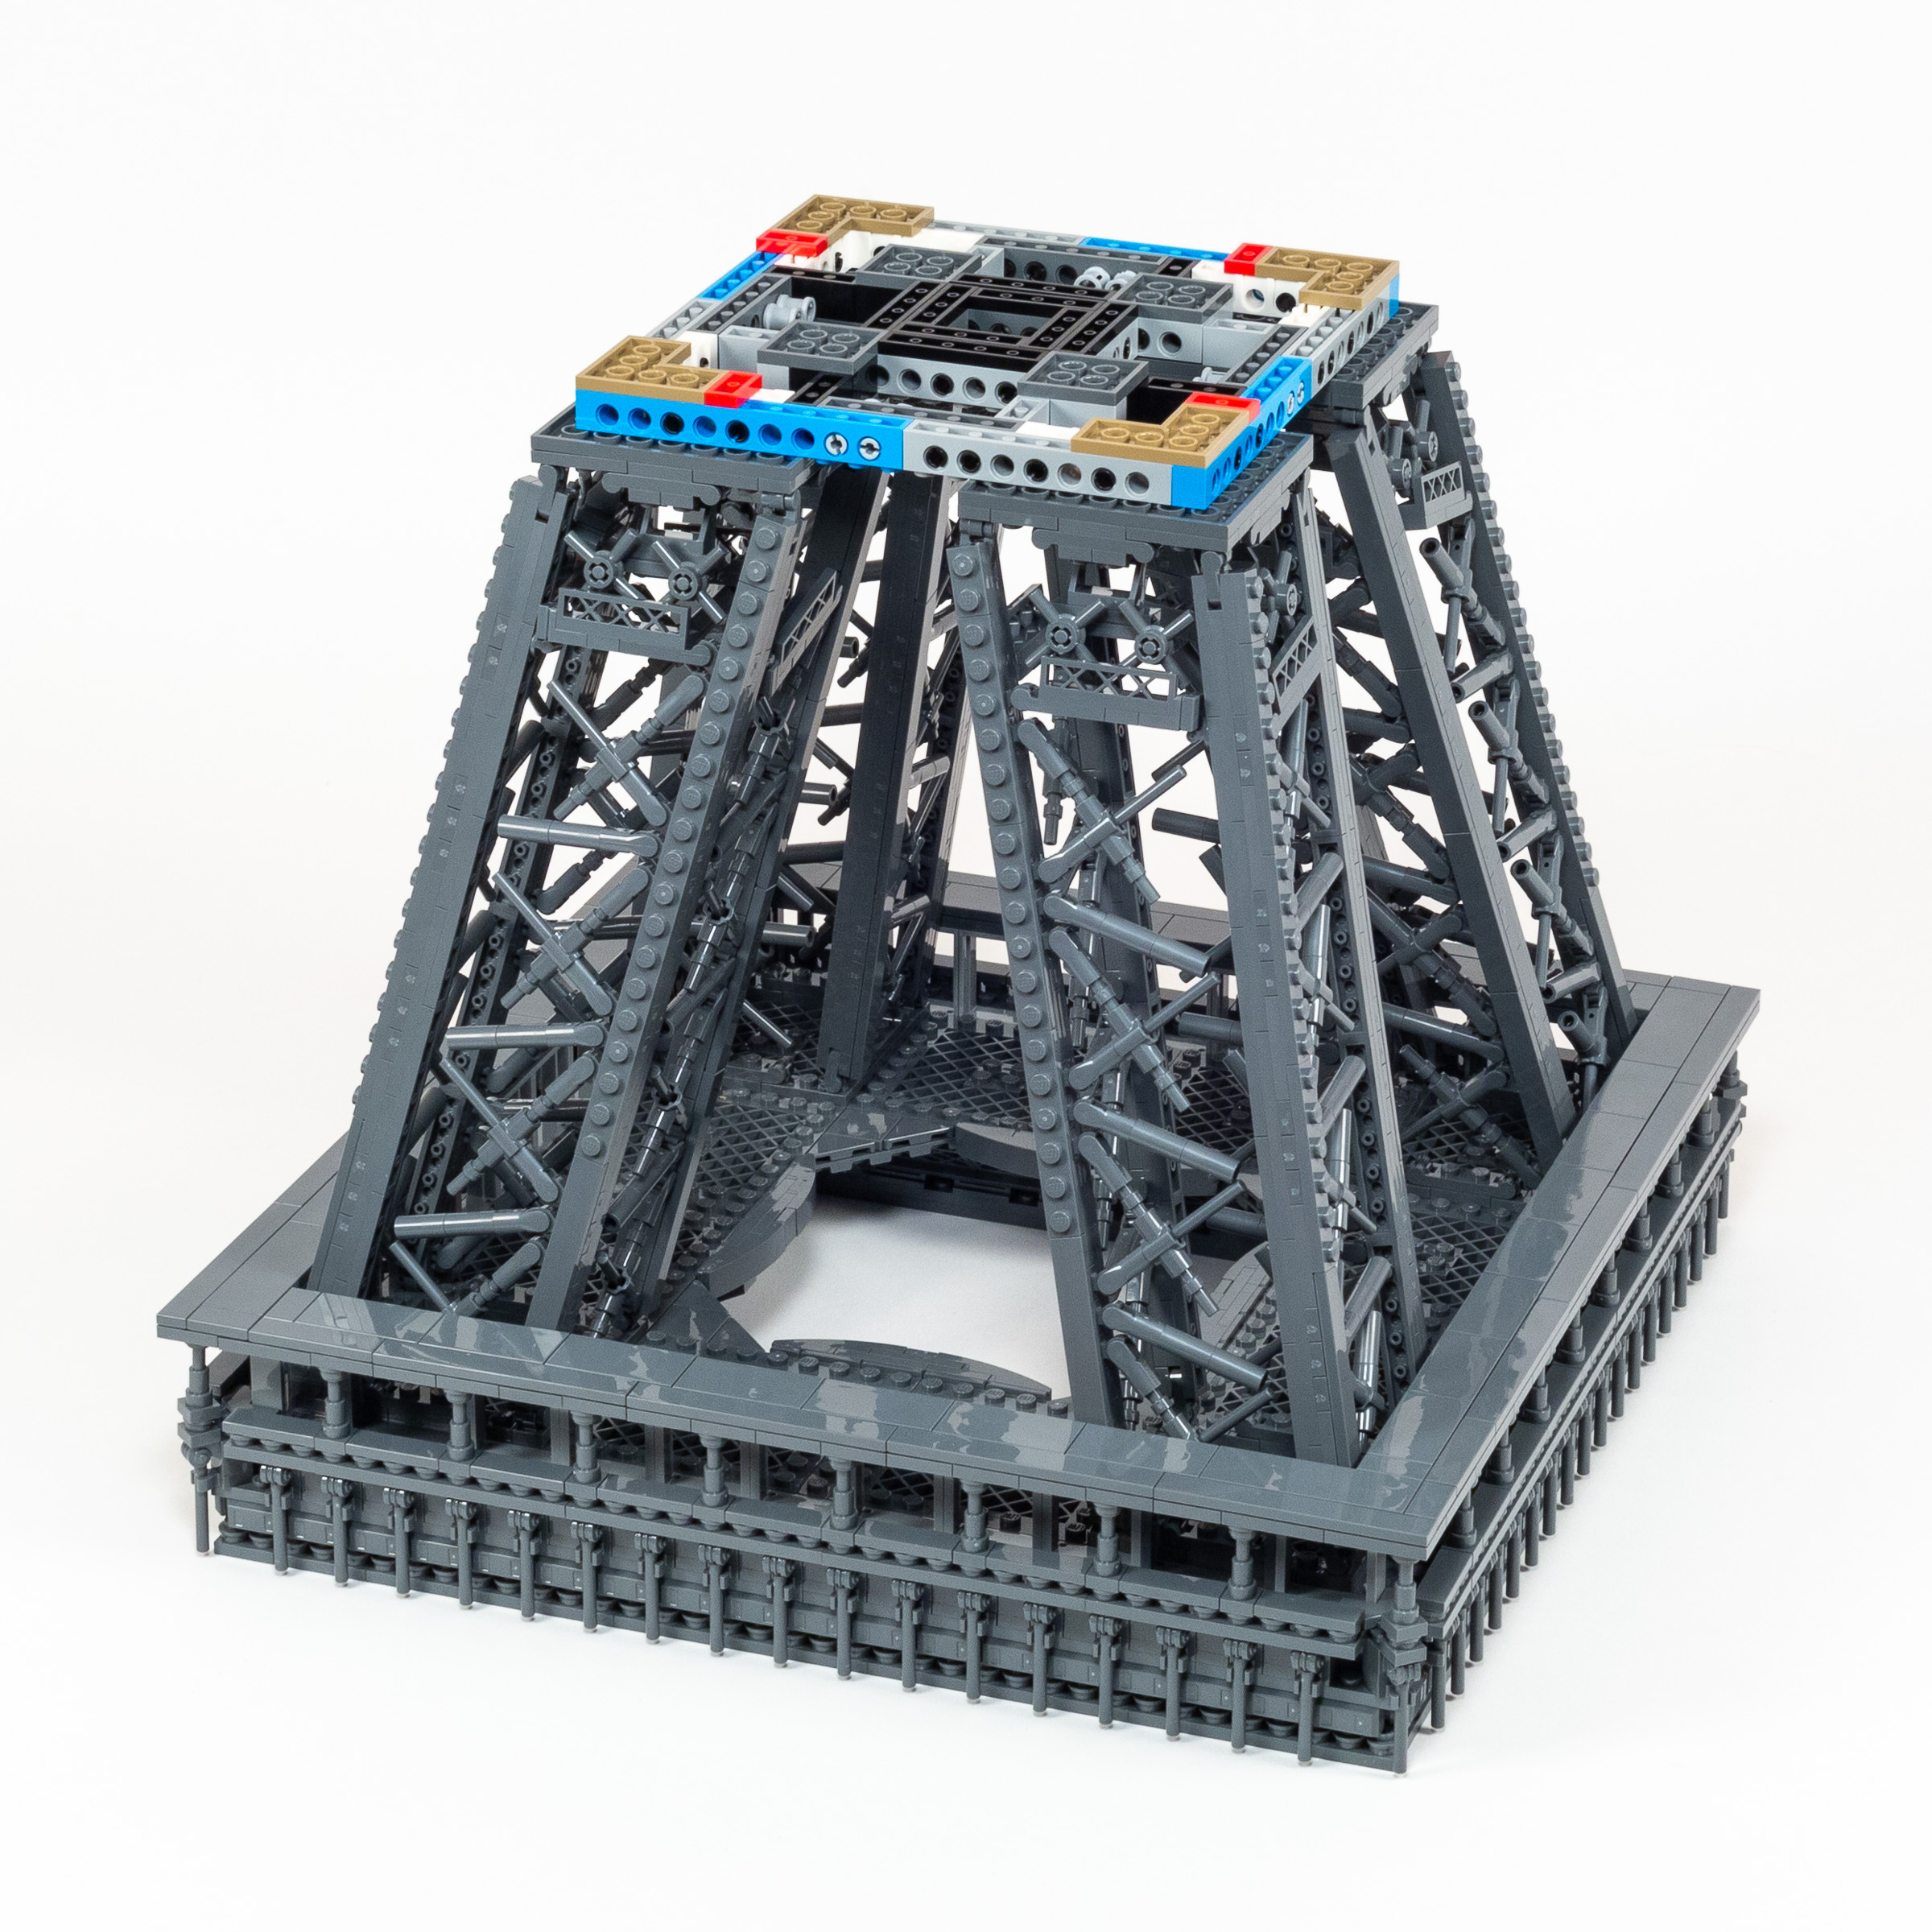
Bags 29 – 32: Decorative Supports
At this point, we have four parallelepiped-shaped legs connected at the top by two layers of Technic Bricks. It’s reasonably sturdy, but lacks the elegant curved shape that the base of the Eiffel Tower is known for.
Jumping into Bags 29+30, we get eight short flex tubes out of one of the unnumbered bags before we begin. They are attached to the inside corners of the model using just two clips, with an extra piece partway up mimicking additional structural elements even though it isn’t actually attached.
Adding small sections of Flex Tube near the base of each leg.
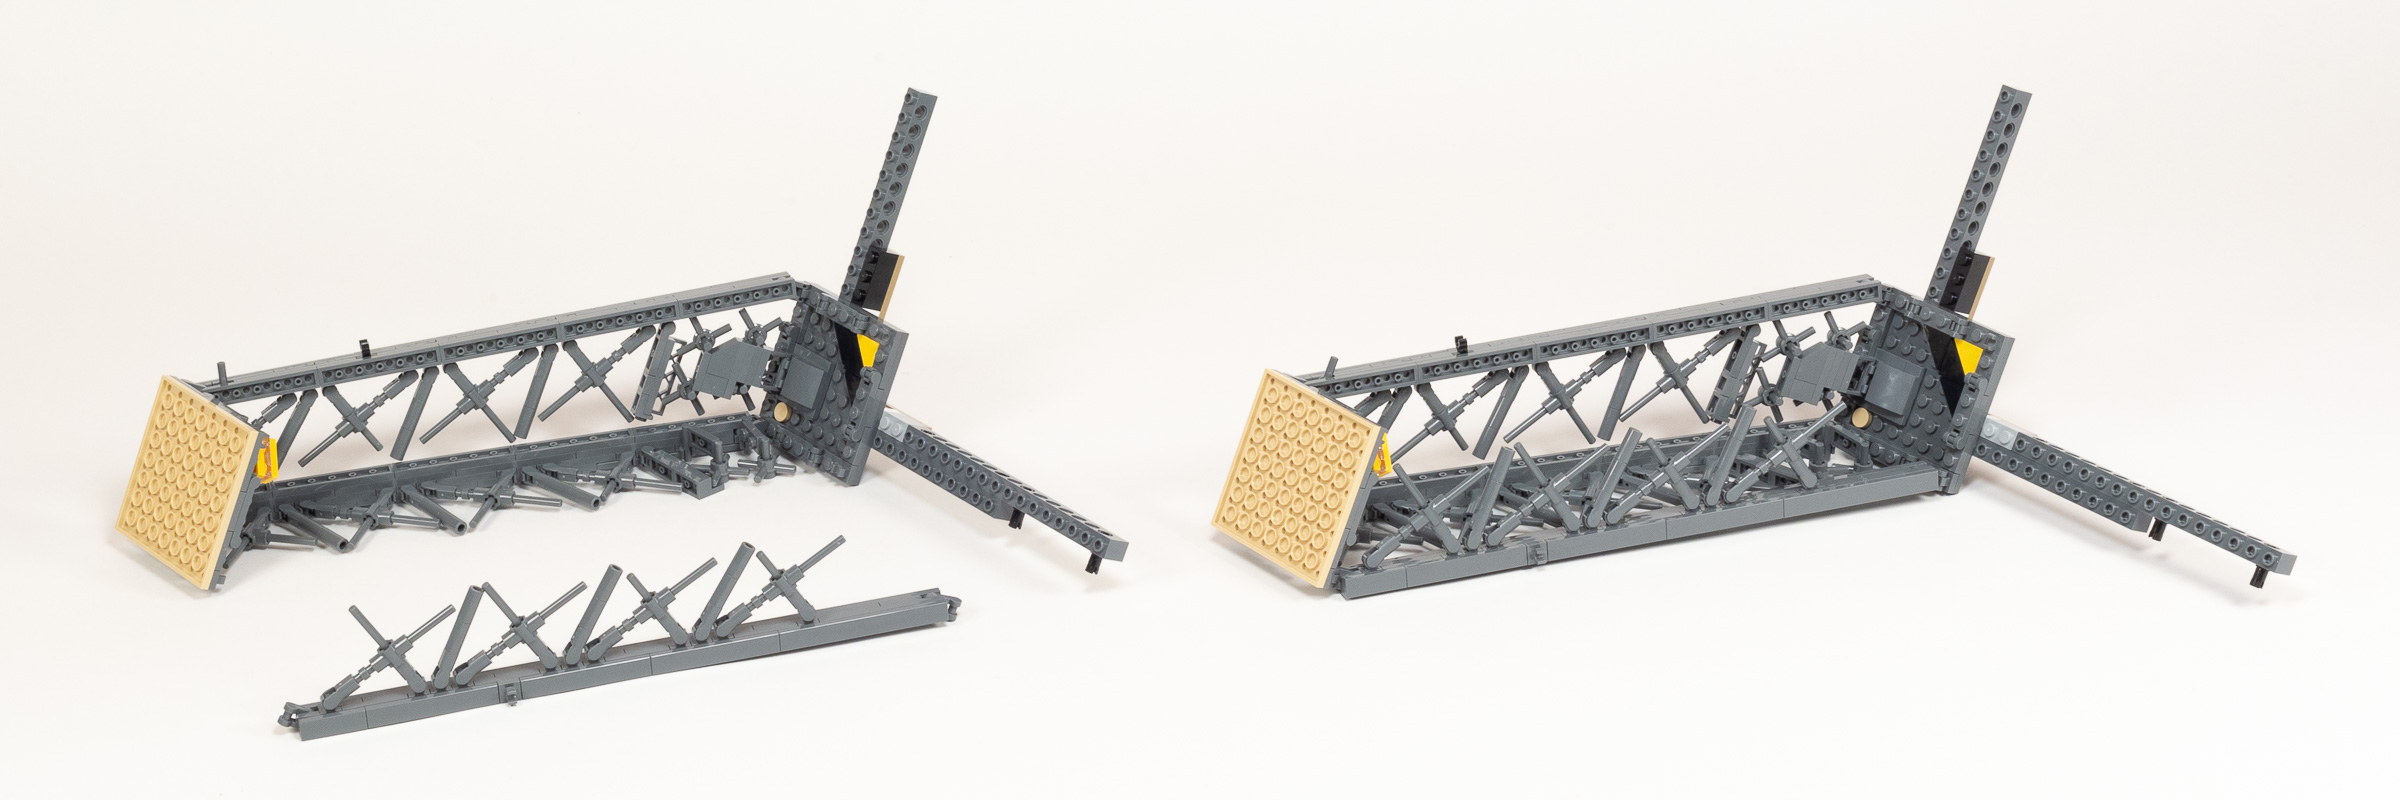
After that, we start building four arch-shaped assemblies which I believe will be attached to the four outward-facing sides. This includes attaching a row of fences that are attached using SNOT techniques and will be facing outward.
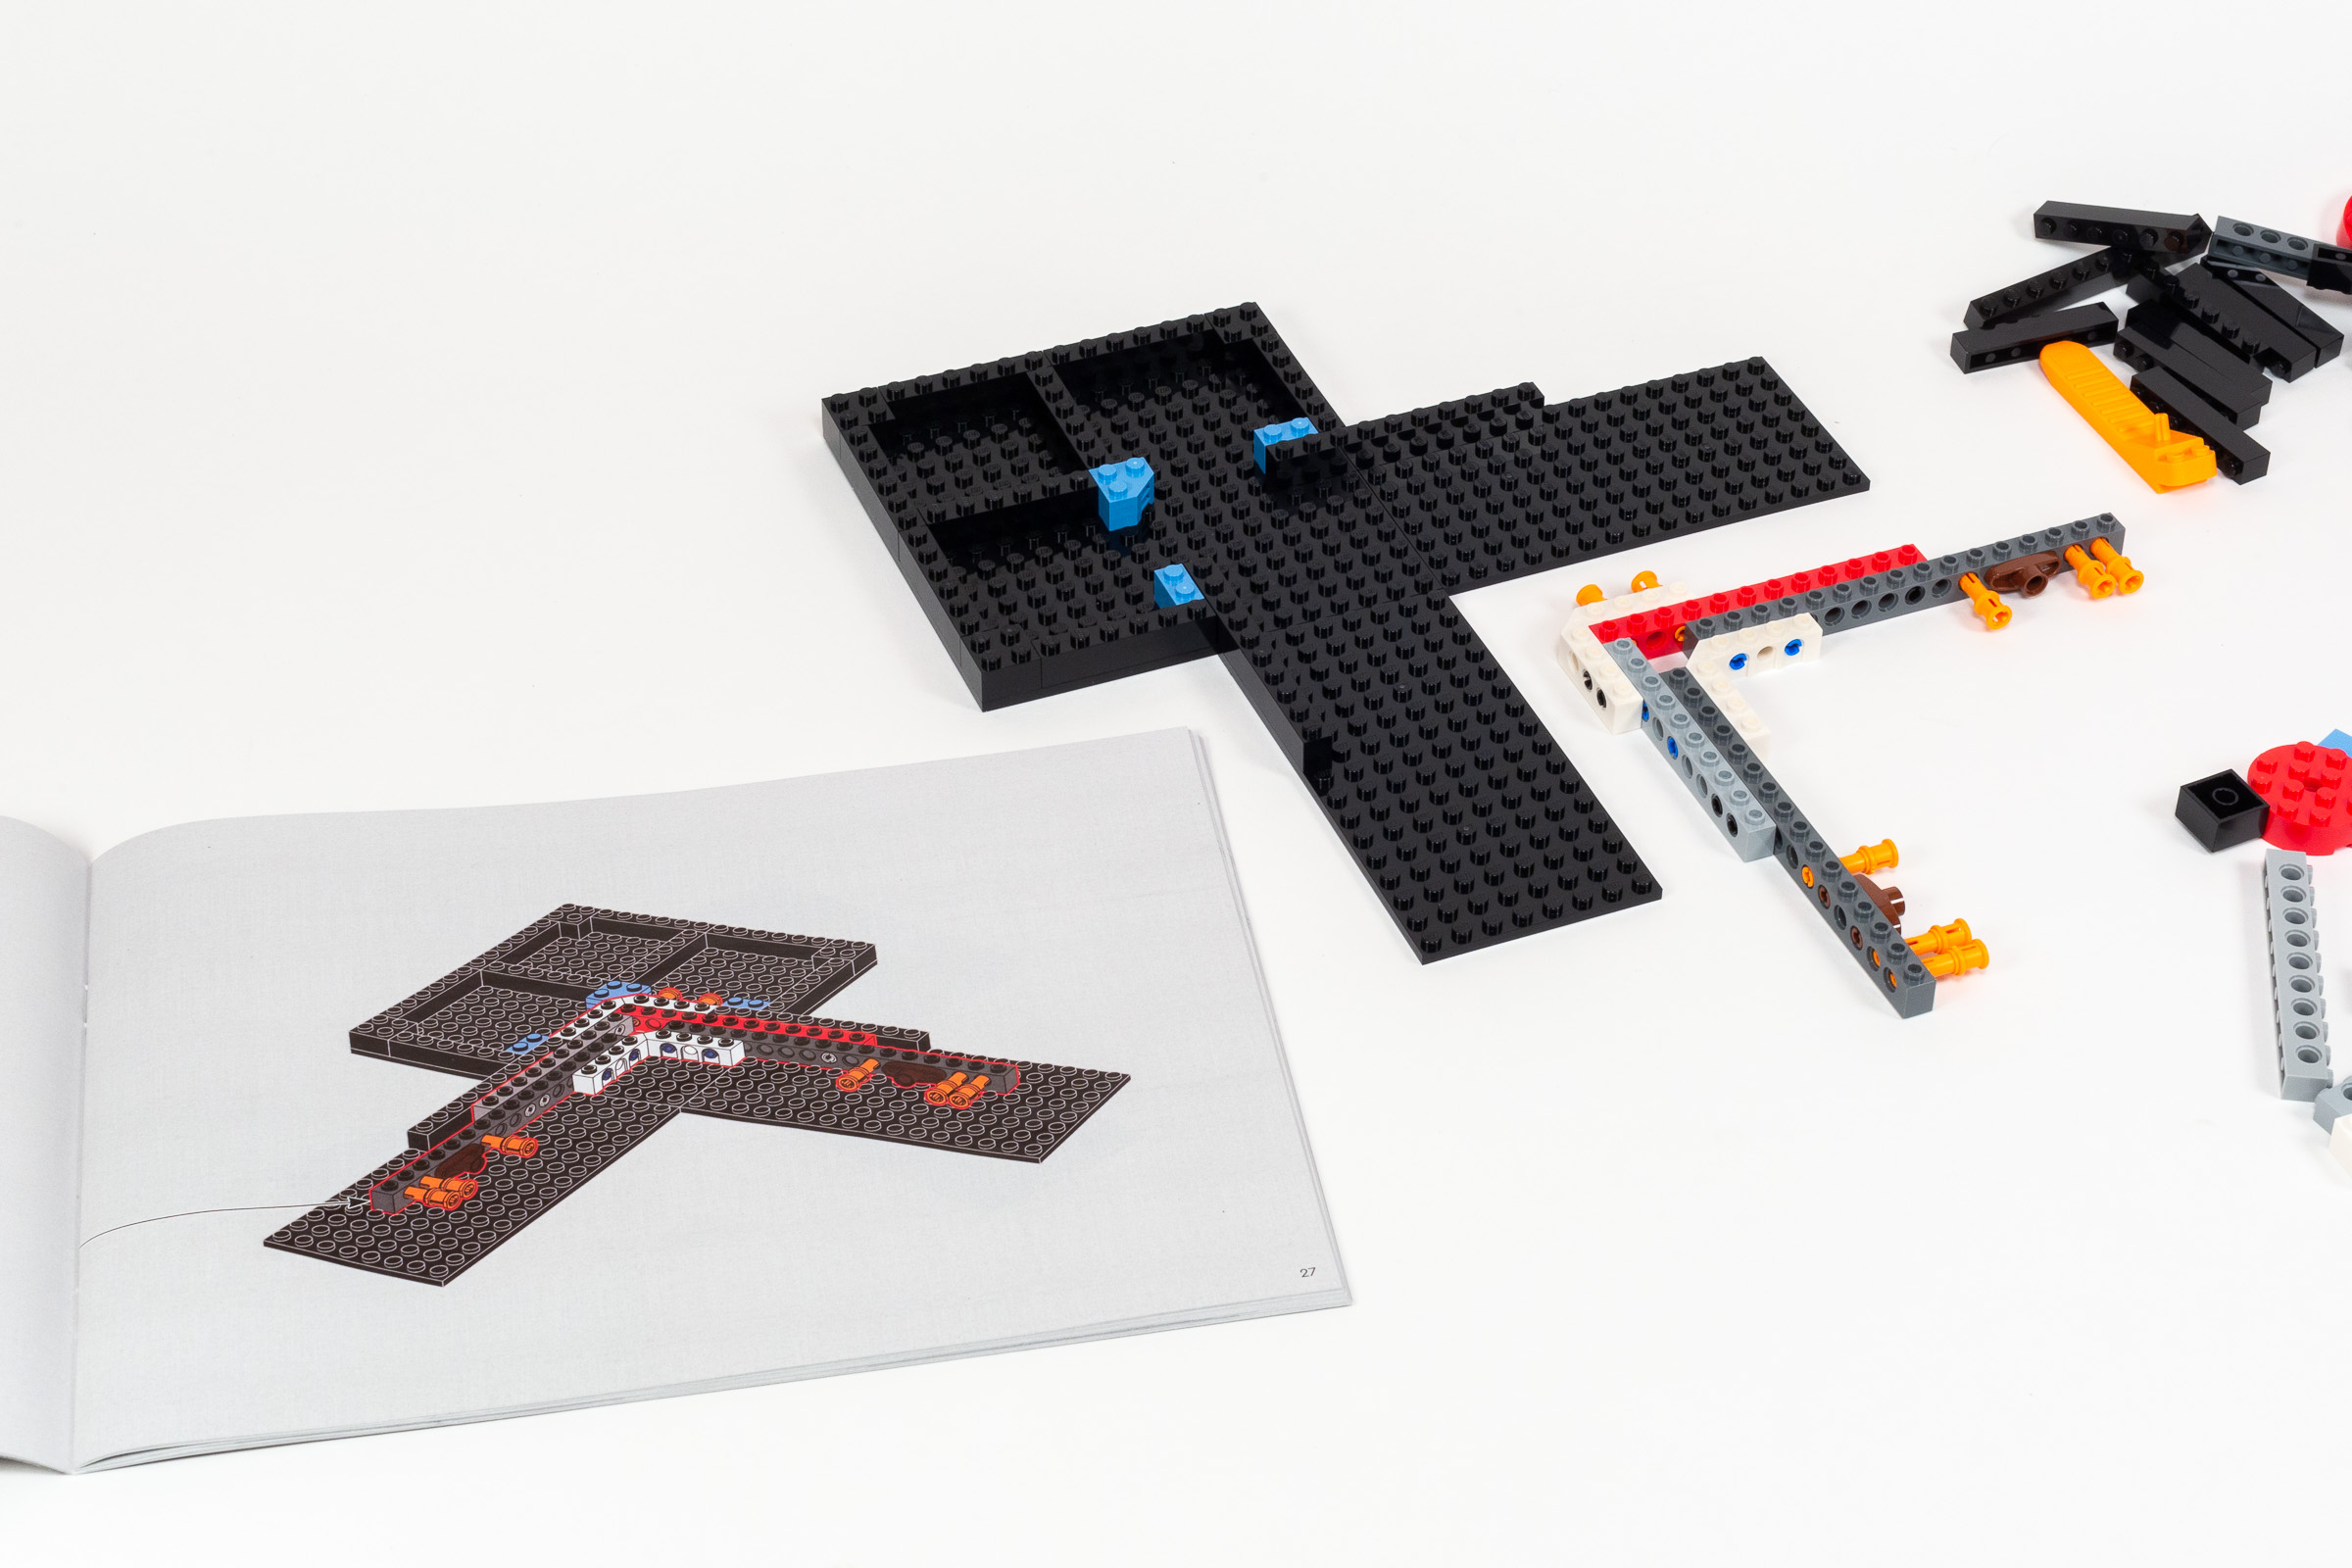
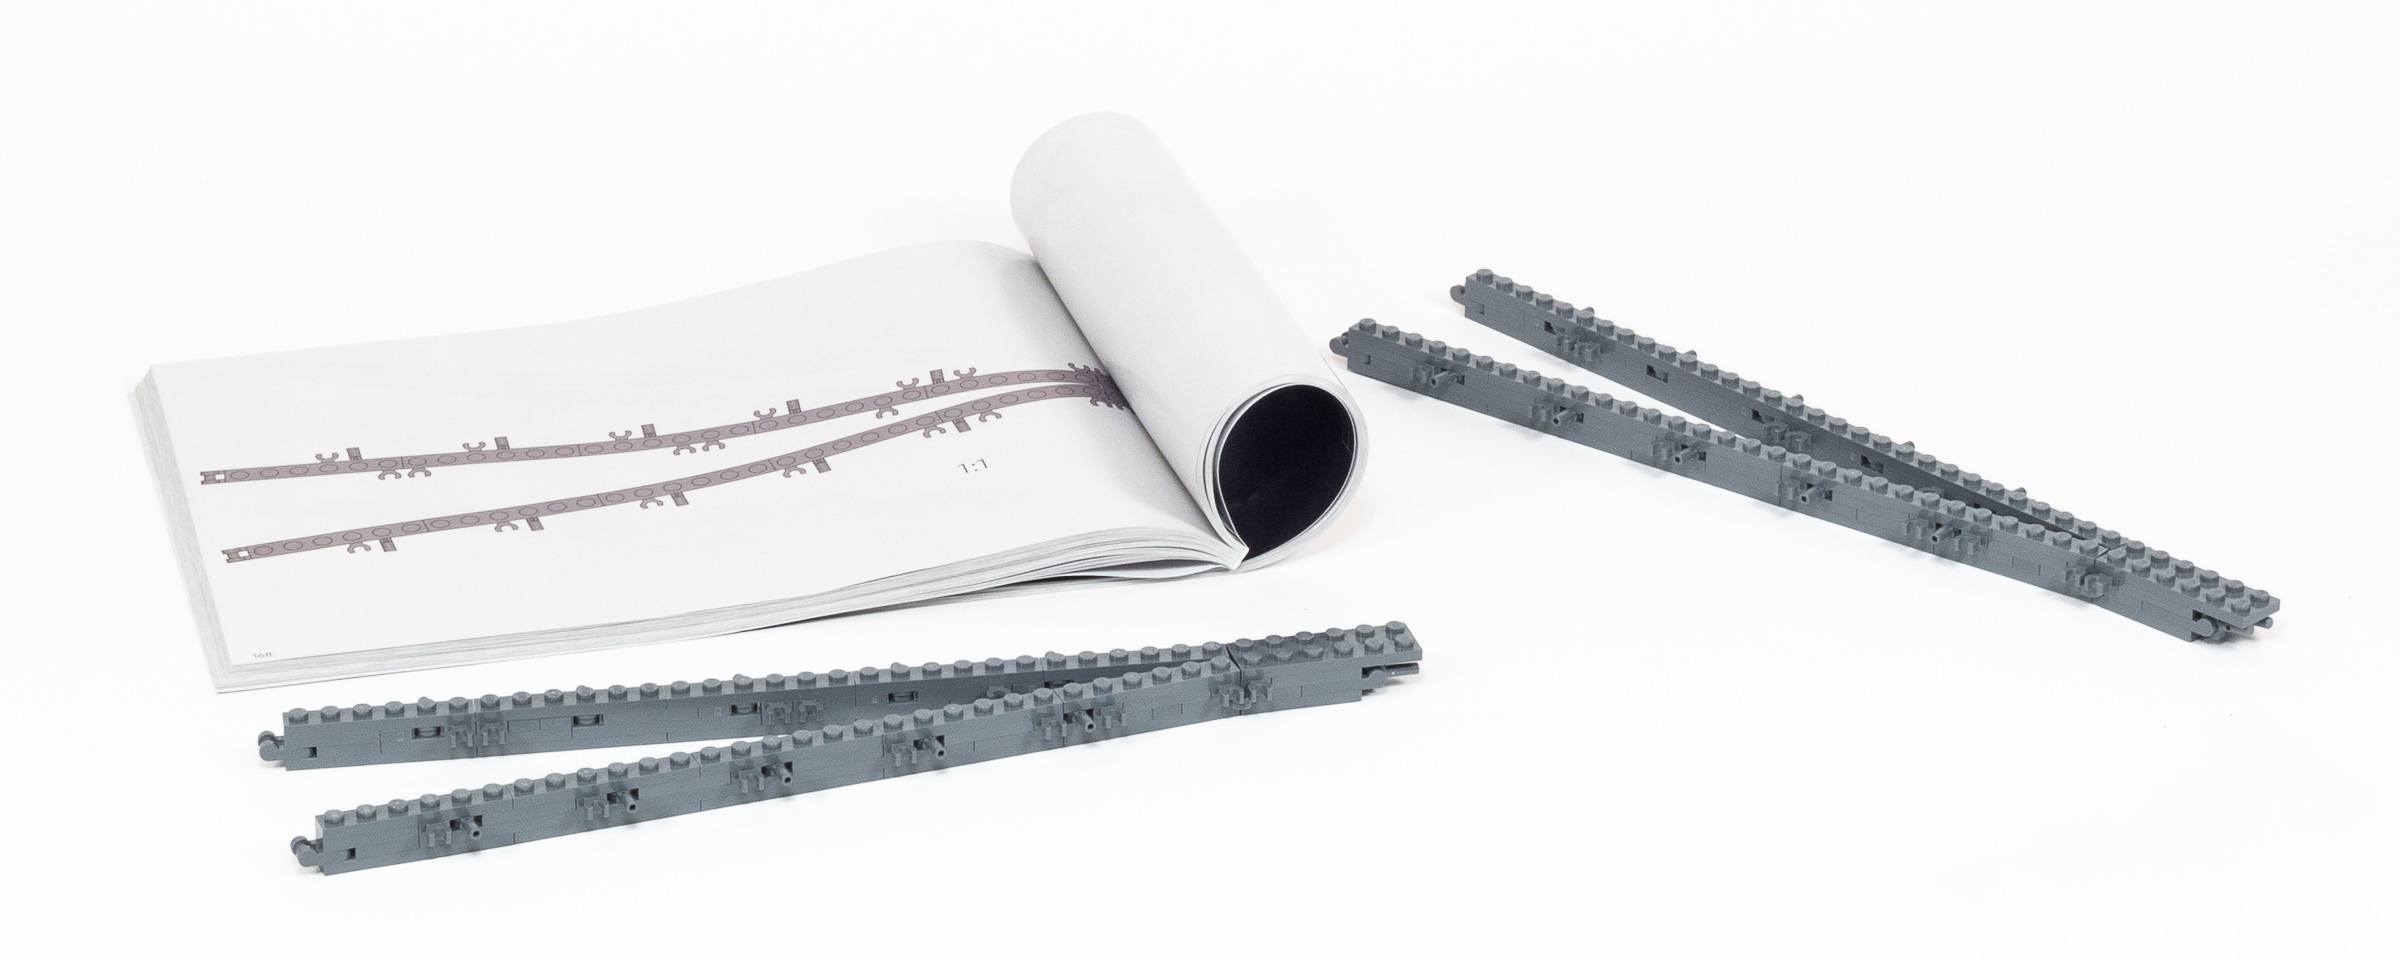
This assembly continues into Bag 31 where we build a grid of (non-load bearing) latticework using 16 identical sub-assemblies. The curved assemblies are completed in Bag 32, which is when we get to use Rollercoaster track to create the gentle curve along the bottom edge of the lower observation deck.
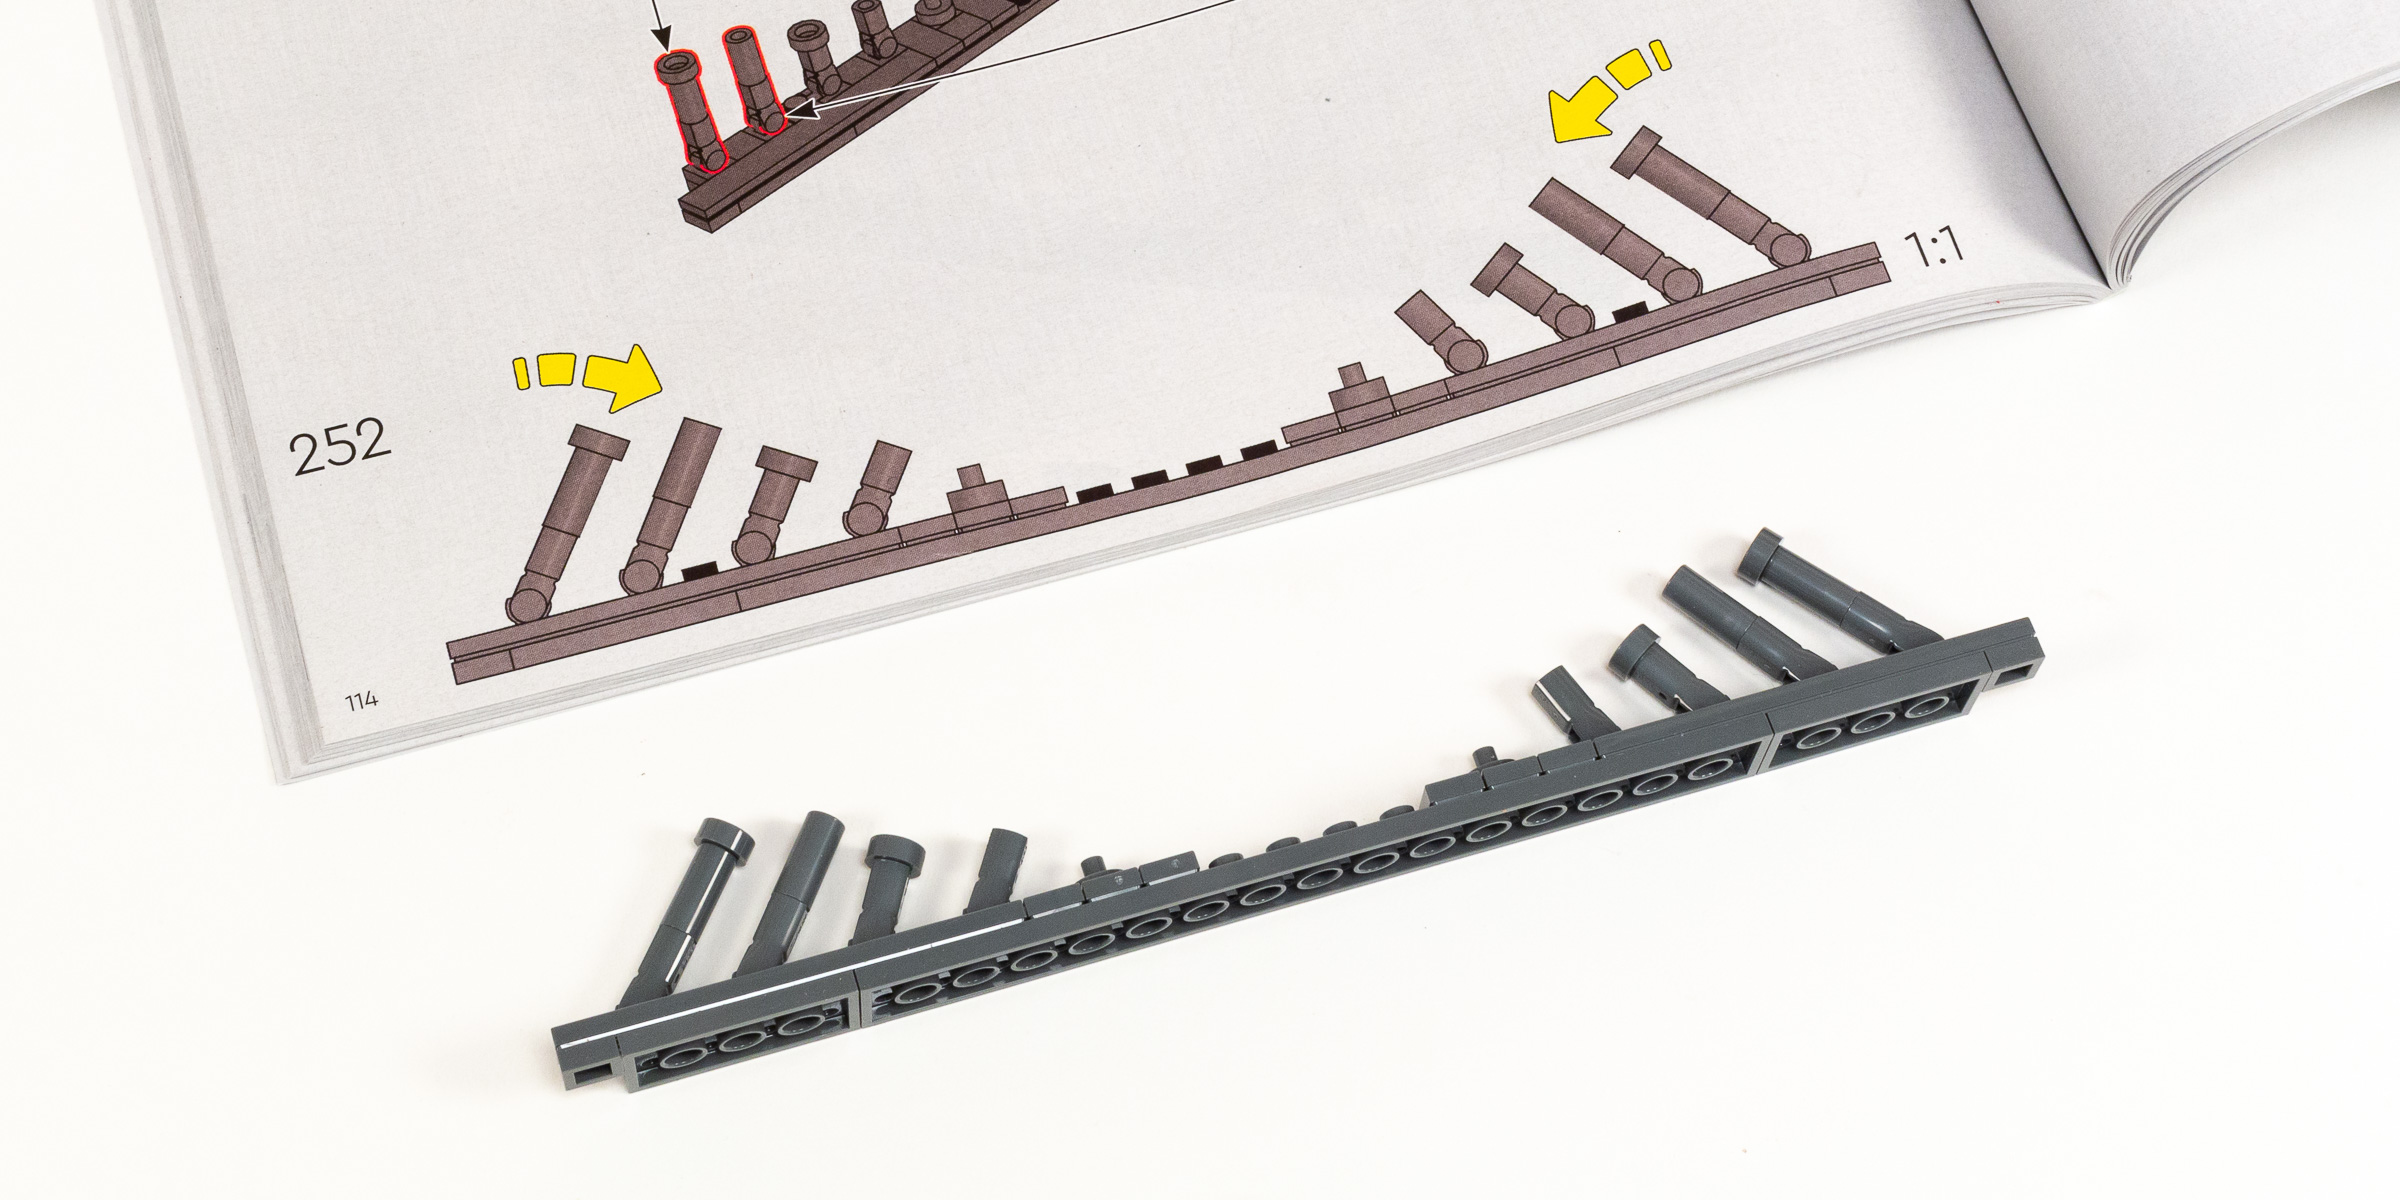
A 1:1 scale guide is included in the book to help you get the angle right.
First we build a straight section using plates, tiles, and clips. To achieve the radial arrangement of supports, a series of small assemblies are attached to the clips. A 1:1 ratio picture is included in the instruction booklet to help position them at the right angle.
Getting ready to attach the arched modules at the end of Bag 32.
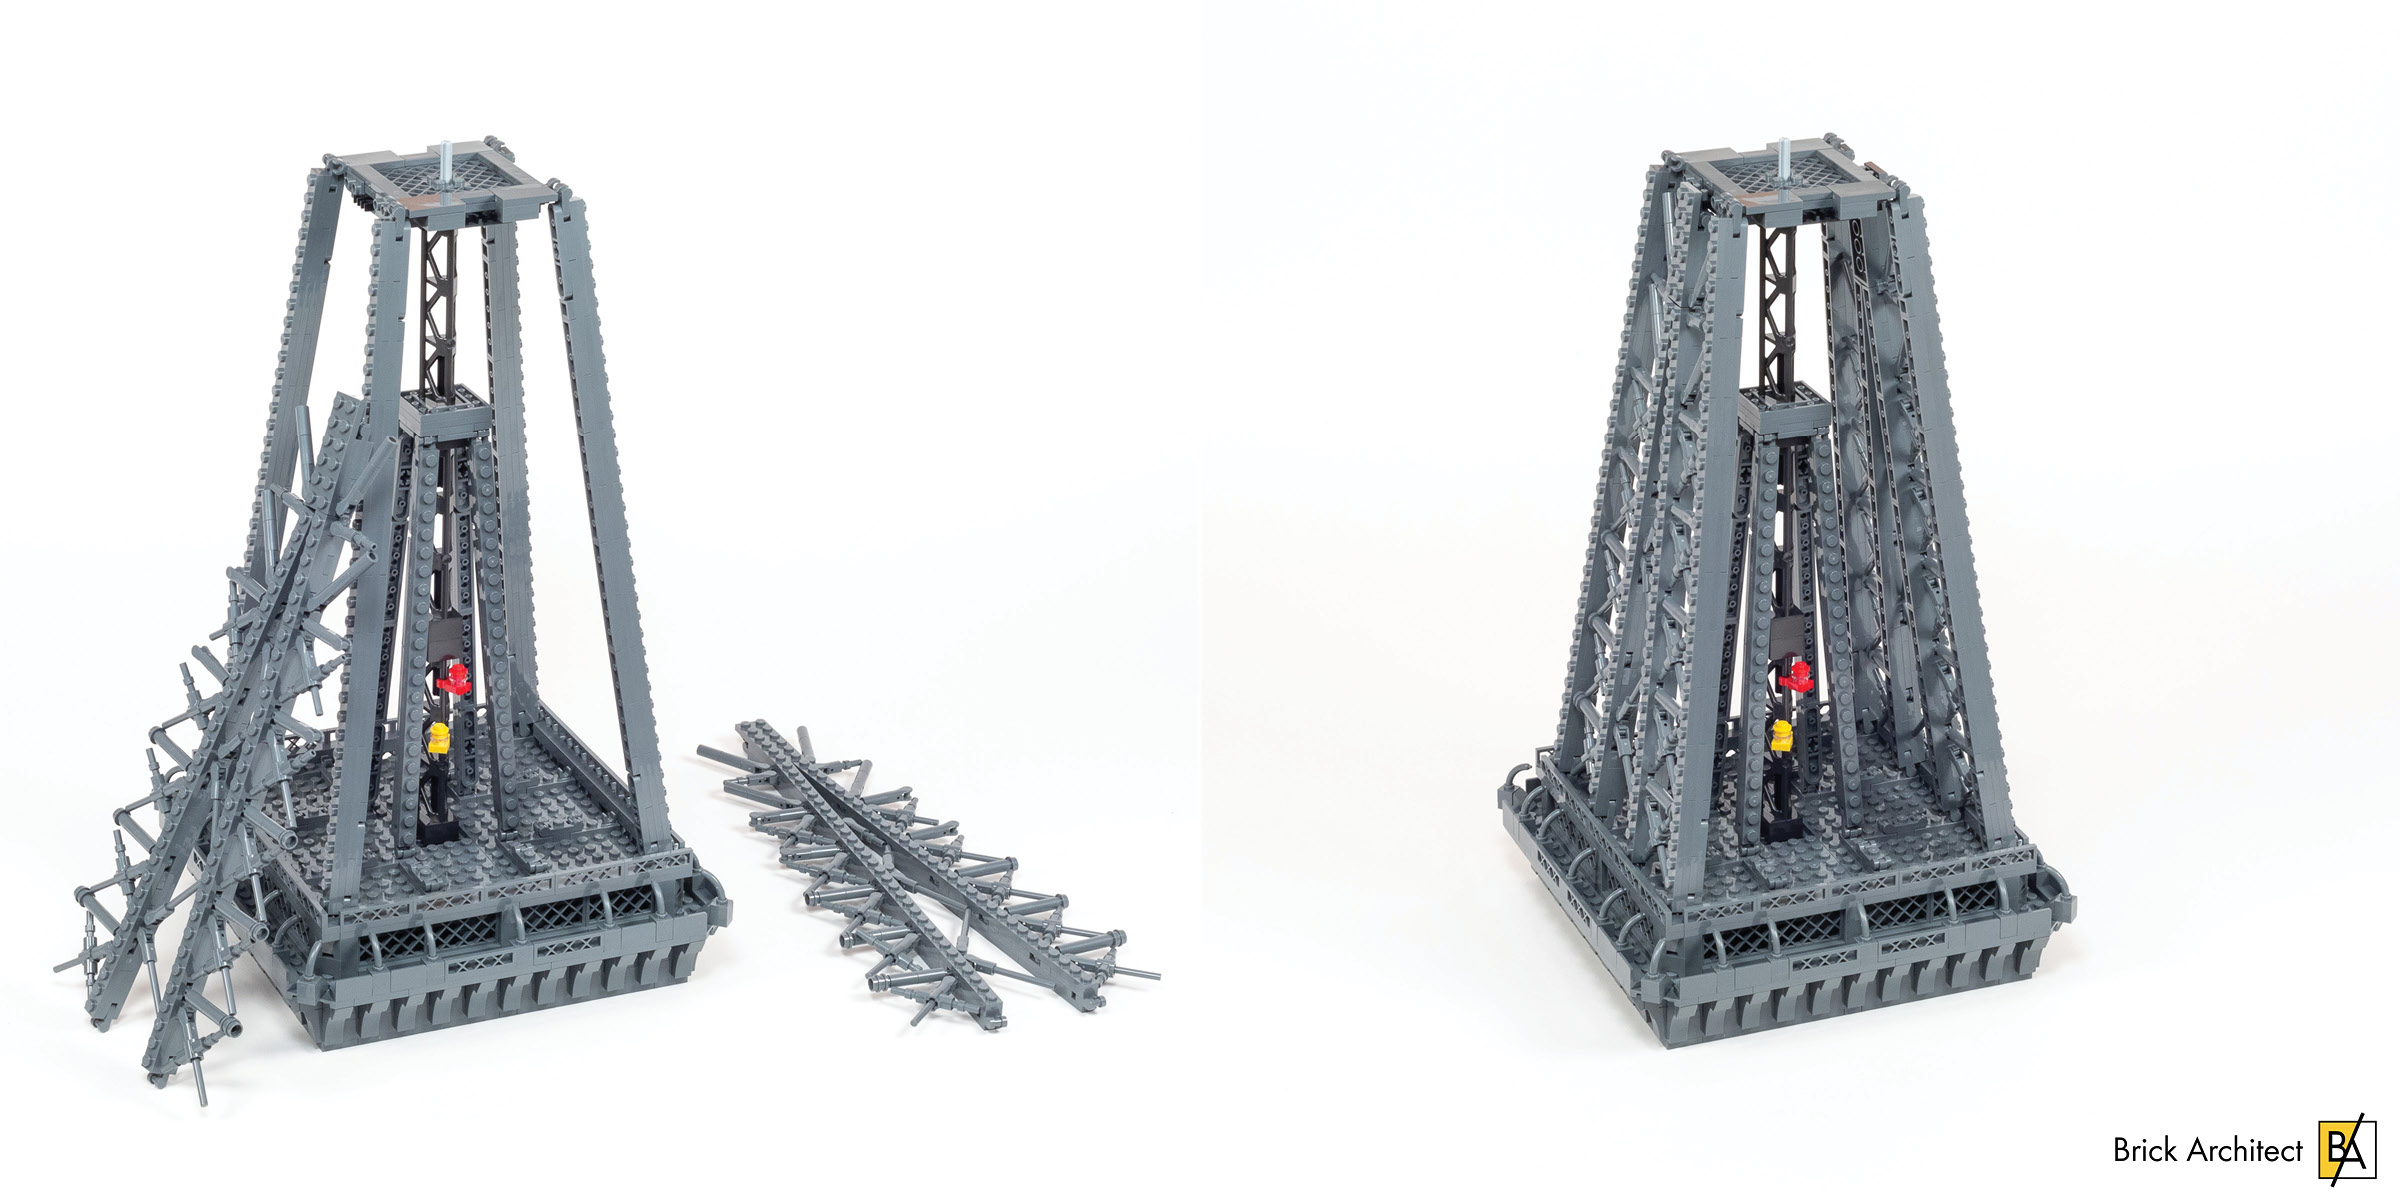
Next, we add two sections of rollercoaster track to each assembly which give us an appropriate curved shape. After attaching each of the four modules to the tower, a section of flex tube is added to continue the curved shape all the way to the ground. I do not like how little of the trusses and supports in this model are structural, but I can’t complain about how it looks — the detailing is excellent.
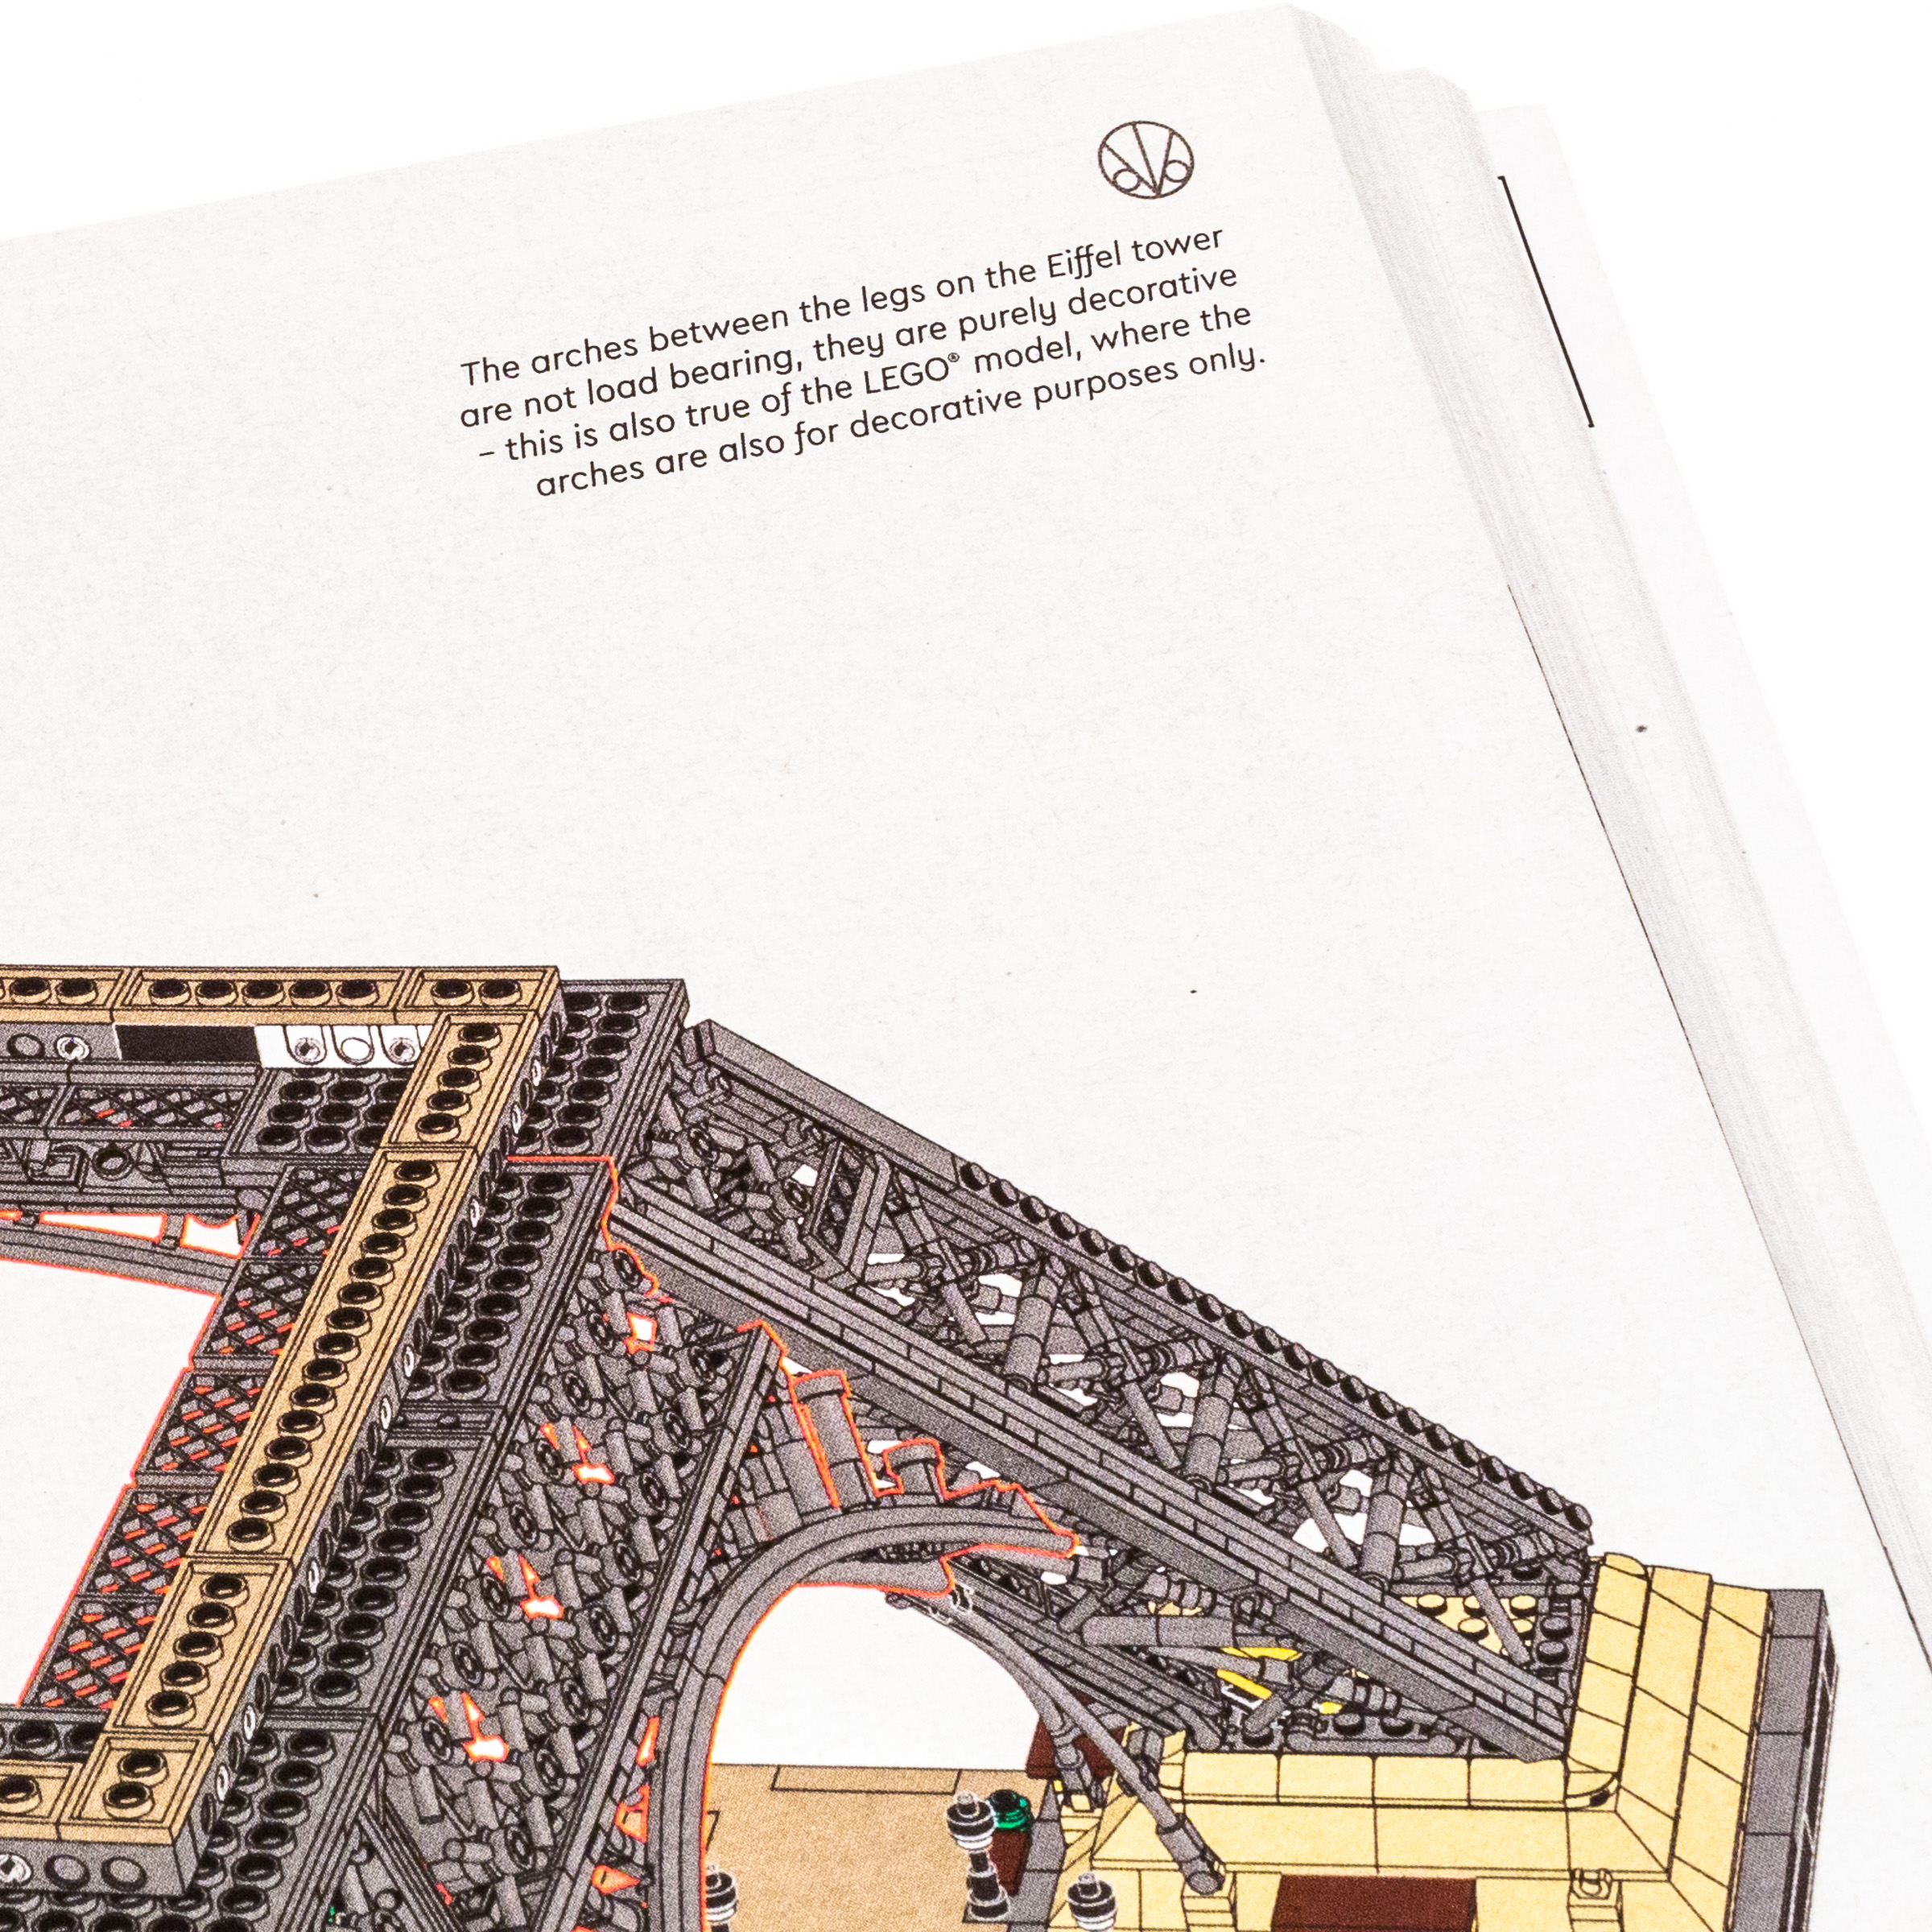
The angled supports above the curve are superficial in both the LEGO model and in the real building.
Build time: 64 minutes.
Bags 29+30: 16 minutes, Bag 31: 12 minutes, Bag 32: 36 minutes.
Bags 33 – 40 – Lower Deck
This is when we being the next module of the tower, which begins in Bag 33 by building a large square that is surrounded by 144x 1×1 Round Plate w/ Hollow studs (part 85861). Bag 34 continues by adding a band of additional detailing using 1×2 Ingot elements (part 99563) above the row of 1×1 plates we added in the previous step. To get them positioned correctly, we use 1×2 and 1×3 jumper elements attached to SNOT bricks.
Bag 35 starts with an additional smaller square, onto which we attach a row of 1×2 hinge bricks on each side, which allow us to attach another set of 1×4 Fence pieces at an angle. At the end of this bag, we attach the new module to the larger square from the past two bags. Continuing to Bag 36, we create the floor for the lower observation deck by connecting eight 8×8 plates with grille (part 4151) together into a large panel. It attaches directly on top of the section we are building.
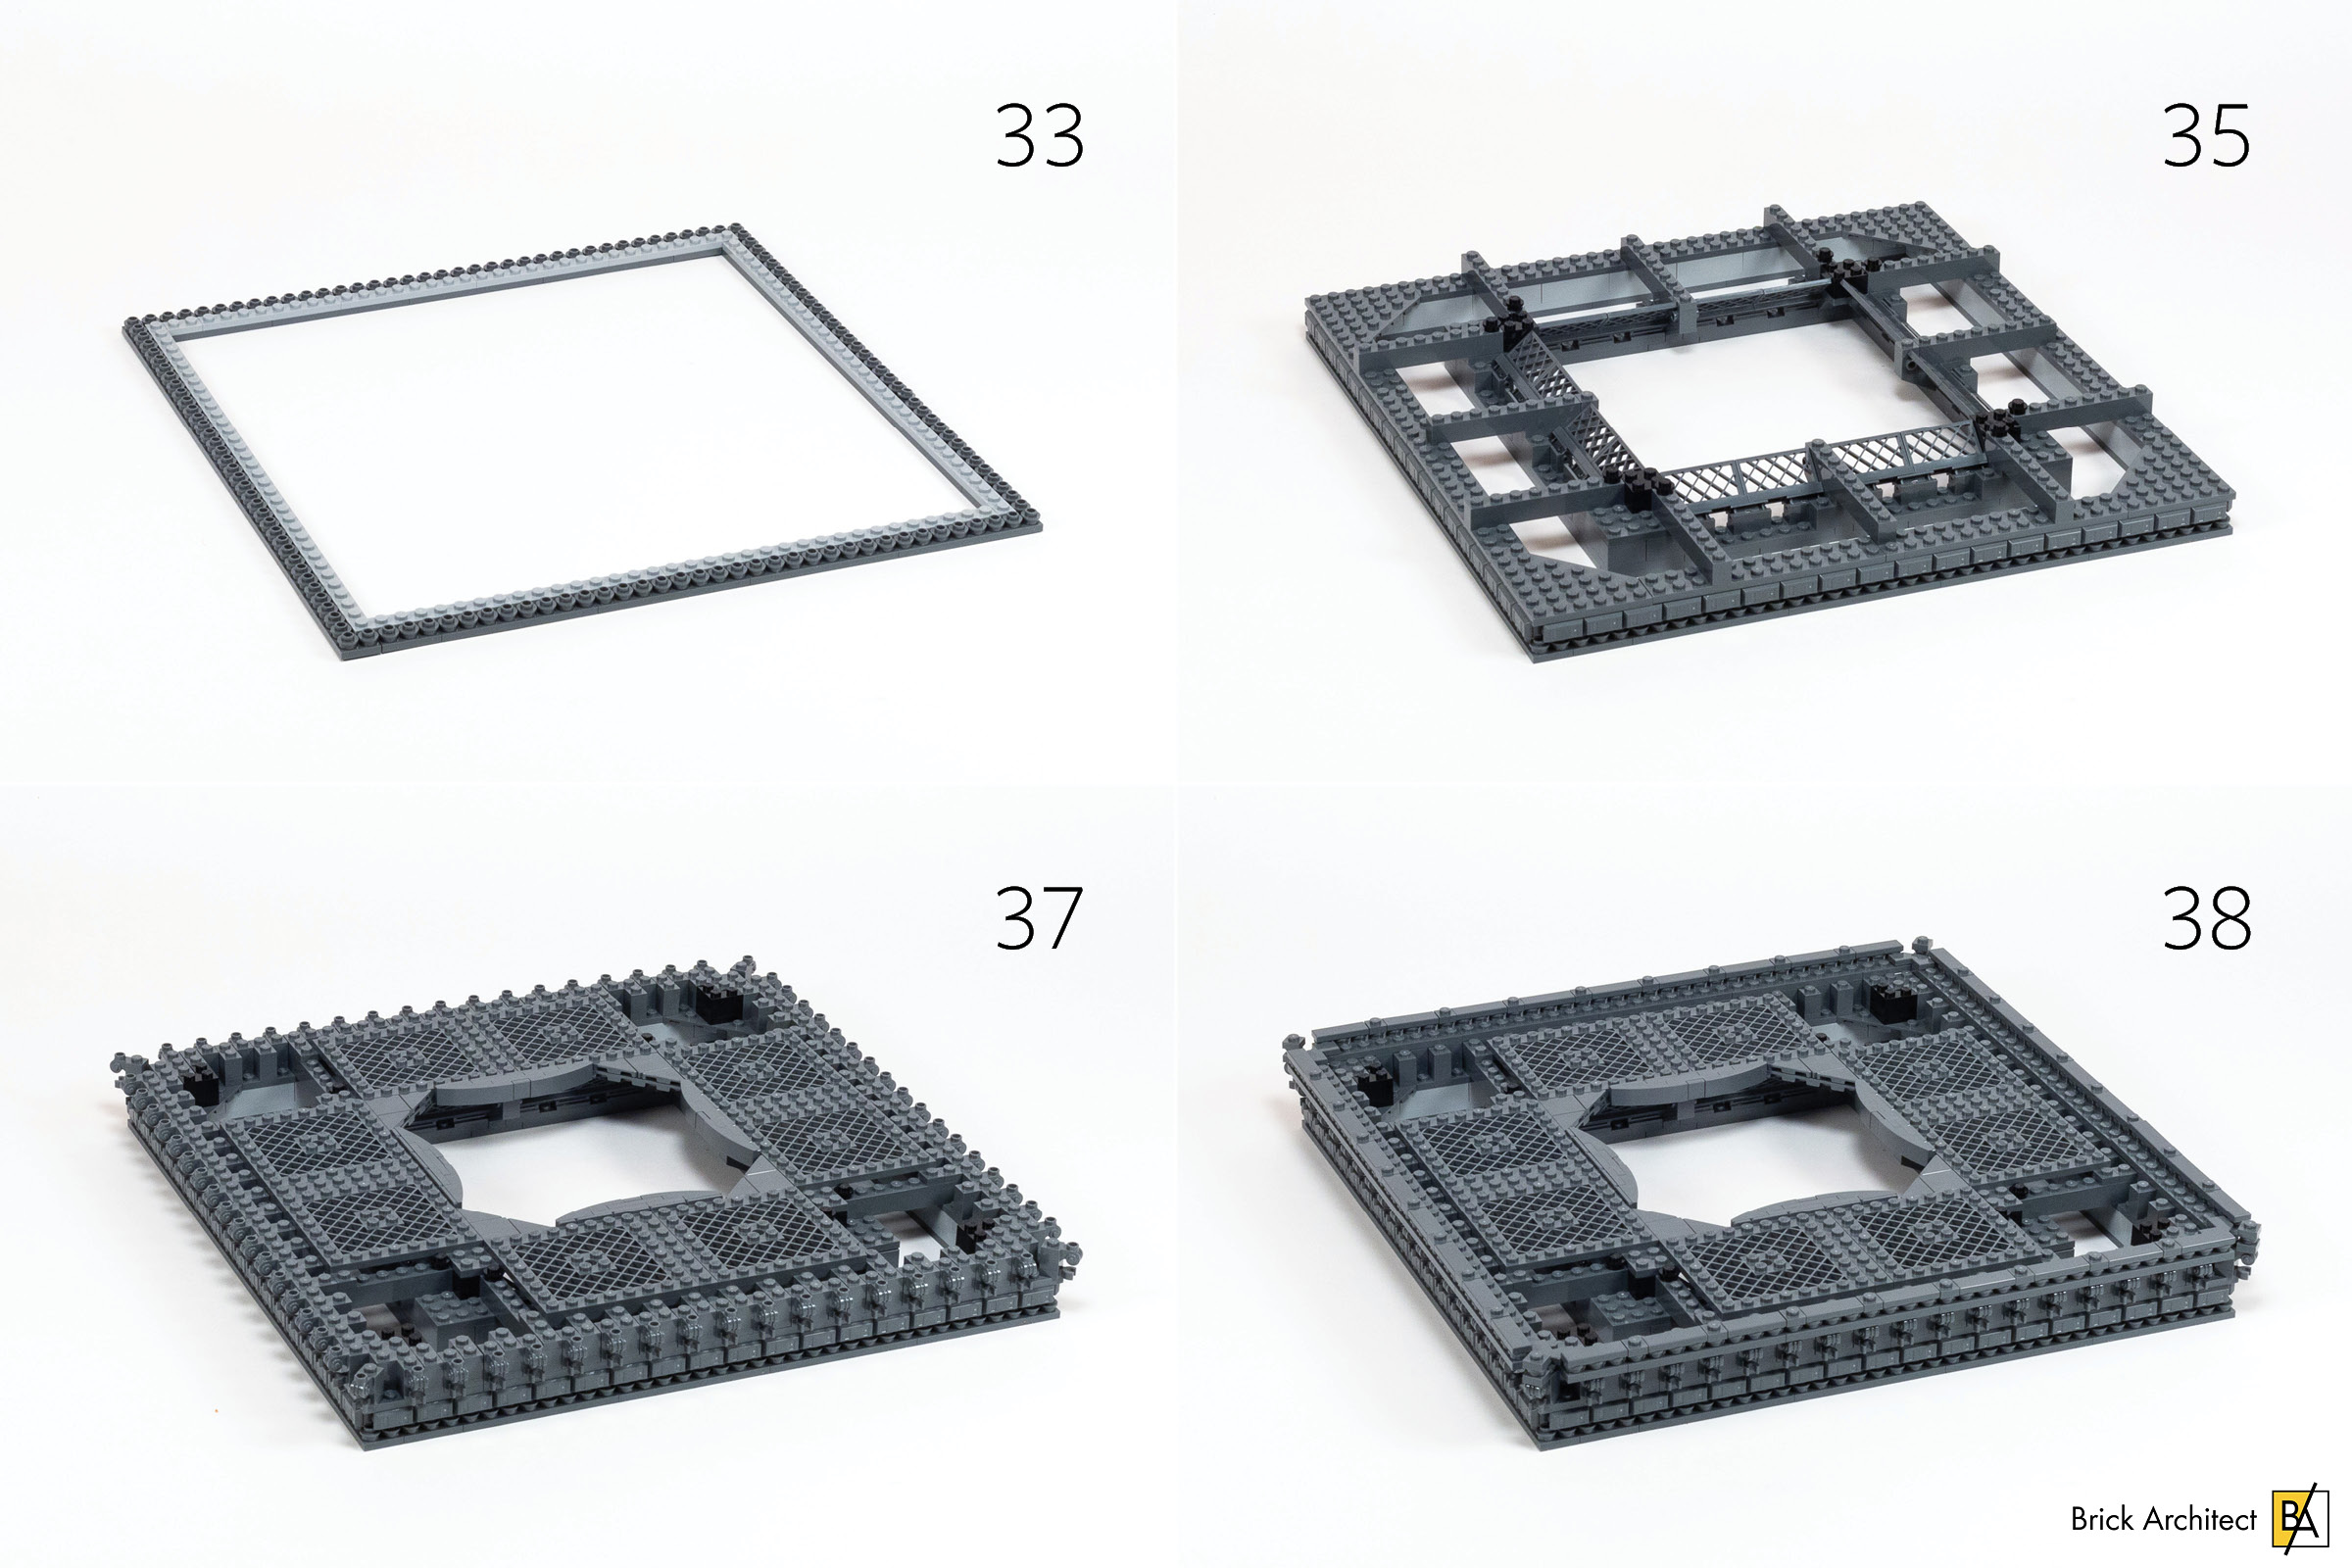
Steady progress on the lower observation deck in Bags 33 – 38.
The mind-numbing alignment of tiny parts continues in Bag 37 where we attach clips around all four sides, followed by 1×2 scroll bricks (part 20310) on top. It’s nice to see so much intricate detailing in this model, but it’s slow going. Bag 38 isn’t much better — another row of 1×1 round plates going all the way around the edge, this time finished with alternating 1×3 tiles and 1×1 plates.
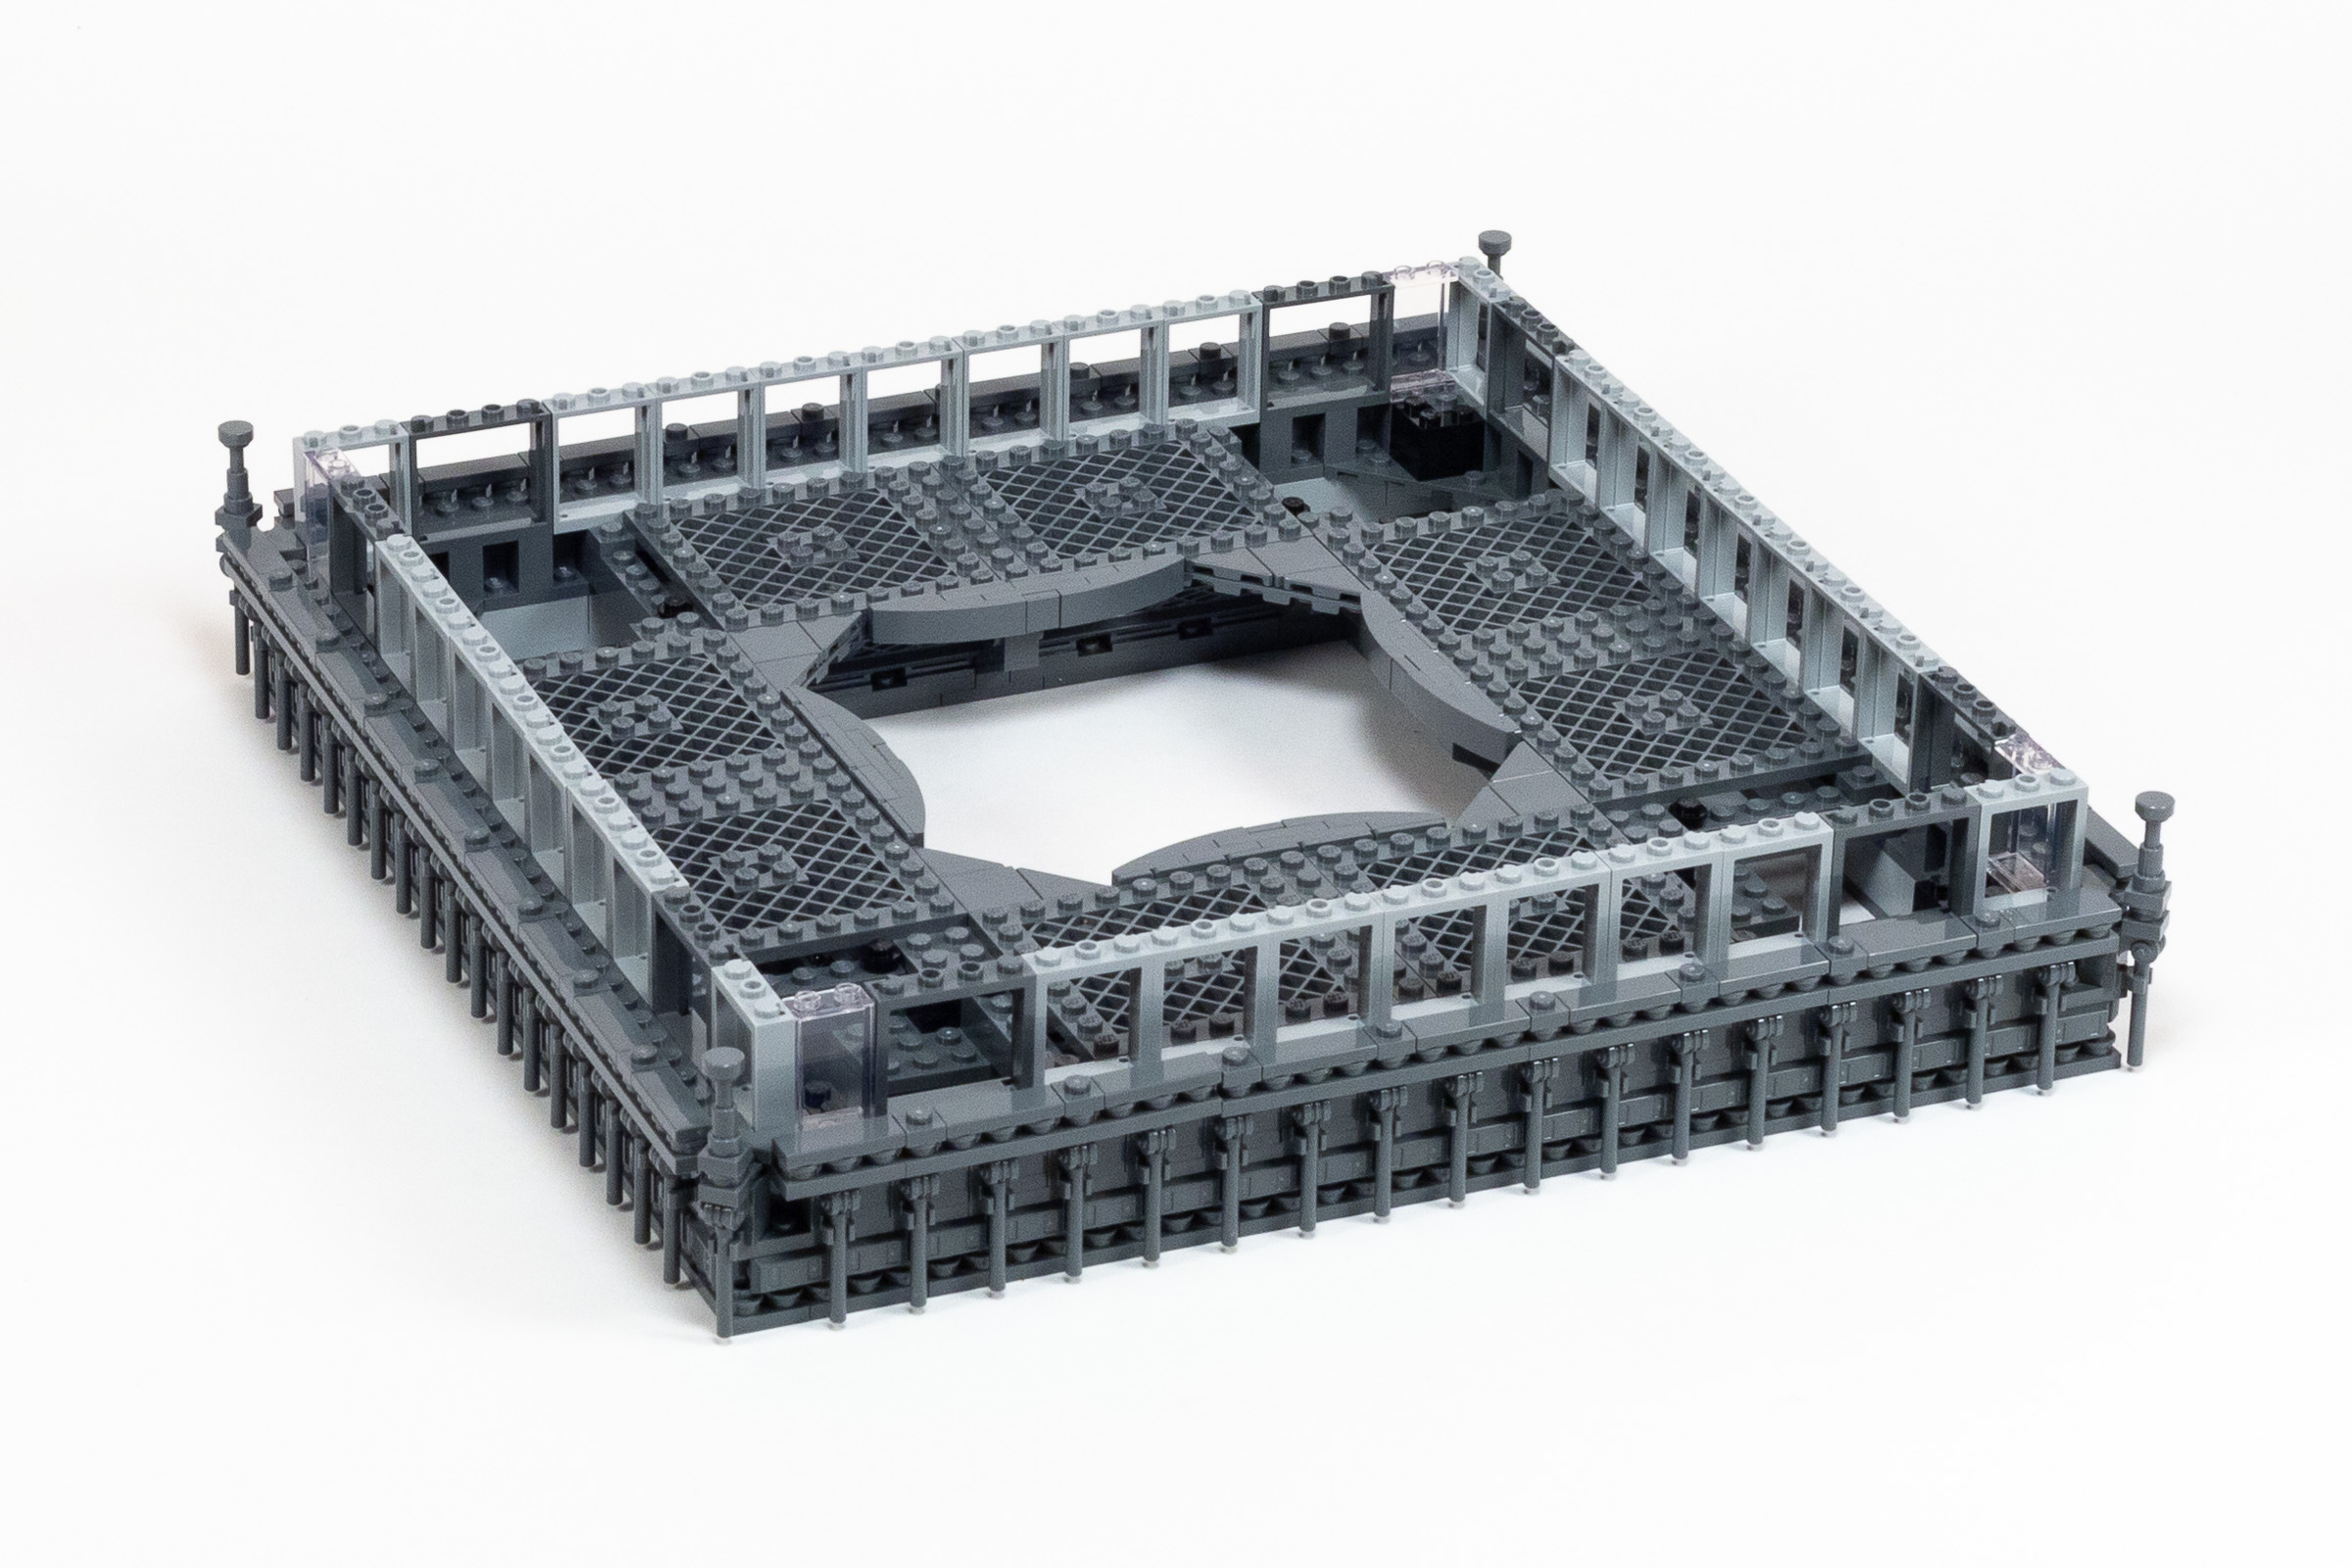
Closer look at detailing at the end of Bag 39.
With just two bags left in this box, in Bag 39 we quickly attach 72x Bar 3L (part 87994) to the clips around all four sides, followed by a row of windows around the top edge. Bag 40 adds columns in front of the windows, and finally tops the section off with one layer of plate for strength, and one layer of tile which results in a smooth top edge.
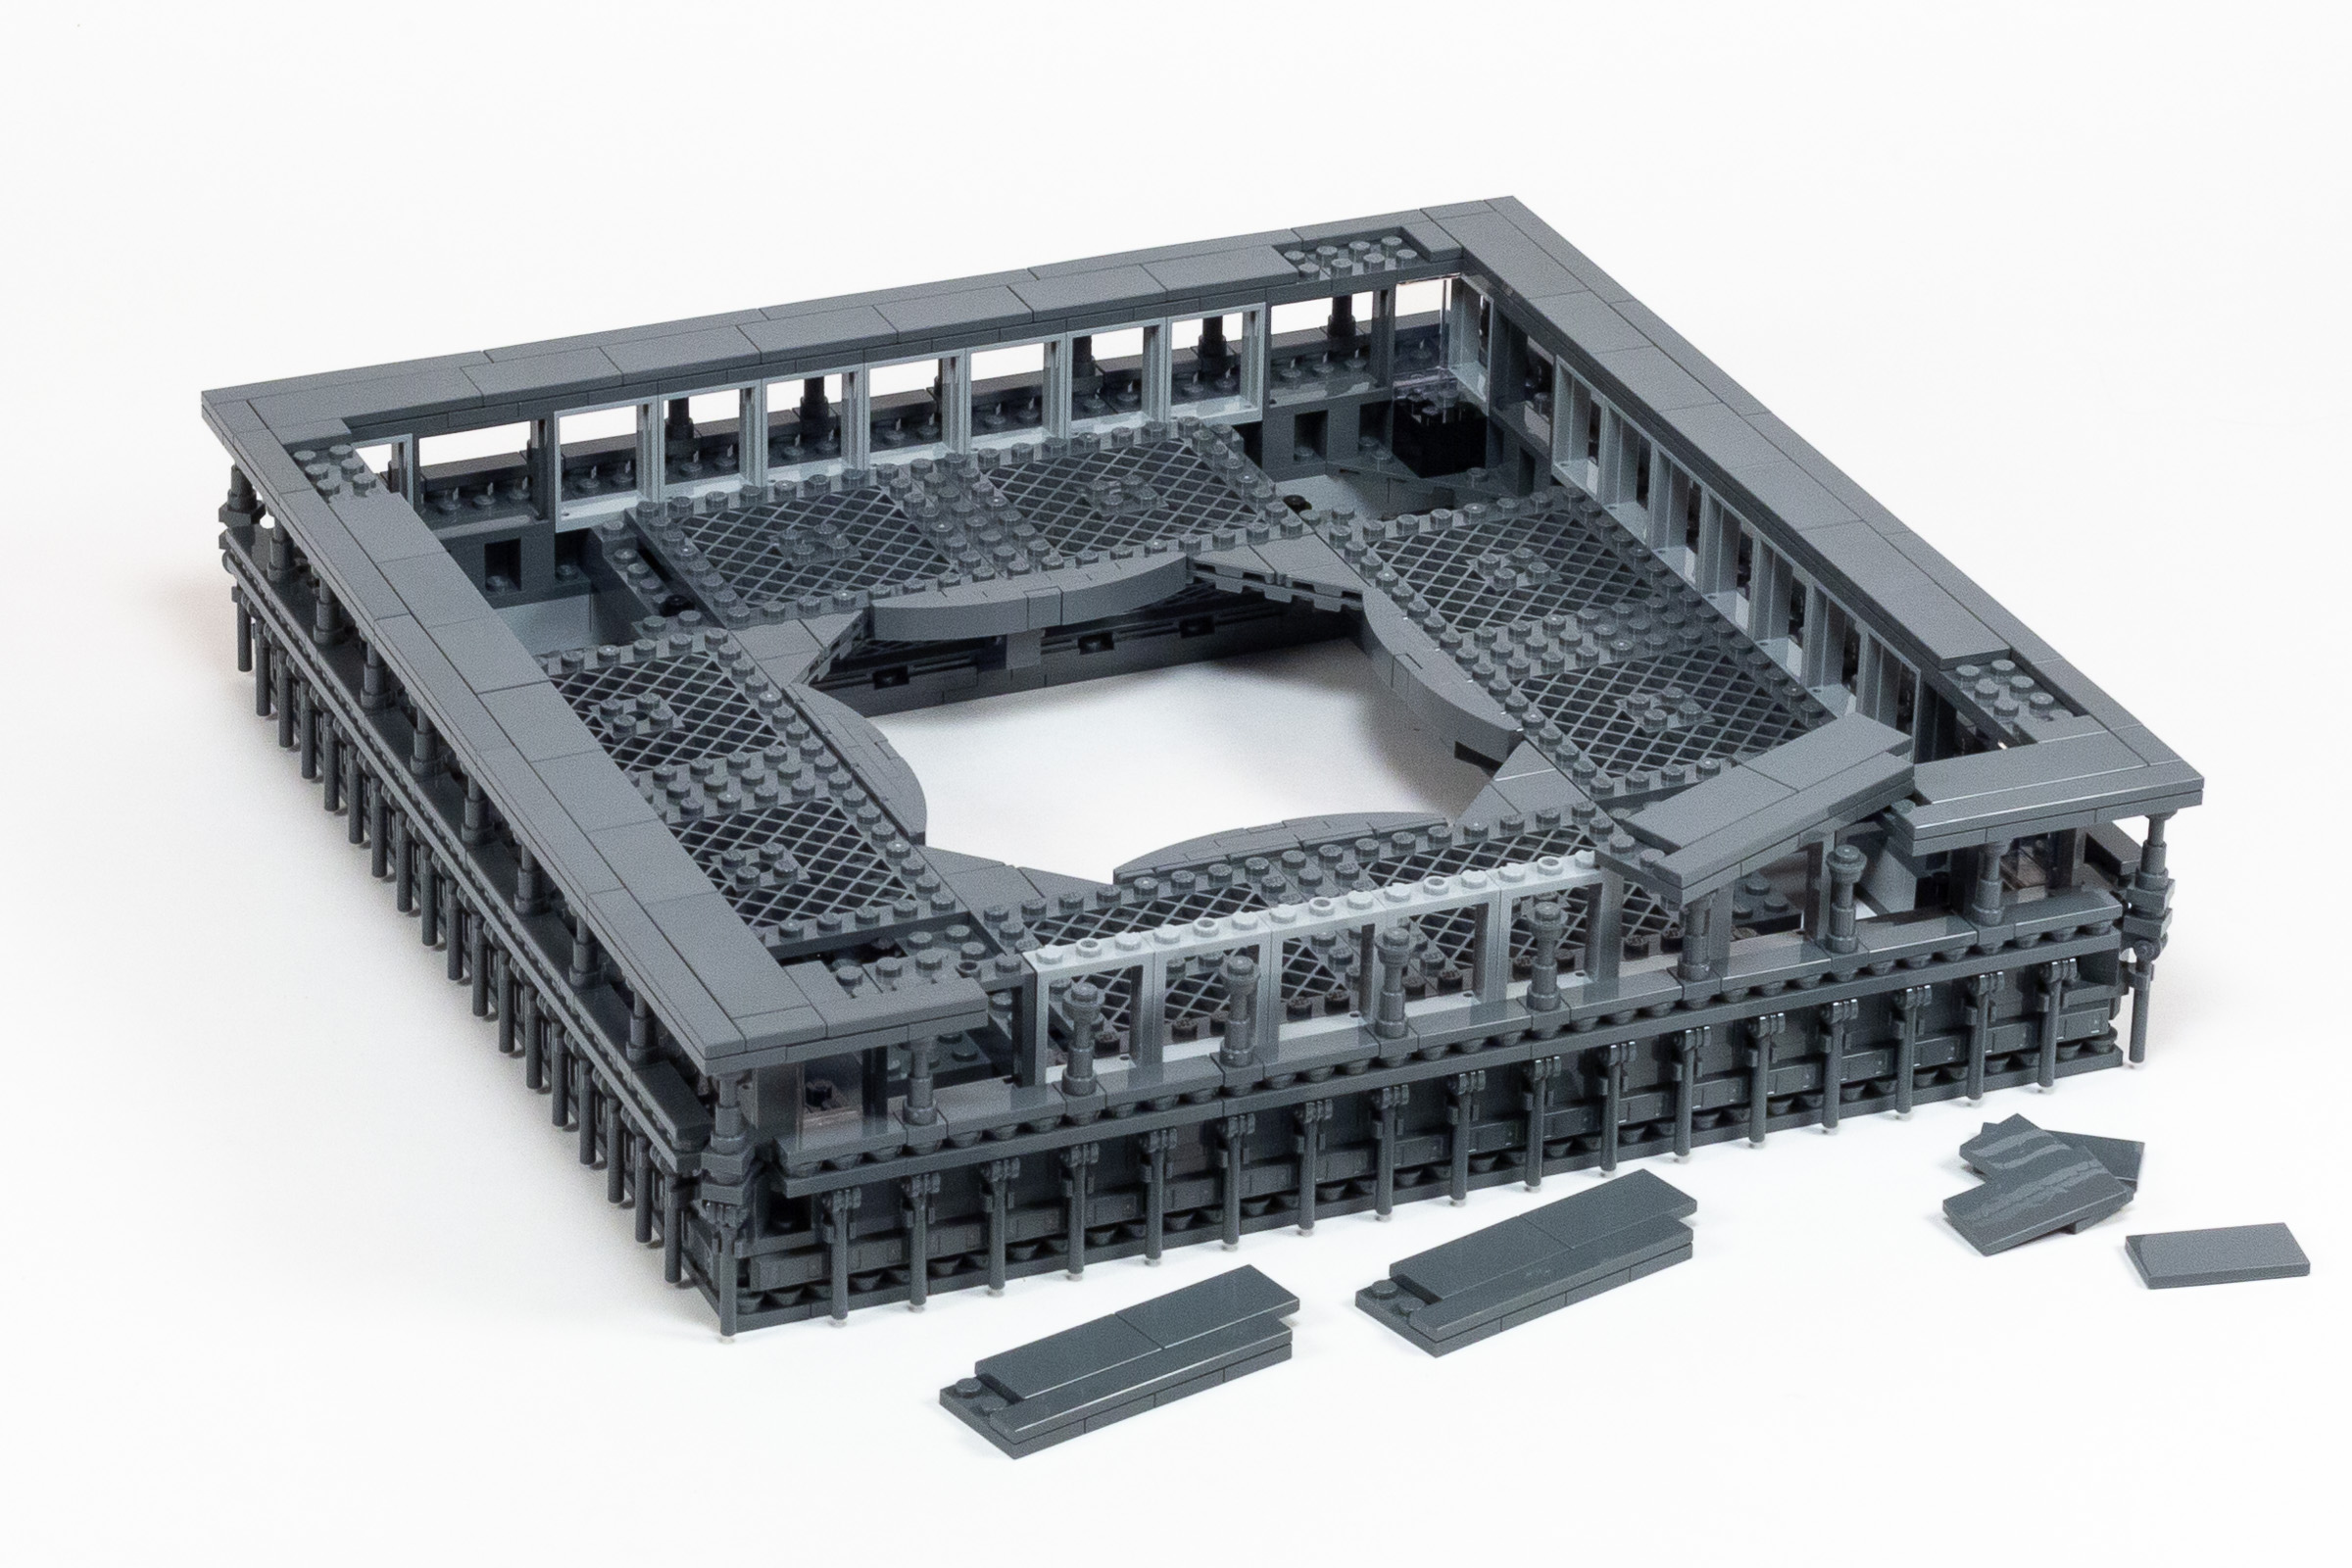
Adding the last of the tile modules in Bag 40.
Build time: 101 minutes.
Bag 33: 9 minutes, Bag 34: 13, Bag 35: 14 minutes, Bag 36: 8 minutes, Bag 37: 19 minutes, Bag 38: 17 minutes, Bag 39: 9 minutes, Bag 40: 12 minutes.
As we complete the second box, we’ve added significant height and heft to the model. As I had anticipated, this box took a lot longer than the previous one – coming in at 295 minutes (nearly five hours). That’s more than double the build time for the first box.
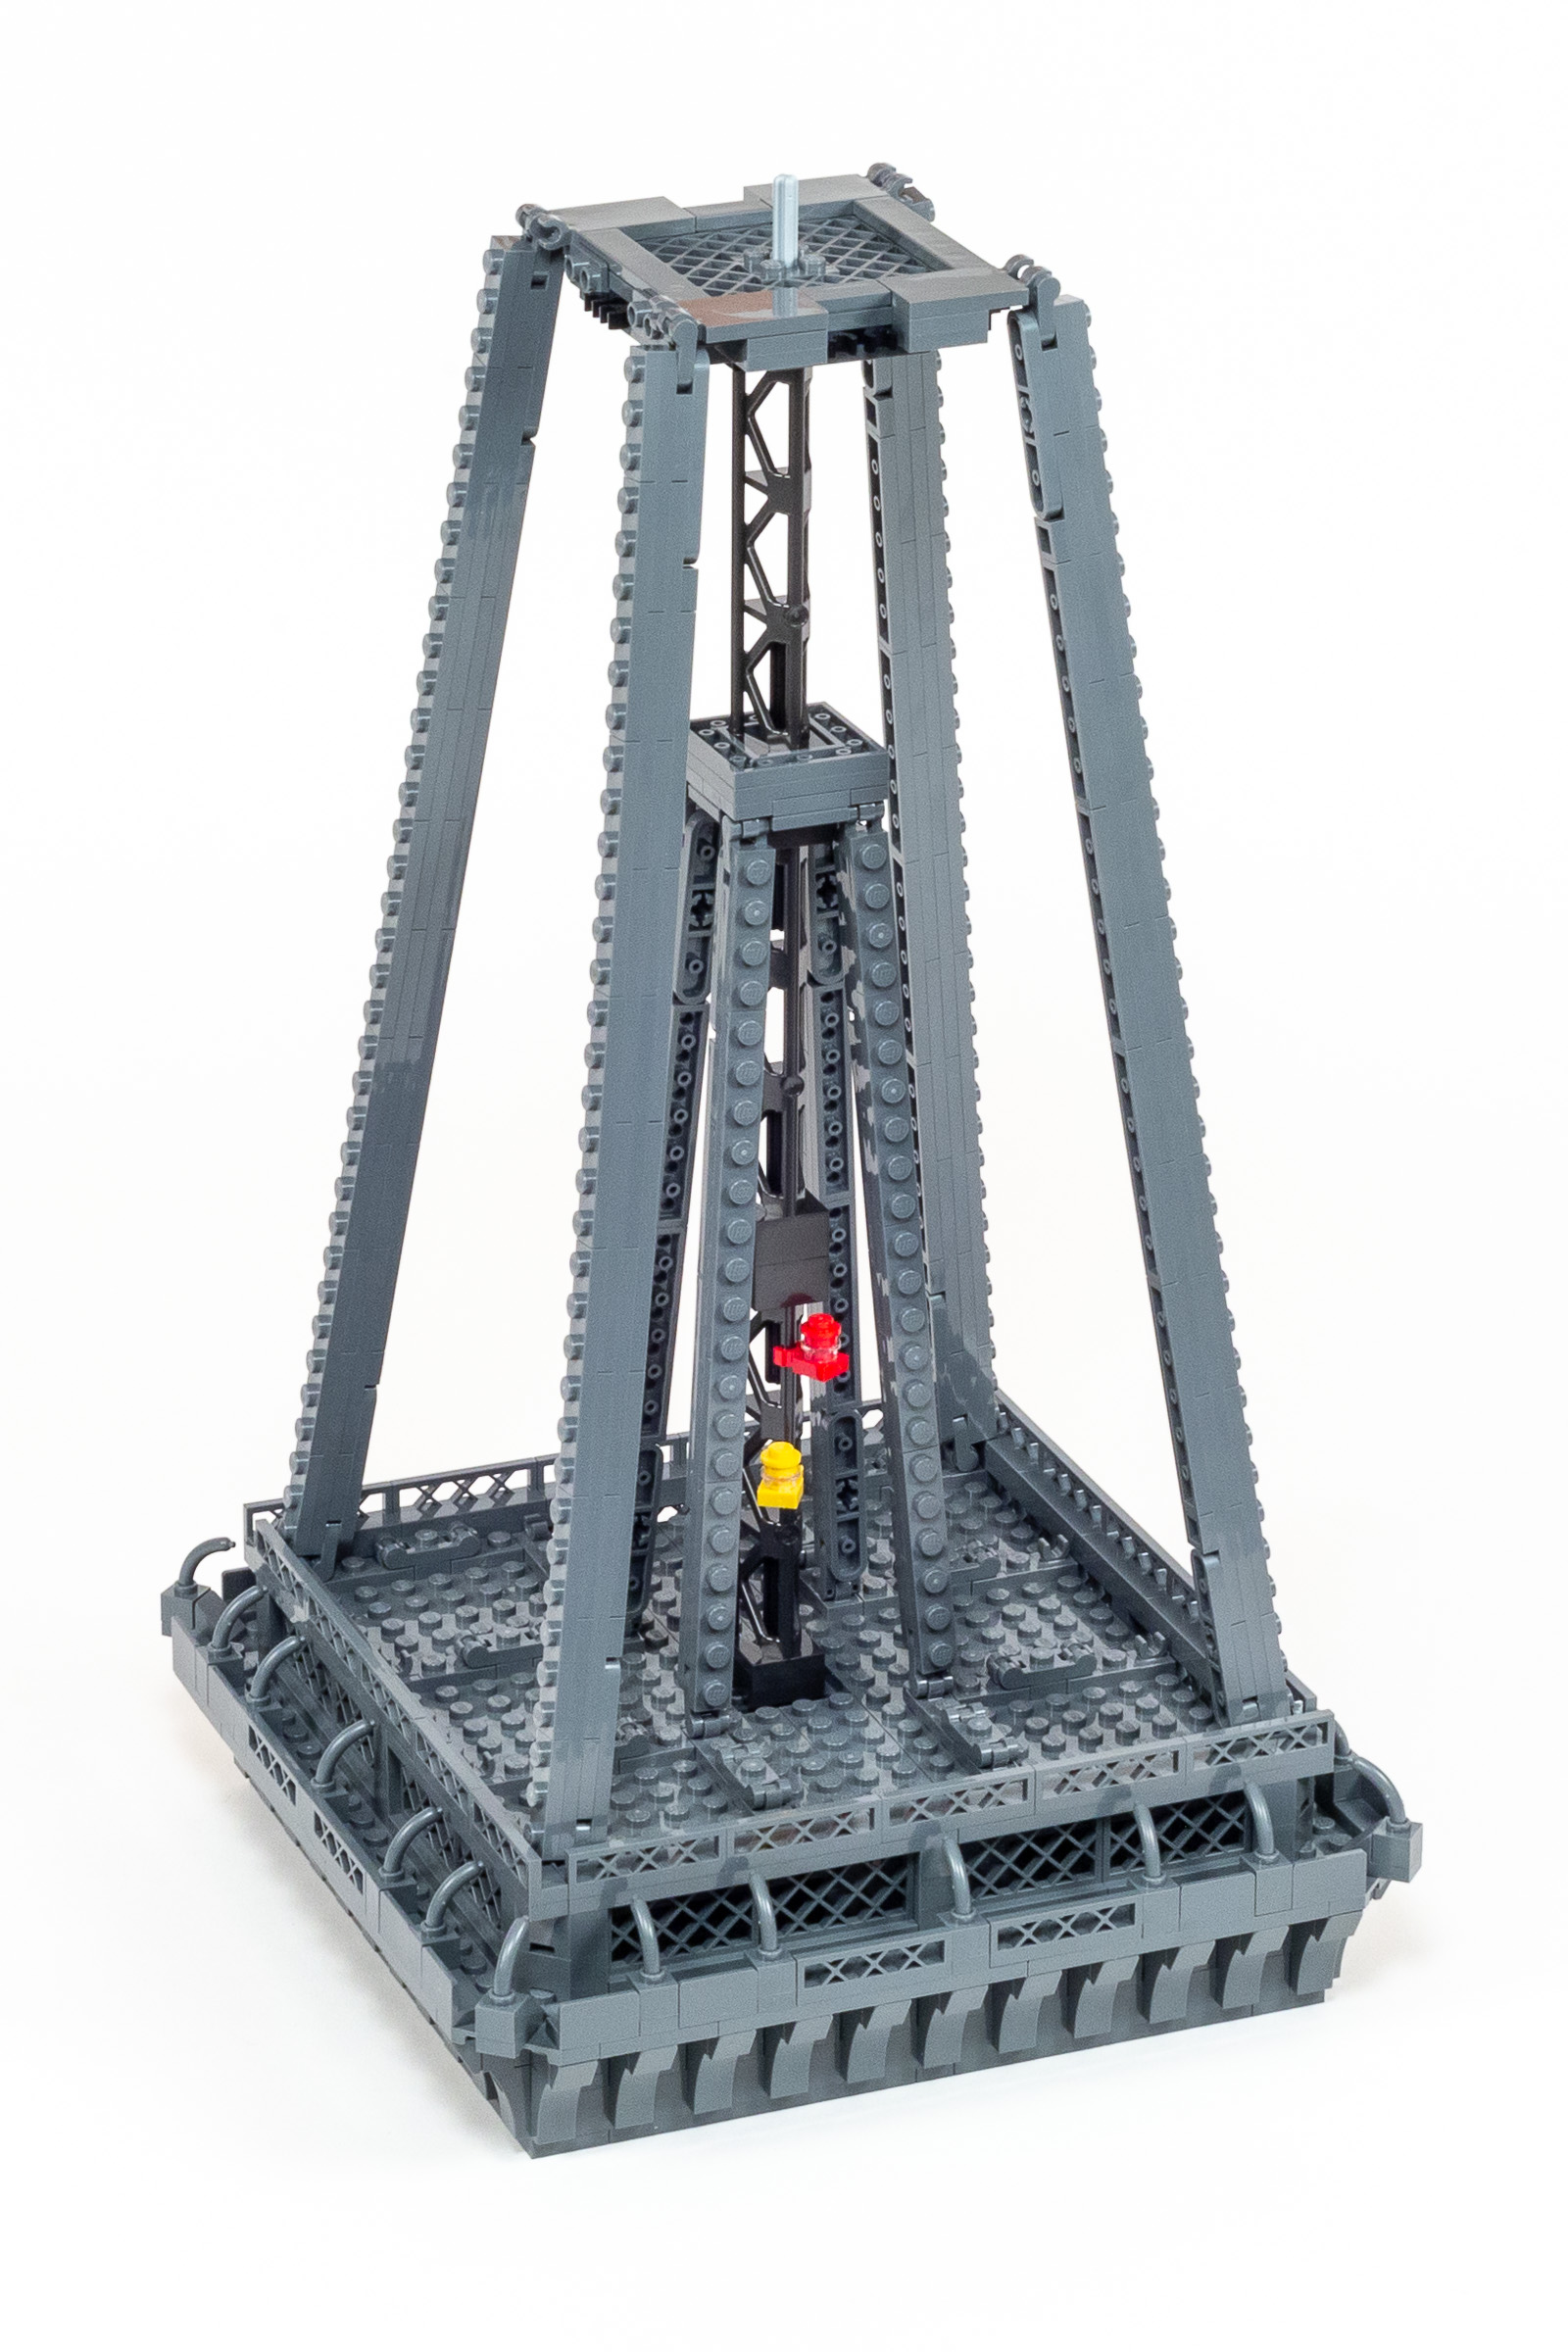
Progress at the end of Box 2 (even though we aren’t instructed to put the current module on top of the legs yet).
Box 3 (of 3)
While what we have built so far is impressive, it is only a tiny fraction of the height it needs to be. The vast majority of the height of the completed model will be achieved in the third and final box.
The third box contains 34 numbered bags, although some of them came in a smaller inner box (not pictured).
Contents of Box 3:
- Bag 41: 1x large bag (marked 636S2).
- Bag 42: 1x medium bag (marked 636S2)
- Bag 43: 1x medium bag (marked 636S2).
- Bag 44: 1x extra-large bag (marked 636S2).
- Bag 45: 1x large bag (marked 636S2).
- Bag 46: 1x medium bag (marked 636S2).
- Bag 47: 1x small unmarked bag.
- Bag 48: 1x large bag (marked 636S2).
- Bag 49: 1x large bag (marked 636S2).
- Bag 50: 1x medium bag (marked 636S2).
- Bag 51: 1x large unmarked bag.
- Bag 52: 1x extra-large bag (marked 736S2).
- Bag 53: 1x large bag (marked 636S2).
- Bag 54: 1x small unmarked bag.
- Bag 55: 1x large bag (marked 636S2).
- Bag 56: 1x medium unmarked bag.
- Bag 57: 1x medium unmarked bag.
- Bag 58: 1x large bag (marked 636S2).
- Bag 59: 1x medium unmarked bag.
- Bag 60: 1x large bag (marked 636S2).
- Bag 61: 1x small unmarked bag.
- Bag 62: 1x small unmarked bag.
- Bag 63: 1x large bag (marked 636S2).
- Bag 64: 1x extra-small unmarked bag.
- Bag 65: 1x small unmarked bag.
- Bag 66: 1x large bag (marked 636S2).
- Bag 67: 1x large unmarked bag.
- Bag 68: 1x large bag (marked 636S2).
- Bag 69: 1x small unmarked bag.
- Bag 70: 1x medium unmarked bag.
- Bag 71: 1x extra-small unmarked bag.
- Bag 72: 1x large unmarked bag.
- Bag 73: 1x extra-large bag (marked 136S2)
- Bag 74: 1x extra-large bag (marked 136S2).
- 1x white box (marked 6418327): containing several of the numbered bags listed above.
Box Dimensions: 35.3 x 19.2 x 9.0 cm (13 7/8 x 7 12/ x 3 ½ “) - 1x medium unmarked bag: containing 6x – 8×8 plates with grille (part 4151) in 199Dark Stone GreyDark Bluish Gray.
- 1x Cardboard pouch (marked 6437287): containing 252-page instruction booklet.
Book Dimensions: 27.0 x 19.2 cm (10 3/4 x 7 1/2”).
NOTE: Bags 51, 54, 57, 59, 64, 67, 71-74 were found inside of the smaller white box (6418327) rather than loose inside of Box #3 (like the rest of the bags). I do not know why they did this only for just one of the three boxes.
Bags 41 – 51: Frustum-shaped central module
Over the next 11 bags, we build the second removeable module of our growing Eiffel Tower model. The next module has the shape of a pyramid with the top cut off, which is called an Frustum. (I’m continuing to use this article to teach the names of obscure geometric shapes — Enjoy!)
When seen in the context of the larger model, you can plainly see that each corner of this module is another parallelepiped, but with a steeper angle than the previous module. I have made the editorial decision to not bother with step-by-step photos for the four corners of the module, since the building techniques are nearly identical to bags 19-28 which we already covered in detail.
Simply put, in Bags 41-45 we build the first two legs. These are attached to the lower observation deck and connected at the top to a small 5×5 stud module using Technic pins.
Attaching the first two legs at the end of Bag 45.
The second two legs are built almost exactly the same way in Bags 46-50. It feels very repetitive and monotonous, but I could feel myself getting more efficient as I went, and the reduced build times reflected this.
All four legs installed at the end of Bag 50.
There is a little more to do before we move on to the next assembly. In Bag 51 we add four wedge-shaped assemblies that add latticework connecting the two sloping sections near the top. The modules are a bit fussy to build, and each use a single 1×2 hinge brick to adjust the section with the tiny 1×4 fence to the right angle.
Adding wedge-shaped modules containing additional cross-bracing.
Build time: 119 minutes.
Bag 41: 8 minutes, Bag 42: 17, Bag 43: 14 minutes, Bag 44: 12 minutes, Bag 45: 13 minutes, Bag 46+47: 10 minutes, Bag 48: 16 minutes, Bag 49: 11 minutes, Bag 50: 11 minutes, Bag 51: 7 minutes.
Bags 52 – 65: Fairly pointy section
With a little more than half of the final box to go, our tower is only 53 cm tall out of an alleged 149 centimeters finished height. (21 ¼” so far vs. just under five feet.) Over the next 20 bags we will build a tall pointy assembly that gets us close to the final height of the tower.
Here we go – in Bag 52 we assemble a strong square base which we will no doubt build on top of (literally). Continuing to Bags 53+54, we cover this module with a layer of plates on top, forming a cornice which is decorated with a row of curved pieces attached beneath it.
Cornice detailing in Bags 53+54.
In Bag 55, we prepare for the vertical sections by building up four platforms which have 7×7 stud areas with clips on them, where I suspect additional vertical sections will clip into place in the bags which follow.
Progress at the end of Bag 55.
Before we start building those vertical sections, Bags 56+57 finish off the platform by adding additional fencing details. We wrap up this stage by building the first vertical section, involving four slender supports which attach with clips to a 4×4 plate w/ cutout (part 64799).
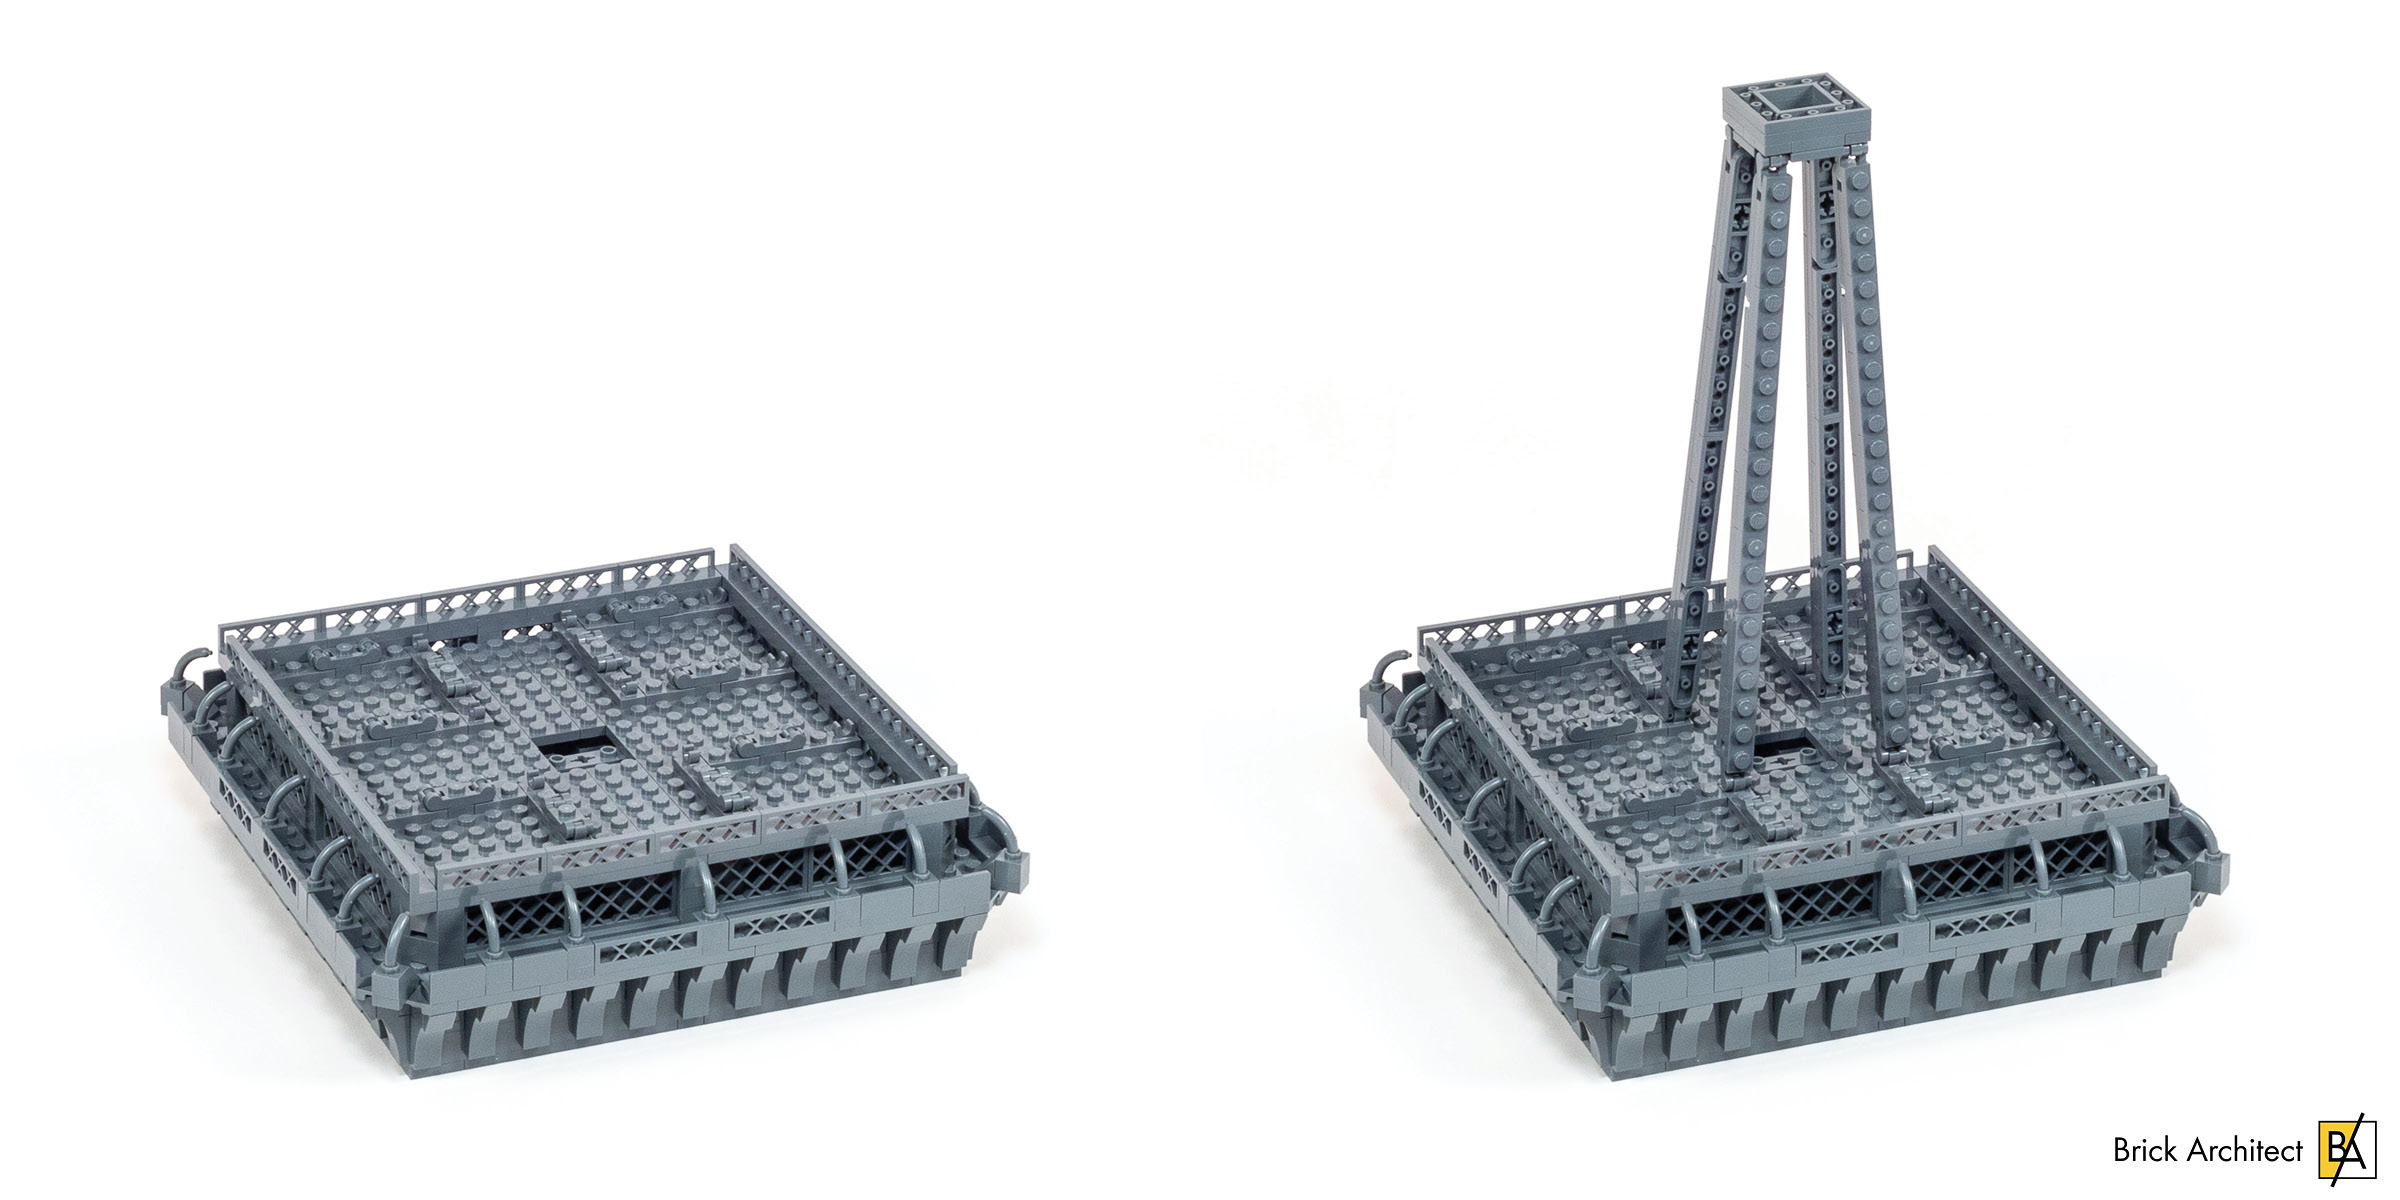
Finishing the base with bags 56+57 and adding the first vertical section.
We jump feet first into ‘getting vertical’ in Bags 58+59. This begins with a central tower built using three 2x2x10 Girders (part 95347) which slide through the center of the initial pyramidal assembly from the previous stage. Onto that central tower we clip a red and yellow elevator, and we wrap up the stage by building long diagonal modules that connect to a new central structural platform. This is only about half the height of this module, but it’s already taller than the previous one.
Progress at end of Bags 58+59.
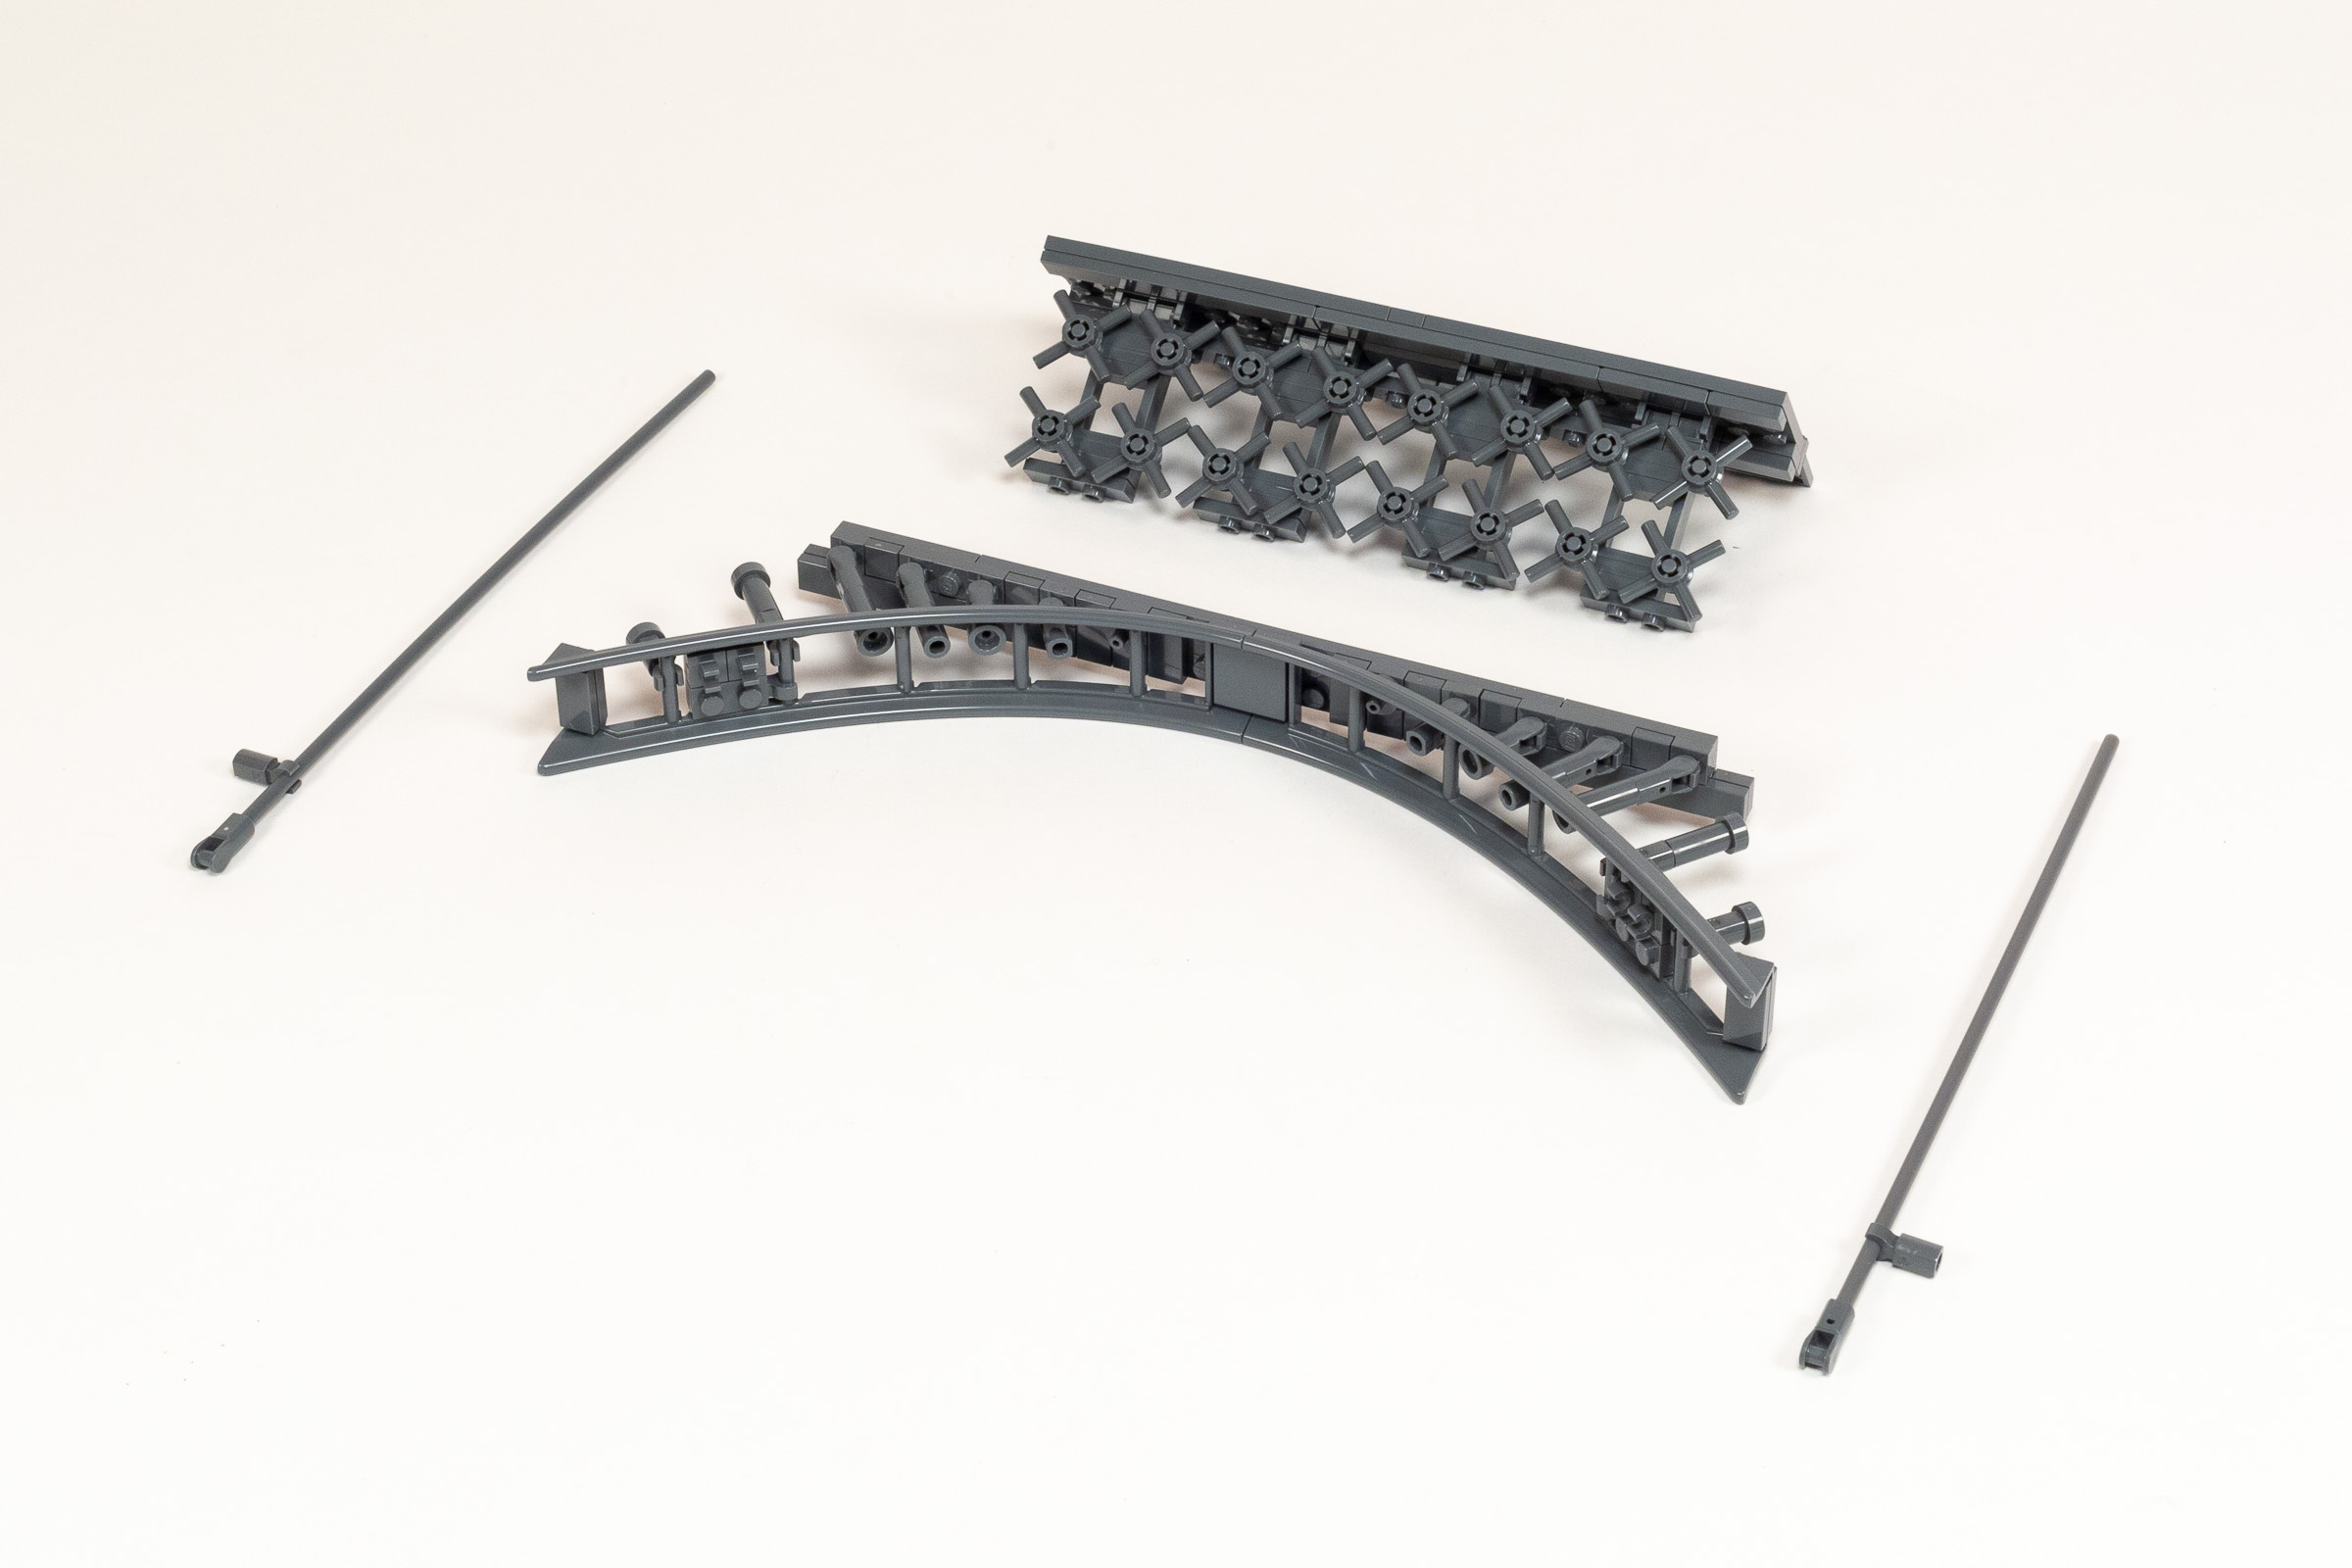
The next step is to cover the triangle-shaped gap on the front and back with a lattice of (faux) supports. This beings in Bag 60 with a triangular-shaped assembly with a mind boggling number of clips and bars embedded in layers of plate. Getting the right pattern of clips, bars and spaces requires patience and careful attention to detail.
Beams with a ton of clips on the side.
Now in Bags 61+62, we add a ton of meticulously created x-shaped bracing to fill in the empty space around the y-shaped module. It’s slow going, but the end result is pretty convincing.
Adding the y-shaped module in Bags 61+62.
Bags 63-65 follow the same building process as the previous three bags and are not shown here. Suffice to say, we end up with the same level of decoration on all four sides once this is complete.

Progress at the end of Bag 65.
Build time: 135 minutes.
Bag 52: 11 minutes, Bag 53+54: 17 minutes, Bag 55: 10 minutes. Bags 56+57: 17 minutes, Bags 58+59: 13 minutes, Bag 60: 15 minutes, Bags 61+62: 20 minutes, Bag 63: 16 minutes, Bags 64+65: 16 minutes.
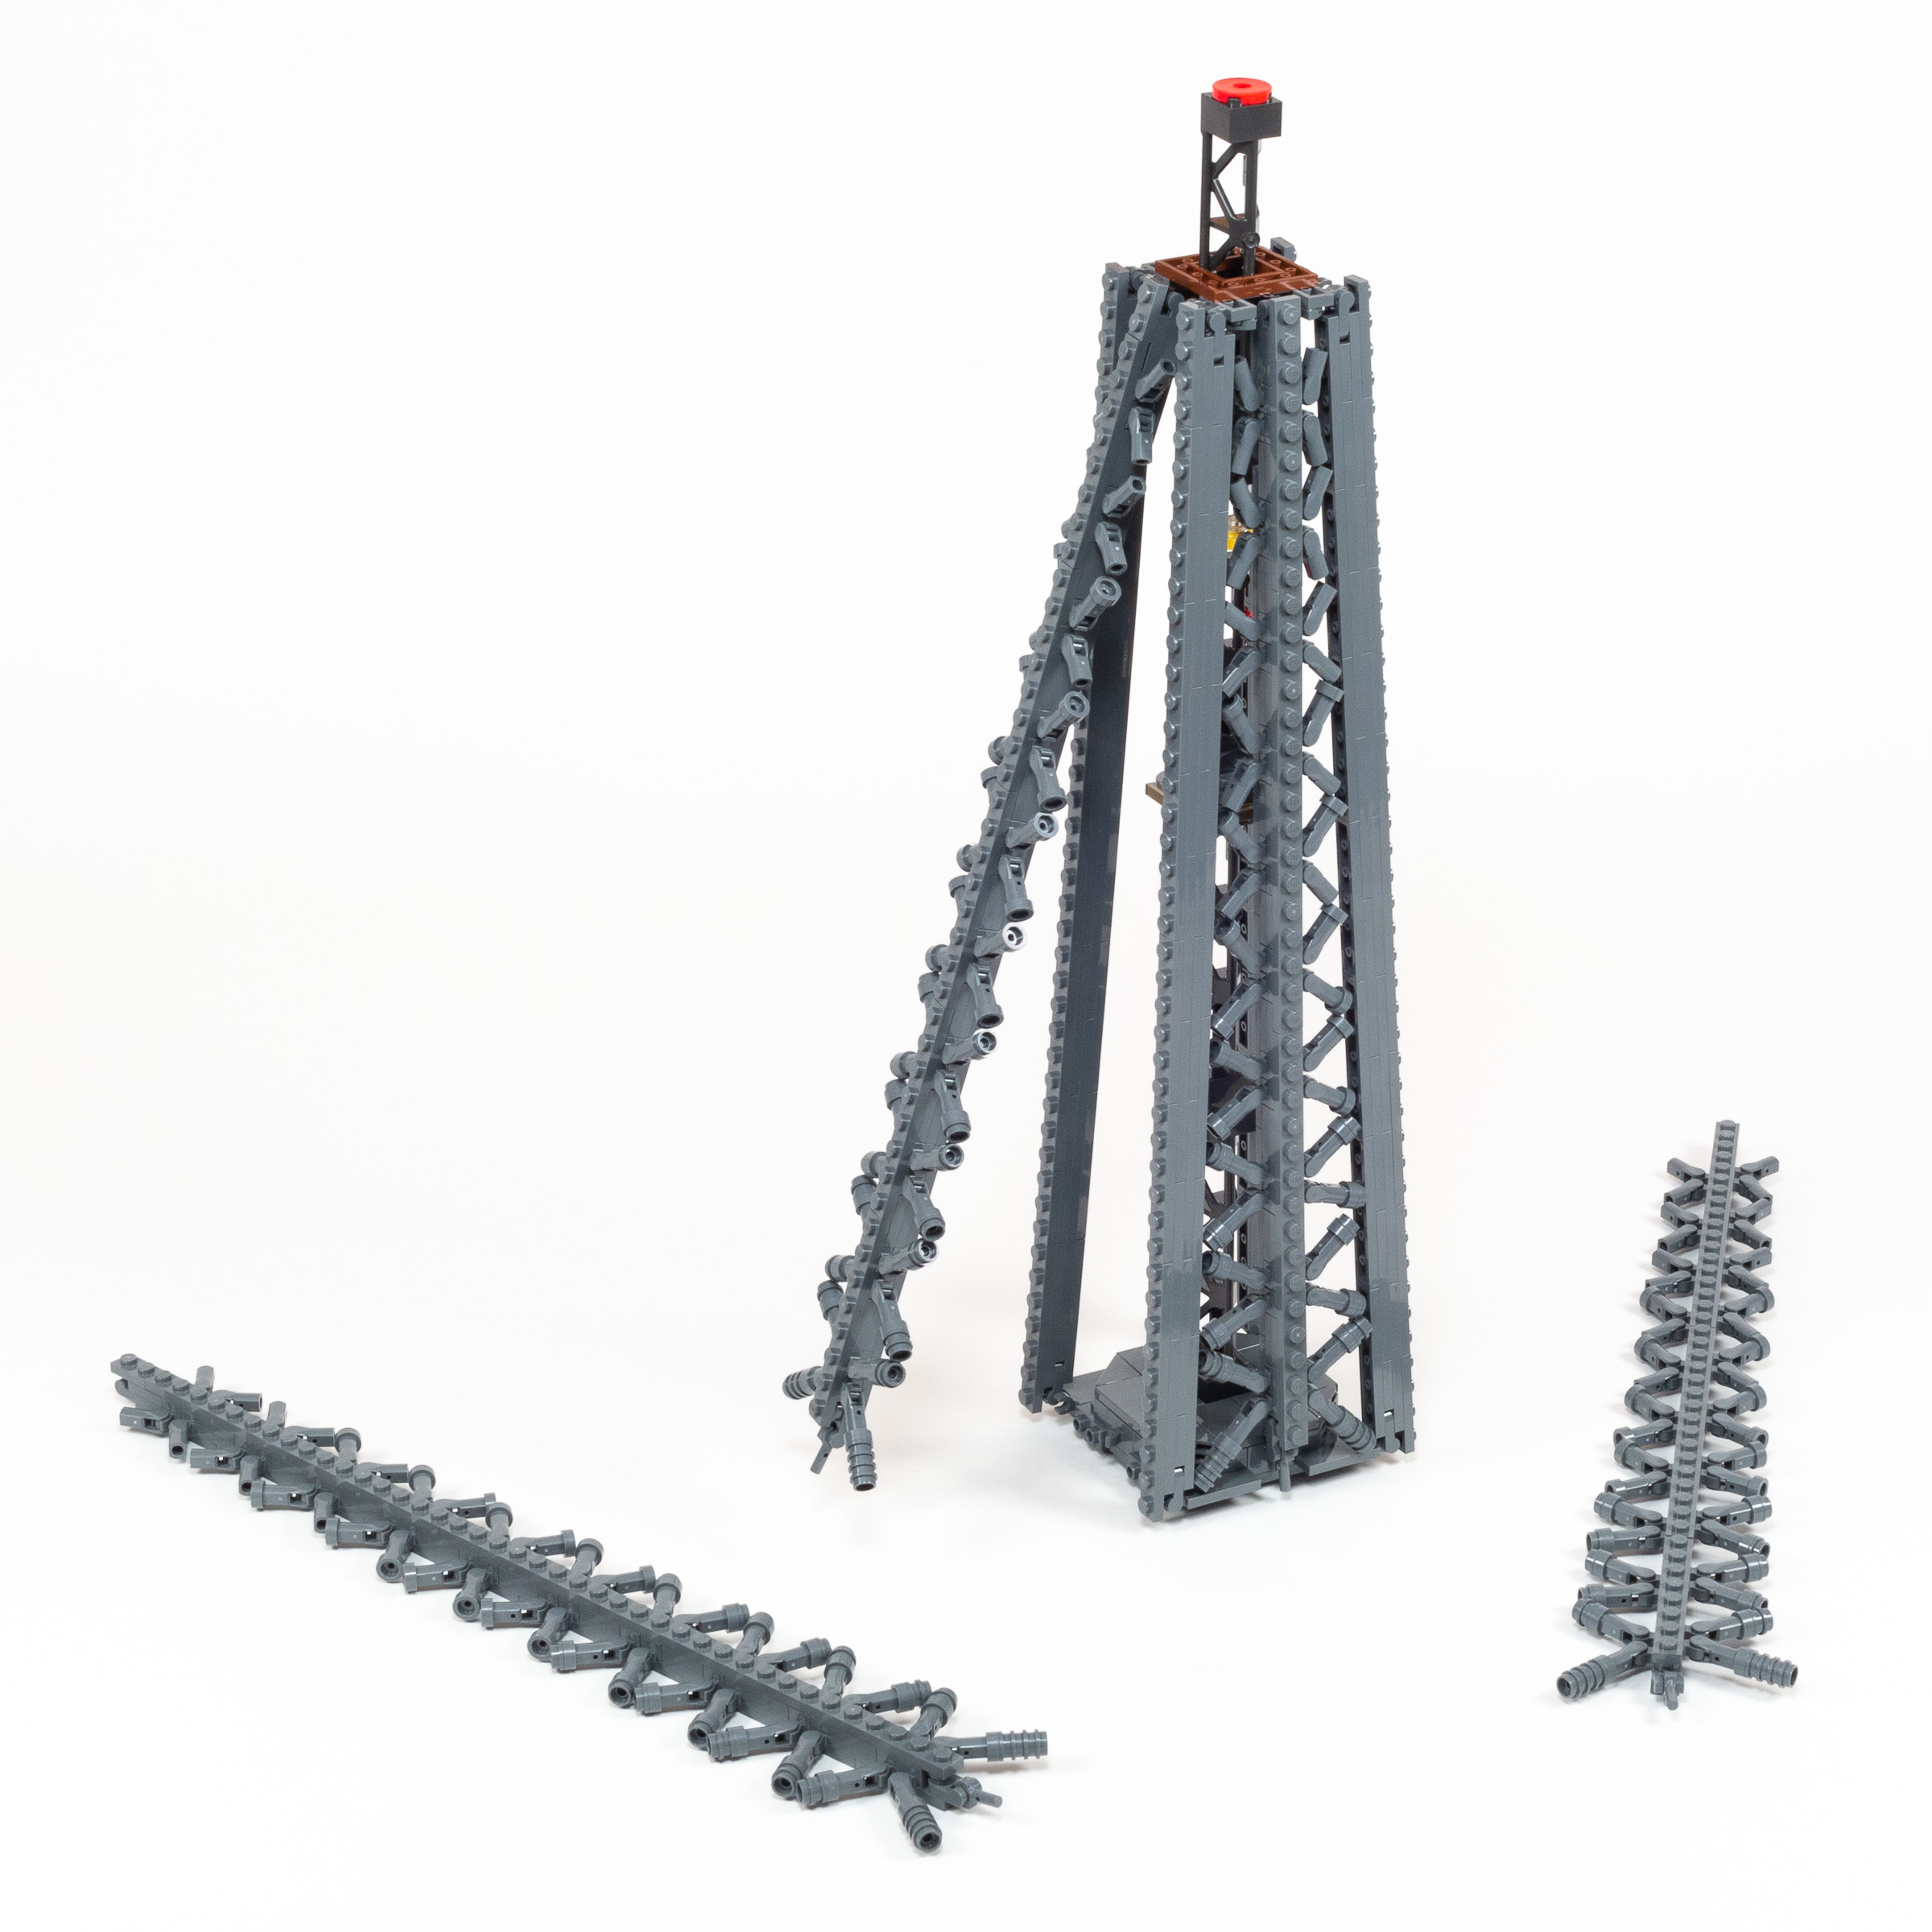
Bags 66 – 72: Very pointy section
The last thirteen bags created a fairly pointy section, and now it is time to build an even pointier section to go on top of it. This increase in angle as we get higher in the build give us the gently curved profile that the Eiffel Tower is famous for…
The very pointy section begins in Bags 66+67 with an 8×8 base onto which we attach a tall central support. After that, we create four very long beams using a ton of 1×6 plates (in Dark gray, of course). These 42-stud long beams attach to a smaller 4×4 assembly that slides over that vertical support but is not actually attached to it.

Attaching the long beams to a slender vertical support.
In Bags 68+69, we create a pair of tall vertical beams with clips down both of the sides. As with the previous stages, we simply clip pieces to those clips at differing angles to create the cross-bracing effect that we see near the top of the real building. By this point in the building’s height, we no longer have discrete left and right side, so much as a single triangular face on each side.
Attaching the four panels of cross-bracing.
The build process is nearly identical in Bags 70-72, when we build the the last two modules of cross-bracing which attach to the opposing two sides. Finally, we attach this module to the previous one using four 2×2 plates that are tucked away on the right and left sides.
Attaching the last two modules — and outgrowing the height of my normal backdrop.
Build time: 82 minutes.
Bag 66+67: 15 minutes, Bags 68+69: 33min, Bags 70-72: 34 min.
Bags 73 – 74: Upper Observation Deck
After many hours of painstakingly building latticework using Clip and Bar connections, the final module is refreshingly simple to build, with a focus on the familiar stacking of LEGO Bricks. Bag 73 concludes with an octagonal platform which flares slightly wider than the tower beneath it.
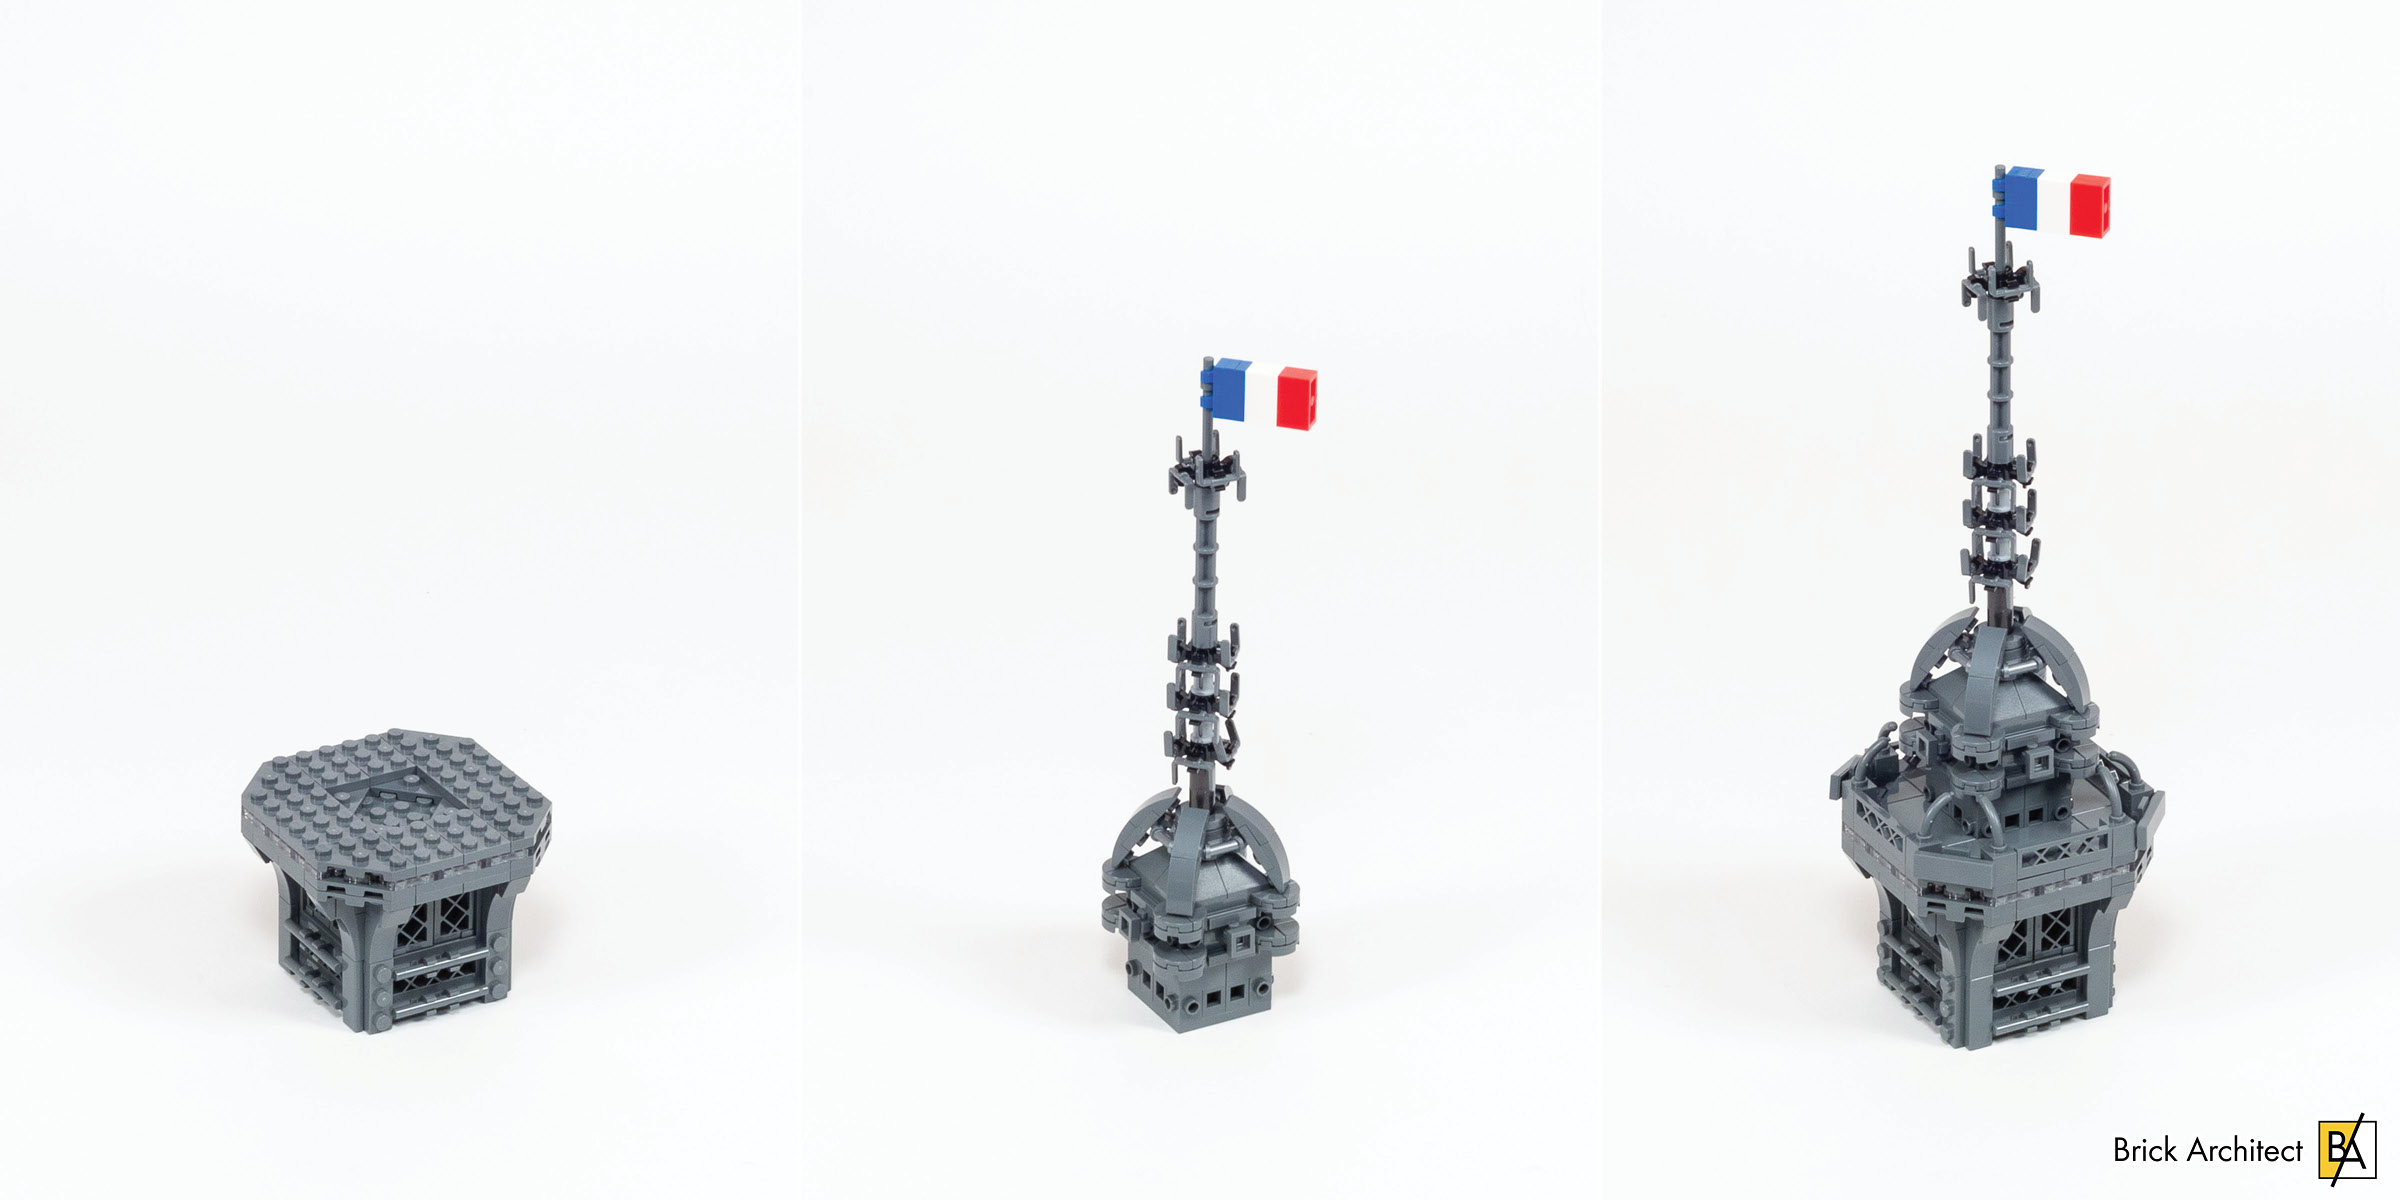
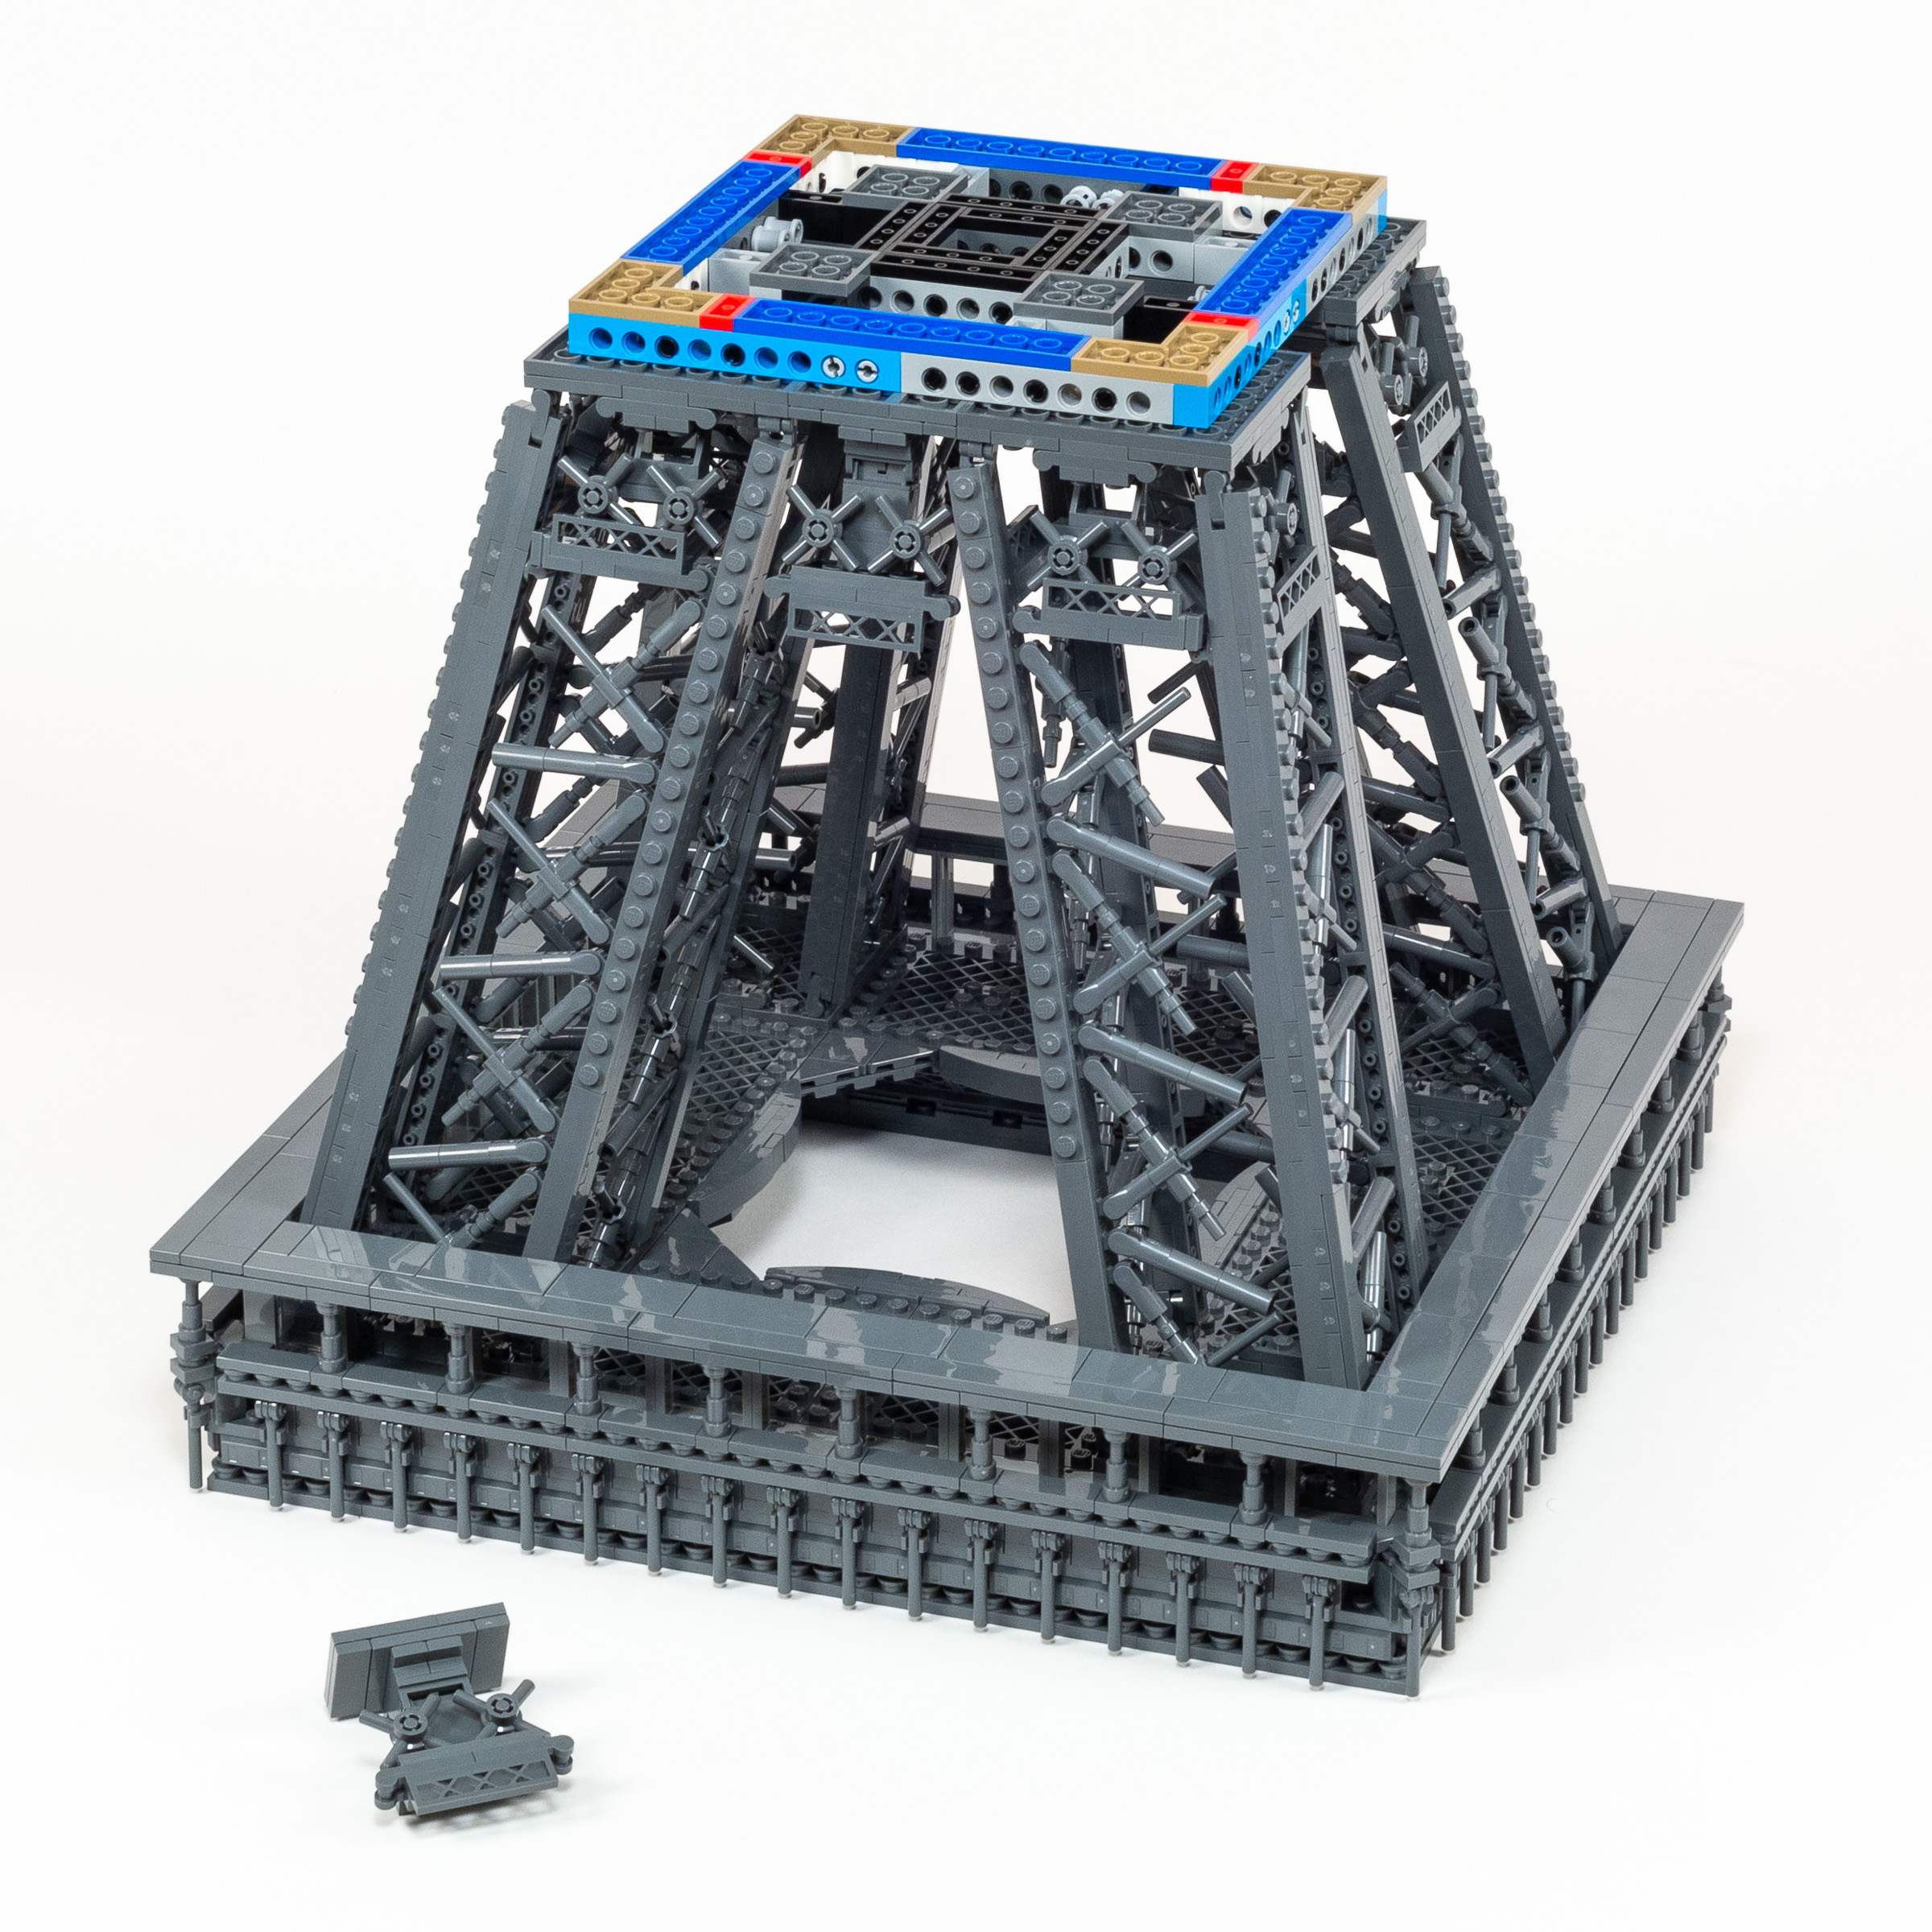
Bag 73 (left), vertical module from Bag 74 (middle), and completed module (right).
In the Final Bag, we add a railing to this upper observation deck, and build a vertically-focused module with a curved top and a tall flagpole. As with the much smaller LEGO models of the Eiffel Tower, it is topped with a brick-built flag of France.
Build time: 33 minutes.
Bag 73: 13 minutes, Bag 74: 20 minutes.
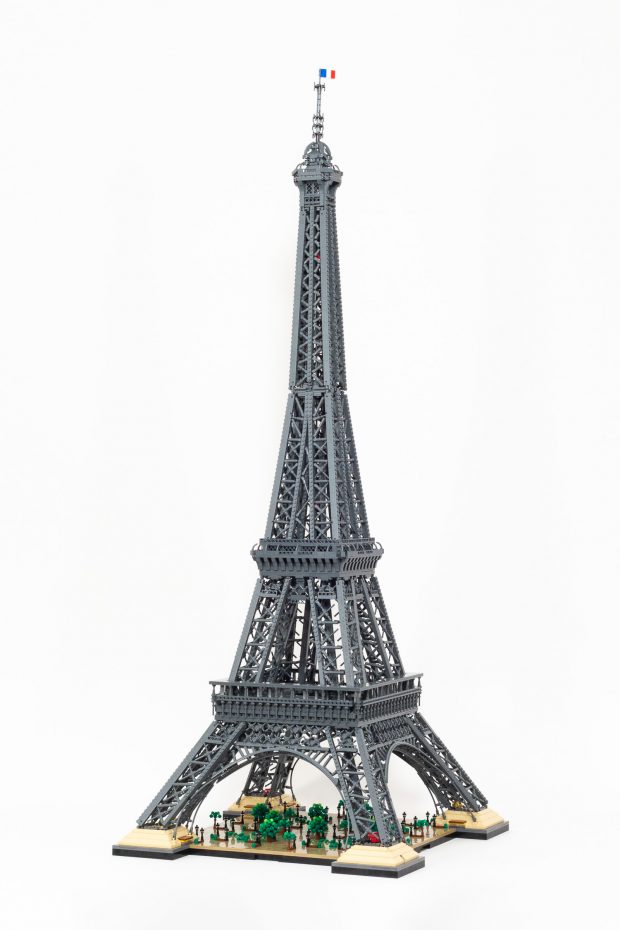
#10307 Eiffel Tower – The tower is finally finished!
There you have it – the third and final box totaled 369 minutes, or about 6 ¼ hours!
Parts
When it comes to the parts in this set, there’s a single color that dominates the story — the entire tower is 199Dark Stone GreyDark Bluish Gray. This will likely be a boon for Star Wars fans, as the parts included in this set in large quantities will likely go down in price on BrickLink after the set has been available for a few months.
There are about 12 parts that come in quantities in excess of 100, including 704x of the badly damaged 1×1 clip mentioned below, and a potentially ‘evil’ 666x 1×6 plates. Naturally, almost all of these high-volume parts are 199Dark Stone GreyDark Bluish Gray. The exception is 1×1 Round w/ 5 petals (part 24866) which you get in large quantities in both 37Bright Green and 28Dark GreenGreen.
Injection Moulding Quality Issues
While I’m not the first person to highlight some very ugly ejection points on a number of recently updated LEGO moulds, several of the more problematic parts are included in this set. I think it is important to shine a light into a problem that The LEGO Group has refused to acknowledge, especially given their motto that “only the best is good enough”.
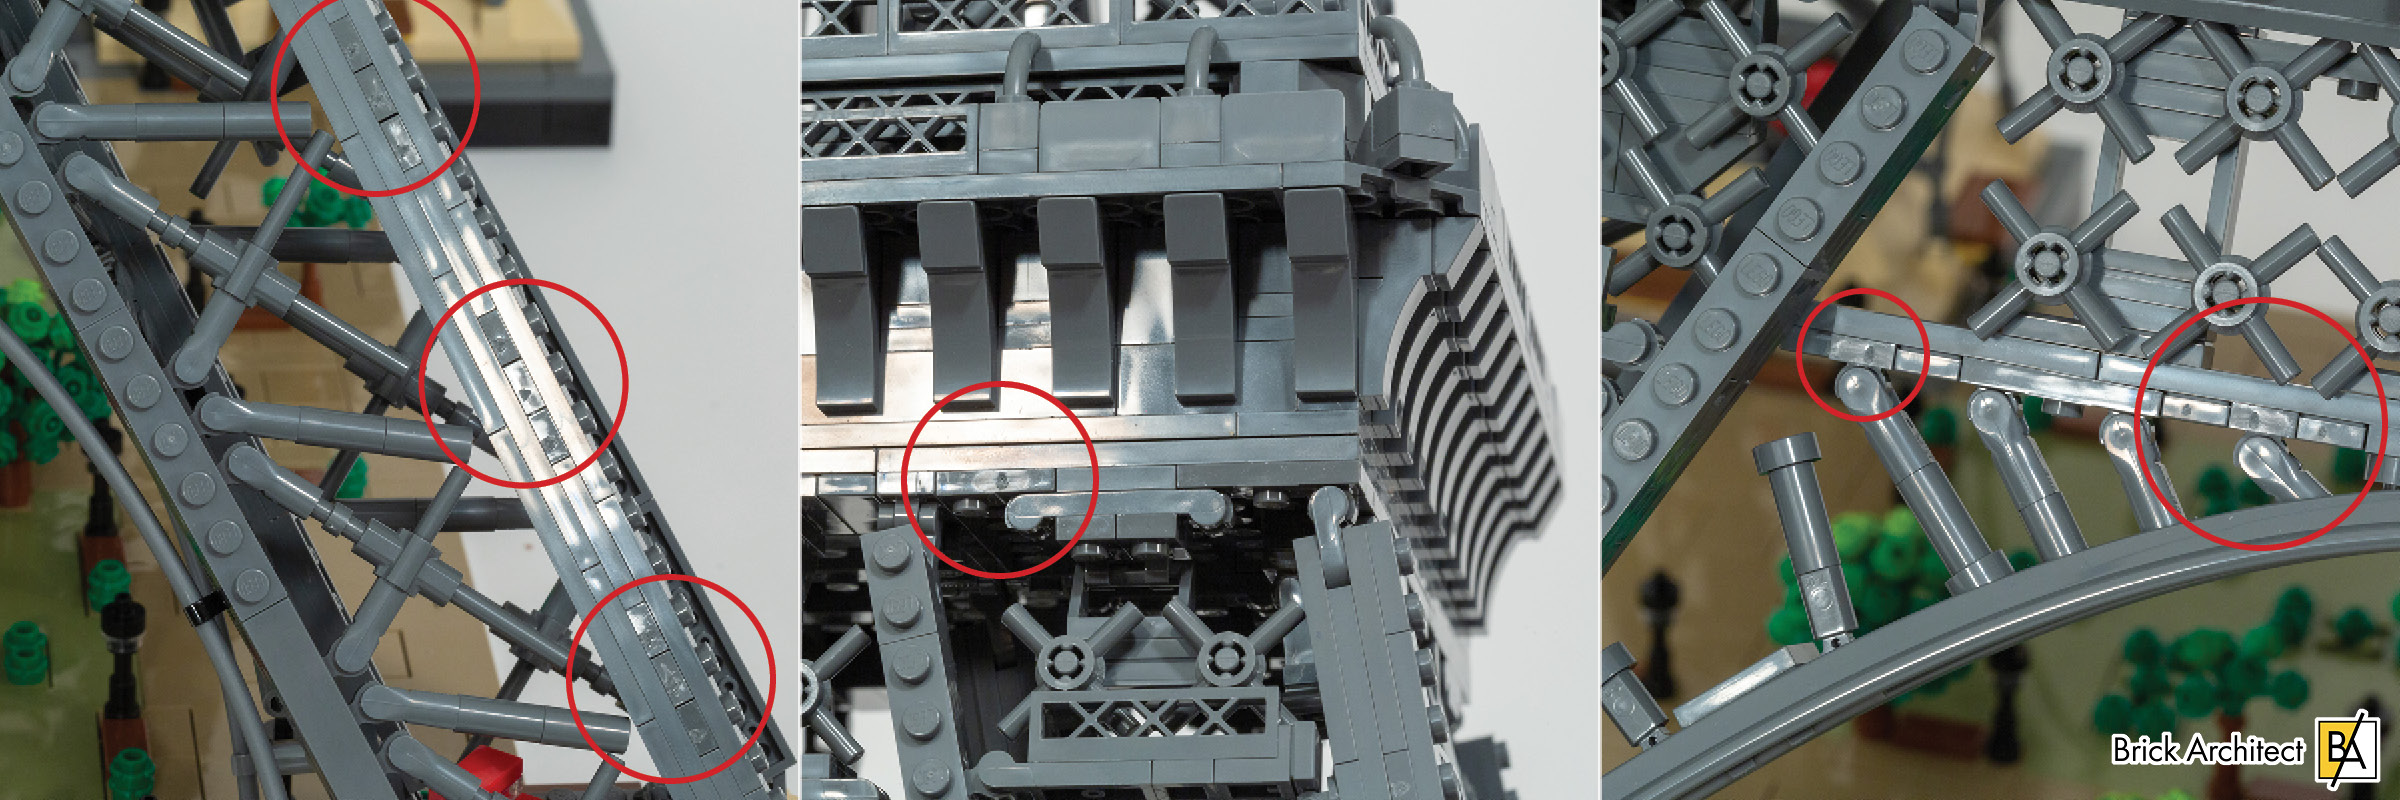
Highlighting some of the worst moulding issues encountered in this set.
I am not an expert on injection moulding, I have learned a few things along the way. Notably, each mould needs an entrypoint for hot plastic and an outlet for gas and excess plastic. Typically they are on the studs themselves (you might notice one of the studs on an 1×2 plate has a perfect LEGO logo, and the other has a small dot in the middle) and the underside of the brick where you won’t notice it. Some complex moulds may require multiple of these, as well as “ejection pins” that help get the part out of the mould after it cooled.
Poor quality moulds in this set:
- 1×1 w/ Clip, Vertical (part 4085) – Extreme damage on the side opposite clip.
- 1x1x 2/3 w/ open stud (part 86996) – Noticeable damage on one of the four sides.
- 1×1 Clip on top (part 15712) – Noticeable damage on one side.
- 1×3 Tile (part 63864) – Moderate damage on one of the narrow ends.
One of the ways that The LEGO Group reduces costs is to make moulds more efficient. This includes modifying the mould to use less plastic, producing more copies of the same part in each batch, or speeding up how quickly each batch is produced. I strongly suspect that these rough marks are the result of attempts to speed up the mould, or fit more parts in a single mould. Either way, I want to use this opportunity to cast a light into this issue, in the hopes that they can produce better versions of these moulds in the future.
Conclusion
This is a massive, expensive, and highly anticipated set which deserves serious consideration. To conclude this review, let’s consider the aesthetic aspects of the completed build, value compared to similar sets, and other considerations like learning moments and the practicality of displaying a large (and potentially fragile) set.
Aesthetics
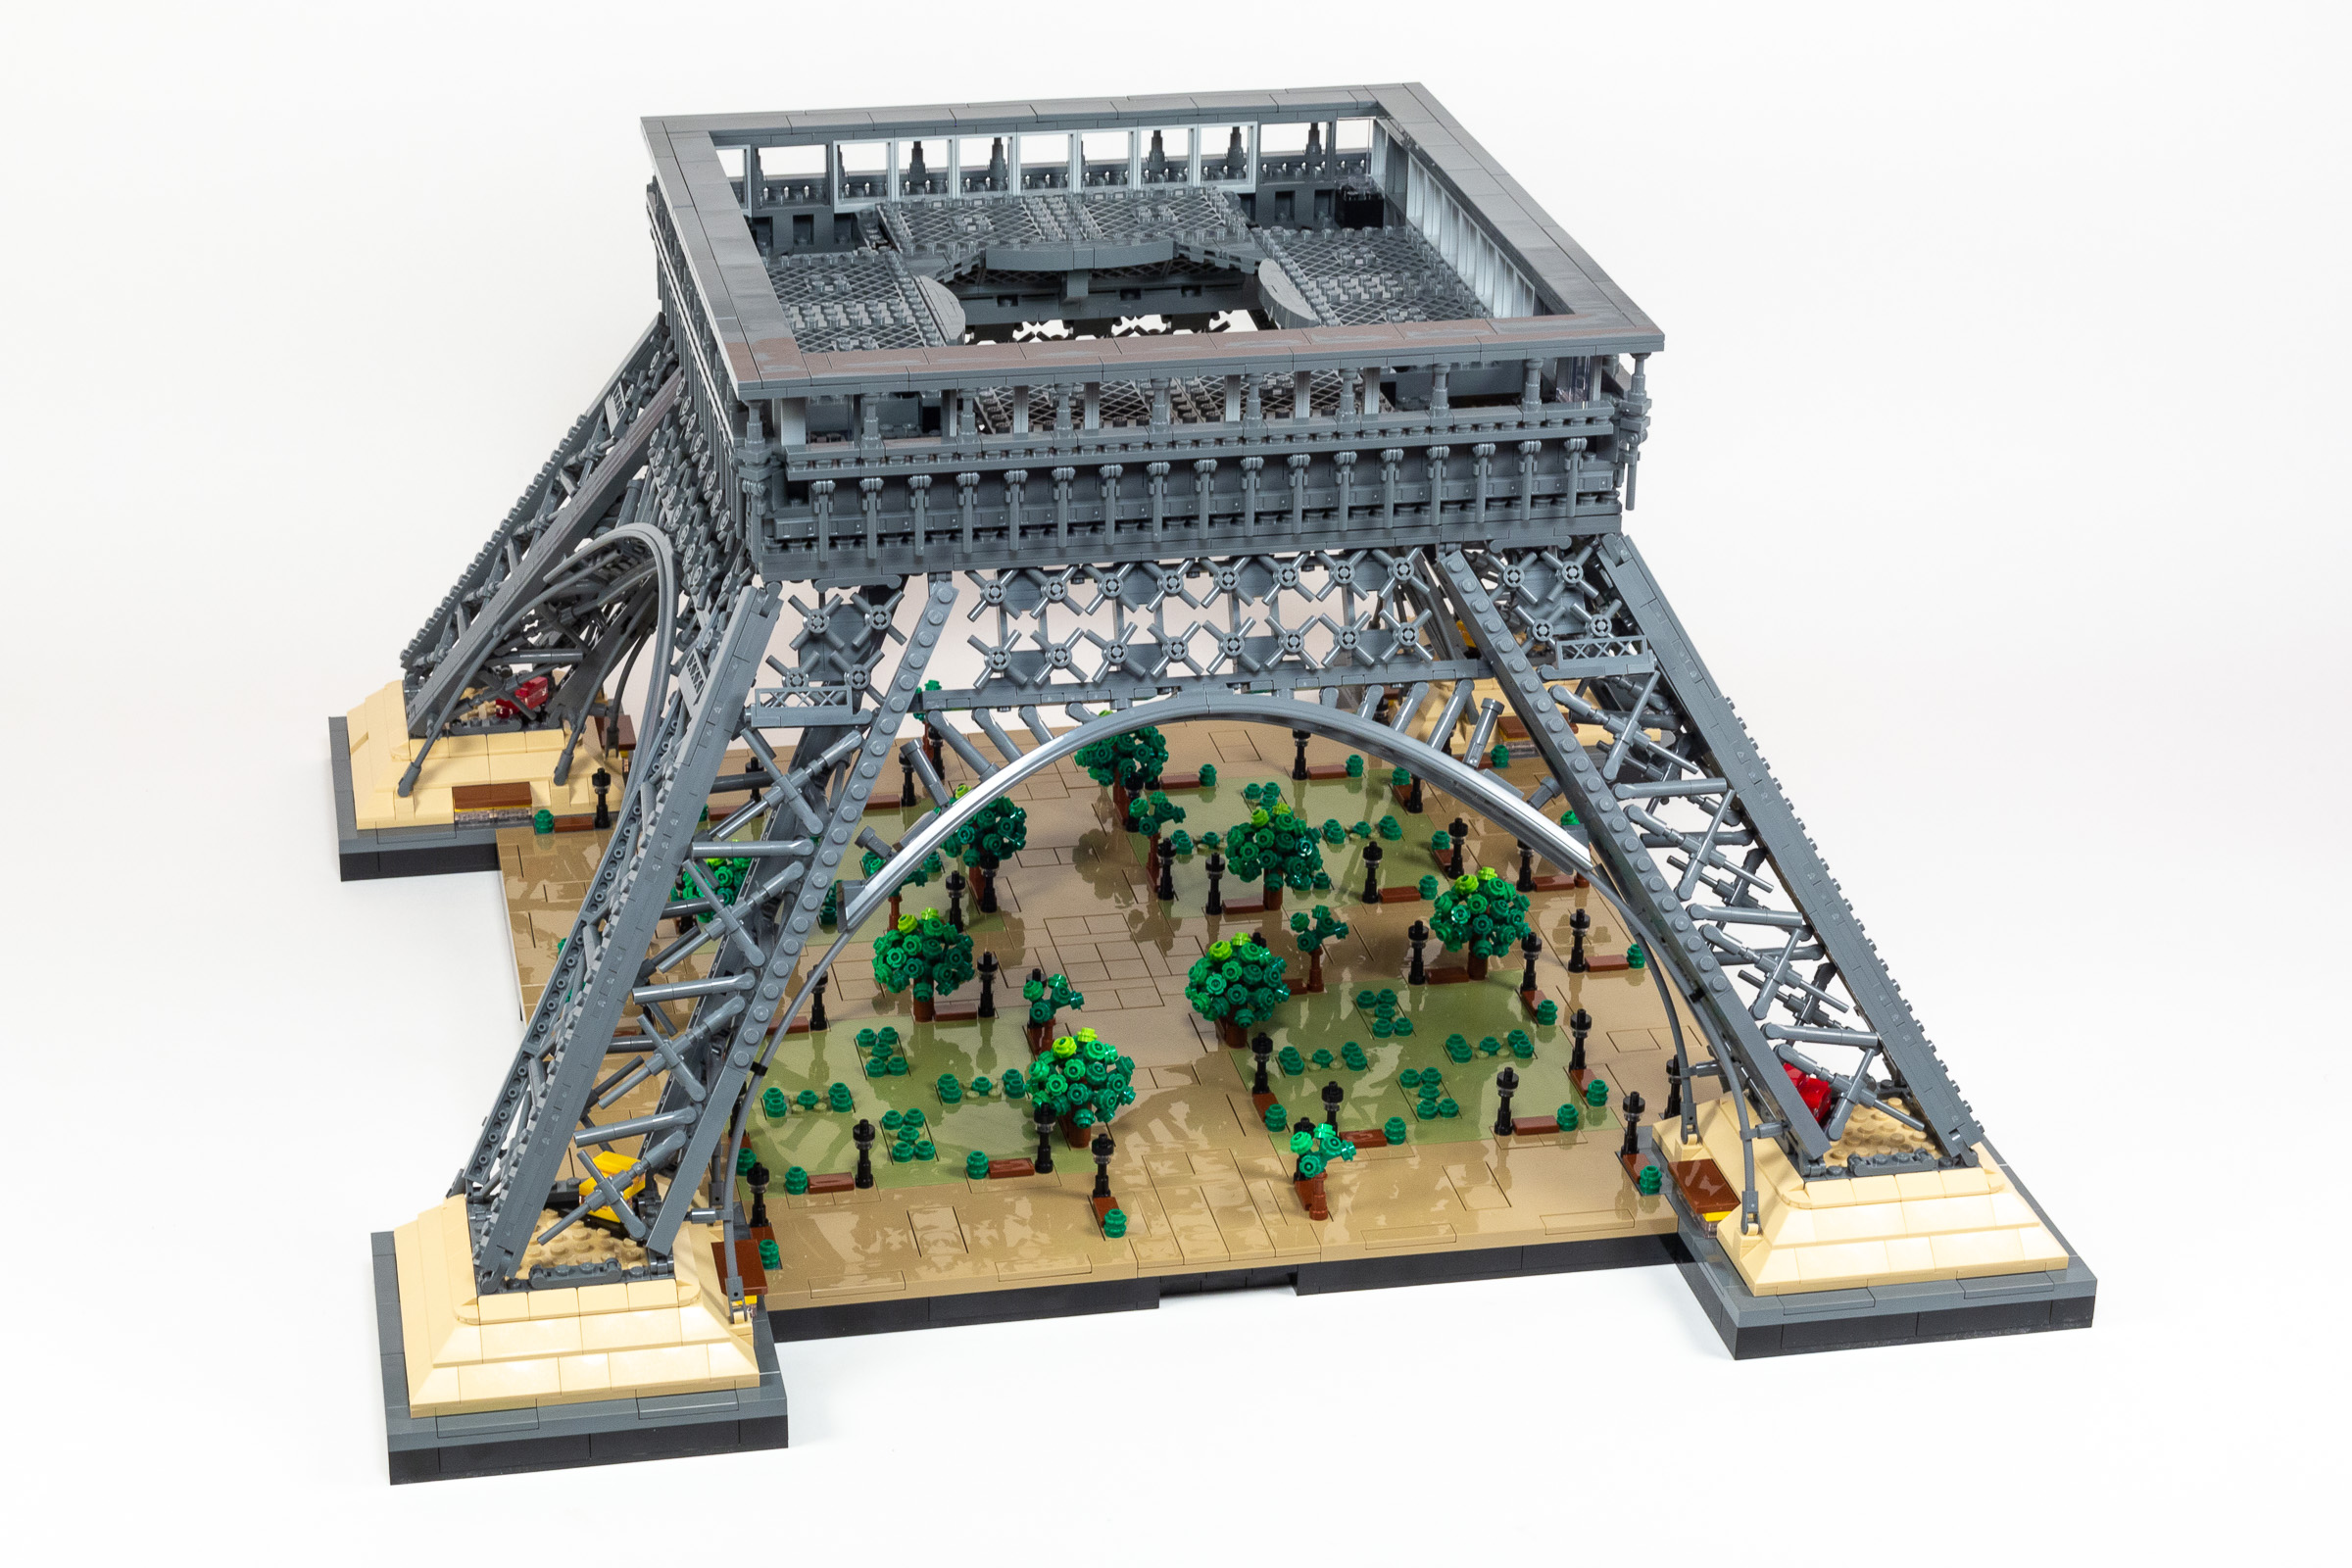
To be frank, this model looks beautiful from across the room — assuming that you have a large enough room to allow you to see it from a distance! I am extremely pleased with the overall shape of the model, which captures the elegant form of the real building very well. If this were a MOC on display at a LEGO convention, it would draw large crowds due to the large size and high degree of craftsmanship.
It still looks good when you get a lot closer, but the techniques which are used to re-create the delicate cross-bracing do not quite hold up to scrutiny. The biggest challenge is that the cross-bracing doesn’t quite touch both sides, no matter how hard you work to align the pieces manually. This breaks the illusion of a massive structure built out of triangular trusses.

Small gaps in the cross-bracing are visible throughout the completed model.
To be fair, even when some of the most talented AFOLs build MOC’s based on key landmarks, they take similar shortcuts to achieve the right ‘look’ without re-creating the structure in the same way. Overall, it is perfectly acceptable, but falls short of exceptional.
Value
There are so many ways to gauge value, and of course most of all it is subjective — how much is it worth to you? Nonetheless, I wanted to provide some concrete comparisons to help you assess how this set stacks up to a few of the other realyl big LEGO sets that have already been released.
Completed Model:
- LEGO Parts Weight: 6775.4 g (14.9 lbs)
- Weight-per-piece: 0.68 g/piece.
- Price per piece: $0.063 per piece.
- Price per gram: $0.092 per gram.
Based on these objective measures, we see an excellent price-per-part of $0.06 (well under $0.10 benchmark). By contrast, it has a fairly typical price-per-gram of around $0.09. (Based on pre-inflation prices, I was seeing anywhere from $0.062 to $0.146 per gram, and $0.10 seems to be about average.) These two metrics tell us that we are getting about the same amount of plastic per dollar as in many other sets, but the parts are smaller on average than in some other sets.
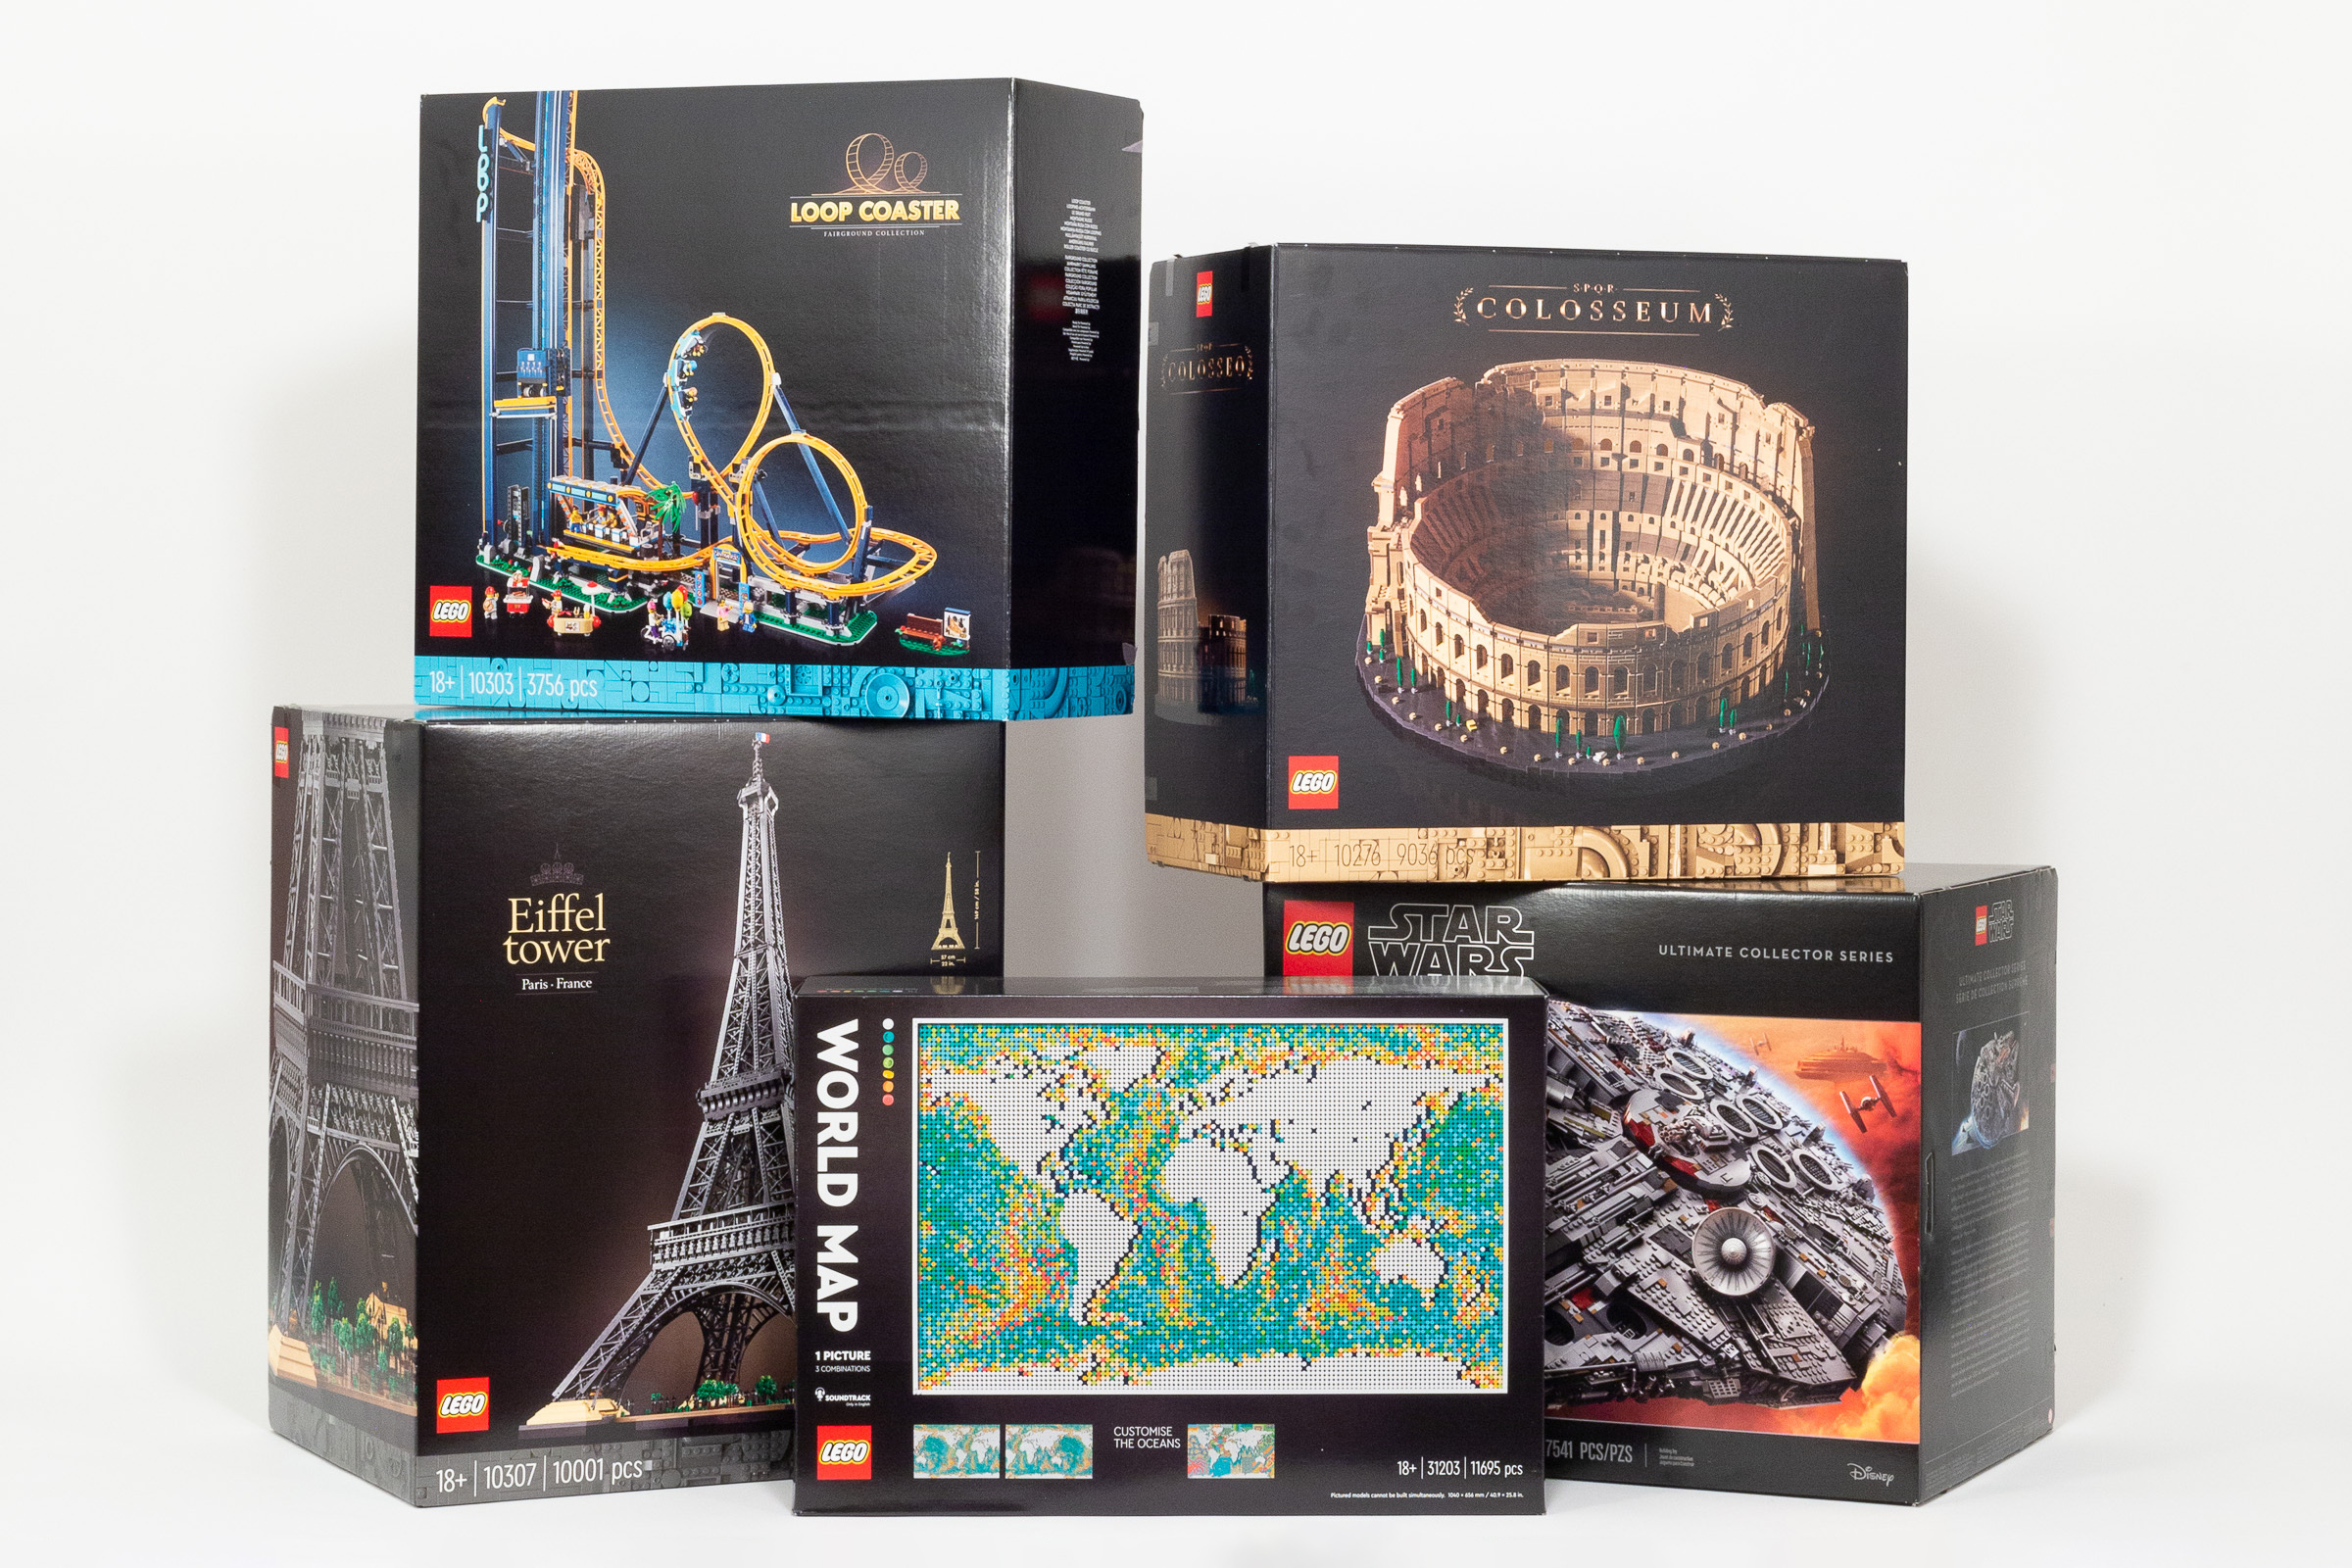
A selection of extremely large LEGO Sets.
Let’s look at how the set stacks up to some popular ‘very large’ LEGO sets, such as those in the photo above.
- #10276 Colosseum, 9036 pieces, $550.
As the most recent previous addition to what we had called the Creator Expert series, the Colosseum is a much denser model than the Eiffel Tower. It is much easier to display because it is shorter, but it does not have nearly as much presence in the room despite a similar price point. - #75192 Millennium Falcon, 7541 pieces, $850.
The iconic rebel ship deserves a place in the collection of serious Star Wars fans, but it’s hard to dispute that it’s overpriced, given that it has a lot fewer pieces and a much larger price than the Eiffel Tower. - #10303 Loop Coaster, 3756 pieces, $400.
While it suffers from a high price-per-part, this is a physically large set with really fun play features. - #31203 World Map, 11695 pieces, $250.
Proving once and for all that price-per-part is a pointless metric, the World Map remains the record-holder for the most pieces in a LEGO set. Whether it is mind numbing, or relaxing is up to you.
I concede that the Millennium Falcon is probably the heaviest LEGO set — although I have not weighed my copy, it has been reported as 16 lbs when complete, versus ‘just’ 14.9 lbs for this set. I also acknowledge that the World Map remains undisputed as the LEGO set with the most pieces, even though it only weighs 8.9 lbs.
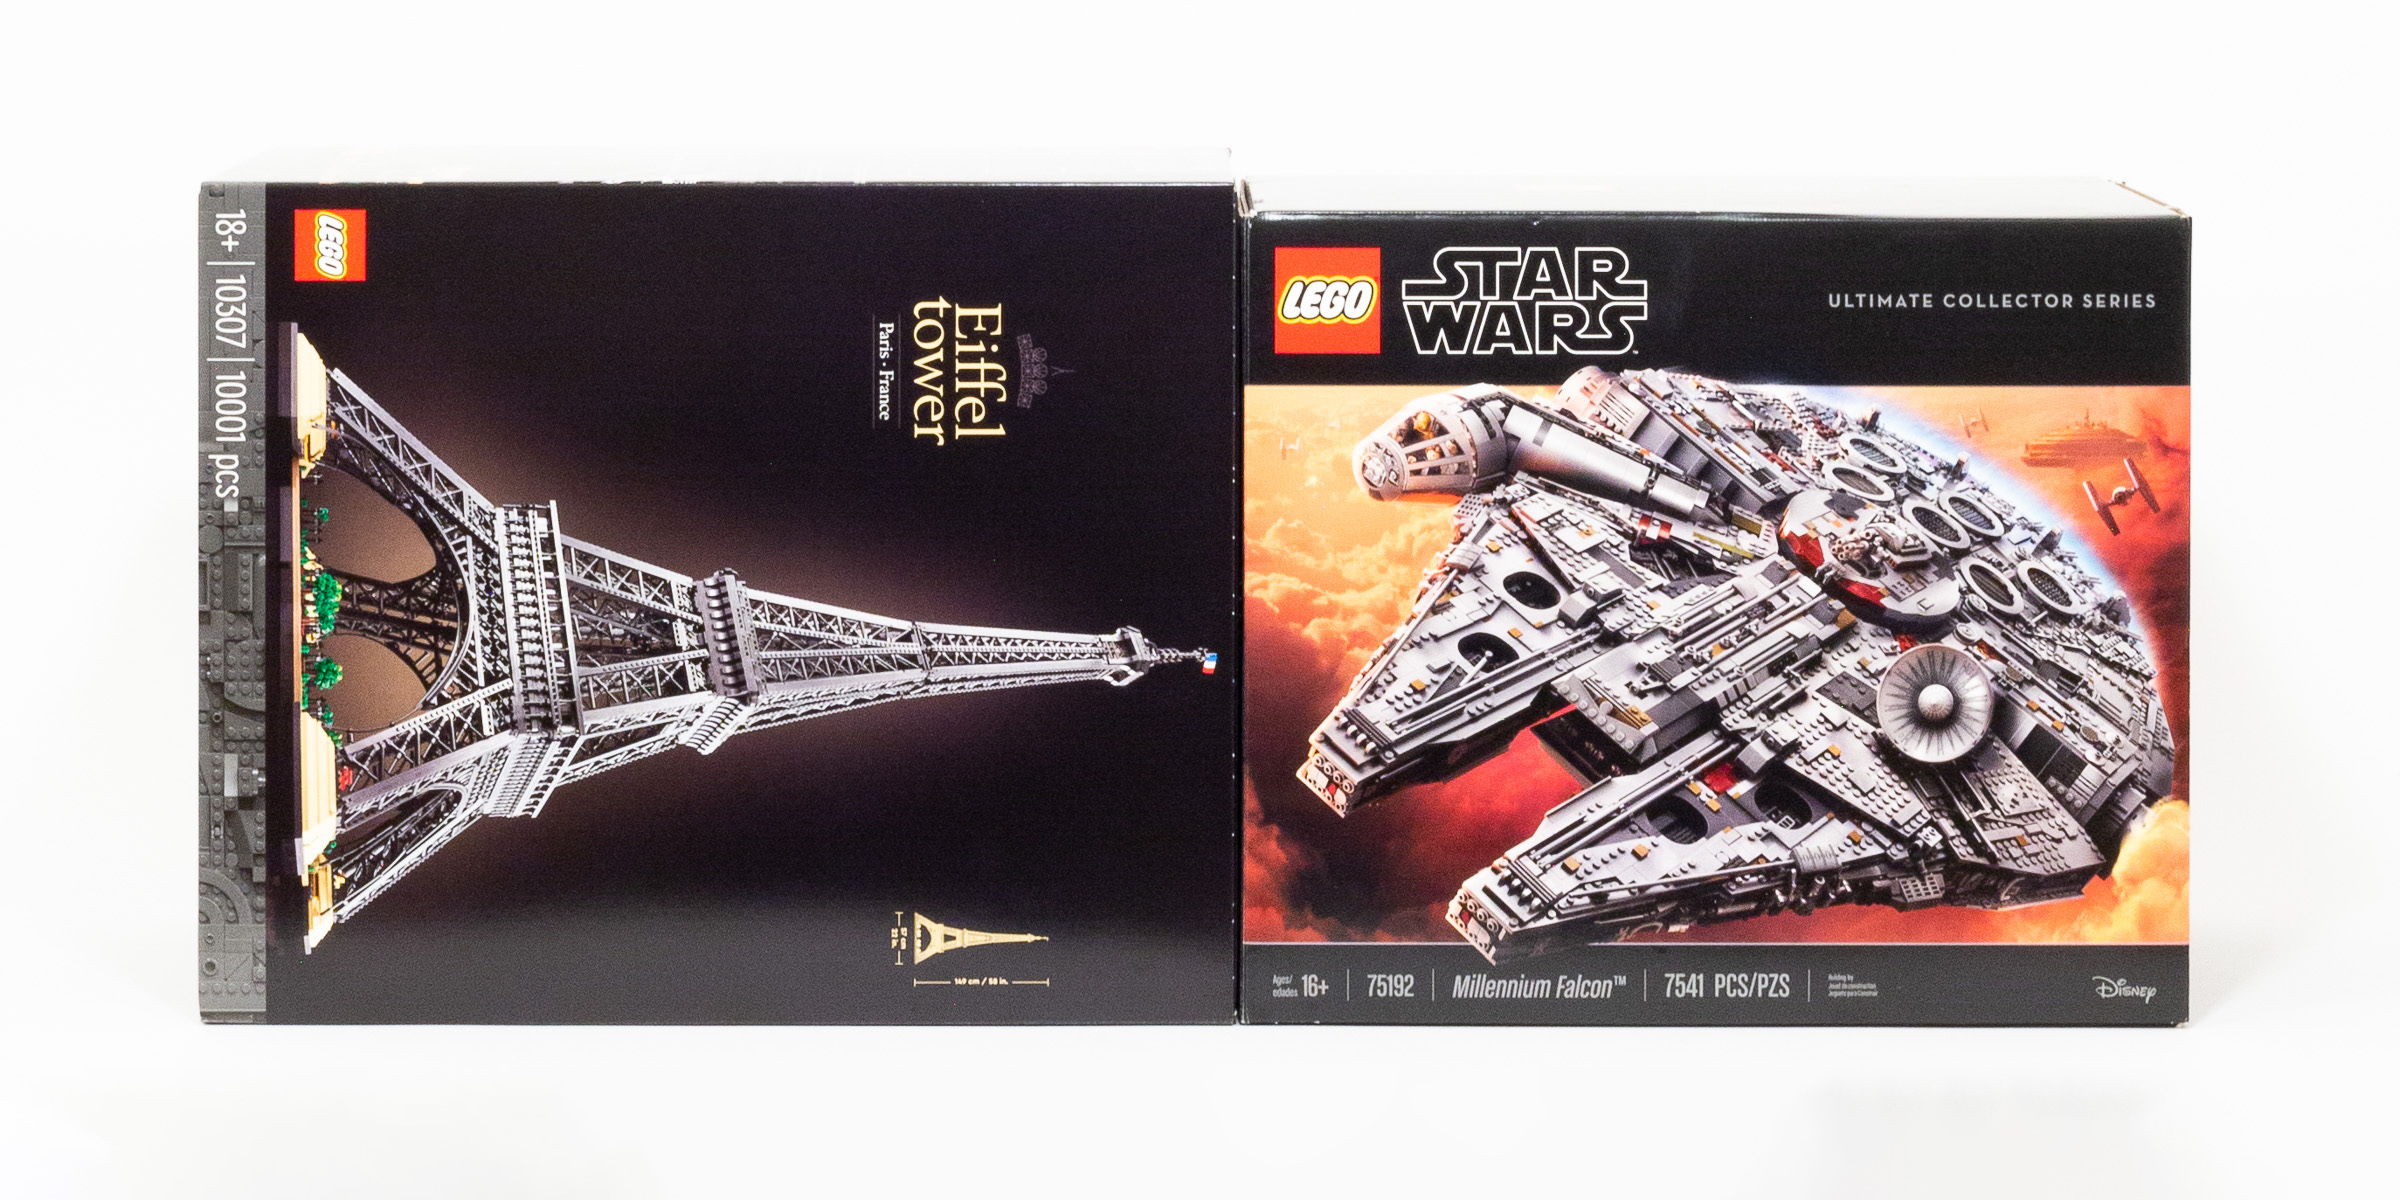
#10307 Eiffel Tower has a slightly larger box than #75192 Millennium Falcon.
Given that the Eiffel Tower is the tallest set ever created, comes in a larger box than the Millennium Falcon, and has the second largest part count, I feel comfortable giving it the title of the “largest” LEGO set ever created — based on a rough assessment of its overall volume.
Closing Thoughts
Whether or not you decide it deserves the title as the ‘largest LEGO set’, #10307 Eiffel Tower is a massive undertaking that has a towering presence in any room. More than any previous LEGO set, it makes the jump from LEGO model to serious home decor — That’s why the real question for many builders is not about whether this is an impressive LEGO set, but rather if they have a safe and suitable place in their home to display it.
When compared other very large sets like #75192 Millennium Falcon or #10276 Colosseum we quickly discover that this is in a different league altogether. While they take up about the same amount of horizontal space, the vertical aspect means that you can’t easily incorporate the Eiffel Tower into a bookshelf, and you can’t put it under a glass tabletop and use it as a coffee table. It will dominate almost any room you put it in.
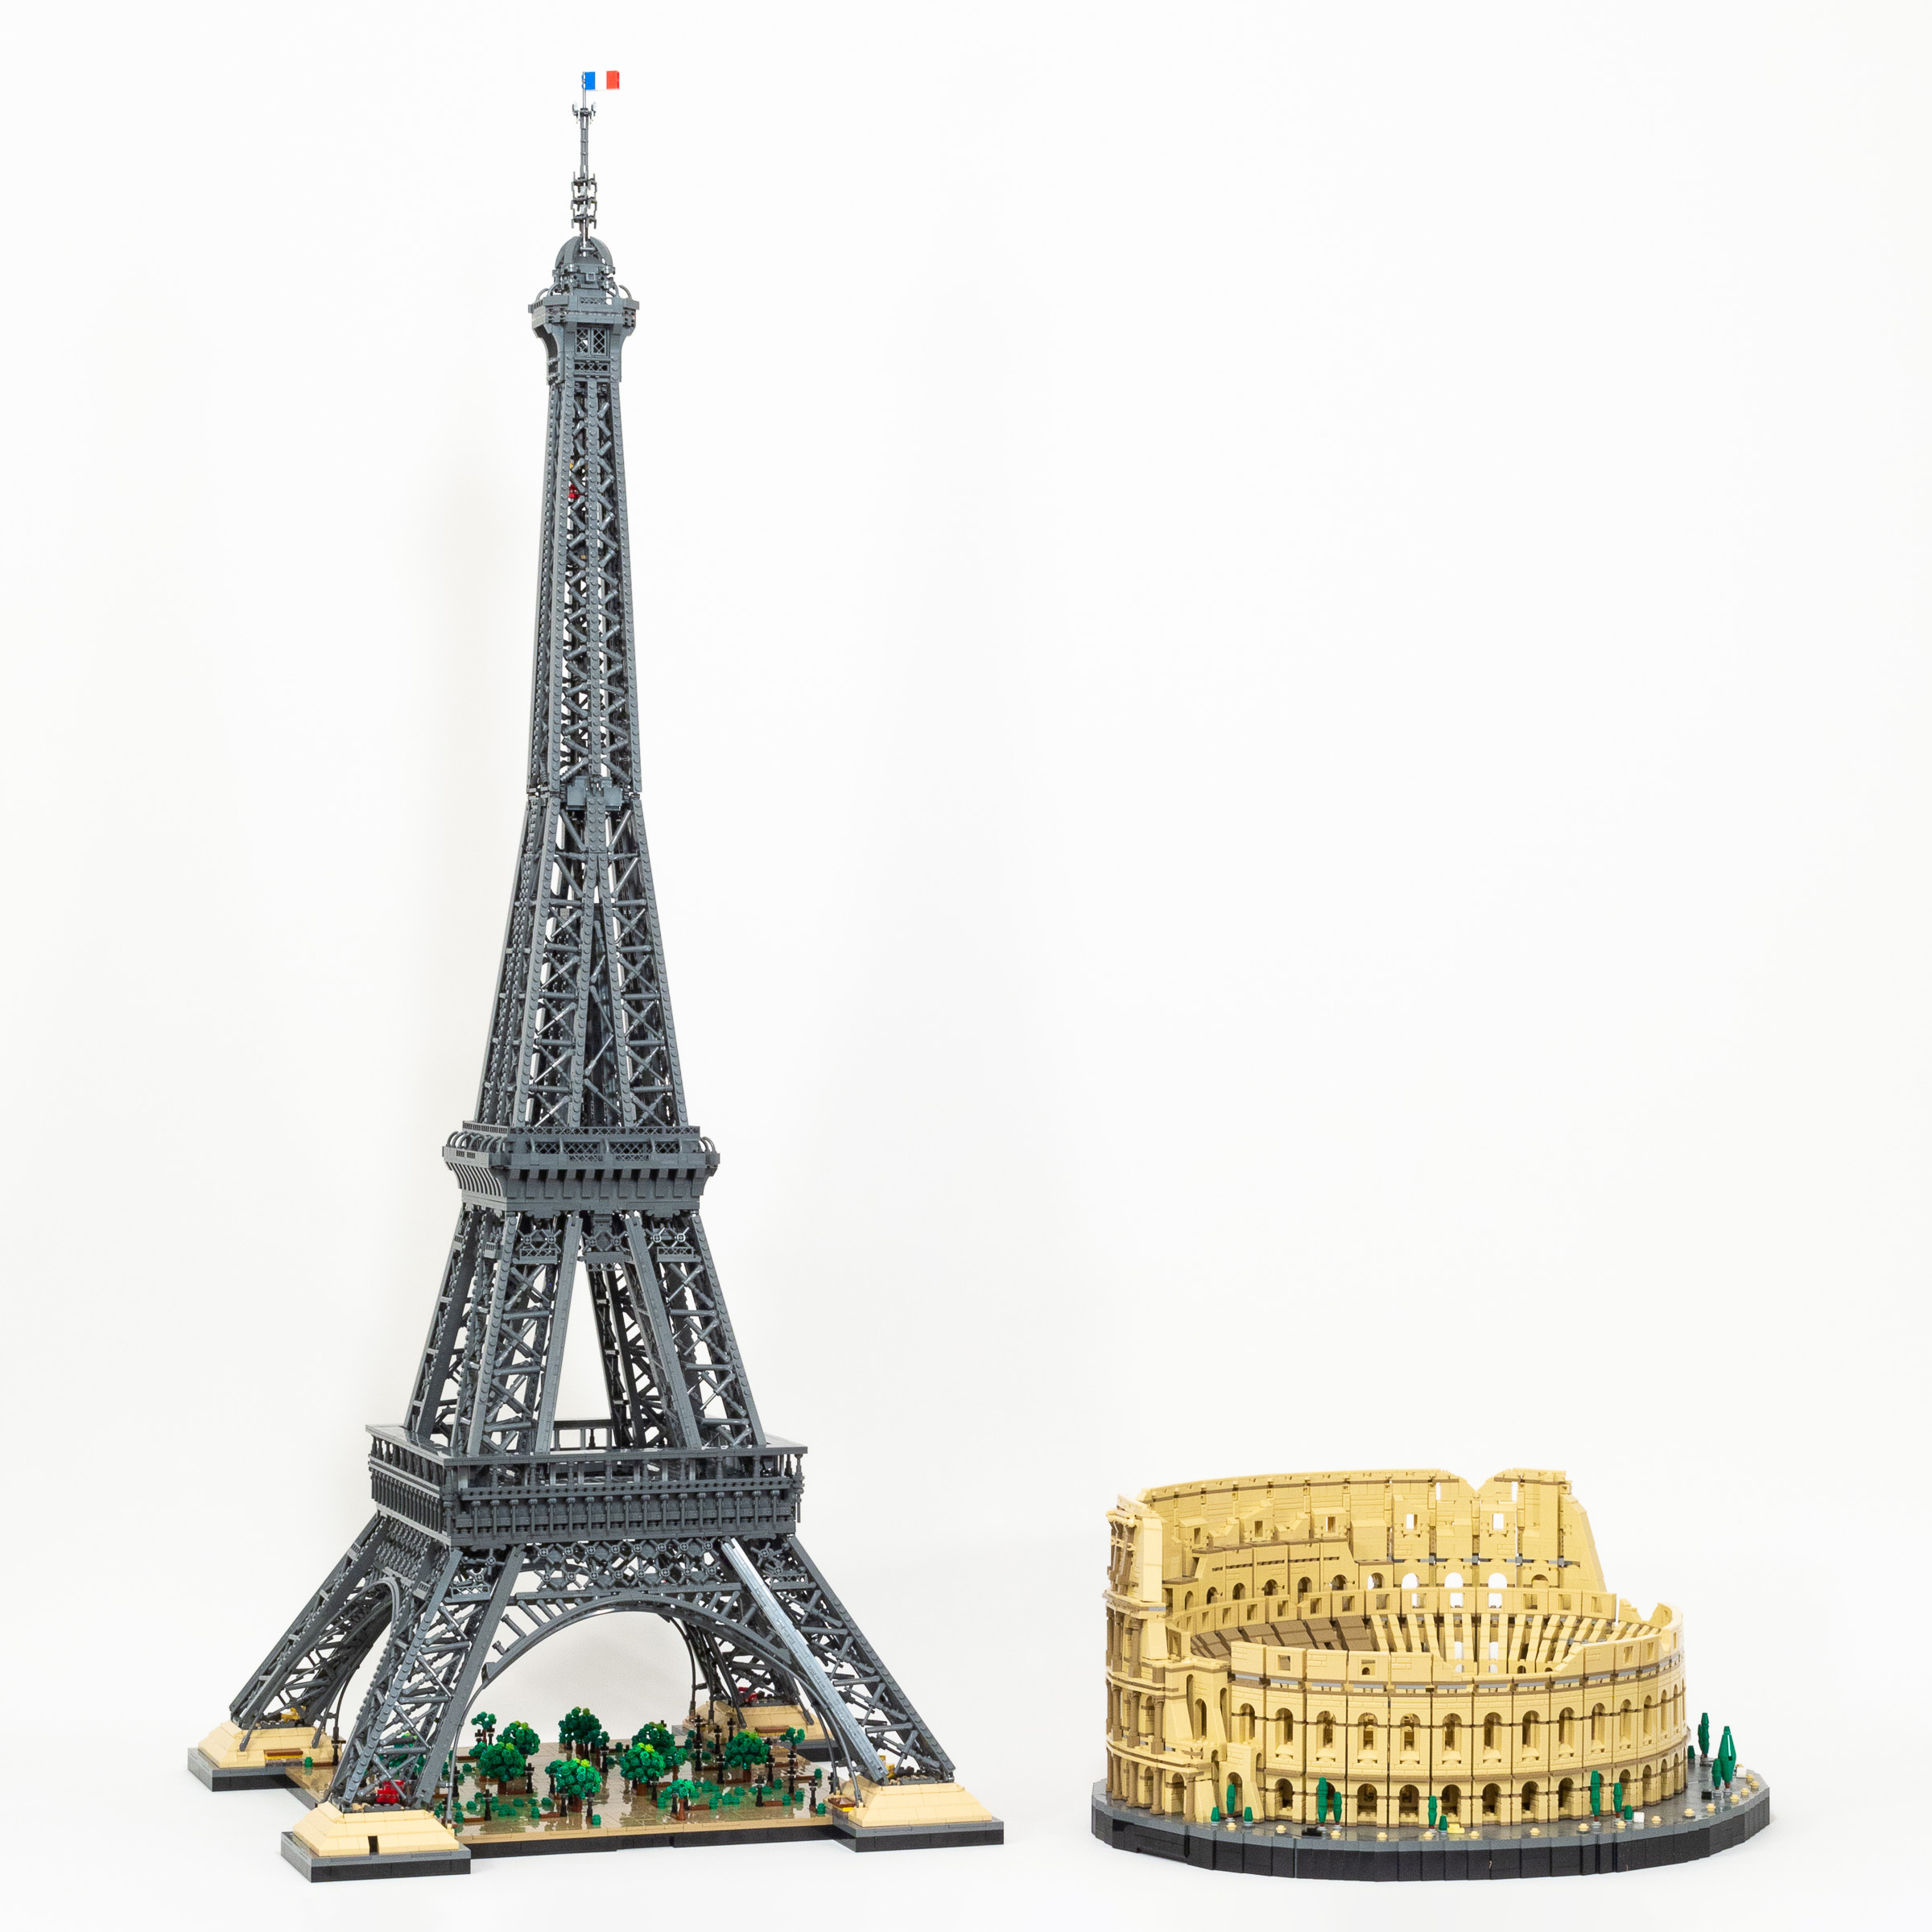
#10276 Colosseum can’t compare to the overall size (especially height) of the Eiffel Tower.
When I compare it specifically to the Colosseum — the most recent architectually focused set in the Icons lineup (formerly Creator Expert) — The Eiffel Tower wins hands down. While I enjoyed building the Colosseum, and in particular learning more about the building while assembling the model, it is not a very captivating display piece. The circular shape does not catch your eye, and I don’t find myself wandering over to look into the centre of the arena very often. To be fair, both of these sets teach you about the LEGO model and real building as you go.)
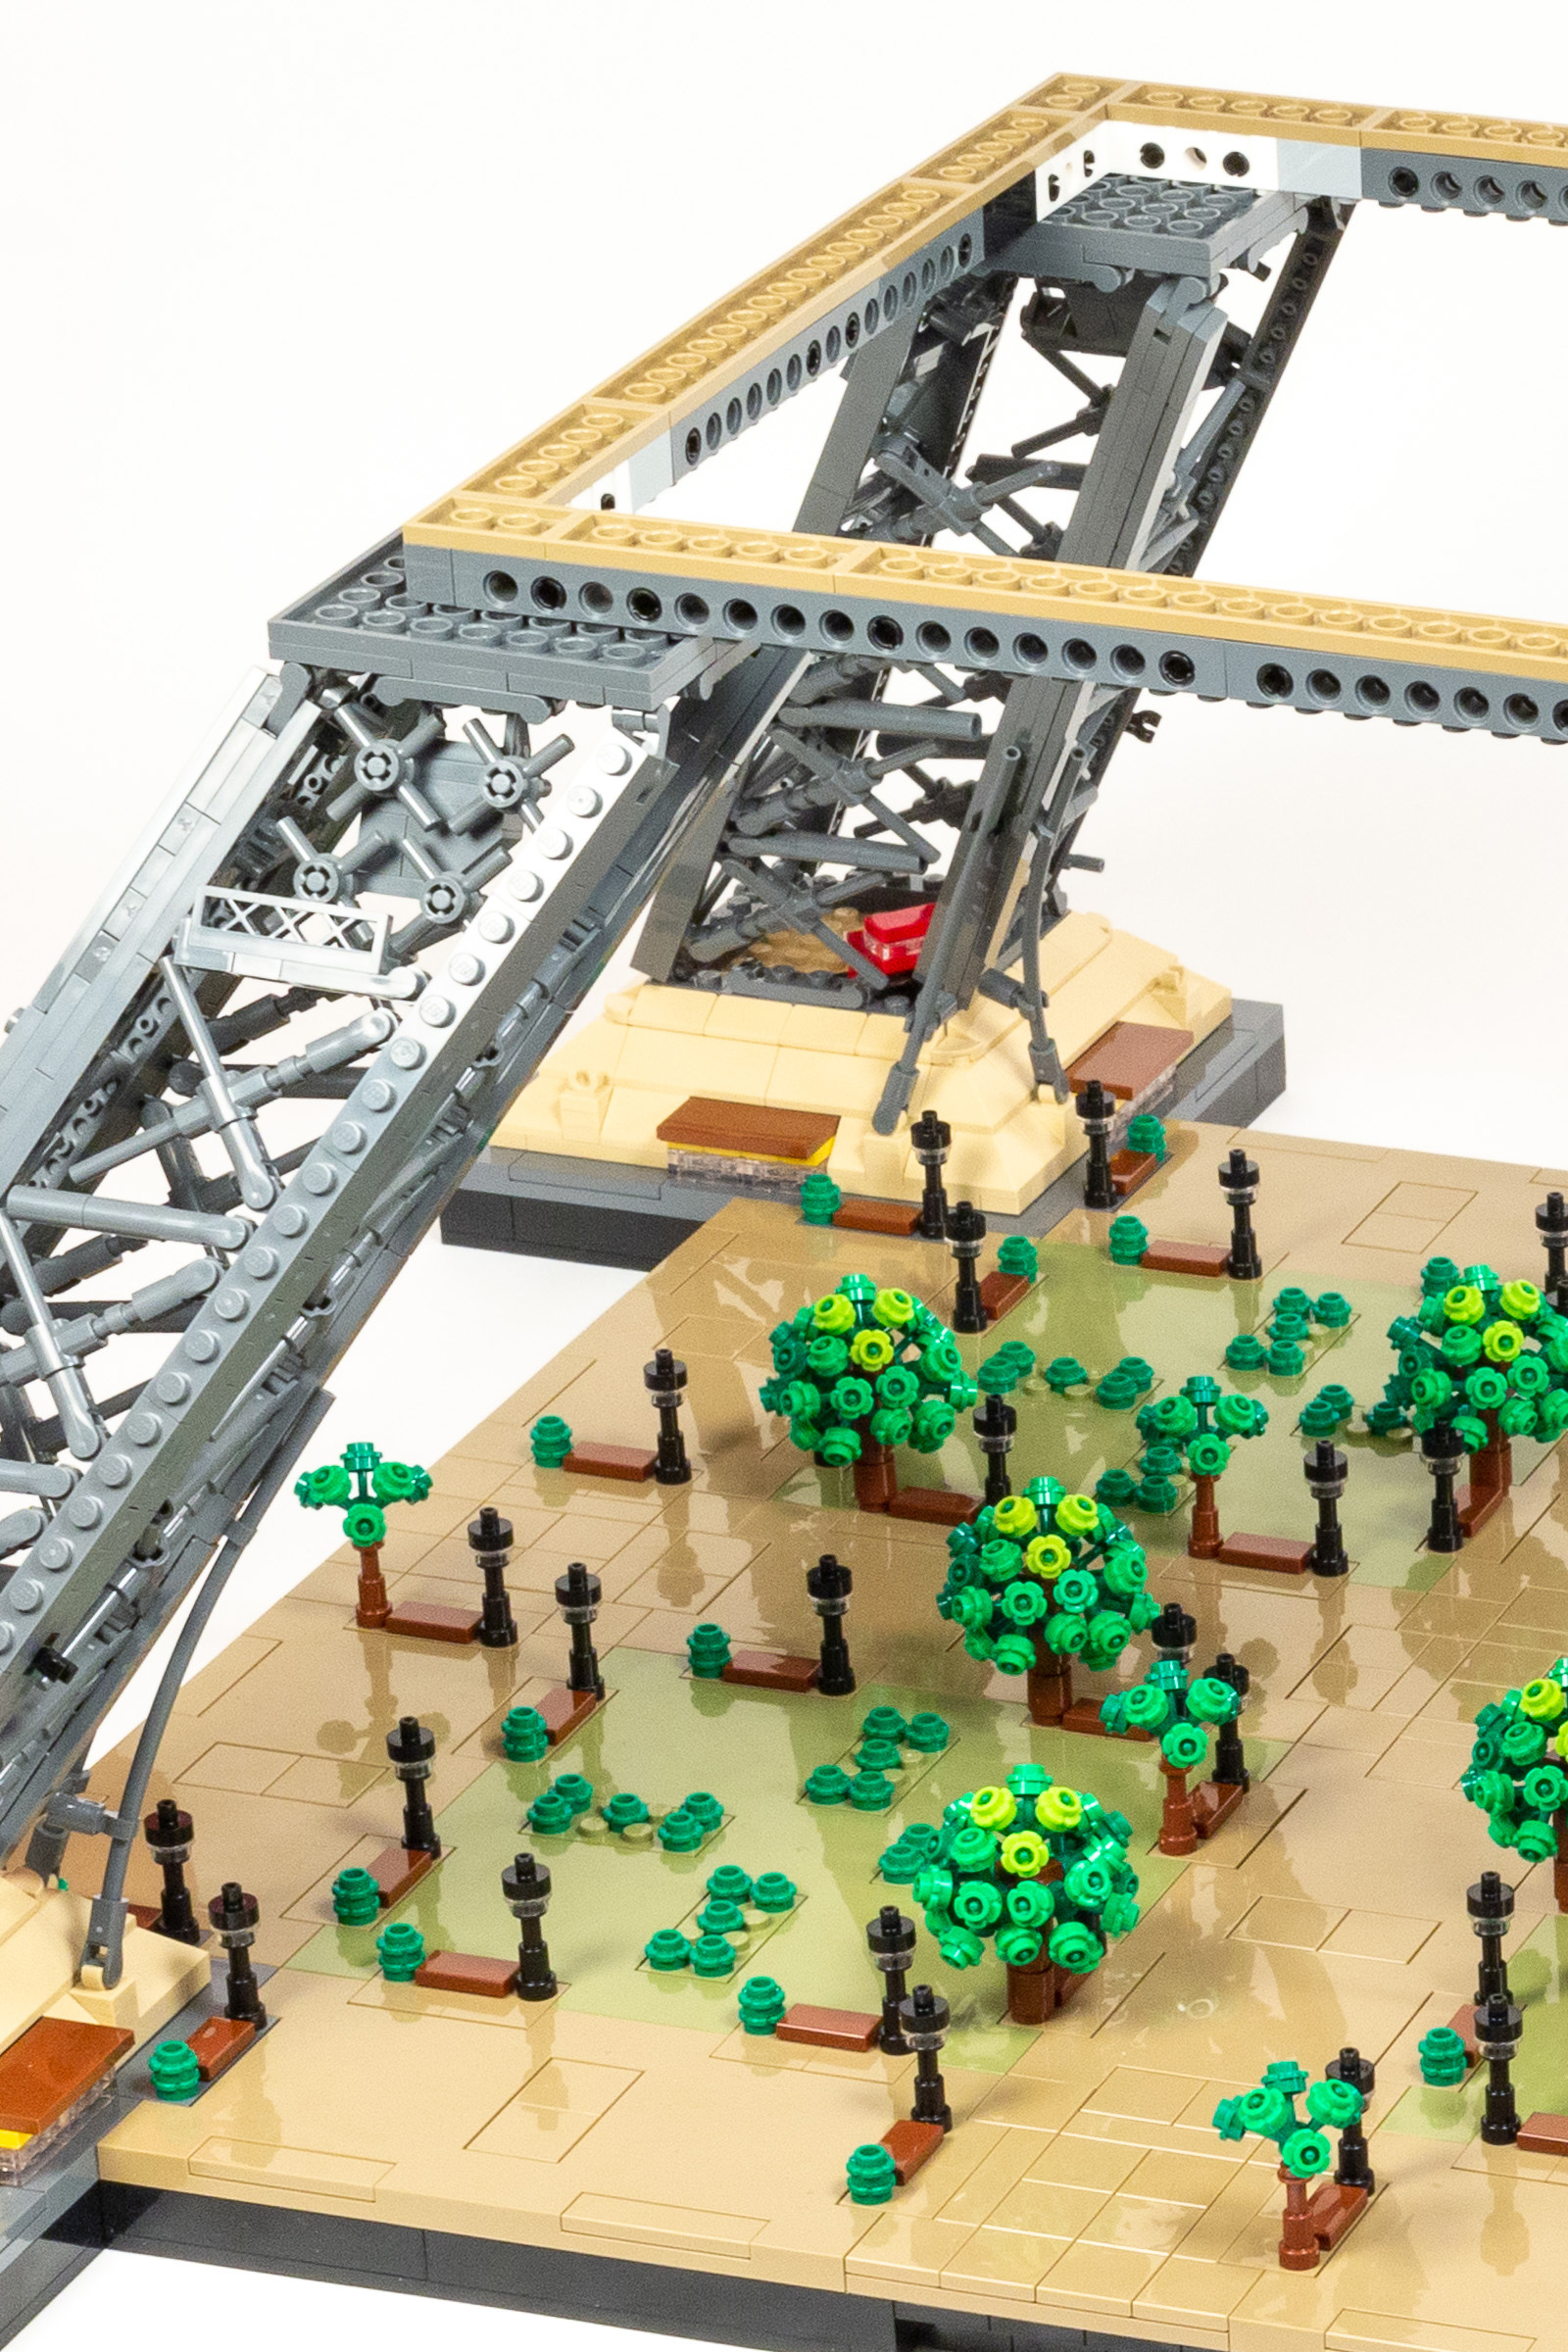
By contrast, The Eiffel Tower is tall and airy — It really catches your eye, and is sure to be a conversation starter. The open lattice structure results in lots of open areas for light to permeate the structure and cast interesting shadows in your room. This makes it feel a lot more lively and dynamic, which I strongly suspect will keep it from rowing stale.

It is hard to get a sense of how big the finished model is. Here’s how it compares to a stack of some of the largest LEGO sets ever created.
It is important to note that it is a very repetitive build which features a lot of intricate clip / bar connections, which are slower and more uncomfortable to do for hours at a time than simple brick stacking. Further some reports indicate that it is very fragile.
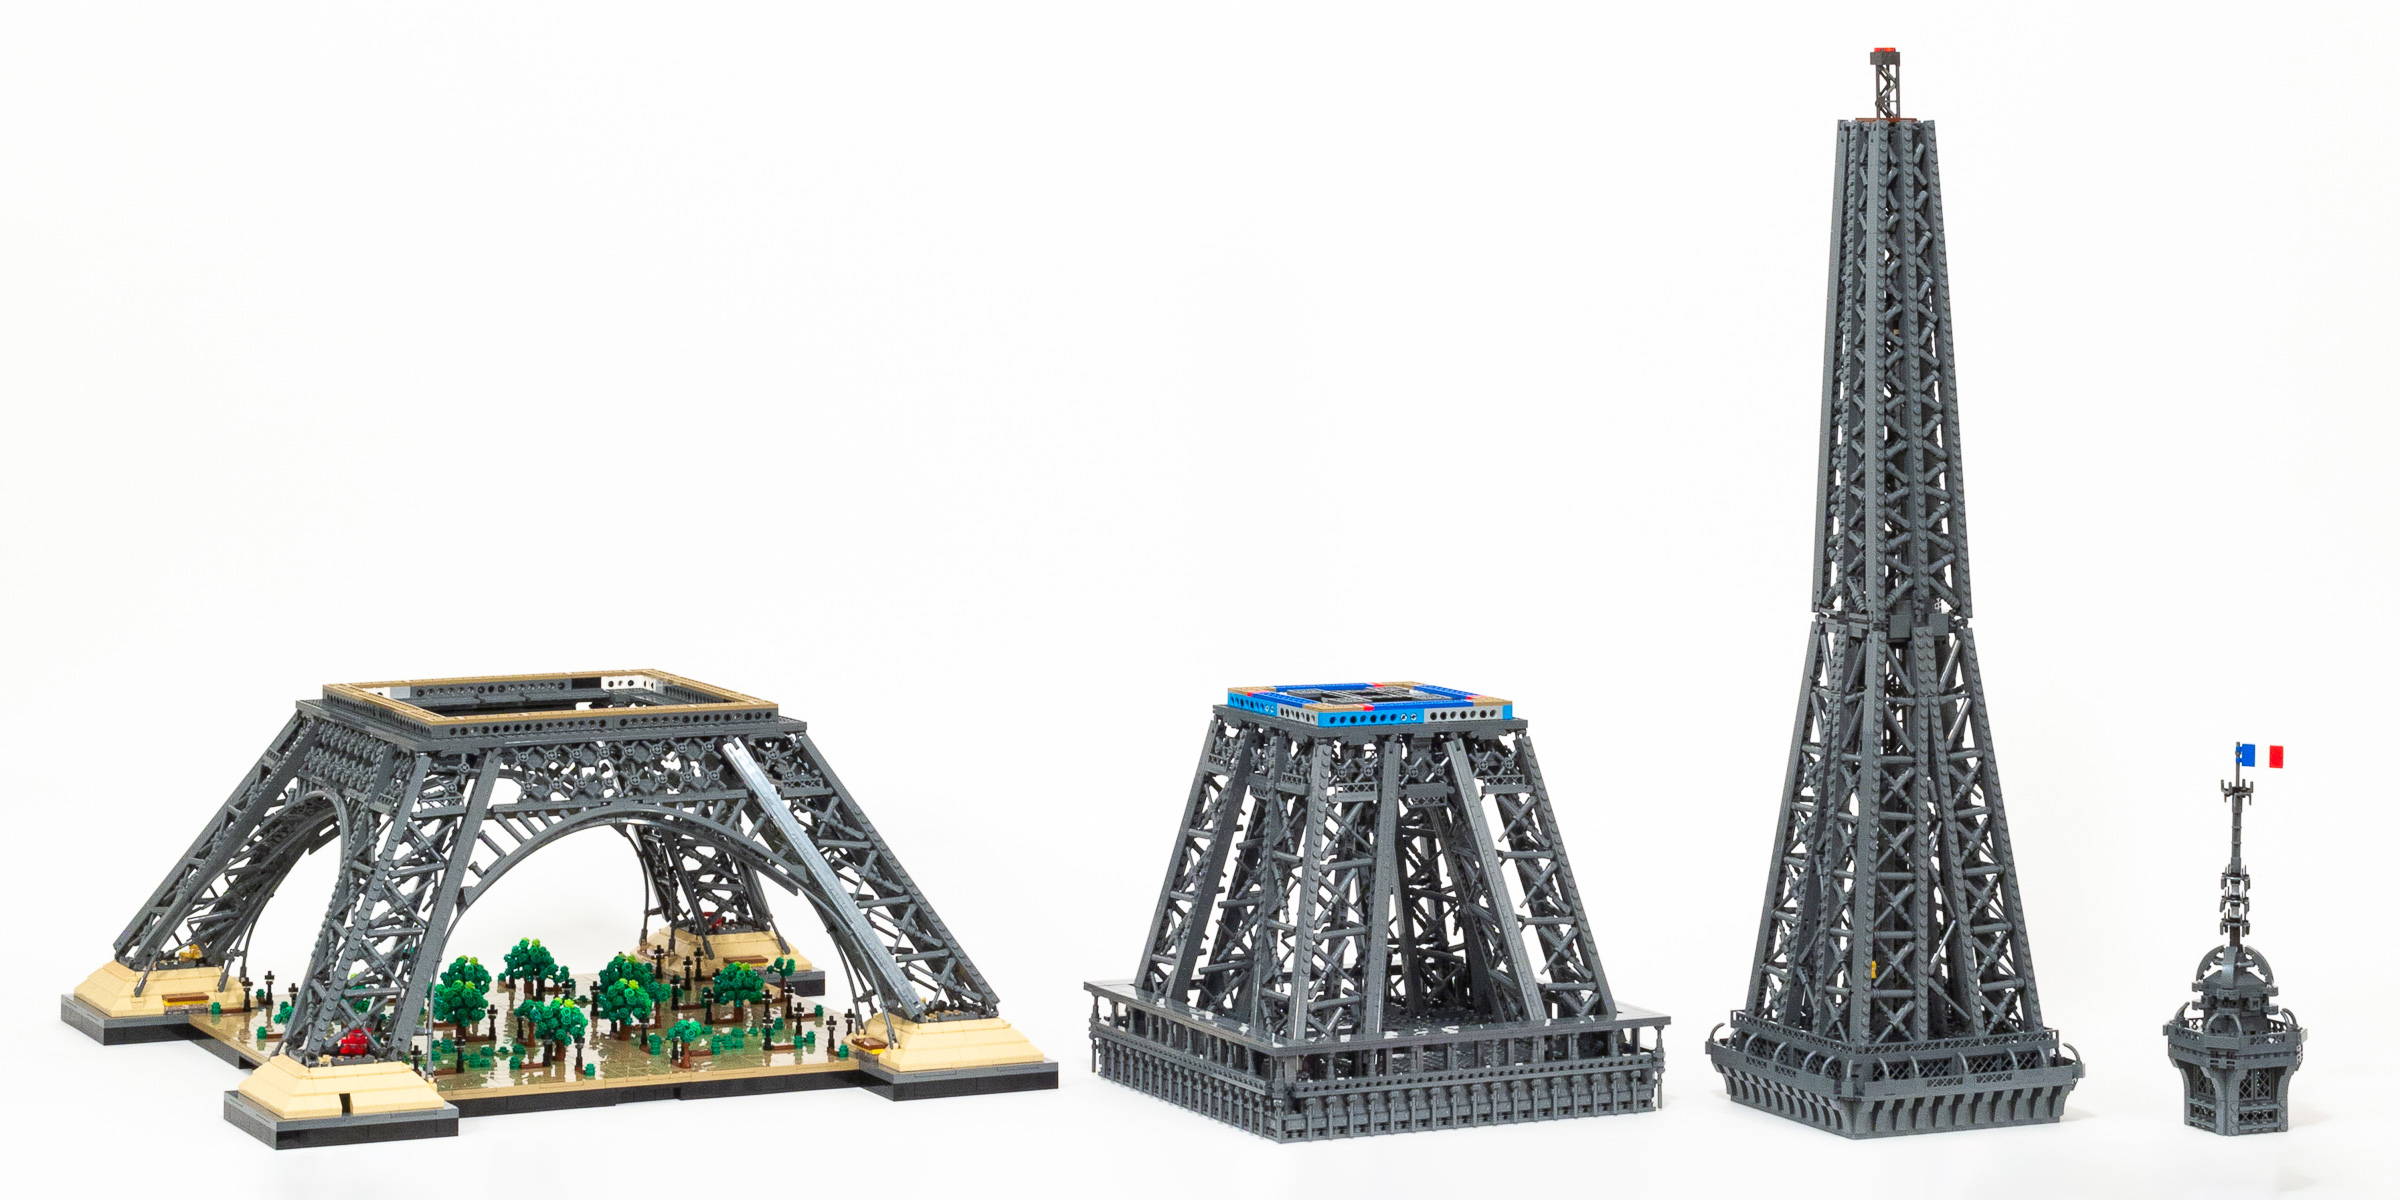
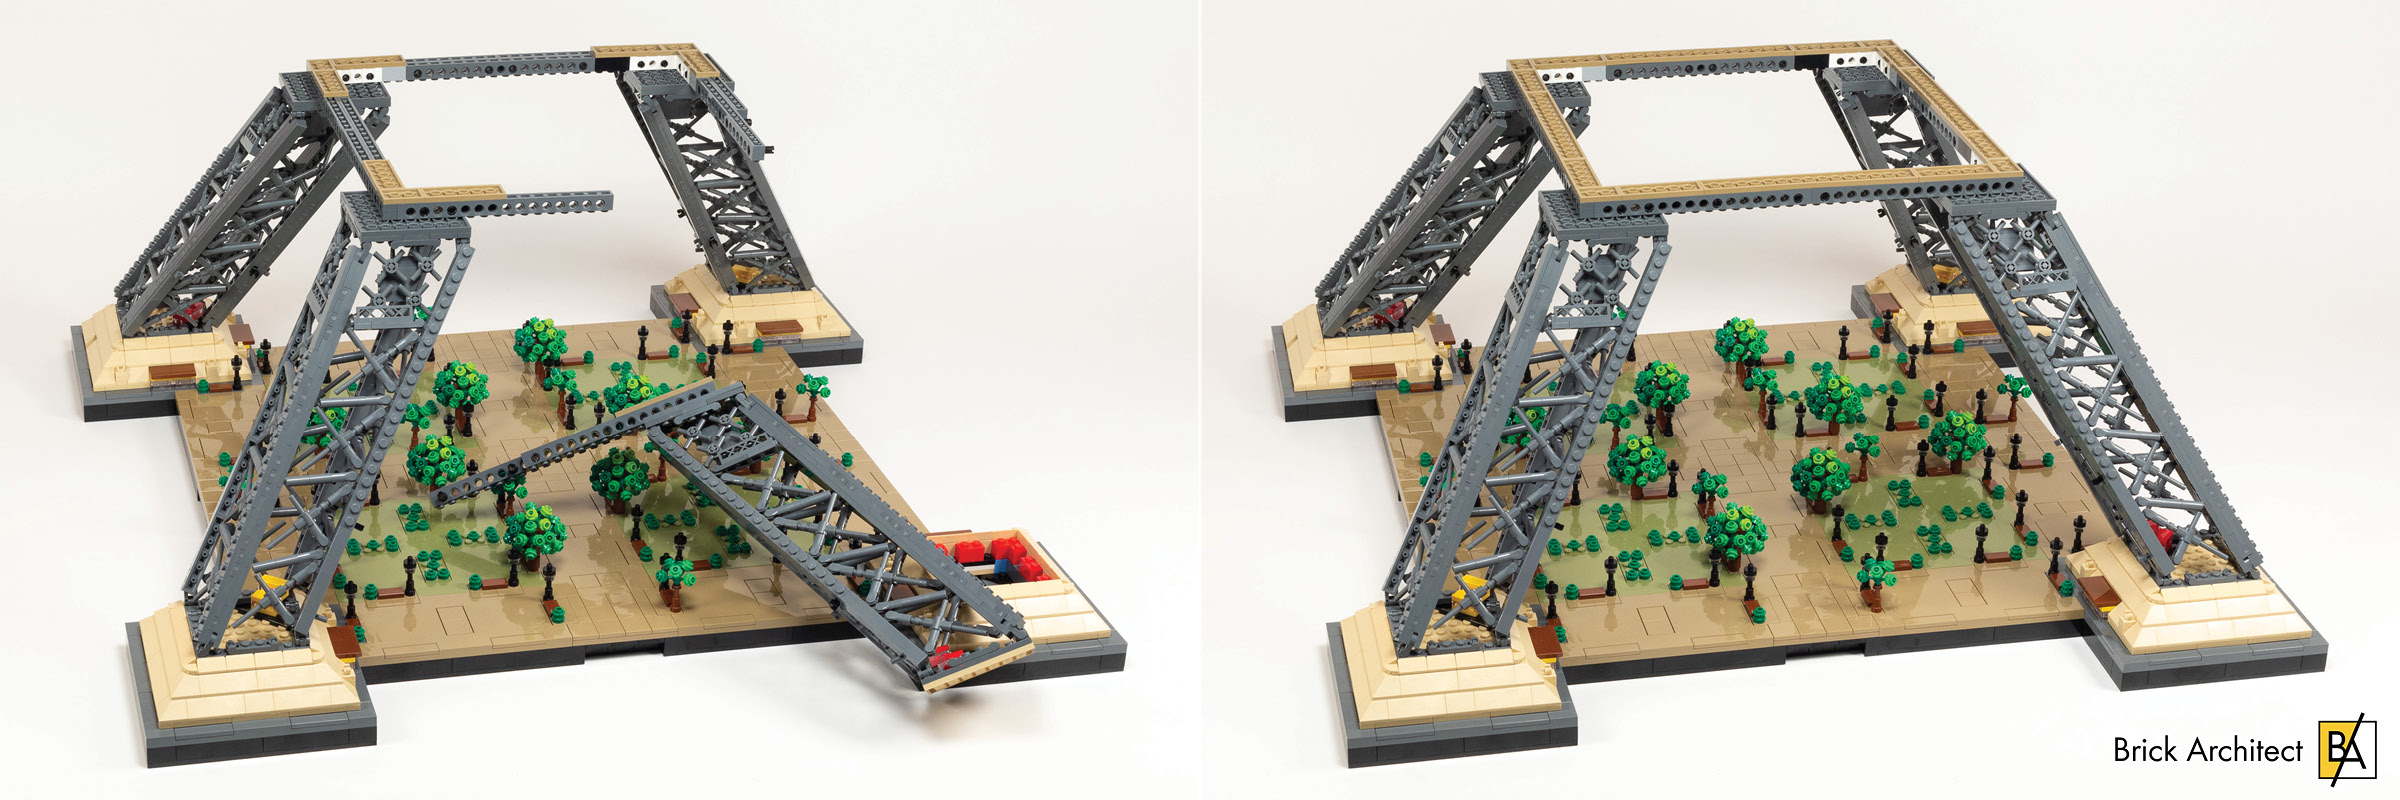
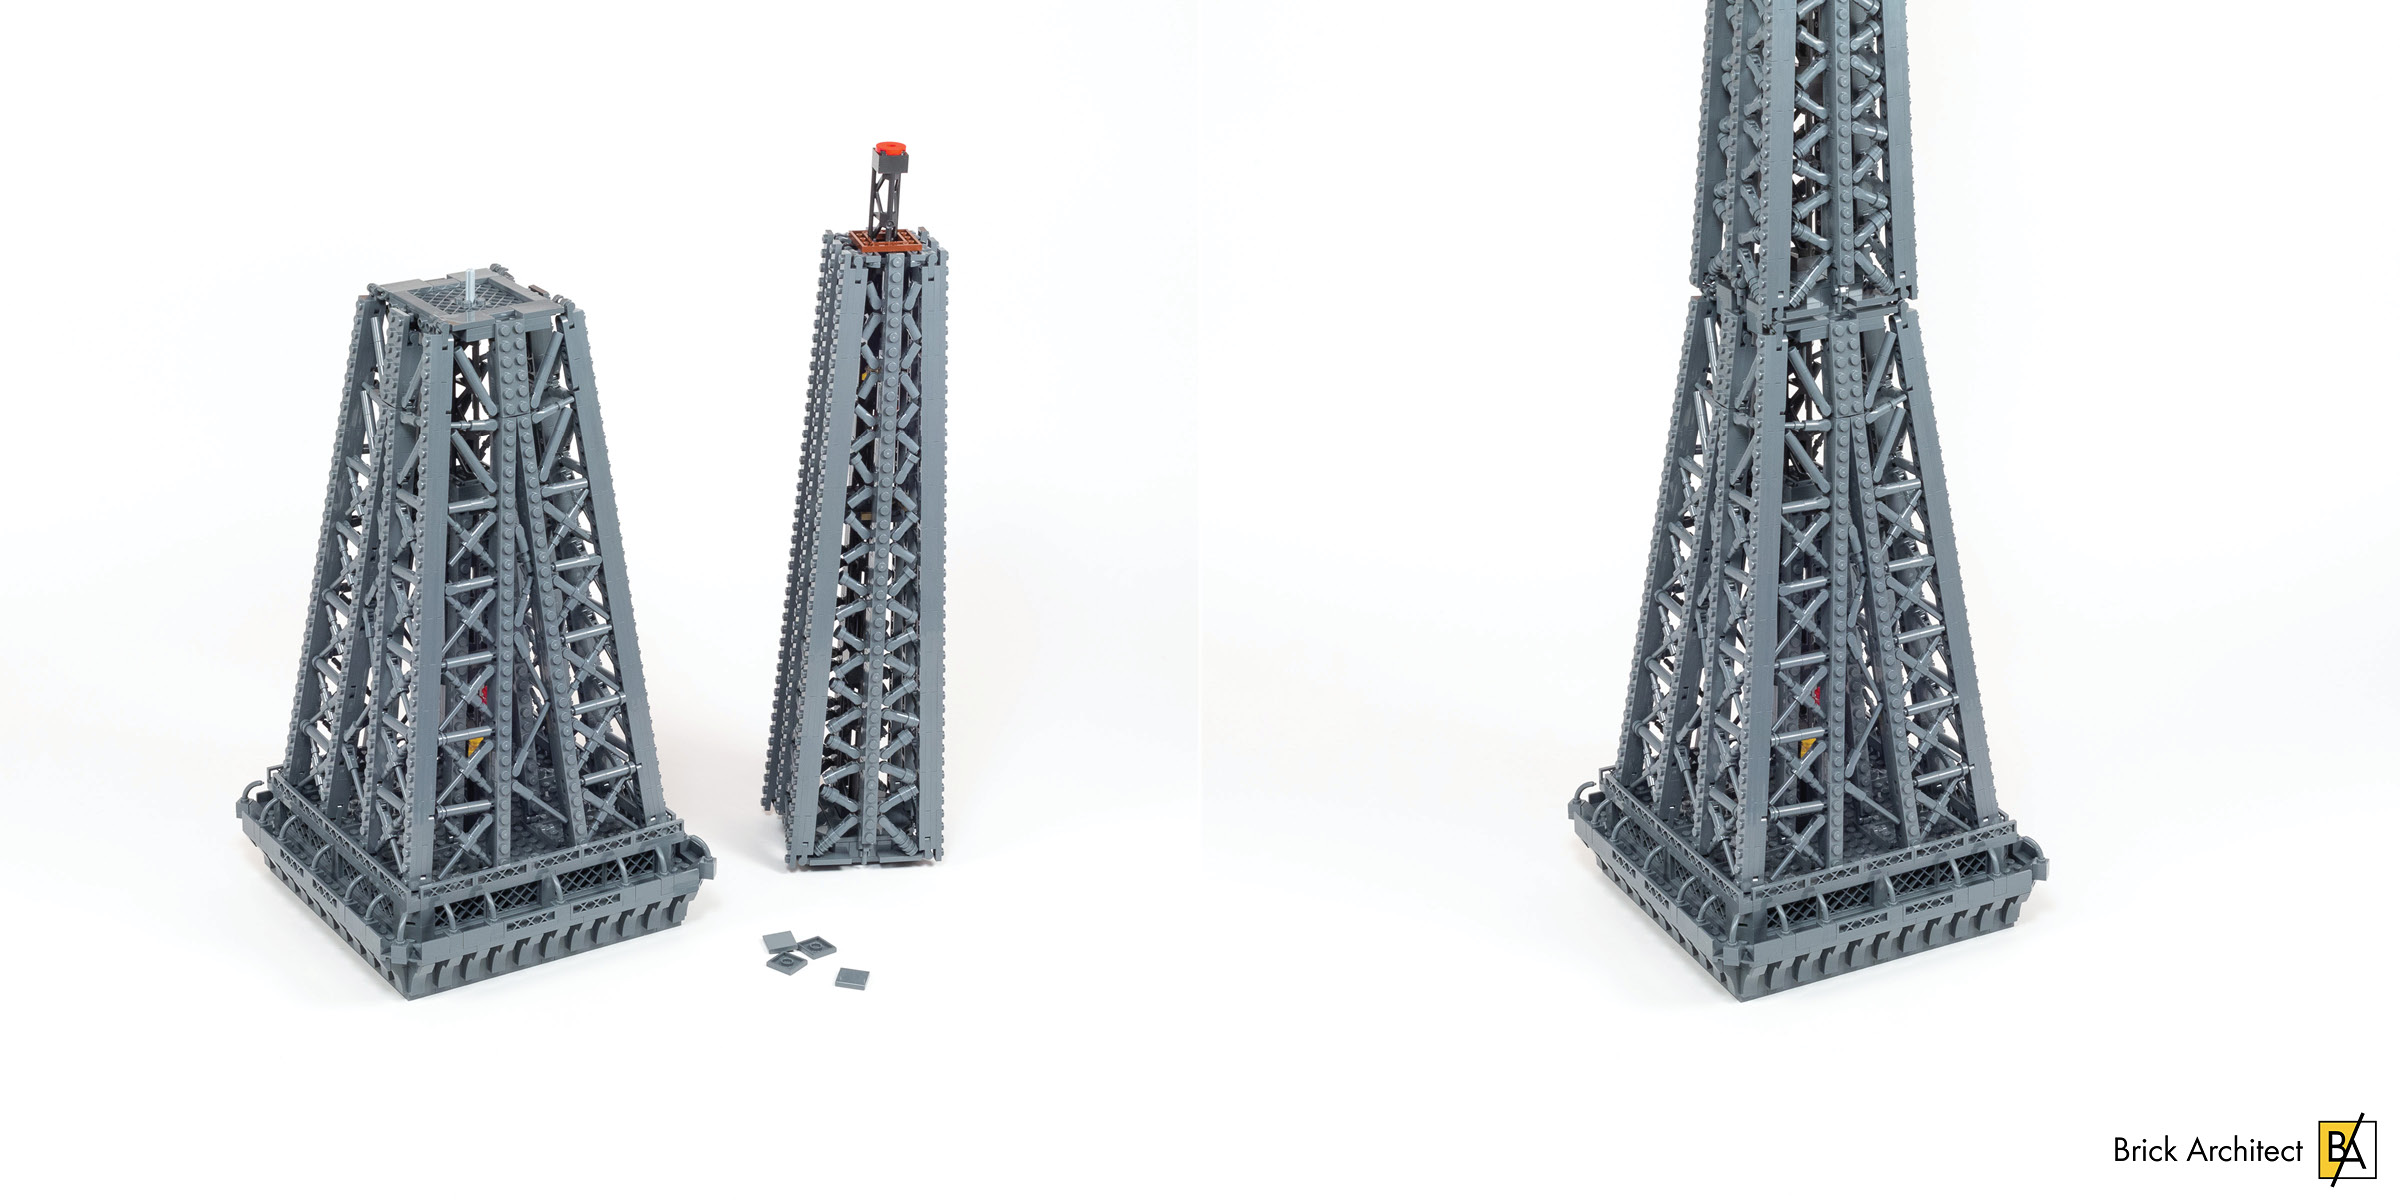
You are supposed to remove all four modules before attempting to move the model.
On the balance, this set earns a Recommended (4/5 star) rating, but only if you have a large enough room to allow the model to look it’s best. That said, I may revise it down if the reports of collapsed towers continue – a LEGO set that can not stand up to gentle prodding without imploding is a serious problem.
Did anyone have problems having pieces staying together?? Has anyone ever used glue to help??
It is pretty sturdy once assembled, and good enough for display in a home.
If it were displayed in a public place where kids might grab it, even glue is probably insufficient for a model this tall. Large display models in LEGOLAND parks have a metal structure hidden within to ensure stability.
I’m surprised in your comparison with other large LEGO sets there was no mention of the Titanic- a set that has tge next-highest piece count and similar challenges with display space.
Thomas,
I did not compare to the Titanic, simply because I have not built that set, nor have I seen it up close. I was not too worried about the omission since I included a comparison with the previous architecturally focused model – The Colosseum.
—tom
I don’t know if you have this set, but there is a super mini Eiffel Tower in bag 6 and consists of 6 pieces. There is also a “Paris” postcard with the tower on it.
I personally don’t care about the injection mould issue with entry and exit points, unless we see something similar to the injection imprint on window panes such as what happened with Cafe Corner, 10182.
That’s fair, but I think it is important to raise awareness of the issue, especially since the markings are very visible on the completed Eiffel Tower model.