
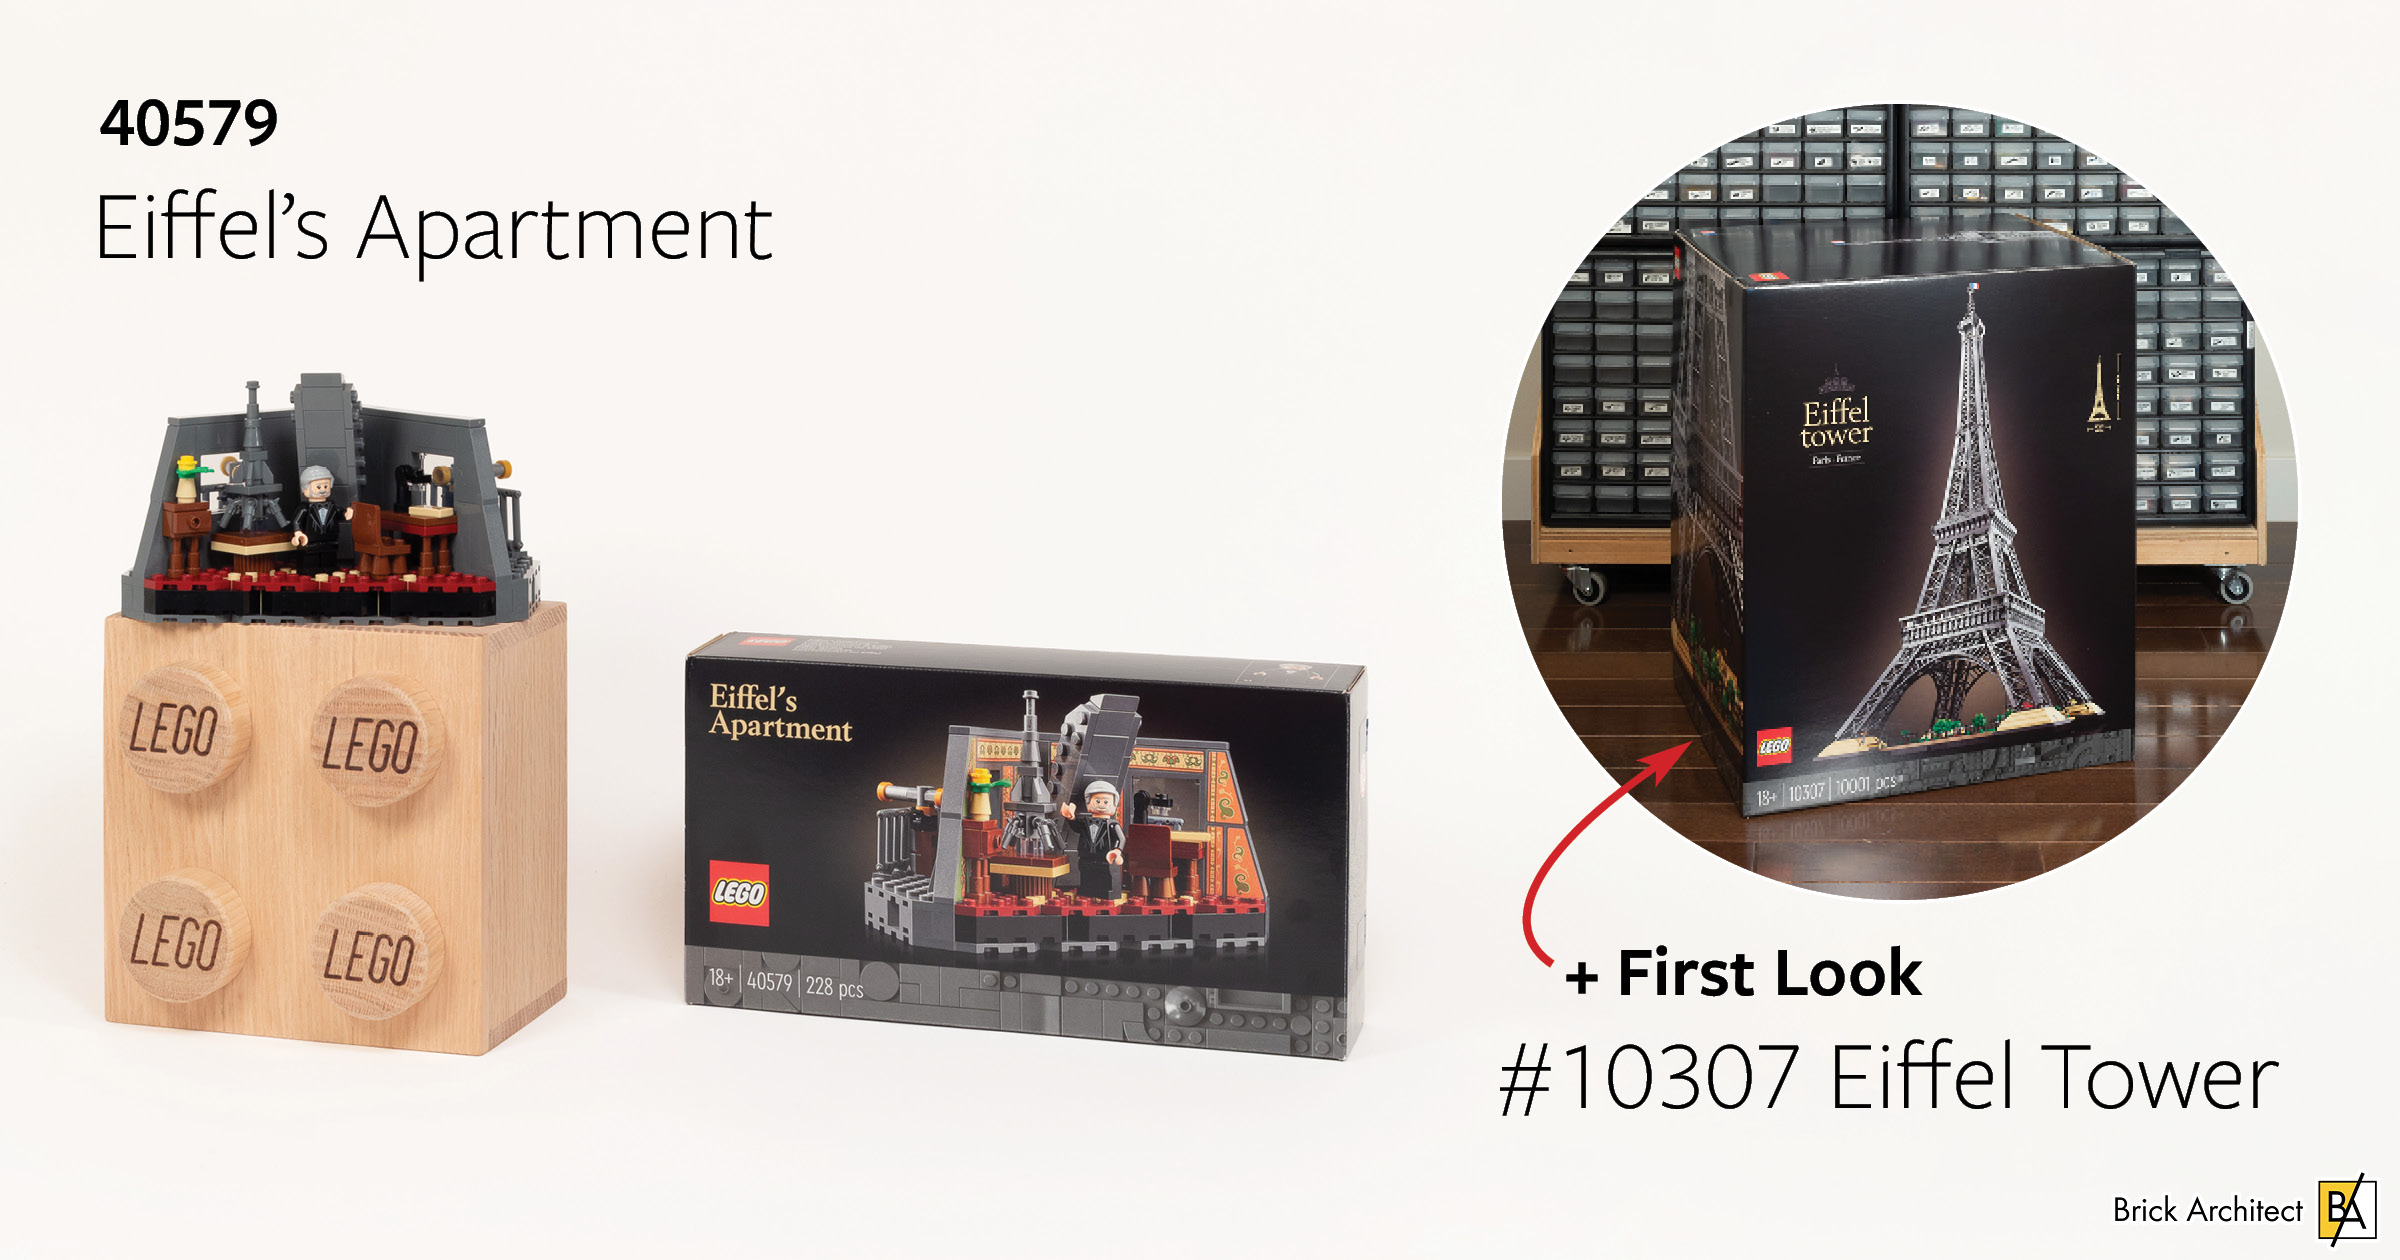
Review: #40579 Eiffel’s Apartment (and first look at #10307 Eiffel Tower)
Whether you want to learn about this gift-with-purchase set or you just want a sneak peek at building the gigantic Eiffel Tower set, we’ve got you covered!
#40579 Eiffel’s Apartment is a small model that will be distributed as a gift-with-purchase, designed to complement the release of the massive #10307 Eiffel Tower set. On the one hand, it makes perfect sense — complement a massive architecturally focused set with a tiny story that inexorably linked with its creation. On the other hand, it is a very small model with a cramped composition, and I’m not sure that will have broad appeal.
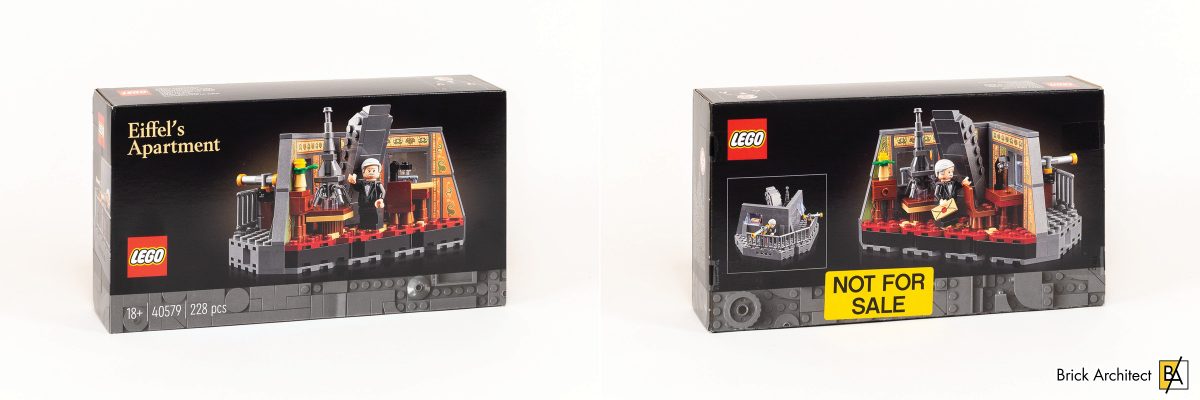
#40579 Eiffel’s Apartment – Box front and back.
#40579 Eiffel’s Apartment will be available as a gift-with-purchase at LEGO stores starting November XXX. The minimum purchase to receive the set will likely be $19.99 based on previous GWP sets of this size.. It contains just 228 pieces and is marked for ages 18+ despite the small size and (seemingly) simple construction techniques. It is one of the smallest and simplest sets with the 18+ / Adults Welcome packaging.
First Impressions
I had heard that Eiffel’s Apartment would be the subject for a gift with purchase this fall but did not put much thought into it. That’s because the larger Eiffel Tower set had captured my imagination instead. I felt like any set designed to complement a massive architectural model in the style of the Creator Expert series would be dwarfed by its larger sibling. While doubtful due to differences in scale, I thought it would be cool if the gift-with-purchase set could replace a module in the larger model, adding an interior to a section of the larger model.
Box Impressions:
When the box arrived, my limited enthusiasm waned further because the composition of the vignette is very awkward. The front of the box shows a tiny room with massive metal beams jutting awkwardly upward, a rough brick-built model of the finished building on the left, and a small desk on the right. Standing out even more is the garish wallpaper, which you can easily see is achieved using stickers. (I hate stickers.) The Minifigure of Gustave Eiffel looks nice, with a formal suit, gray hair and a pensive smile.
The back of the box shows a small balcony on two sides with a pair of telescopes that Gustave might have used to look at famous landmarks around the city. Overall, it looks like an awkward homage to a person whose main claim to fame is the building itself.
Contents
The box is pretty small, and features the 18+ / ‘Adults Welcome’ branding along the bottom edge — this time in 199Dark Stone GreyDark Bluish Gray.
- Box Size: 26.0 x 13.9 x 6.0cm (10 1/4” × 5 1/2” × 2 3/8”)
- Box Weight: 347 grams (0.77 lbs)
- Box Density: 347 grams / 2.17 Liters = 160 g/L
- LEGO Parts Weight: 221.7 g (0.49 lbs)
- Weight-per-piece: 221.7 grams / 228 pieces = 0.97 g/piece.
- Price per piece: $19.99 (nominal) / 228 pieces = $0.088 per piece.
- Price per gram: $19.99 (nominal) / 221.7 g = $0.090 per gram.
While the set can not be purchased separately, it will likely have a $19.99 price inside the LEGO database, which means that you will have to “pay” that amount if you return the set which you bought to earn the GWP. I’ve calculated the Price-per-piece/gram based on this price.

The box contains three bags of parts, but they are not numbered like in larger sets.
The fact that the set appears to have been packed in Billund is interesting — The LEGO Group have very little packing equipment still in Billund, with most of their european packaging coming out of Kladno, Czech Republic. (As we recently learned from Rambling Brick, Kladno is the first factory to shift from plastic to paper bags inside the box.)
I strongly suspect that this set was not produced in large quantities. I would not be surprised to learn that even those copies sold in North America will be packaged in Billund as well (but with slightly different packaging that includes just English, Spanish, and French.)
Box contents:
- 1x large unmarked bag.
- 1x medium unmarked bag.
- 1x small unmarked bag.
- Sticker sheet (marked 10100592/6407373).
- 60-page instruction booklet. 19.5 x 12.5 cm (7 3/4 x 4 7/8”).
Build Process
At just 228 pieces for this set, the larger set that inspired this GWP contains about 44 times as many parts. If there’s any hope that I will be able to build the larger model in a reasonable amount of time, I need to warm up by completing this tiny model in 30 minutes or less!
Given the small number of pieces, I wasn’t all that surprised to see no numbered bags for this set – just like in the 1980’s, you get to dump out all the parts at once!
The build process begins by building a solid base that has two layers of plates sandwiching a layer of bricks. This uses a lot of “angle” bricks with 45(deg) angle since the base is not rectangular. Also notable are the clips installed at a 45deg angle using a 2×2 turntable.
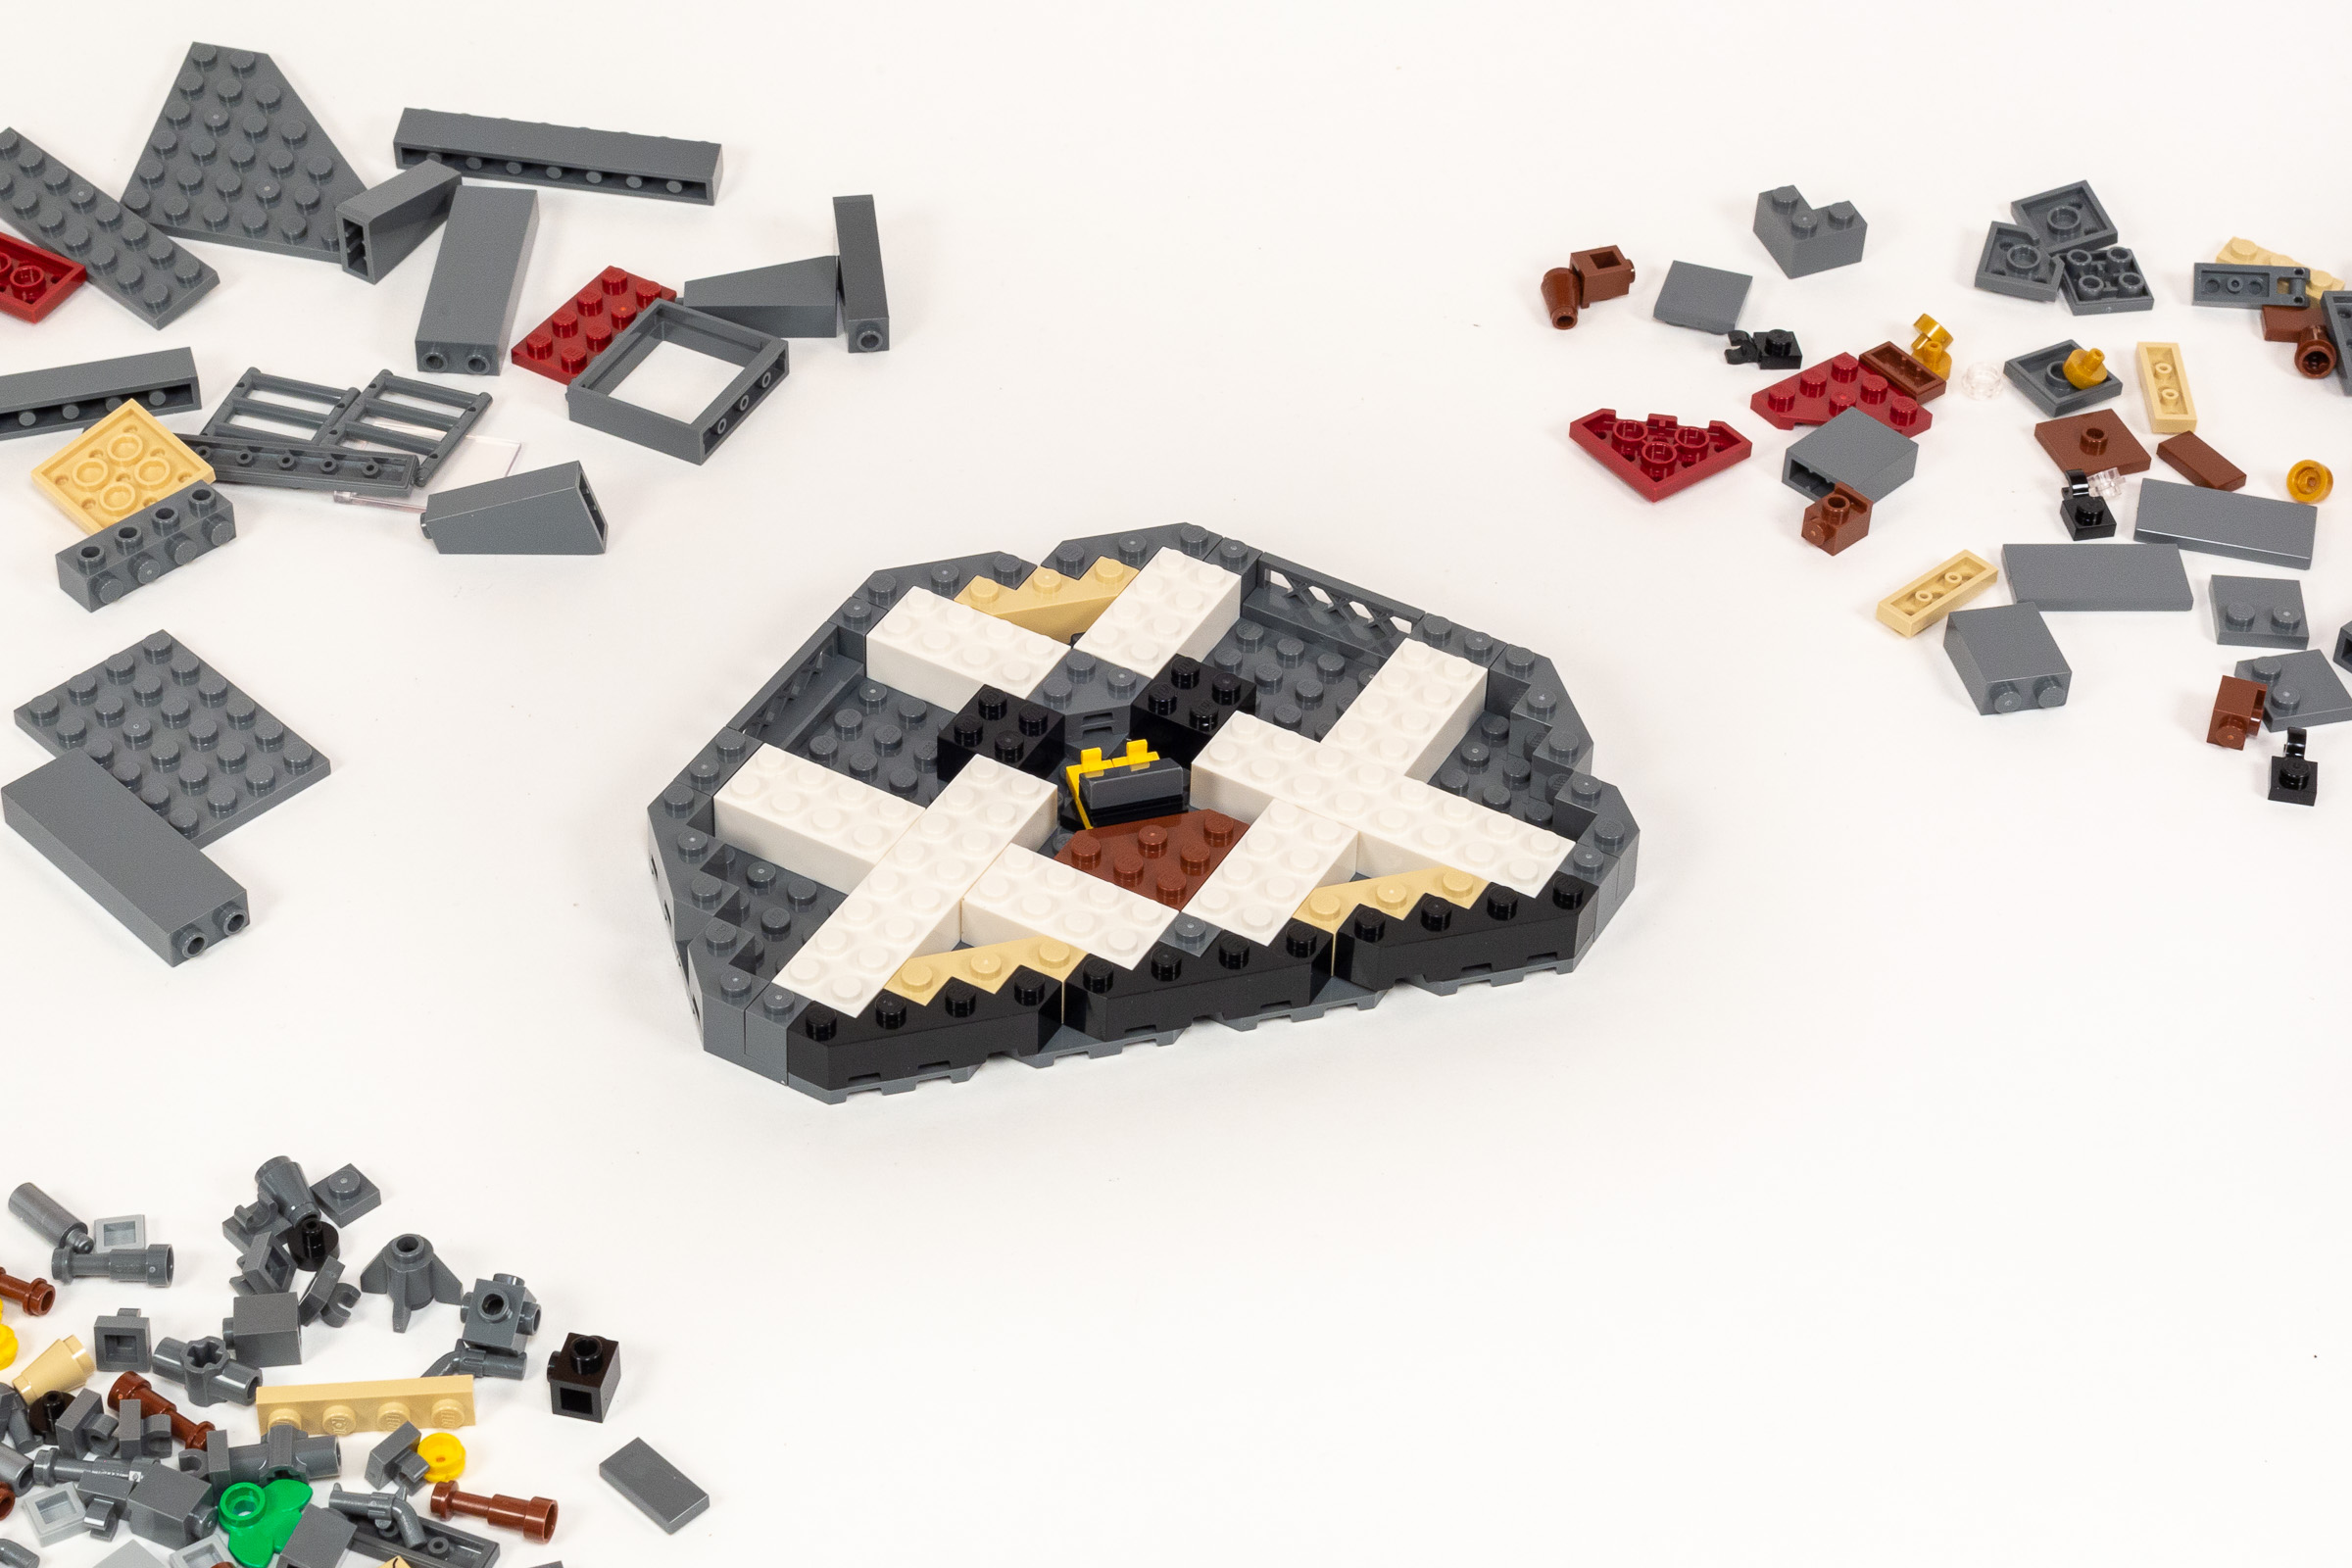
The strong base is built at an angle.
Afterwards, we build the walls, which go quickly if you skip the stickers as I did. (It would have taken a lot longer if you added all twelve of the garish wallpaper stickers.) After that, we build a SNOT assembly with bar connection on one end which creates the diagonal support which goes through the middle of the room.

Assembling the interior furniture.
From there, we build a selection of interior furnishing, including a table on the left with a microscale Eiffel Tower model. I do not find it to be a particularly convincing rendition unfortunately, and I’m not a fan of the decision to support it using a transparent element. We also have a small desk and chair, and a dresser with a plant on it.
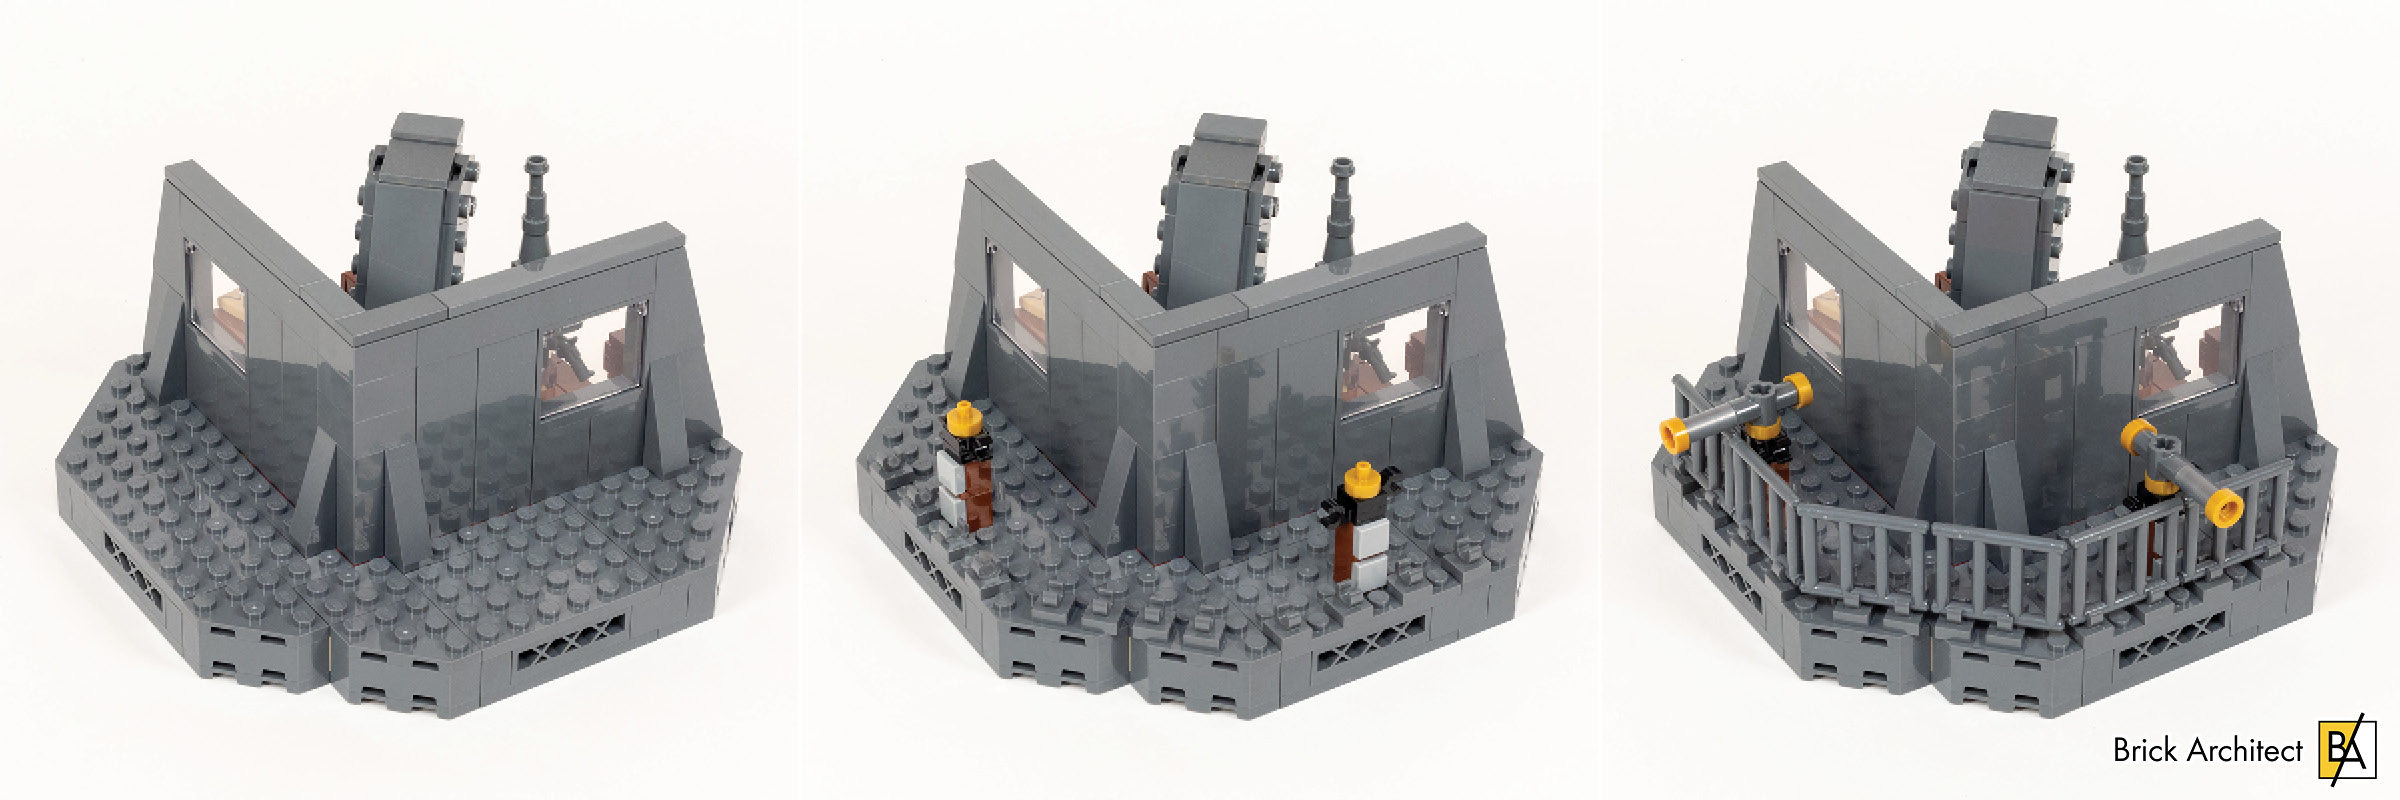
Exterior railing and telescopes.
Finally, we turn the model around a build a simple railing and two telescopes on stands. It doesn’t add a lot to the model when displayed on a shelf, but it does give a bit more context into how this apartment would have related to the building as a whole.
Build time: 20 minutes (without stickers).
Conclusion
I am slightly disappointed by this set, even though it is a “free” GWP set. It is similar in scope and size to the #40531 Lars Family Homestead Kitchen promotion earlier this year, which had even fewer parts, but looks better on a shelf. It’s also worth noting that set ended up with a high resale value because of the unique Aunt Beru minifigure… there are a lot of Star Wars collectors out there!
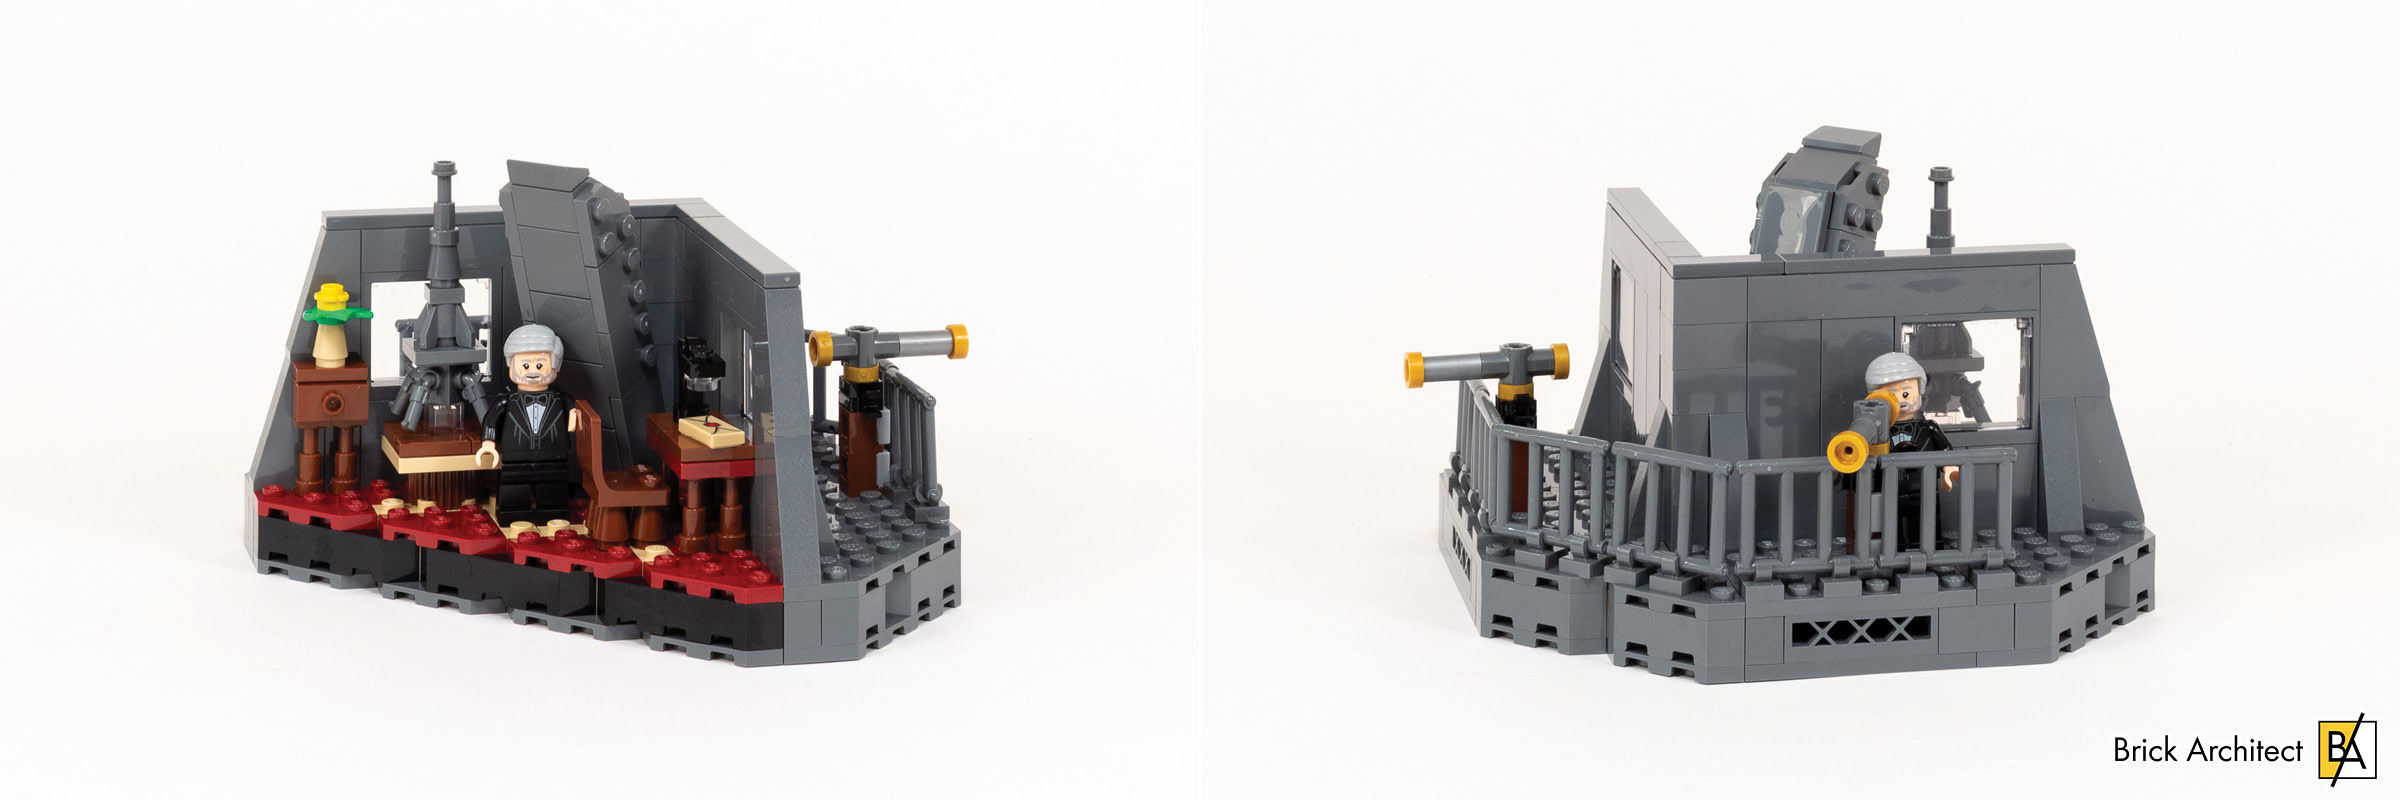
The model looks a little better when viewed from the front.
I’m not a fan of stickers, and a lot of them are employed to create wallpaper on the interior. Most of all, it is an awkward composition, which does not look good from any angle.
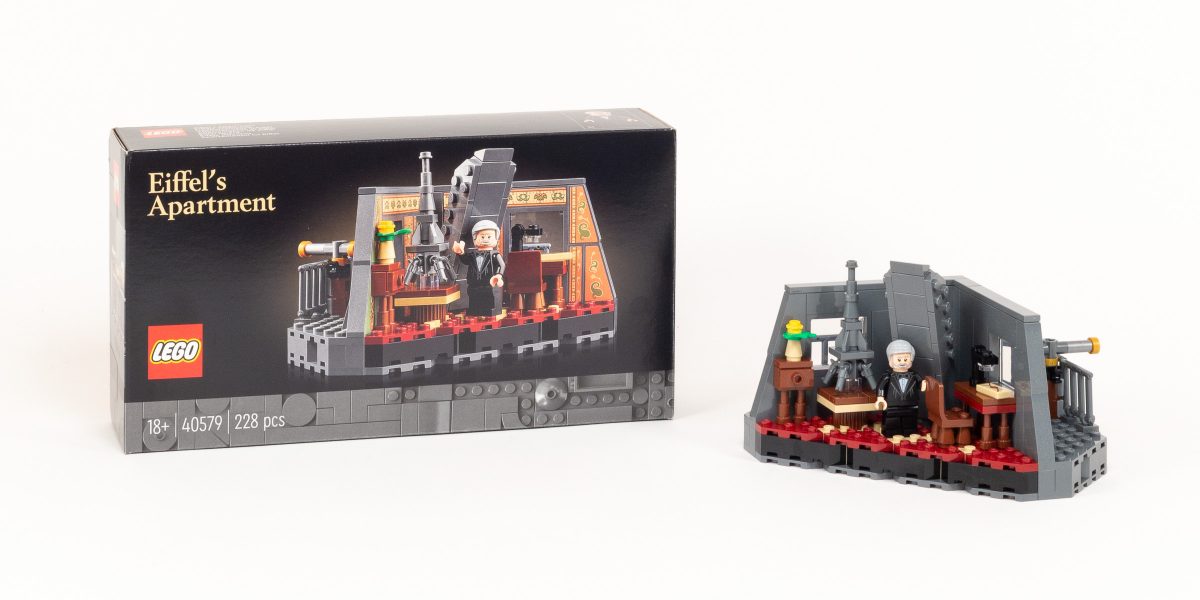
#40579 Eiffel’s Apartment
I’m also disappointed that neither the instruction booklet or box explains what this model is about – no context into where the apartment is located in the Eiffel Tower, or historical information explaining why it exists in the first place. I was motivated to do some of my own research into this tiny apartment on my own, but this felt like a missed opportunity. Ultimately, it struggles to capture my attention, resulting in a middling Acceptable (2/5 star) rating.
Bonus: First Look at #10307 Eiffel Tower
I just received the massive Eiffel Tower set on Monday, which is why I wasn’t able to publish my full review yet. Nonetheless, it is one of the most exciting releases this year and I wanted to share a sneak peek at the set!
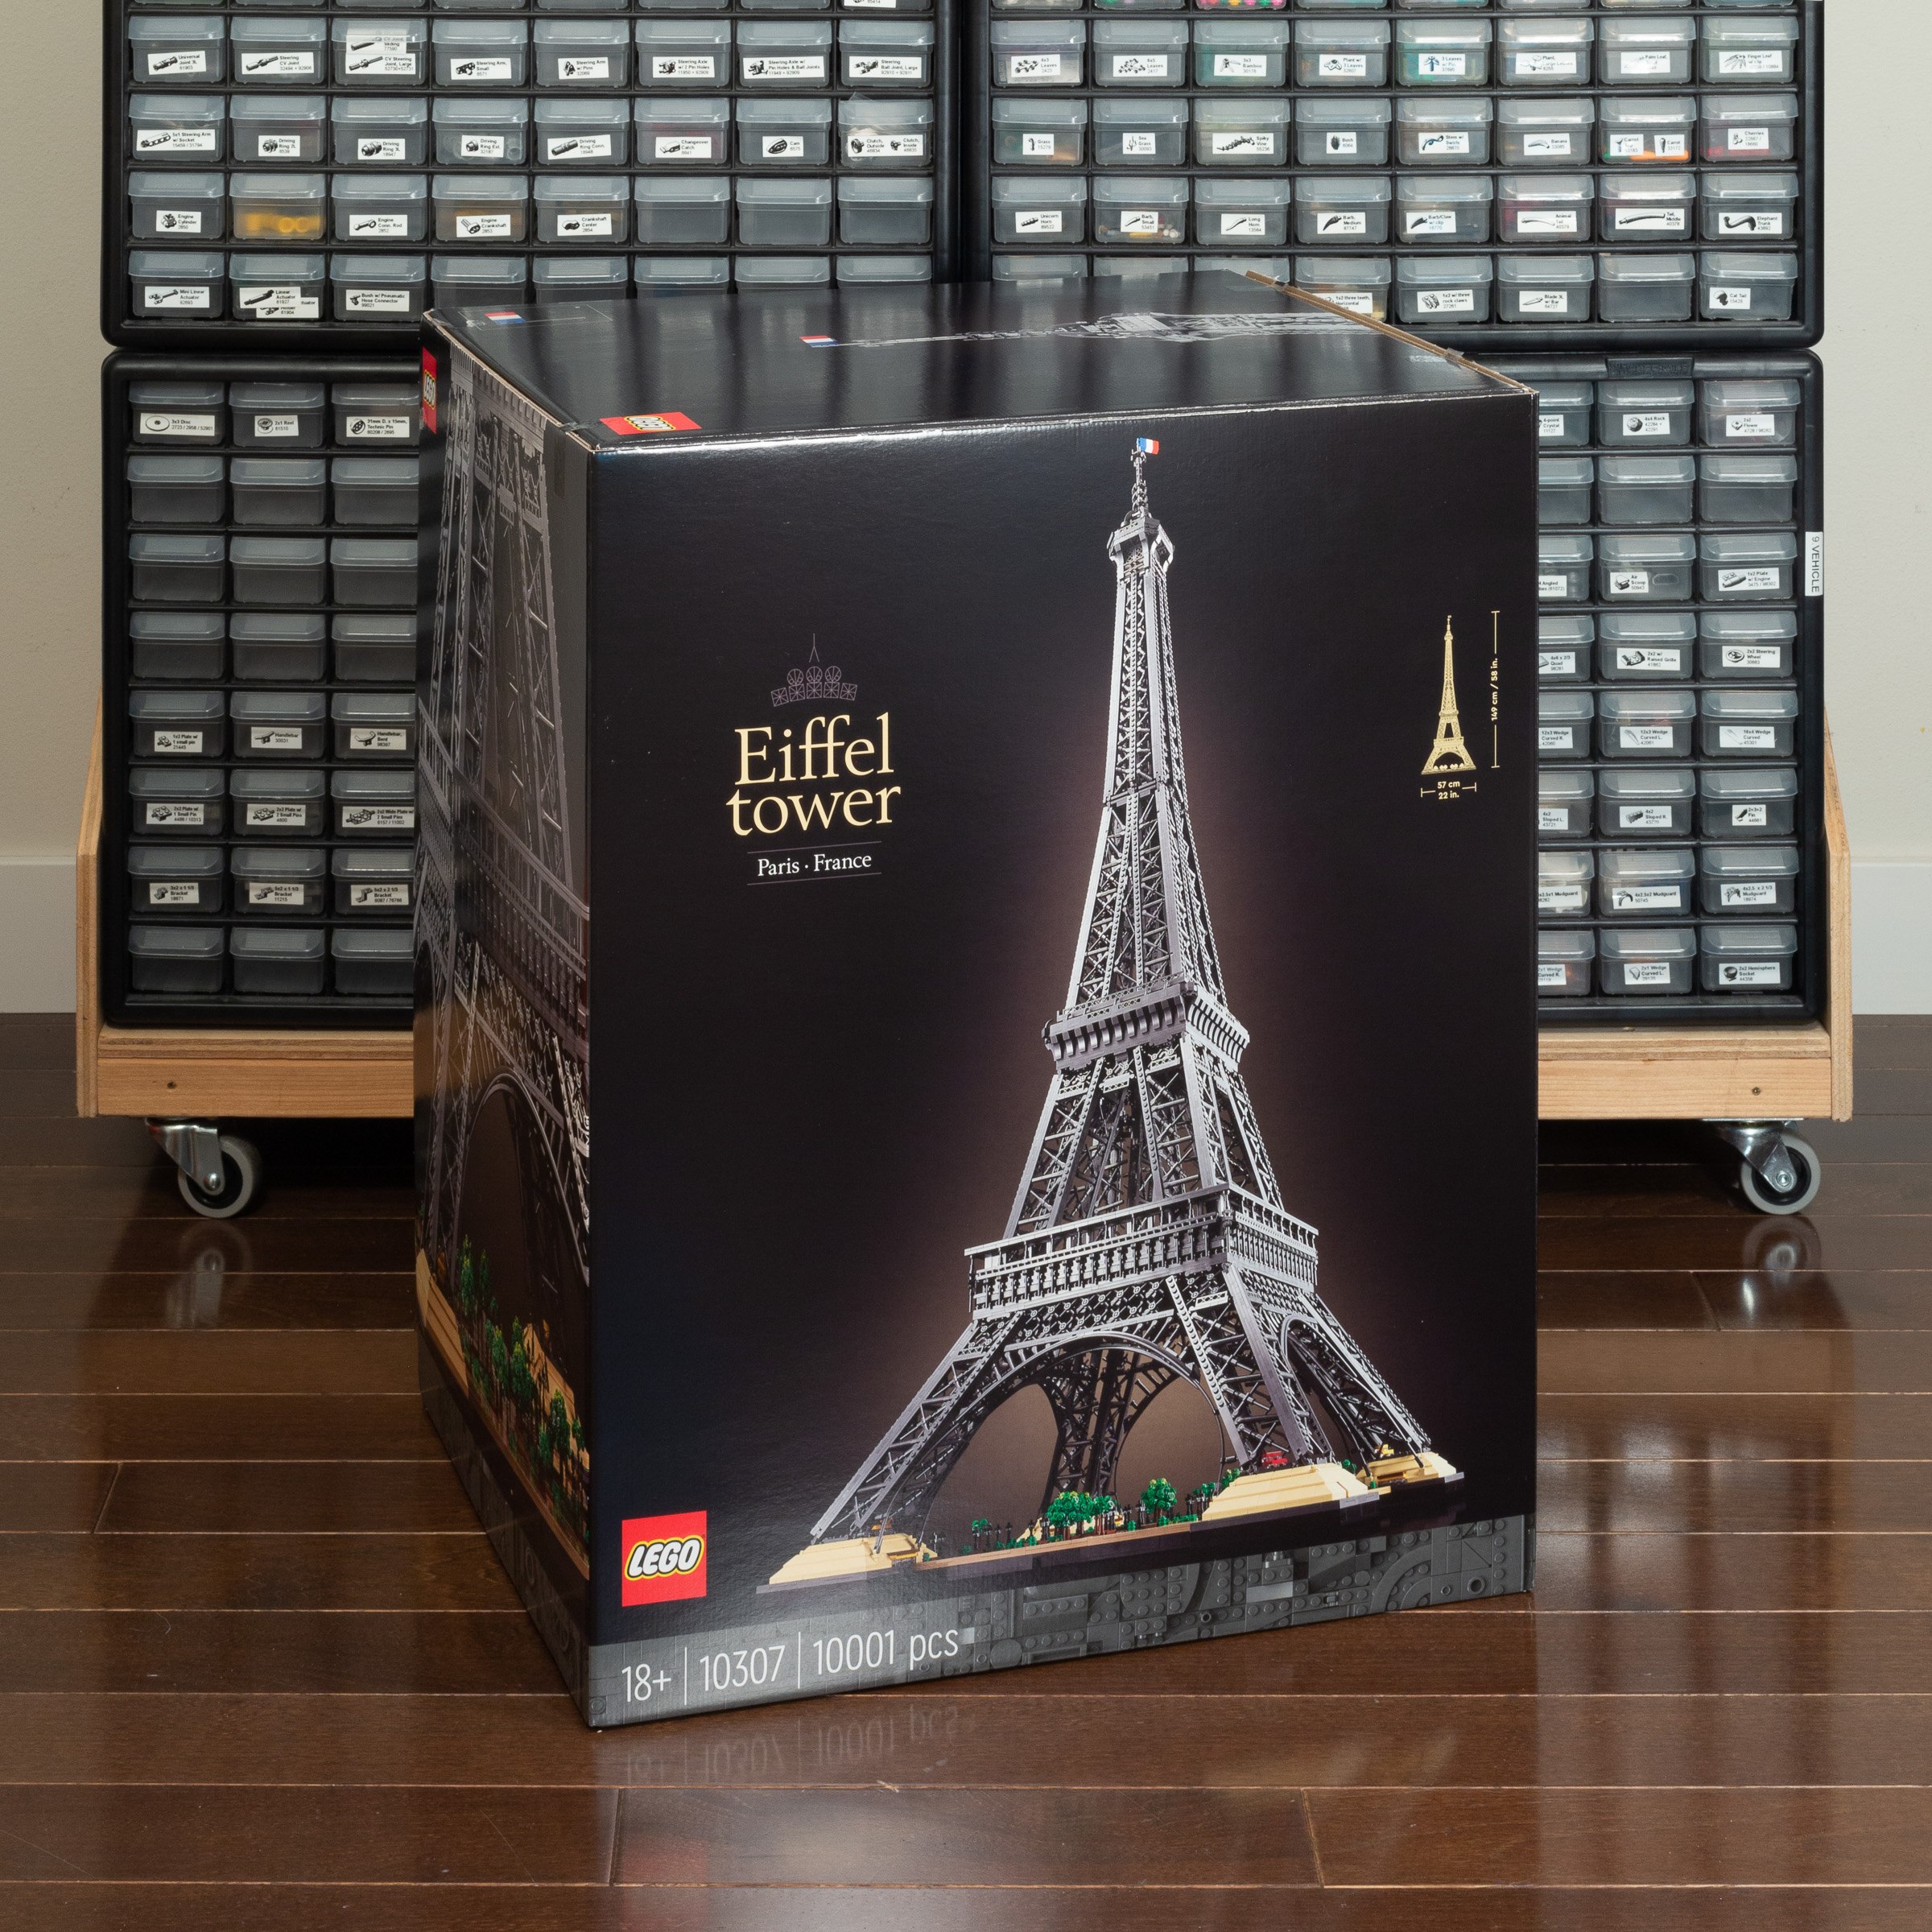
#10307 Eiffel Tower comes in a massive box!
The box alone is gigantic and heavy, matching if not exceeeding the size of the previous largest LEGO set box — #75192 Millennium Falcon. (For the final review, I am hoping to do a side-by-side comparison of the two boxes.)
Inside the box you will find three smaller boxes. Given the immense size of the big box, these three smaller boxes are quite large as well – Each one is approximately the same size as the #31203 World Map set (which still holds the record for the most pieces in a LEGO set, not to be confused for the largest LEGO set).
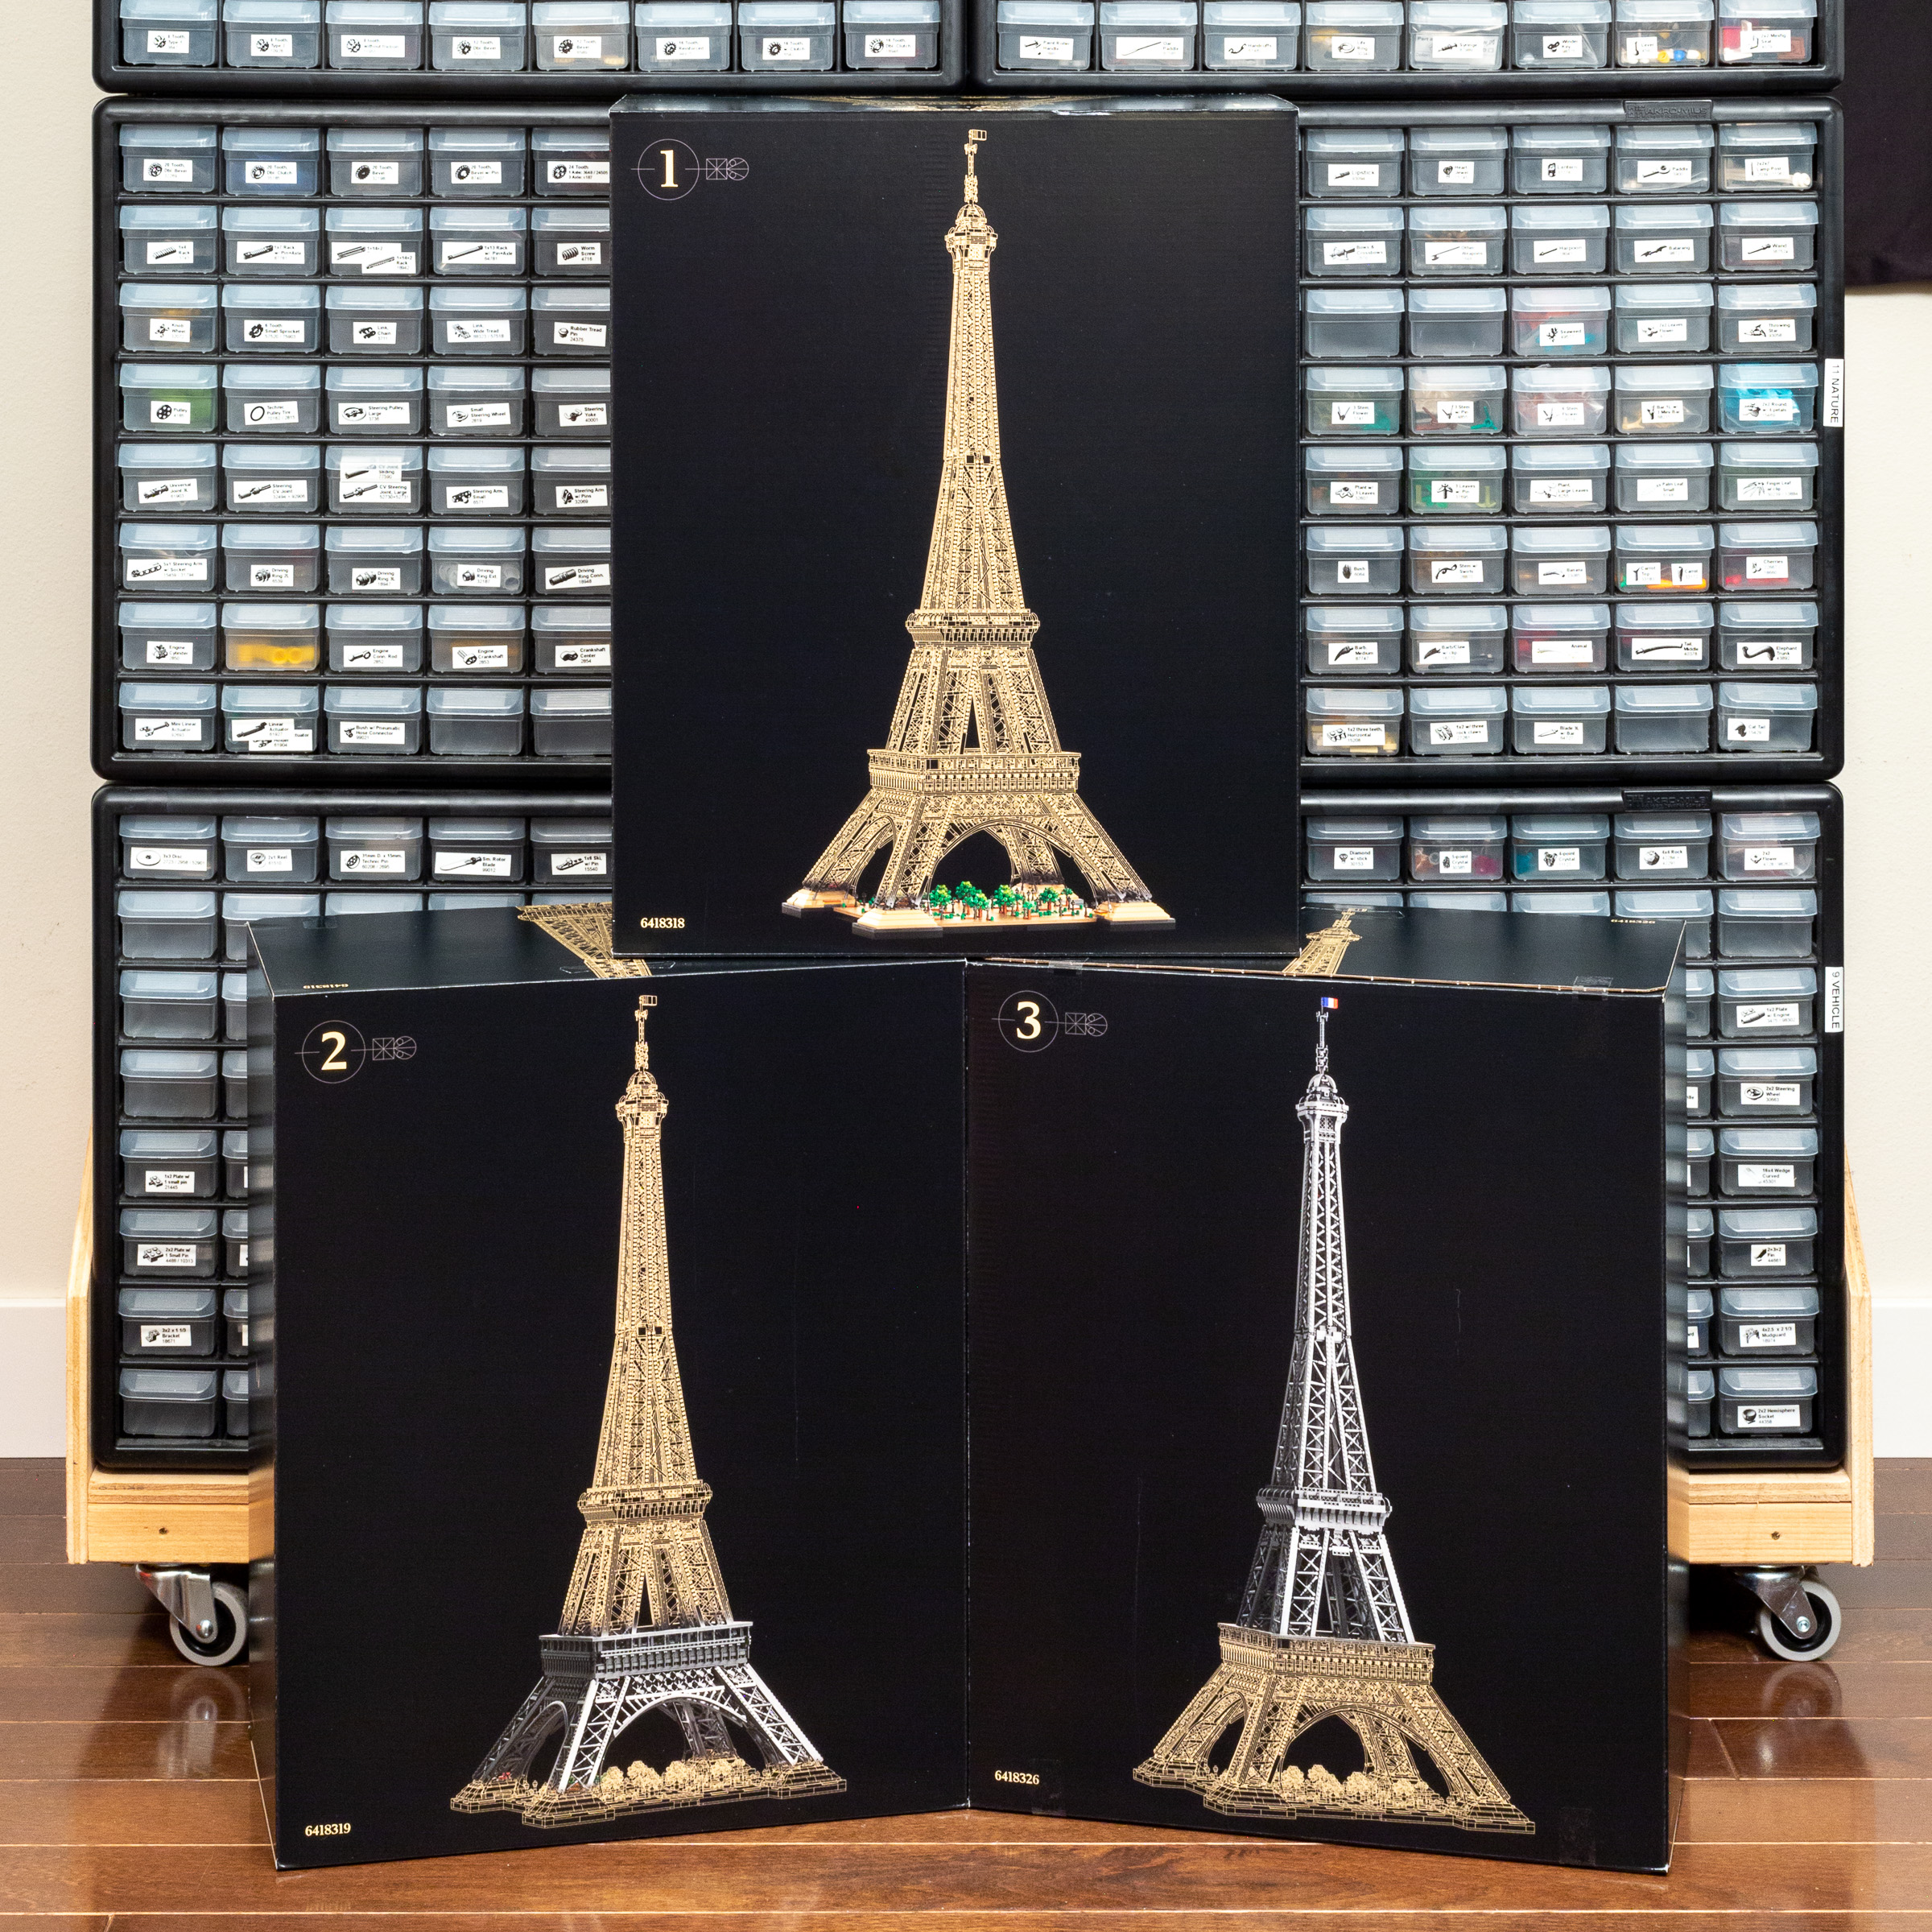
Each of the three smaller boxes focus on one ‘layer’ of the build process.
On the front of those three boxes, you can see which part of the model it will build, with the first box only assembpling the base itself, the second box taking us up to the lower observation deck, and the final box finishing the mode.
Build Process – Box 1
I have only had time to complete the first box, but I’ve decided to include the build process for that box as a teaser for my final review. If you would prefer not to see ‘spoilers’ about the set, I suggest your jump down to the Initial Thoughts section below.
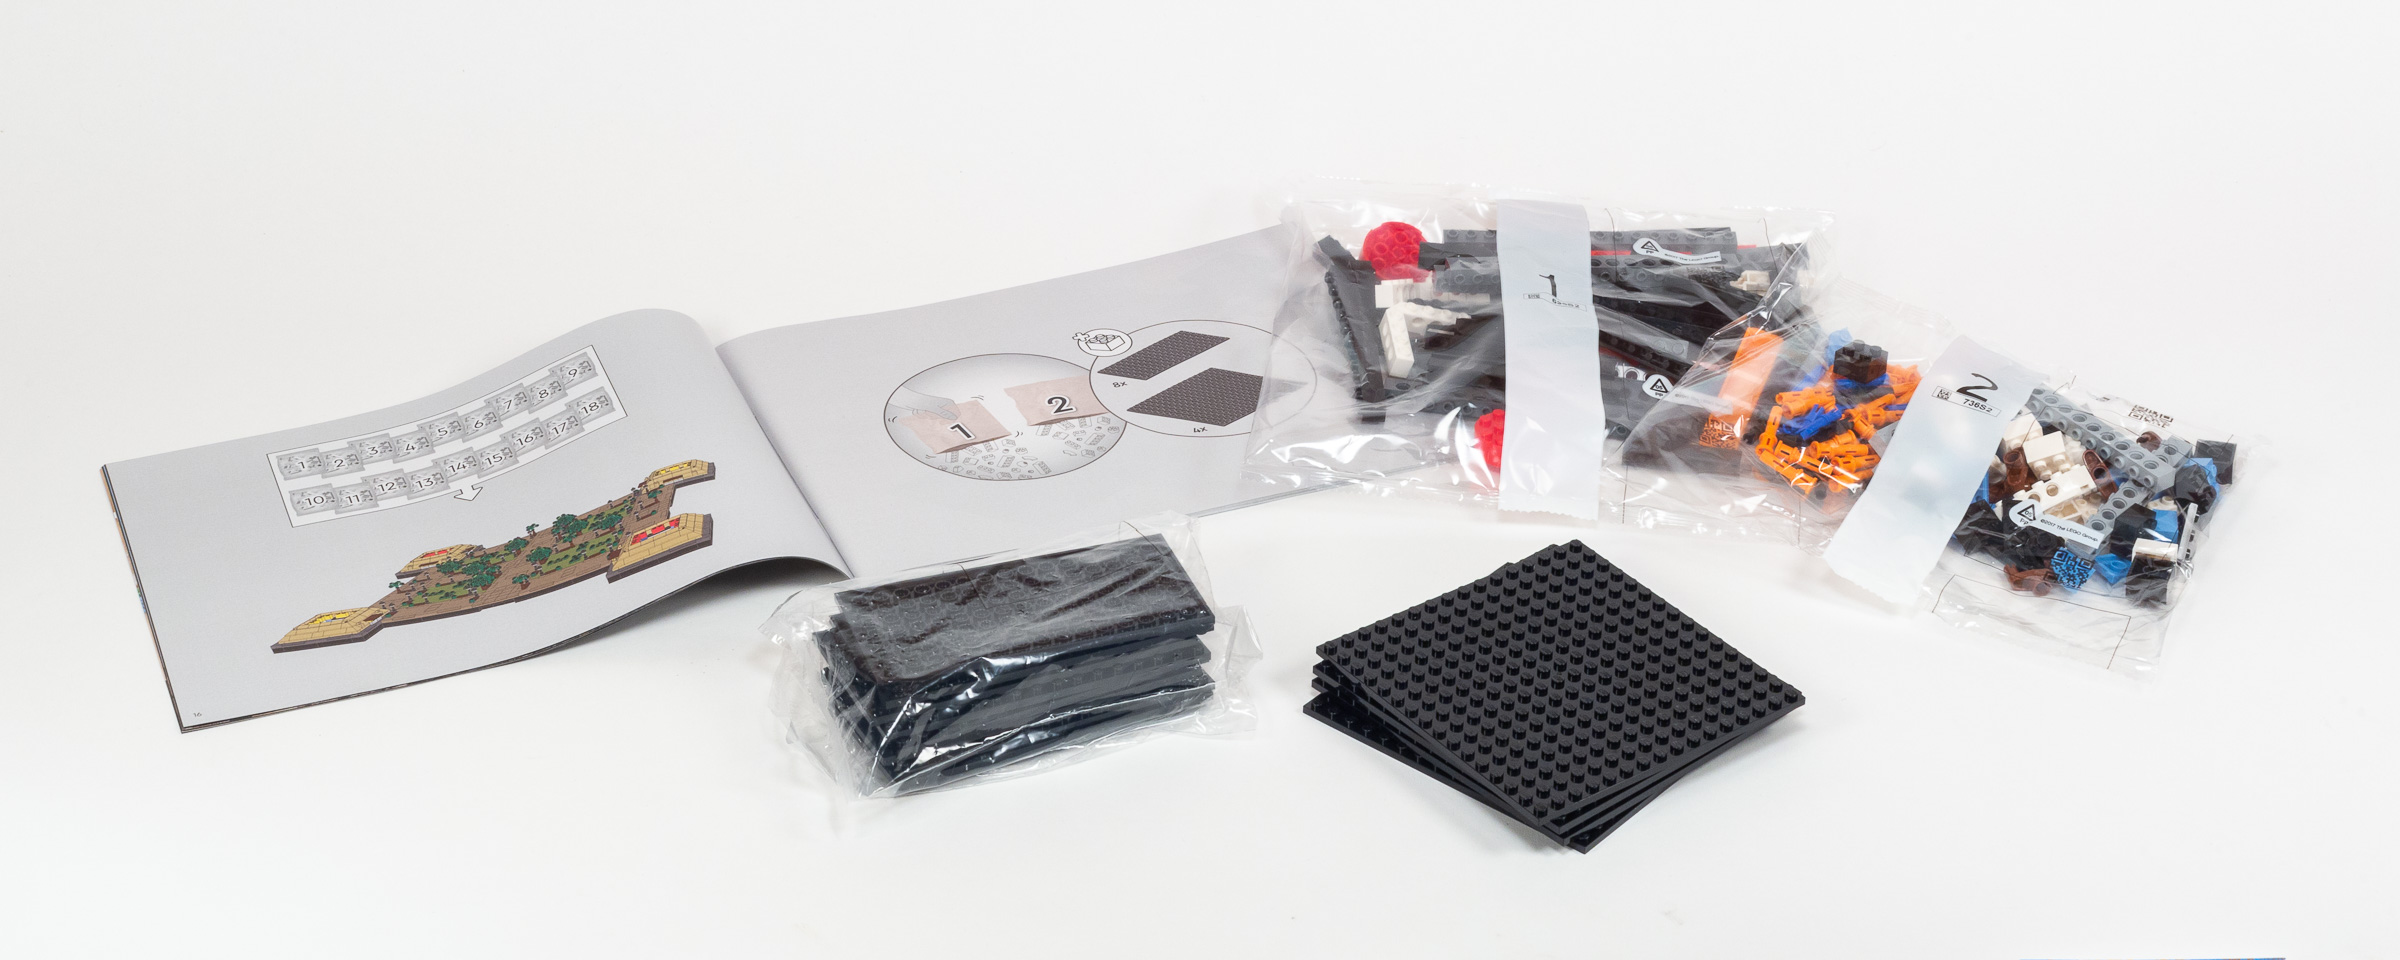
As indicated on the front of the smaller box, we begin the project by just building the base and the foliage. It looks like we will need to wait until the second box to actually start building the Eiffel Tower itself. This feels like a big investment in just the foundation, but we saw something similar with the Colosseum model.

The first box includes several loose parts and unmarked bags, plus numbered bags for the first 18 stages of the build.
Bags 1–10: Base
Before we lay a single brick, I was pleased to see several pages of information about the history of the Eiffel Tower, as well as a page about the design process for this set, featuring a great photo of LEGO Designer Rok Zgalin Kobe.
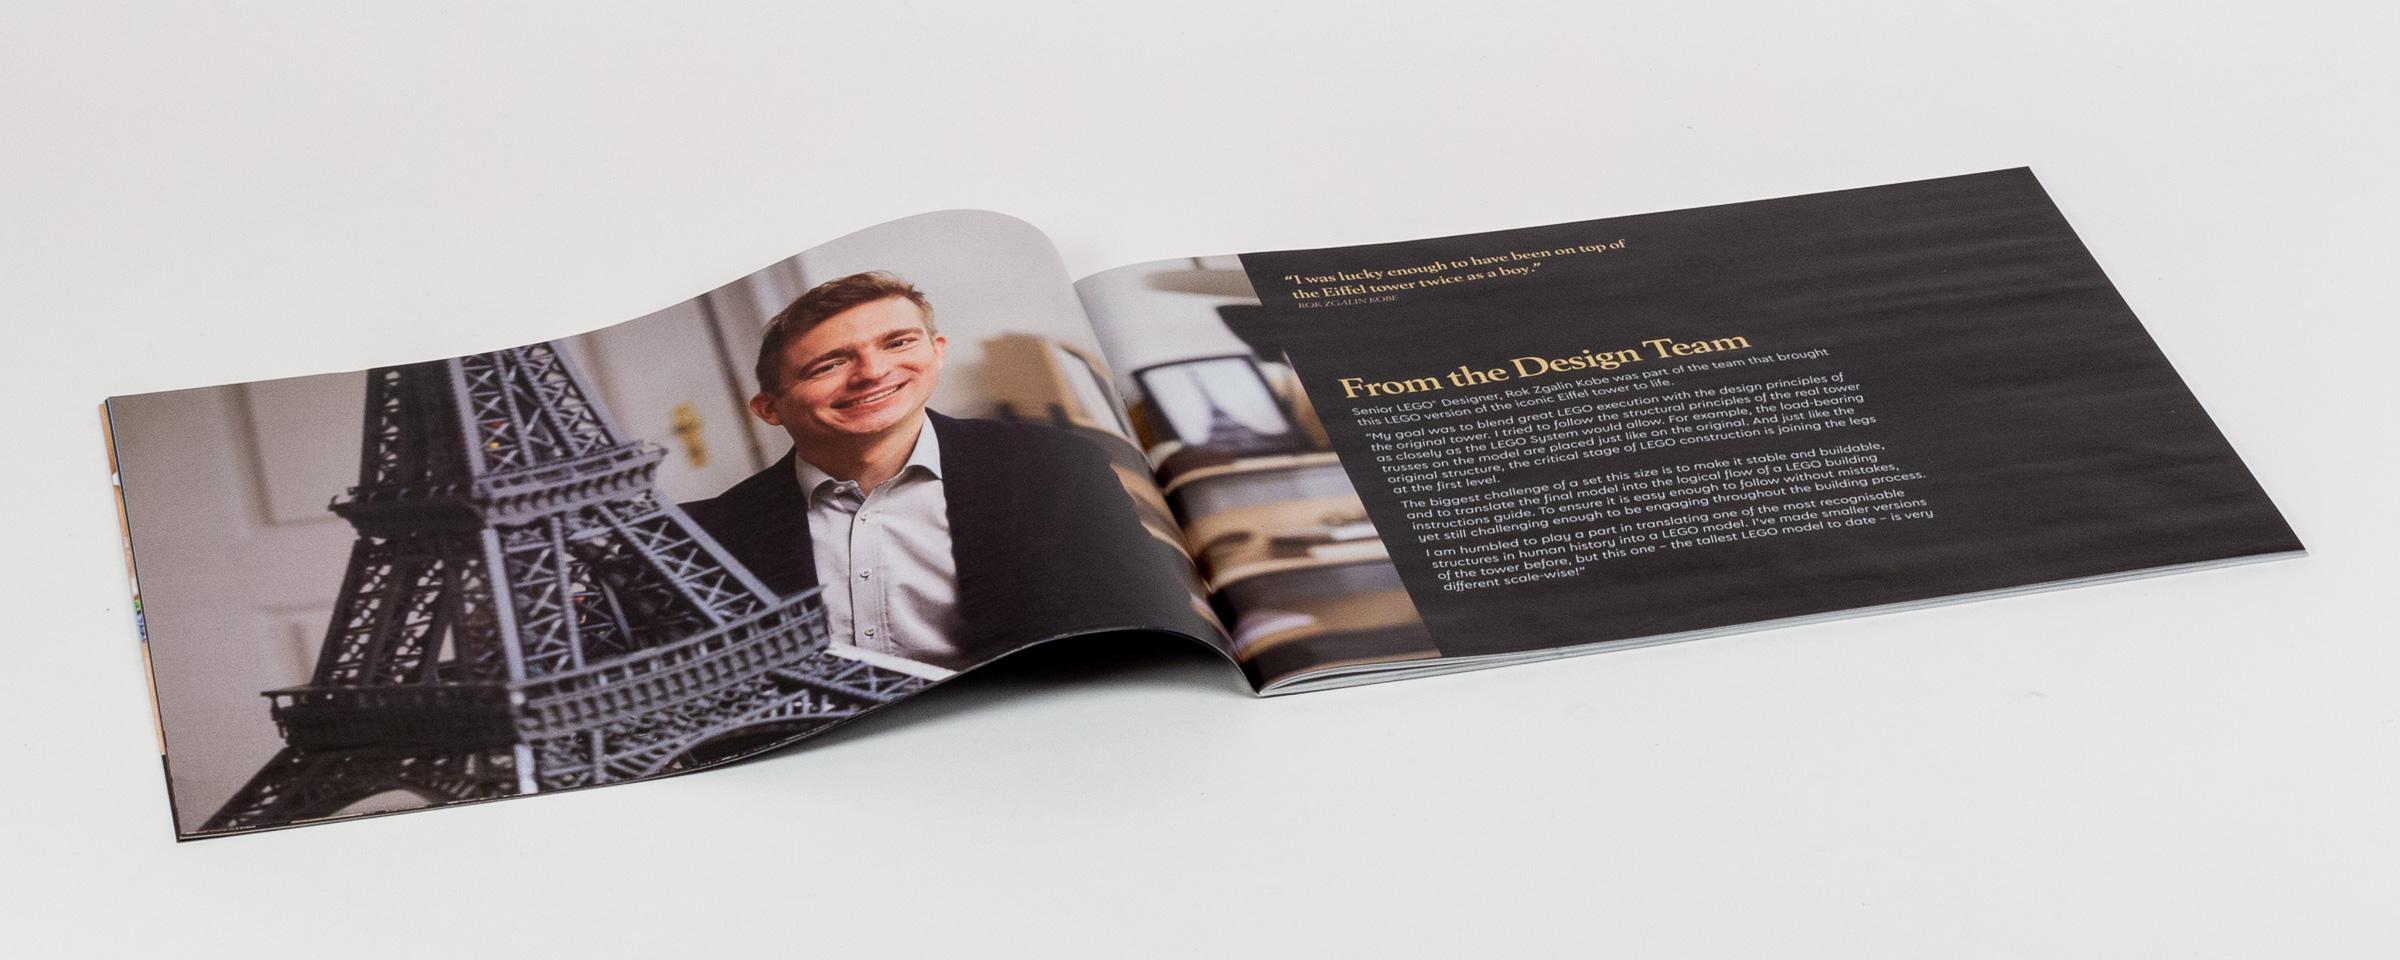
Instruction booklet includes background info on the building itself, and the LEGO set designer.
While I love having this background information, I was surprised to see that it is only in English — also including French would have been a respectful design choice given where the building is located!
How do you start building one of the largest LEGO sets ever created? By combining Bag #1 and #2 of course!
As we move to the actual building instructions, we see something that I’ve never experienced before – the instructions ask us to dump out both Bag #1 and #2 at the same time. I suspect that they decided to use a unique number for each bag (instead of multiple bags with the same number) to help with inventory management.
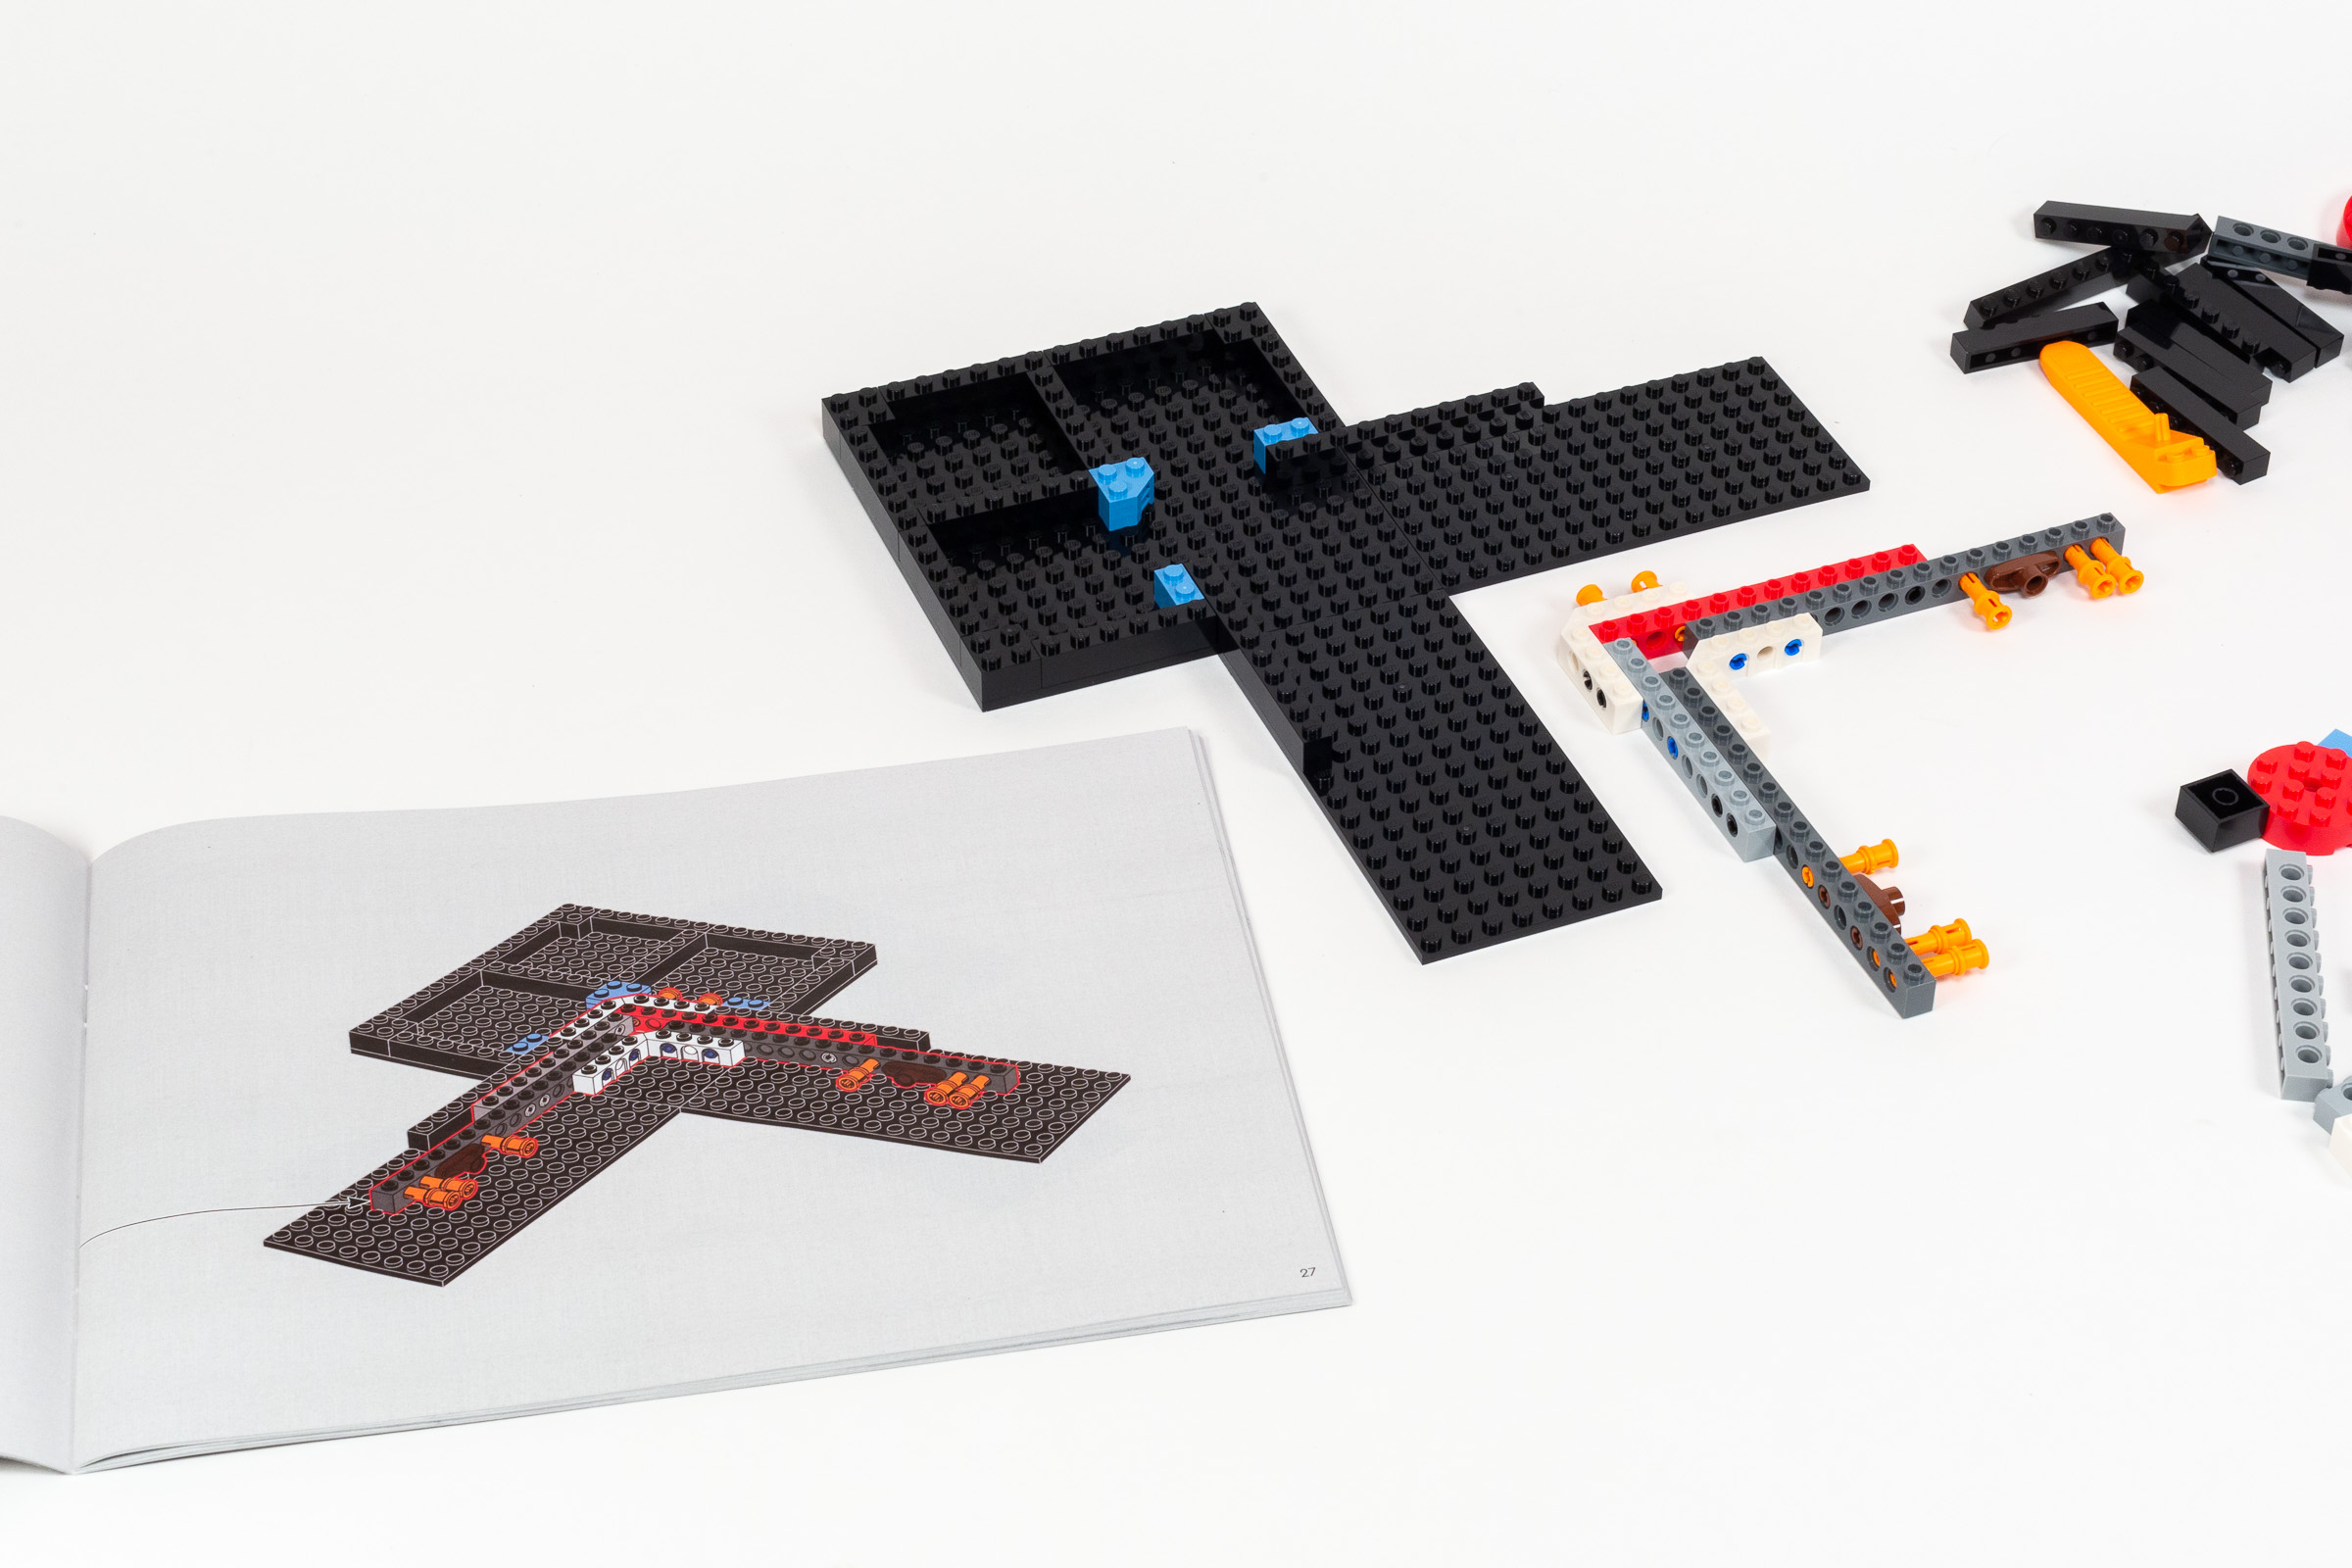
A Technic substructure with corner bracing should result in a no-nonsense, super strong base.
Right from the beginning of bags 1+2, we are building four identical modules. I am extremely pleased to see a mix of LEGO Plates and Technic components that I’m confident will be very strong once completed. In particular, we see two 5×5 Technic corner elements (part 32555) strengthening the model.
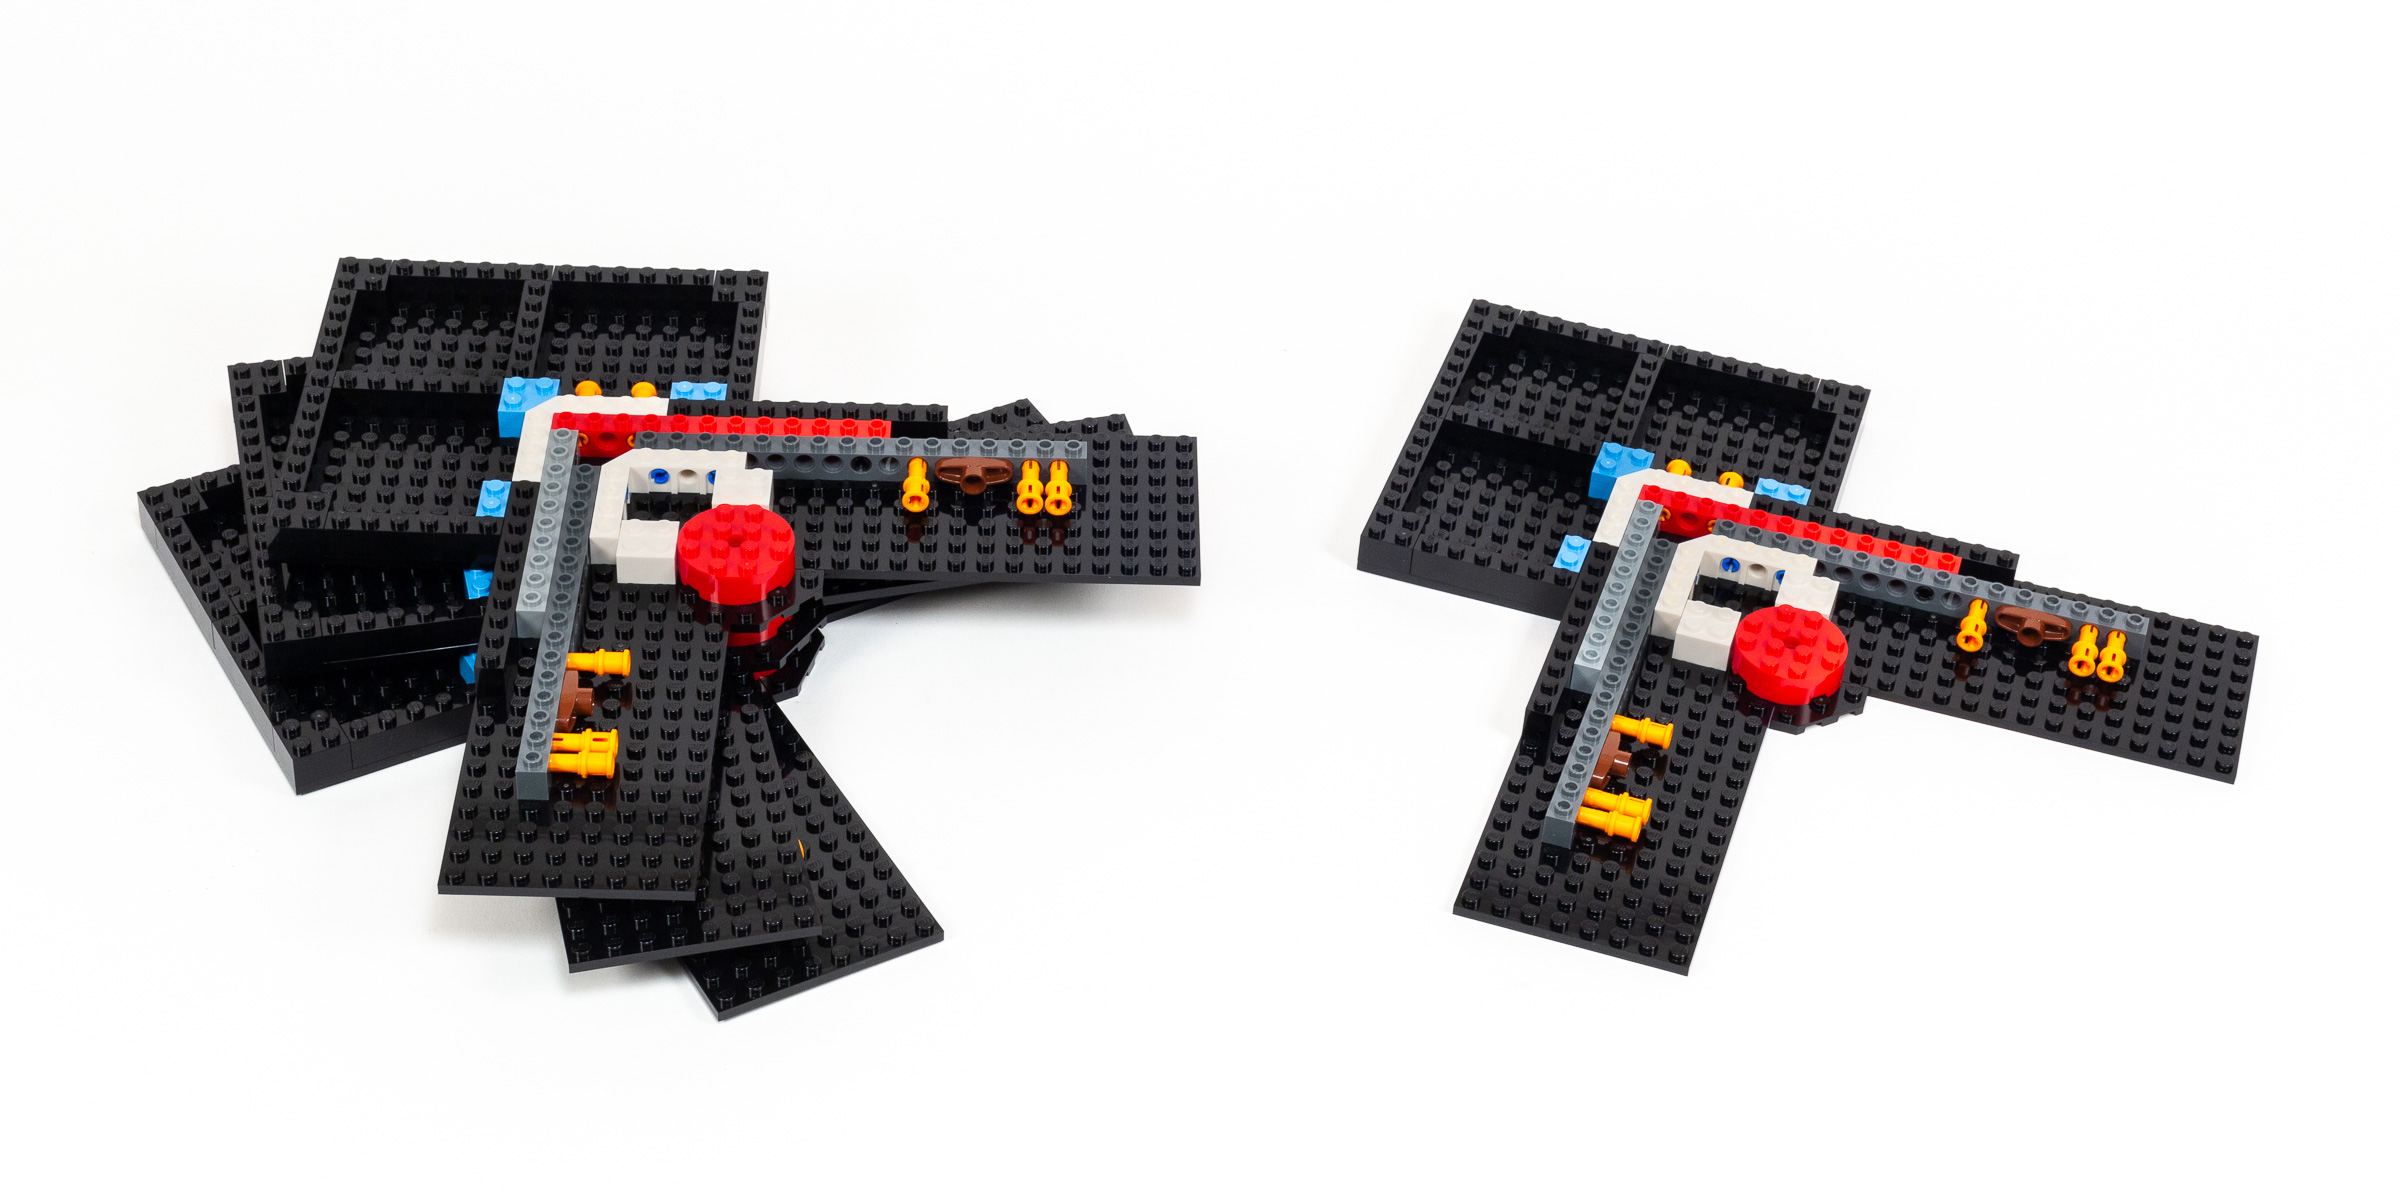
Progress at the end of Bags 1+2.
Moving on to bags 3+4, we are continuing to build up the four corners, by adding a lattice extending the base towards what I believe will be the center of the completed model. We wrap up this quick stage of the build by adding the 16×16 x 2/3 Road Tiles (part 69958) on the corners.
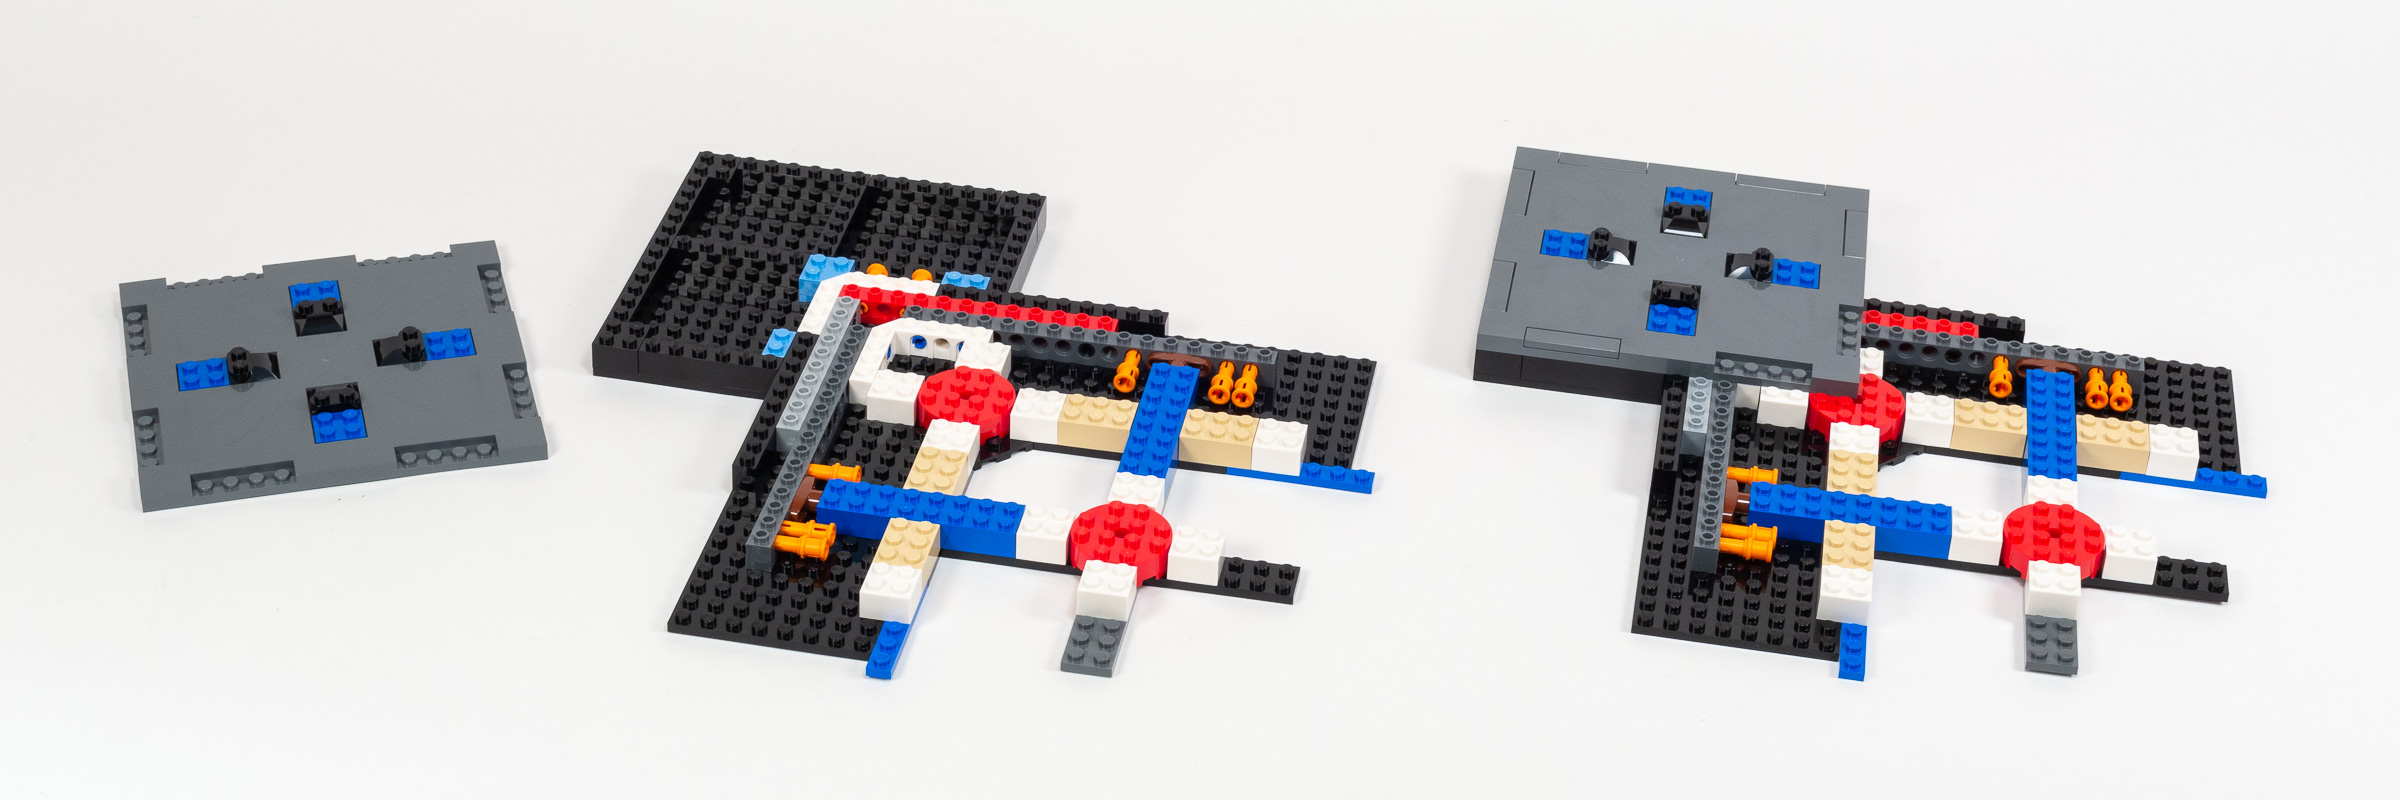
Even stronger corners by the end of bags 3+4.
Bags 5+6 promise to connect these four corners into a single strong (but unwieldy) base. I can already tell when roughing-out their relative position that this isn’t going to fit on my normal workbench without some changes… Sure enough, the wedge-shaped modules built in this stage connect the four corners we had already built.

Attaching the corners using four wedge-shaped modules.
The resulting base is huge! I had been naively expecting a total size of 64×64 studs, but the base is a bit larger than that — 72×72 studs.
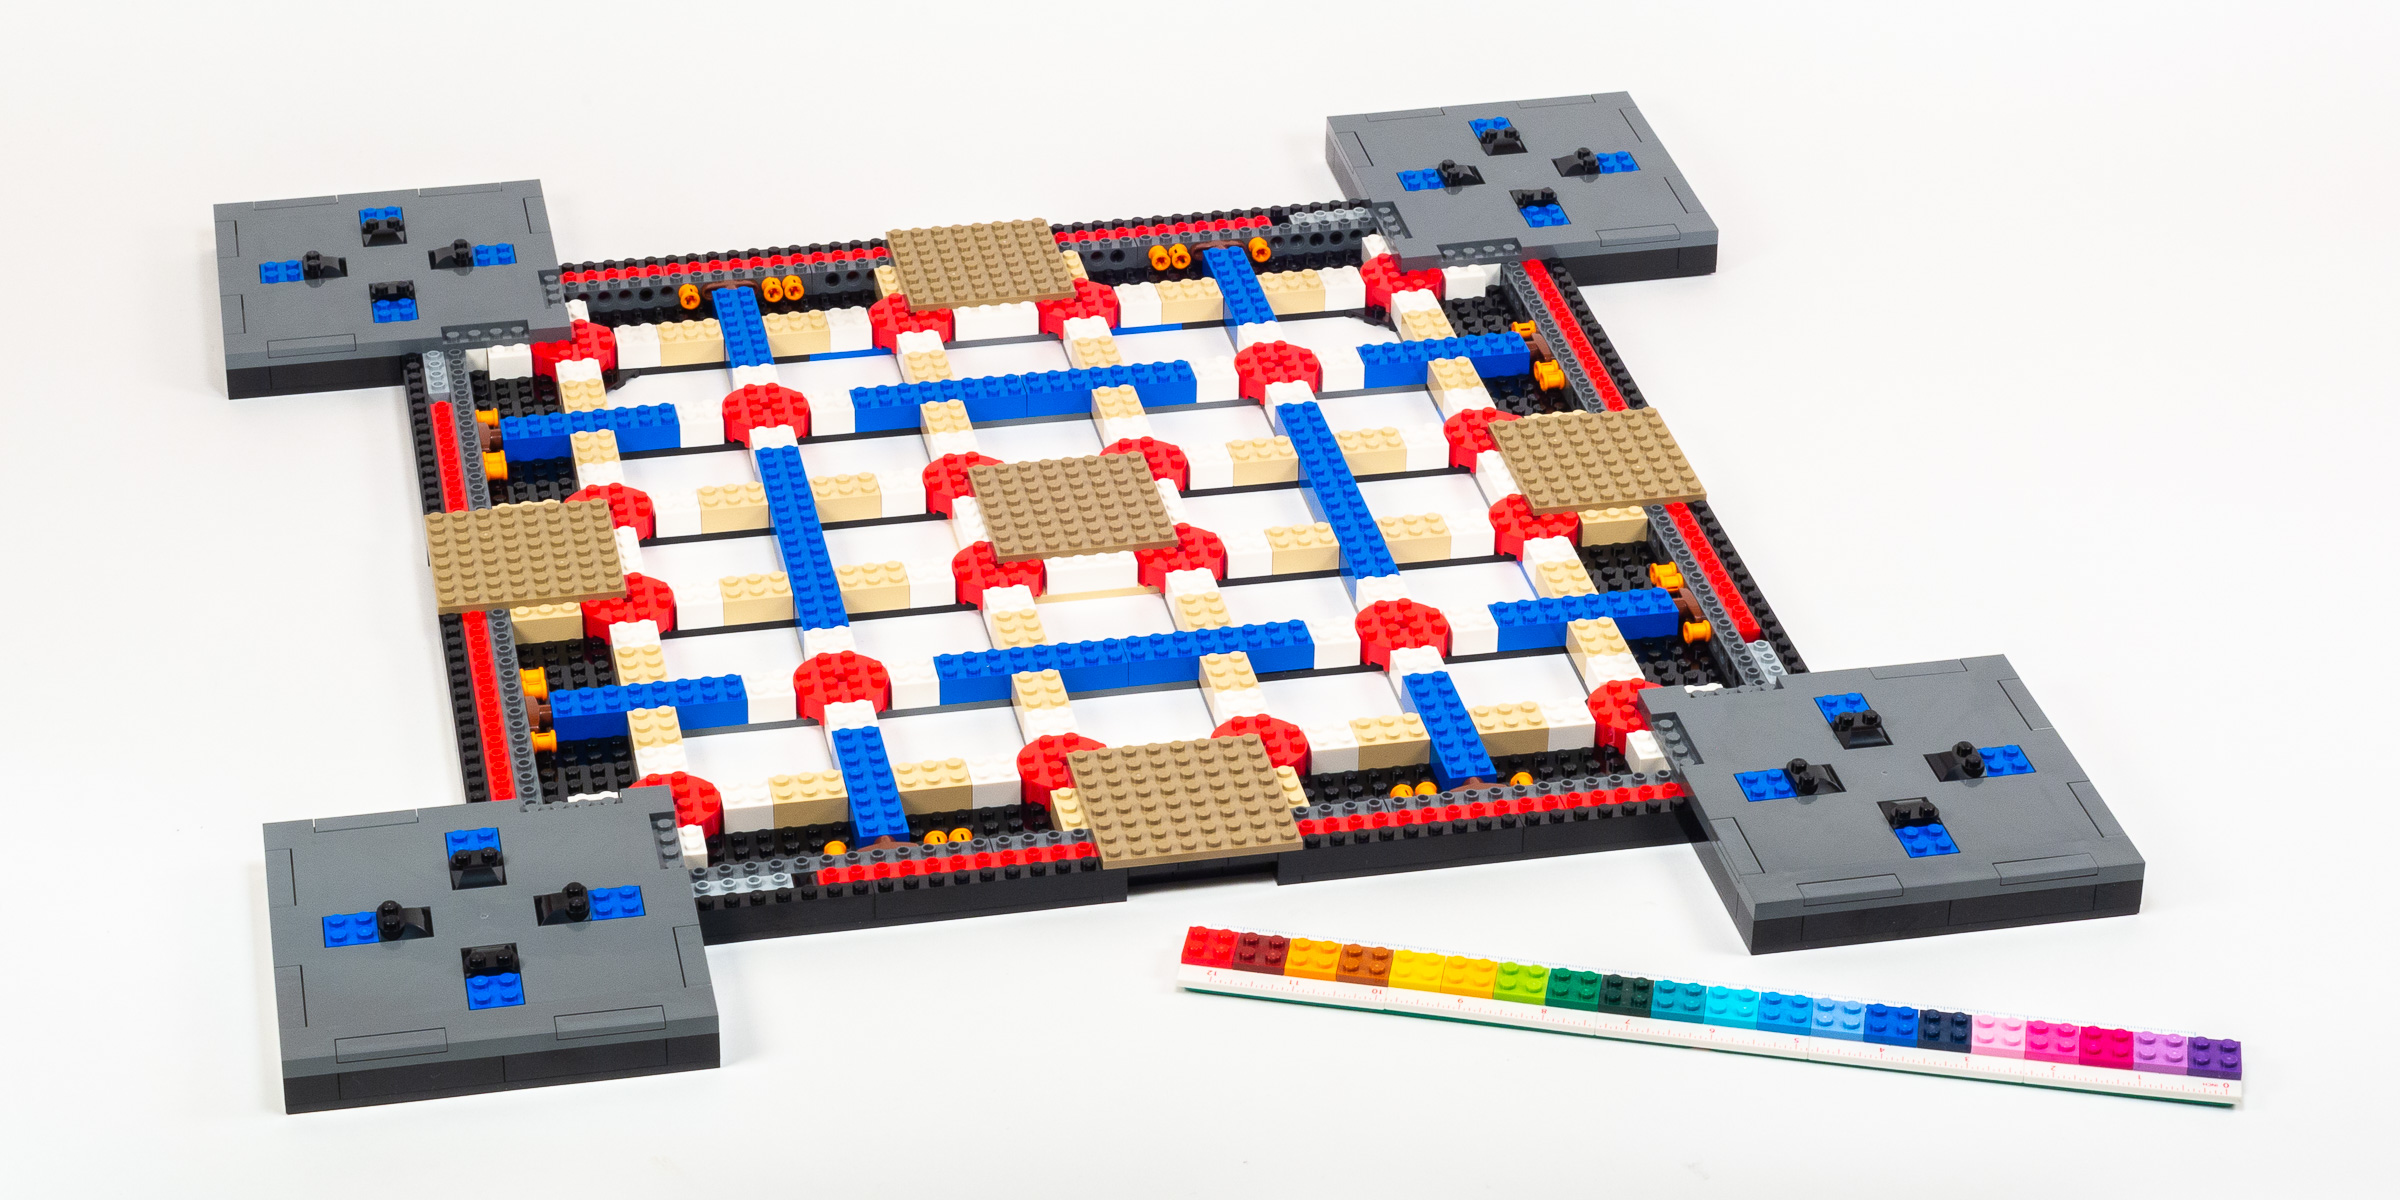
Progress at the end of Bags 5+6.
We continue to Bags 7+8 where we start covering up the lattice structure quickly using 6x12x 2/3 Road Plates. Those parts have studded indentations on each side, so we spend the rest of the time covering most of the outstanding surfaces with 138Sand YellowDark Tan 2×2 and 1×4 tiles.
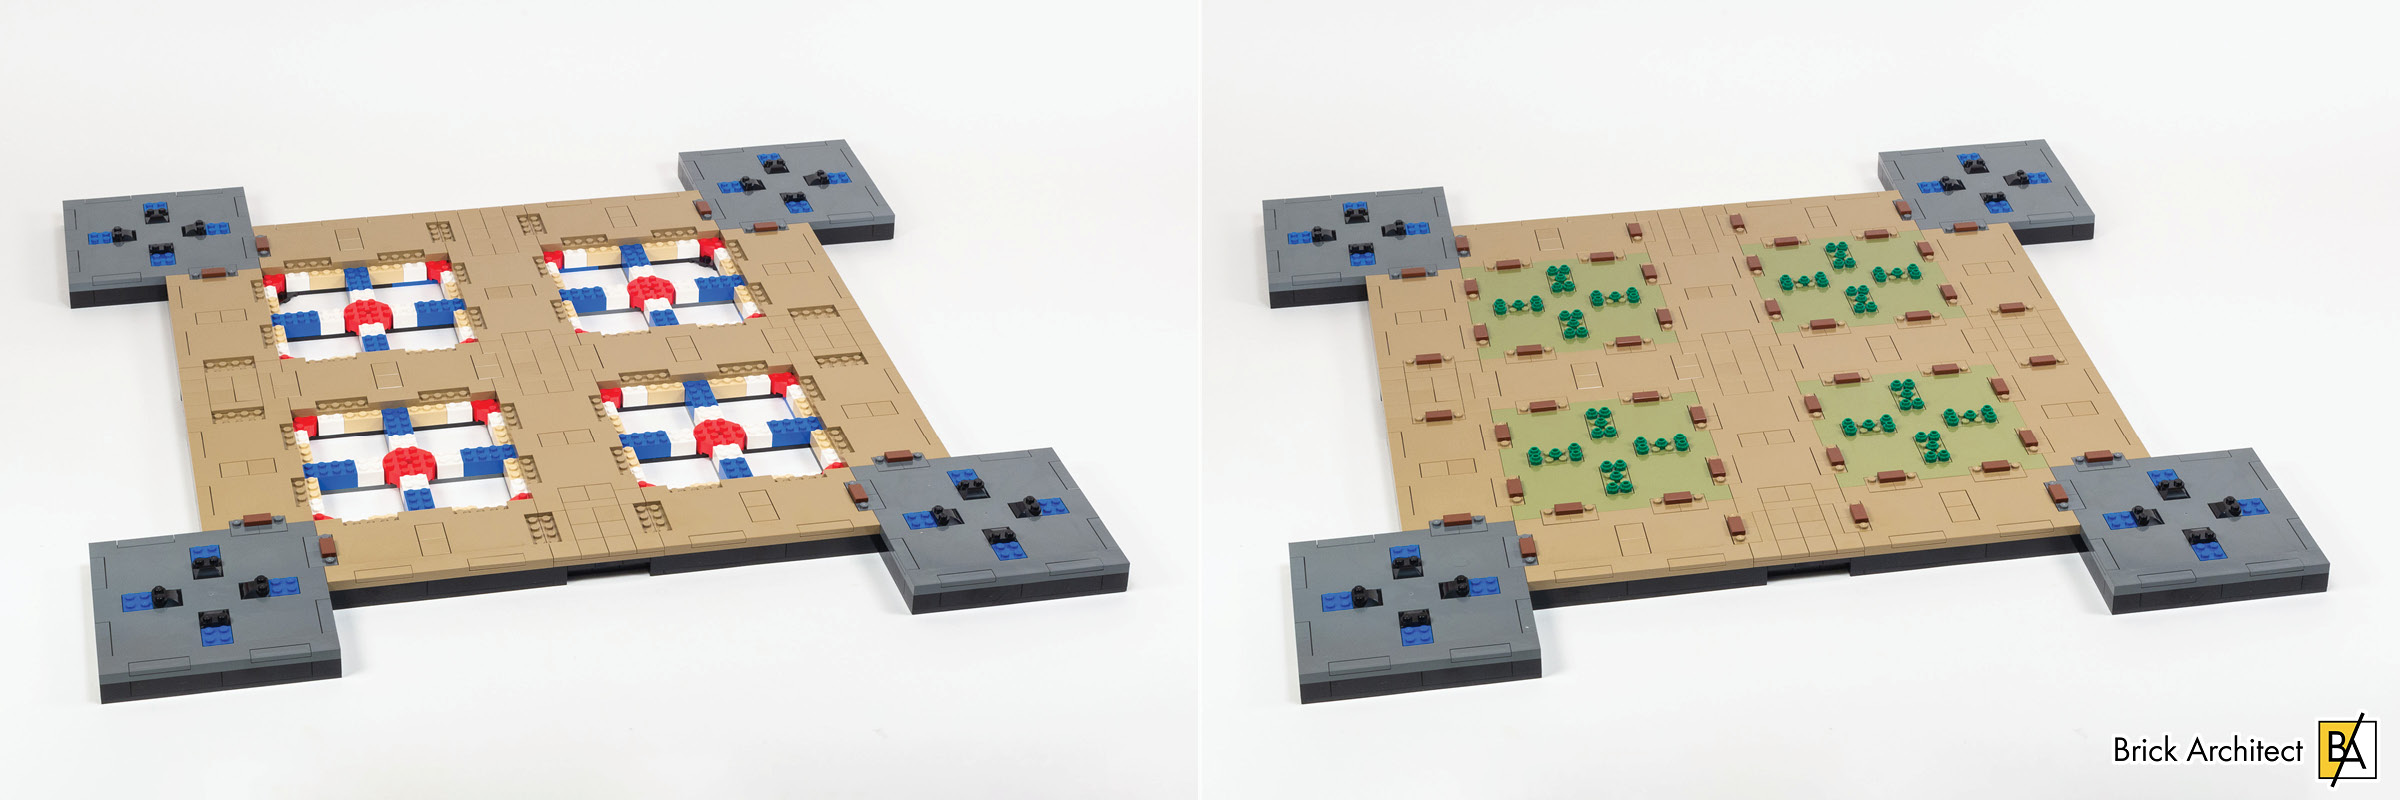
Progress at the end of Bags 7+8 (left) and Bags 9+10 (right).
Completing a smooth base is one of the first milestones in every LEGO Architecture model, which is why I was looking forward to completing bags 9+10. The last four holes in the base are covered by four more 16x16x 2/3 Road Plates in 330Olive Green. The rest of the studded gaps are finally covered with a lot more tiles, and 1×2 tiles in 192Reddish Brown which I believe are meant to represent park benches.
Build time: 61 minutes: (Bags 1+2: 18 minutes, Bags 3+4: 9 minutes, Bags 5+6: 12 minutes, Bags 7+8: 10 minutes, Bags 9+10: 12 minutes.
Bags 11-18: Piers and Foliage
In Bags 11+12 and Bags 13+14, we build four corners of the tower which are pyramidal in shape and have 5Brick YellowTan on the exterior. The internal structure is simple and brick-built, with some offset work needed to build the two awnings and glass entrances on each corner. To help keep track of the orientation of the model, yellow and red colors are hidden in alternating corners.
With the four corners in place, it’s time to decorate the park beneath the Eiffel Tower. Bags 15+16 involve bushes using a stack of two Flower elements (part 24866) in 28Dark GreenGreen, small trees using six of those parts in two different shades of green, and lamp posts which are next to all 48 of the tiny benches from the previous stage.
Bags 17+18 wrap up the first box. This involves painstakingly building eight large trees (with 30 green ‘flower’ elements for each tree) and scattering them around the scene. These last two stages are finger-numbing and slow going, but it adds a nice visual texture to the base.
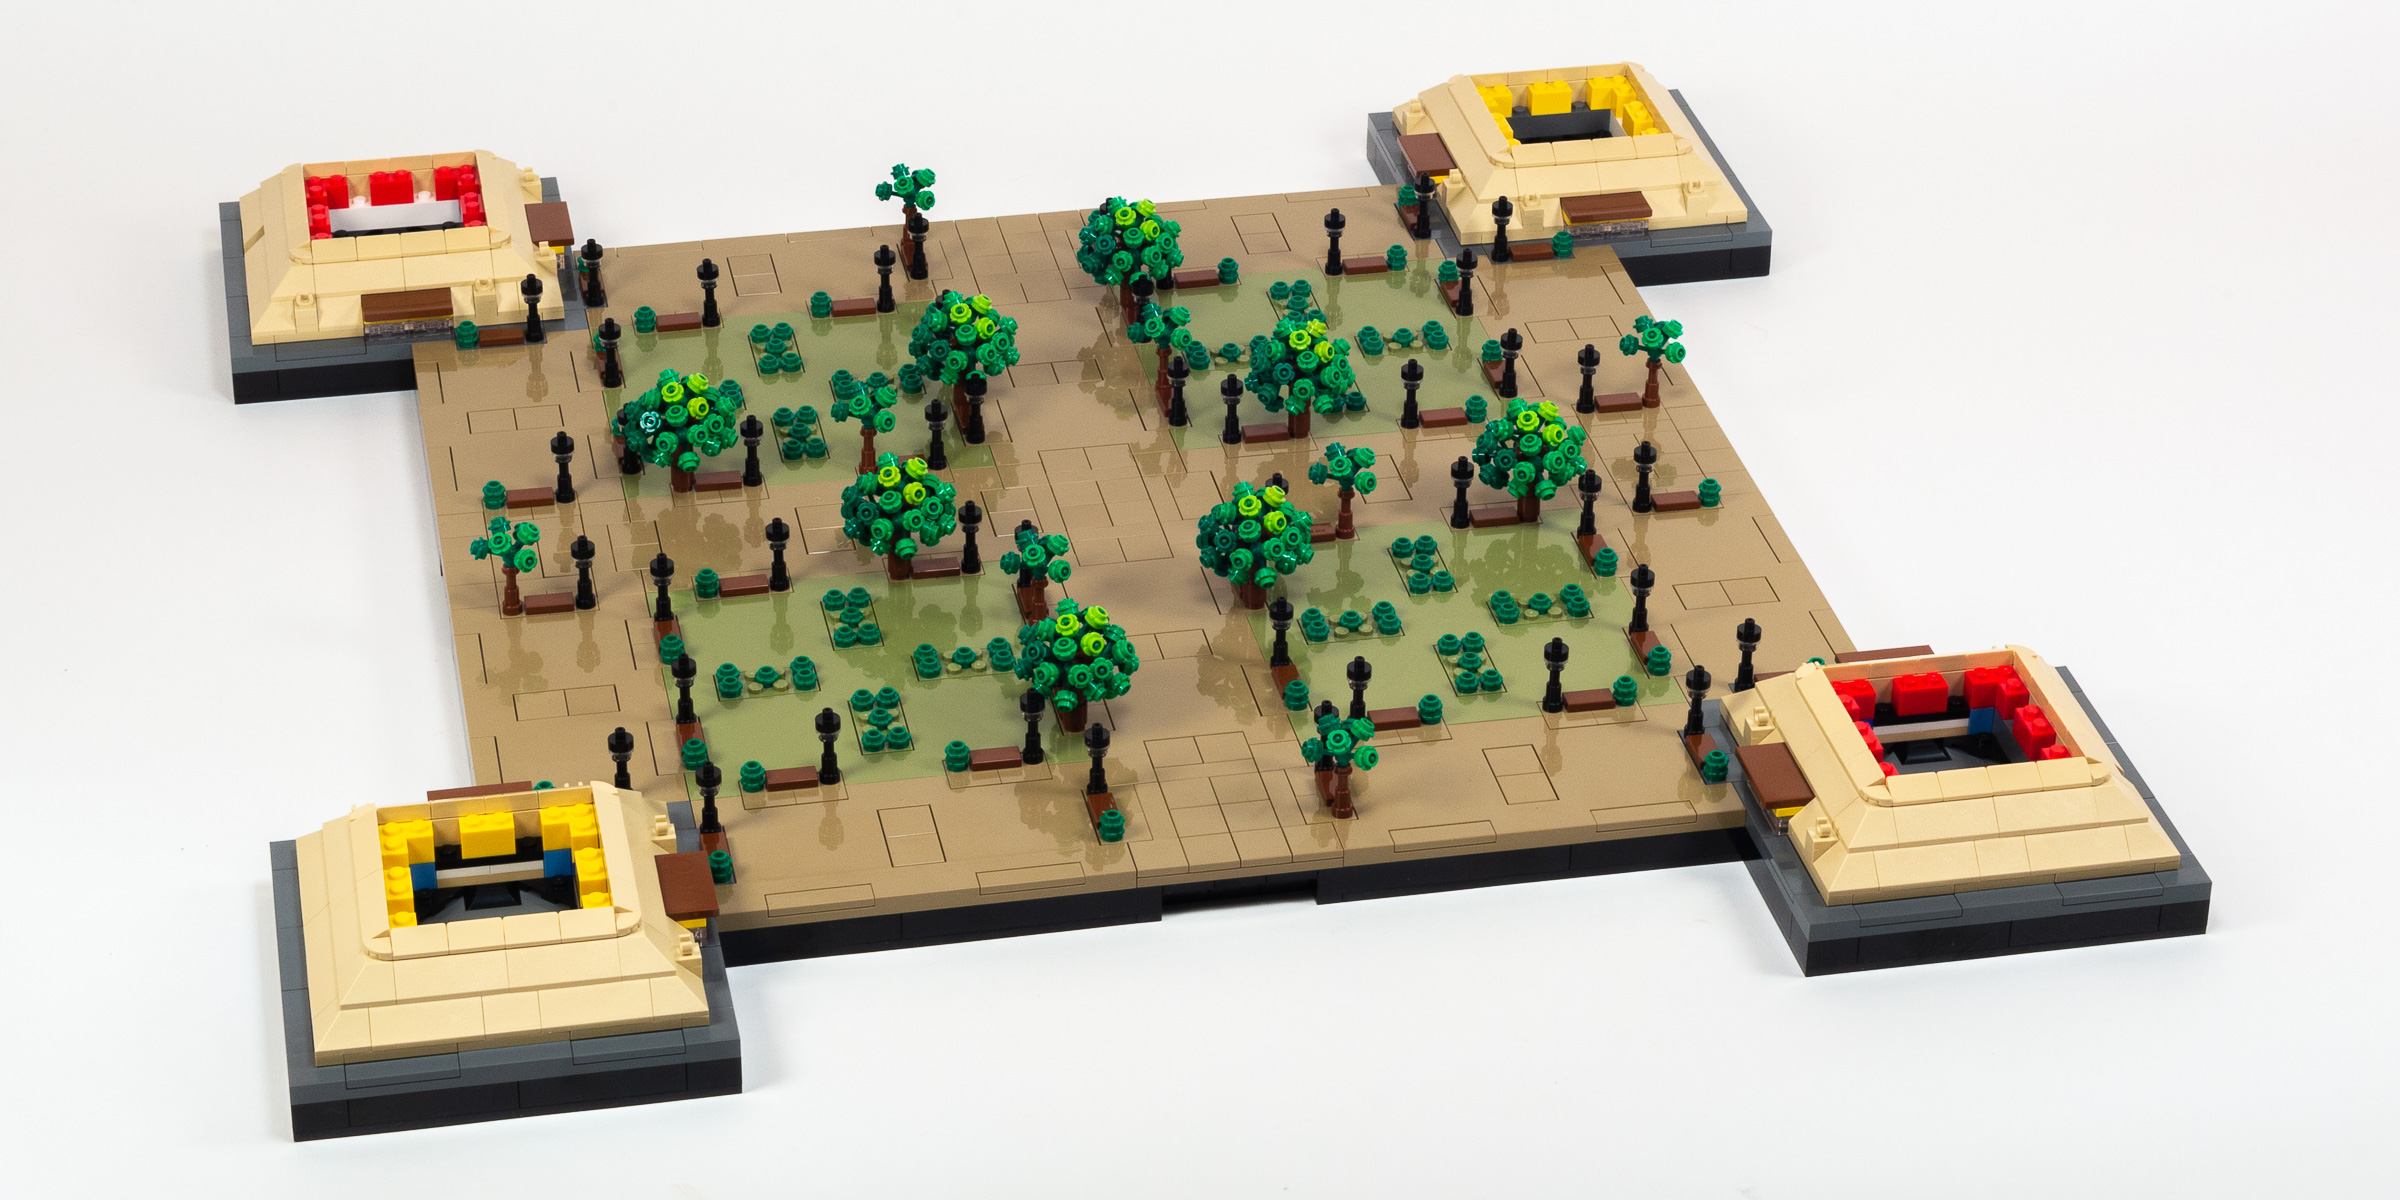
Progress at the end of Box 1.
Build time: 78 minutes: (Bags 11+12: 18 minutes, Bags 13+14: 16 minutes, Bags 15+16: 22 minutes, Bags 17+18: 22 minutes.
Want to be first to read the whole review?

Subscribe to the Brick Architect newsletter for early access to exclusive content, the latest articles, and updates to the Printable LEGO Brick Labels, LEGO Storage Guide, and my book The LEGO Architect.
Initial Thoughts
As I prepare to start building the second box, I am feeling good about this build. The base itself is large and sturdy and I really appreciate the inclusion of a lot of landscaping details in the base. I do expect the build process to slow down a lot from here, since I am less than three hours into a build process that I expect will take 15 hours or more… (It took 14.5 hours to build #10276 Colosseum, which contains about 10% fewer pieces. Learn more in my review of that set.)
Most of all, I am curious to see what kind of “presence” this set has in a room when it is complete. I suspect that even at nearly 5 feet tall, it will feel kind of small when placed directly on the floor, due largely to the way that the real building tapers agressively near the top making it look smaller than it really is. By contrast, placing it on an end table in your living room should cause it to tower over your guests.
I guess that we will have to wait and see… I’m hoping to post the full review before Black Friday, in the hopes that my thoughts will help with your own purchasing decision.