
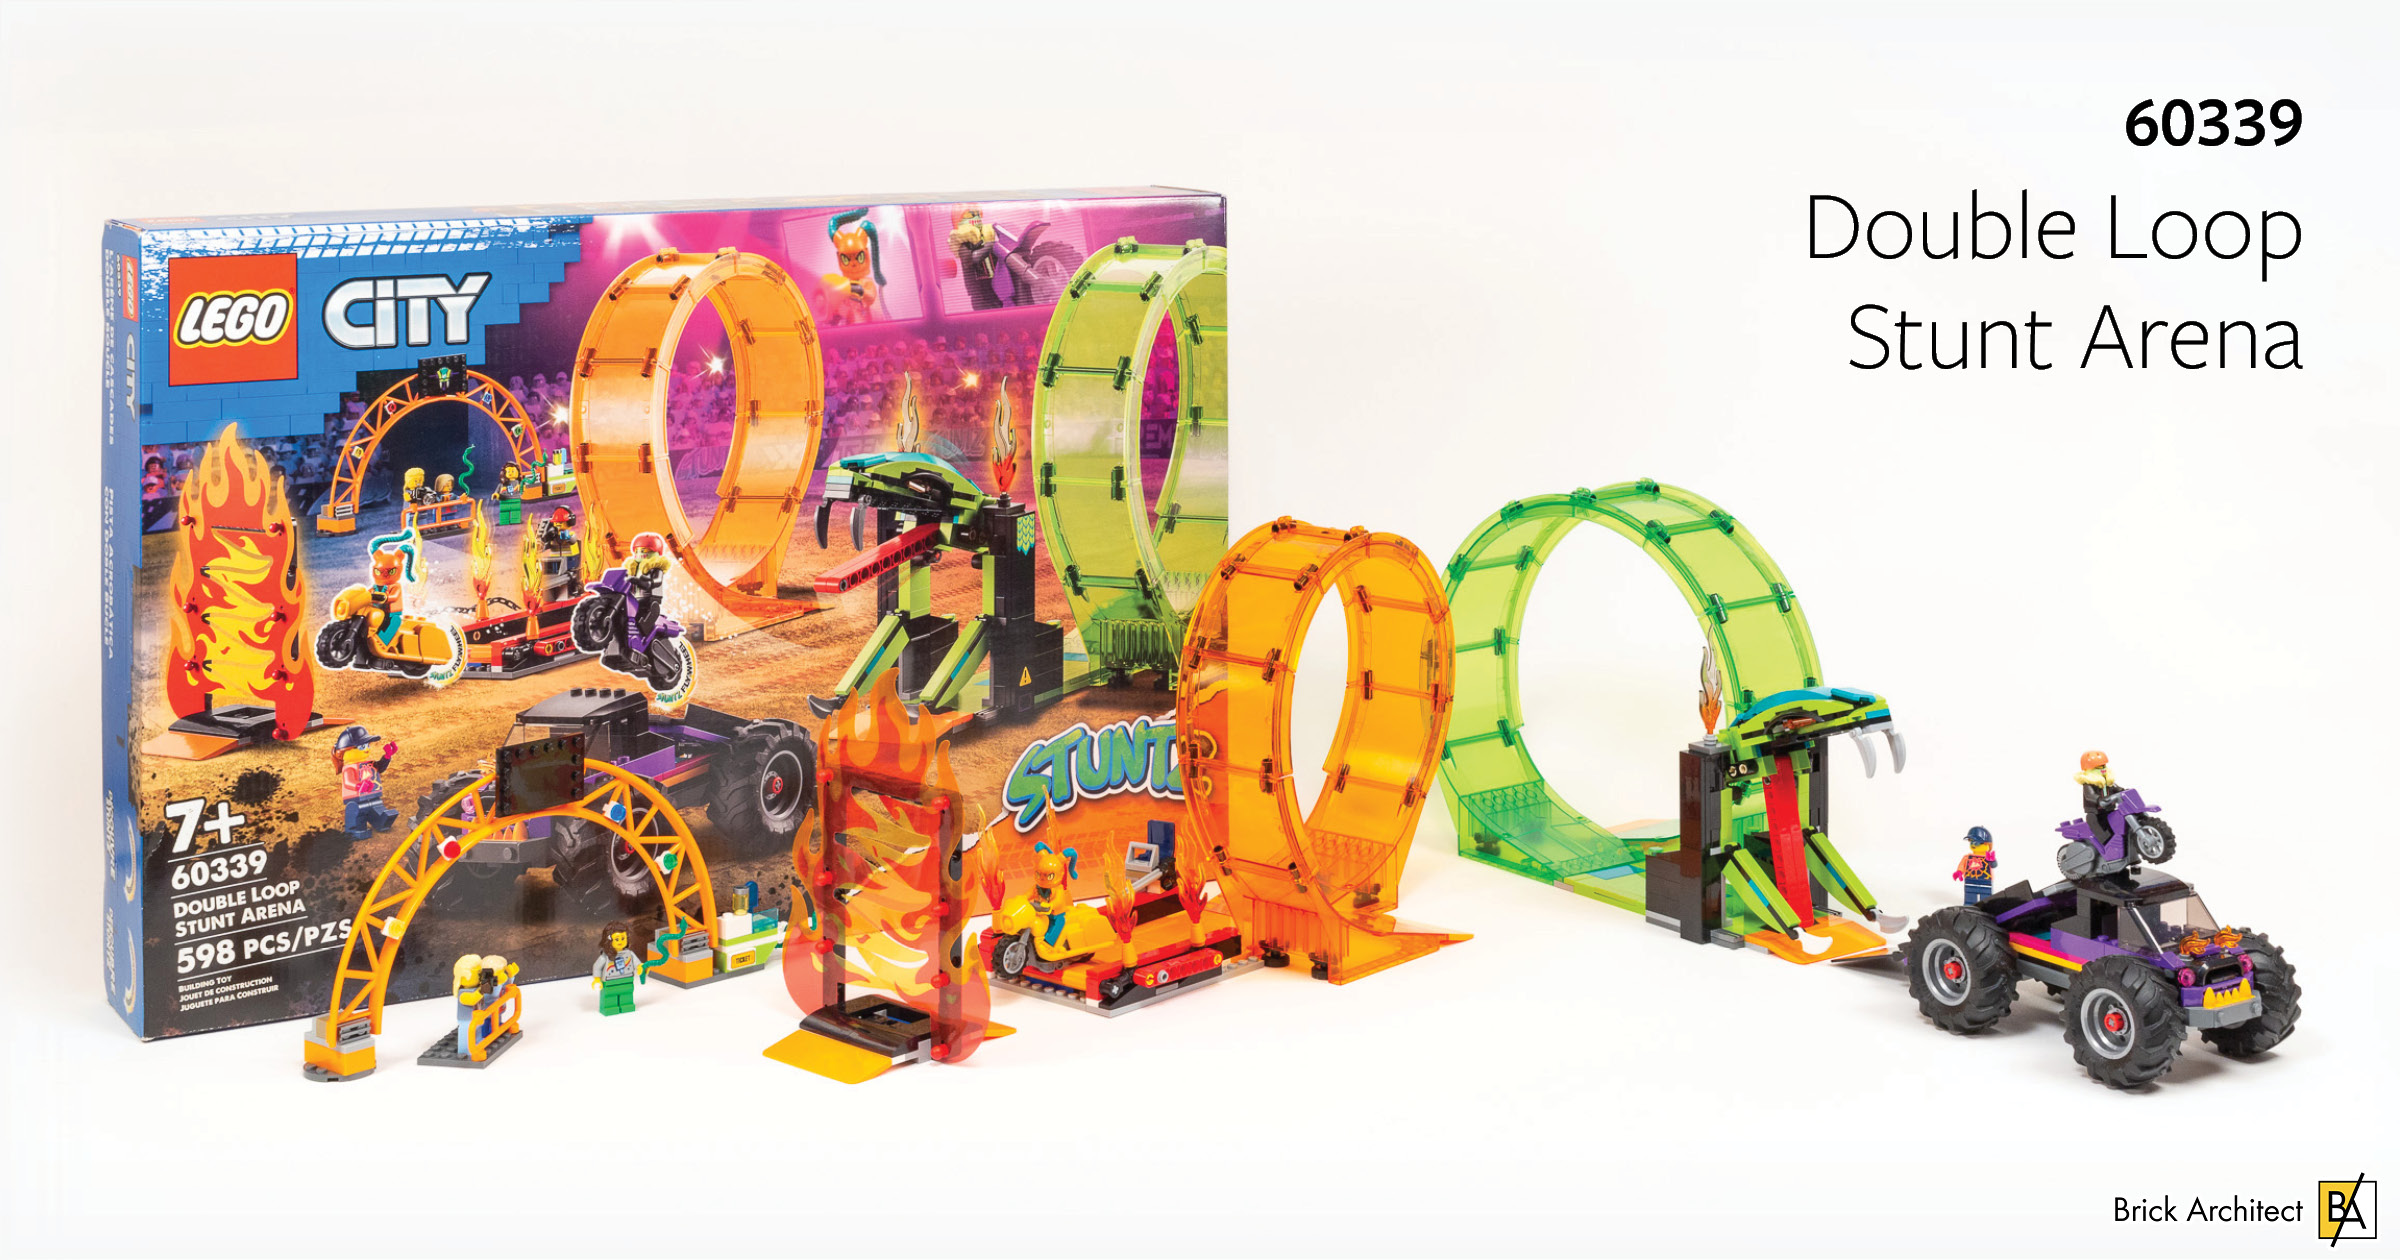
Review: #60339 Double Loop Stunt Arena
This wildly overpriced set looks cool, but good luck completing a double loop with the cool flywheel motorcycles. Let’s find out about the major flaws in the design of these new loop elements.
#60339 Stuntz Double Loop Stunt Arena is a pricy set with a singular promise – to see if you can get the wind-up motorcycles to go around the loops before falling down. This is classic territory for Hot-Wheels style cars — I remember building a giant downhill ramp for cars to get enough speed to go around through one or two loops back in the 1980’s.

#60339 Double Loop Stunt Arena – Box Front and Back.
In order to compete in this space, The LEGO Group had to create some new parts, most notably the flywheel motorcycles and the ramp and loop components. A much closer look at these specialized parts is the focus of this article, although I’ve also included a brief review of the set as designed (with the help of a 4-year old). Speaking of which, a few parts and one of the minifigures are missing from the photos. This is an inevitable side-effect of the age and enthusiasm of my assistant.
Contents
Before we start building, I want to acknowledge the elephant in the room, 169$ is a crazy price for a set with fewer than 600 pieces. Granted, these are large and specialty parts, but it’s still a tough price to swallow. I will be certain to consider value in the analysis as well. That said, the box itself is comparable in size to other sets at this price point.

The set contains seven numbered stages, but a lot of the parts come in un-numbered bags.
My set was marked with box code 20R2. This code indicates where and when the set was manufactured – in this case it was packaged on 20th week of 2022 in Ciénega de Flores, Mexico (Factory code ‘R’). As such, this set was packed around May 19, 2022.
Box Contents:
- Stage 1: 1x large bag (marked 119R2).
- Stage 2: 1x small unmarked bag.
- Stage 3: 1x medium bag (marked 319R2).
- Stage 4: 1x extra-large bag (marked 319R2).
- Stage 5: 1x large bag (marked 319R2).
- Stage 6: 1x medium bag (marked 120R2).
- Stage 7: 1x medium unmarked bag.
- 1x un-numbered bag containing ramp and loop parts in 182Transparent Bright OrangeTrans-Orange .
- 1x un-numbered bag containing 8×16 road plate in 106Bright OrangeOrange, Roller coaster track in 106Bright OrangeOrange and Technic 11×15 frame in 26Black.
- 1x un-numbered bag containing ramp and loop parts in 311Transparent Bright GreenTrans-Bright Green.
- 1x un-numbered bag containing wheels and 8×16 road plate in 119Bright Yellowish GreenLime.
- 1x cardboard pouch (numbered 6428747) containing:
- 1x small sticker sheet (marked 10092286/6380396).
- 1x clear vinyl sheet with pre-cut flame pattern (marked 01875/6395538).
- 1x 112-page glued spine instruction booklet (Book 1). 19.5 x 17.5 (7 3/4 x 6 7/8”).
- 1x 64-page stapled instruction booklet (Book 2). 19.5 x 17.5 (7 3/4 x 6 7/8”).
Build Process
With fewer than 600 pieces and a 7+ age recommendation, I am not expecting a lengthy build. That said, as a parent of a young child, I appreciate that it includes several numbered stages, as this allows you to break up the build (over multiple days if needed), which reduces the likelihood of a meltdown.
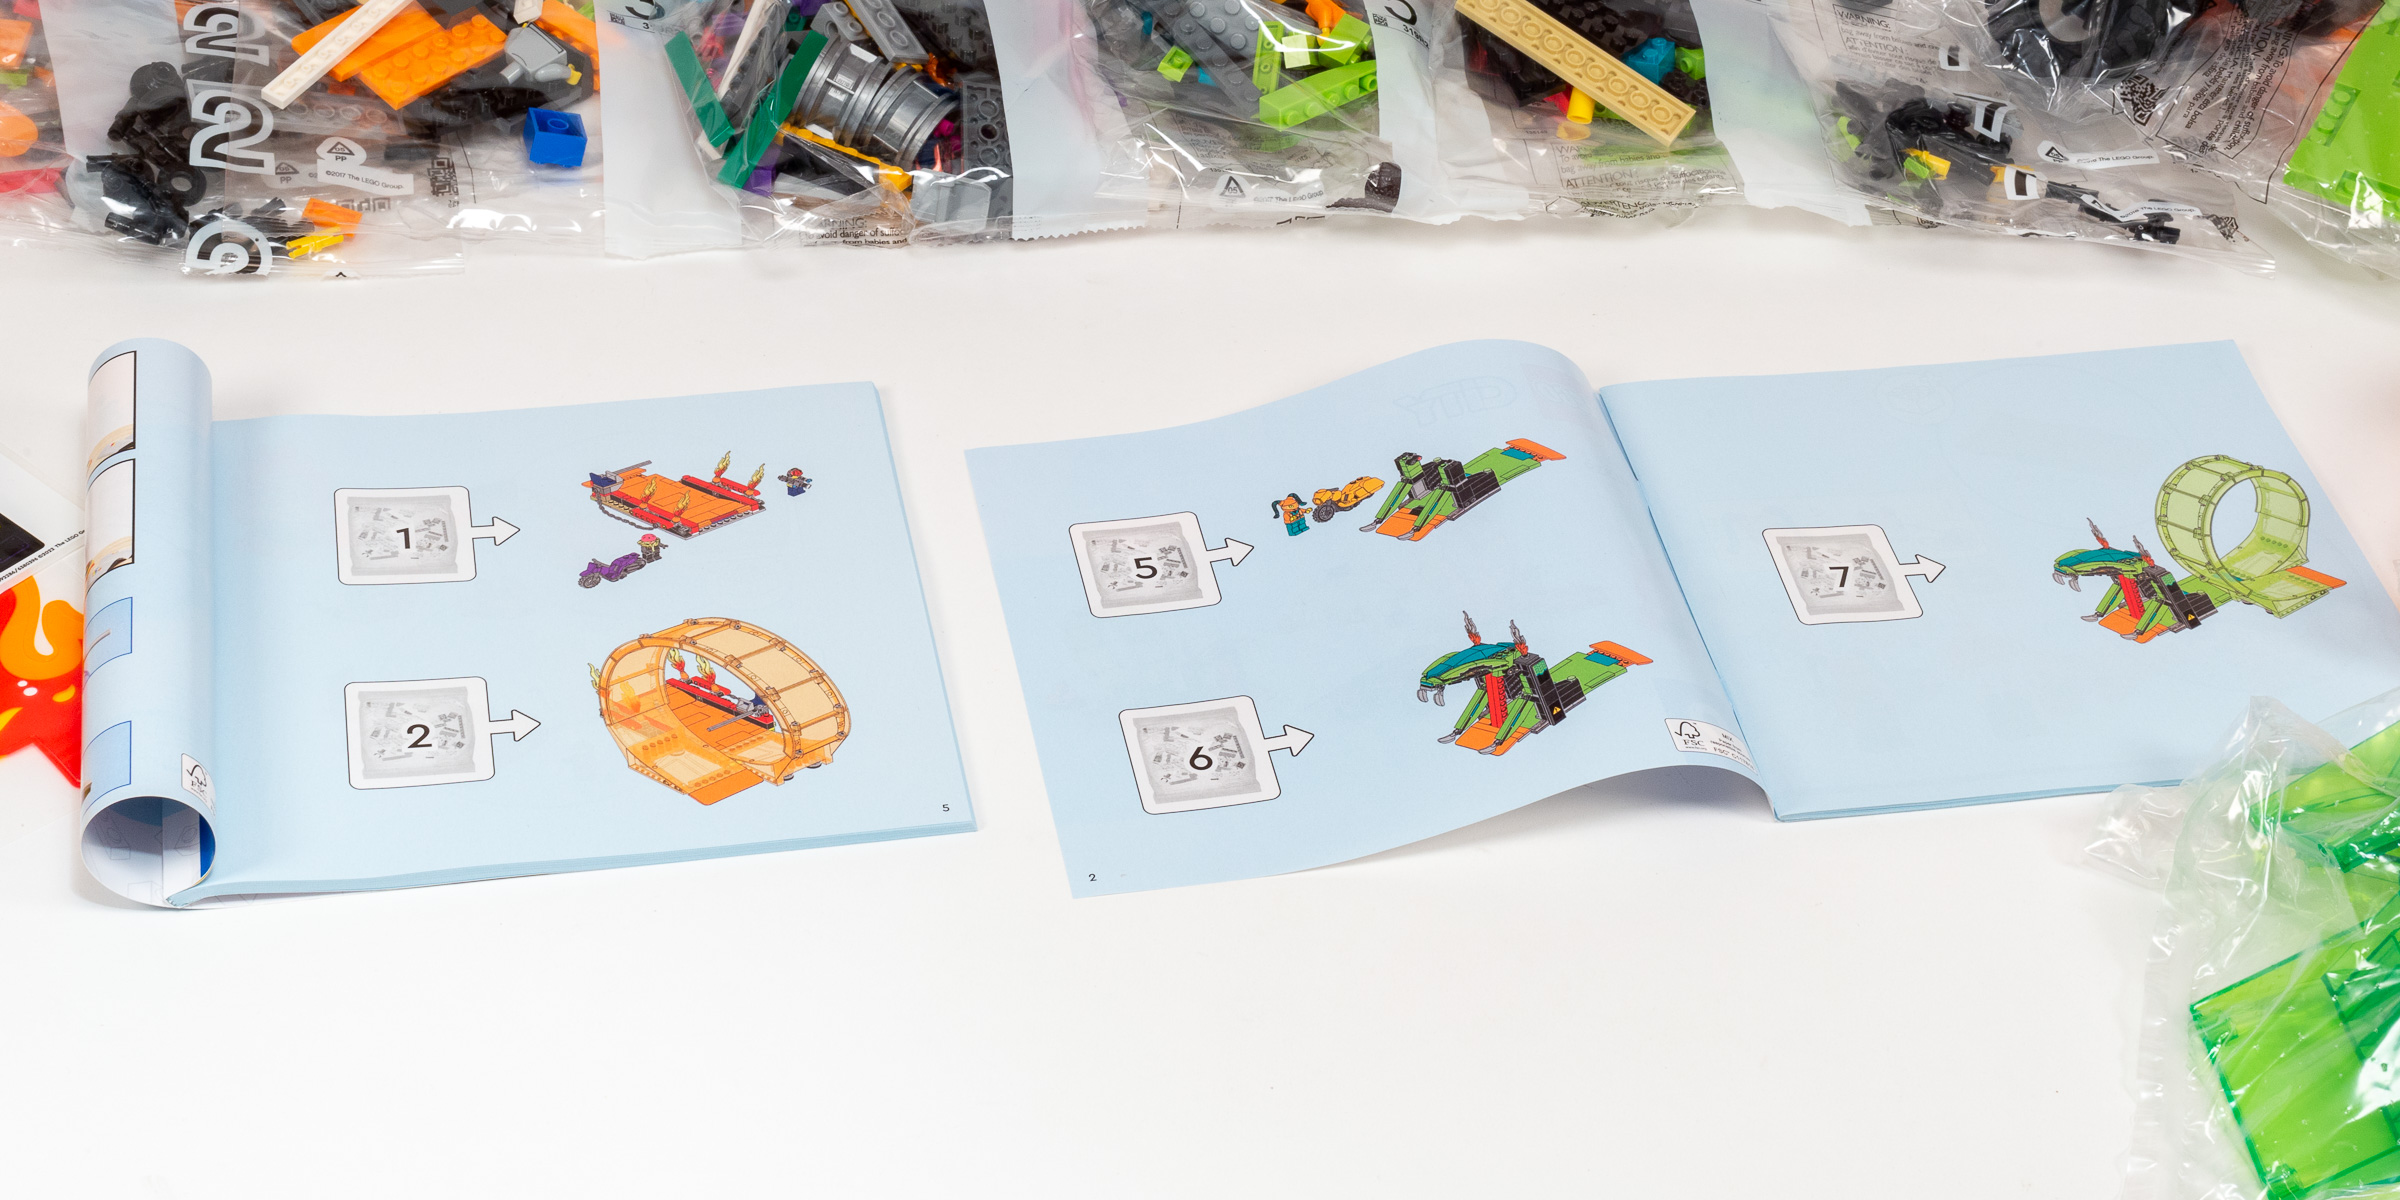
The first book uses bags 1-4, and the second book uses bags 5-7.
Given the simplicity of the set and the boisterous subject matter, I allowed my 4-year old son to help me build most of the model. That’s why I am not including a “build time” in this review.
Bags 1-4: Orange Loop (1st instruction booklet)
In the first two bags, we build the orange loop and the mechanism which causes flames to shoot up when you hit a lever at the end of the loop. This is a fun mechanism when it works, but the lever frequently causes the motorcycle to lose control.
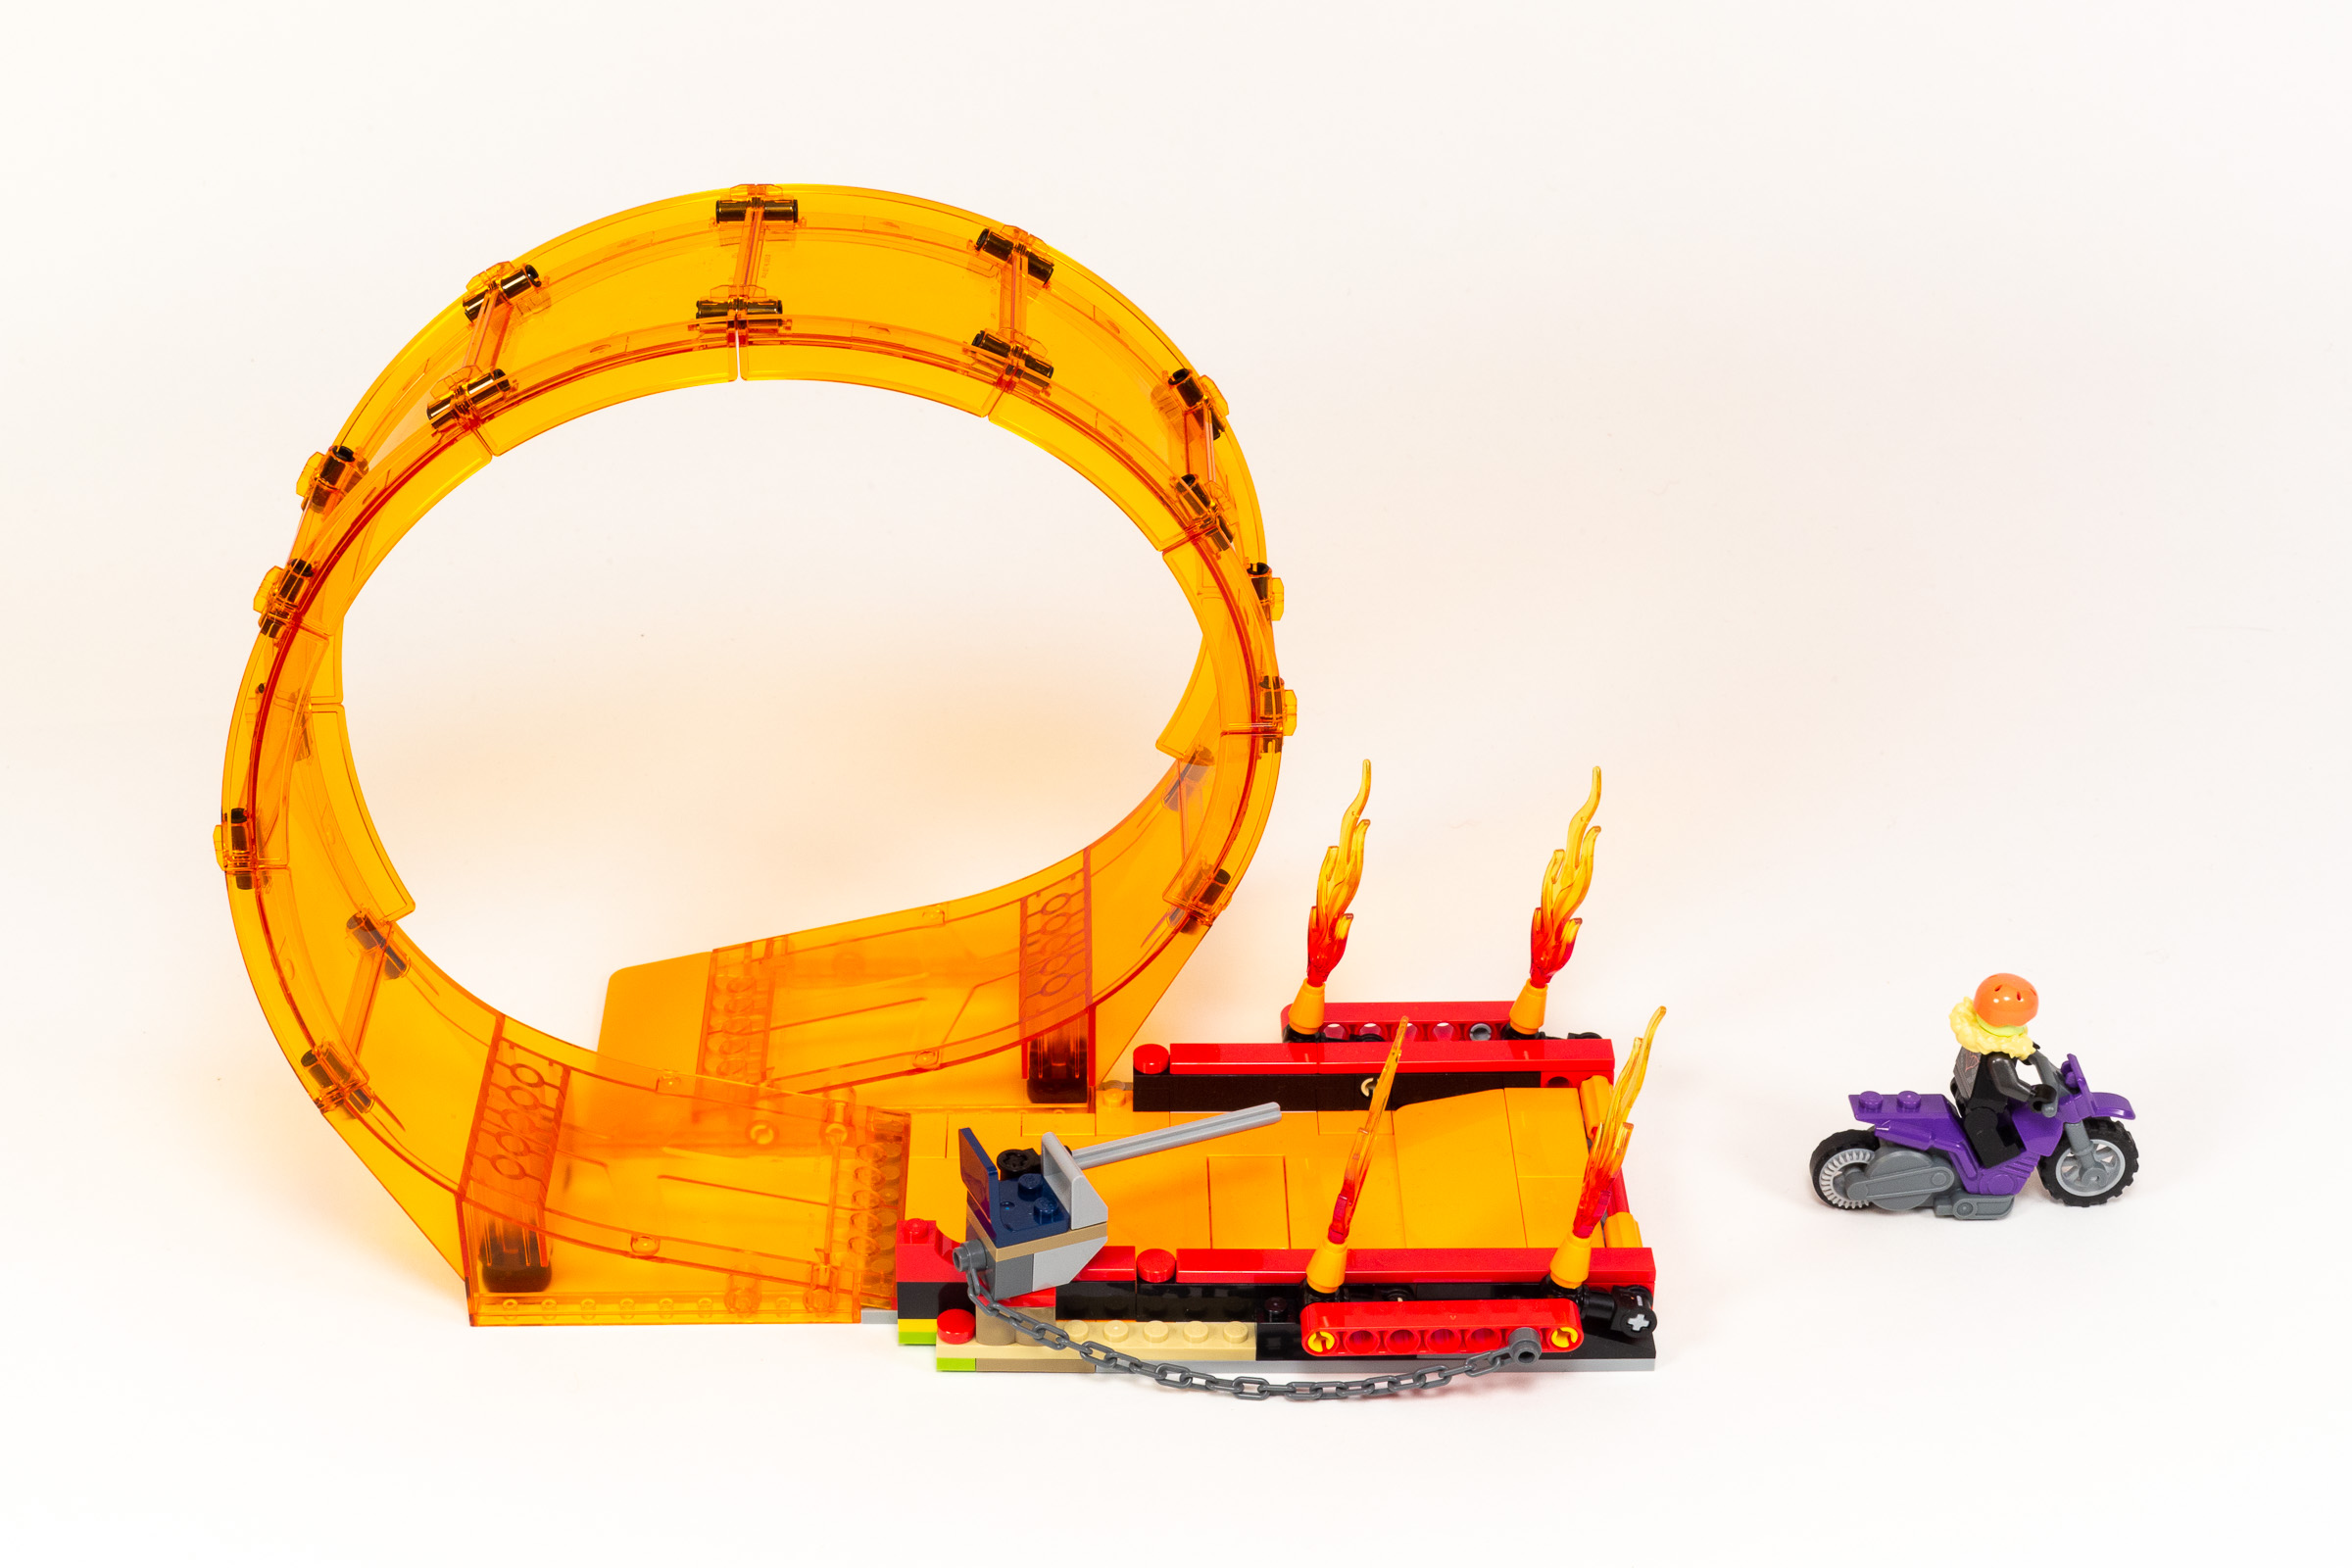
The first loop has flames which pop up when the motorcycle drives through.
In the third bag, we add some decorative elements to our model in an attempt to live up to the ‘arena’ mentioned in the set name. A simple archway adds an air of ambience with an economy of parts, using two rollercoaster elements on their side to create the archway. It includes a small snack stand on one end.
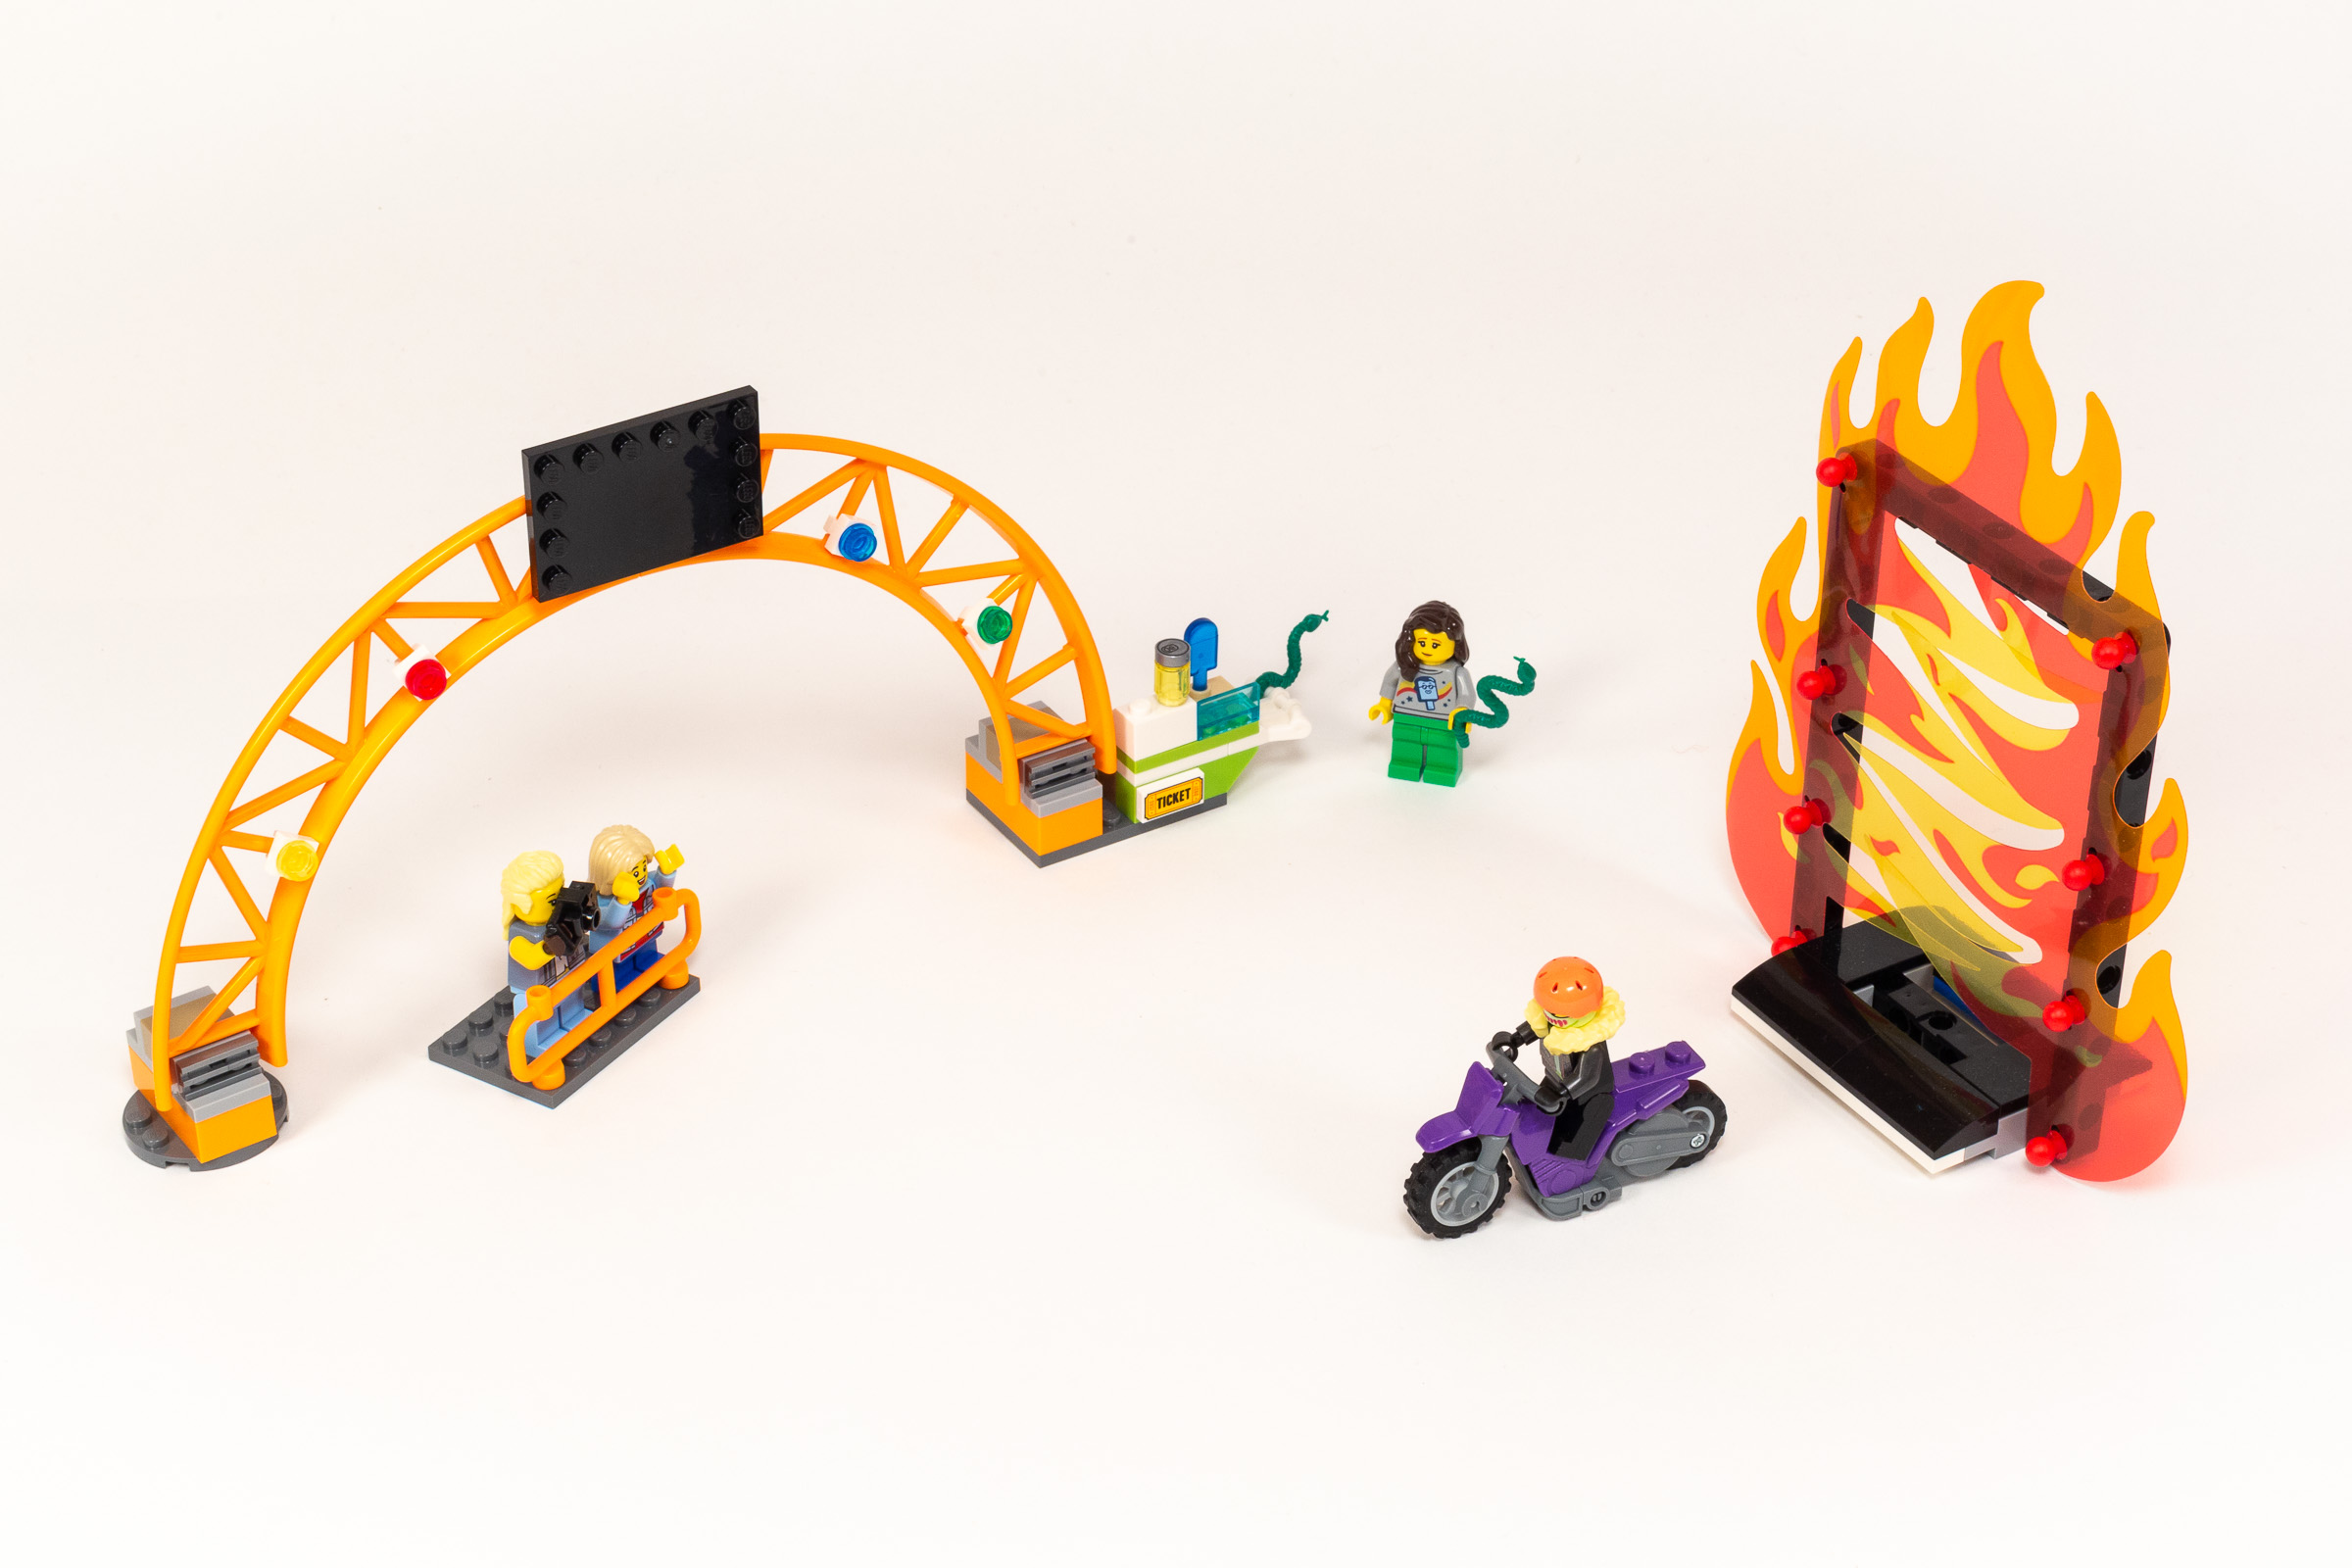
The archway, miniature stands, and a loop surrounded by flames.
We finish this bag with an extra addition to our fire-theme — a rectangular loop filled with flames for the motorcycle to drive through. It uses a flexible plastic material that the motorcycle can drive through without any difficulty.
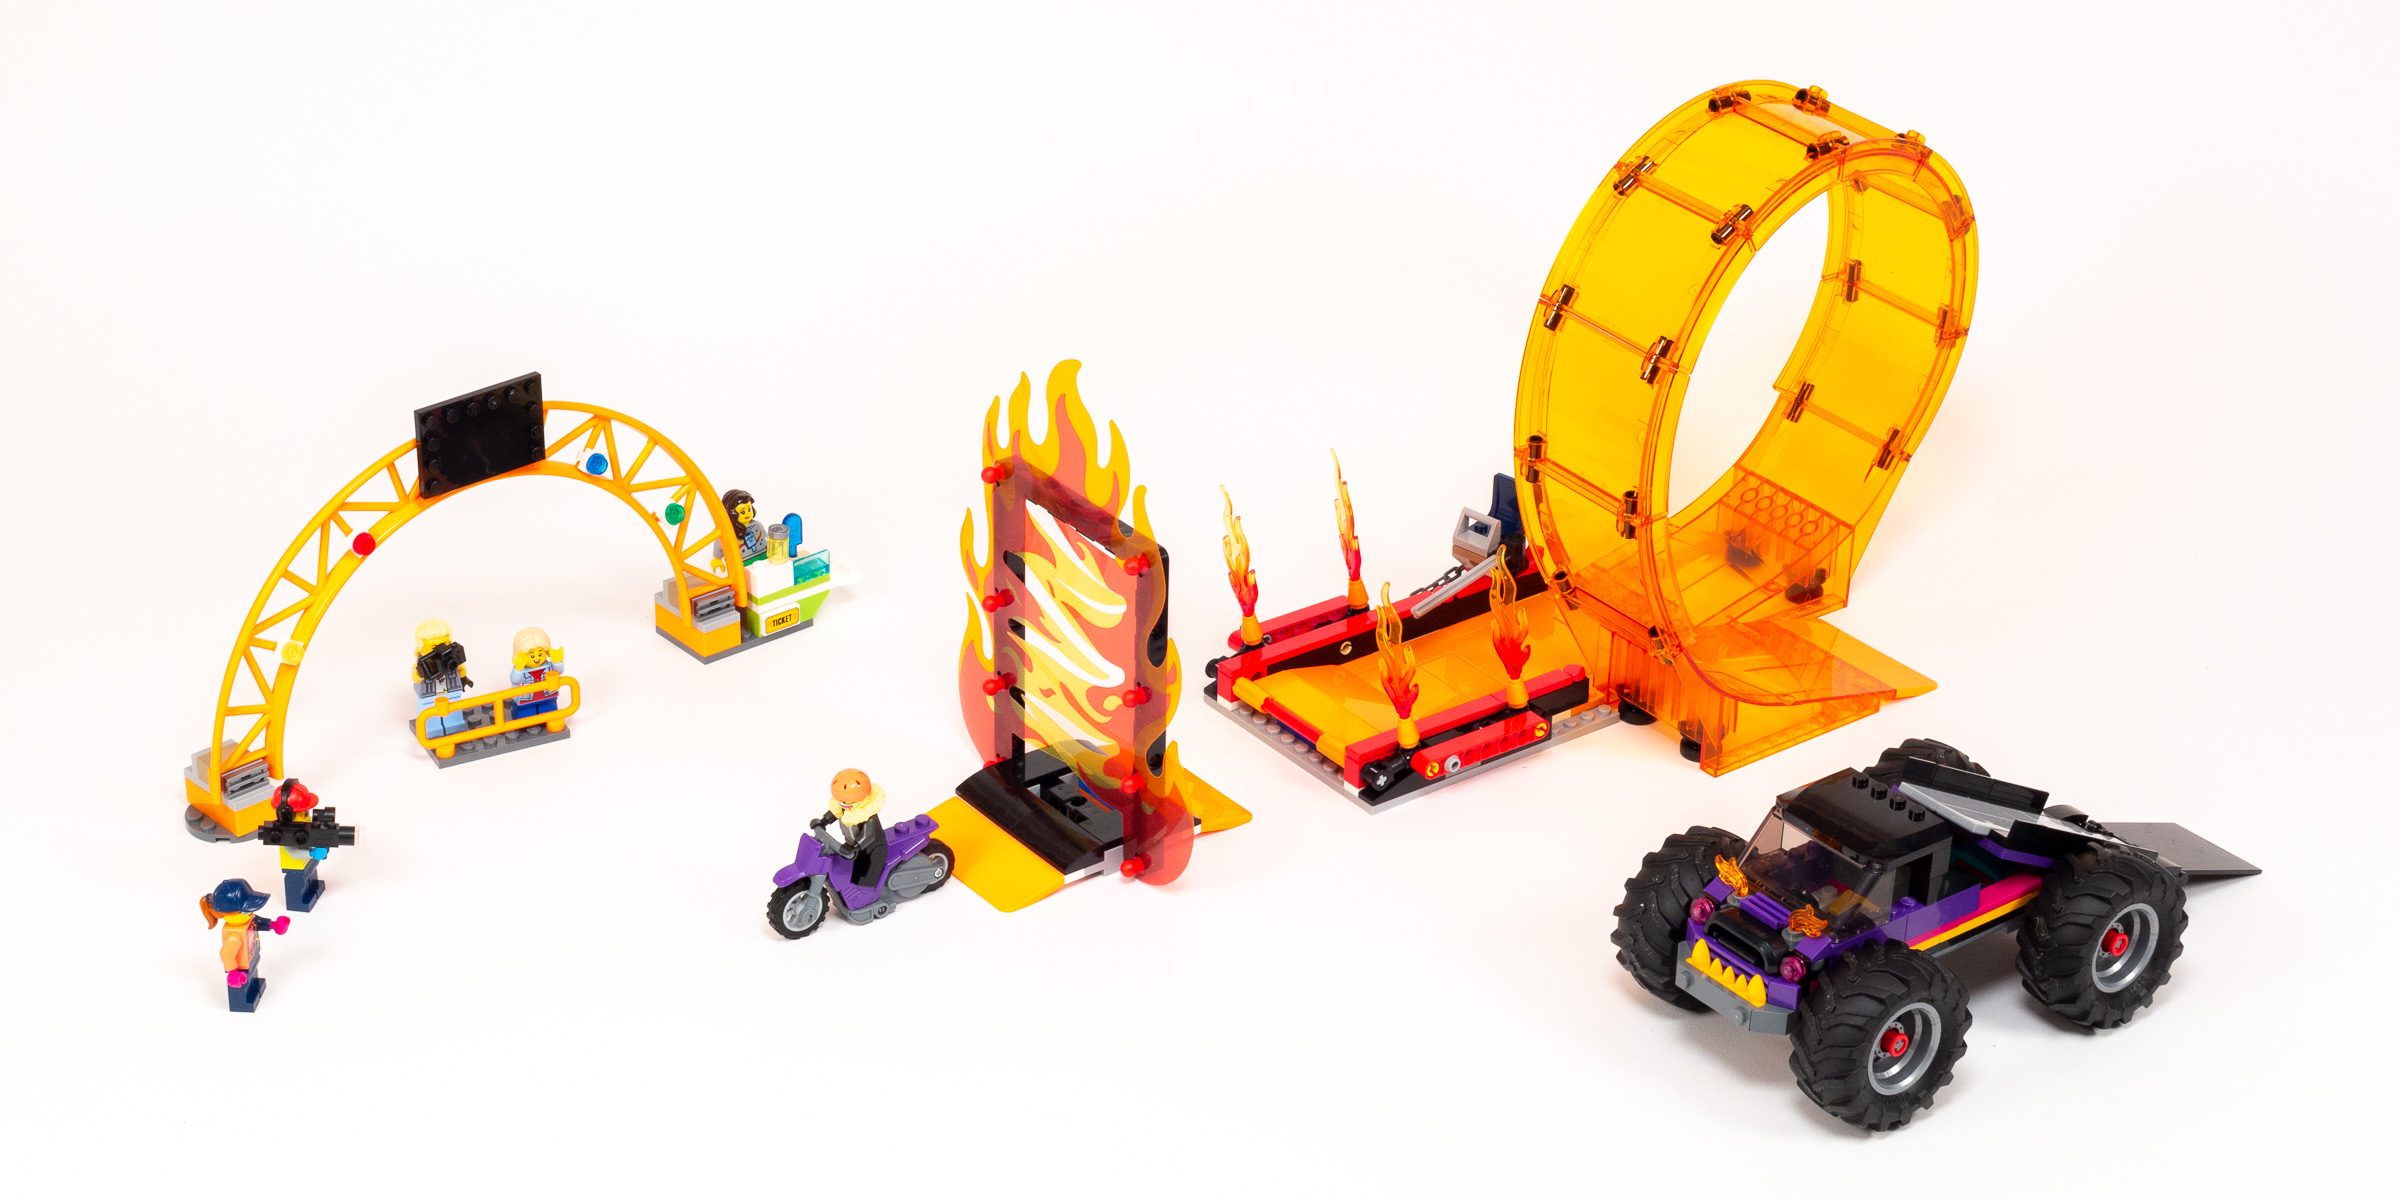
A Monster Truck with a bed that turns into a ramp completes the fourth bag.
In the fourth bag, we build a completely new element for our scene. It’s a small monster truck with a bed that can tilt and turn into a ramp. It’s not very complicated, but it does bring some diversity to the daredevil antics on display
Bags 5-7: Green Loop (2nd Instruction booklet)
The second instruction book is completely unrelated, which makes me think that they might have considered releasing these as two different sets originally. It features a second loop in a green color that features a vicious Snake theme.
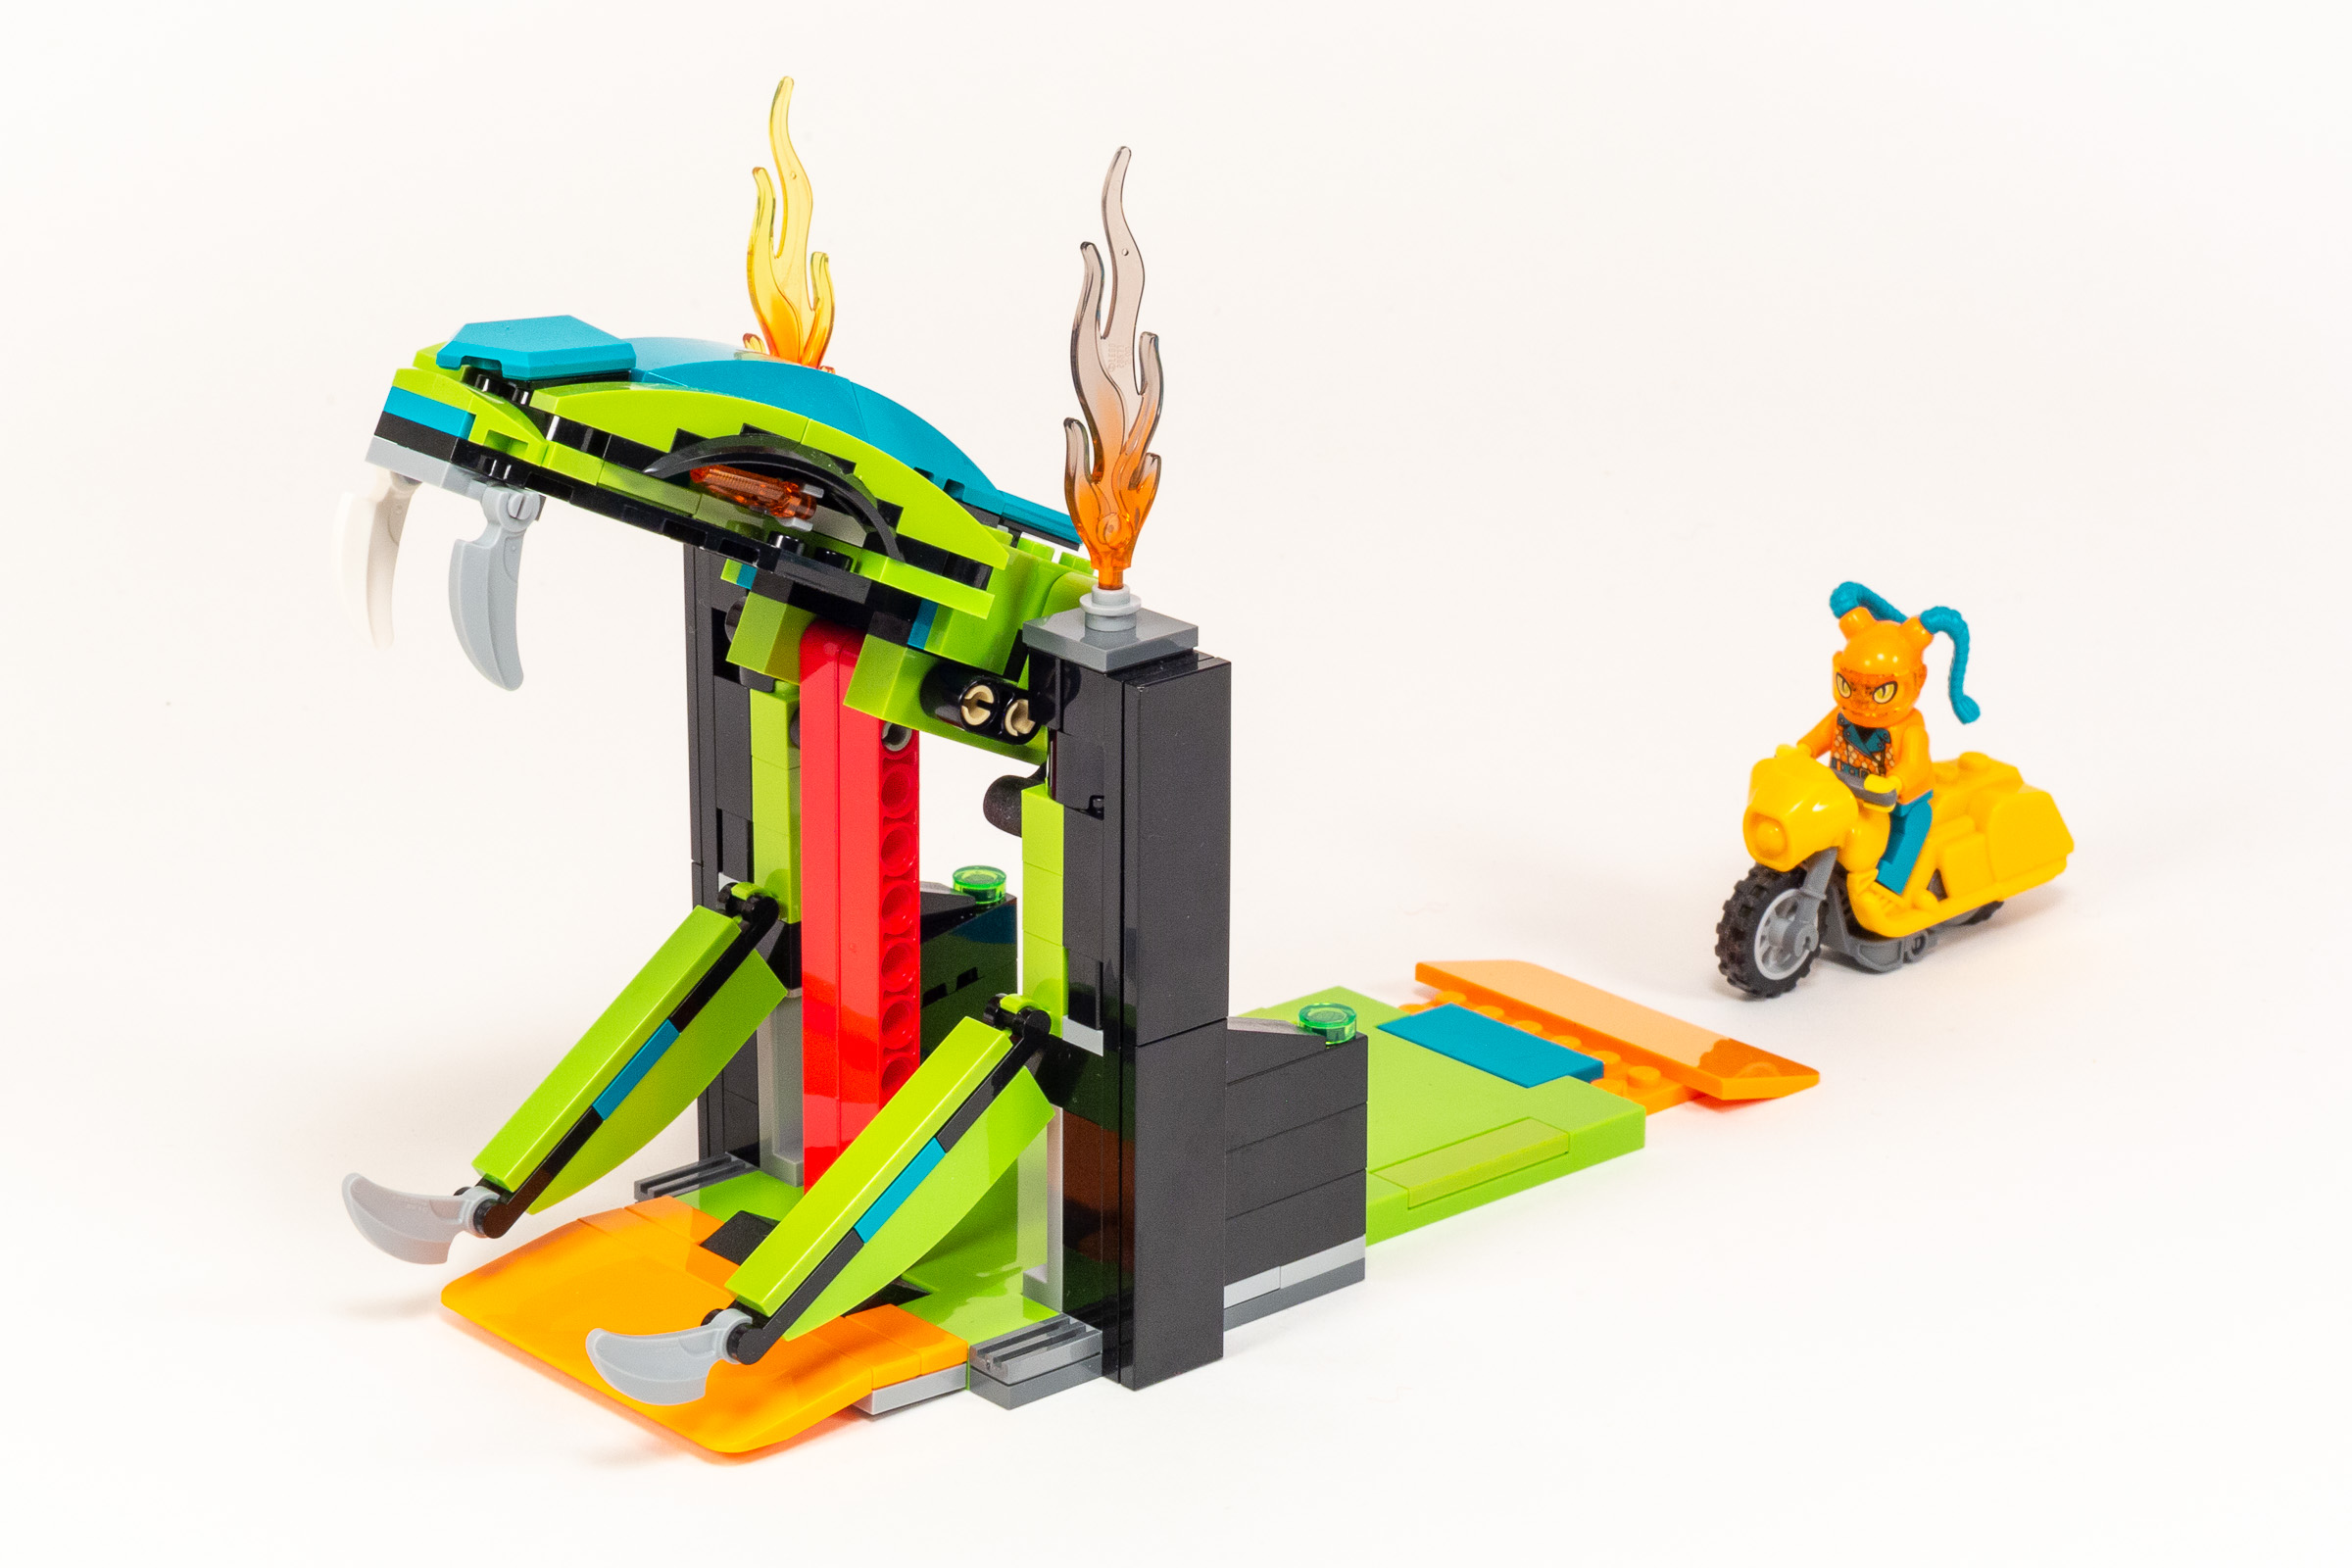
Snake head assembly without loop attached. Shown with jaw wide open.
In bags five and six we create a fairly intricate assembly that looks like the head of a snake with a long red tongue sticking down. It is pretty apparent as you get close to the end that the jaws of the snake will drop when the motorcycle hits the tongue, and you are able to test this mechanism before adding the loop in the final bag.
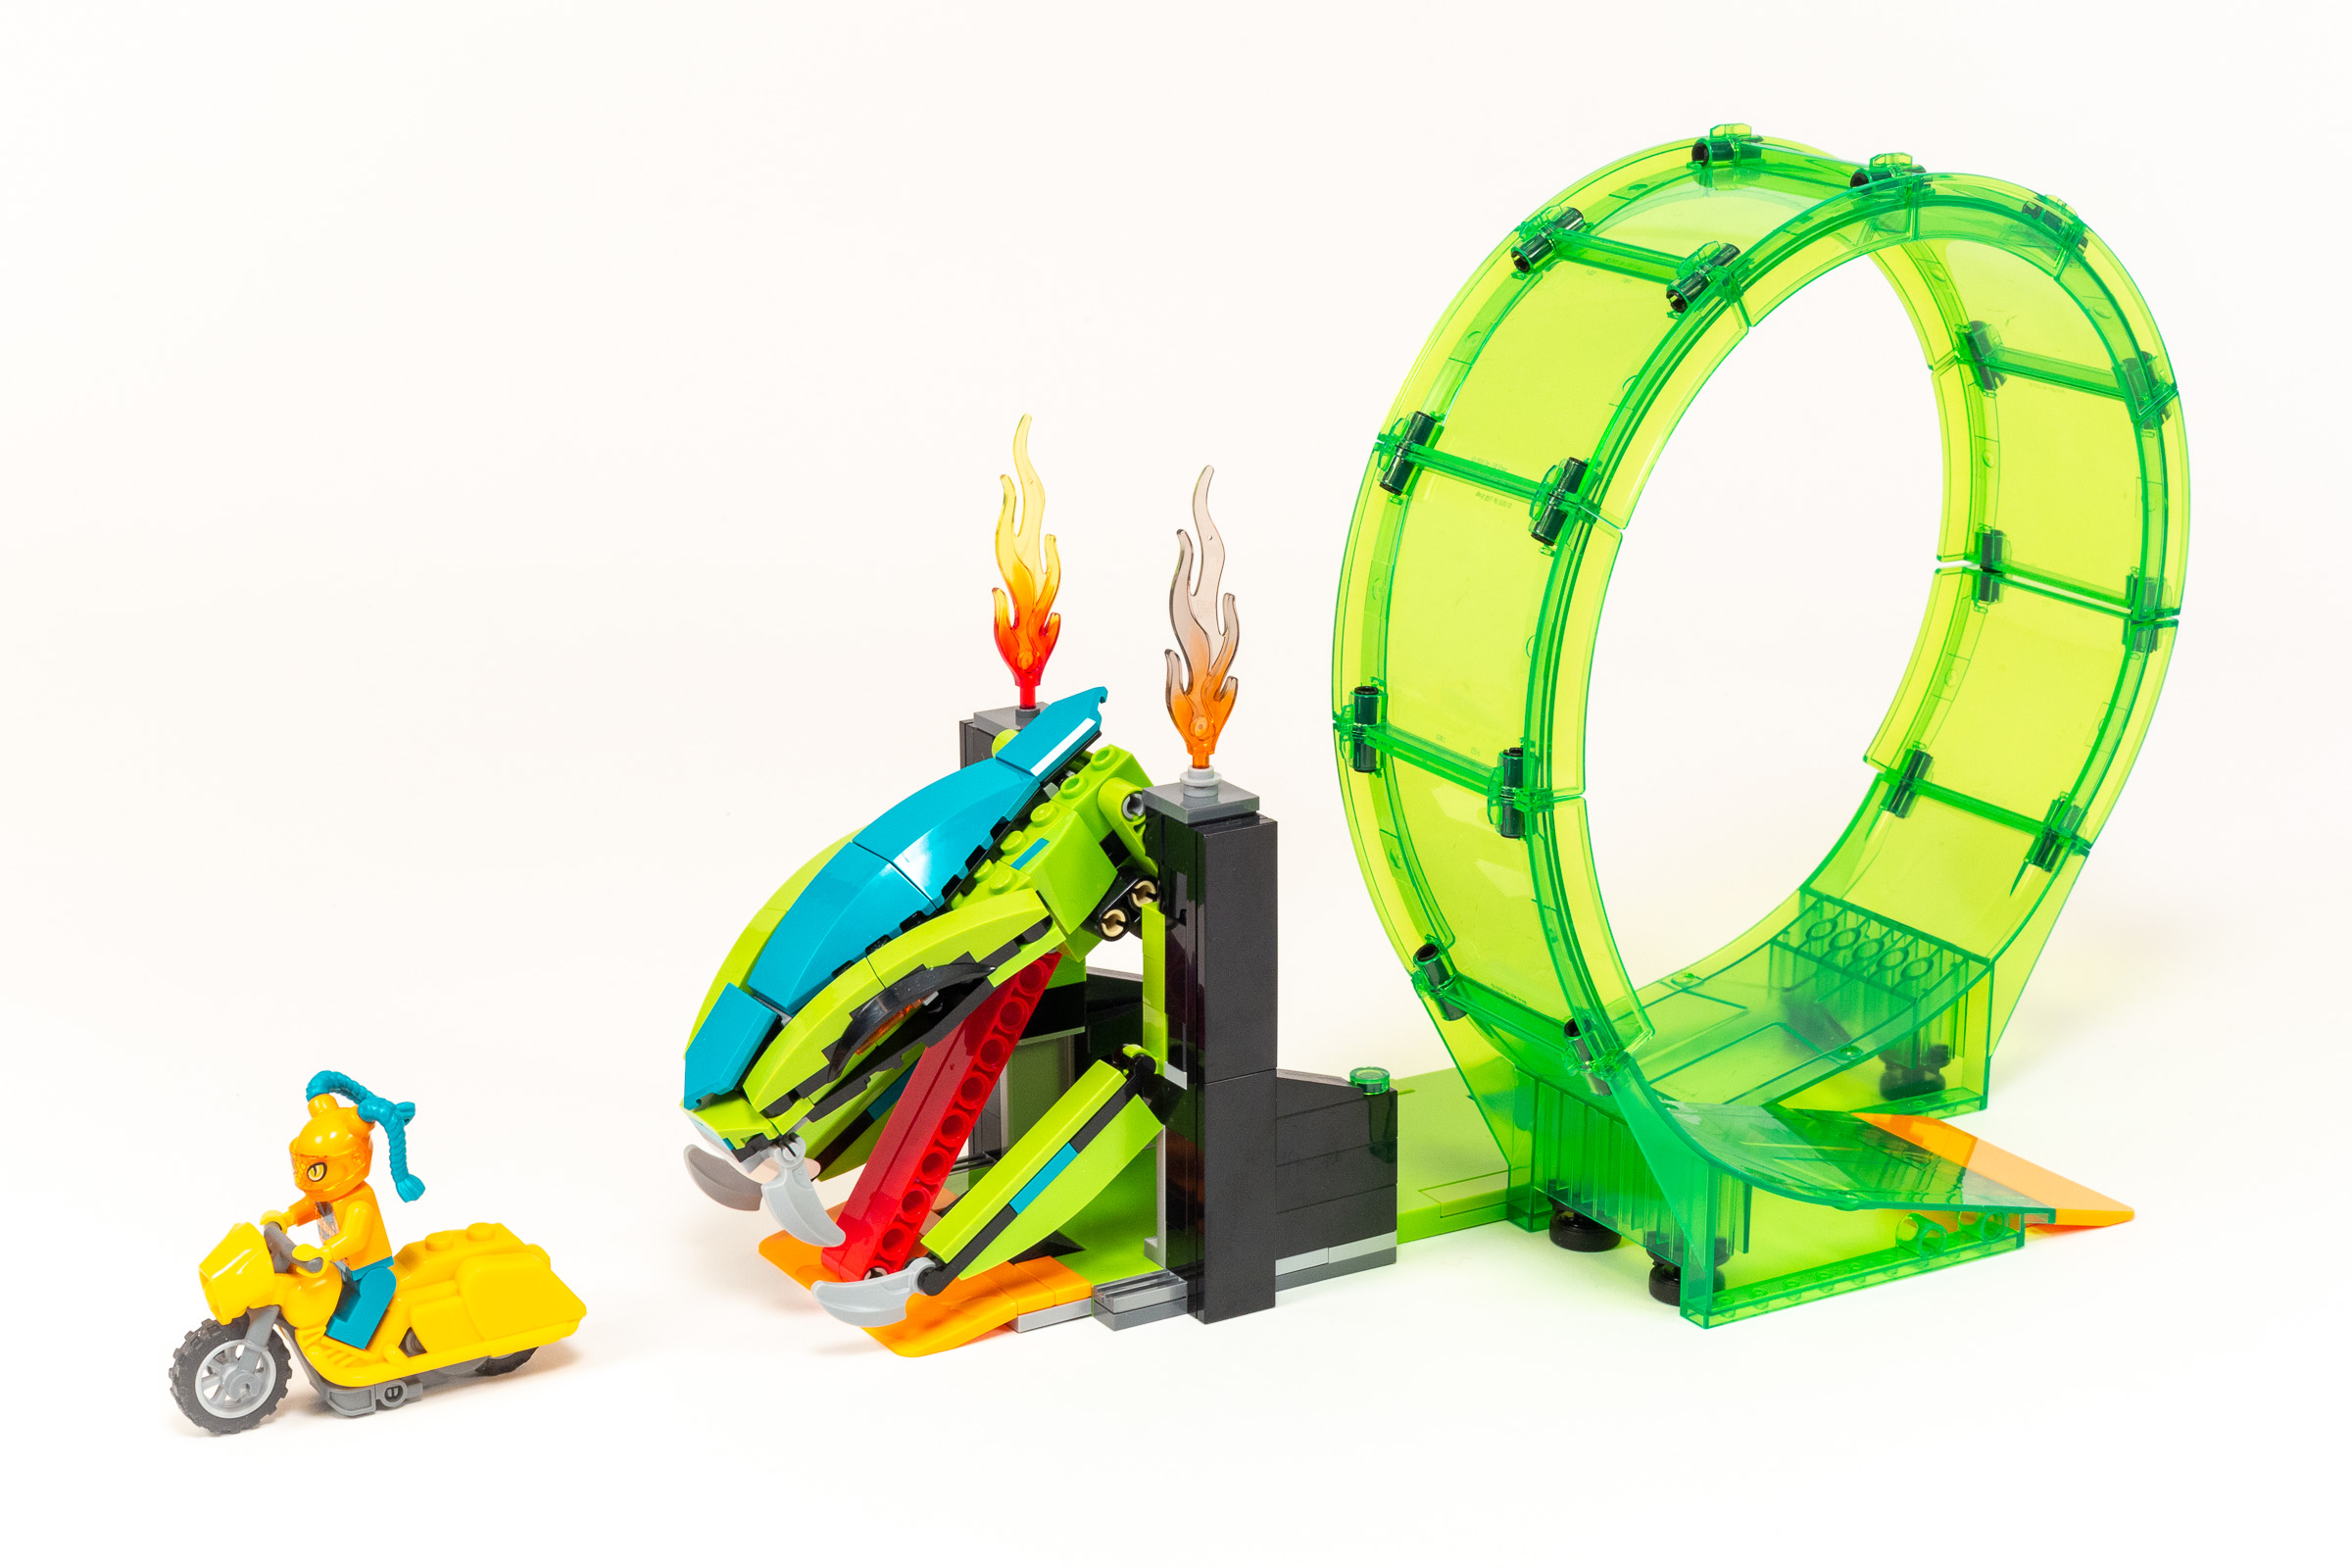
Brick-built snake head with the loop attached. Shown with jaw snapped shut.
The final bag completes the snake-themed loop and completes the set. Of the two loops, I think that the snake is more interesting and aesthetically pleasing than the first loop that relies on a bright color and flames to draw attention.
New Parts Analysis
While the set has been out for some time, there are some details about the new components that have not been explored sufficiently other LEGO websites. In particular, I want to talk about the geometry of the ramp and loop elements, because I found that they are a bit problematic in practice.
Flywheel Motorcycles
Each of the two motorcycles are comprised of five removeable elements – the flywheel assembly (which includes the rear wheel), the front tire and wheel, a standard handlebar element, and one of two motorcycle chassis. (Other sets in the Stuntz line include even more removeable chassis – including one shaped like a bathtub.)

Each motorcycle consists of 5 parts.
While I have a lot of concerns about the loop elements which are outlined below, the flywheel-based motorcycles are really cool. Unlike the more common wind-up vehicles, you do not need to pull the motorcycle backwards to get it ready. Instead, you push it quickly across the ground one or two times and the energy of your push is stored in a tiny flywheel, causing it to zoom forward when you place it on the ground.
Ramp and Loop elements
By default, each loop is comprised of two ramp sections that connect to one another on the sides and 8 curved sections that complete the loop. On closer analysis, I confirmed that it would take 12 loop elements to create a complete loop without using the ramp element, so each one is a 30° segment. Since the ramp is 8 studs wide and there are 8 curved sections in each loop, every curved section has a 1-stud offset to create the required corkscrew shape.

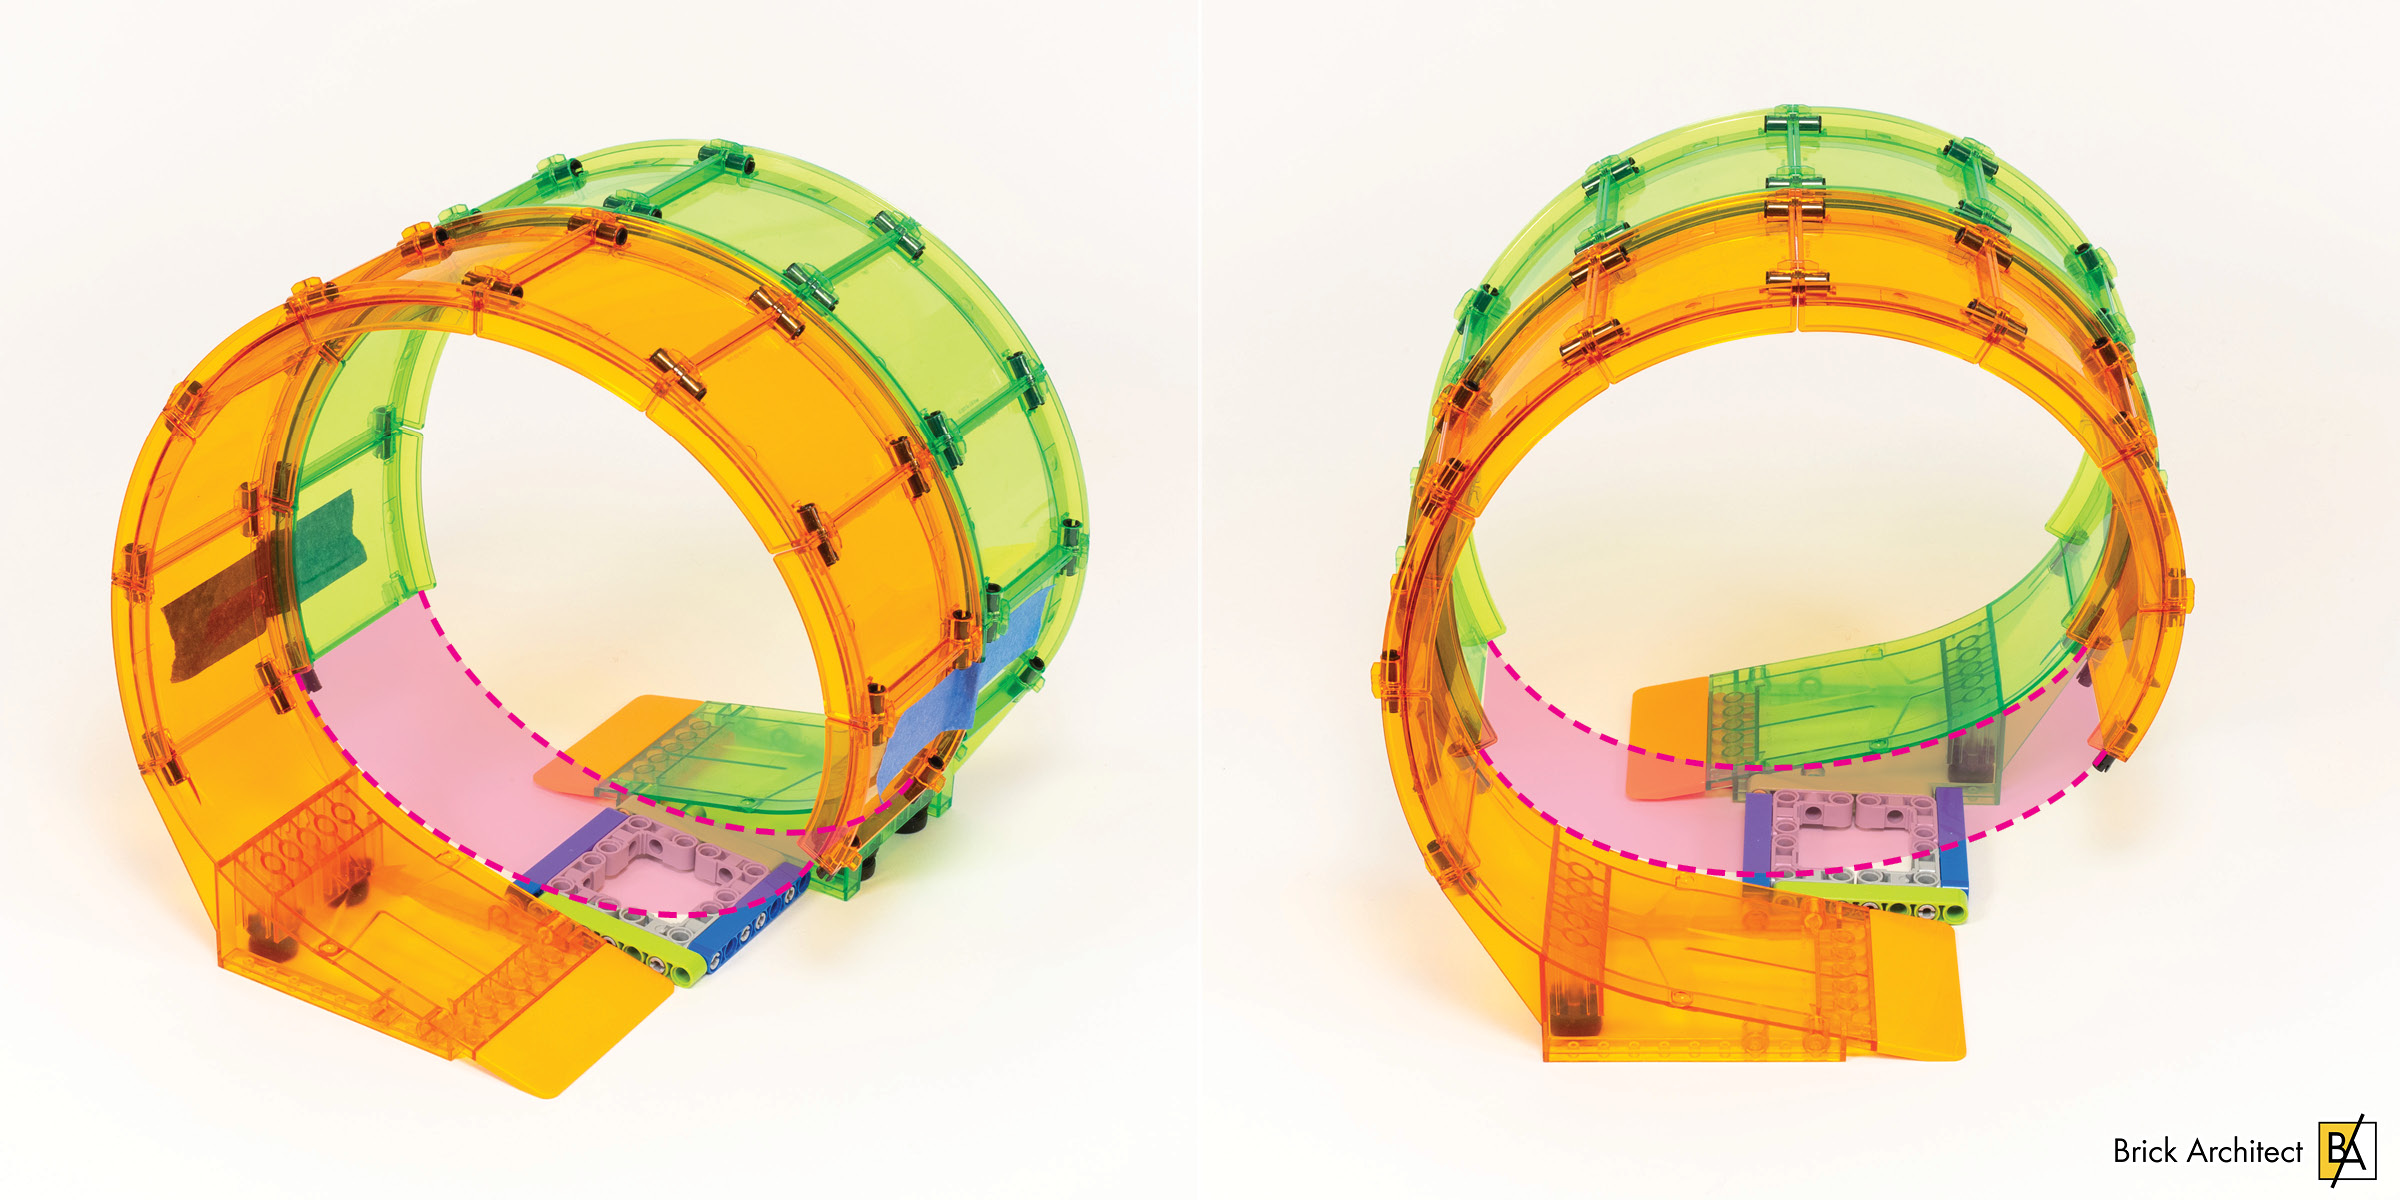
I taped a piece of paper to the inside surface of the loop to measure the length of each curved segment.

I unrolled the paper to measure the distance.
The ramp consists of a main ramp and a small ramp up onto the big ramp, which I measured using a similar process. The surface length measurements are 2.5 cm for the small ramp, and 12.3cm for the larger section (for a total of 14.8cm).
In order to do detailed analysis of the ramp and loop geometry, I needed to do a number of measurements and calculations. If you want to skip that section, feel free to scroll down.
Measurements and Calculations
I’ve chosen to include some of my calculations. There’s always a chance I made a mistake — but more importantly it’s a practical scenario for showing and practicing geometry skills.
As seen in the photos above, I measured the surface area (inner diameter) of four contiguous sections of the loop. Measuring more than one section and dividing the result gives a more accurate measurement.
20.2 cm / 4 segments =  5.05 cm per section.

	5.05 cm / 0.80 cm/stud = 6.31 studs per section.
These measurements are based on the assumption that the curves sections connect to make a cylinder instead of a spiral – that’s why I used a triangular-shaped piece of paper attached perpidicular to the starting edge to take the measurements. As you can see, each section has an inner diameter of 5.05cm.
5.05 cm × 12 sections = 60.6 cm circumference  (not accounting for the spiral shape).

	60.6 / (2 × π) cm/stud = 9.64 cm inner radius (or 19.29 cm inner diameter).

	9.64 cm / 0.80 cm/stud = 12.05 stud inner radius (or 24.11 stud inner diameter).
Given the possibilty of small errors in my measurements, it is entirely possible that the true measurements fit perfectly into the LEGO system with a perfect 24-stud diameter.
The angles shown in the diagrams below were measured using the angle tools in my graphics software instead of calculating them directly.
Basic Single Loop
As noted earlier, the set suggests a loop containing two ramps and 8 curved sections. It is not too difficult to get the flywheel motorcycle to complete the loop without hitting the wall and careening out-of-control, but you do need to start the motorcycle slightly to the left of the beginning of the ramp, and aim it at an angle to prevent it from hitting the wall.
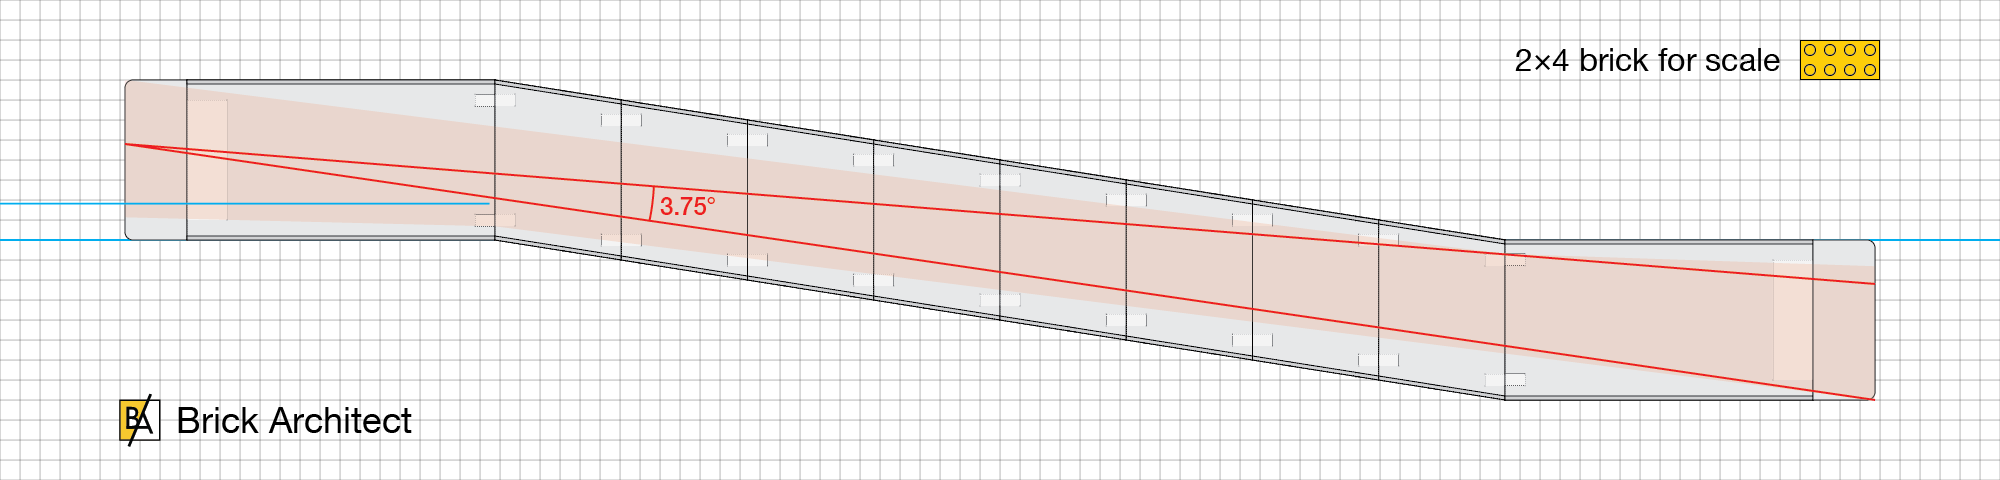
It can be tricky to get the right angle to complete the loop since the beginning section of the loop is straight.
By “unwrapping” the loop using the diagram above, you can see that pointing the motorcycle at a significant angle compared to the ramp piece is required to get the motorcycle to complete the loop. As you can see, you have less than 4° of flexibilty in the entrance angle or else it will slam into the wall.
Modified Single Loop

Modified loop using only curved pieces.
It is possible to create a loop using just 12 curved pieces, but you need to connect it to Technic panels as there isn’t a straightforward way to connect with system elements at the right height.
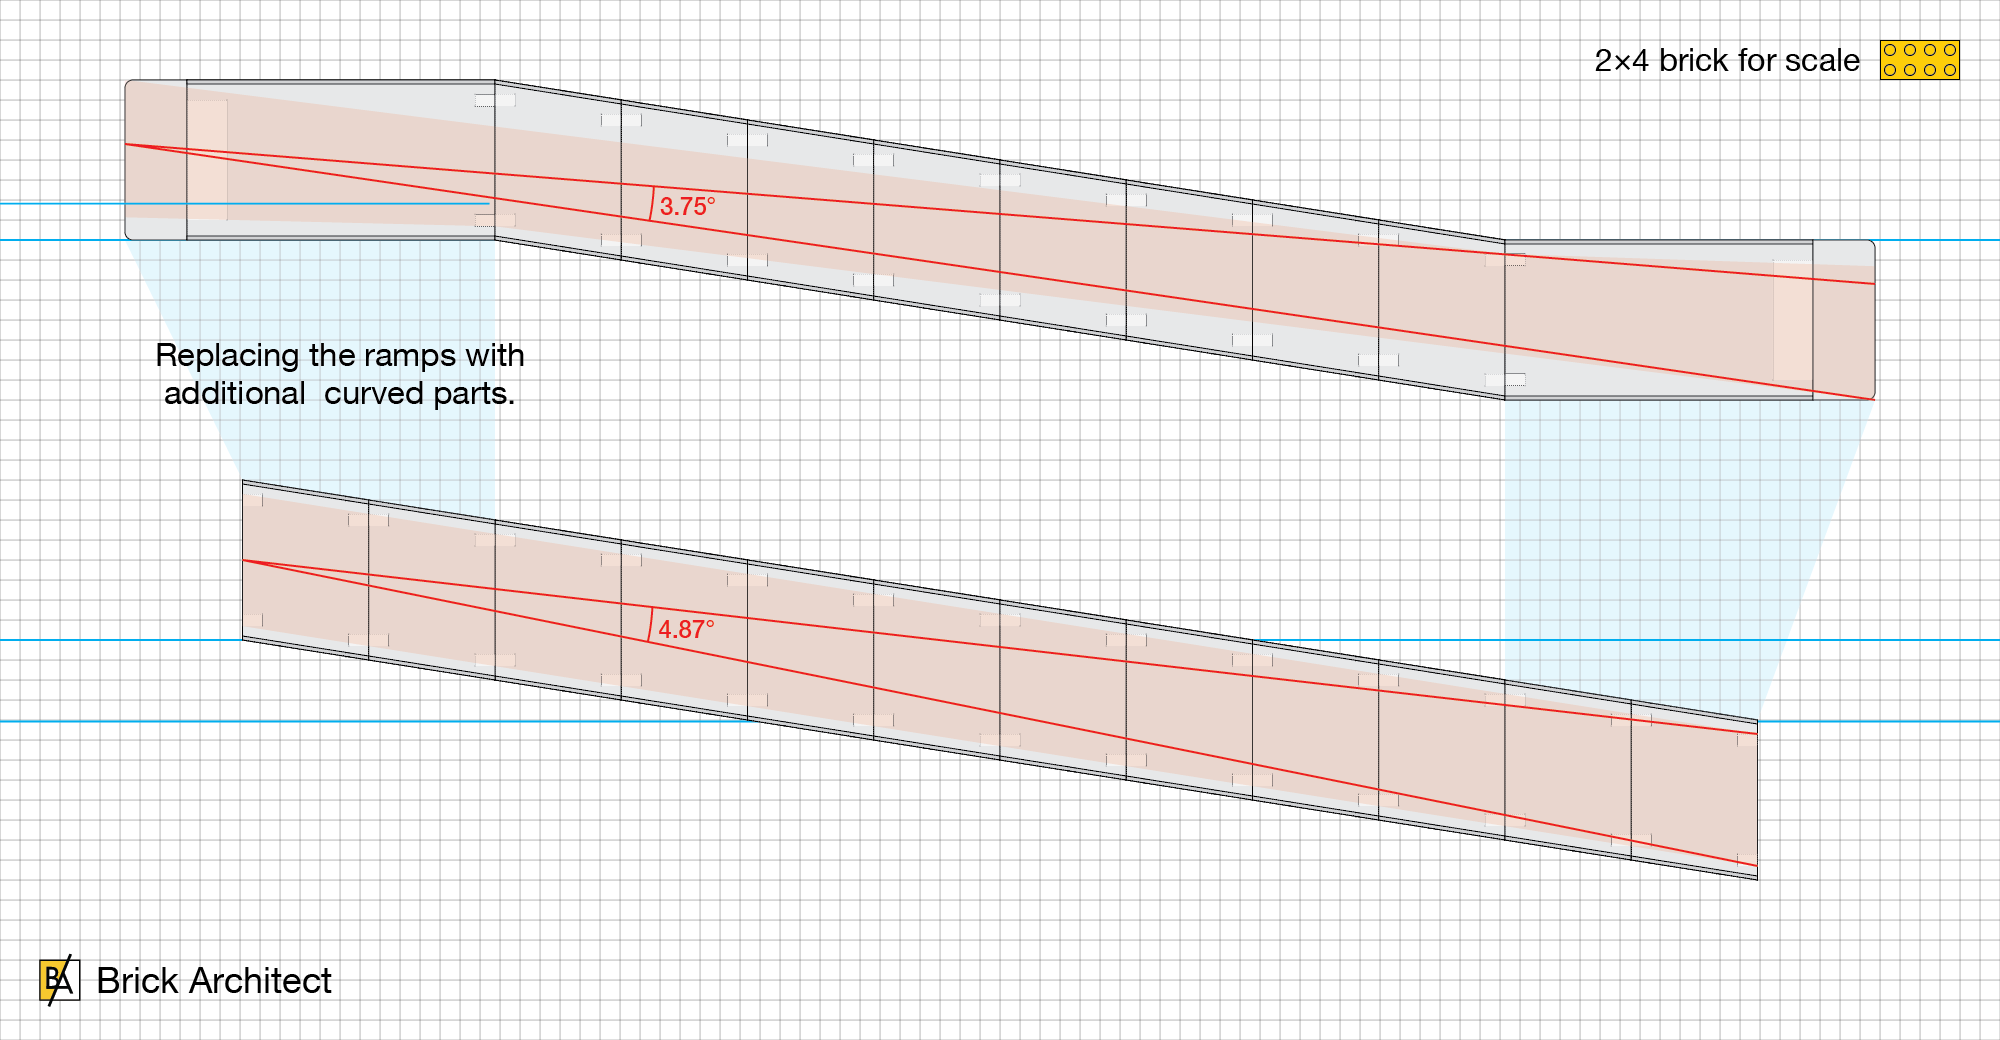
It is easier to complete the loop when the ramp is the same angle.
If the ramp section had the same angled shape, or you replaced each ramp with two more curved sections, it becomes a bit easier to complete the loop without slamming into the wall. At nearly 5° of flexibility in the entrance angle with thic confiiguration, you have about 30% better chance of getting the angle right.
Double Loops
Let’s be real, even though we don’t see a double loop on the box, every 4 (and 40)-year old sees a set with two loops and wants to see if they can get the motorcycle to complete both of the loops in a row! I was disappointed to learn that this is extremely difficult to achieve in practice.

You can create a ‘double loop’ using just the parts that come in the set.
I would estimate that only one in about 50 attempts was successful, because the motorcycle kept crashing into the wall of the second loop or missed the second loop completely. I made it my mission to ‘do the math’ and figure out why.
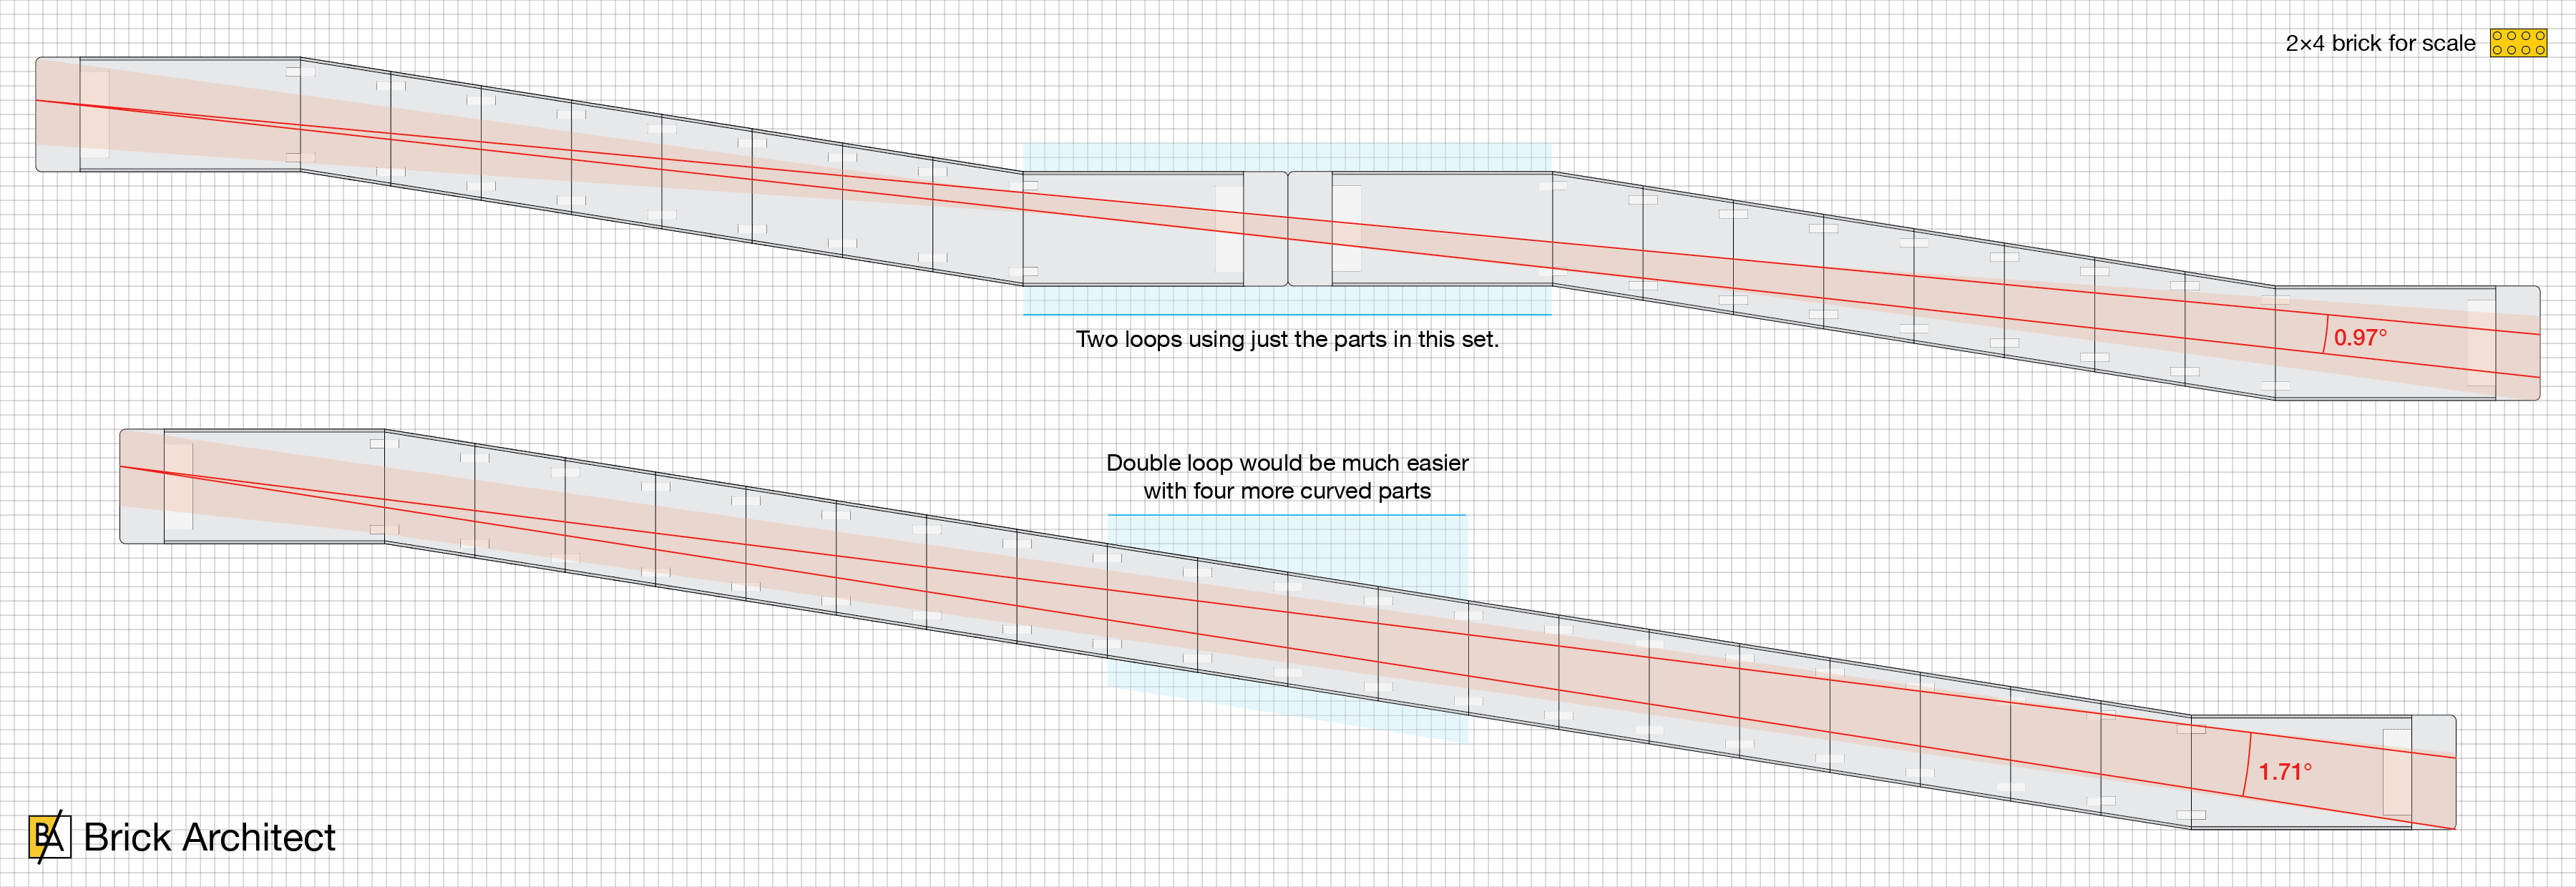
It is very difficult to complete a double loop because the margin for error is so small.
I’m going to let the illustrations do most of the work, but the overall answer is pretty simple – you need to get the starting point and angle of the motorcycle almost perfect for it to complete two full loops.
Even with this theoretical improved loop design, the range of valid angles to complete the loop is very narrow.
I was unable to test the improved loop design because I do not have four additional curved sections. If my calculations are correct, it should be about twice as easy to complete a double-loop with the modified design than the double-loop which is possible using just one copy of this set.
Value
Let’s be honest, this set screams fun, but it’s an obviously bad deal if you assess it using typical AFOL metrics like price-per-part. This is not the only way to assess value though – there’s also price-per-gram and play value to consider.
- LEGO Parts Weight: 865 grams (1.907 lbs)
- Price per piece: $159.99 / 598 pieces = $0.267 per piece
- Price per gram: $159.99 / 865 g = $0.185 per gram
This is both the worst price-per-part and the worst price-per-gram that I have ever seen. Sets with complex mechanisms like the flywheel in the motorcycles, or electronics tend to have lower value, but this is unusually bad.
| LEGO Set | Price | Part Count | Price-per-part | Weight | Price-per-gram |
|---|---|---|---|---|---|
| #31203 World Map | $249.99 | 11,695 pieces | $0.021 per-piece | 4020 grams | $0.062 per-gram |
| #21056 Taj Mahal | $119.99 | 2022 pieces | $0.059 per-piece | 1811 grams | $0.066 per-gram |
| #21058 Great Pyramid of Giza | $129.99 | 1476 pieces | $0.088 per-piece | 1832 grams | $0.071 per-gram |
| #10278 Police Station | $199.99 | 2923 pieces | $0.068 per-piece | 2602 grams | $0.077 per-gram |
| #71741 Ninjago City Gardens | $299.99 | 5685 pieces | $0.052 per piece | 3719 grams | $0.081 per-gram |
| #71043 Hogwarts Castle | $399.99 | 6020 pieces | $0.066 per-piece | 4899 grams | $0.082 per-gram |
| #10292 Friends – The Apartments | $149.99 | 2048 pieces | $0.073 per-piece | 1778 grams | $0.084 per-gram |
| #10297 Boutique Hotel | $199.99 | 3066 pieces | $0.065 per-piece | 2380 grams | $0.084 per-gram |
| #10312 Jazz Club | $229.99 | 2899 pieces | $0.079 per-piece | 2392 grams | $0.096 per-gram |
| #10270 Bookshop | $199.99 | 2504 pieces | $0.080 per-piece | 2085 grams | $0.096 per-gram |
| #10282 Adidas Originals Superstar | $79.99 | 731 pieces | $0.109 per-piece | 735 grams | $0.109 per-gram |
| #10316 Rivendell | $499.99 | 6167 pieces | $0.081 per piece | 4375 grams | $0.114 per-gram |
| #10305 Lion Knights’ Castle | $399.99 | 4514 pieces | $0.089 per piece | 3265 grams | $0.122 per-gram |
| #10303 Loop Coaster | $399.99 | 3756 pieces | $0.106 per-piece | 3189 grams | $0.125 per-gram |
| (This set) #60339 Double Loop Stunt Arena | $159.99 | 865 pieces | $0.267 per-piece | 865 grams | $0.185 per-gram |
Note: Prices based on date of initial release. (The LEGO Group increased the price of many older sets in late 2022.)
This set is way above the 10 cents-per-piece rule of thumb and offers an atrocious price-per-gram as well. It does offer a lot of ‘fun value’ — but it’s hard to see how this makes up the gap compared to many other LEGO sets which you might buy for yourself or your family.
Conclusion
The set is challenging to recommend for a number of reasons. It is almost impossible to complete the desired ‘double loop’ using just the parts which come with the set.

#60339 Stuntz Double Loop Stunt Arena – Completed Model.
Worse still, the set fails horriby on any objective measure of value – If you are feeling the need for speed and the desire for cars to go around loops, you can get a hot-wheels compatible toy on Amazon for $23. While I suspect that the buildable aspect of this LEGO interpretation of the popular kids will hold kids attention for a bit longer, I would be surprised to see that it offers 7× more play value to match the radically greater price tag. I’m not convinced that it was a good idea to create premium-priced LEGO product that competes in a category dominated by inexpensive toy cars. The higher cost of LEGO products is laid bare in this type of comparison.
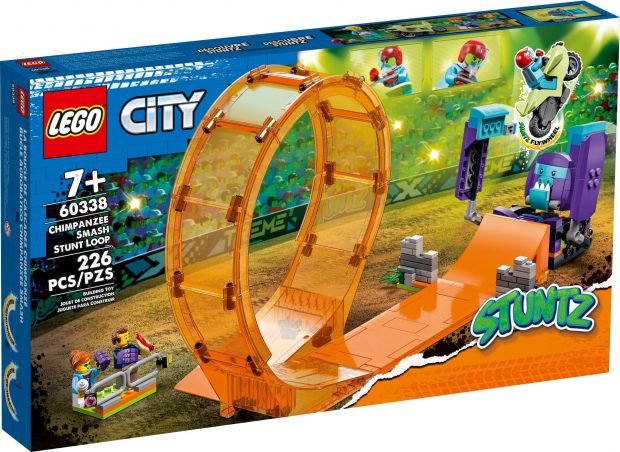
So what should you do if your child sees this set in a store and really wants it? At full price, you should save a lot of money (and avoid the two-loop debacle completely) by considering #60338 Smashing Chimpanzee Stunt Loop — at $70 it is less than half the cost!
#60338 Smashing Chimpanzee Stunt Loop offers a similar experience for a much lower price.
If it is deeply discounted to $100 or less, it’s not a terrible choice. Despite the issues in completing a double-loop, you do have a number of additional play features including the viewing area, the snake and flames components that make the loops more exciting, and the monster truck that converts into an extra ramp for doing even more stuntz.
Even if we ignore the price, this is not a top-tier set because the loop elements are not very well designed. At the ludicrously high sticker price, the set limps away from a bad crash with an Not Recommended (1/5 star) rating. If you can find it deeply discounted, it climbs into the ‘Acceptable’ range.
A lot of changes would be needed for this set to earn a really good review. A good place to start would be a much lower price and including enough pieces to complete two loops by adding four more curved parts. I would also like to see improvements to the ramp and loop elements. They should have the same angle the whole way around, and they need pin connections on the sides of the curved pieces to allow you to connect two loops in a row in a structurally-sound way. Lastly, I would like to get a better sense of an “arena”, such as the inclusion of some actual bleachers which you could fill with other minifigures that you already own.
Tom, I appreciate the deep dive into the geometry of these components, and showing your work. You are my kind of dork.
Analyzing the difficulty of completing the course by “unrolling” the loop was a fun (and nerdy) take on the set. This assumes that any contact of the bike with the loop’s curb will doom the run to failure. Is that what you found in your multiple runs, or could the bikes occasionally recover and continue on a different vector?
Also, I wonder if the bike significantly changes course in the transition from rolling on a level plane, to an incline plane, to the cylindrical ramp & loop, sort of like light rays bending when they refract through a transition from air to glass.
The value of these Stunts loop sets is unfortunate, but I also couldn’t resist picking up one to explore the possibilities of the novel new parts.
Mark,
Both of the points you raised are things I considered while writing the article. In the case of the motorcycle bumping into the edge – this does doom the ride to failure in almost all cases because it introduces a wobble and slows the vehicle down enough that it is unable to complete both loops. (In a single loop configuration it might be able to recover.)
As for the issue of subtle changes in direction when the radius of the curve changes – I simply chose not to worry about that. I suspect that the slight decrease in pressure against the wall of the course when it straightens out after the first loop may cause it to drift slightly, but this is followed by a steeper upward ramp which may mitigate it slightly.
Thanks for the kind words – it was a joyous nerdy journey, and I’m glad that others enjoyed it with me!
Sincerely,
—Tom