
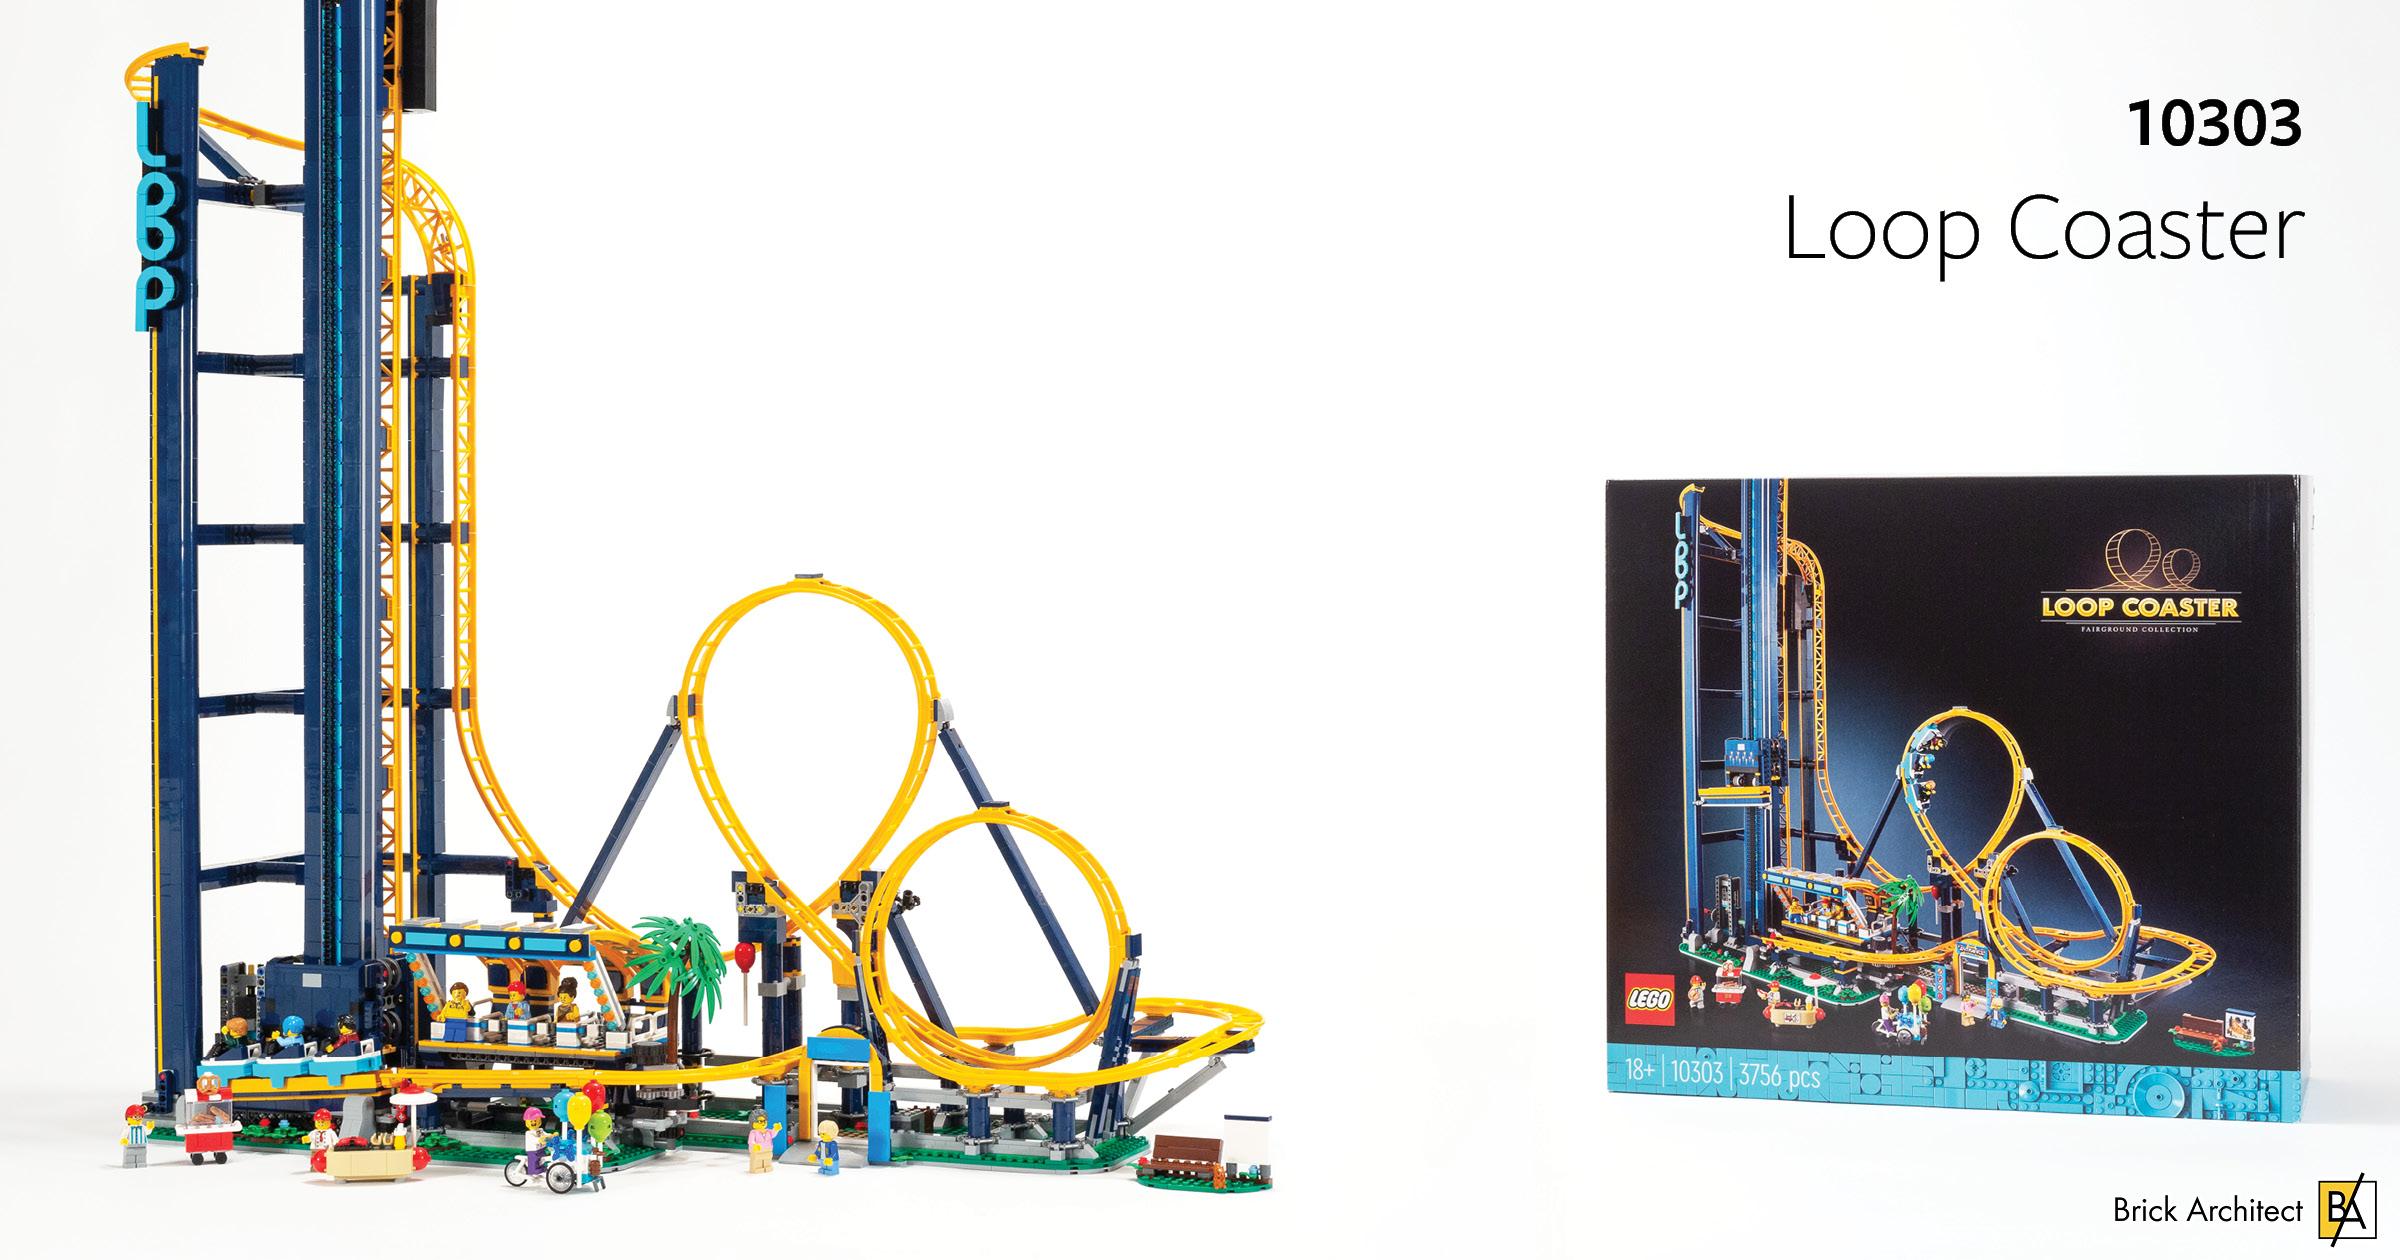
Review: #10303 Loop Coaster
For just $20 more than the previous LEGO Roller Coaster, this new version with two loops is much more satisfying!
There are many LEGO Sets that engage my curiosity, and occasional sets that I desperately want to just play with; this is one of them! I’m honestly more excited to play with #10303 Loop Coaster than build it. While the 2018’s original #10261 Roller Coaster looked like fun, without a loop it missed out on the most iconic element of modern coasters — going upside-down!
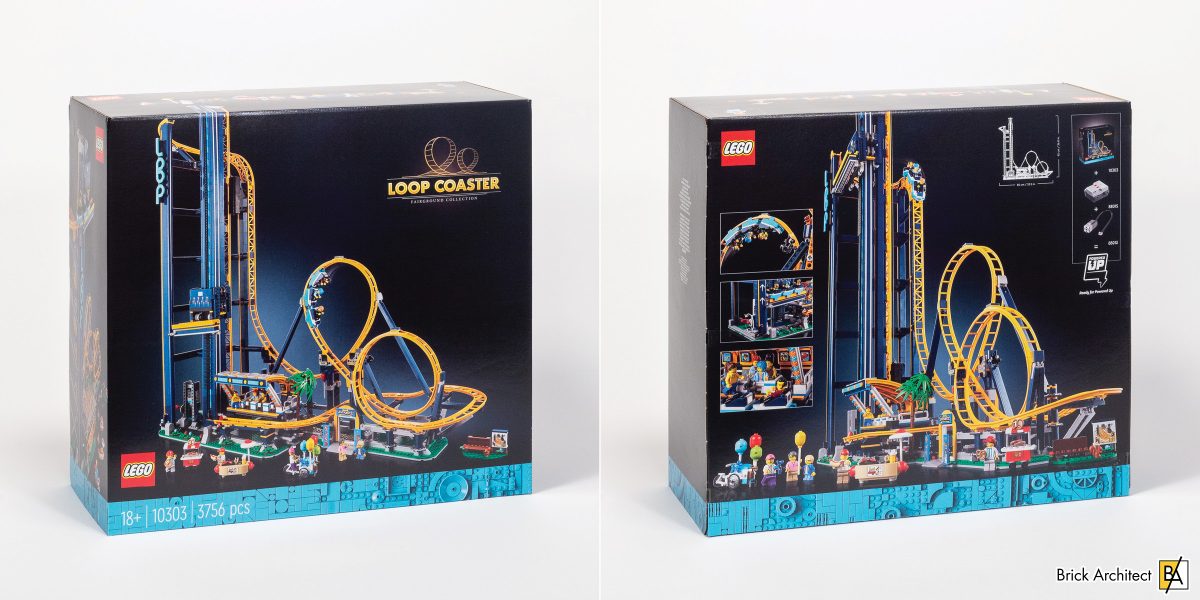
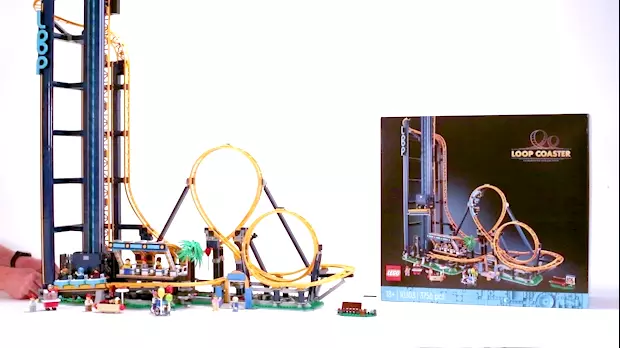
#10303 Loop Coaster – Box front and back.
#10303 Loop Coaster will be released worldwide on July 1 worldwide (with free VIP membership). It costs $399.99 (399.99€ / £344.99 / 499.99 CAD / 599.99 AUD) for 3756 pieces, ages 18+.
At that price, the set comes to $0.106 per piece in the USA, which is well above what we usually see for Creator Expert sets — but do bear in mind that it includes 40 sections of coaster track (which can be costly to buy separately). If you simply look at the cheapest color for each section of track on BrickLink, track segments average $1.00 per piece. (This ignores the completely new part introduced in this set to build loops, and extra track might not match the 191Flame Yellowish OrangeBright Light Orange color used in this set.
First Impressions
Rumors of a new Roller Coaster with an elevator and loop were circulating well before the press photo were released. This immediately made me think of the ambitious model created by Boone Langston & Mark Cruickshank in the very first episode of LEGO Masters USA Season 1. While running laps around the creations by other contestants in terms of scale and ambition, the elevator mechanism was too unreliable and didn’t function correctly when it needed to.
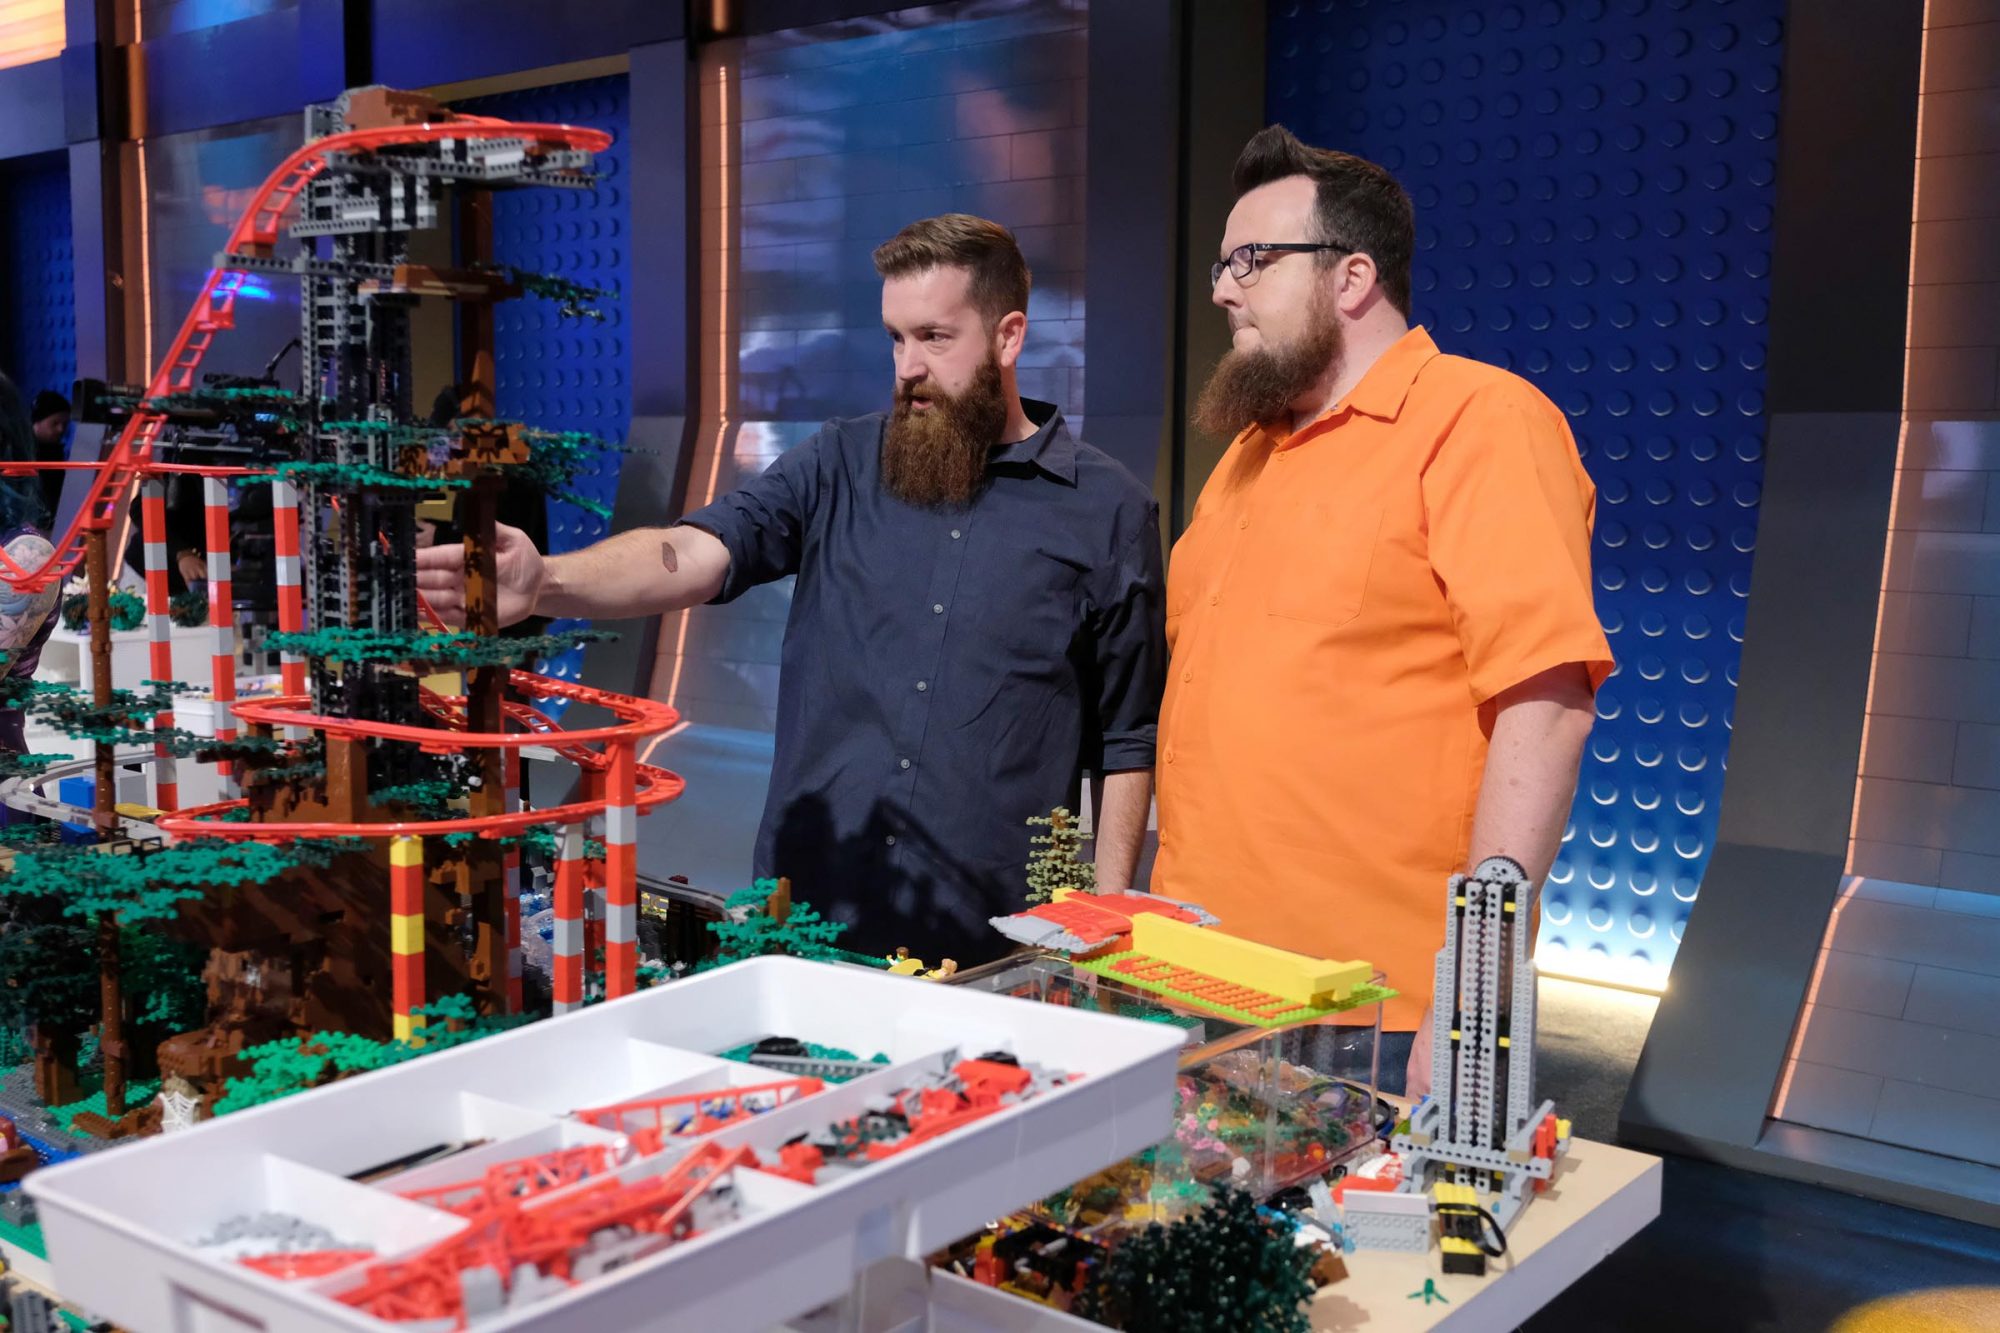
‘Timber Town’ by Boone Langston & Mark Cruickshank. (Photo: Ray Mickshaw / Fox Studios).
The next thing that crossed my mind was how tall it would need to be, and how many new parts would be required to make this set possible. The problem with the current selection of curved track is that they are good at making a perfect circle (that the cars can neither enter or exit), but lack the lateral shift needed to achieve a slight spiral. As such, MOC’s created prior to the release of this set have relied on applying a bit of pressure to the track to bend it into a spiral.
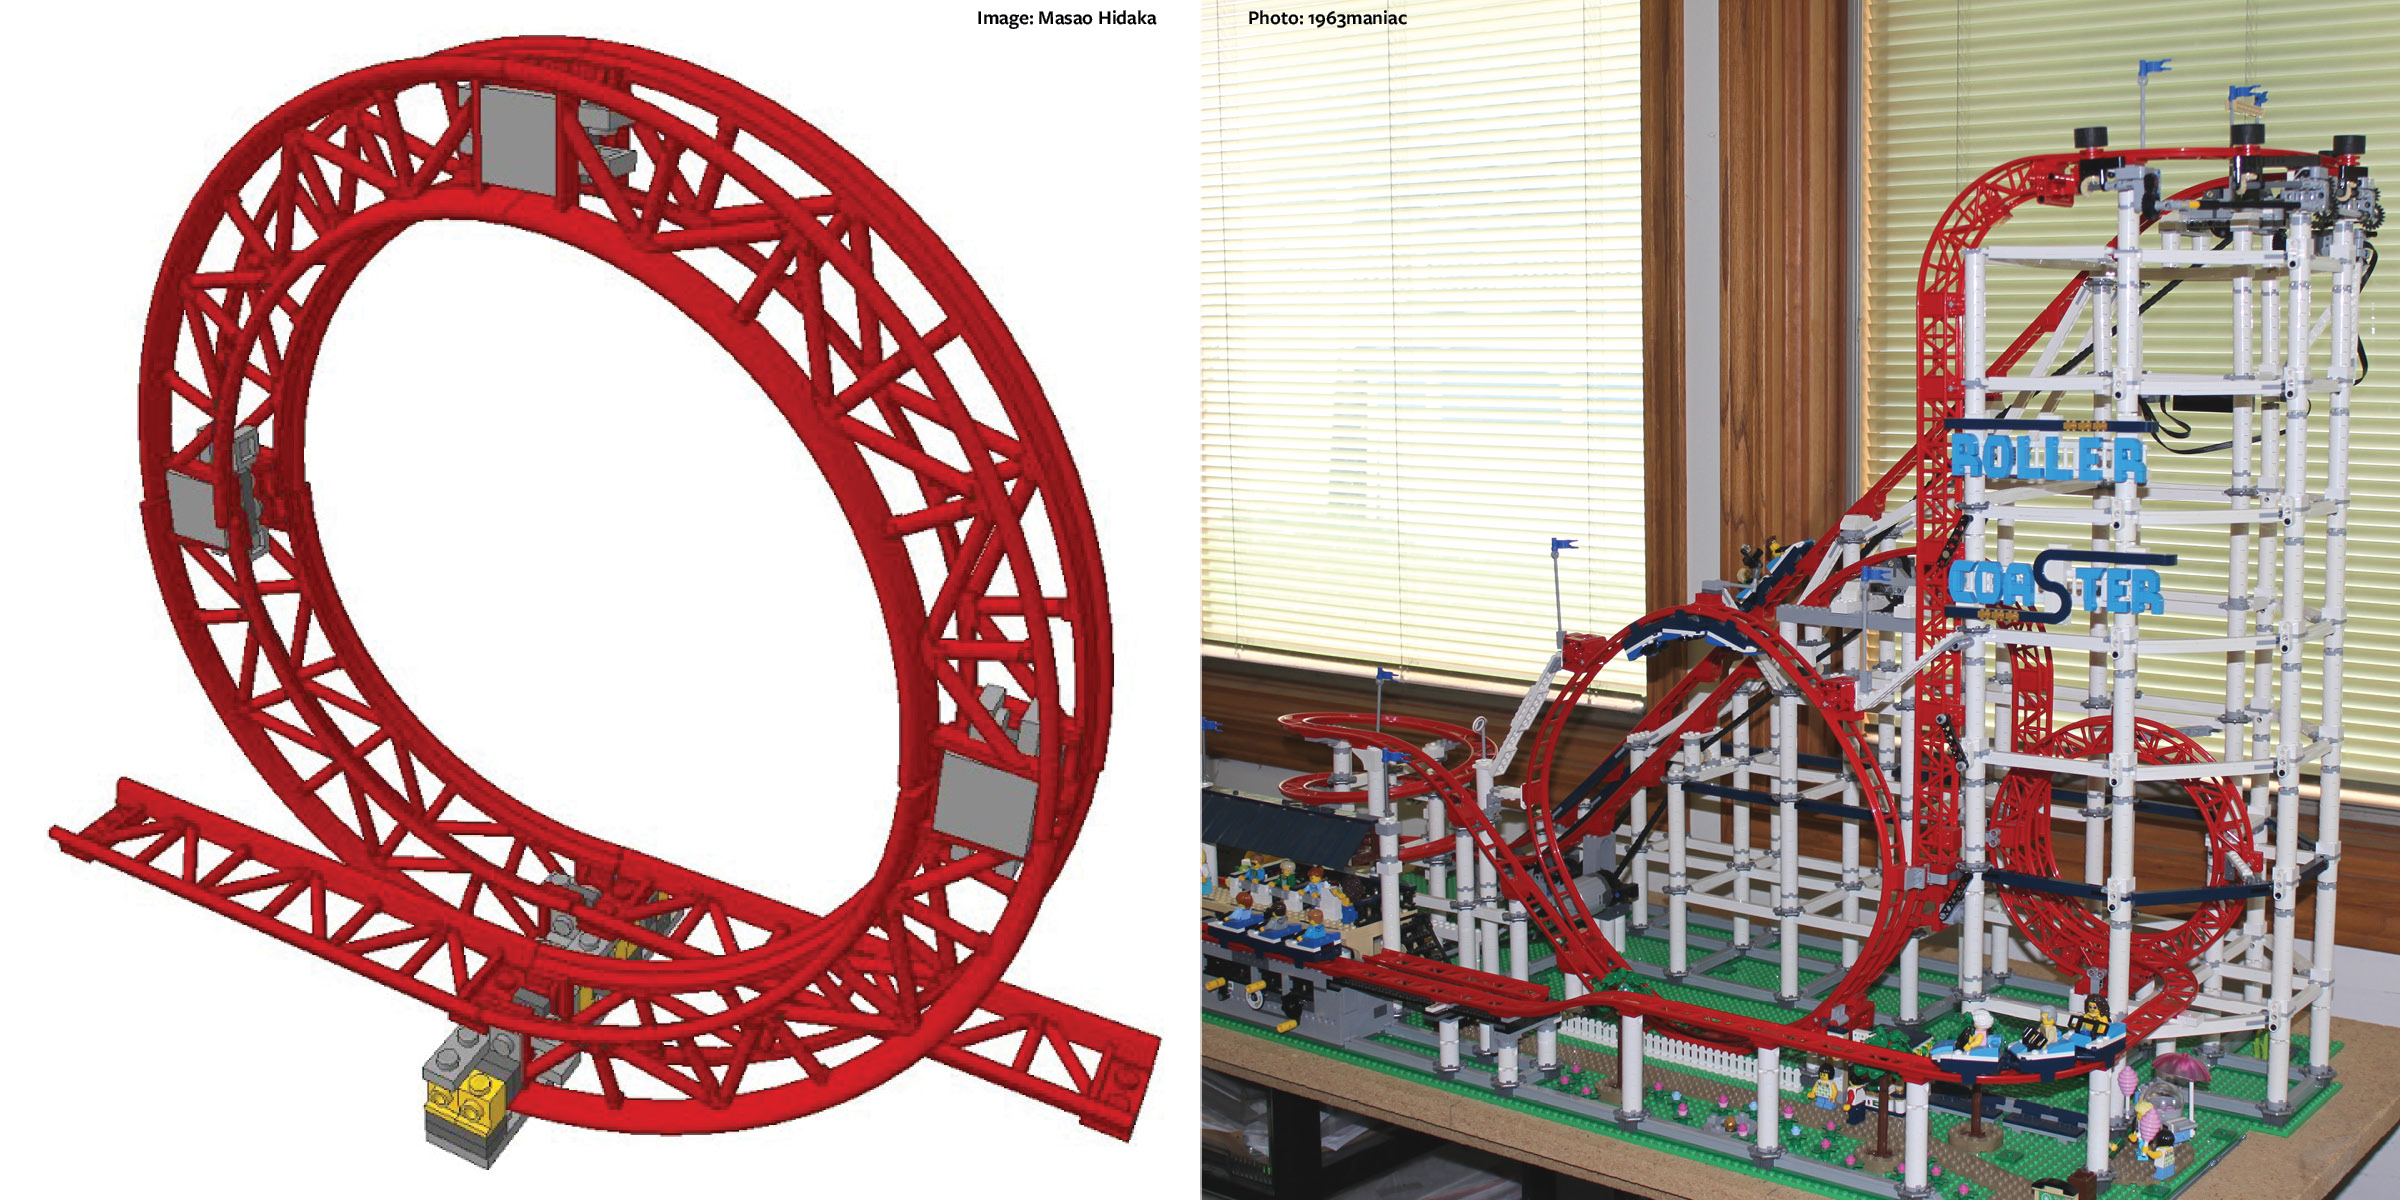
Tight Loop illustration (left) by Masao Hidaka, and Large Loop (right) by 1963maniac.
A few MOCs featuring various loop designs:
- How to make Lego Roller Coaster Loop by Masao Hidaka (1:23) – This video includes detailed instructions to build a tight loop using existing parts and brick bending.
- Roller Coaster (with large and tight loops) by 1963maniac – This model shows that you can use 8x Coaster Track, Bottom Ramp (part 26559) to create a large loop.
- Double Looping Rollercoaster (LEGO Ideas) by Nachapon Lego Pinball – This MOC features a very similar configuration to this set, with a Teardrop loop followed by a tight loop.
Since The LEGO Group does not employ brick bending techniques in official sets, their only option was to create a new part. My best guess without seeing the set was that they would introduce a ¼ loop with a one-stud offset for each part, resulting in a 4-stud offset when using four pieces in a row to create a complete loop. The other option is to create a new part that connects a pair of Coaster Track, Bottom Ramp (part 26559) on the bottom and another pair on the top to create a fairly large loop. That part would be awkward since it would need to add a two-stud offset while the rest of the loop is perfectly straight, resulting in an unnecessary loss of momentum.
Box Impressions:
Upon reviewing the box art, it looks like I was right – the new part is indeed a ¼ loop with a small shift, although it looks like they opted for 2-stud offset per ¼ loop instead of just 1-stud that I had predicted. This greater offset allows them to achieve both a tight loop and a teardrop-shaped loop. For the teardrop-shaped loop, they employed the same SNOT technique that AFOL’s like 1963maniac have been using to create large loops using existing parts (but without the need for brick bending due to the new part).
Press photos clearly show new part used for Teardrop and Tight loops. (Photo: The LEGO Group)
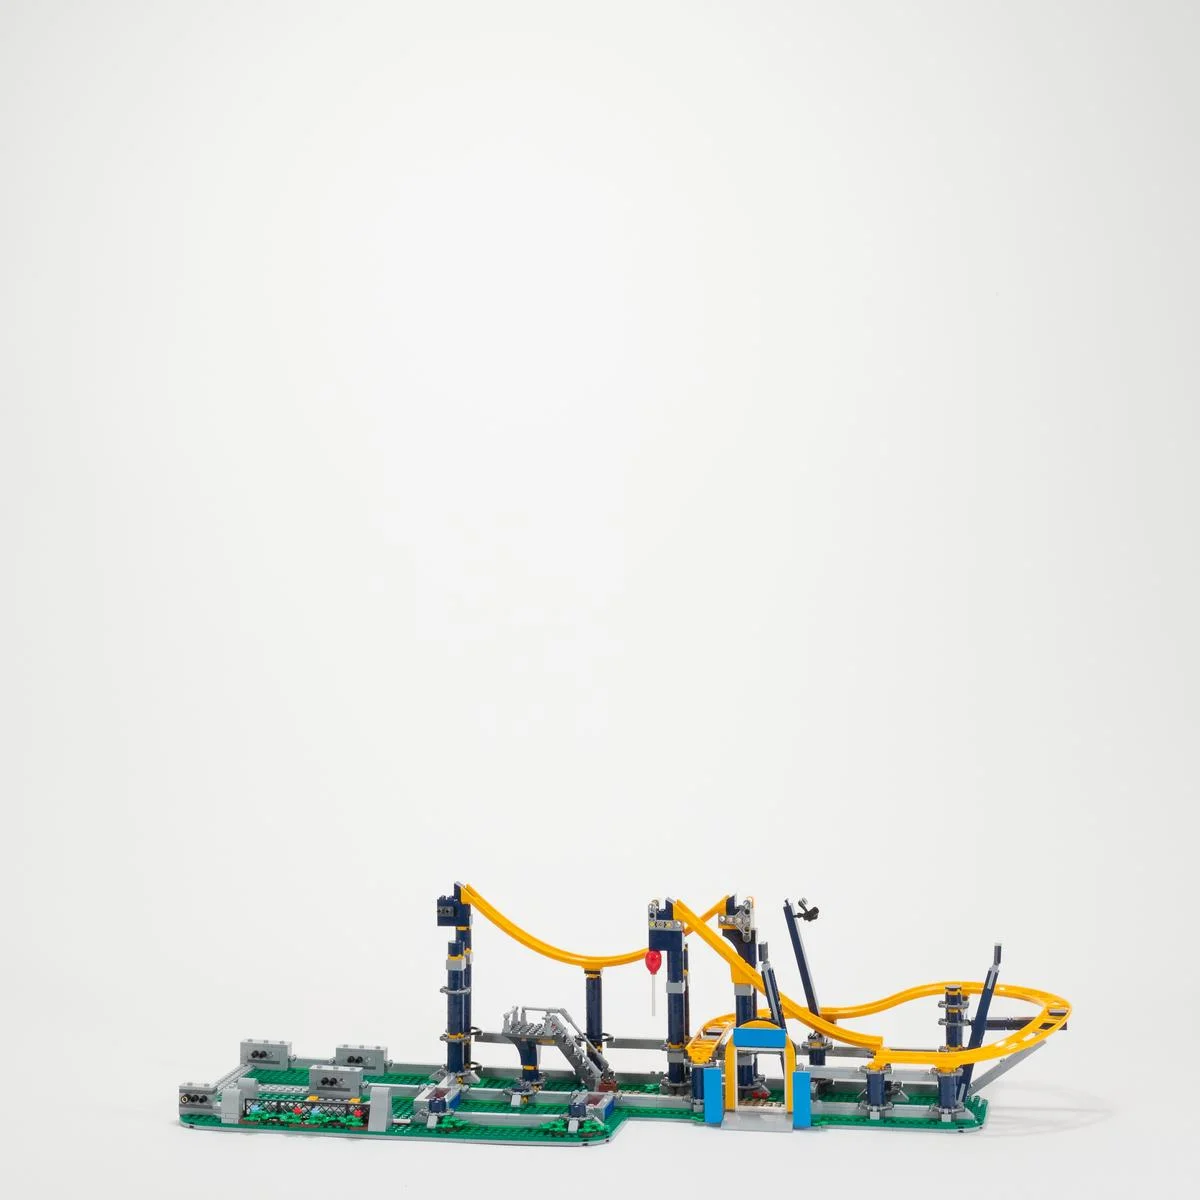
More generally, #10303 Loop Coaster is better looking that it’s predecessor, with a 140Earth BlueDark Blue and 191Flame Yellowish OrangeBright Light Orange color scheme that is really striking. I also appreciate the modern-looking diagonal struts compared to the boring lattice of white pillars in the predecessor. And it does all this with a smaller overall footprint and lower part count thanks to the use of an elevator instead of a ramp!
Box Contents
The box is very large! The front of the box is the same size as the massive 9036-piece #10276 Colosseum, although this box is about half as deep. Collectors will appreciate that the box shipped in a very sturdy outer box, with a cardboard insert on two ends to reduce the chance of crushed corners.
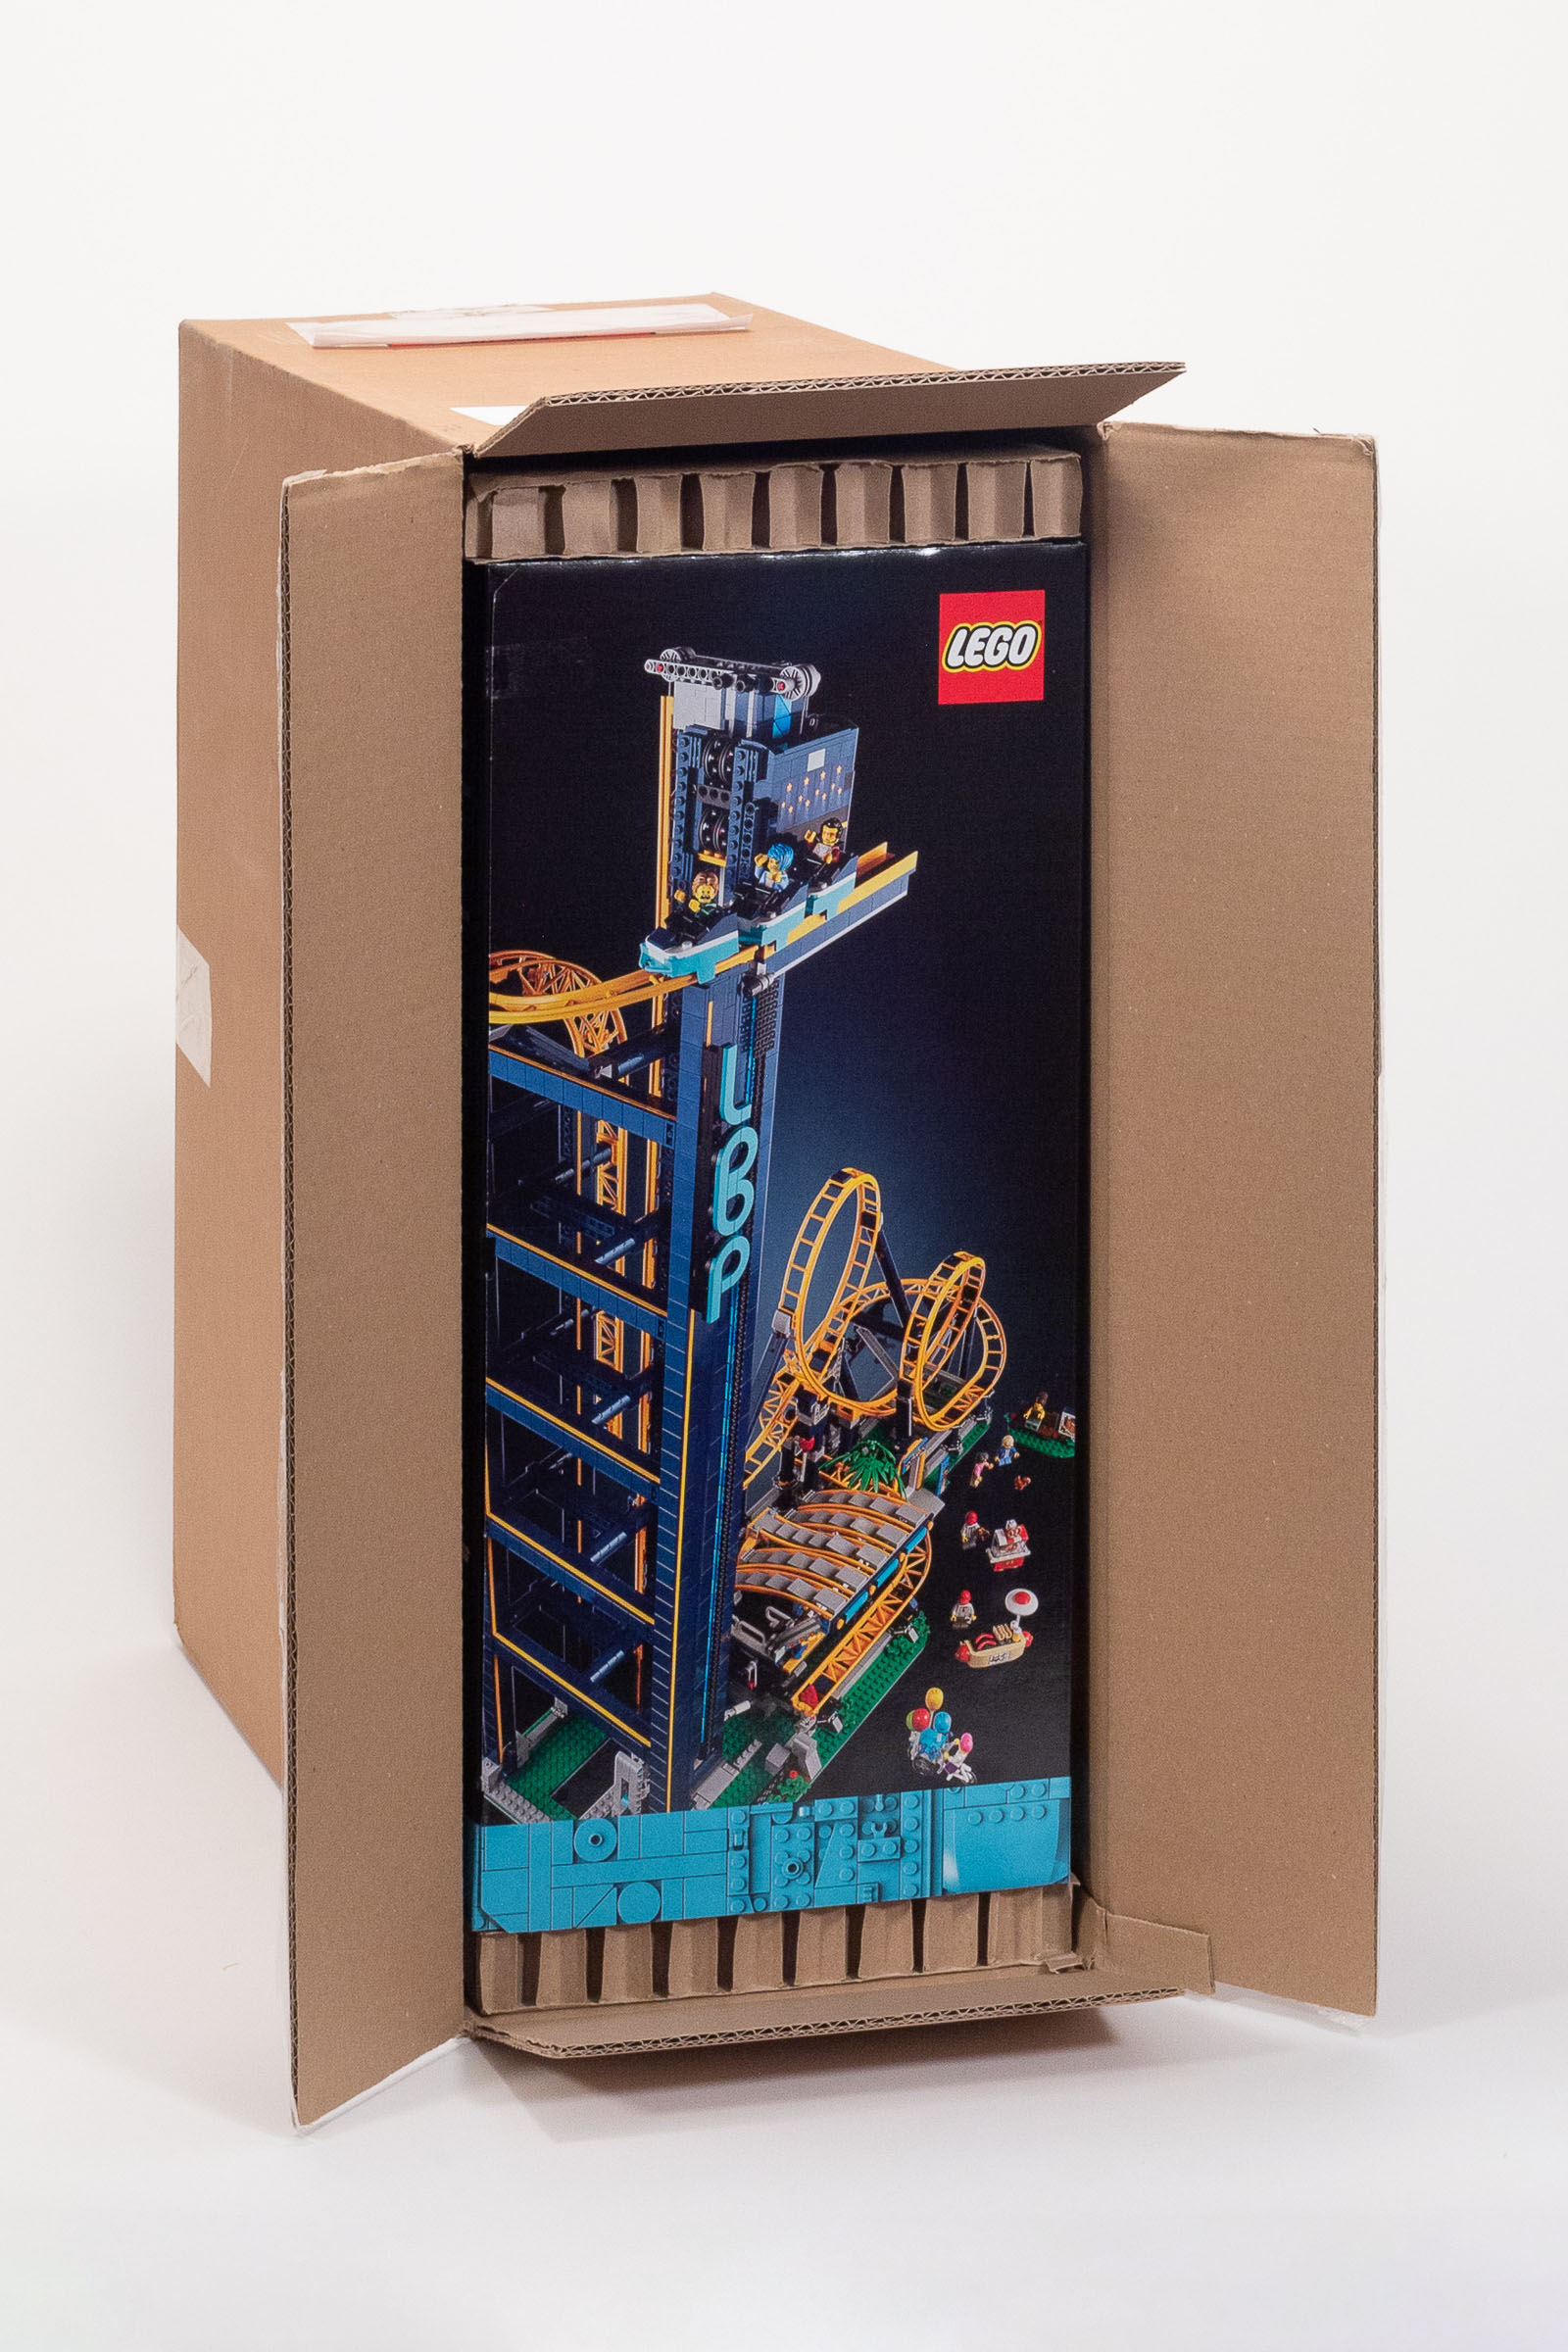
The set shipped in a well-protected outer box.
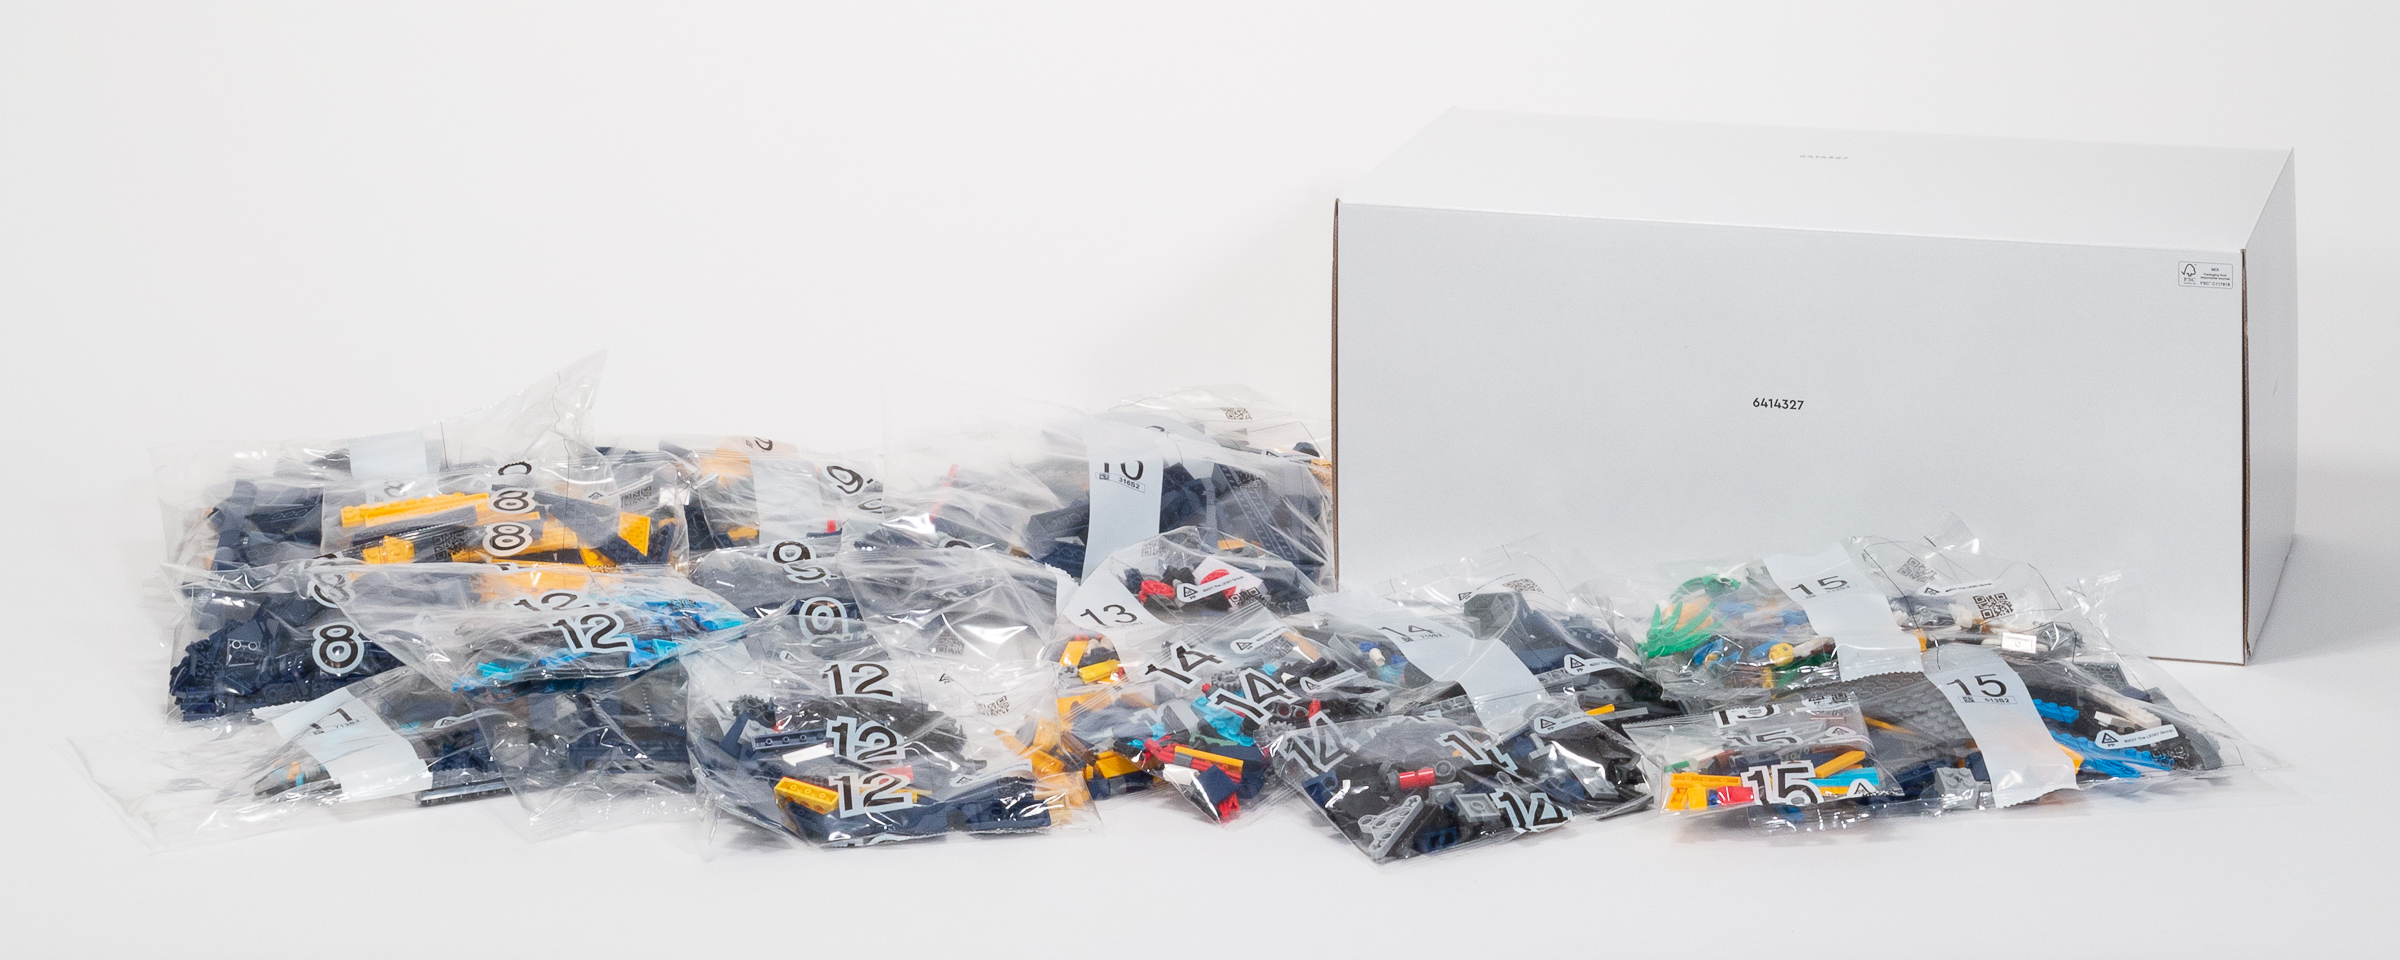
The build process takes place over 15 numbered stages
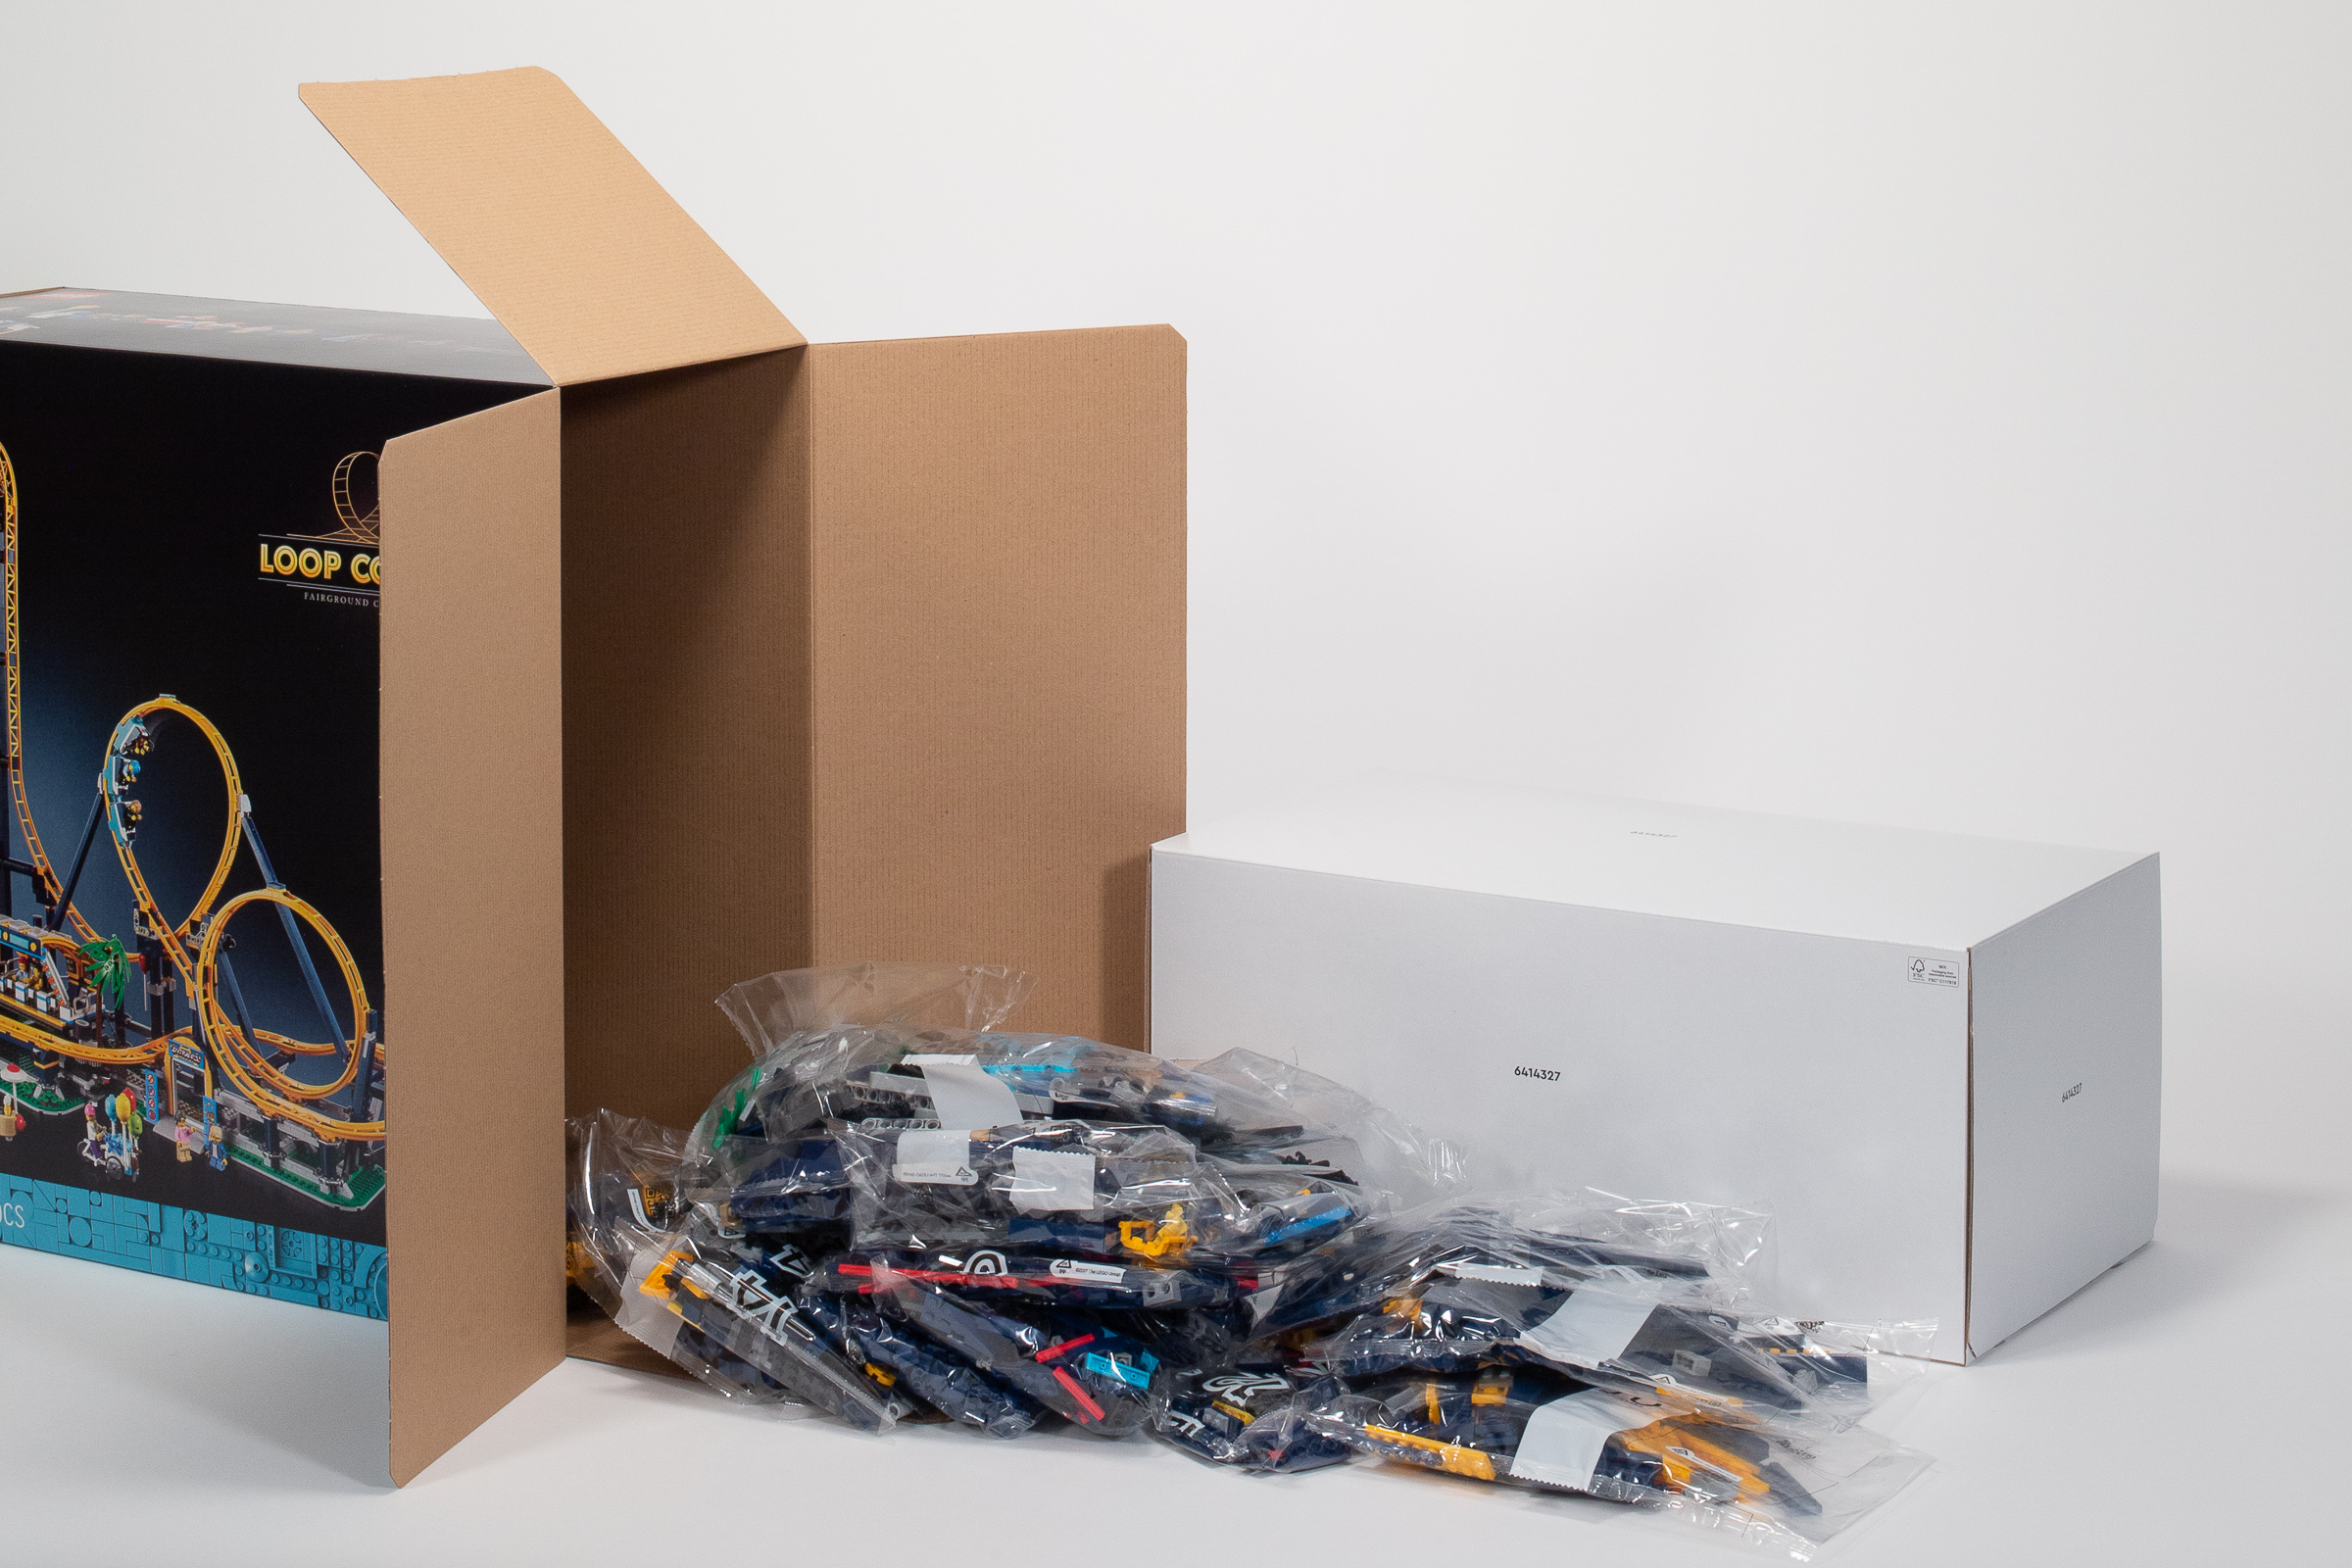
As with some other large sets, an inner box is used to keep the outer box from crushing. Given recent commitments to reducing packaging waste, I suspect that The LEGO Group has done the analysis and found that the use of a small inner box allows them to use thinner cardboard on the outer box, saving cardboard overall while allowing the box contents to be better organized and protected.
Contents of outer box (including the inner box which we will open shortly).
Outer Box Contents:
- Stage 8: 1x extra-large bag (marked 315S2), 1x large bag (marked 316S2), 1x large unmarked bag, 1x small unmarked bag.
- Stage 9: 1x extra-large bag (marked 715S2), 1x large unmarked bag, 1x medium unmarked bag, 1x small unmarked bag.
- Stage 10: 1x extra-large bag (marked 114S2), 1x extra-large bag (marked 316S2)
- Stage 11: 1x medium bag (marked 713S2).
- Stage 12: 1x extra-large bag (marked 713S2), 2x large unmarked bags.
- Stage 13: 1x large bag (marked 613S2), 1x small unmarked bag.
- Stage 14: 1x extra-large bag (marked 715S2), 1x medium unmarked bag, 1x small unmarked bag.
- Stage 15: 1x extra-large bag (marked 613S2), 1x large bag (marked 613S2), 1x extra-small unmarked bag.
- Inner box (marked 6414327), contents listed below.
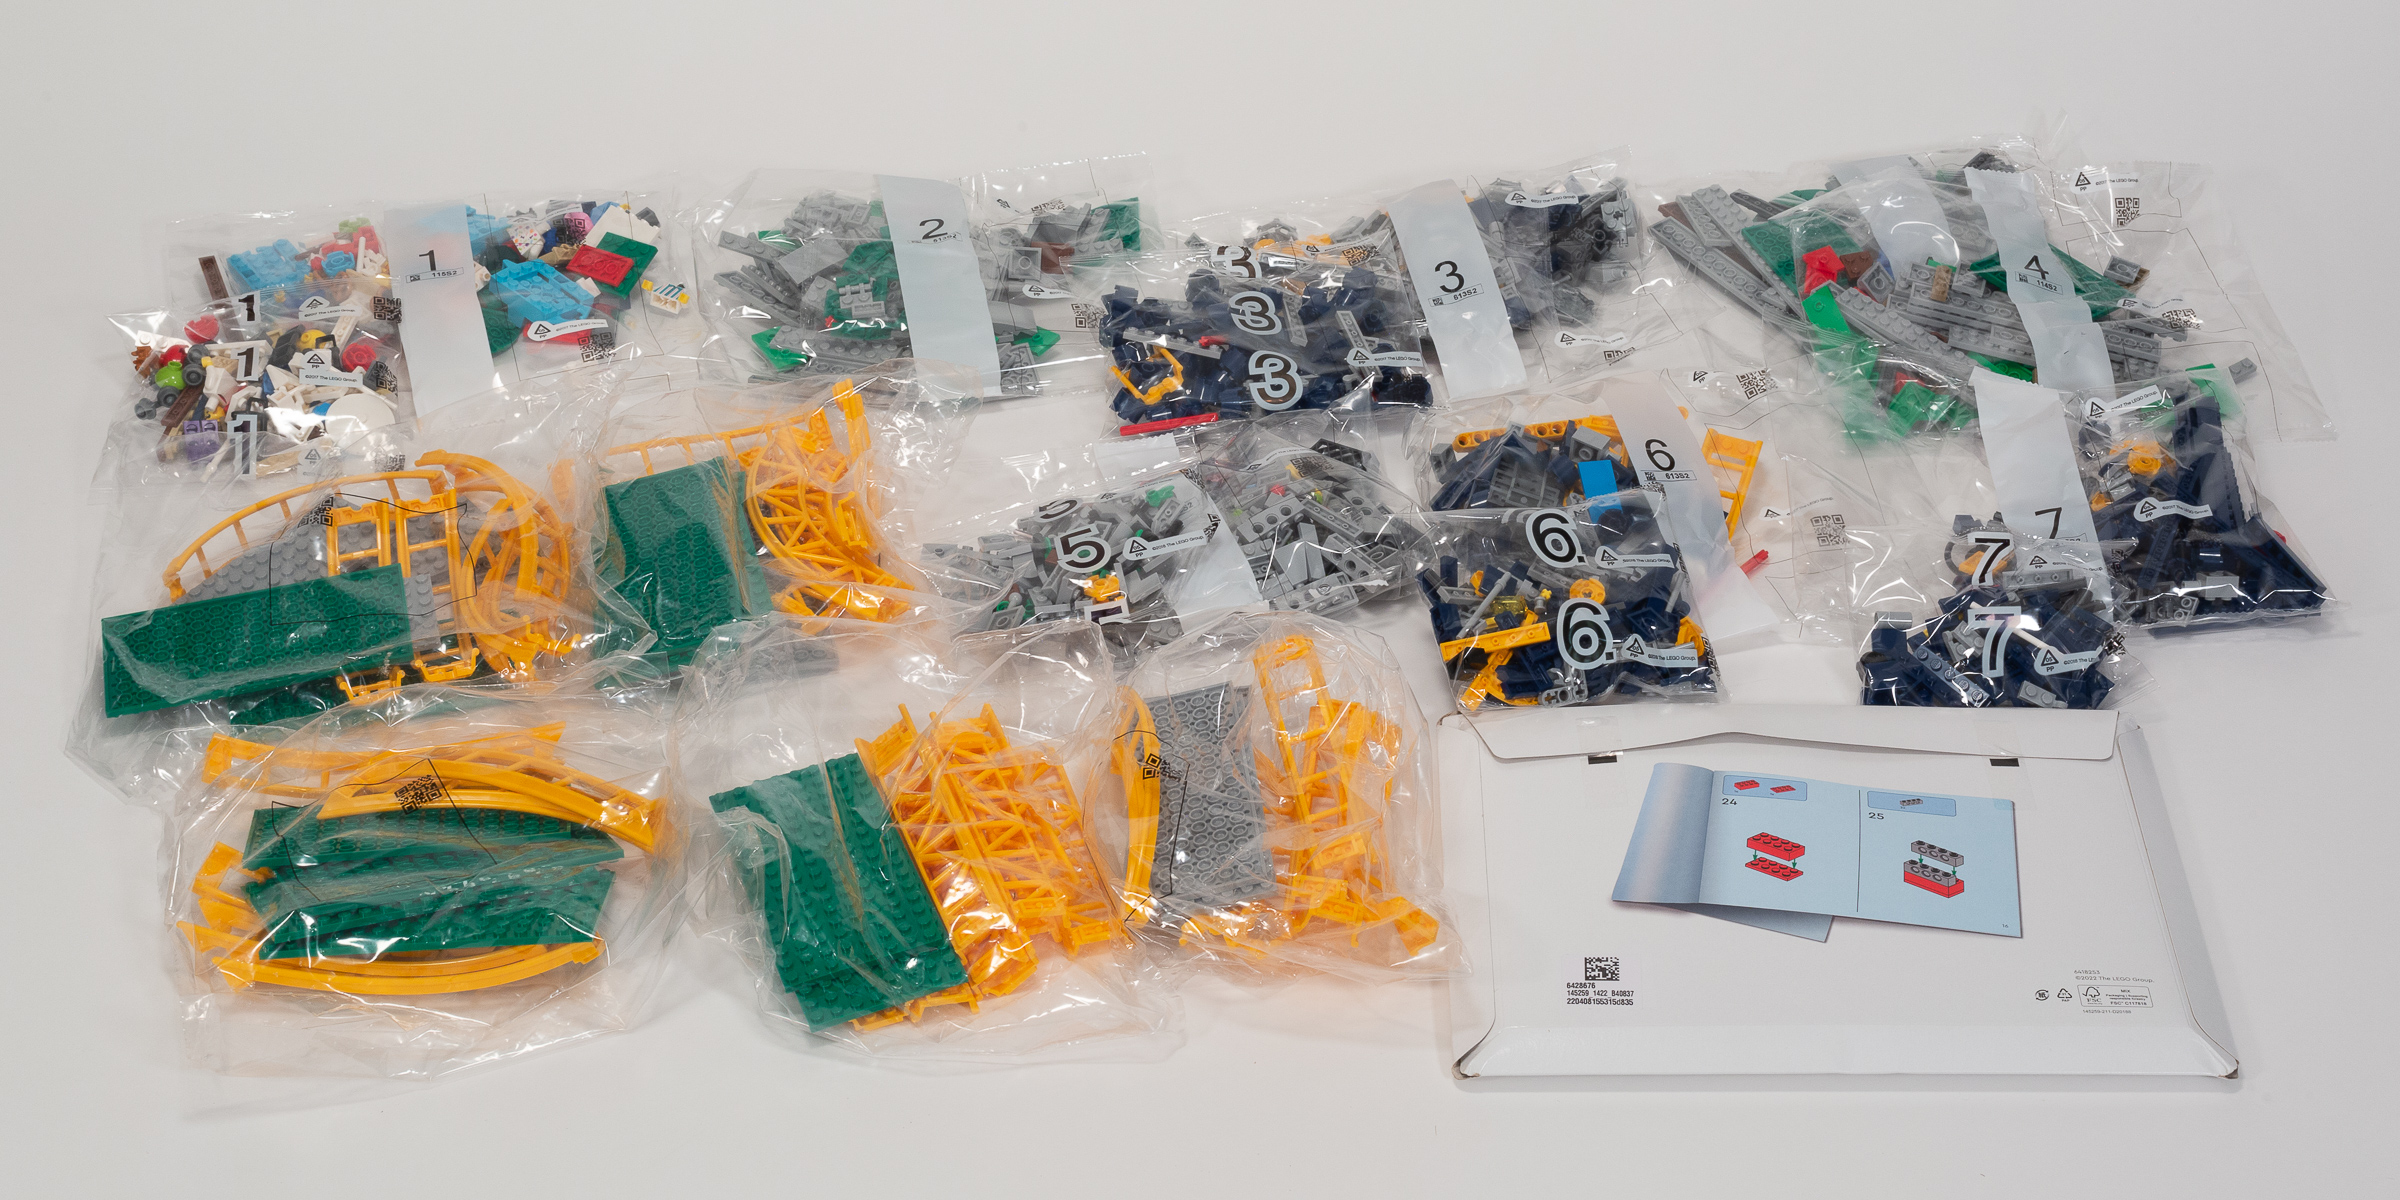
The inner box contains bags numbered 1-7 and a pouch containing the building instructions and stickers.
Inner Box Contents:
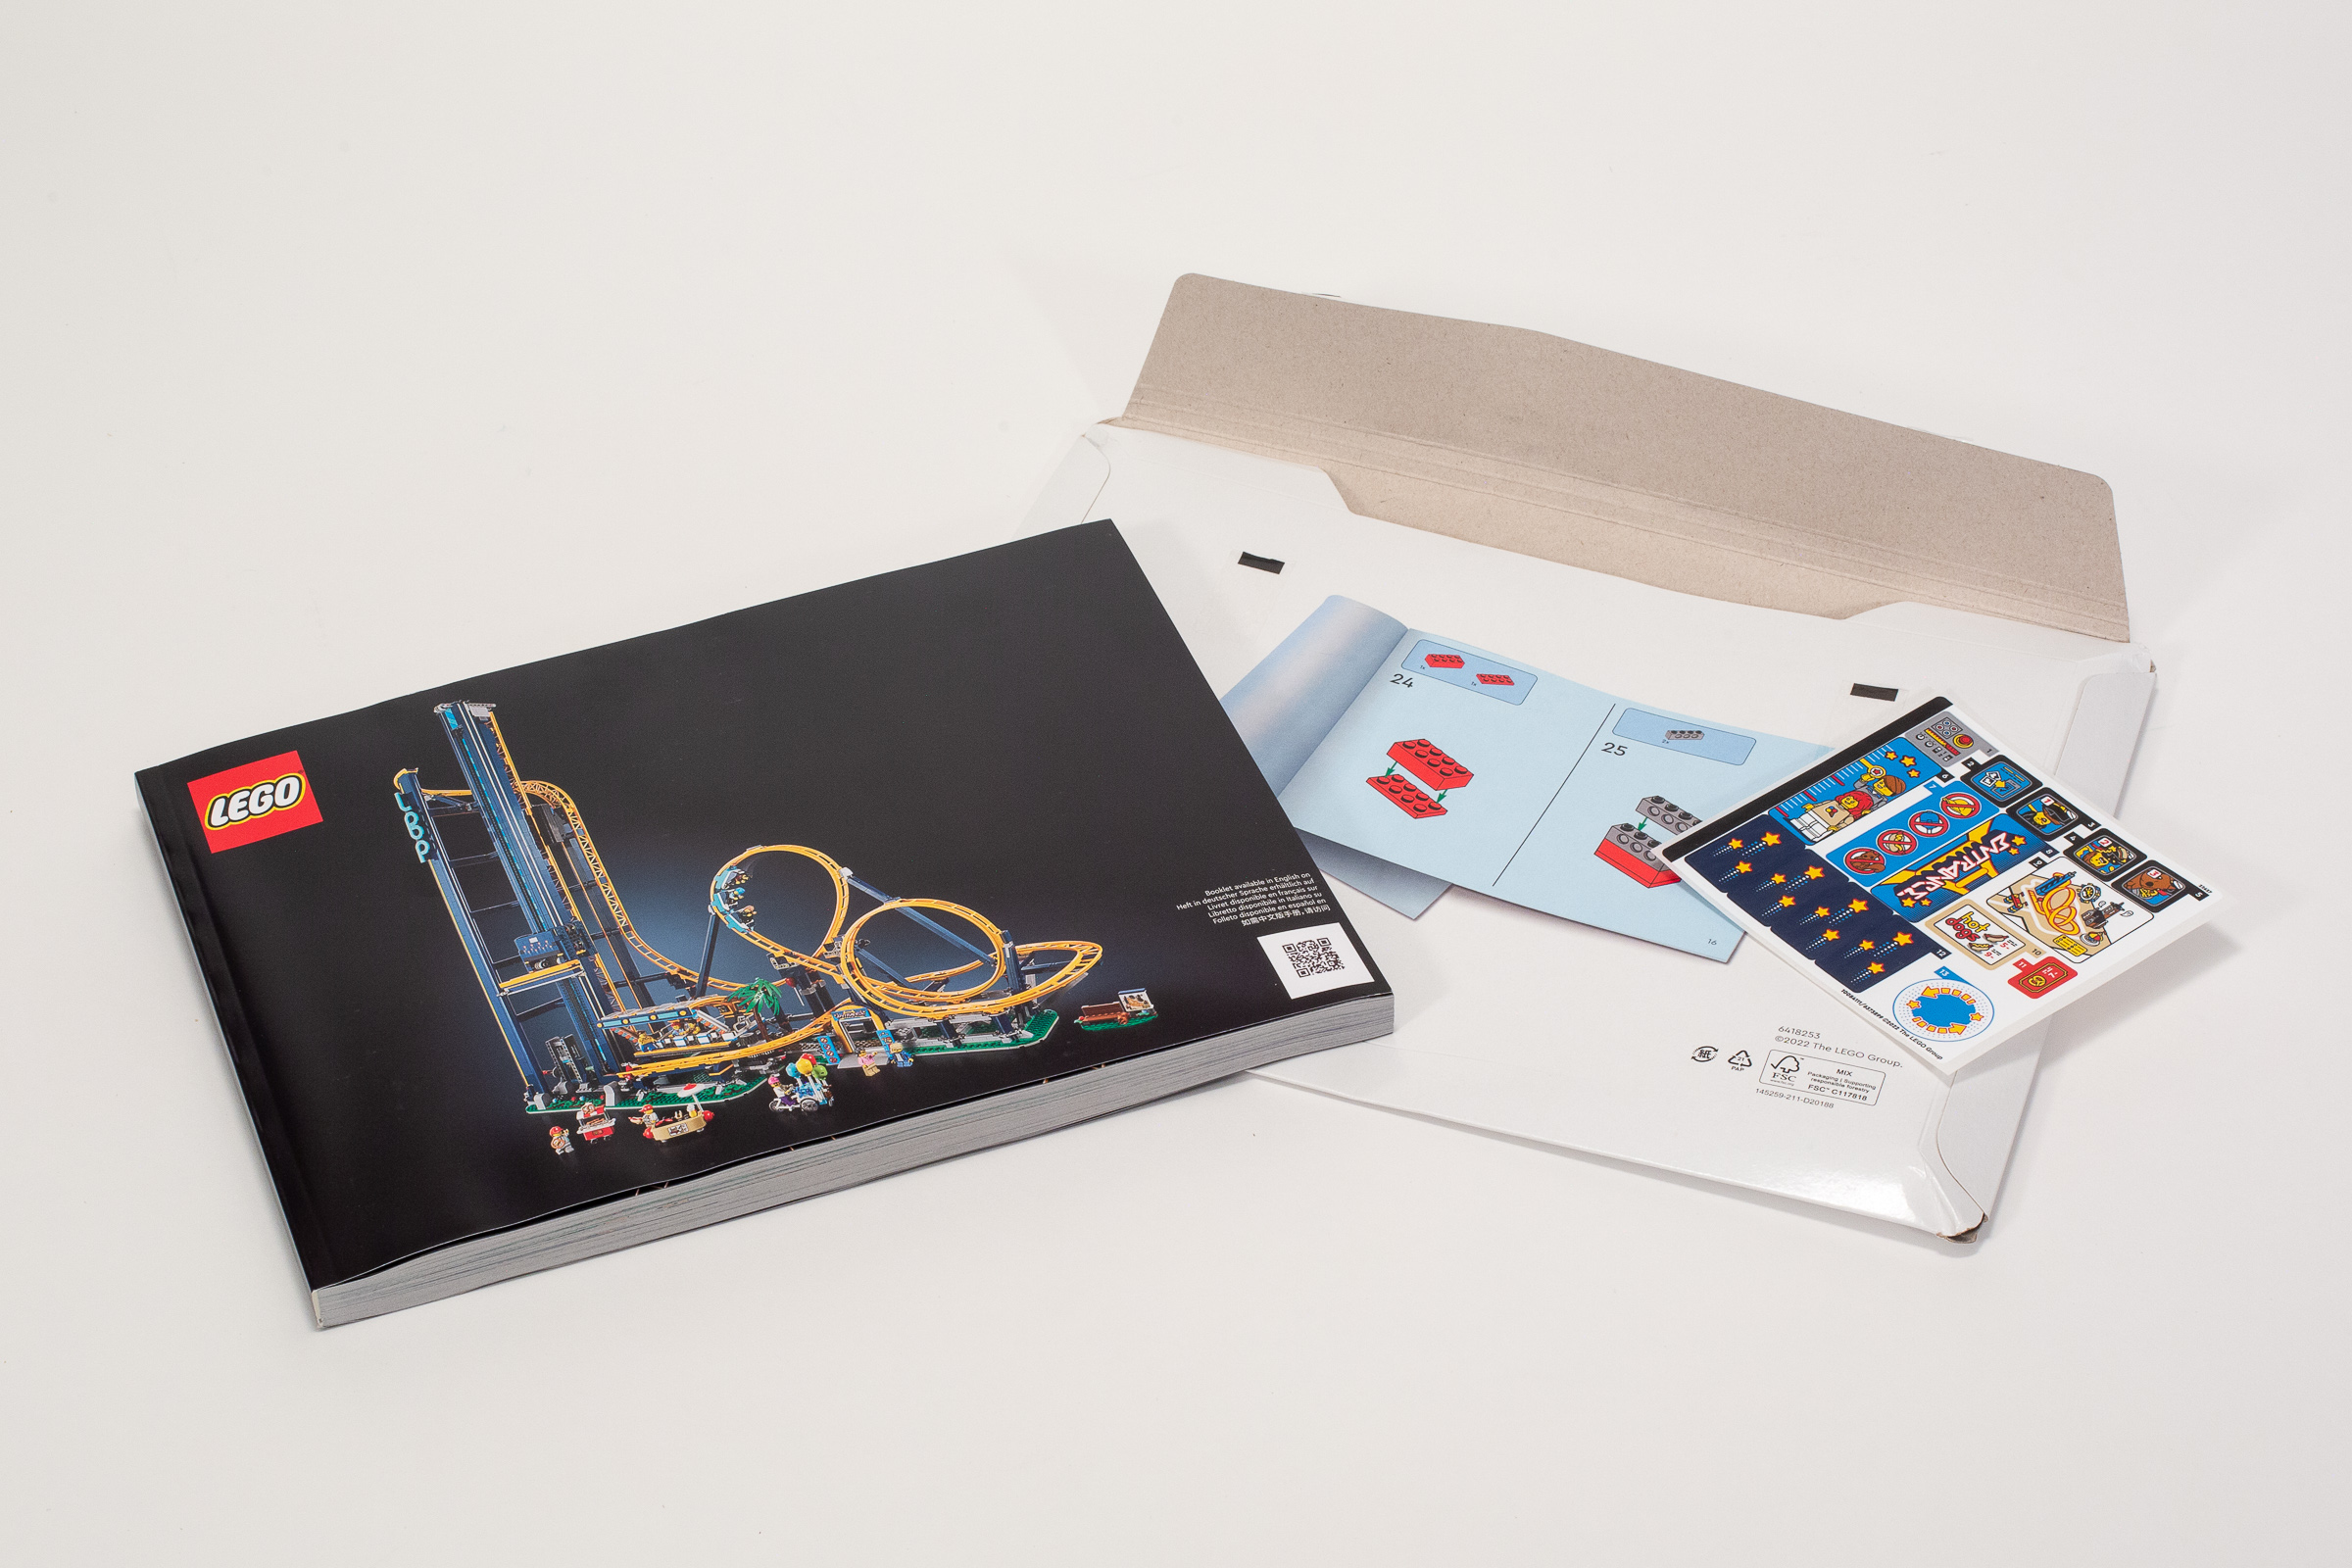
Thin cardboard pouch protecting the building instructions and sticker sheet.
The cardboard pouch for the building instructions and sticker sheet represents the latest step in The LEGO Group’s commitment to eliminate single-use plastic bags in their products. I do not know how effective this will be at meaningful environmental change, but I do like that it protected the instructions very well.
Build Process
I was really excited to get started since I was extremely eager to see the loops in action. In fact, I skipped the first bag entirely so I could work on the coaster itself right away.
Stage 1 – Minifigs and Stands
The first stage is all about building a bunch of minifigures and a selection of vendors to sell food and balloons to amusement park guests. I especially enjoyed the hot dog cart which has a convincing hot dog shape despite the small part count, and the balloon bike which is just packed with whimsy.

Bench, Balloon Bike, Hot Dog Cart, and Pretzel Cart.
In this stage we also build the coaster cars. This only involves attaching the wheels, adding a few decorations, and a bar that folds down to keep minifigures safer while riding the coaster… (More on passenger safety later!)
Because this stage focused on smaller standalone models, I built it a few days later with my almost 4-year-old son. He needed a little help with a few steps such as putting the pretzels onto the cart or attaching the bike to the balloon cart, but nothing outside of the ordinary for sets aimed at ages 7+. I really wish that they included a smaller instruction booklet with 7+ age mark for just this stage, to encourage families with kids to include them on this one part of the project.
Build time: 35 minutes. (Although my 3-year-old built all of the carts, slowing the process down significantly.)
Stages 2 & 3 – Right half of base
The second stage builds just a small subset of the base for what I am expecting will be a really large model. The base itself is built similarly to sets in the LEGO Architecture series, with large plates on top of a lattice of support provided by 2-stud wide plates. I don’t know if it will be sturdy enough to move such a large model easily, but it does go together quickly.
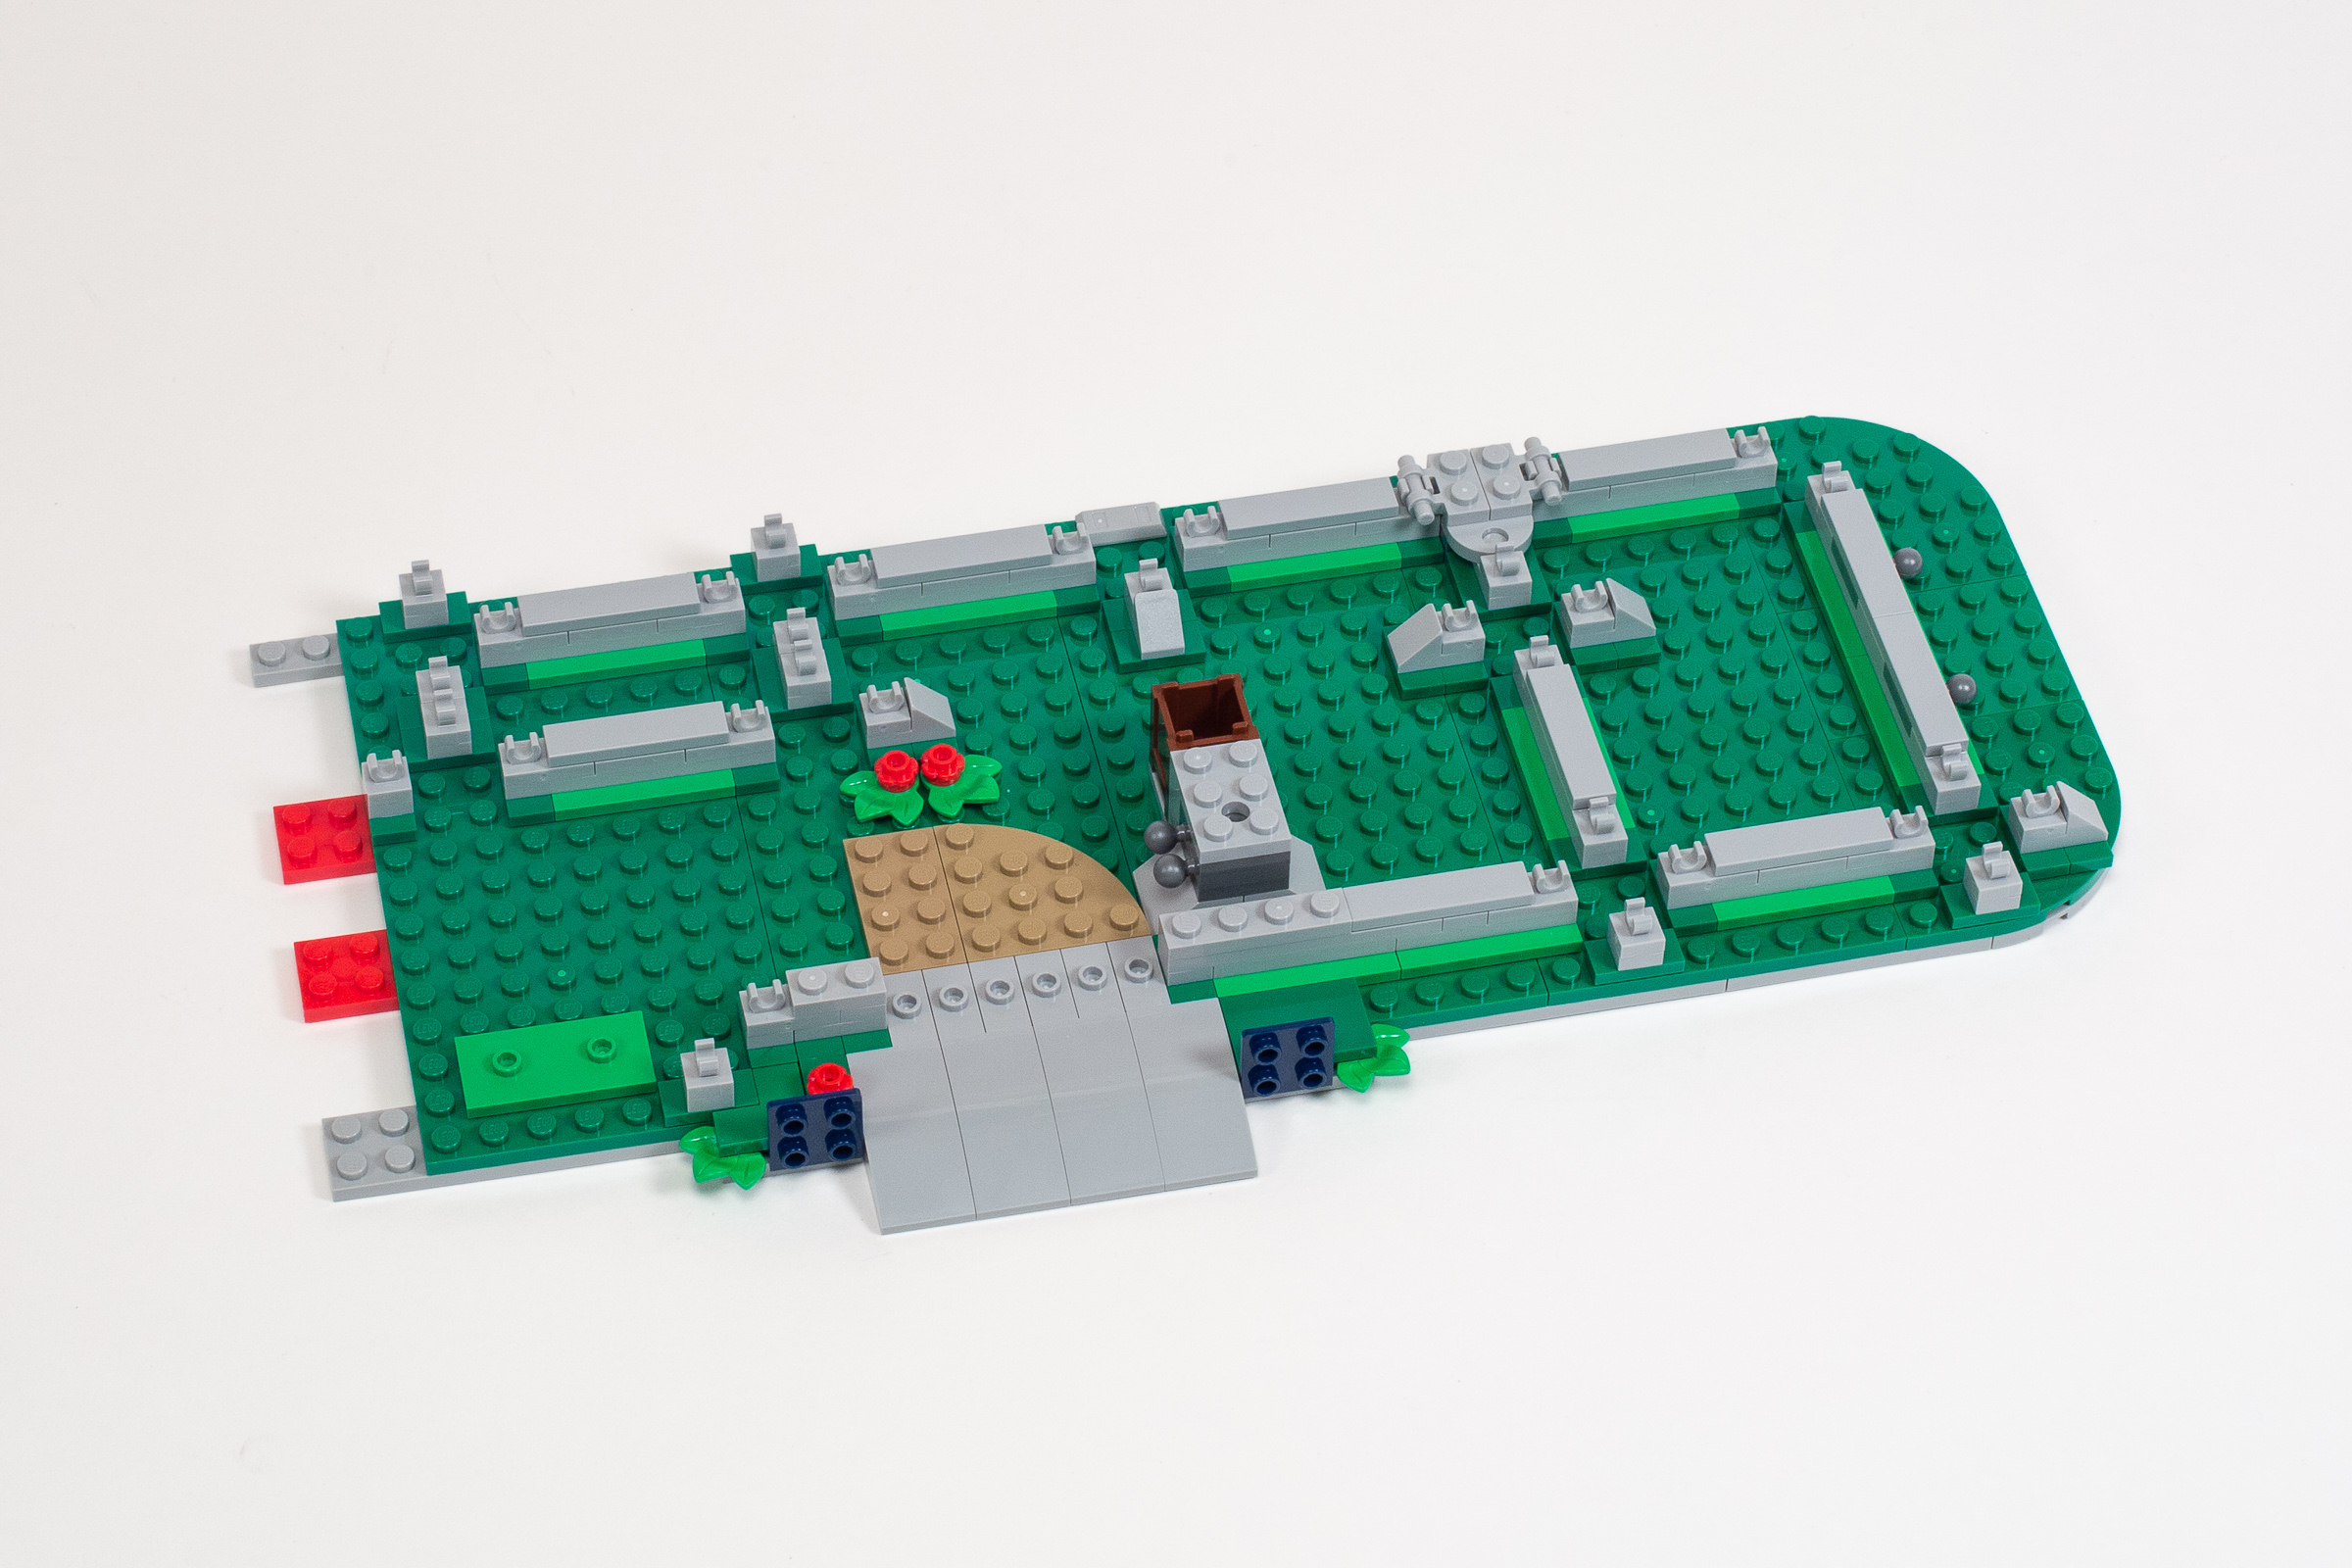
Progress at the end of stage 2.
On top of that base, we build the footings which will hold up the rollercoaster itself, with what looks like a mix of stud and clip connections. We also have a small ramp on the front edge of this assembly, which I presume is the entrance to the ride.
In the third stage, instead of finishing the base, we actually get to build the first set of supports on top of this half of the base. The vertical supports are comprised of 2×2 Round Bricks (part xxx) with 2×2 with octagonal bar around it (part xxx). The good news from a structural perspective is that Technic axles run though the center making the supports pretty strong.
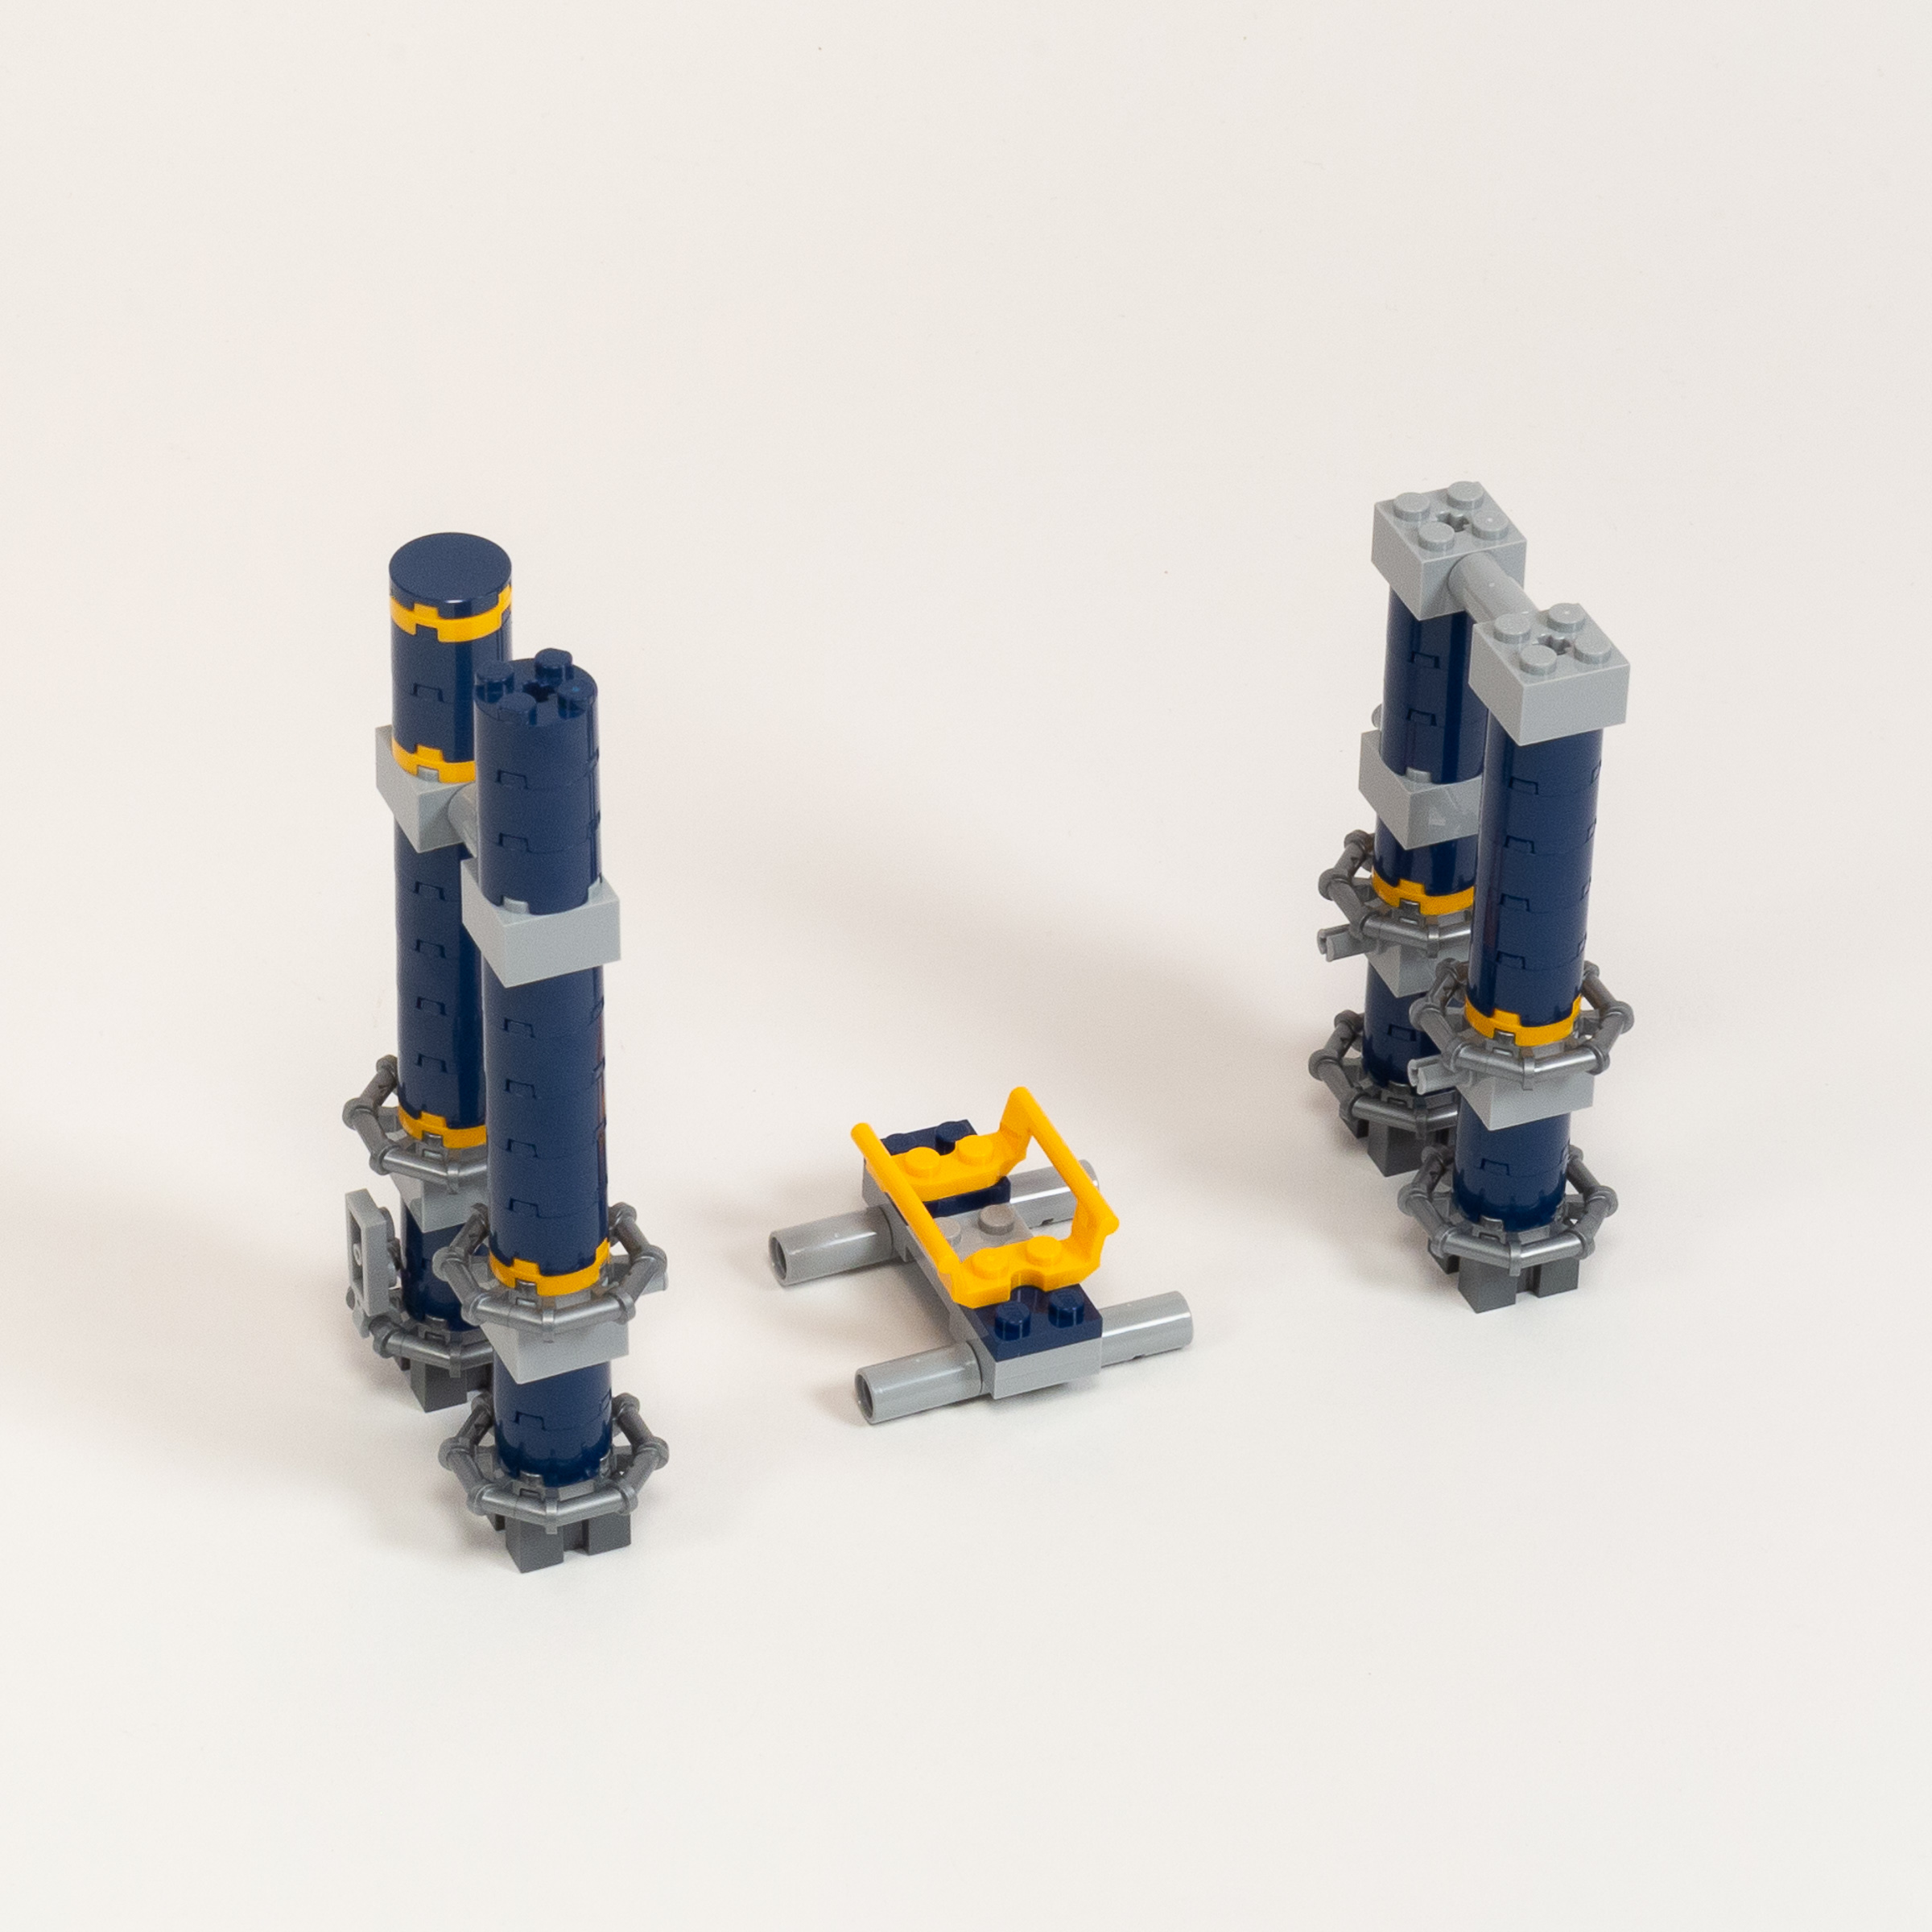
Building a sturdy sub-assembly of four interconnected support columns with a small section of track down the middle.
These vertical supports are connected by horizontal arms that clip to the octagonal parts. I was surprised to see that part of the model is cantilevered beyond the edges of the plate – making the model larger than at first it appeared. Finally, we actually get to add some track already, making it possible to play with the coaster which we built in the first bag!
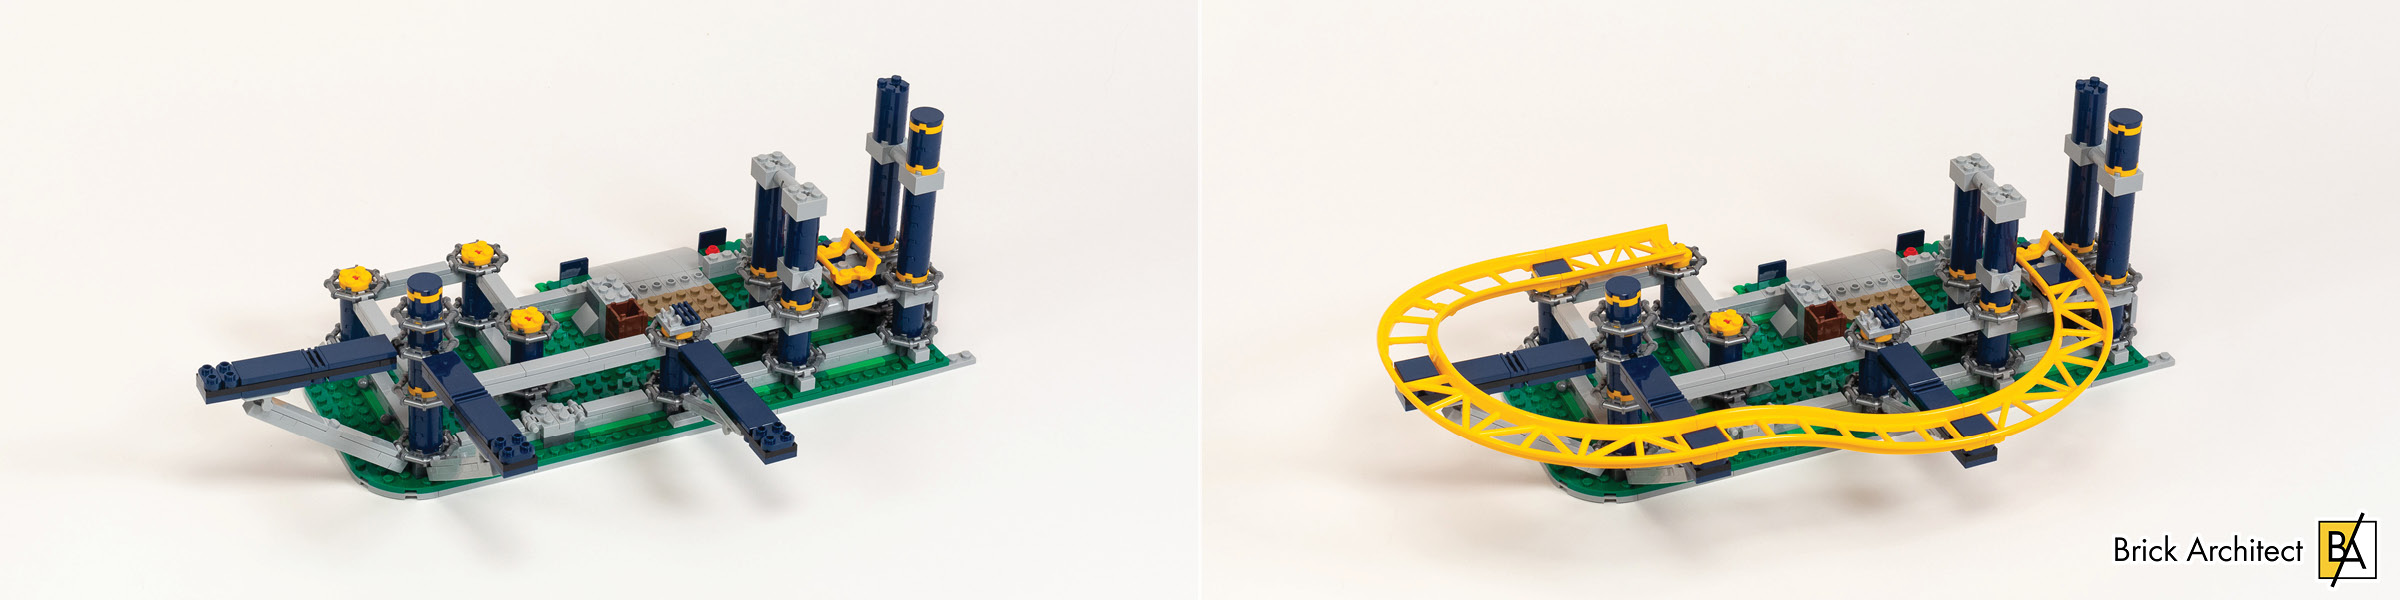
Before and after adding some sections of track at the end of stage 3.
Build time: 45 minutes (Bag 2: 17 minutes, Bag 3: 28 min)
Stages 4-7 – Left half of base
In stage four we build the left side of the base, which is significantly larger than the right side was — it barely fits in my 5-foot wide build are. I am quite curious to learn why they left a large empty strip down the middle, as I worry that this will make the model less sturdy when I need to move it around my home.

Left side of the base near the beginning of Stage 4 (left) and at the end of stage 4 (right).
The fifth stage adds to the foundation for the left side of the model, which looks like it will be dominated by brick and Technic construction techniques unlike the right side that used columns of round bricks connected with clips. The scope of this side of the model results in a slower pace for the build — I hope that I get to add more track in the next bag!
The left and right sides are combined in Stage 5.
Moving to the sixth stage, we expand the support structures to prepare for adding a bunch more coaster track in this stage and the stages to come. We also add a half-circle around the entrance to the ride, which has three 2×6 Tiles in 321Dark AzurDark Azure, which each have custom stickers (which I did not apply).
One of the most interesting aspects of this stage is the L-shaped bracket which we build to prepare for adding the teardrop-shaped first loop, which is built using some SNOT techniques to make the connection work. It’s becoming easier to see how the whole thing will work as we add a few more sections of track in this step.
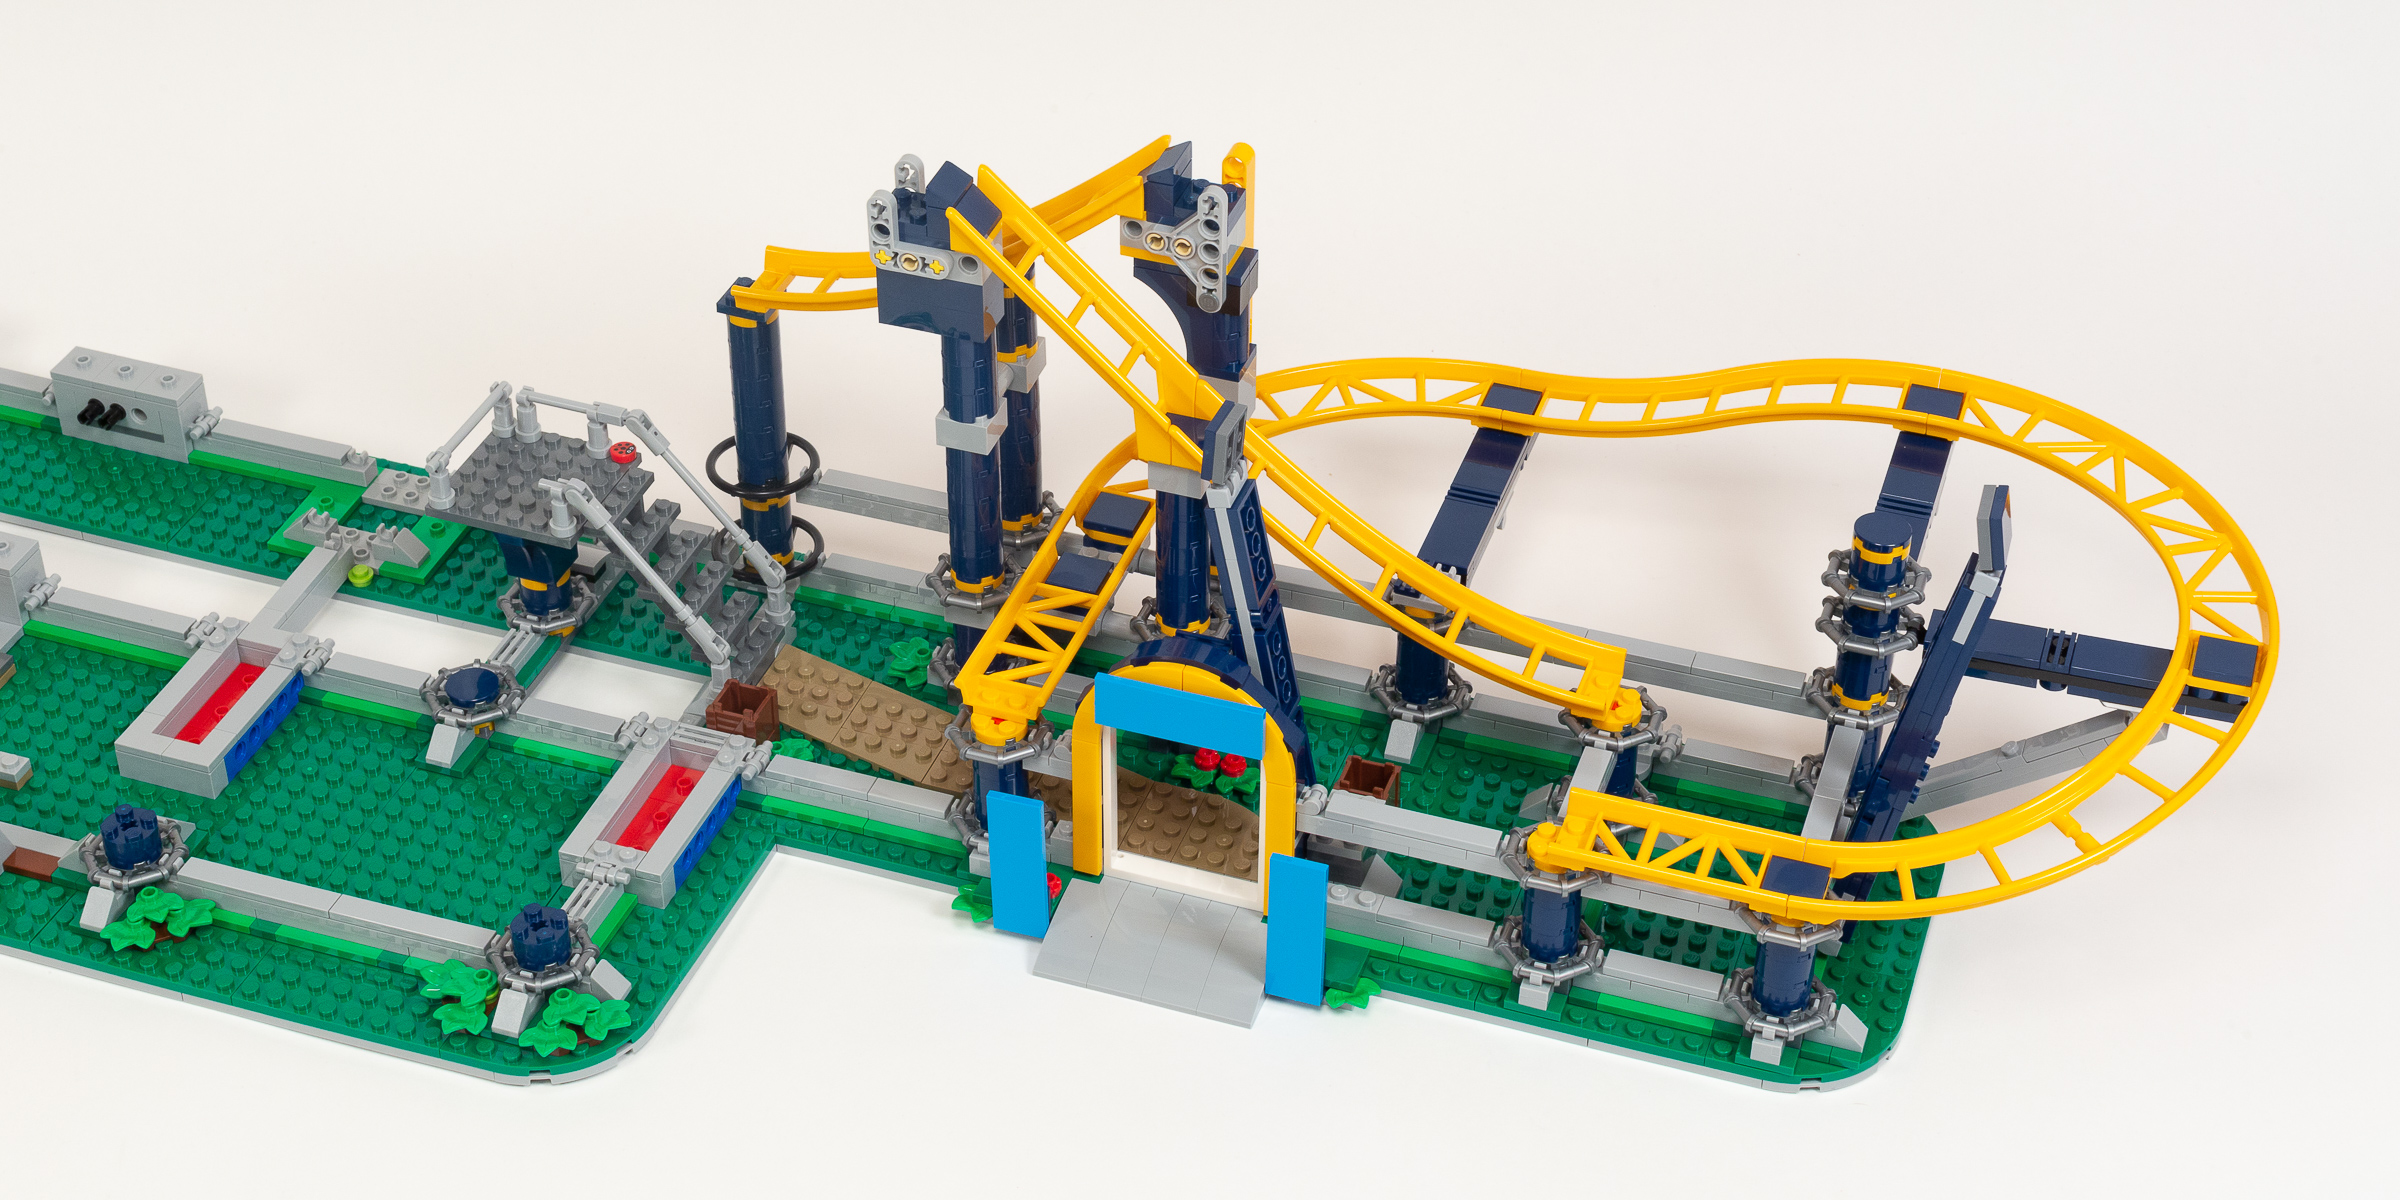
Preparing for loops as we finish bag 6.
It’s time for the loops as we enter stage seven, which we add quickly to the model. We start by leveraging the SNOT technique to add another gentle curve as part of the teardrop-shaped first loop. We use four of the new loop pieces to make the tight second loop, and the other two to make the top section of the taller first loop.
Two loops in place at the end of bag 7!
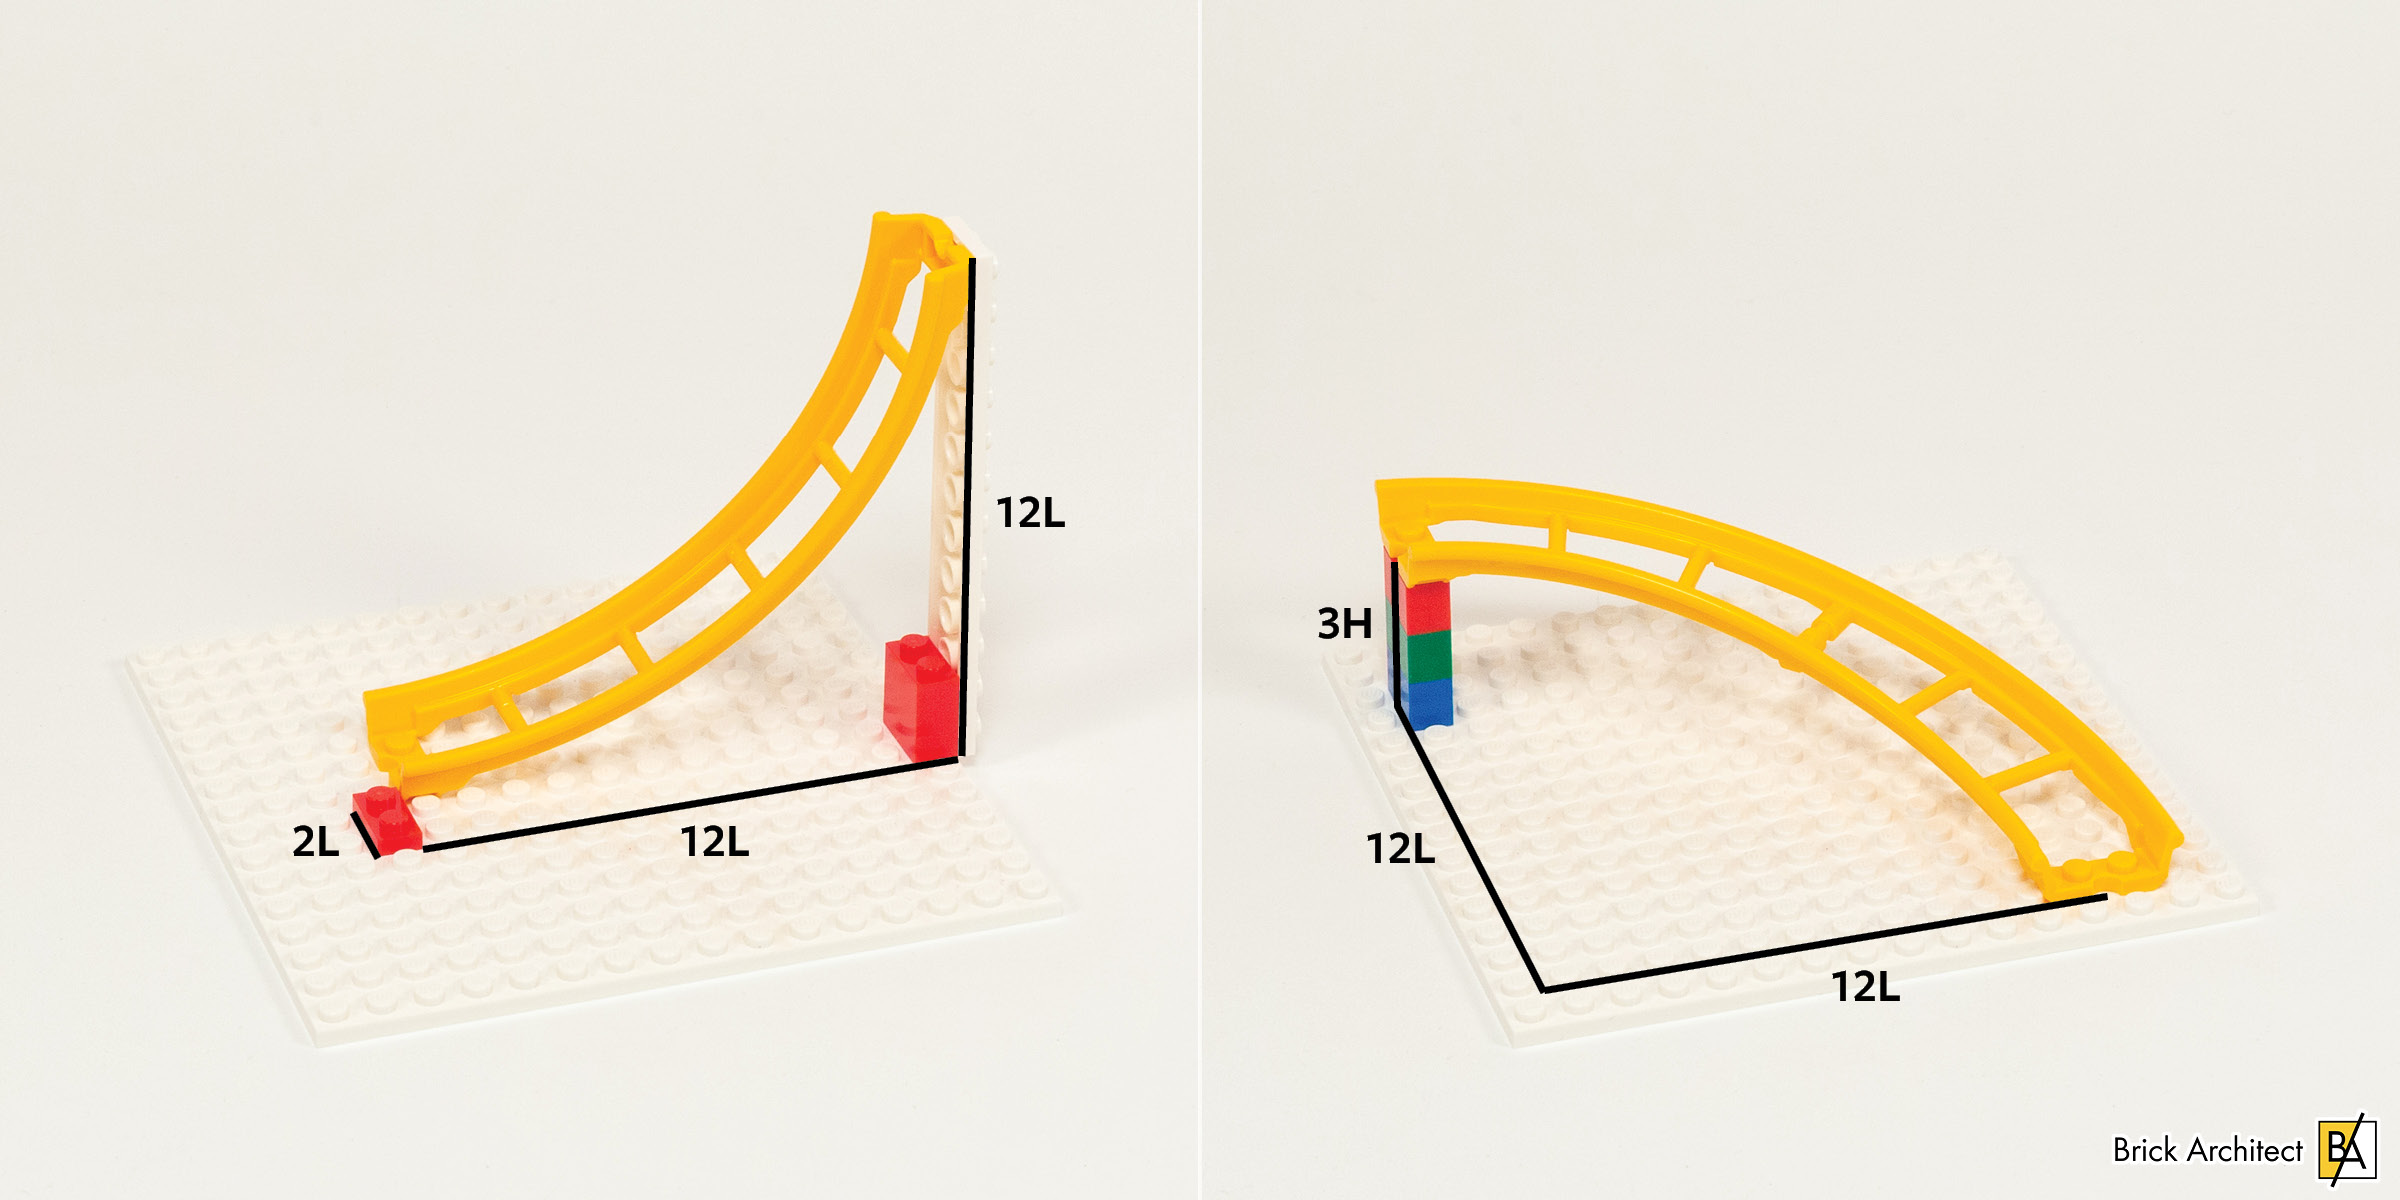
In order to make the loop work, the new part has a 90° curve and a 2-stud offset which allows it to make a corkscrew shape. (Without the offset, you would end up with a perfect circle so there wouldn’t be a way for the coaster to enter and exit the loop.)

A tall section roughed in place to test the loop using some SNOT elements from my personal collection.
Rather than wait for the instructions, I went ahead and built a long loop using the track to see if I can make it go fast enough to make it around the loop. I just couldn’t wait to see it working!
Build time 90 minutes (Bag 4: 18 min, Bag 5: 26 min, Bag 6: 24 min, Bag 7: 22 min.)
Stages 8-11 – Tower
Stage 8 contains four bags of parts, so I’m hoping we will get a better sense of the height of this project. That is definitely the focus of this bag, where we create two tall vertical supports which are connected by four horizontal braces.
Getting ready to attach the horizontal braces.
It’s purely brick-built without any Technic supports inside, and to ensure a smooth surface on all sides, it employs a ton of 2×2 Inverted Tile parts to cover the back side, which will be the left hand side of the finished model. The taller of the two towers has 2×4 Round Bricks covering it, which I believe the rollercoaster car will lean up against while going up the elevator.
Progress at the end of Stage 8.
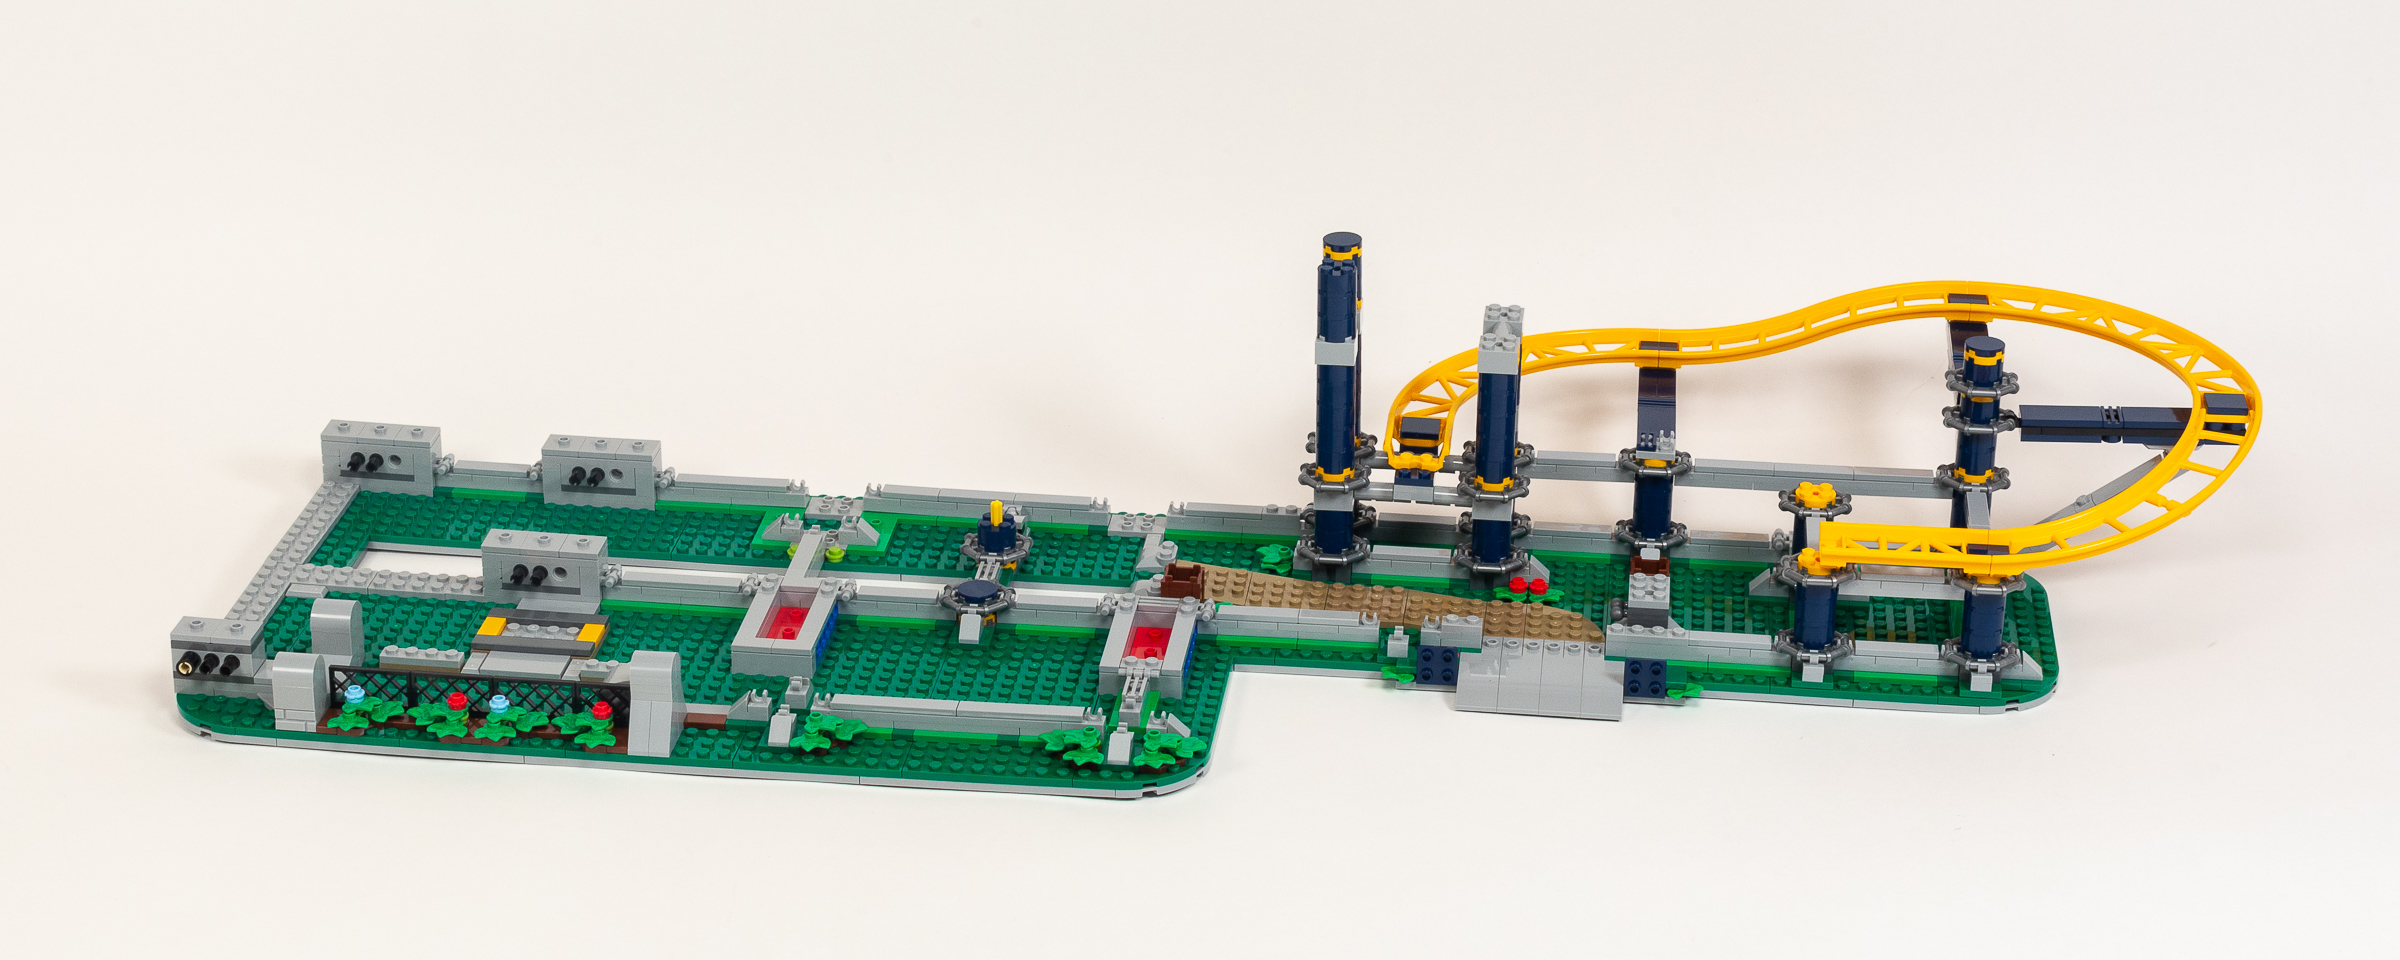
Stage 9 continues where we left off, adding a bunch of vertical-looking supports (which will be horizontal once this tower is installed in the model). The are again reinforced using Technic axles, which bodes well for the structural integrity of the finished model. At the end of the stage, we add four more sections of track, which I strongly suspect will line up perfectly with the beginning of the loop which we finished in Stage 7.
Tower assembly at the end of stage 9.
If you are impatient (like I am), this is the first time that you can get the loop working without a completely precarious tower. Simply place the new module where it belongs, and attach the tracks using two 2×4 Liftarm, L-Shape (part 32140) and add two additional sections of straight track to the top. It’s alive!
We top off the main tower in stage 10, which begins by building yet another slender vertical support structure. This one is reinforced with six additional sections of straight coaster track along the back side of the model. (I know the extra track will play a functional role in the elevator but can’t help but think the designers made this choice deliberately to give people buying the set additional track to play with when building alternate models.)
Progress at the end of stage 10.
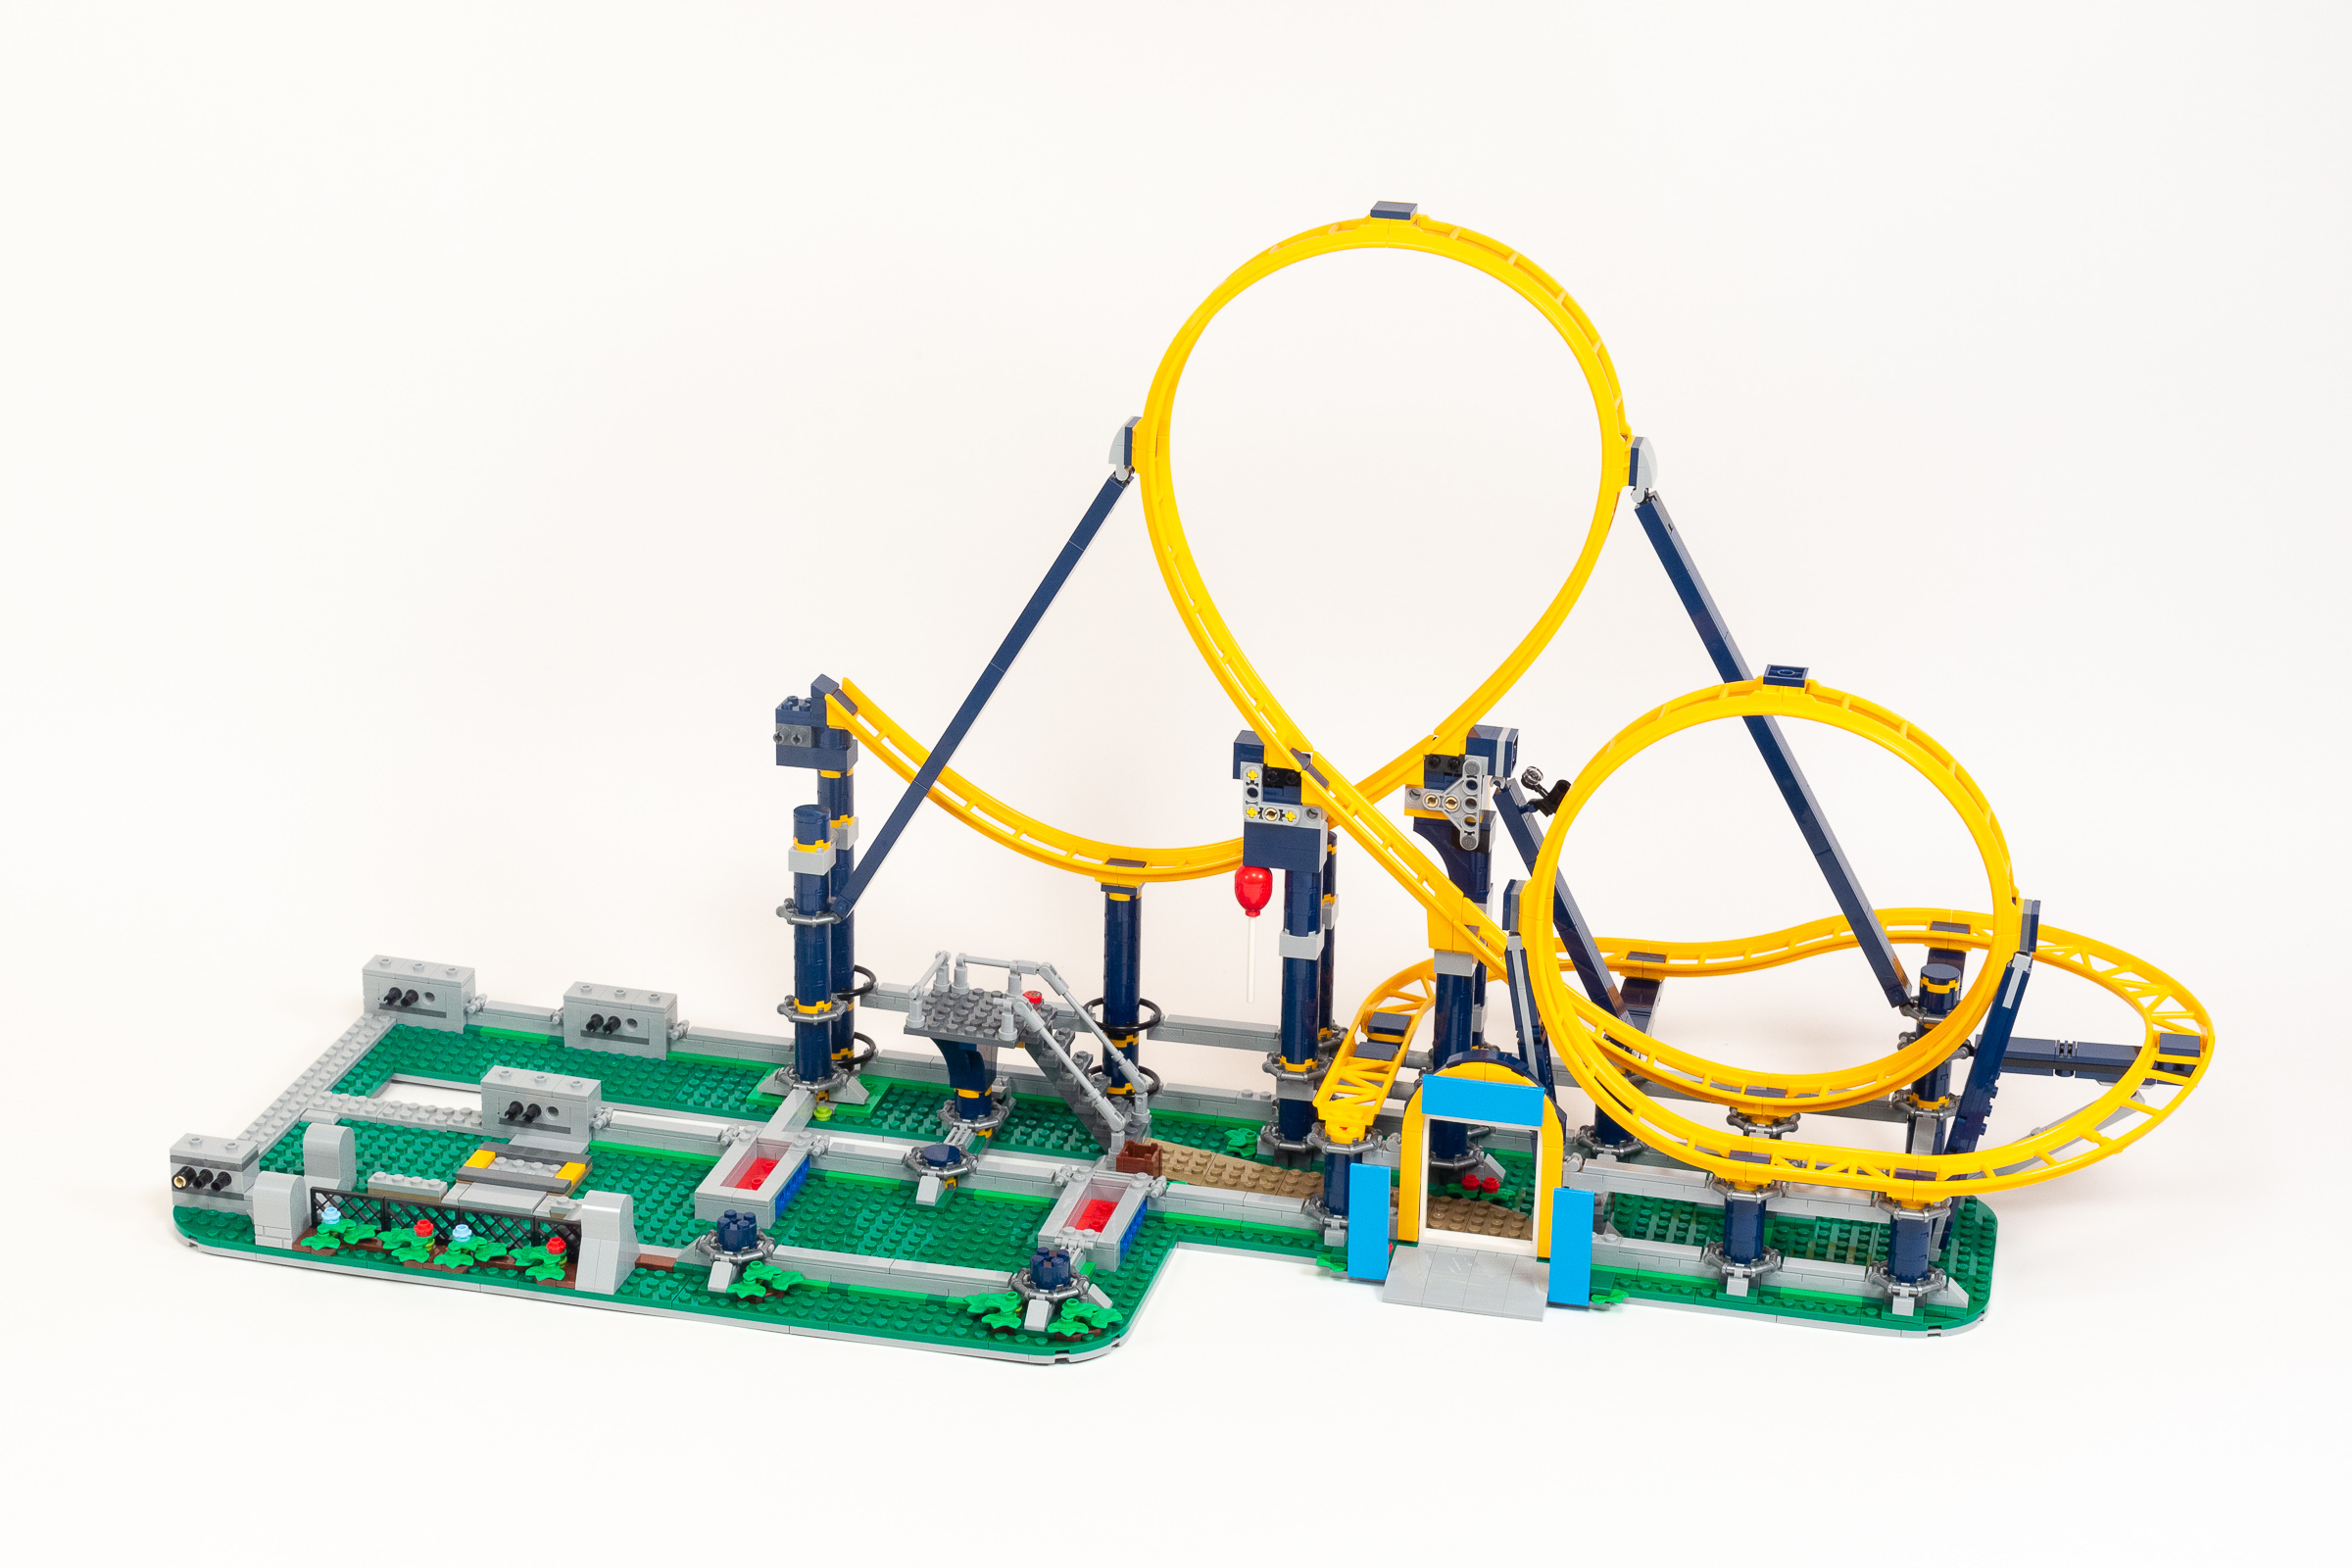
Stage 11 adds the top section of track, which curves down from the highest point. Rather than create a new part for a convex 90° section of track, they used two of the existing curved parts which are connected using some more clever SNOT work. This will result in a pretty dramatic descent, as the cars pint straight down before going through the first loop.
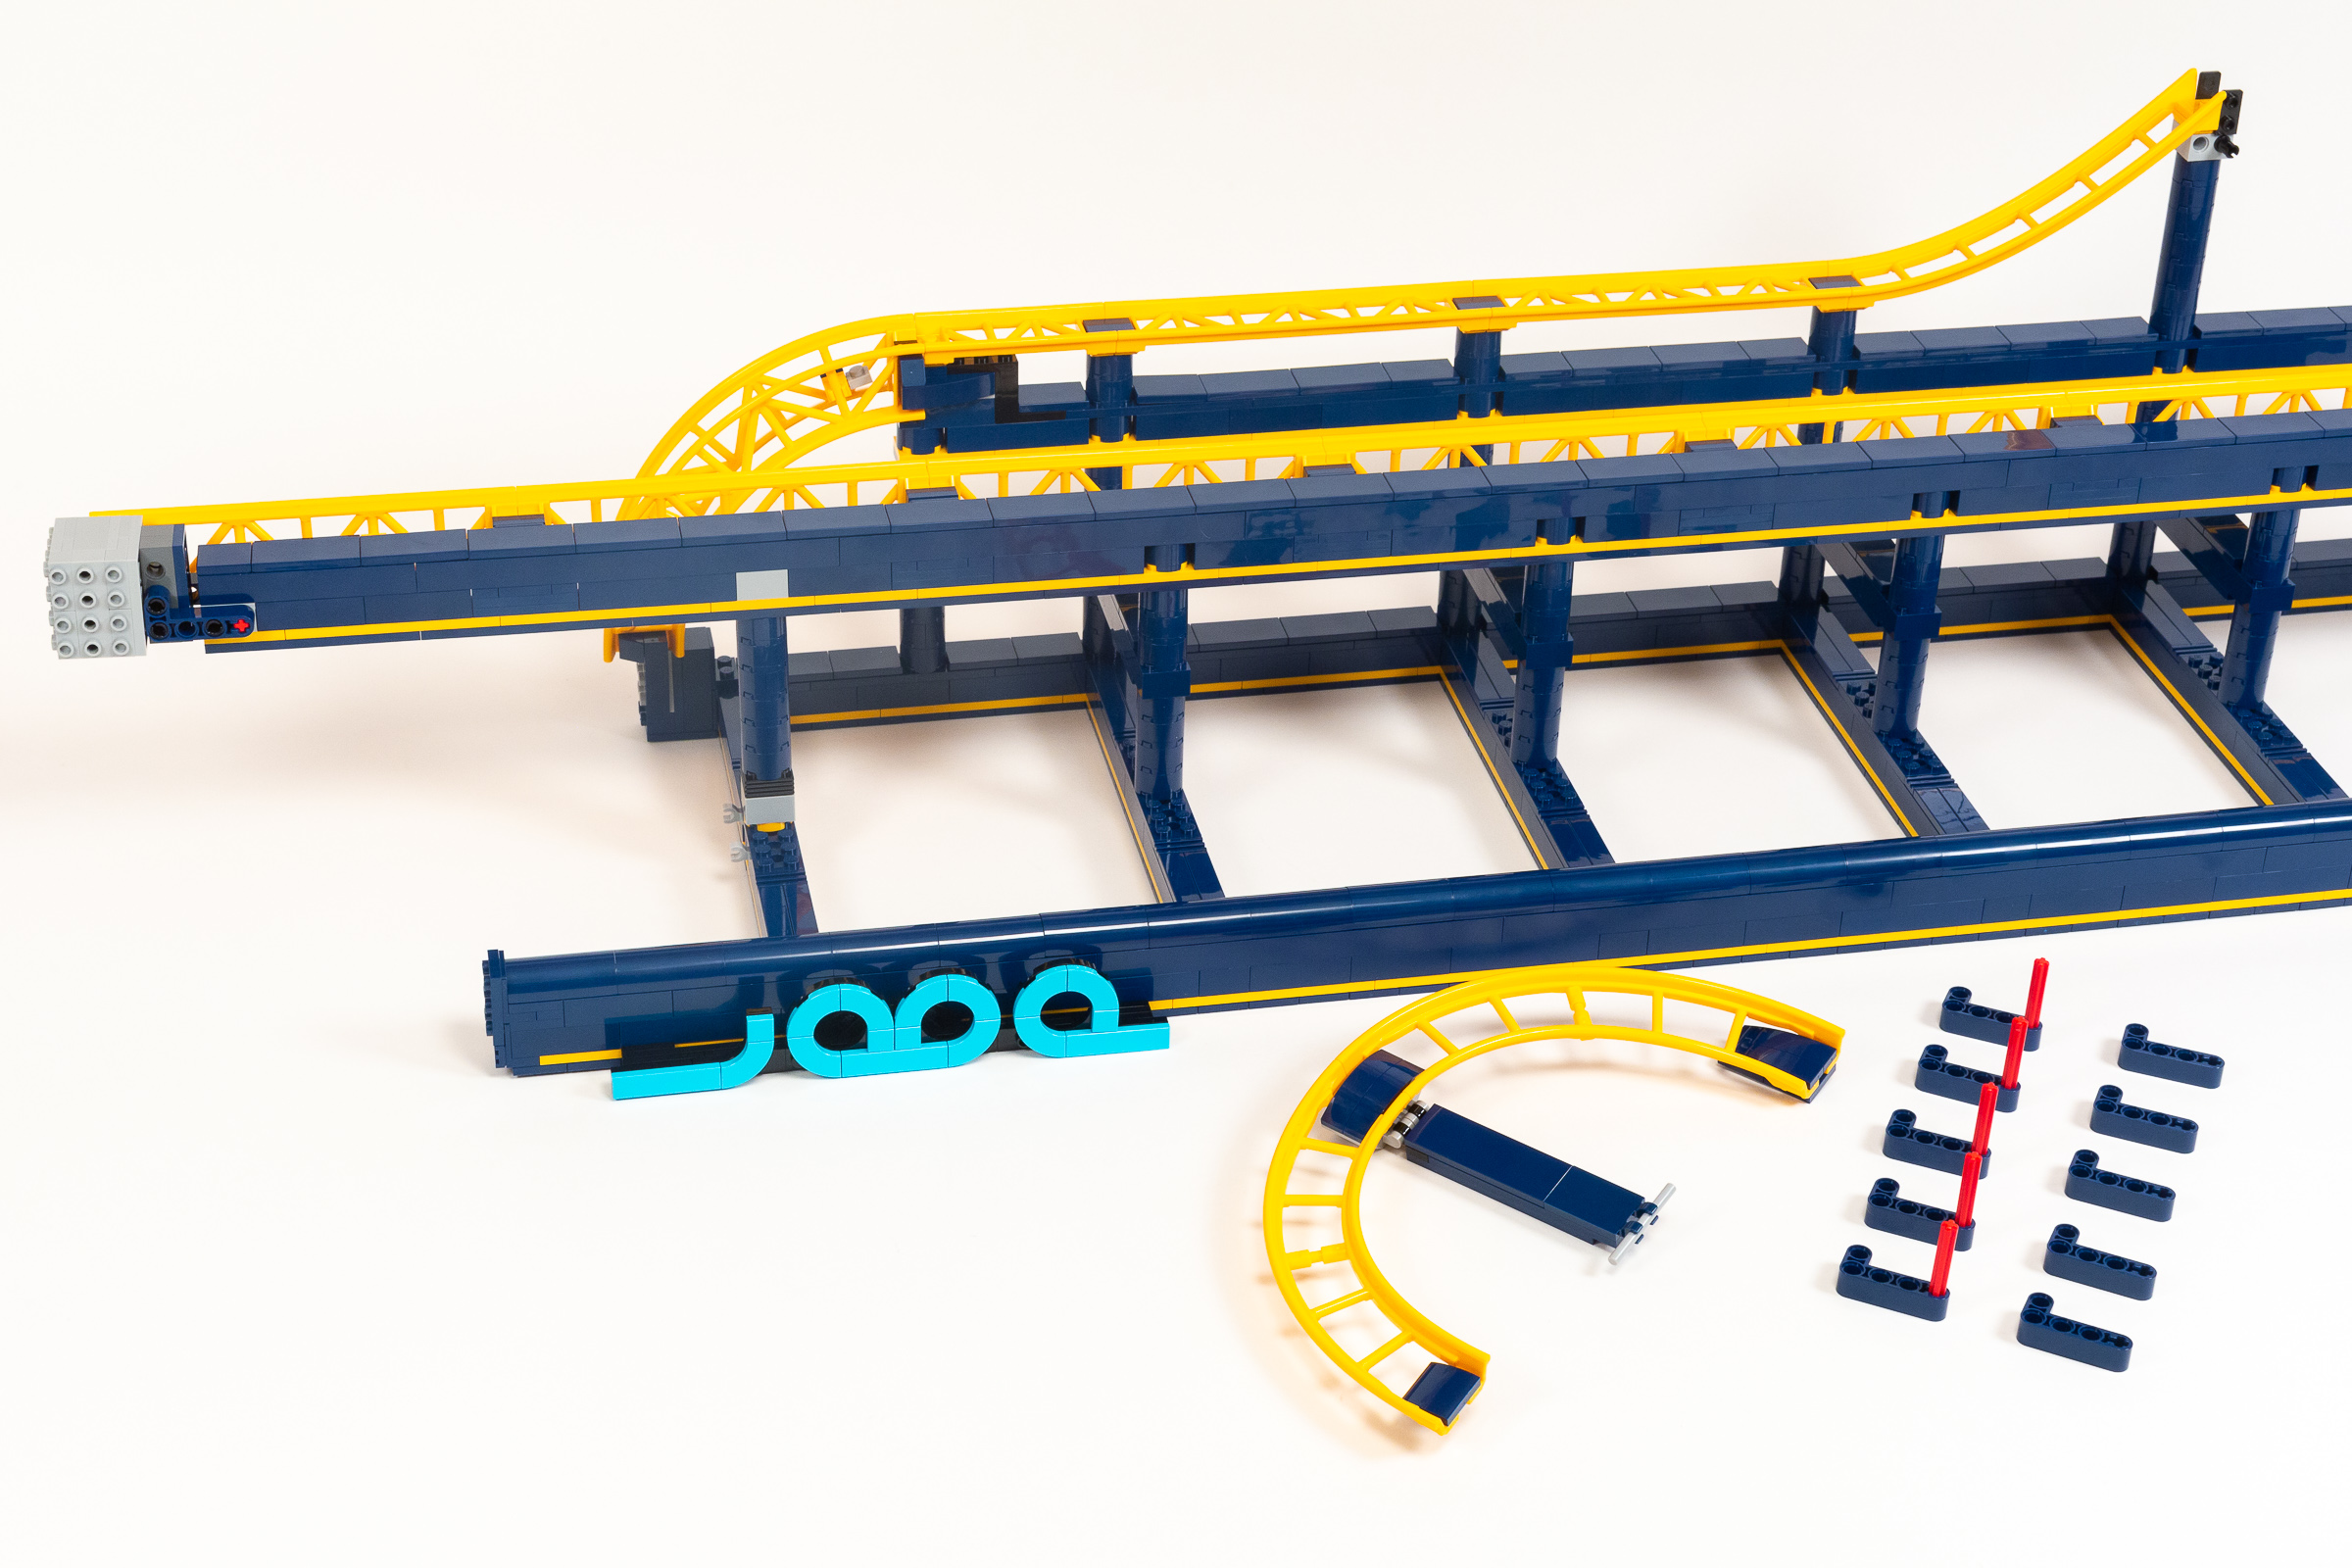
Text and curved track added in stage 11.
We also get to build some nice lettering for the word “LOOP” which goes vertically down from the top of the tower. The best news — we finally get to attach the tower to the base for good, which means that we can play with the loop functionality without having to add precarious extra track to the model! The “correct” way to attach the model is the same way that I did it temporarily in the previous step – using L-shaped Technic beams.
Build time: 72 minutes (Bag 8: 24 minutes, Bag 9: 22 minutes, Bag 10: 14 minutes, Bag 11: 12 minutes).
Stages 12-14 – Elevator
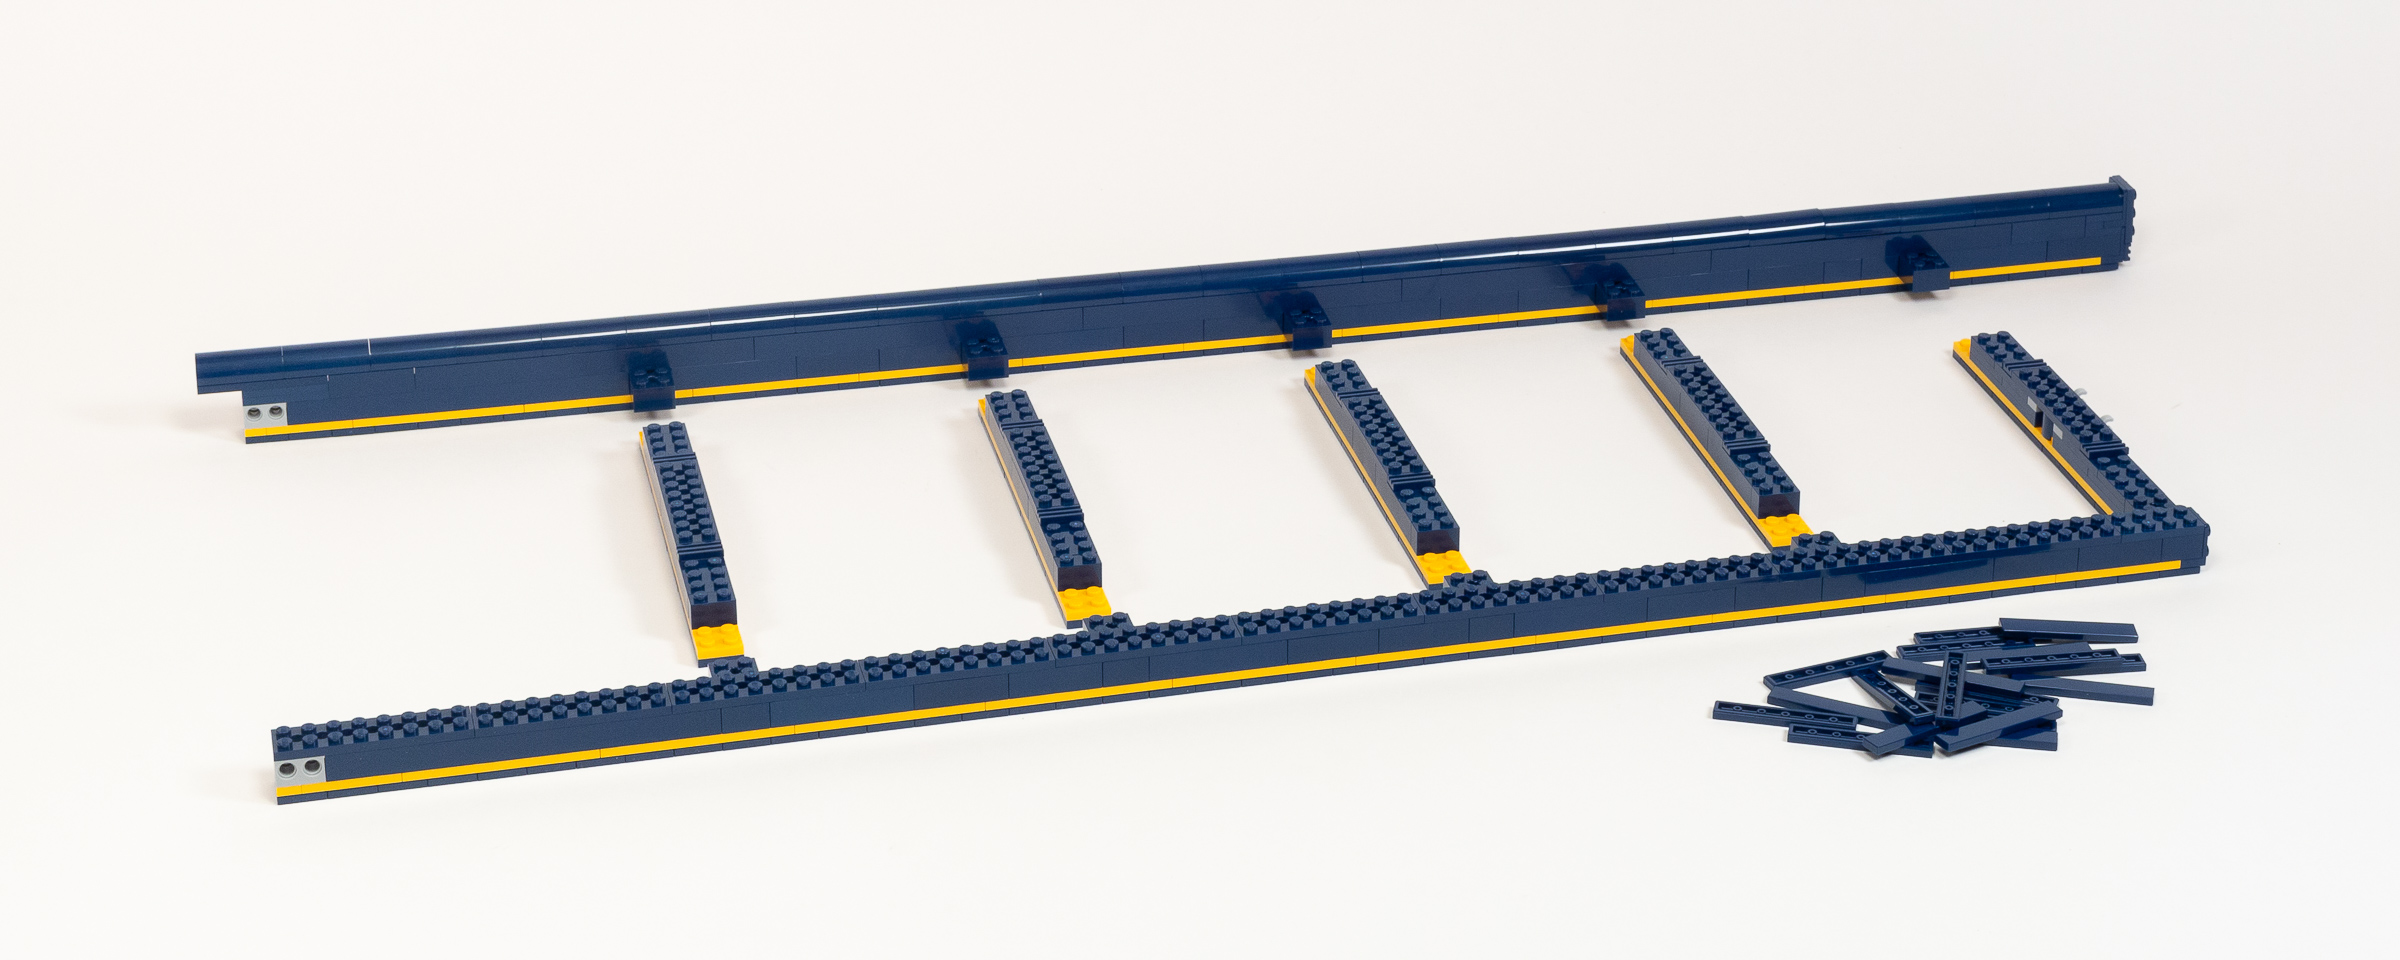
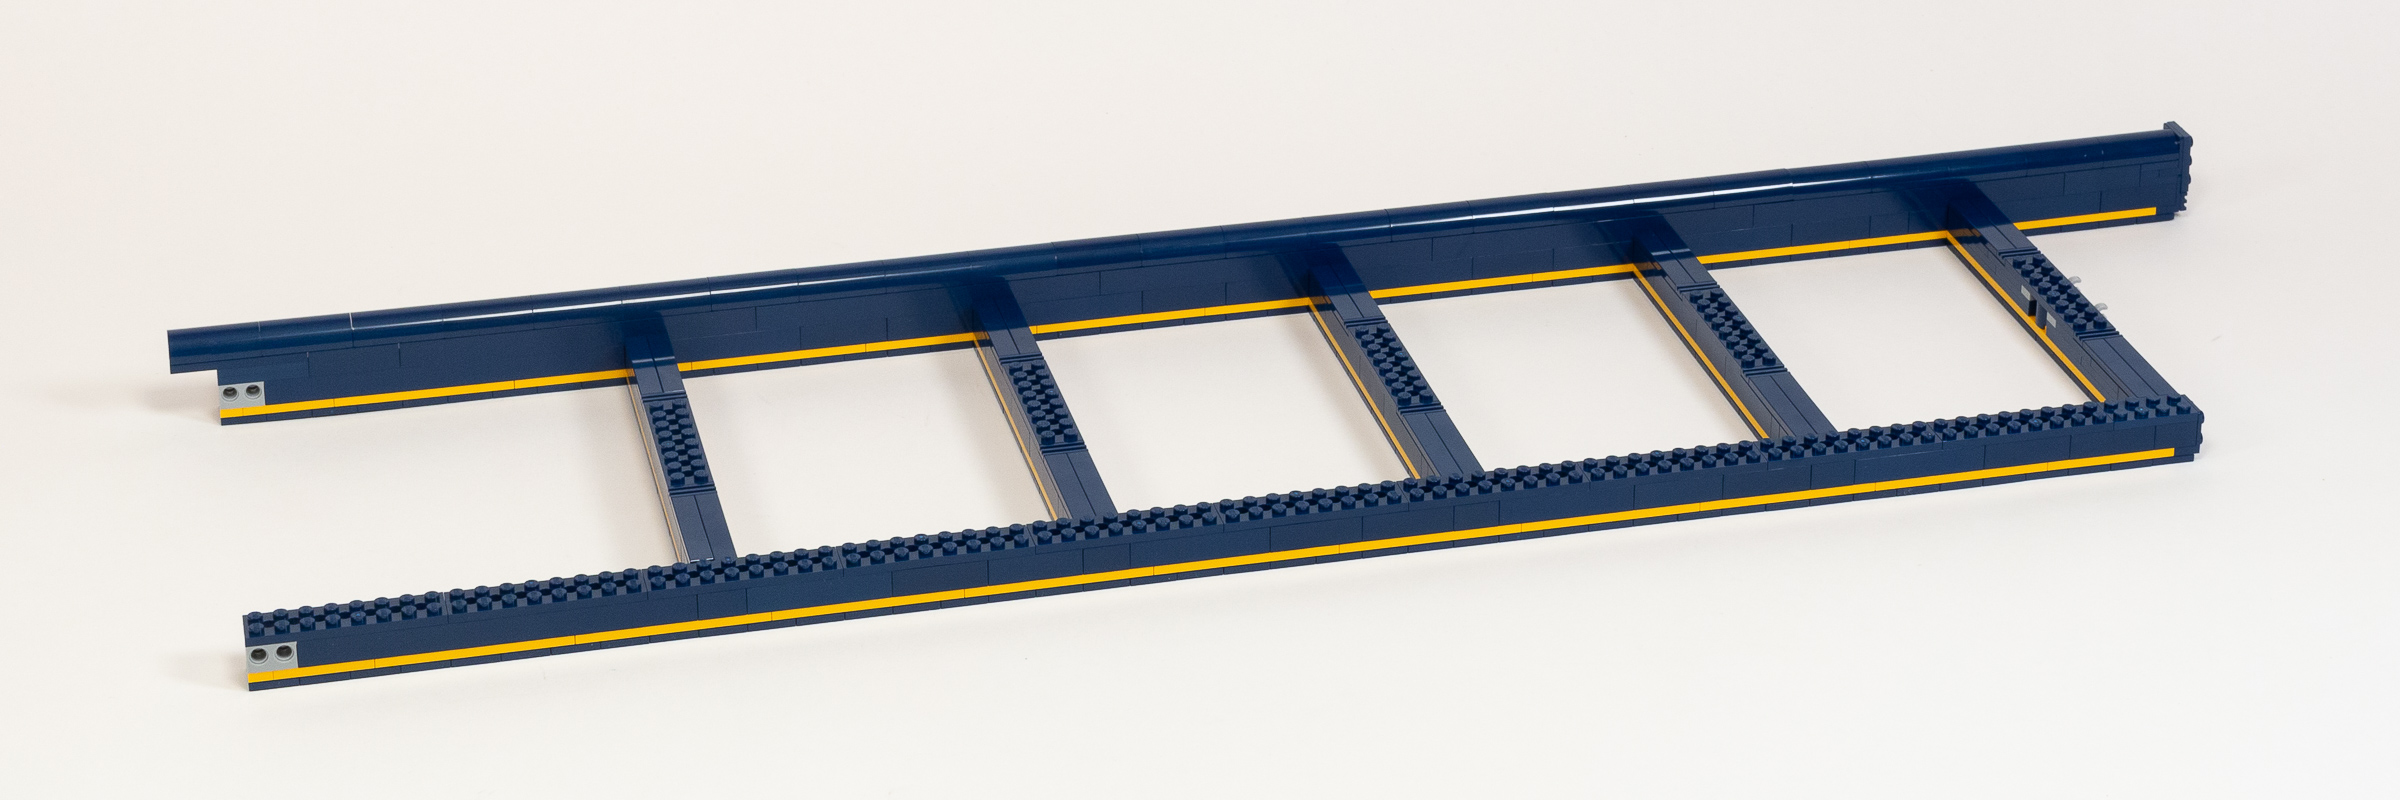
Moving on to stage 12, we have several bags of parts and a disconcerting number of links that we will probably need to connect into a very long chain. But first, we need to build a very large rectangle, which we make even longer by adding another small assembly on both ends containing a single 24-Tooth gear (part 24505).

Building a giant rectangle in stage 12.
The top of this lengthy rectangle is covered with tiles for a smooth finish, but not just any tiles—a band down the middle is covered with alternating 322Medium AzurMedium Azure and 321Dark AzurDark Azure. creating a diagonal patterning down the front which takes quite a bit of time to get right.

Creating a giant loop of chain links is extremely time consuming.
And yes, my worries were well founded… It took nearly 30 minutes to connect 255 chain links into a very long loop, which is not explained very well in the instruction booklet, but I believe is supposed to loop all the way around both the front and back of the rectangular assembly. It is not especially clear how tight it should be. I erred on the side of making it tighter, so I may need to add an additional chain link later. This was not a very fun bag to build, and the first time in this project that things got a bit boring.
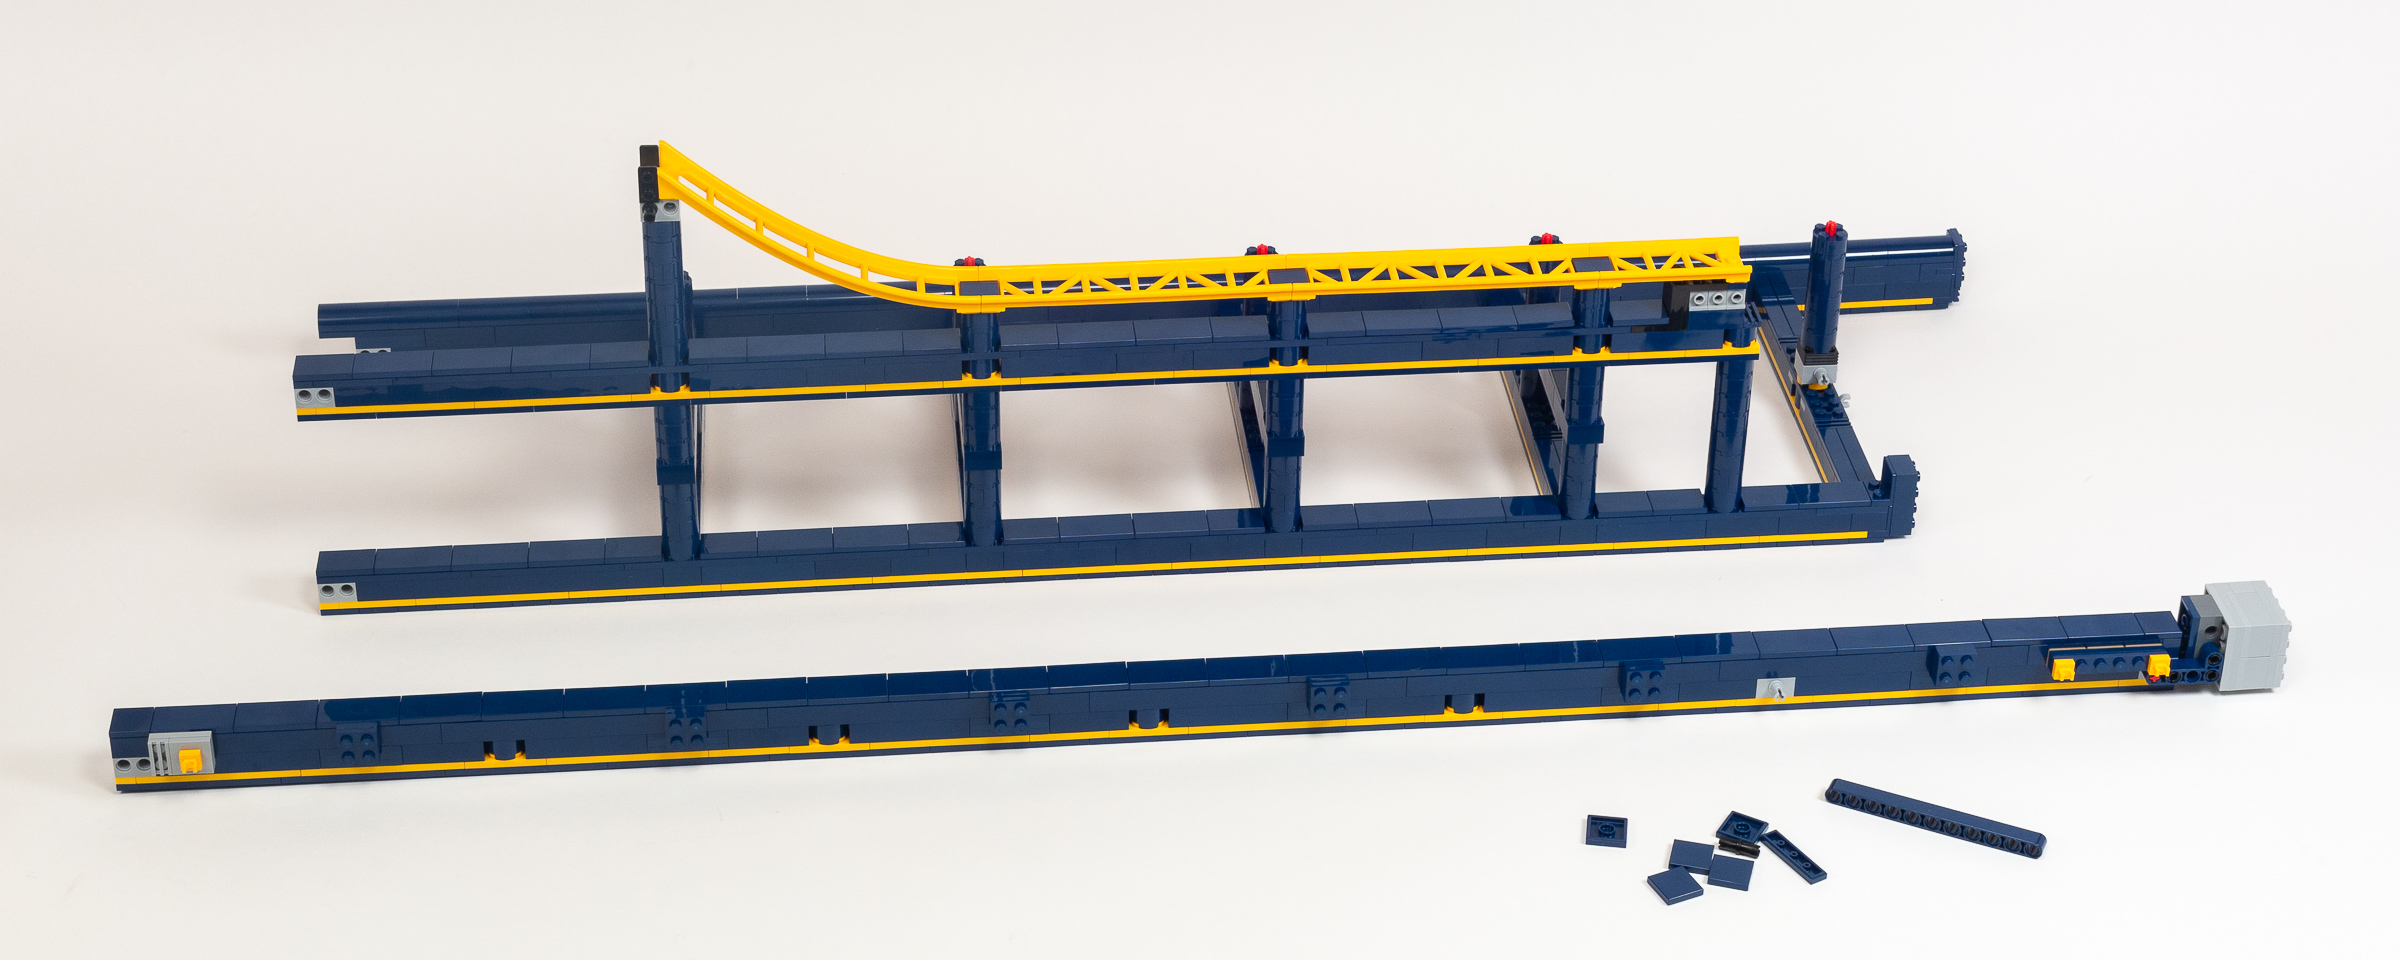
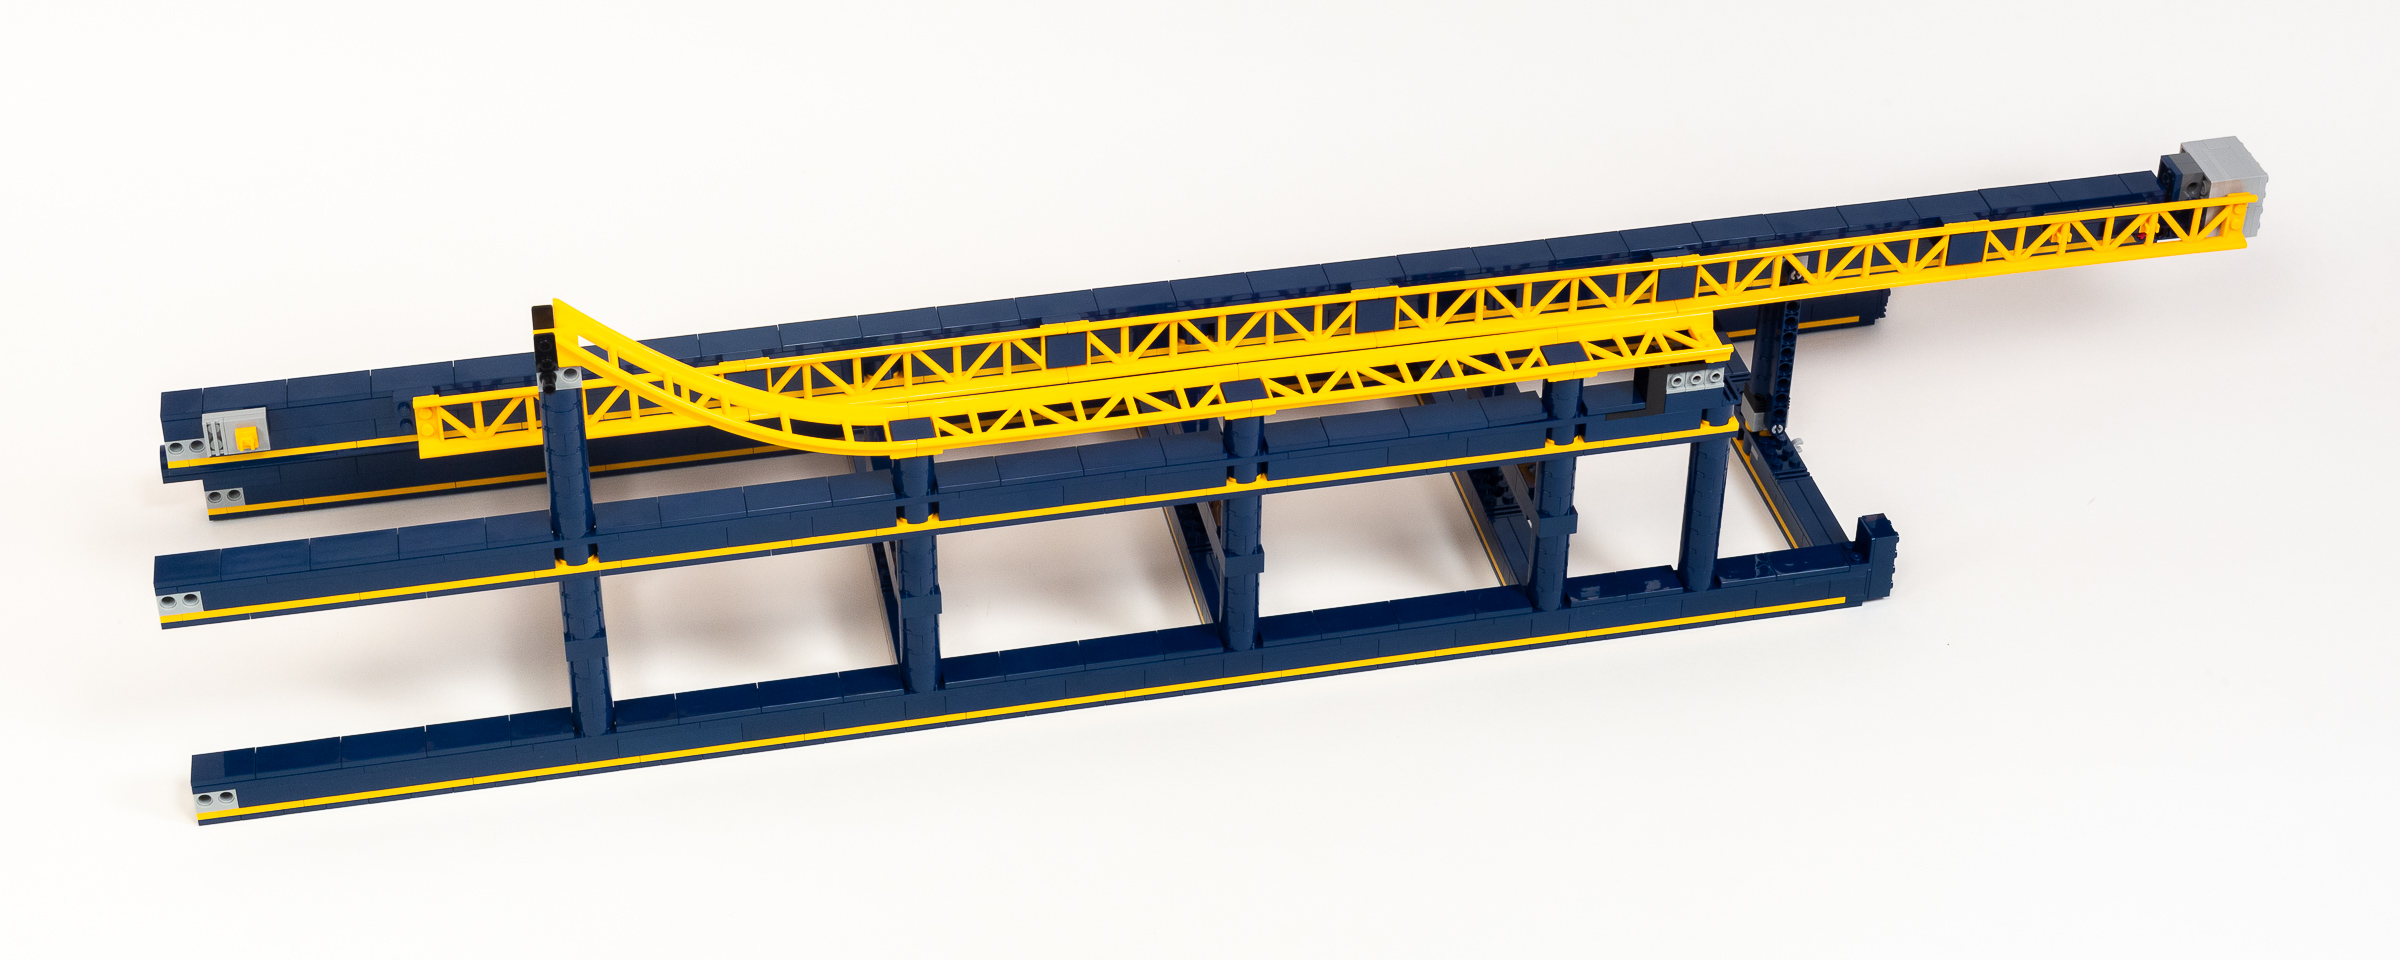
Continuing to stage 13, we built another separate sub assembly which will hold the coaster as it goes up the tower. The bulk of the work is in building a large C-shaped module with a lot of wheels on the inside. It will slide over the large column which we built in the previous stage, but only after building a brick-built platform that has a very gentle slope, which will hold the coaster as it is lifted to the top of the ride.
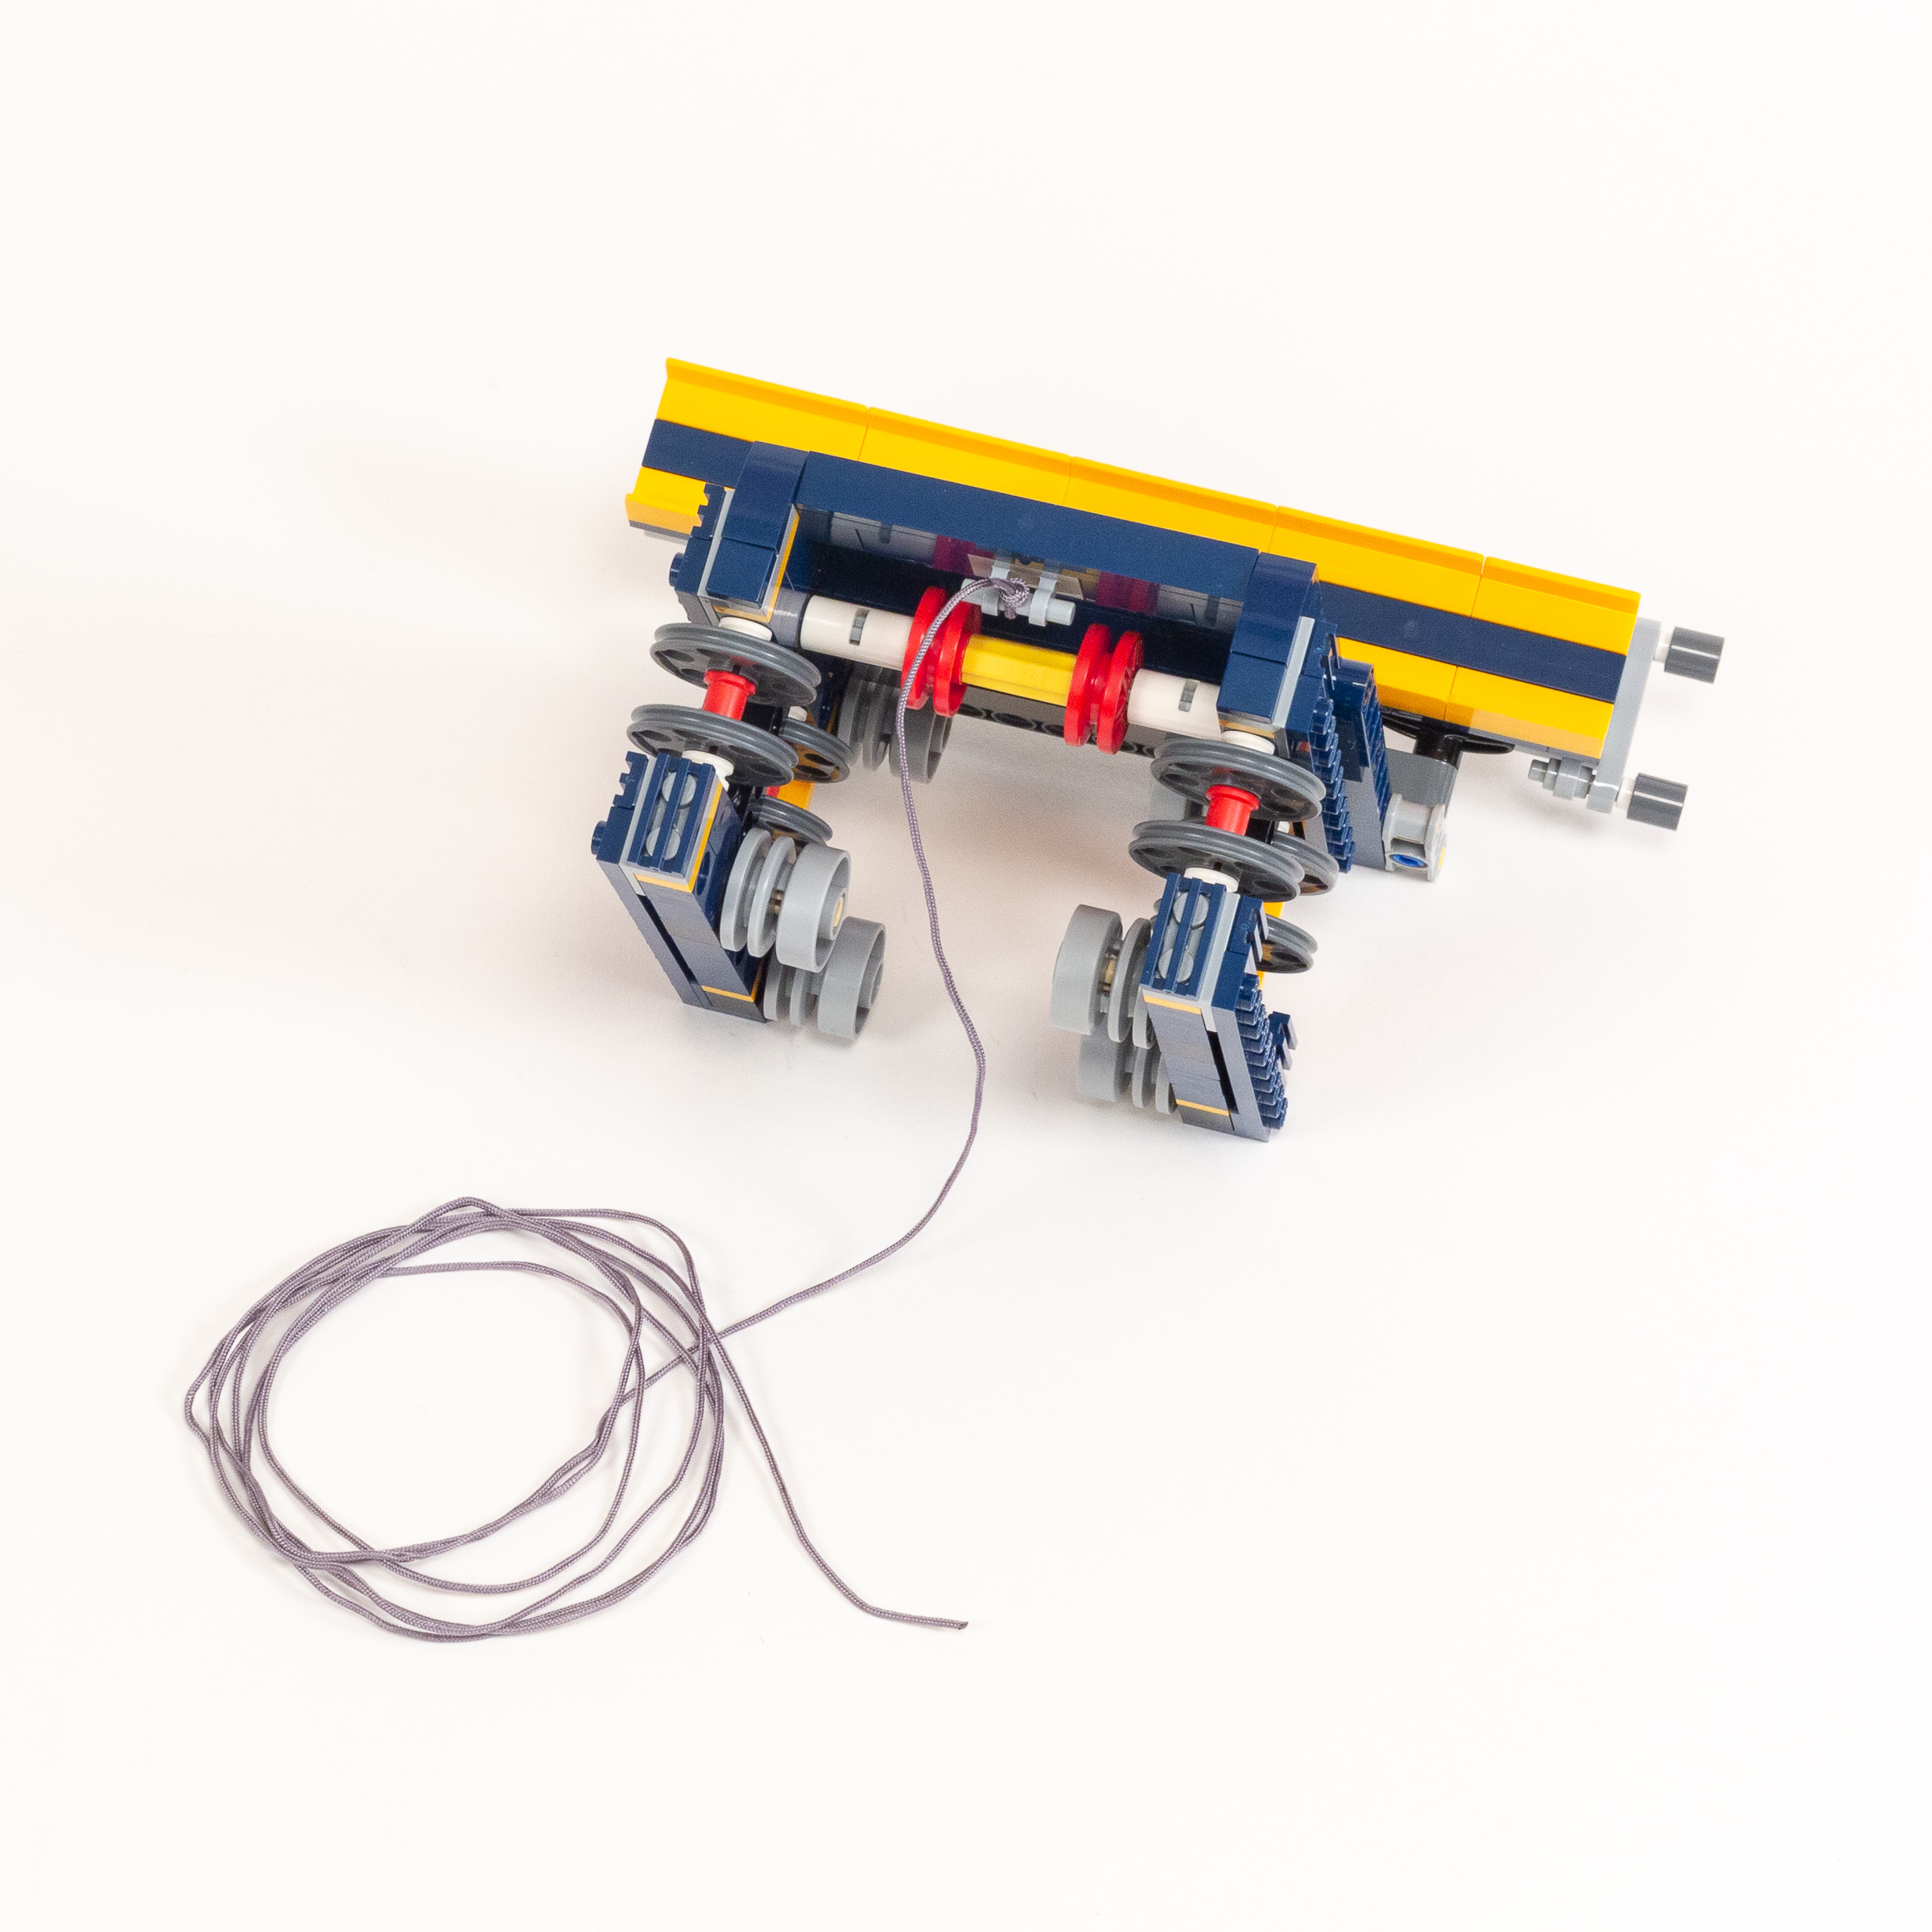
Elevator assembly ready for installation.
With just two stages to go, stage 14 brings us that much closer to the finish line with a series of small modules that we add to our growing model. The intention is that you would build each module then attach it right away to your growing model, but in the interest of getting better photos for this article, I built each module and laid them out on the table for a photo.
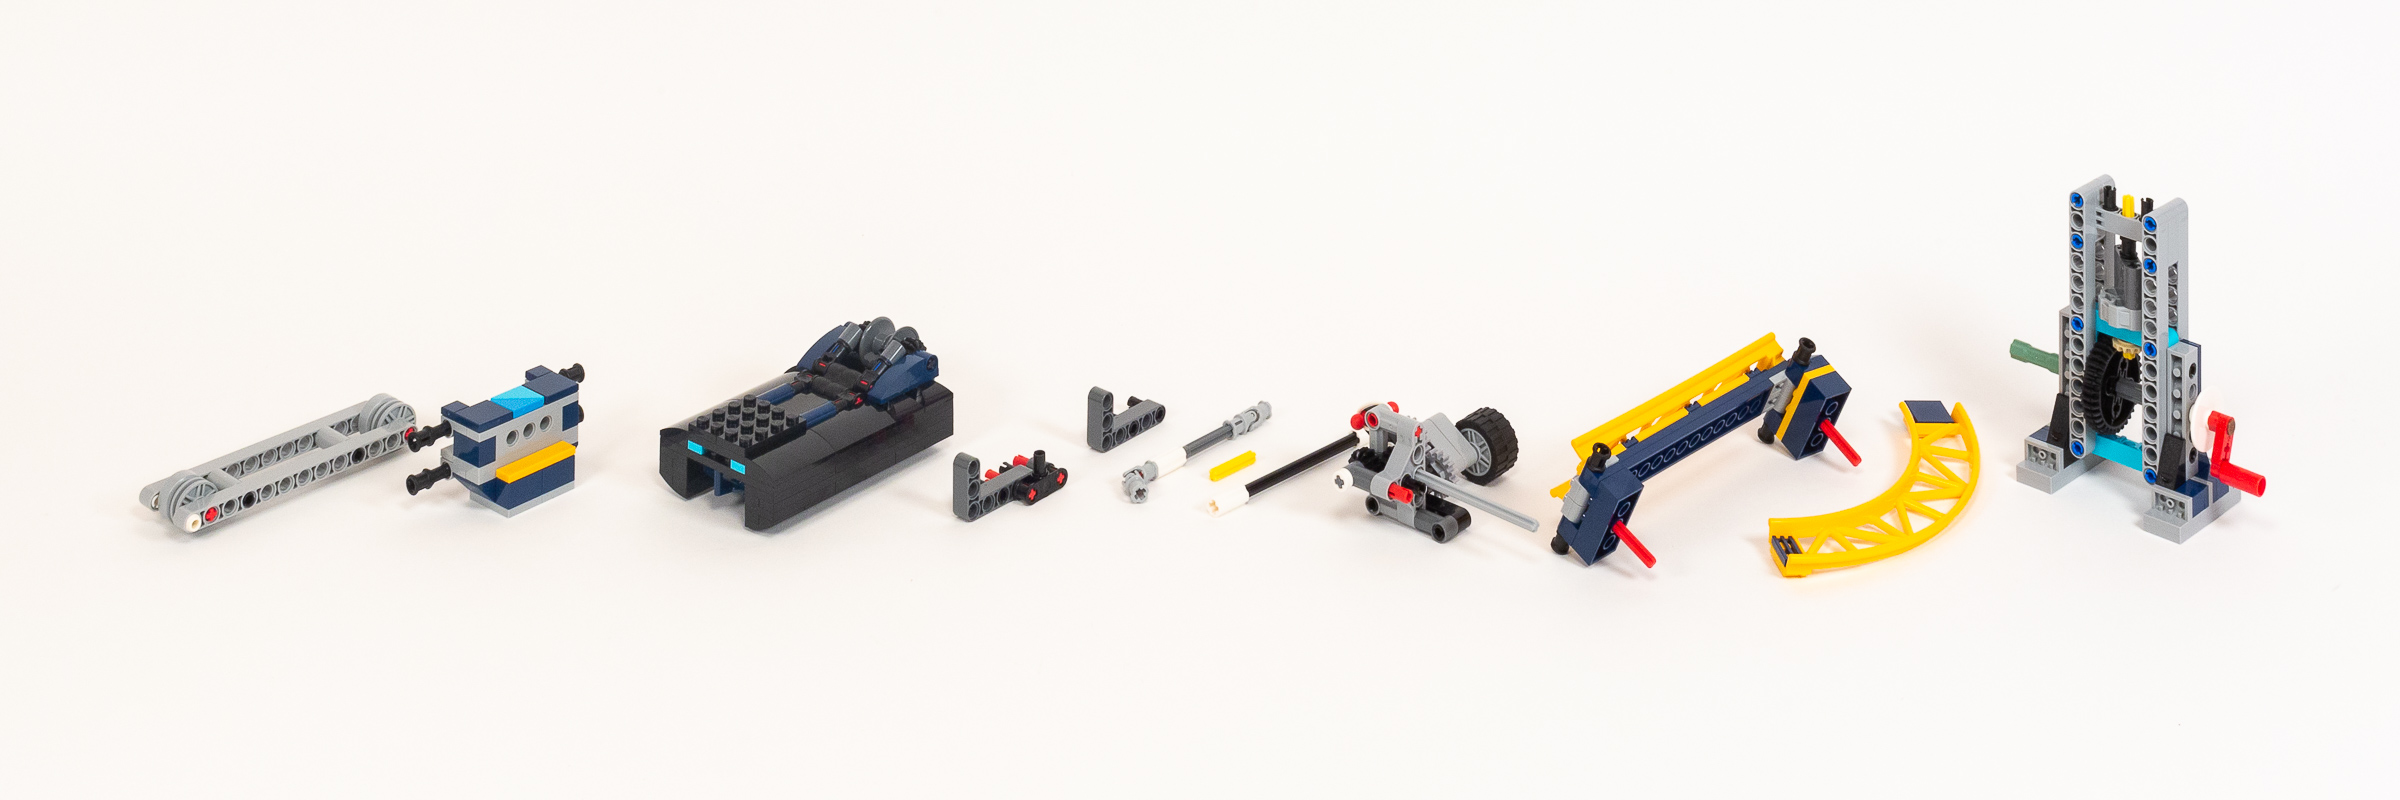
Modules from Stage 14 before adding to the model itself.
Some of the modules include an endcap to attach the top of the elevator support to the rest of the model, a counterweight for the elevator, a selection of technic connections, a mechanism to slow down the coaster, and the last two sections of track before the elevator. Last, but not least, we have a cranking mechanism for the elevator (which I will most certainly connect to a motor as soon as the model is complete).
Build time: 103 minutes (Bag 12: 53 minutes, Bag 13: 19 minutes, Bag 14: 31 Minutes.)
Stage 15 – Station
This is it; time to open the three bags for stage 15 so we can celebrate our towering accomplishment. We start off with two simple support towers, but spend most of our time on the station where passengers can get on and off of the ride. The roof is made of more coaster track, with a contemporary-looking “scaled” covering comprised of 2×3 Tile w/ clips (part 30350).

The final batch of modules ready to be installed.
After this, we have another small mechanical assembly, a short section of track to finish the loop, and a nice looking palm tree.
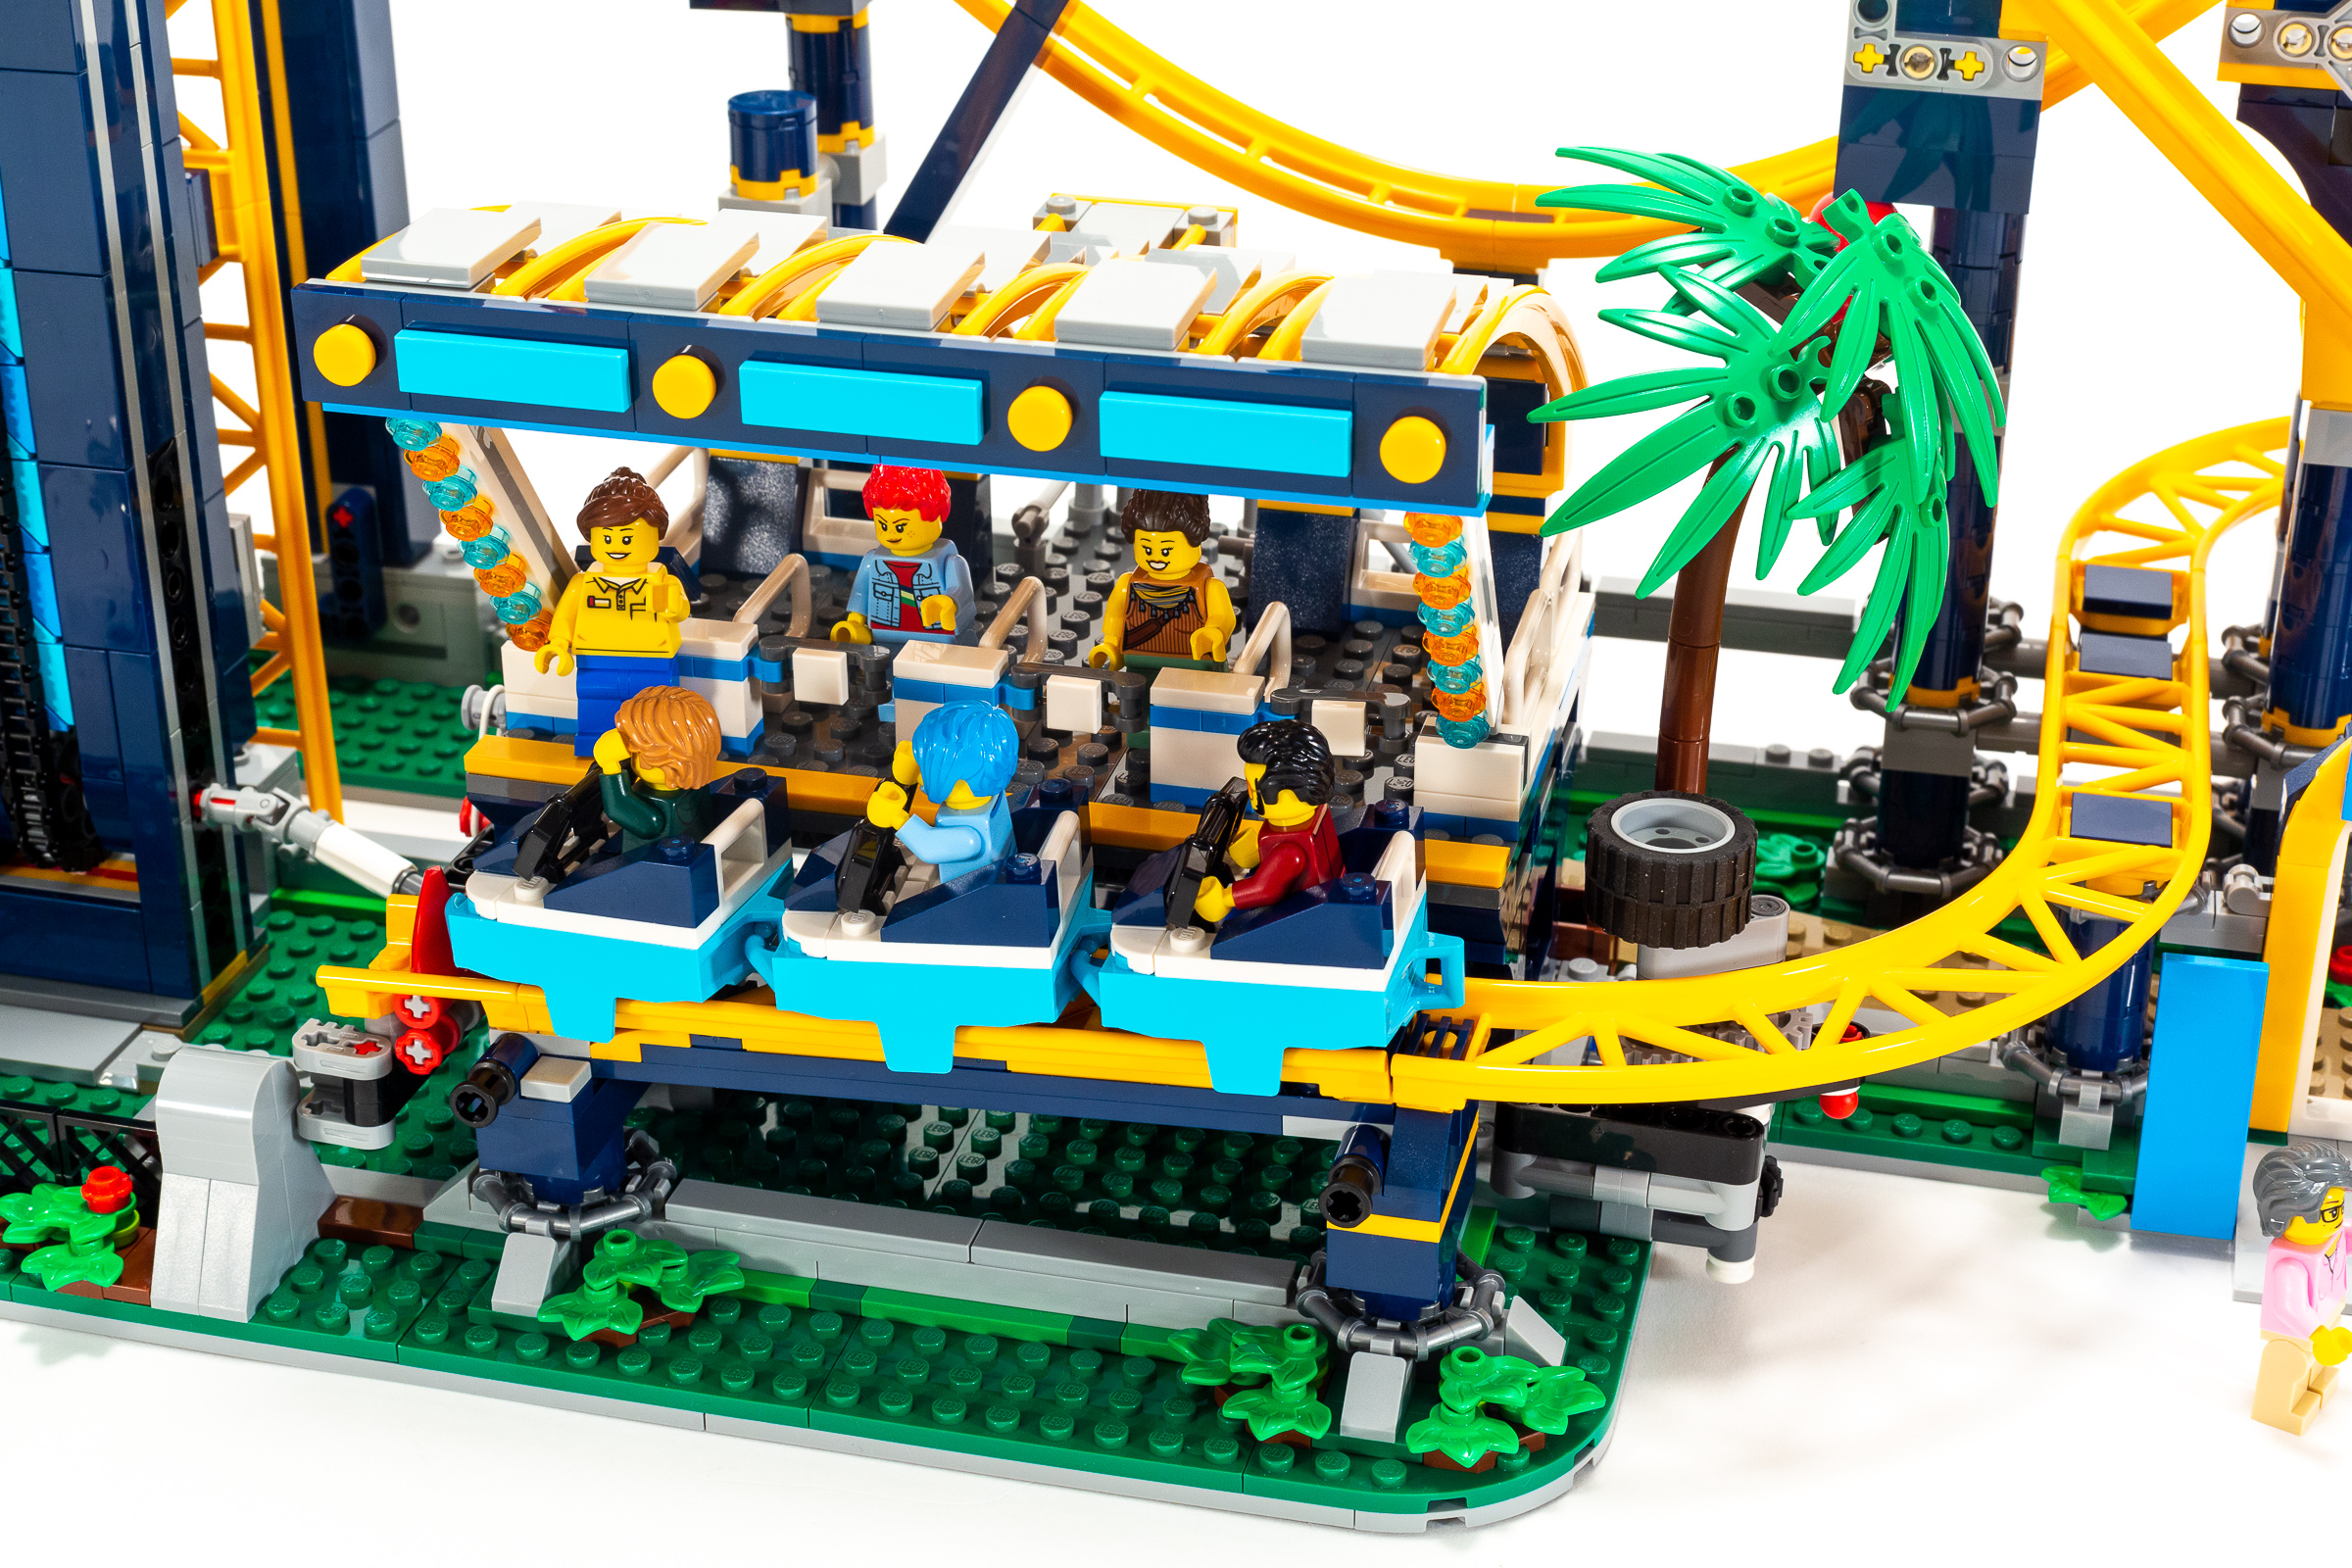
The station installed in the completed model.
In addition to looking cool, the decision to use additional train track to build the roof puts more track in the hands of builders who will inevitably want to build an even bigger and crazier coaster after completing this one.
Build time: 33 minutes.
Parts
I did not do an exhaustive analysis of the set to identify existing parts in new colors, although it is fairly likely that there are some new parts in 140Earth BlueDark Blue since it is a rare color and a signature color in this set. Instead, I focused on the new track elements, the excellent selection of minifigures, and the overall value.
New Parts
All of the track included in this set comes in a new color: 191Flame Yellowish OrangeBright Light Orange. This results in 7 recolors (existing parts in new colors), and three brand new sections of coaster track. Let’s give them a closer look…
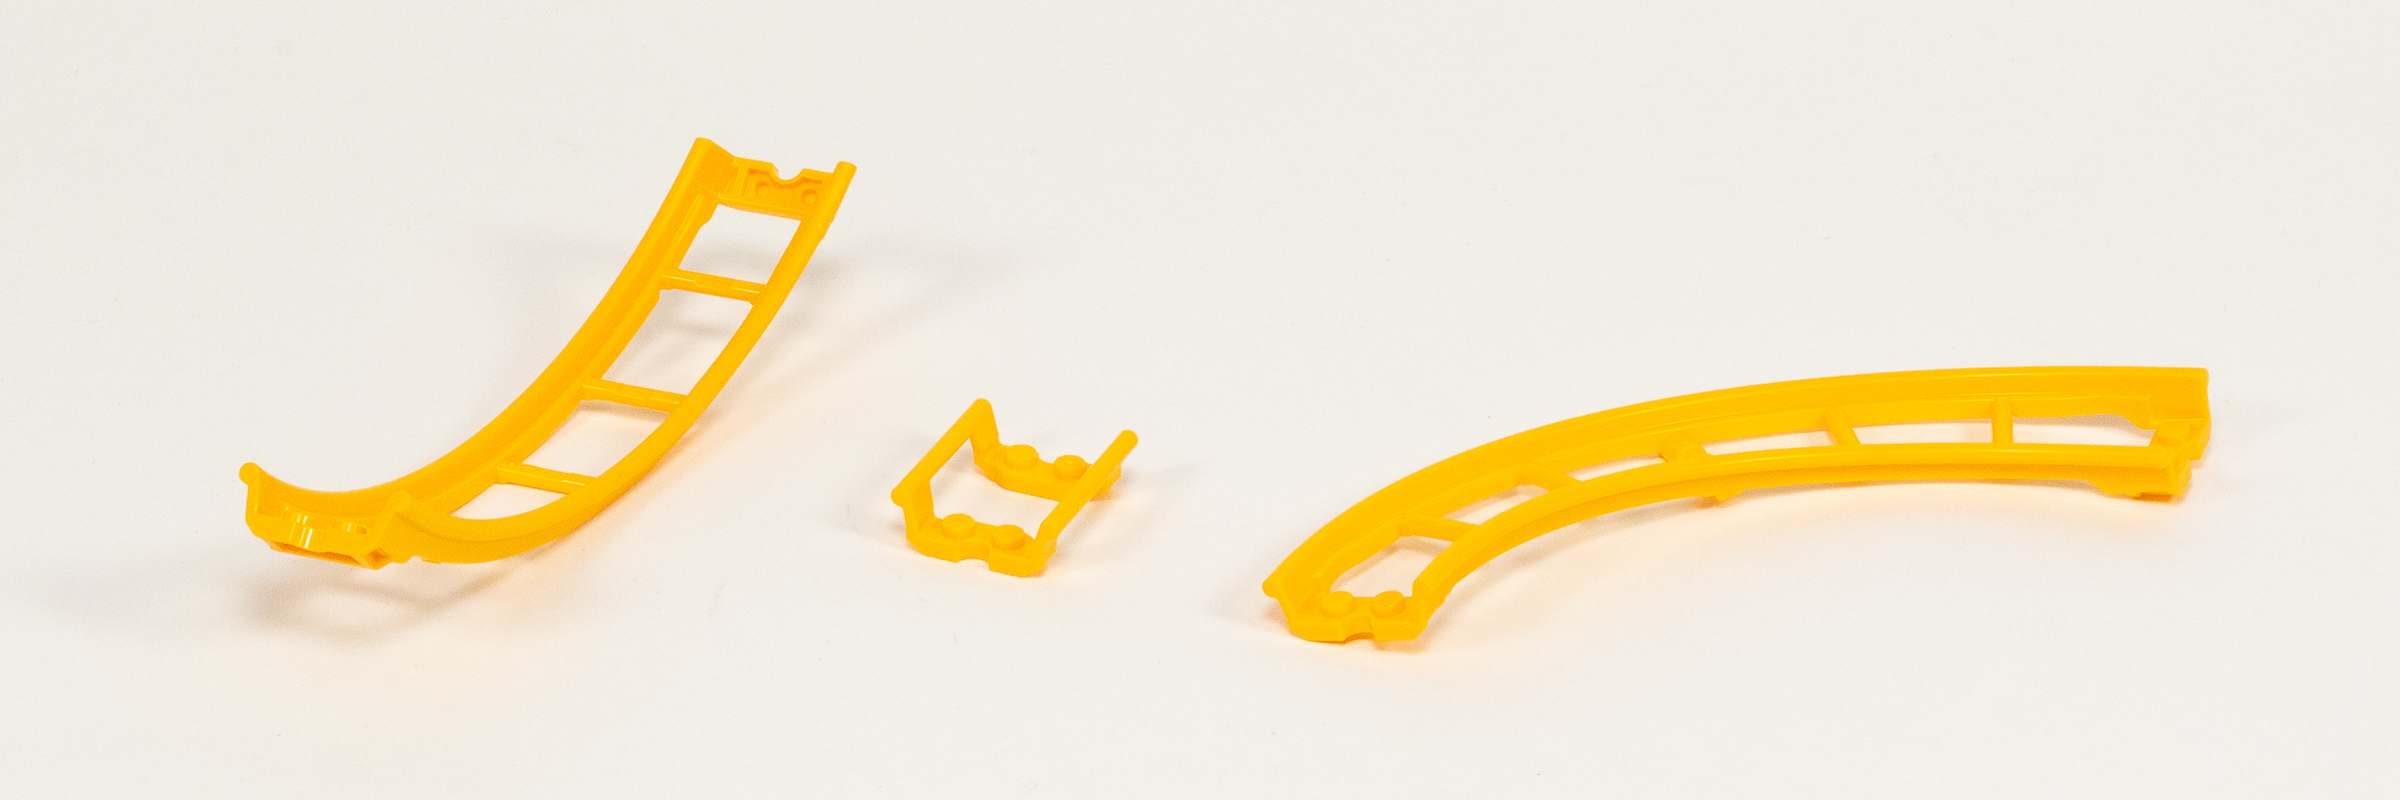
Three new types of Roller Coaster track introduced in this set.
New Parts:
- 6x – 1/4 Loop (part 80564) in 191Flame Yellowish OrangeBright Light Orange.
- 2x – 4L Straight (part 80562) in 191Flame Yellowish OrangeBright Light Orange.
- 3x – Curve with 3-Brick Grade (part 80566) in 191Flame Yellowish OrangeBright Light Orange.
New parts have interesting geometries. 1/4 Loop (part 80564) on left, Curve w/ 3-brick grade (part 80566) on right.
The cool thing about the wide range of track sections included in this set is that every current type of coaster track is now available in a single color. I suspect highly-sought parts like the short straight section or loop parts will command a steep price on secondary markets, unless of course they are made available for a fair price on the online Pick a Brick store.
Minifigures
Overall, we see a nice selection of Minifigures in this set. I do wish they used the relatively new “medium” legs for the child, since the short legs they included prevent the figure from sitting in the coaster at all — I don’t think it is safe to stand in a rollercoaster! That’s probably why the rest of the minifigs are full-sized, and the child is never pictured near the rollercoaster itself, but rather at the entrance near the vendors.
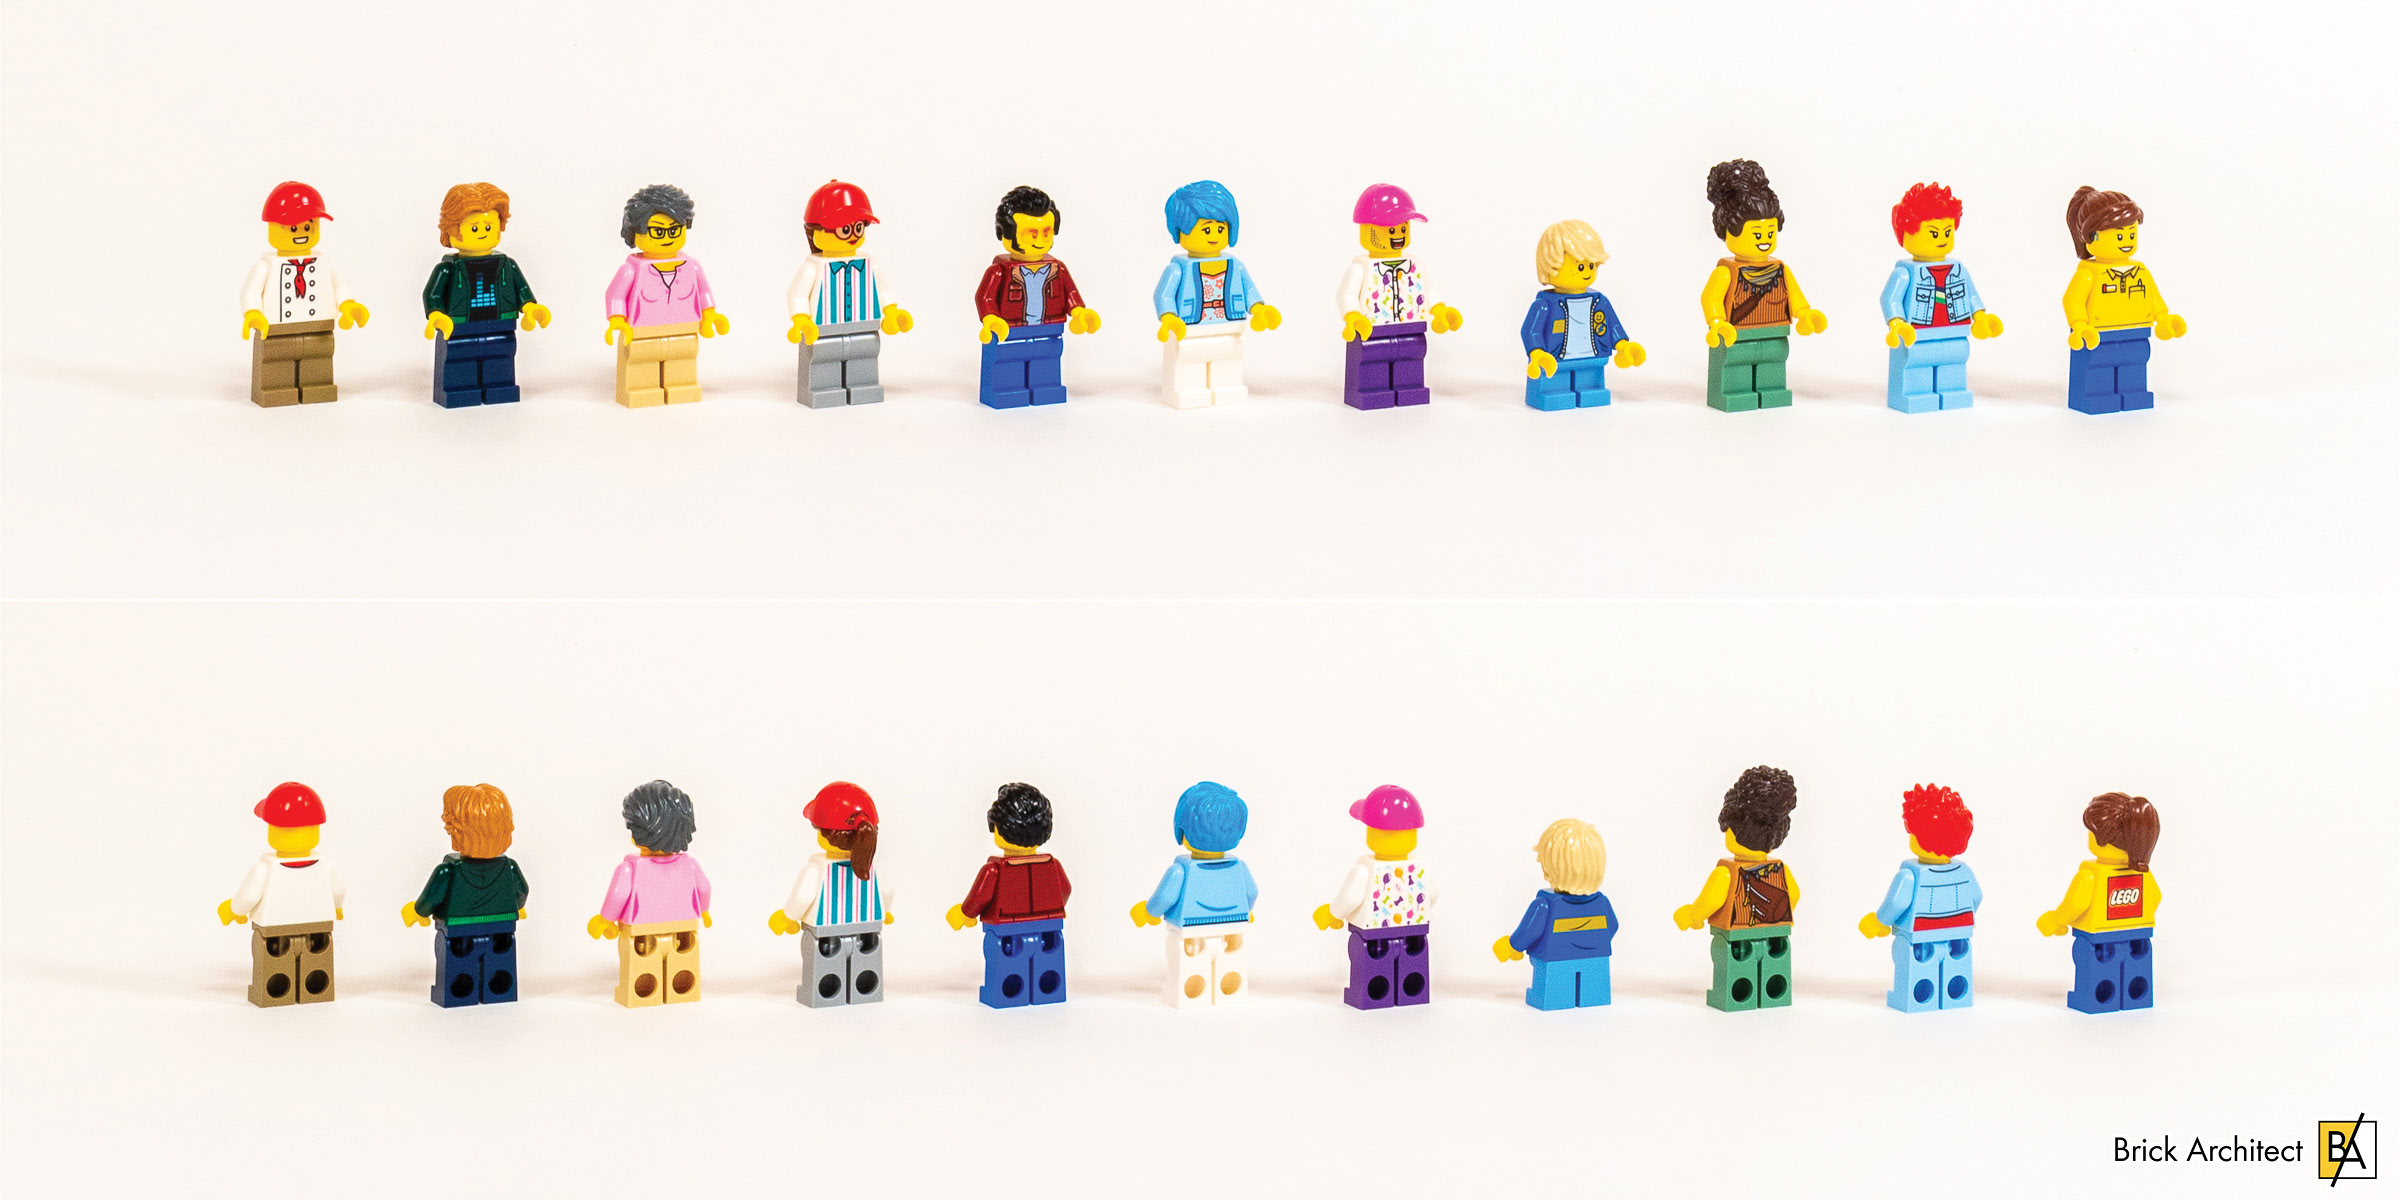
It’s hard to complain about 11 minifigures, even if many leverage existing prints.
I especially appreciated representation in the form of a new Minifigure with a hearing aid. The head is part 3626cpb2696, which was introduced in 2020’s #60271 Main Square, which retired last December. I’m glad to see them re-introduce the part in two 2022 sets. (It is also in #31131 Downtown Noodle Shop.)
I also noticed the LEGO Store Employee, which is a bit confusing as they are positioned in the photos as the roller coaster operator. Is The LEGO Group signaling their intent to add “serious” roller coasters with loops to their LEGOLAND theme parks? (I doubt it, I think they just used this as an excuse to give us a branded torso.)
Value
When it comes to objective measures of value, the set doesn’t fare as well as other sets I’ve analyzed recently. The per piece is $0.106, which is not terrible, but we ususally see well under 10 cents a piece in the Creator Expert series. (#10261 Roller Coaster offered a better value at $0.092 per part).
Assessing value compared to a selection of popular recent sets:
| LEGO Set | Price | Part Count | Price-per-part | Weight | Price-per-gram |
|---|---|---|---|---|---|
| #31203 World Map | $249.99 | 11,695 pieces | $0.021 per-piece | 4020 grams | $0.062 per-gram |
| #21056 Taj Mahal | $119.99 | 2022 pieces | $0.059 per-piece | 1811 grams | $0.066 per-gram |
| #21058 Great Pyramid of Giza | $129.99 | 1476 pieces | $0.088 per-piece | 1832 grams | $0.071 per-gram |
| #10292 Friends – The Apartments | $149.99 | 2048 pieces | $0.073 per-piece | 1778 grams | $0.084 per-gram |
| #10297 Boutique Hotel | $199.99 | 3066 pieces | $0.065 per-piece | 2380 grams | $0.084 per-gram |
| #10282 Adidas Originals Superstar | $79.99 | 731 pieces | $0.109 per-piece | 735 grams | $0.109 per-gram |
| (This Set) #10303 Loop Coaster | $399.99 | 3756 pieces | $0.106 per-piece | 3189 grams | $0.125 per-gram |
| #21057 Singapore Skyline | $59.99 | 827 pieces | $0.072 per-piece | 411 grams | $0.146 per-gram |
Because some sets contain a ton of tiny parts, I also wanted to see if this set compares more favorably based on the price-per-gram, perhaps due to a lot of large plates and the larger coaster track pieces. Unfortunately, $0.125 per-gram is the second worst value I have observed, making the set a poor value on both metrics. We have been warned that higher prices will become the new normal when the price for many existing sets increases this fall. If the price of this set remains unchanged, it might look like a better value compared to those sets which see a large price increase.
Conclusion
This is an exceptionally fun set, which is why I’m going to lead with my overall conclusion — this set should have earned our top Must Have” rating because of the innovative mechanism, the fun build process, and most importantly it is lot of fun to play with once completed! It also just begs to be modified, especially given that some of the parts to get started are hidden in plain sight.
#10303 Loop Coaster has a satisfying elevator mechanism.
I want to dig a little deeper into a few of these claims to explain why I think this is one of the best sets in recent history. From an innovation perspective, this set shines because it includes a novel elevator mechanism to lift the cars to the top of the ride, which requires just a single crank or motor running in a single direction to both lift and lower the elevator. It combines elegantly with a mechanism at the bottom that stops the car from rolling onto the elevator until it has reached the bottom.
#10303 Loop Coaster is also fun to build.
The 6.5 hour build process feels quicker than that since you can begin playing with the model well before it is complete. To be fair, Stage 12 is very slow and boring, thanks largely to the need to build a 255-link chain from scratch, but I can not think of any other set of this scale that doesn’t have a boring section either. The play will continue once it is complete — It was easy to add a motor to power the elevator, and we have enjoyed putting different minifigures on the cars.

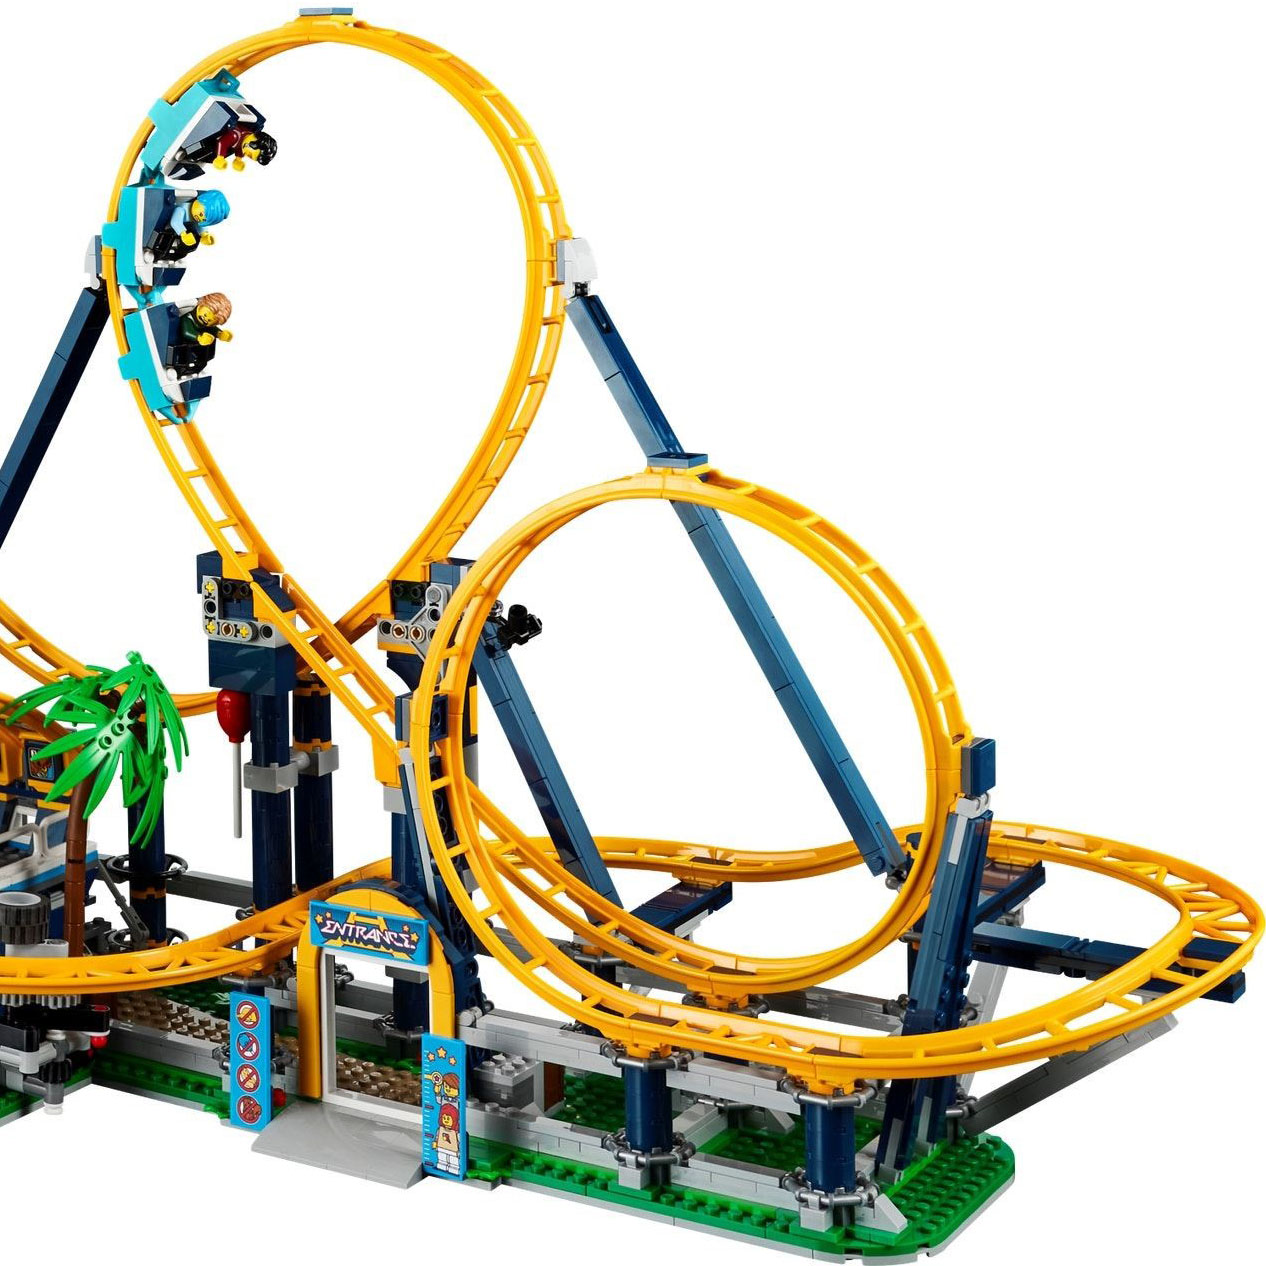
#10303 Loop Coaster – The namesake two loops are the star of the show!
Lastly, the set feels ‘generous’ despite the high price point due to the design decisions which include 12 extra sections of 191Flame Yellowish OrangeBright Light Orange track (5 for the roof of the station, and 7 supporting the elevator counterweight) which you can easily re-claim to build a bigger and crazier coaster. I also noticed that the string which attaches to the counterweight is a lot longer than needed for the set as-is, which further reinforces my hunch that the designers really want to see what people create by combining multiple copies into a monster coaster!
Unfortunately, this clever mechanism is not 100% reliable, so you would not be able to leave it unattended at a LEGO convention. In my experience, the elevator fails about once every 5 minutes when motorized before the cars fall off the elevator.
Elevator accidents are frustratingly common when running for 5 minutes or longer.
I also want to touch on price/value. While this is a physically large set once completed, the set ranks poorly on both of my objective assessments of value. At more than $0.10 per piece, we are getting a poor value compared to other unlicensed sets. Further, $0.125 per gram is the second worse value that I’ve seen so far; I suspect that The LEGO Group believes that they can get away with this since the set looks big and is so much fun to play with — and I think they are probably right. (I would not be surprised to see more physically large sets with a lot of negative space in the future, since the larger completed size feels like a better value than it really is.)
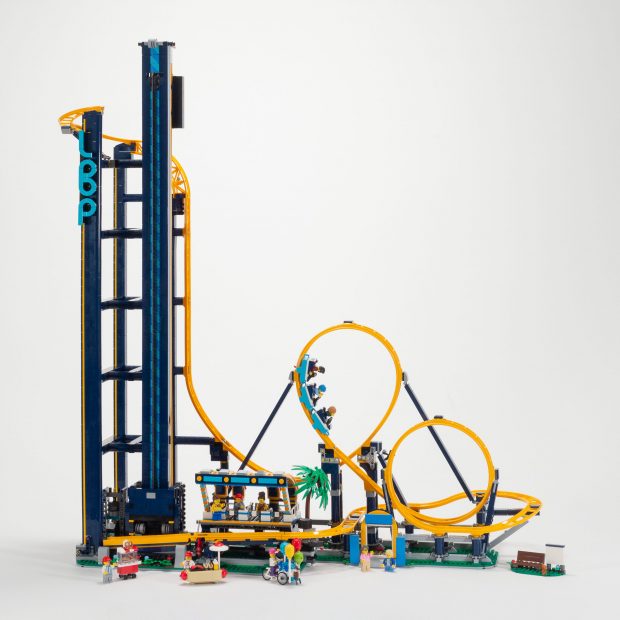
#10303 Loop Coaster – Completed Model.
But let’s be real – the reason you are considering this set is because the idea of building your own rollercoaster with two complete loops is intoxicating. It’s the same reason why the Rollercoaster Tycoon games were so popular back in the day – there’s something invigorating about the gravity-defying experience of going upside-down!,
Even with the reliability issues, this is one of the most fun LEGO sets ever created! That’s why it earns our “Recommended” (4/5 Stars) rating, which I would happily revise up if there is an minor update to the design to make the mechanism rock solid.
So with the benefit of hindsight, which is the better coaster overall? This one or the original ? Opinion seems very split!
I know it’s been a while, but any update on the reliability of the car to coaster transfer?
I took the model apart after writing the review, so I do not have any additional insights into the long-term reliability of the mechanism. It is a clever model, though!
Can you use the XL motor on this set?
I believe that either motor will work as-is. If not, you could modify the connection easily enough!
Cheers.
Just the XL was on offer online so thought I’d ask if it fits in the same space. The connection looks same on each just size was a concern
Thanks for including my 10261 MOC and giving me credit. I didn’t know this was here.
—1963maniac
Hi, I’m really intrigued by this set. Could you please tell us the exact dimensions once it is completed? I was wondering whether I have enough room to accommodate it on my desk. Thank you
My best measurements came to: 31.5″ (wide) x 13.5″ (deep) x 36.25″ (tall)
Good luck!