
Review: #10326 Natural History Museum
The largest set in the Modular Building Series is 50% wider, but dedicated to a single structure. Let’s find out — is bigger always better?
#10326 Natural History Museum will be released on December 1, 2023 – one month earlier than all of the recent additions to the overwhelmingly popular Modular Building Series. It costs $299.99 (299.99€ / £259.99 / 389.99 CAD / 449.99 AUD) and contains 7 minifigures and 4014 pieces. As with other large sets in the LEGO Icons lineup, it is recommended for ages 18+.

#10326 Natural History Museum – Box Front.
First impressions
When I heard that this year’s Modular would be a Natural History Museum, I immediately jumped to conclusions. I assumed a neoclassical structure with a two-story atrium containing a mammoth skeleton, although I think a Dinosaur would be more likely in LEGO form. (This reveals my bias as an American who grew up near Washington DC.) I also acknowledged that it’s a good thing that this year isn’t a corner modular, since they have less interior space and we are going to need a lot of room for displays on gems, science, plants, and more.
Upon receiving the set in the mail, the first thing that I noticed was the sheer size of the box itself – this is way bigger than we have seen in recent years! After looking at the cover, it becomes clear why… This is the second model in the series that is more than one 32-stud plate wide. I do see that my prediction of a neoclassical style was incorrect, but not very far off either. The building has an 330Olive Green exterior and a short Mansard-style roof which is characteristic of French Second Empire style which was popular in France from around 1850-1900. This architectural style blended predictable forms that were popularized by Neoclassical architecture with the more decorative/ornamental elements which were central to the Baroque period. I am excited by the larger scope and scale of the next addition to the Modular Building Series, but I do have to admit that I and not thrilled with the color, nor the restrained architectural treatments used on the front facade.

#10326 Natural History Museum – The back of the box shows how it looks next to the last two modulars.
After years of modulars that squeeze multiple businesses, and even multiple buildings into a single 32×32 baseplate, this feels a bit out-of-scale to other recent additions to the series. This does make logical sense, in that Museums are much larger than typical buildings, but it still feels like we could have seen more than one building/style represented given the massive 48-stud wide footprint. (I really hope the artifacts in the museum are delightful enough to overlook these concerns!)
Contents
Given the large size of this set, I was not surprised to see a box-within-a-box used for this set. (This is based on a learning several years ago that The LEGO Group discovered that they can use thinner cardboard overall if larger sets contain inner-boxes to strengthen the box overall.) In some cases (like #10276 Colosseum or #10307 Eiffel Tower), more than one inner box is employed.
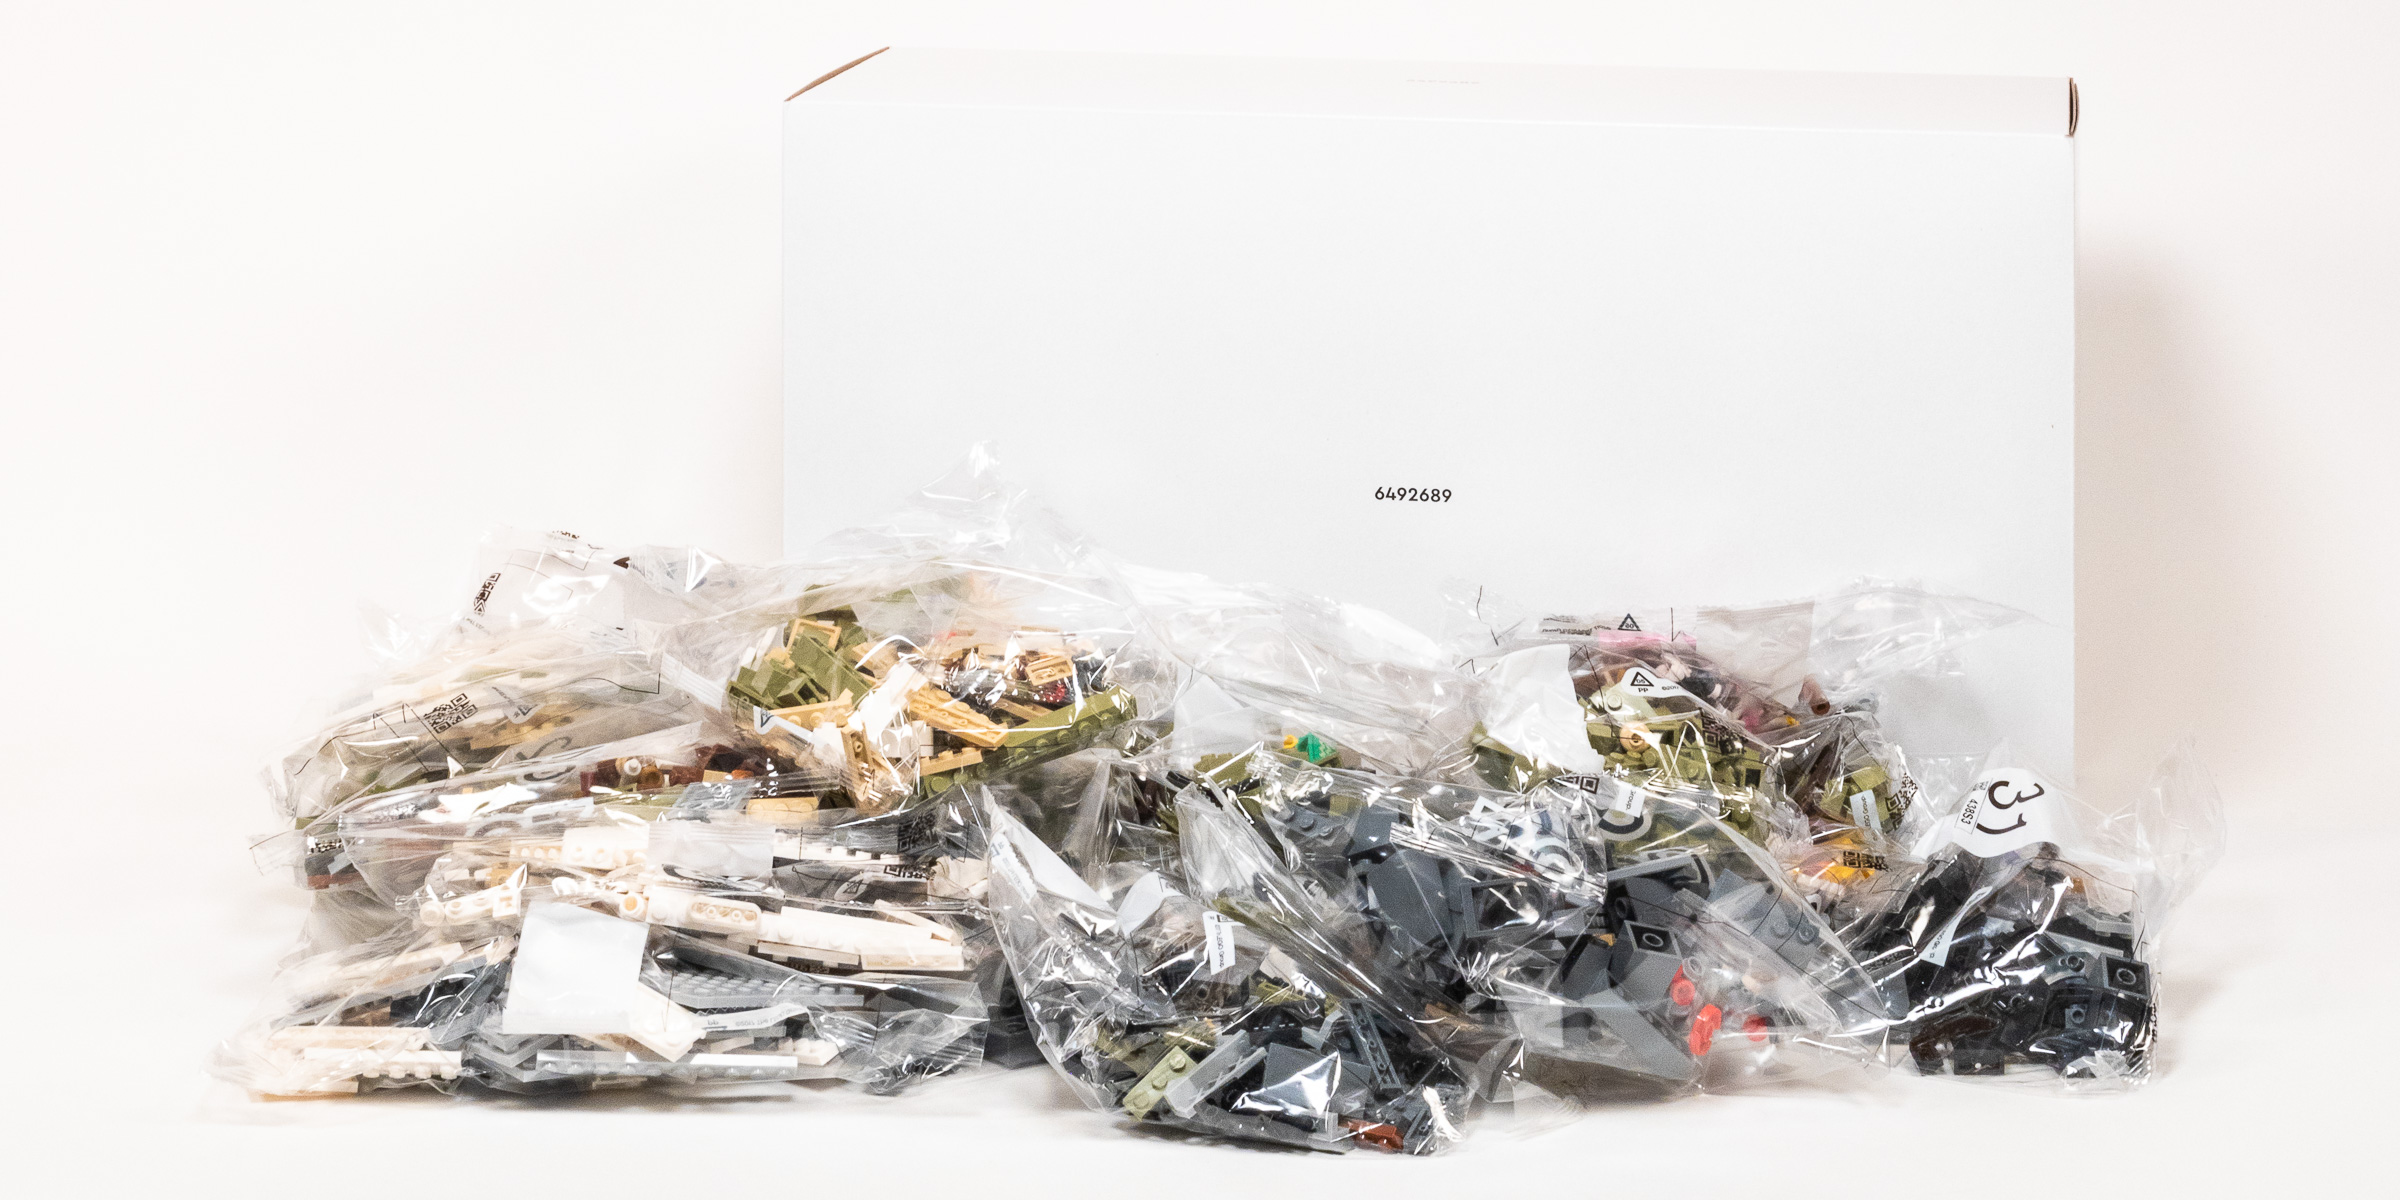
The large box contains a lot of loose bags, plus a smaller box.
In this set, about half of the parts are loose in the outer box and the rest are inside the inner box. The instruction booklet and lower numbered bags are inside the smaller box and the larger numbered bags are loose in the outer box. You will also find a cardboard pouch containing the building instructions and the flexible vinyl banners.
Box contents:
- Bags numbered 15-33 are loose in the outer box.
- Large inner box (marked 6492689) containing:
- Bags numbered 1-14.
- 1x 32×32 baseplate, and 1x 16×32 baseplate, both in 199Dark Stone GreyDark Bluish Gray.
- 1x un-numbered bag containing 7x 2×16 Plates in 1White.
- 1x cardboard pouch (marked 6475963) containing:
- 1x instruction booklet containing 392 pages. 27.0 x 19.2 cm (10 5/8 x 7 5/8”).
- Vinyl sheet (marked 10106993/6475528 ©2024 The LEGO Group) containing 2 flags. 8.2 × 10.1 cm (3 1/4 × 4”)
Build Process

The smaller white box contains 14 numbered bags and a cardboard pouch with the instructions and vinyl banners.
Numbered bags we need to complete the ground floor:
- Bag 1: 1x medium bag (marked 338S3).
- Bag 2: 1x medium unmarked bag.
- Bag 3: 1x large bag (marked 438S3).
- Bag 4: 1x medium bag (marked 238S3).
- Bag 5: 1x large bag (marked 438S3).
- Bag 6: 1x large bag (marked 138S3).
- Bag 7: 1x medium bag (marked 338S3).
- Bag 8: 1x medium unmarked bag.
- Bag 9: 1x large bag (marked 238S3).
- Bag 10: 1x medium unmarked bag.
- Bag 11: 1x large bag (marked 238S3).
- Bag 12: 1x medium bag (marked 238S3).
- Bag 13: 1x large bag (marked 338S3).
- Bag 14: 1x medium unmarked bag .
Bags 1-3: Foundation
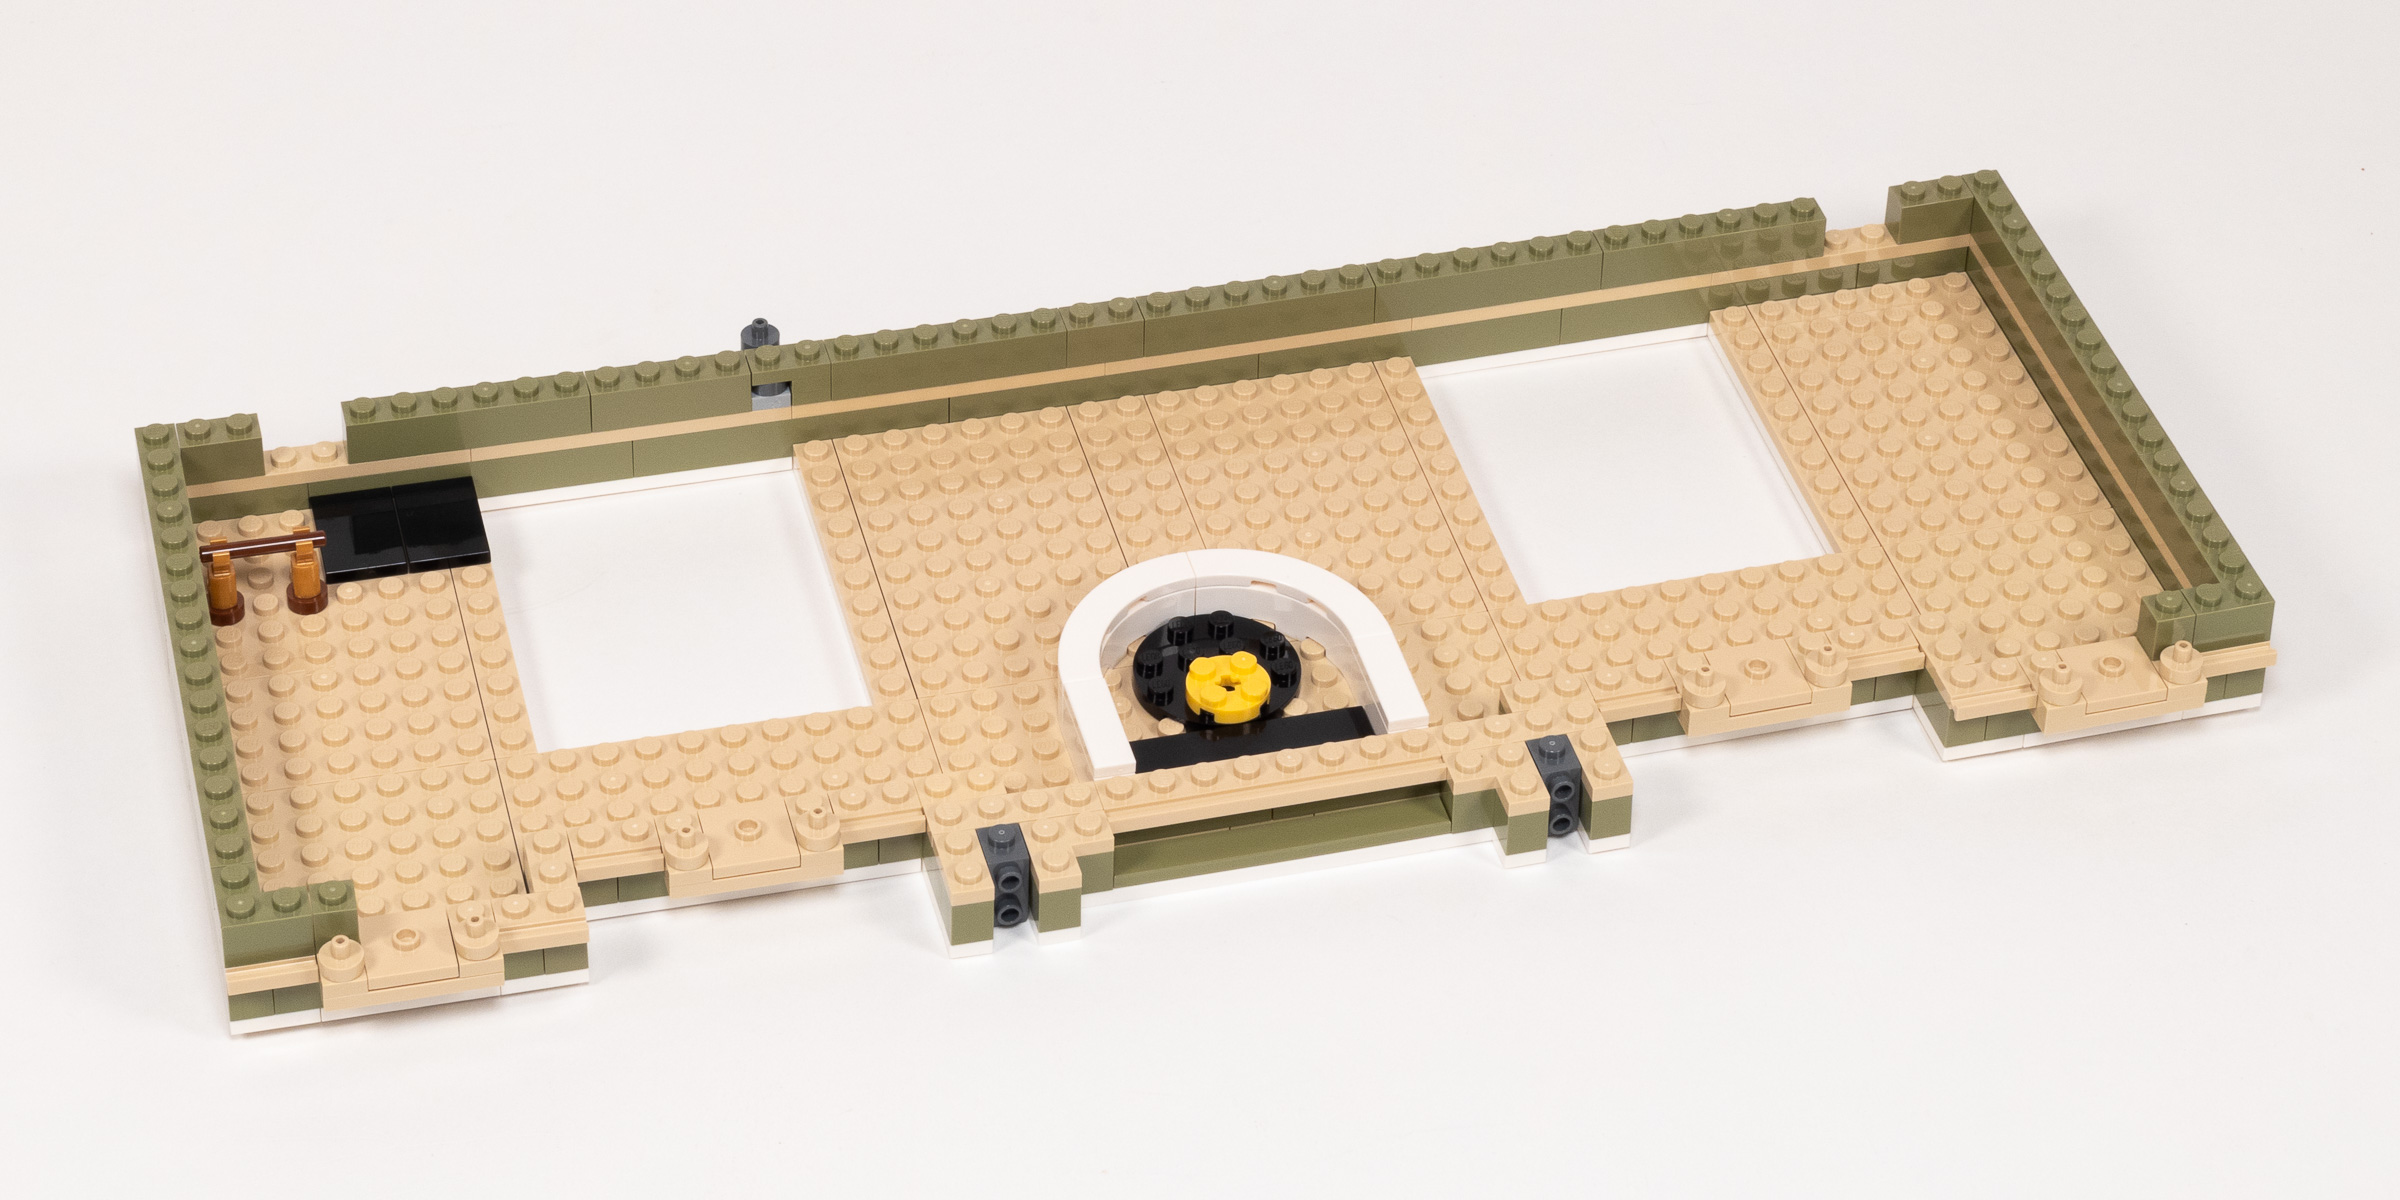
The first bag begins with just the half-width baseplate and a fairly small bag of parts. As I have grown accustomed in almost every other set in the Modular Building Series, we carefully cover the entire baseplate in tiles. (#10264 Corner Garage being the rare exception with exposed tiles on the first floor.) The end result is the rightmost side of the finished model, with a strip of sidewalk, a section of 192Reddish Brown tile in front of the exterior walls, and a pleasing grid of 5Brick YellowTan and 312Medium NougatMedium Dark Flesh tiles for the interior.
The first bag builds one part of the base.
Continuing to Bag 2, it’s time for the larger 32×32 baseplate. It is decorated in a similar way, but we do find a pair of bones that will be hidden in the foundation beneath the building. We don’t completely cover it in this stage, but we do attach it to the previous module in the very last step.
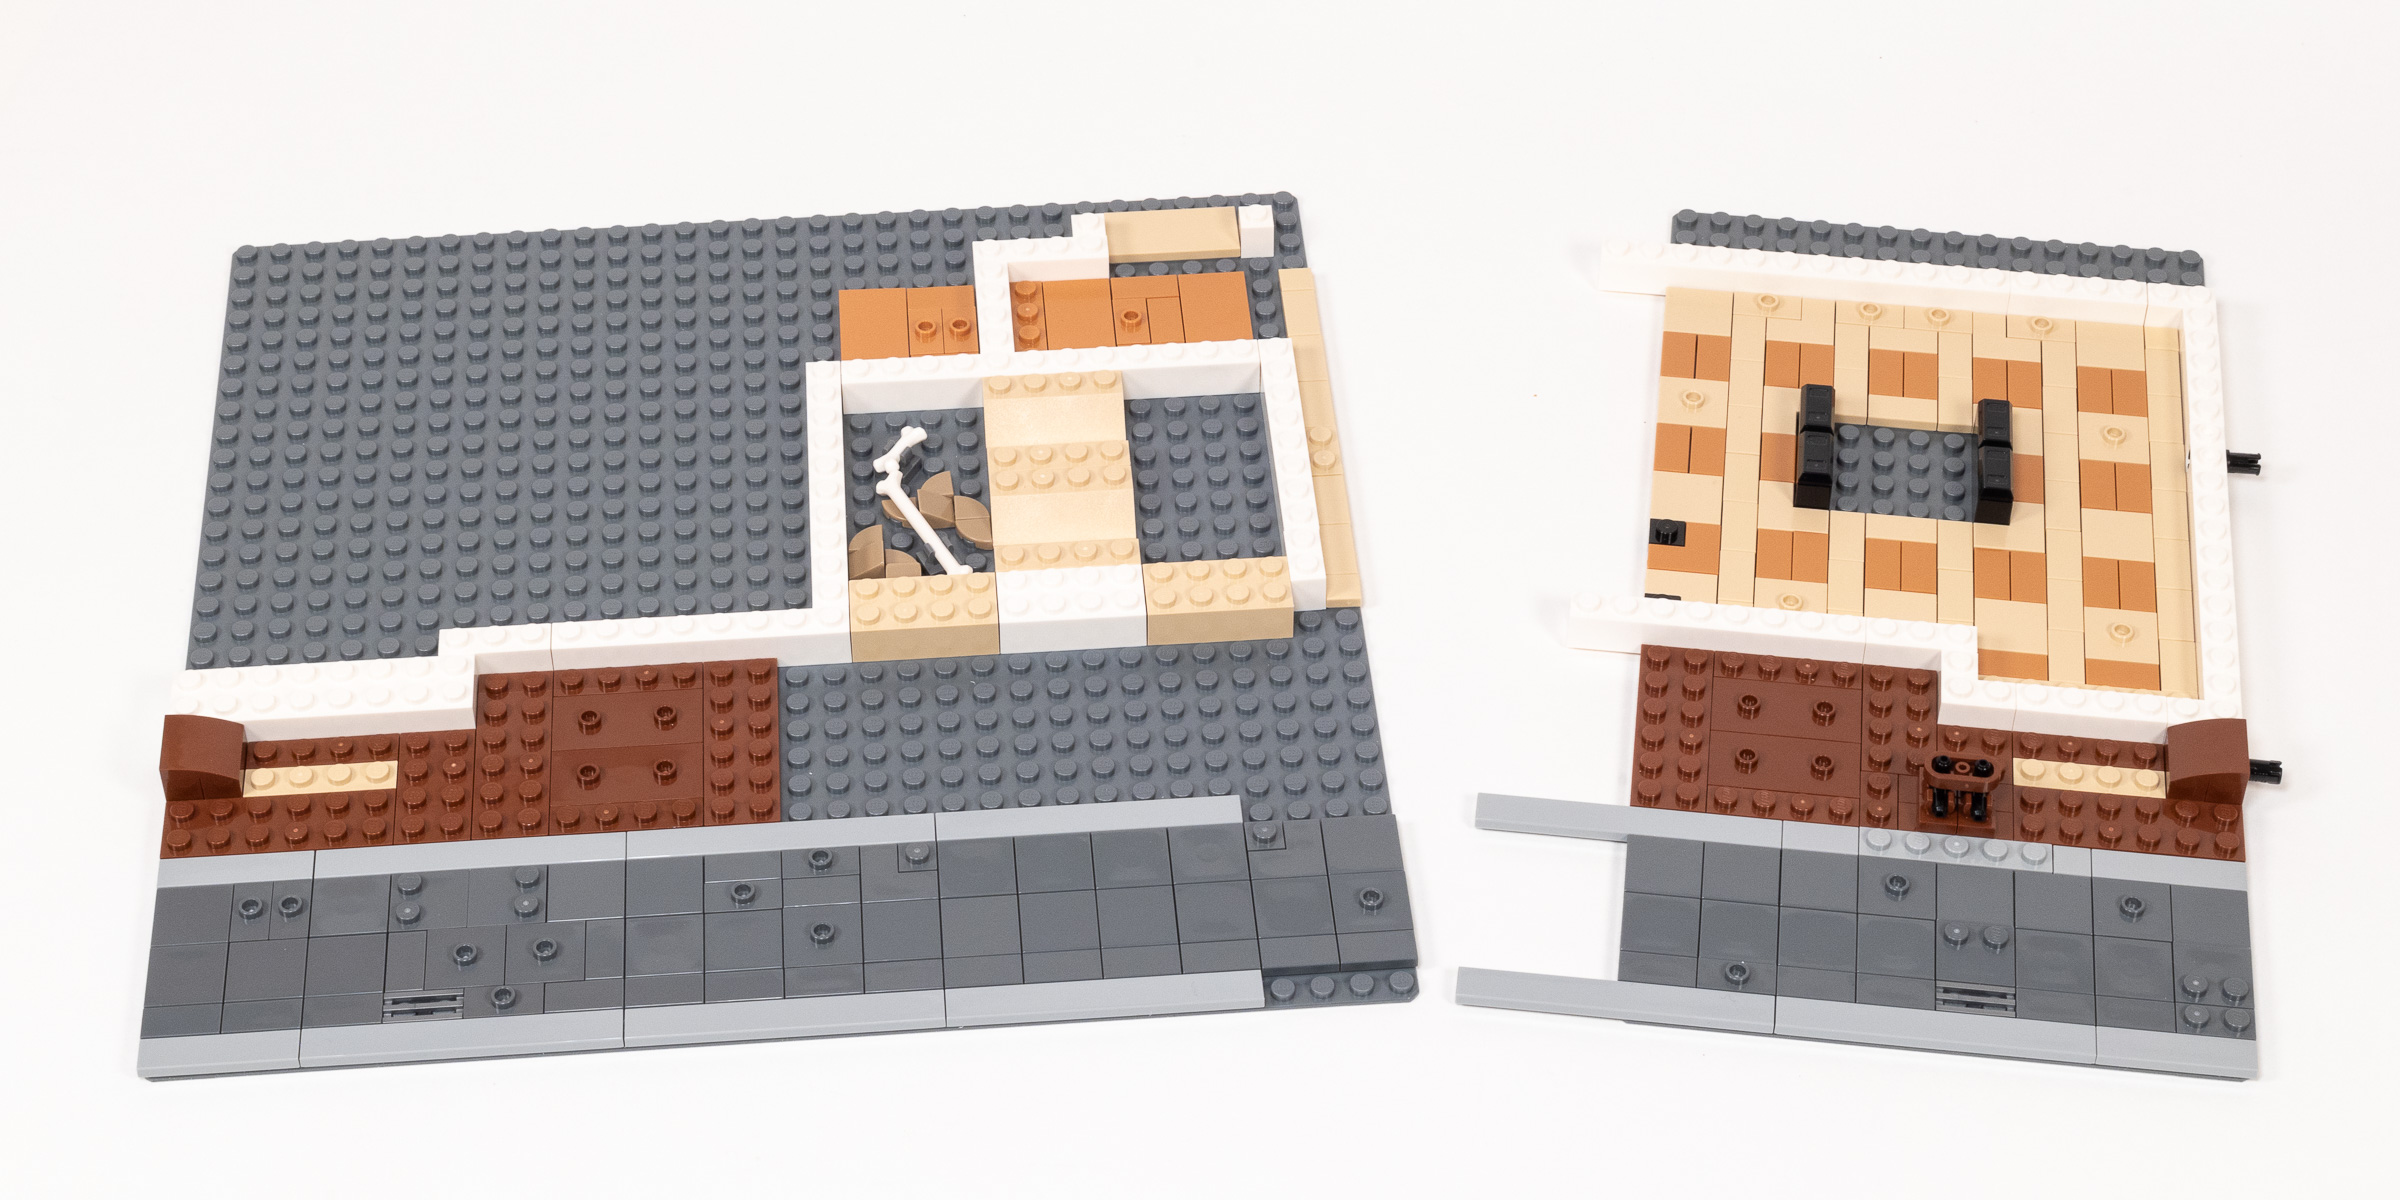
Attaching the two baseplates in Bag 2.
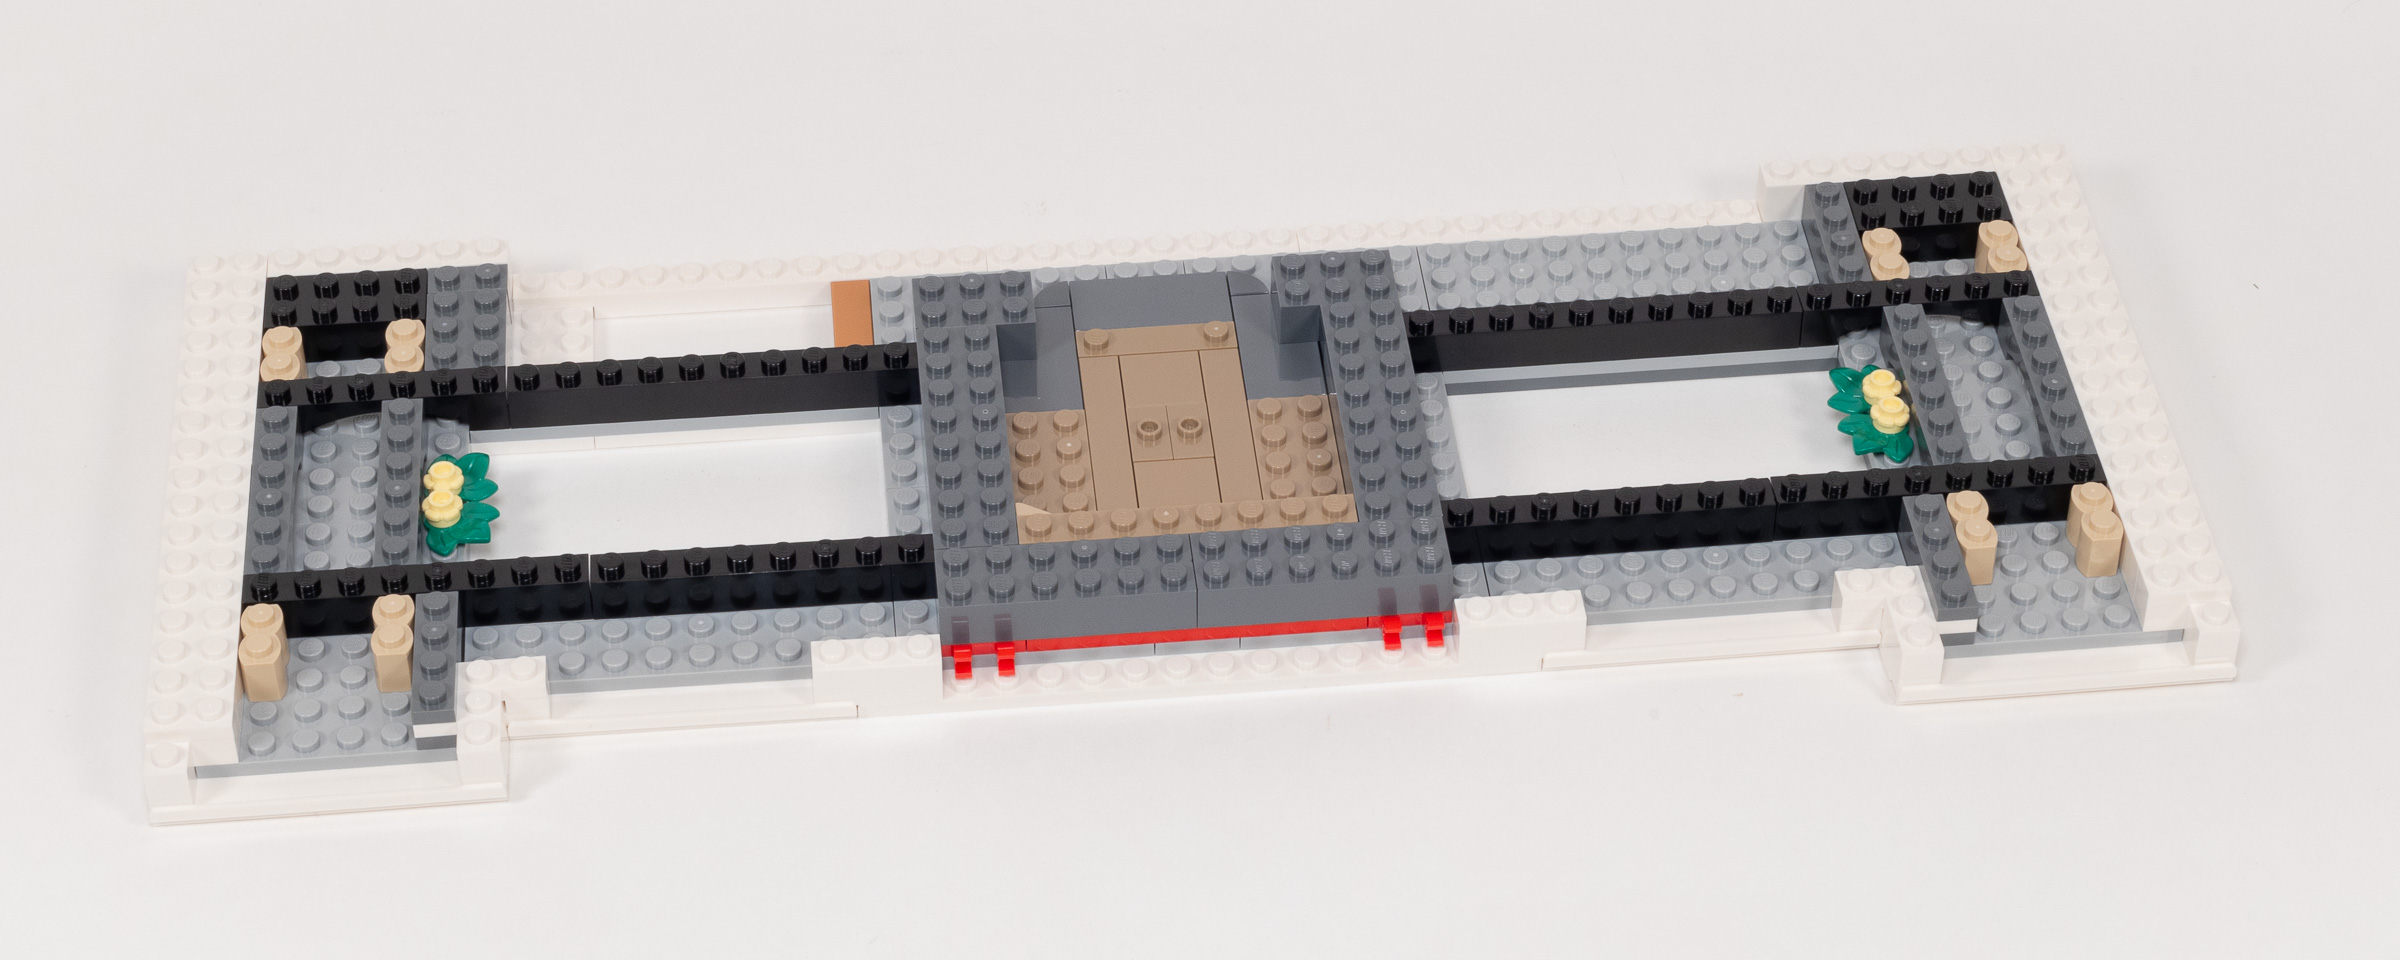
The third bag continues the monotonous tiling job, with a lot more of those 5Brick YellowTan and 312Medium NougatMedium Dark Flesh tiles for more of the interior. Thankfully we switch gears and begin to frame out where the walls will go. We finish it up by adding flowers on both sides of the front of the building, and a toilet in the back of the building.
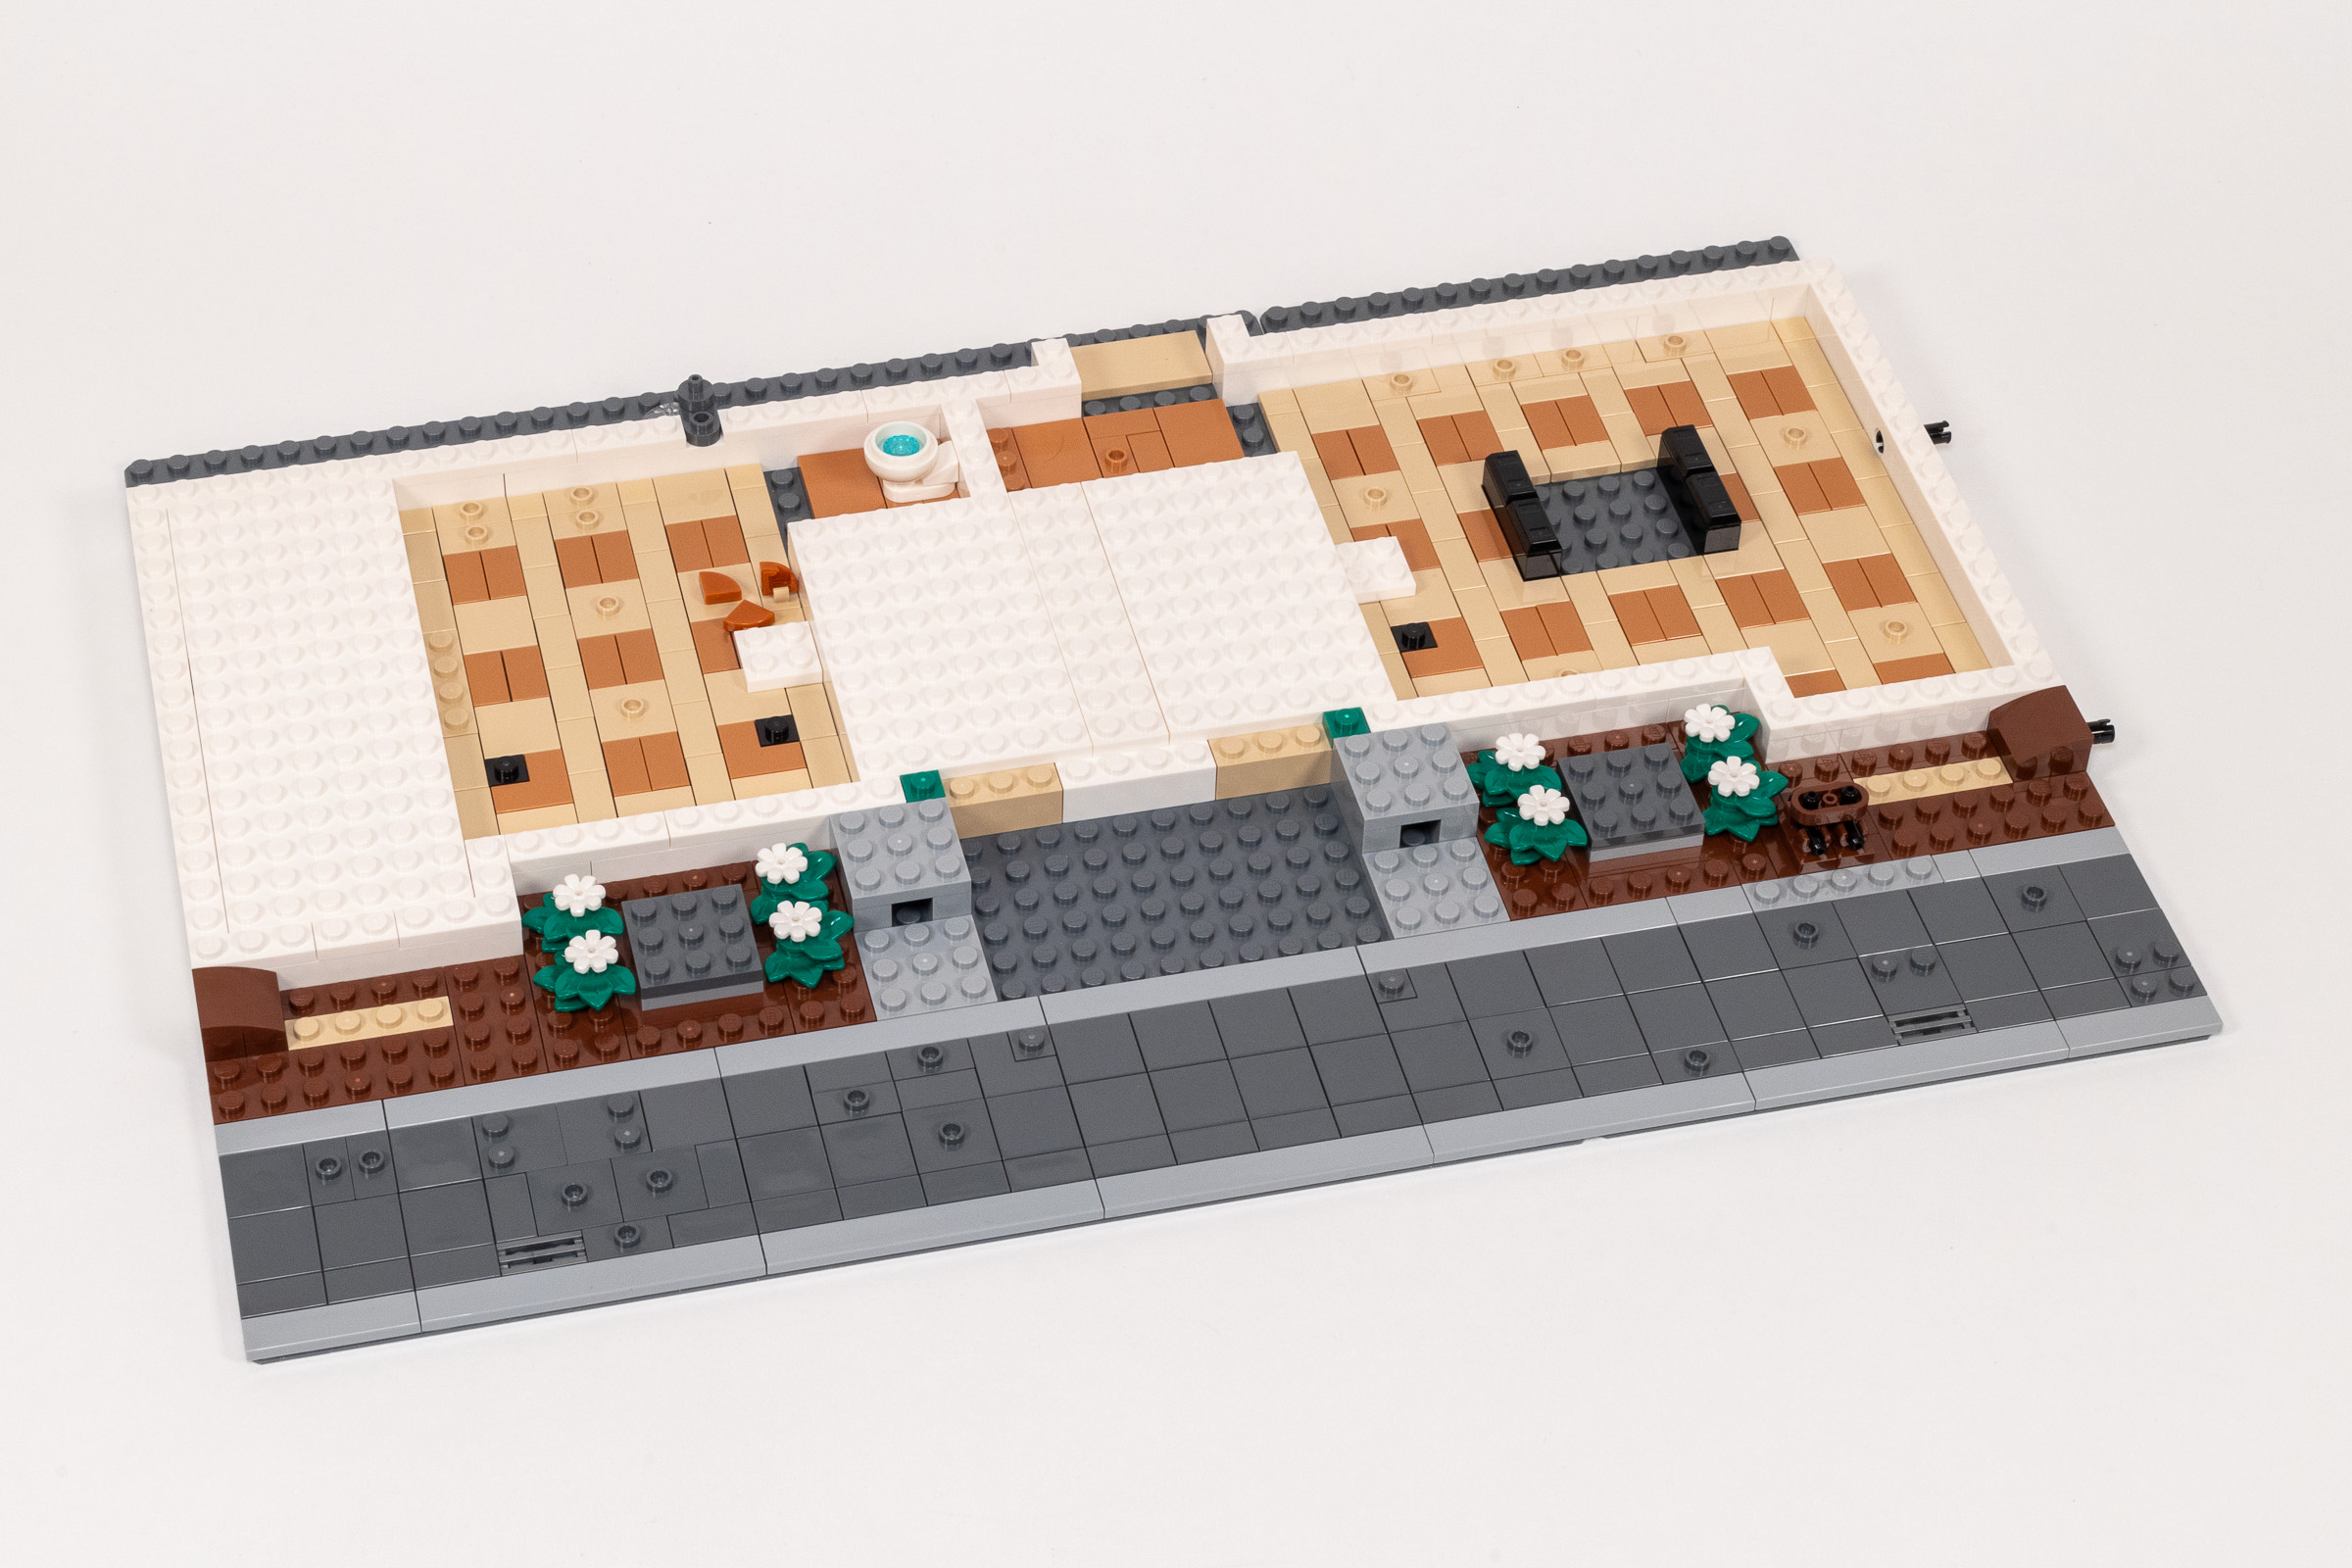
More tiling in Bag 3.
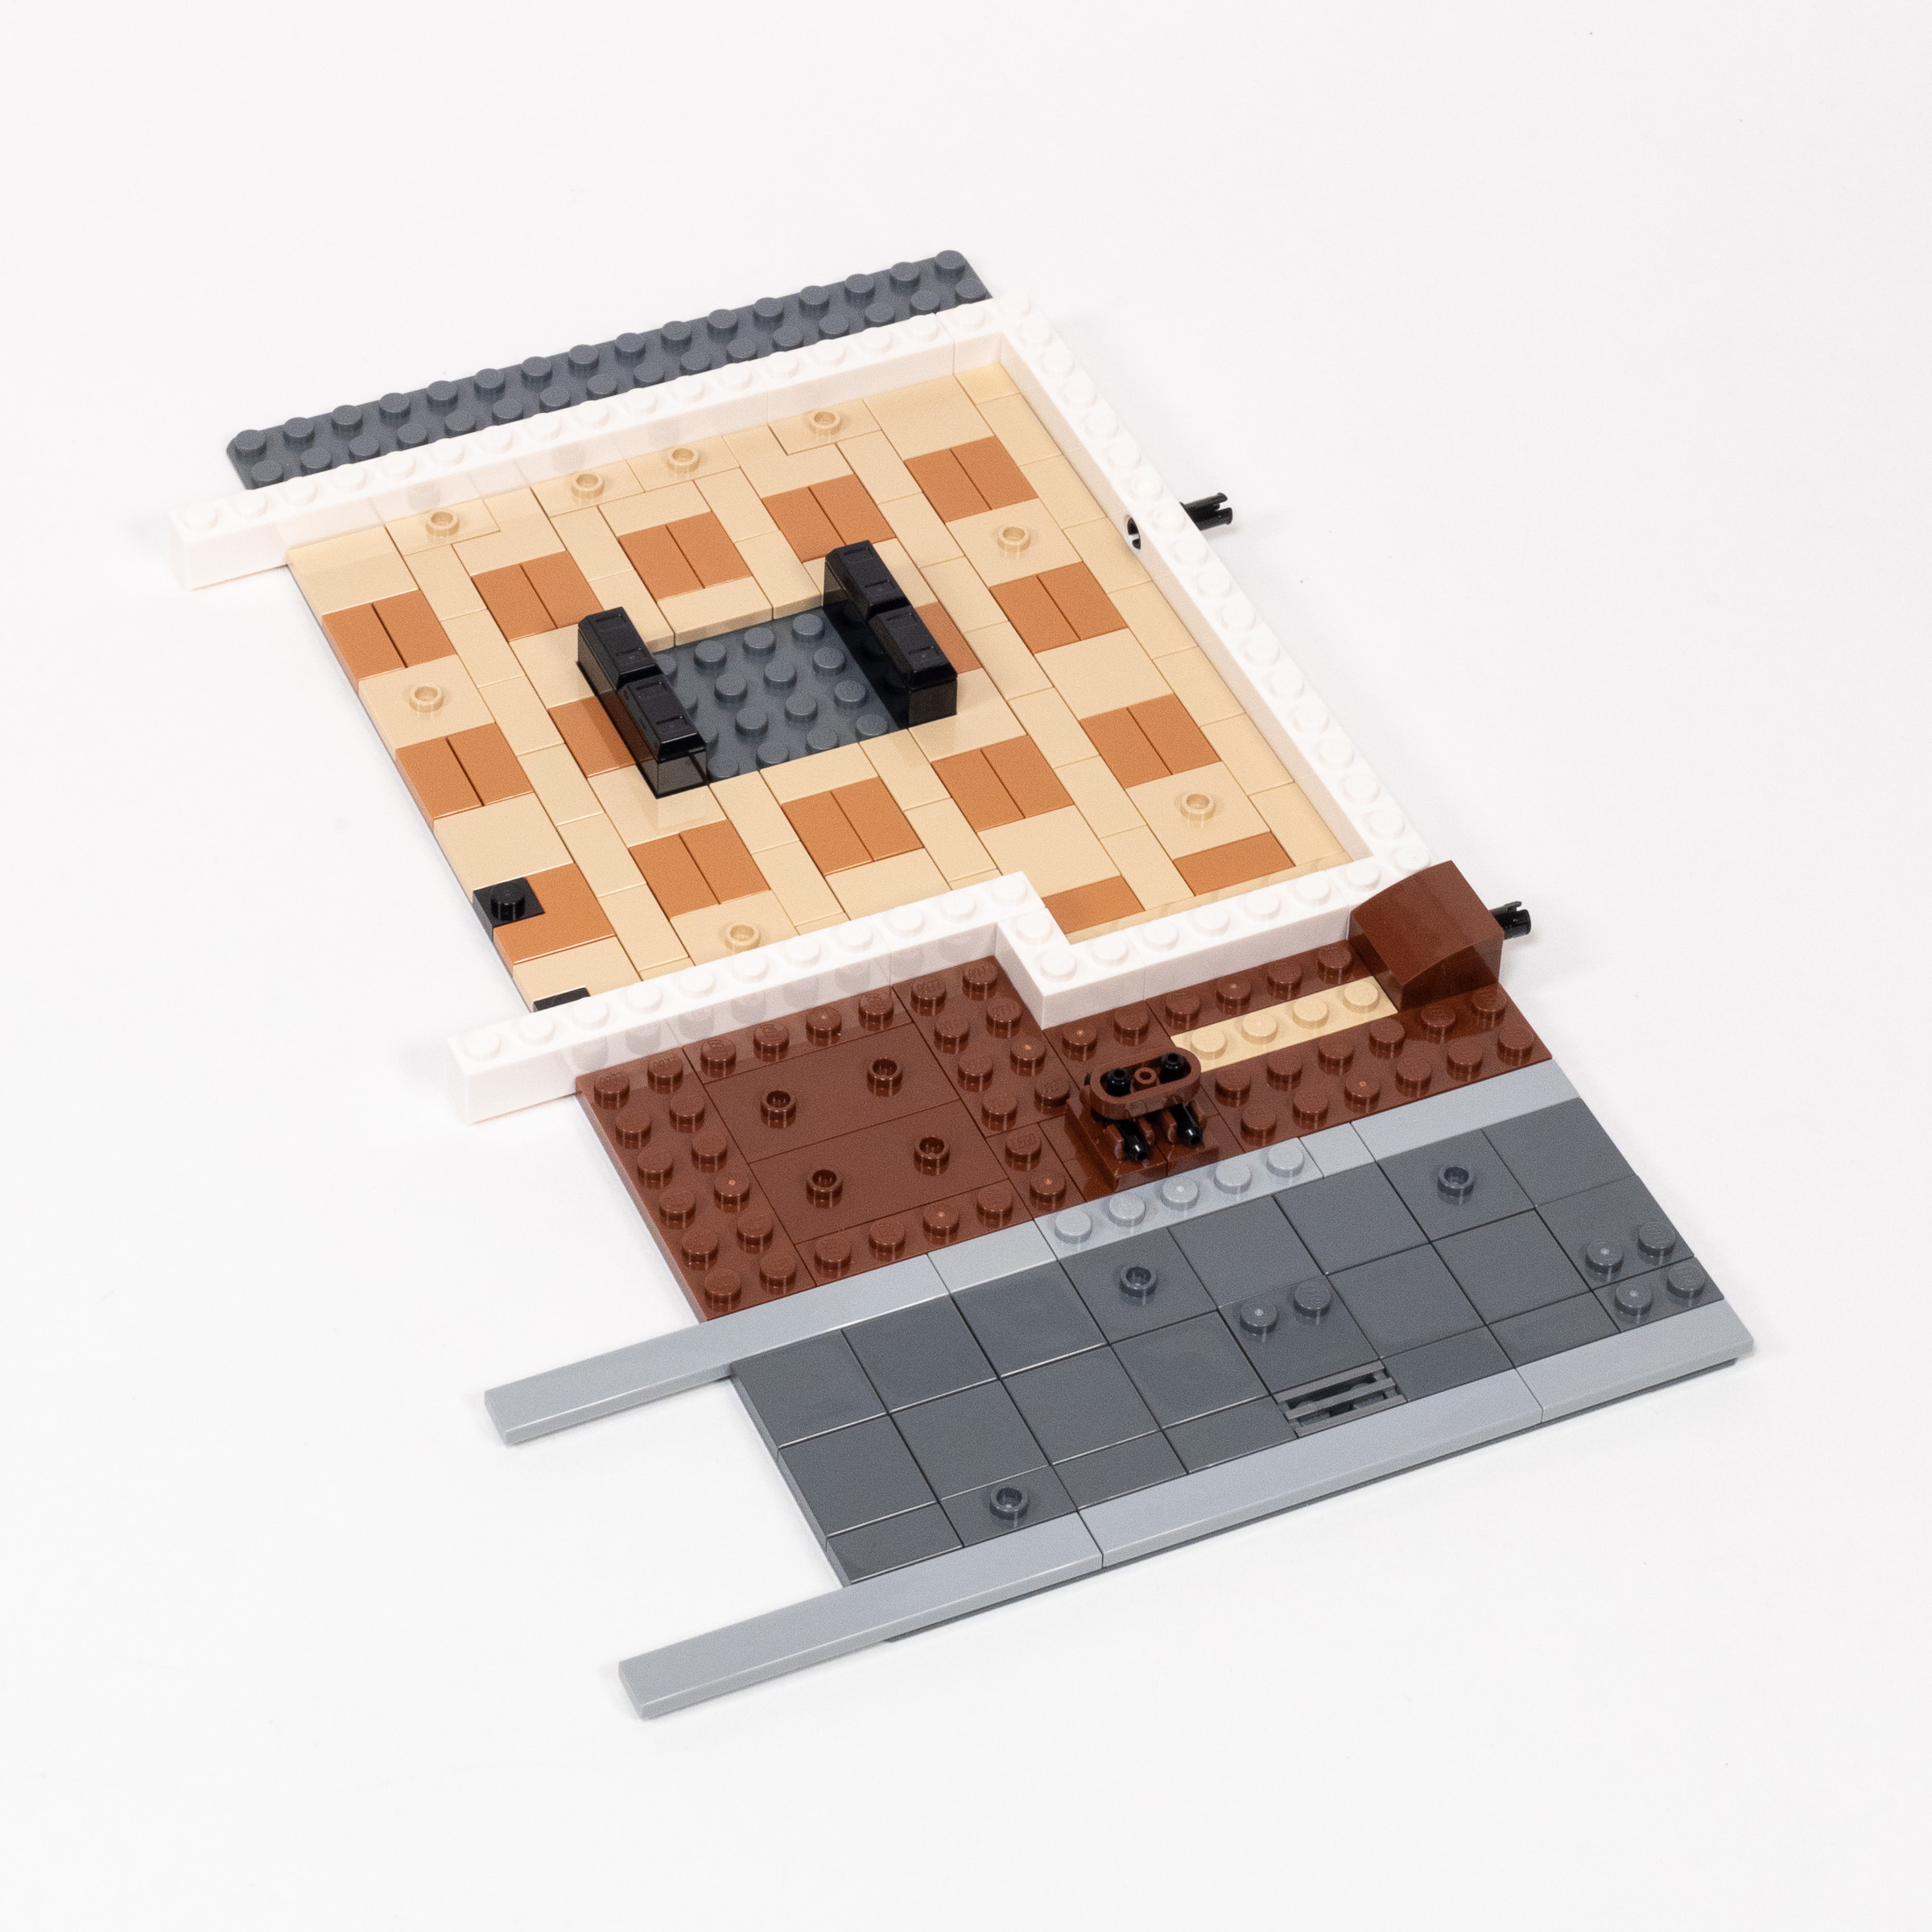
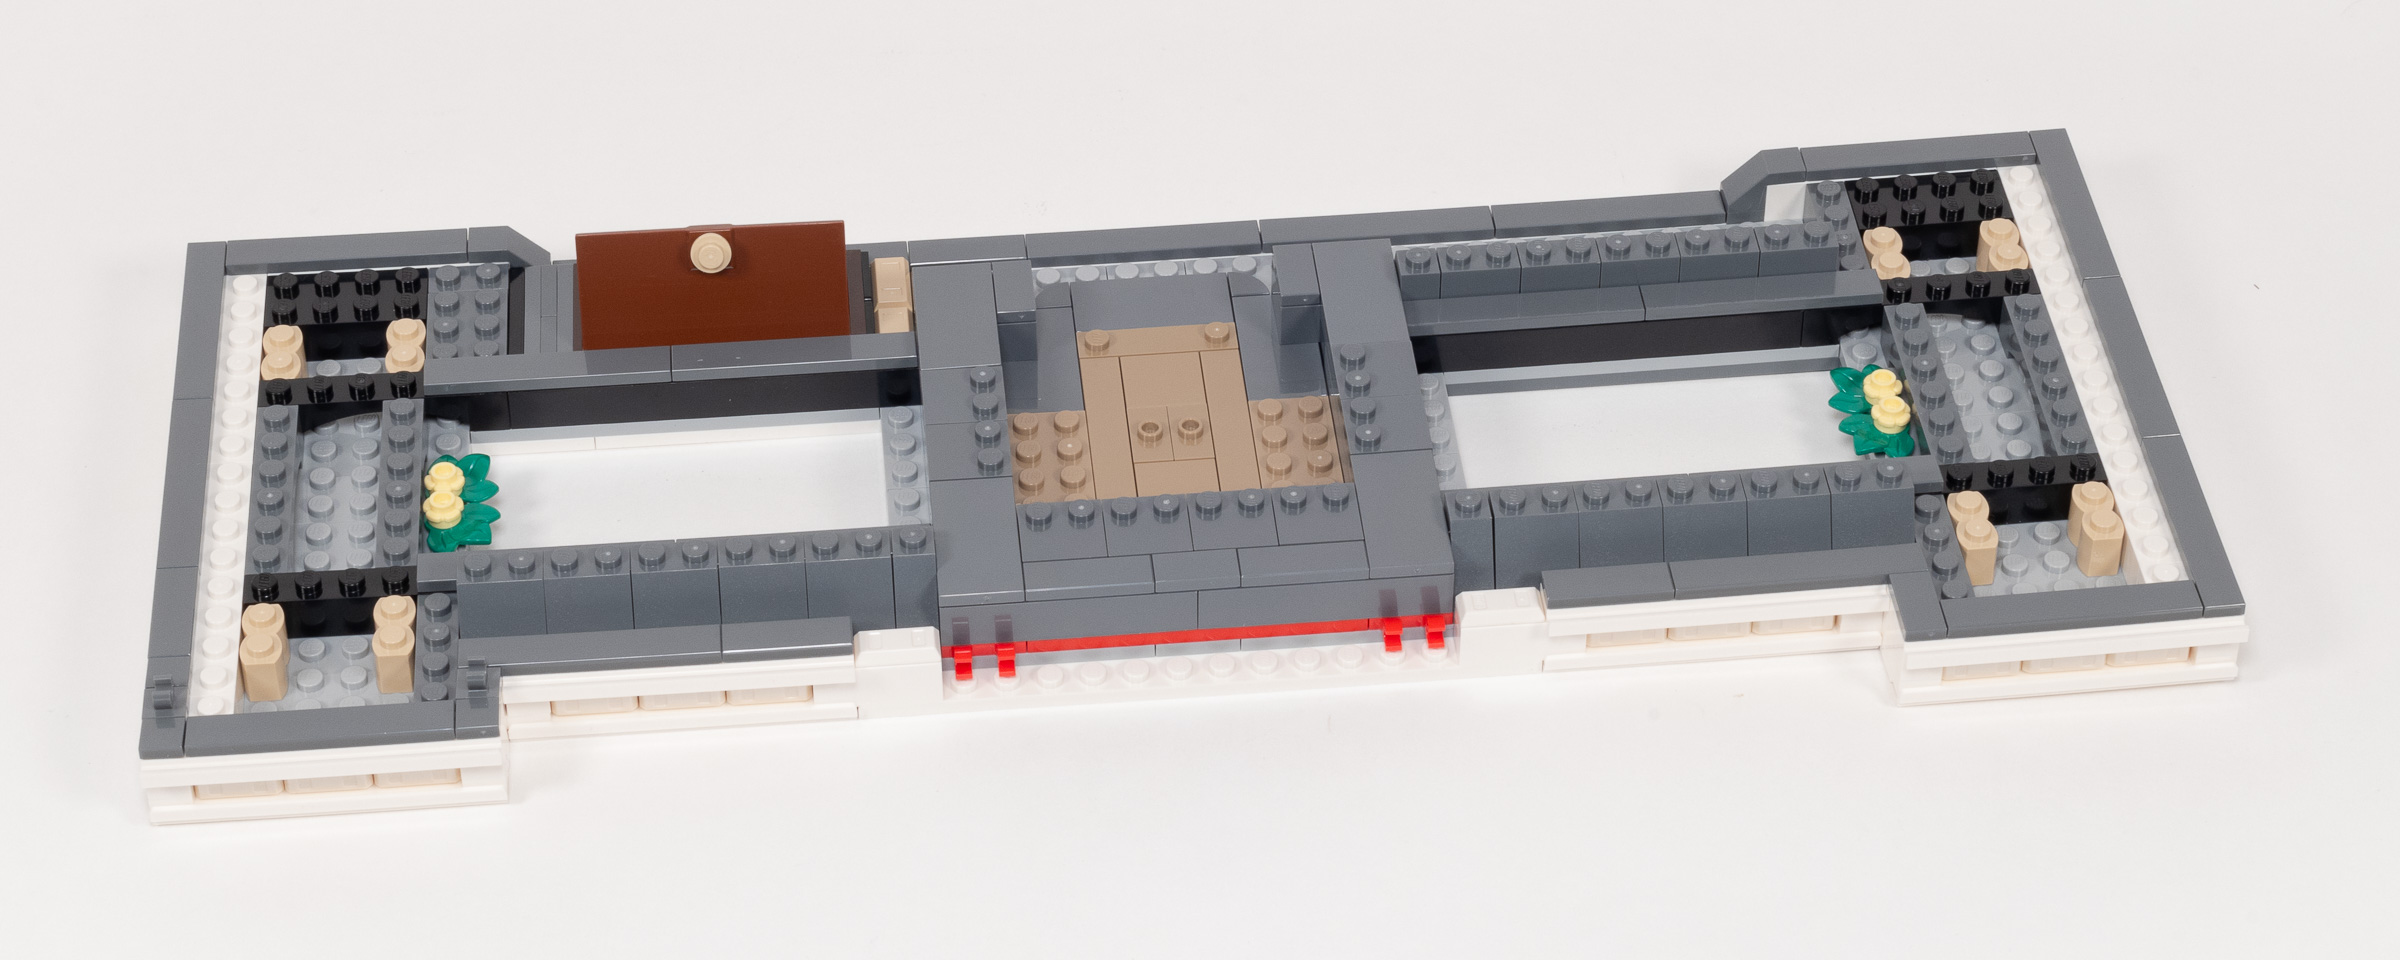
The base is completed in bag 4, although this is a more complex base than in some other models with two raised sections – one at the entrance and another on the left side of the interior. The same tile pattern continues throughout the interior, creating a very coherent overall look across both the raised and lowered sections of flooring. I am eager to see whether this feels like one large room, or feels like multiple distinct areas.
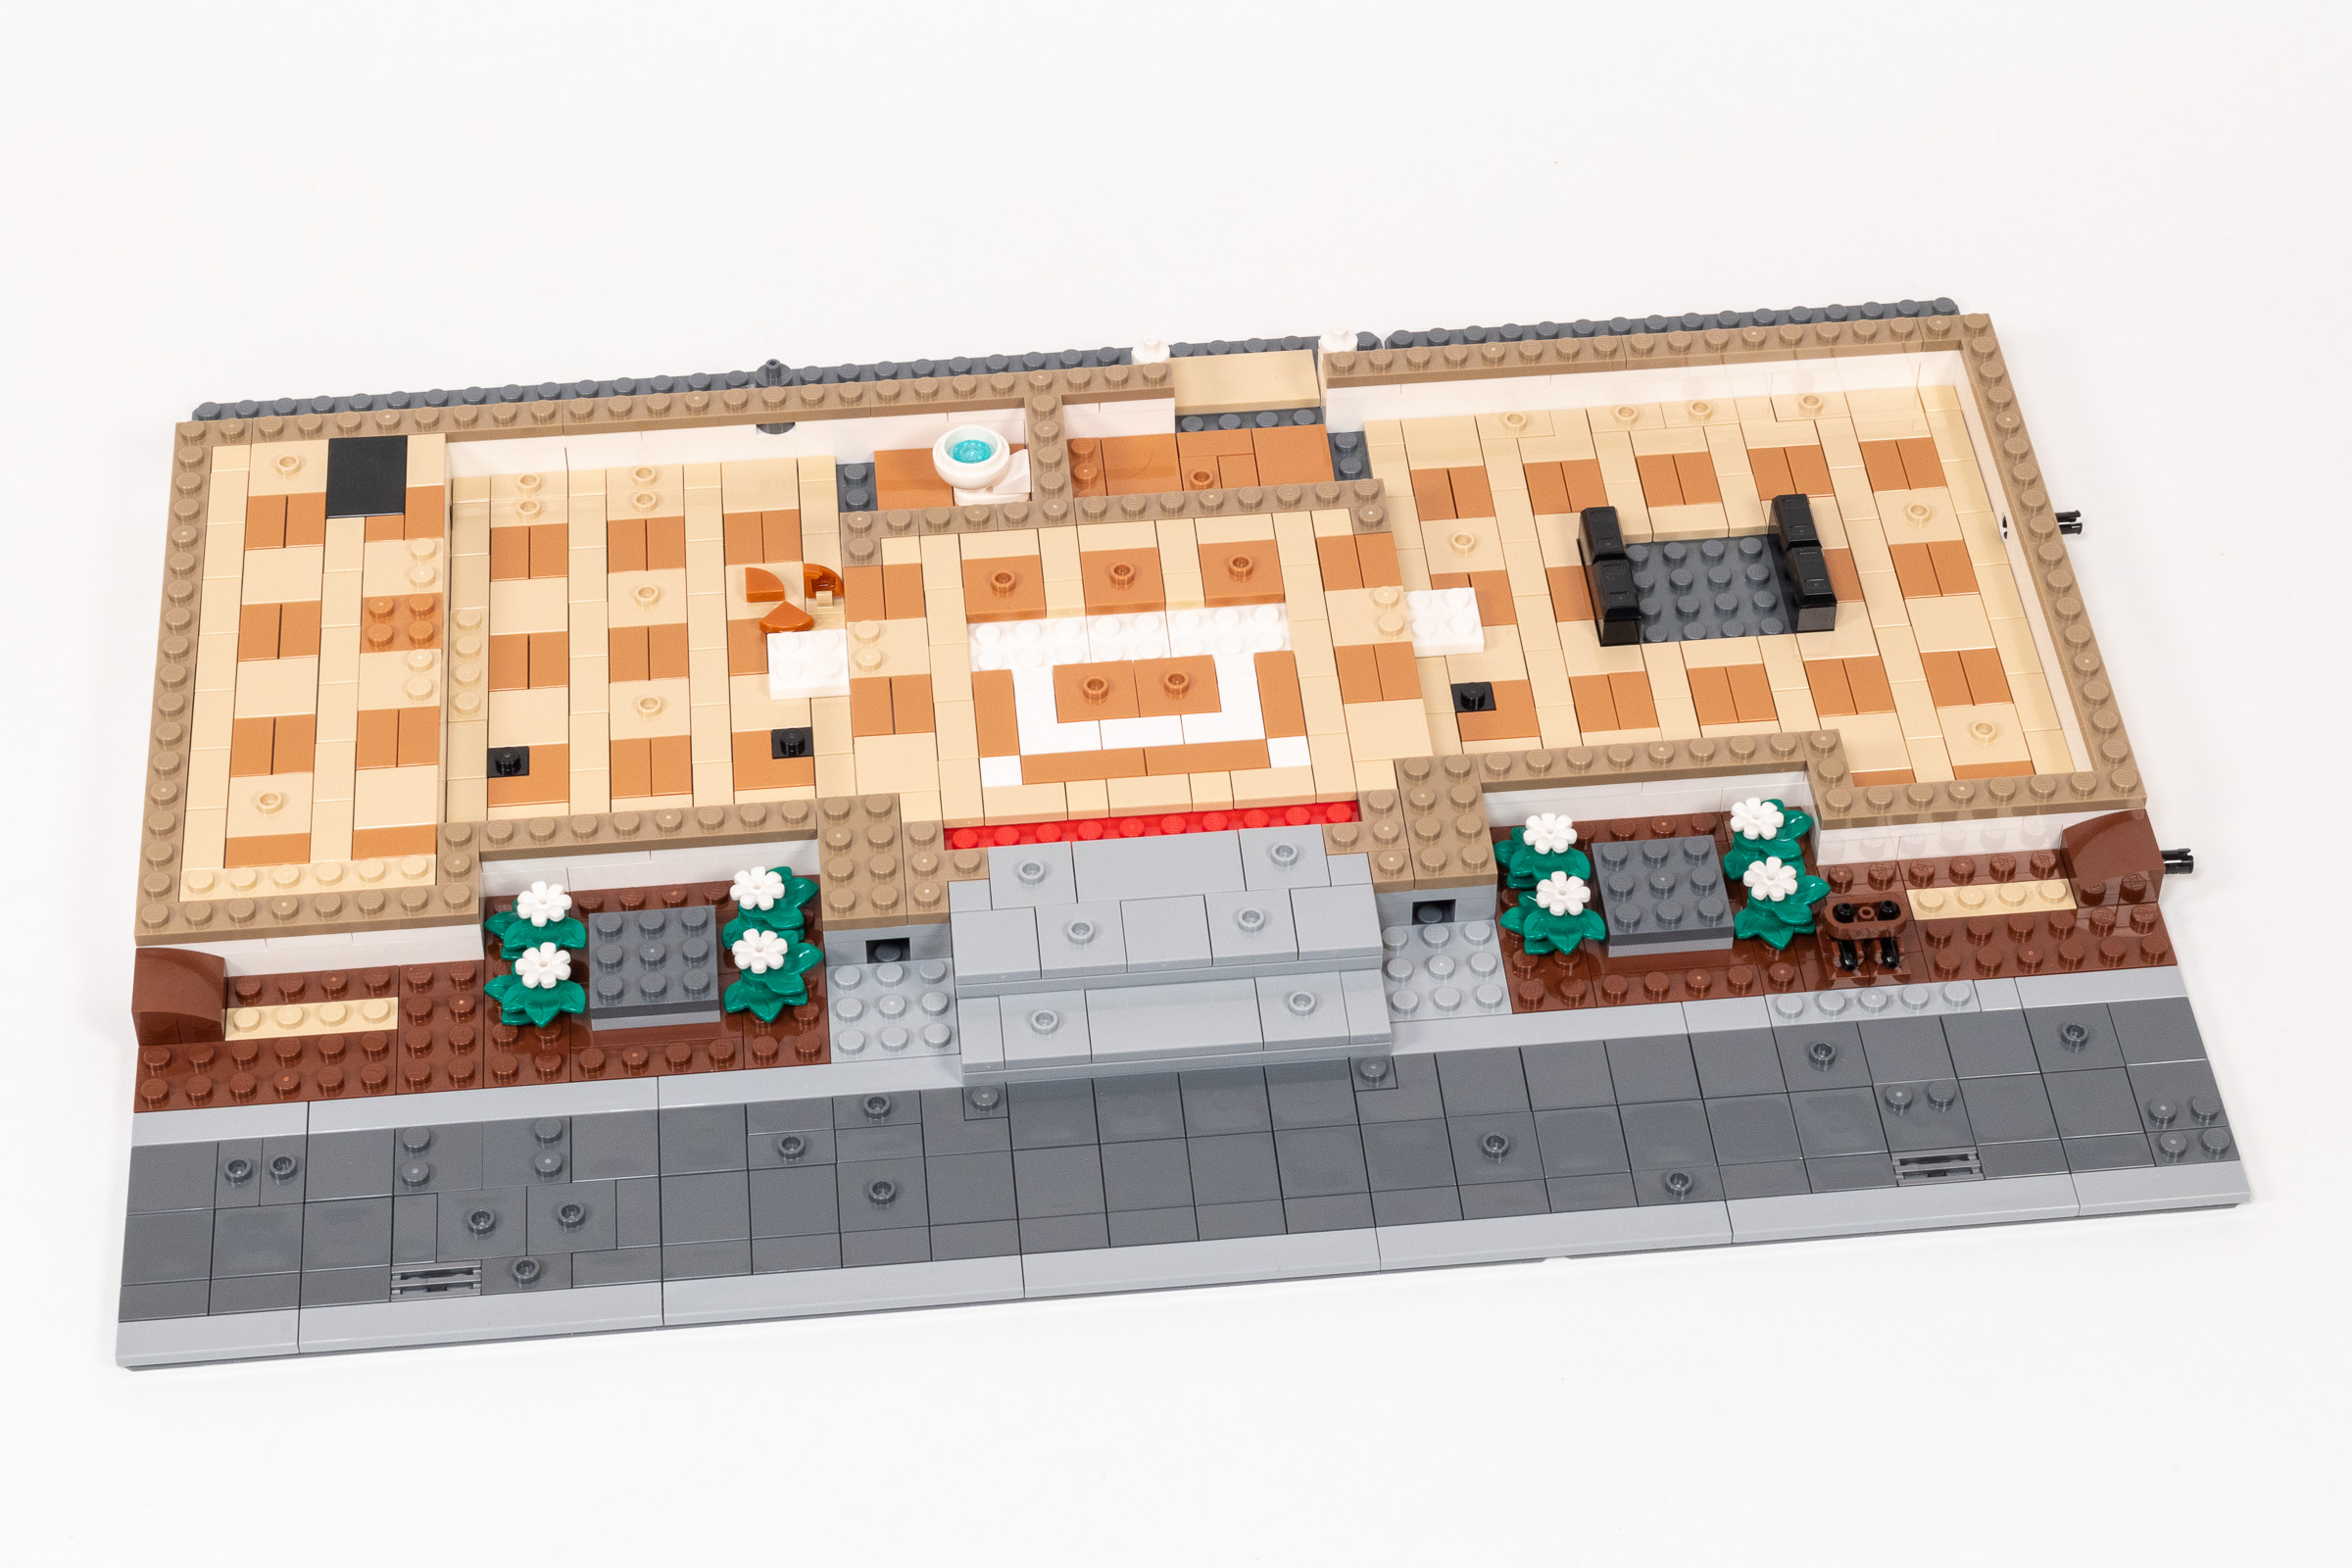
The base is complete, with two raised sections and two recessed sections.
Build time: 53 minutes. (Bag 1: 14 minutes, Bag 2: 10 minutes, Bag 3: 17 minutes, Bag 4: 12 minutes.)
Bags 5-13: Ground Floor
After nearly an hour building just the foundation and flooring, I am excited to start building some walls in Bag 5. It begins by adding simple wooden stairs to access the recessed sections. The process continues with a microsope in a corner in back, and a layer of brick on all four sides. We round this stage off by building substantial 3×3 bases for the two prominent columns pictured on the front of the box.
We build substantial bases for the two large columns.
Bag 6 continues by adding a bunch of height to the rear and side walls which are 138Sand YellowDark Tan in color. We also get three doors in the back of the building, and three wrought-iron railings to direct people to the stairs down to the recessed areas.
Bag 6 adds walls, doors, and railings.
Things get interesting in the seventh bag, since it’s time to add artifacts to the ground floor. This begins with the skull of a sabre-tooth cat, dinosaur eggs, a cash register in the front, a model of a volcano, some pottery, and a selection of rocks and gems. This adds a lot of personality to the ground floor, filling the space out a bit. It still looks pretty open, but museums tend to have a lot of open space to look at the artifacts anyways.
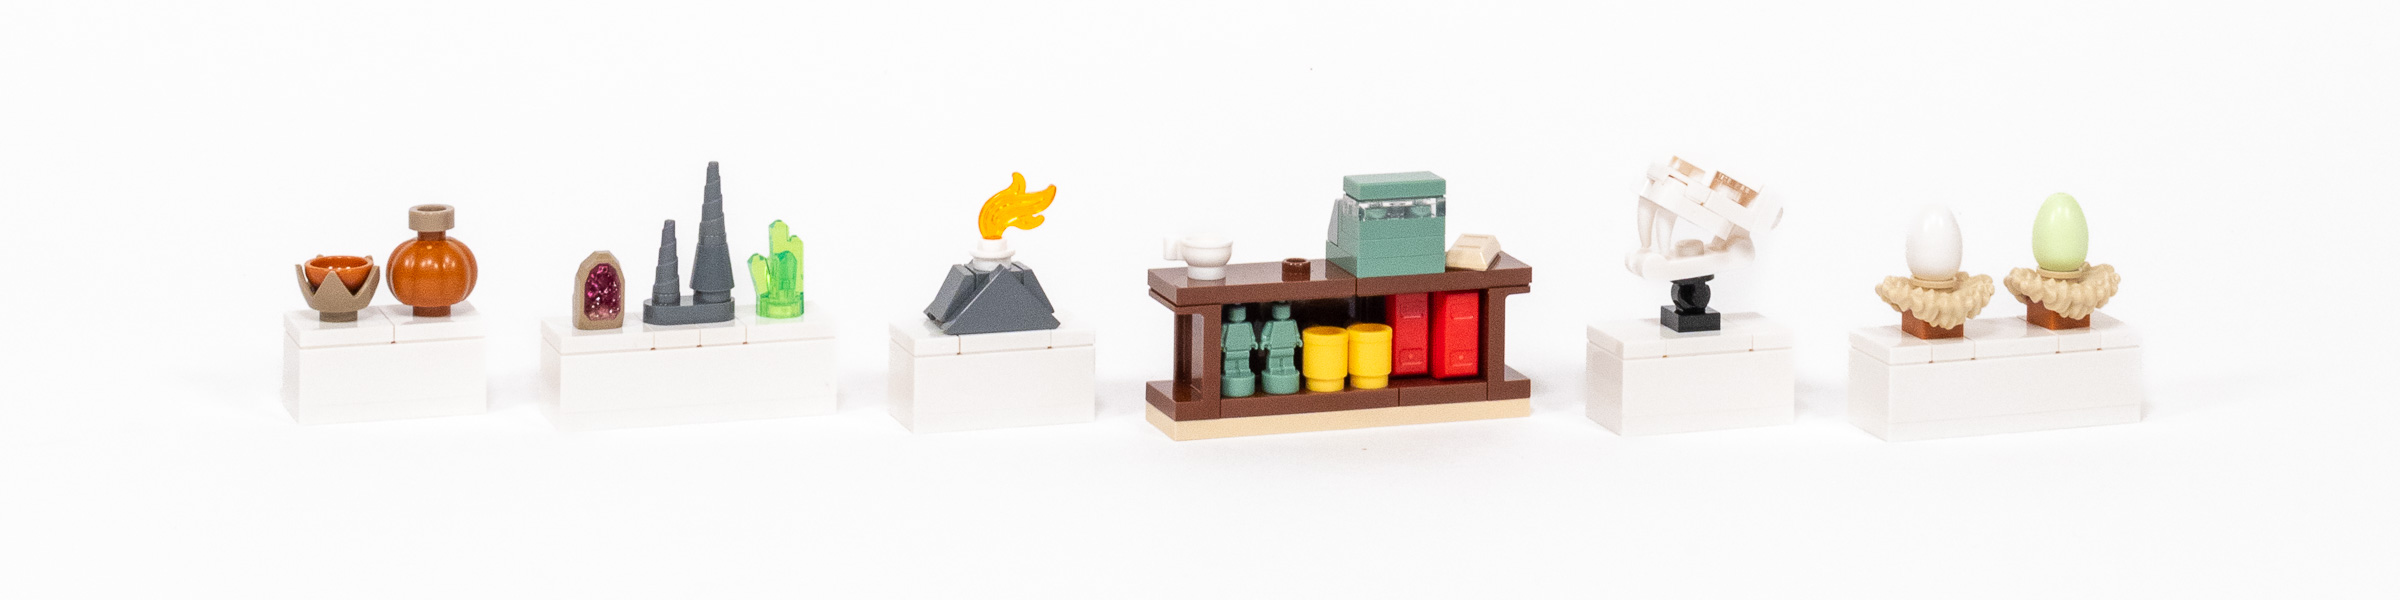
Some of the artifacts in the seventh bag.
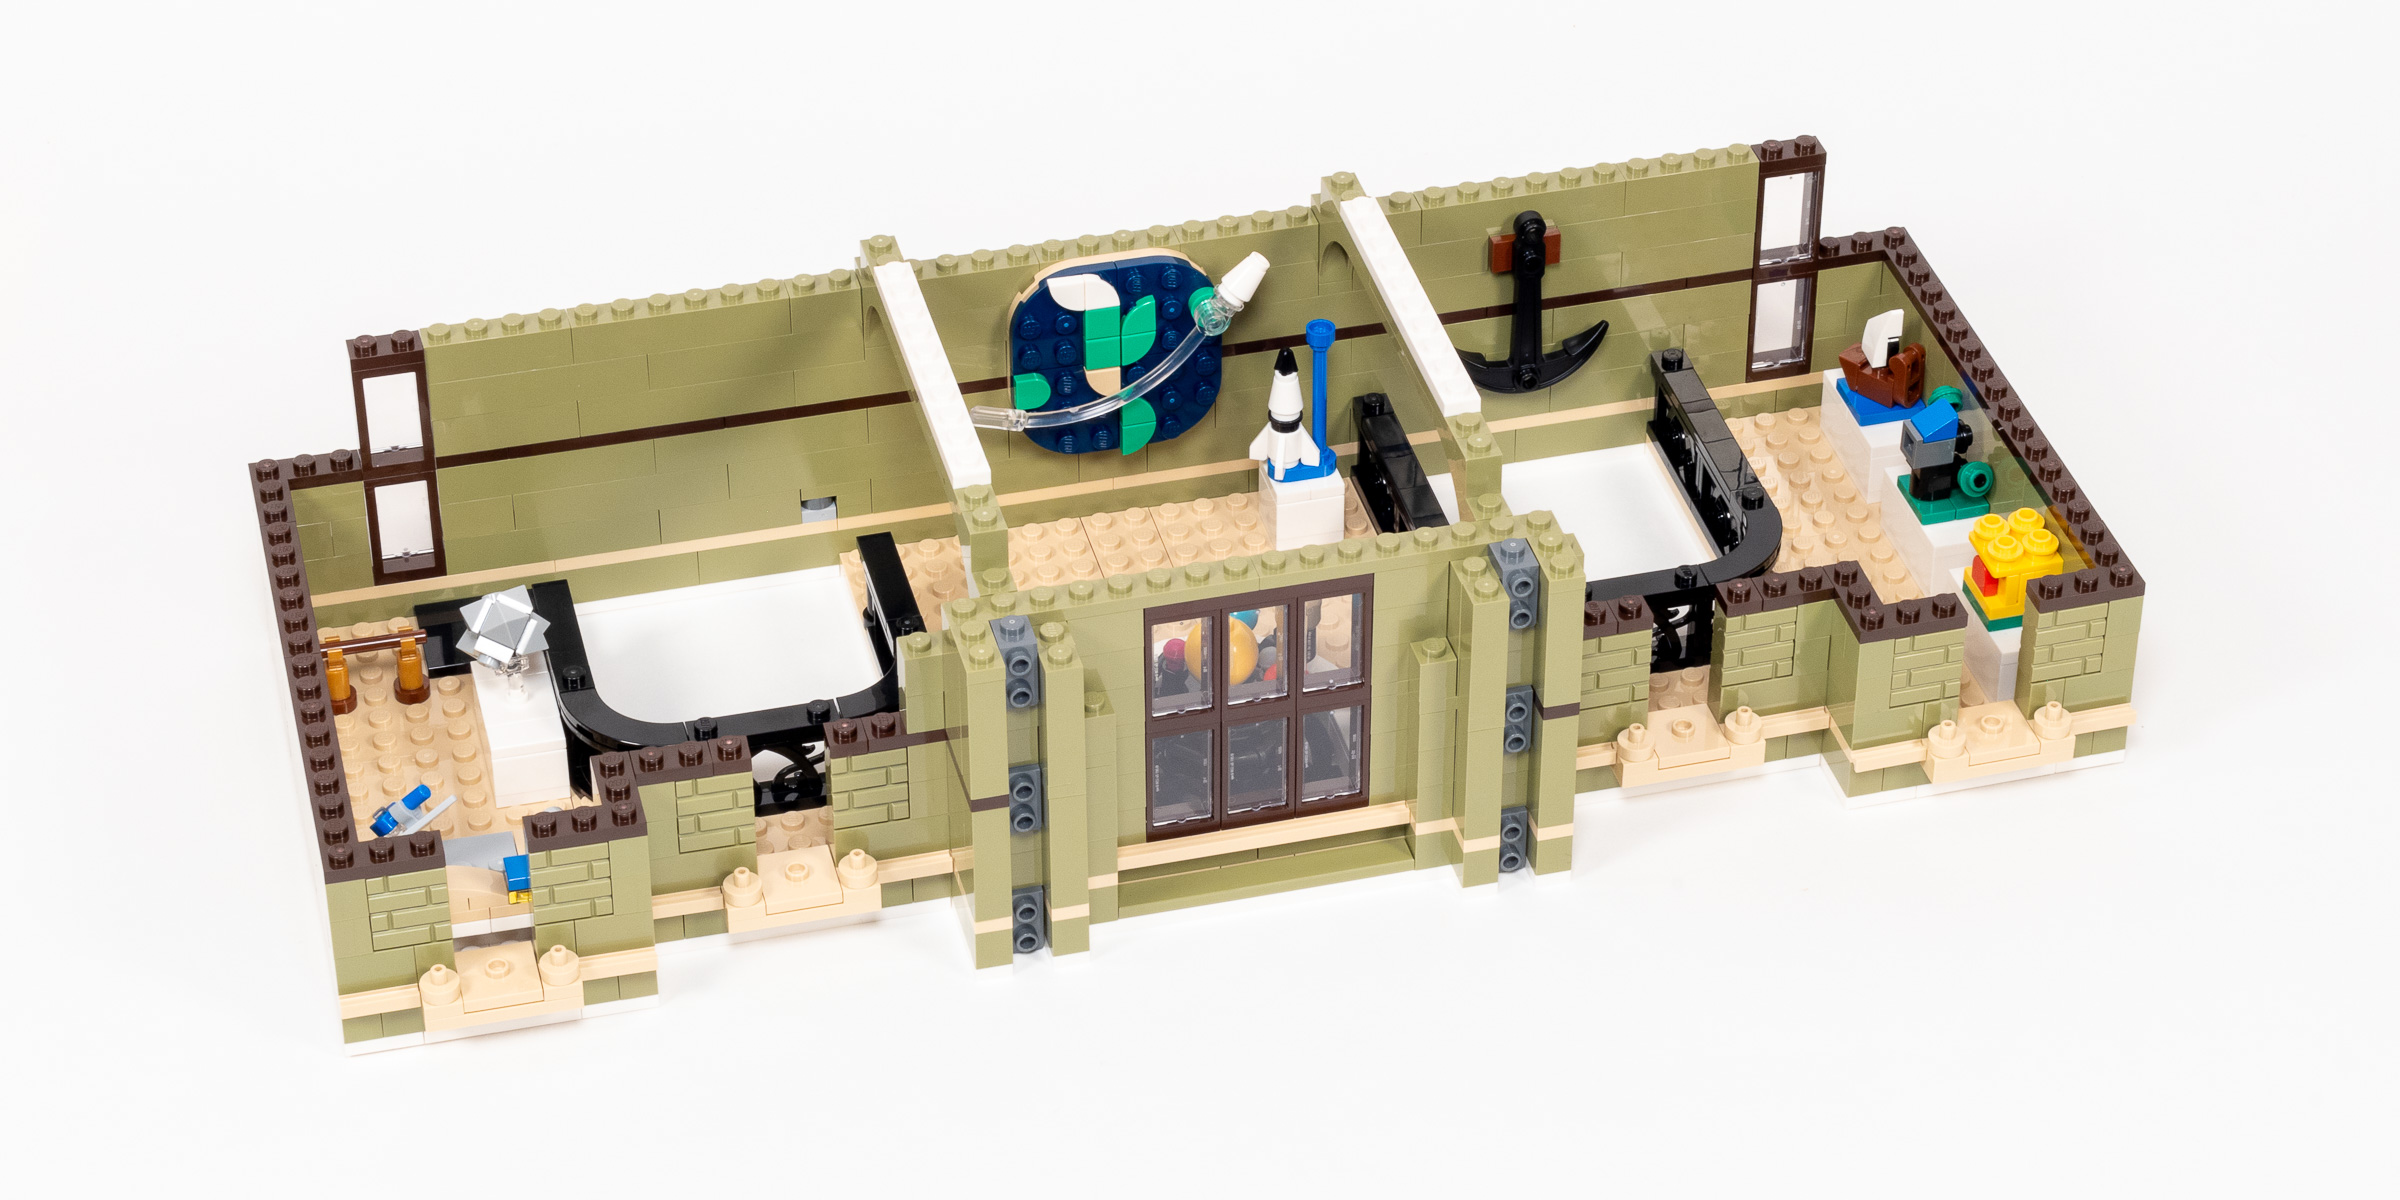
The beige contents of Bag 8 suggest that it is time for more walls, and that’s exactly what we get. We trim out the windows and attach 1×2 tiles to the front to create a rustic stone appearance. Bag 9 introduces a new color since it is fileld with 330Olive Green parts. These are no doubt going to be used for the front exterior which uses this color extensively. Instead of the front, we end up using these parts to add a big section of the back wall, as well as large archways between the central atrium and the large galleries on either side. We finish this bag by adding black guardrails on both sides of the front staircase.
We add 1×2 Tiles to the front in Bag 8 and start adding Olive Green bricks in Bag 9.
The tenth bag is more of the same, adding more height to the green walls. we take a brief detour to build a poster on the wall showing a cross-section of the earth all the way down to the core (which showcases the complete range of 1×1 through 4×4 curved plates that we finally have. Lastly, we add slender columns built out of a stack of four candlestick elements (part 37762) flanking each of the four windows.
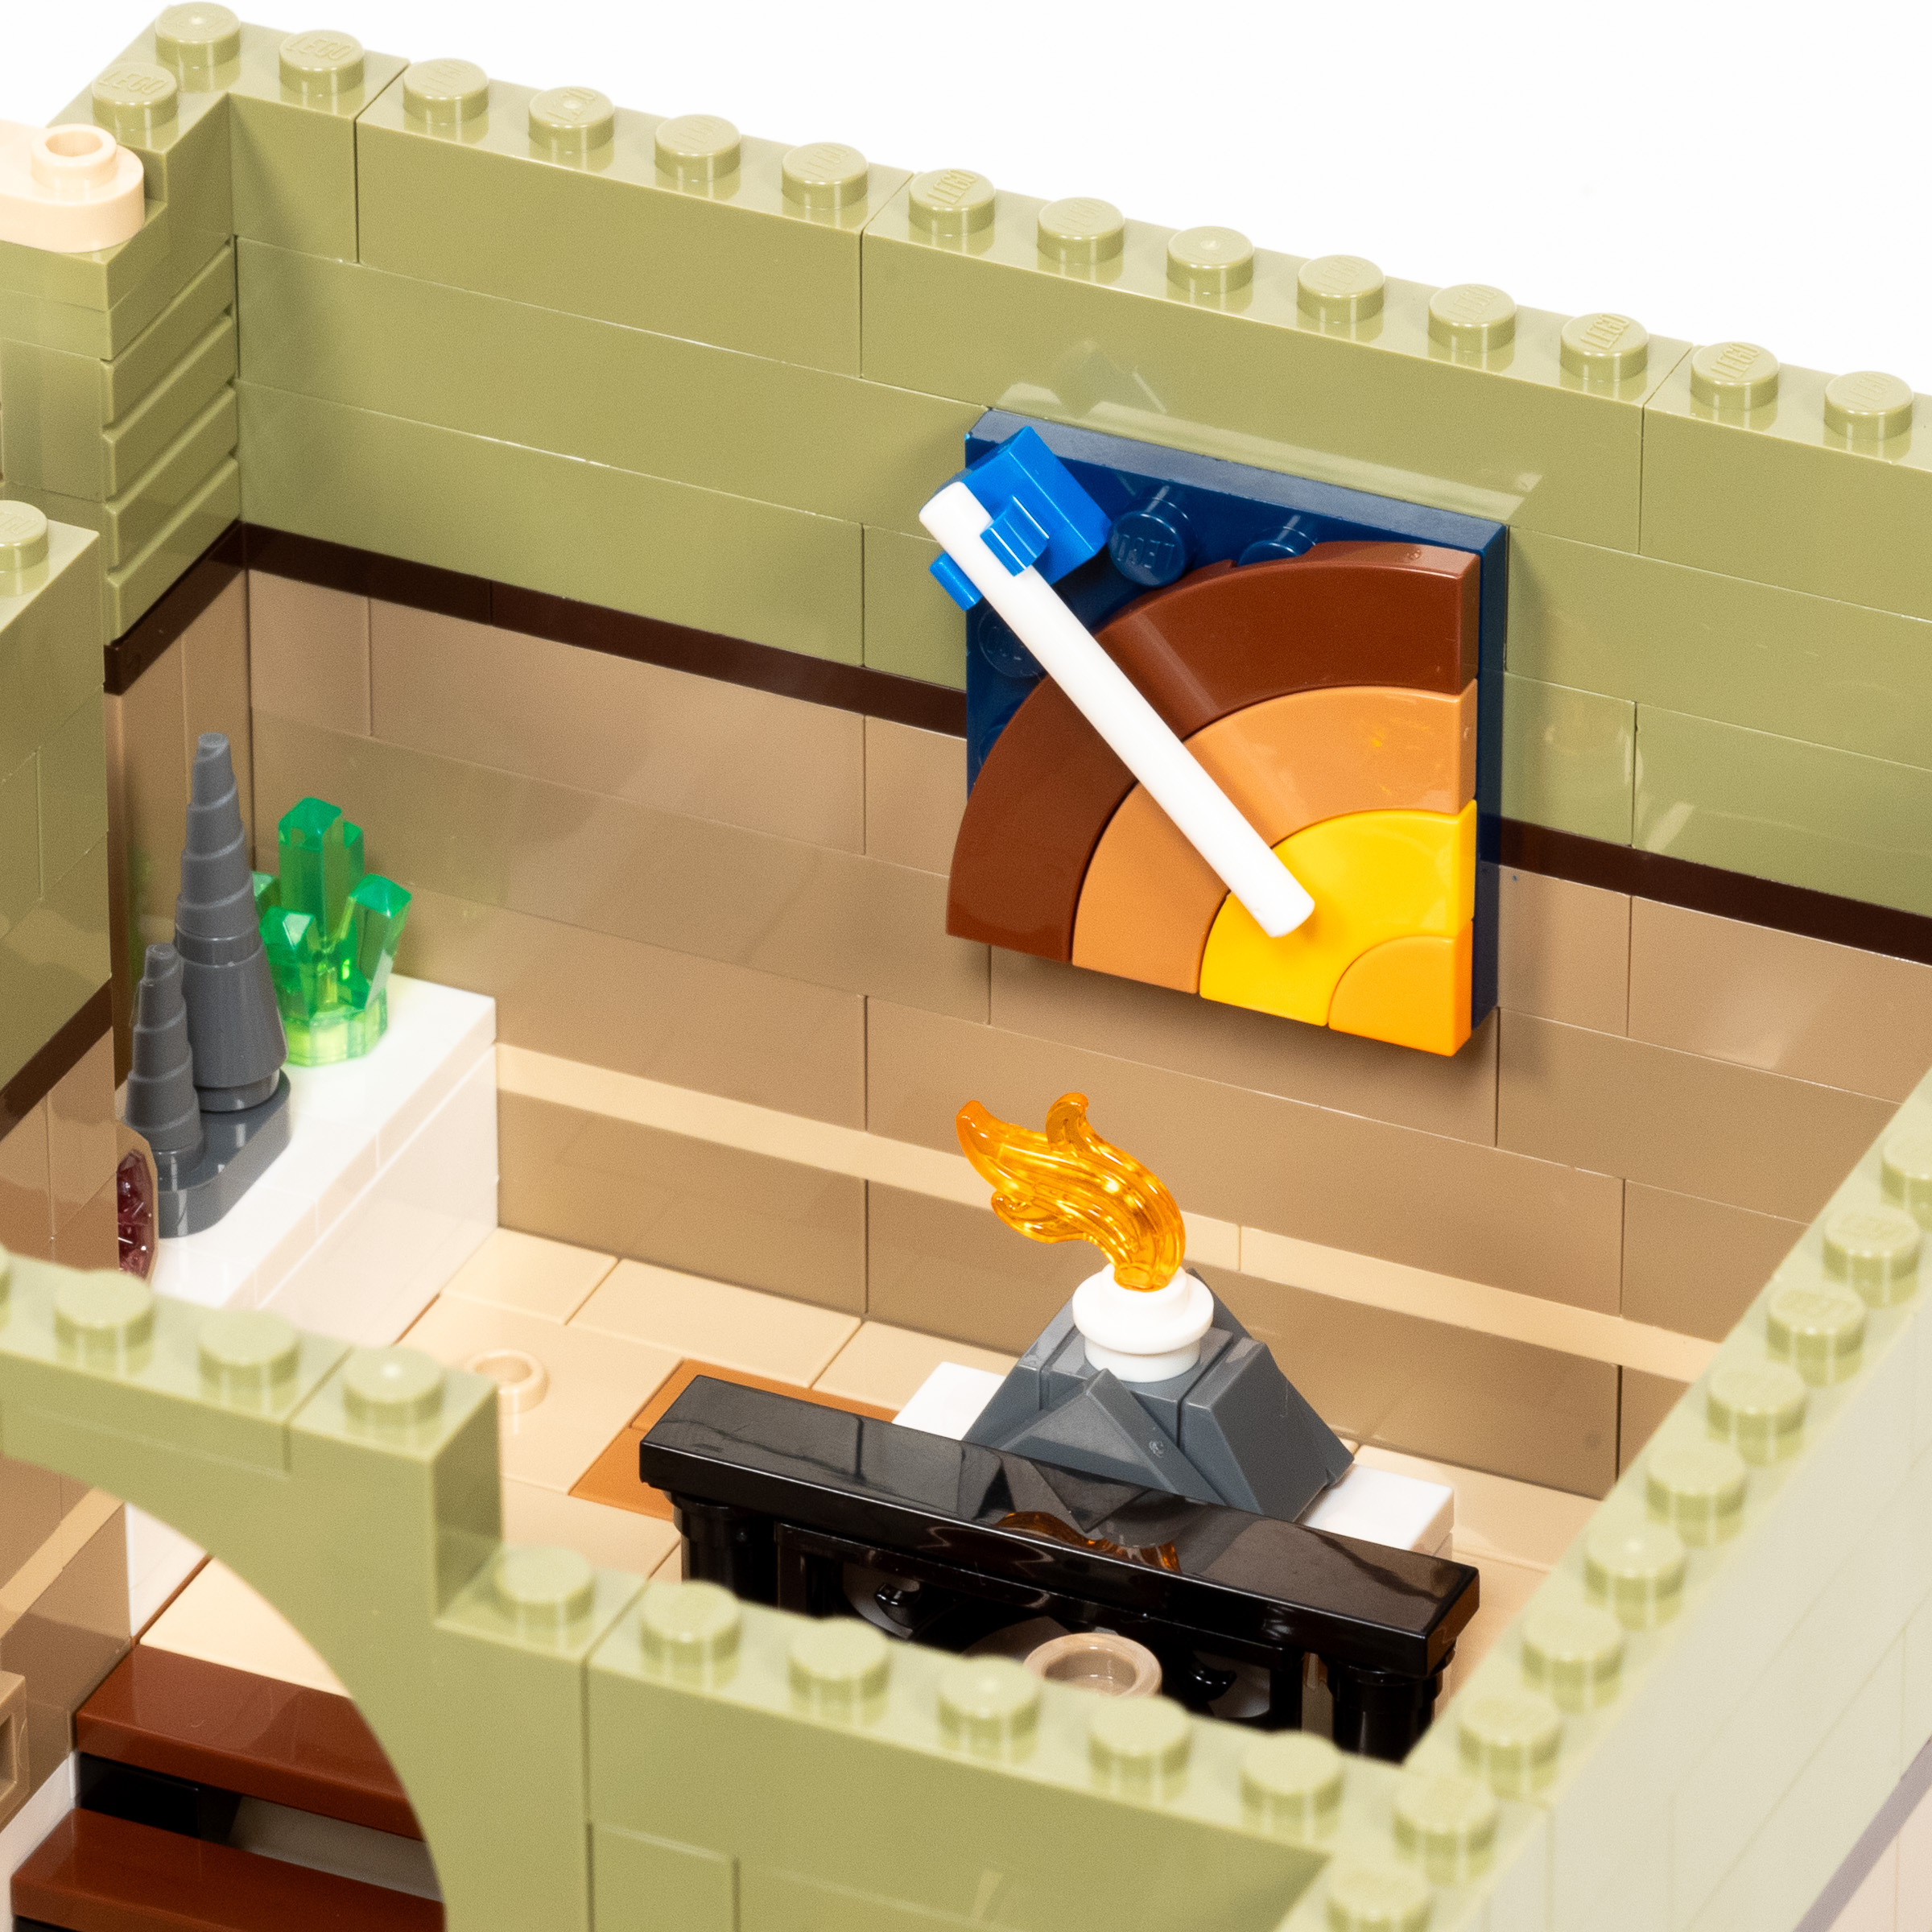
A poster shows a cross-section of the earth behind the volcano sculpture.
We can’t have much more left to complete the ground floor as we enter bag 11 since the walls are looking pretty tall now. In this stage, we add the front windows, a heading to hold the columns in place, and a heading above the main entrance. Another layer of plate and bricks make the walls taller still.
Windows details at end of Bag 11.
The 12th bag adds two interesting sub-assemblies. The first is a removeable interior wall that allows you to more easily access the bathroom and microscope areas. The second is a staircase that is assembled using SNOT techniques and attached at a 45° angle using a clip at the top of the stairs. The top edge has been completely covered in tiles in preparation for the next floor.
Staircase and removeable wall sub-assemblies.
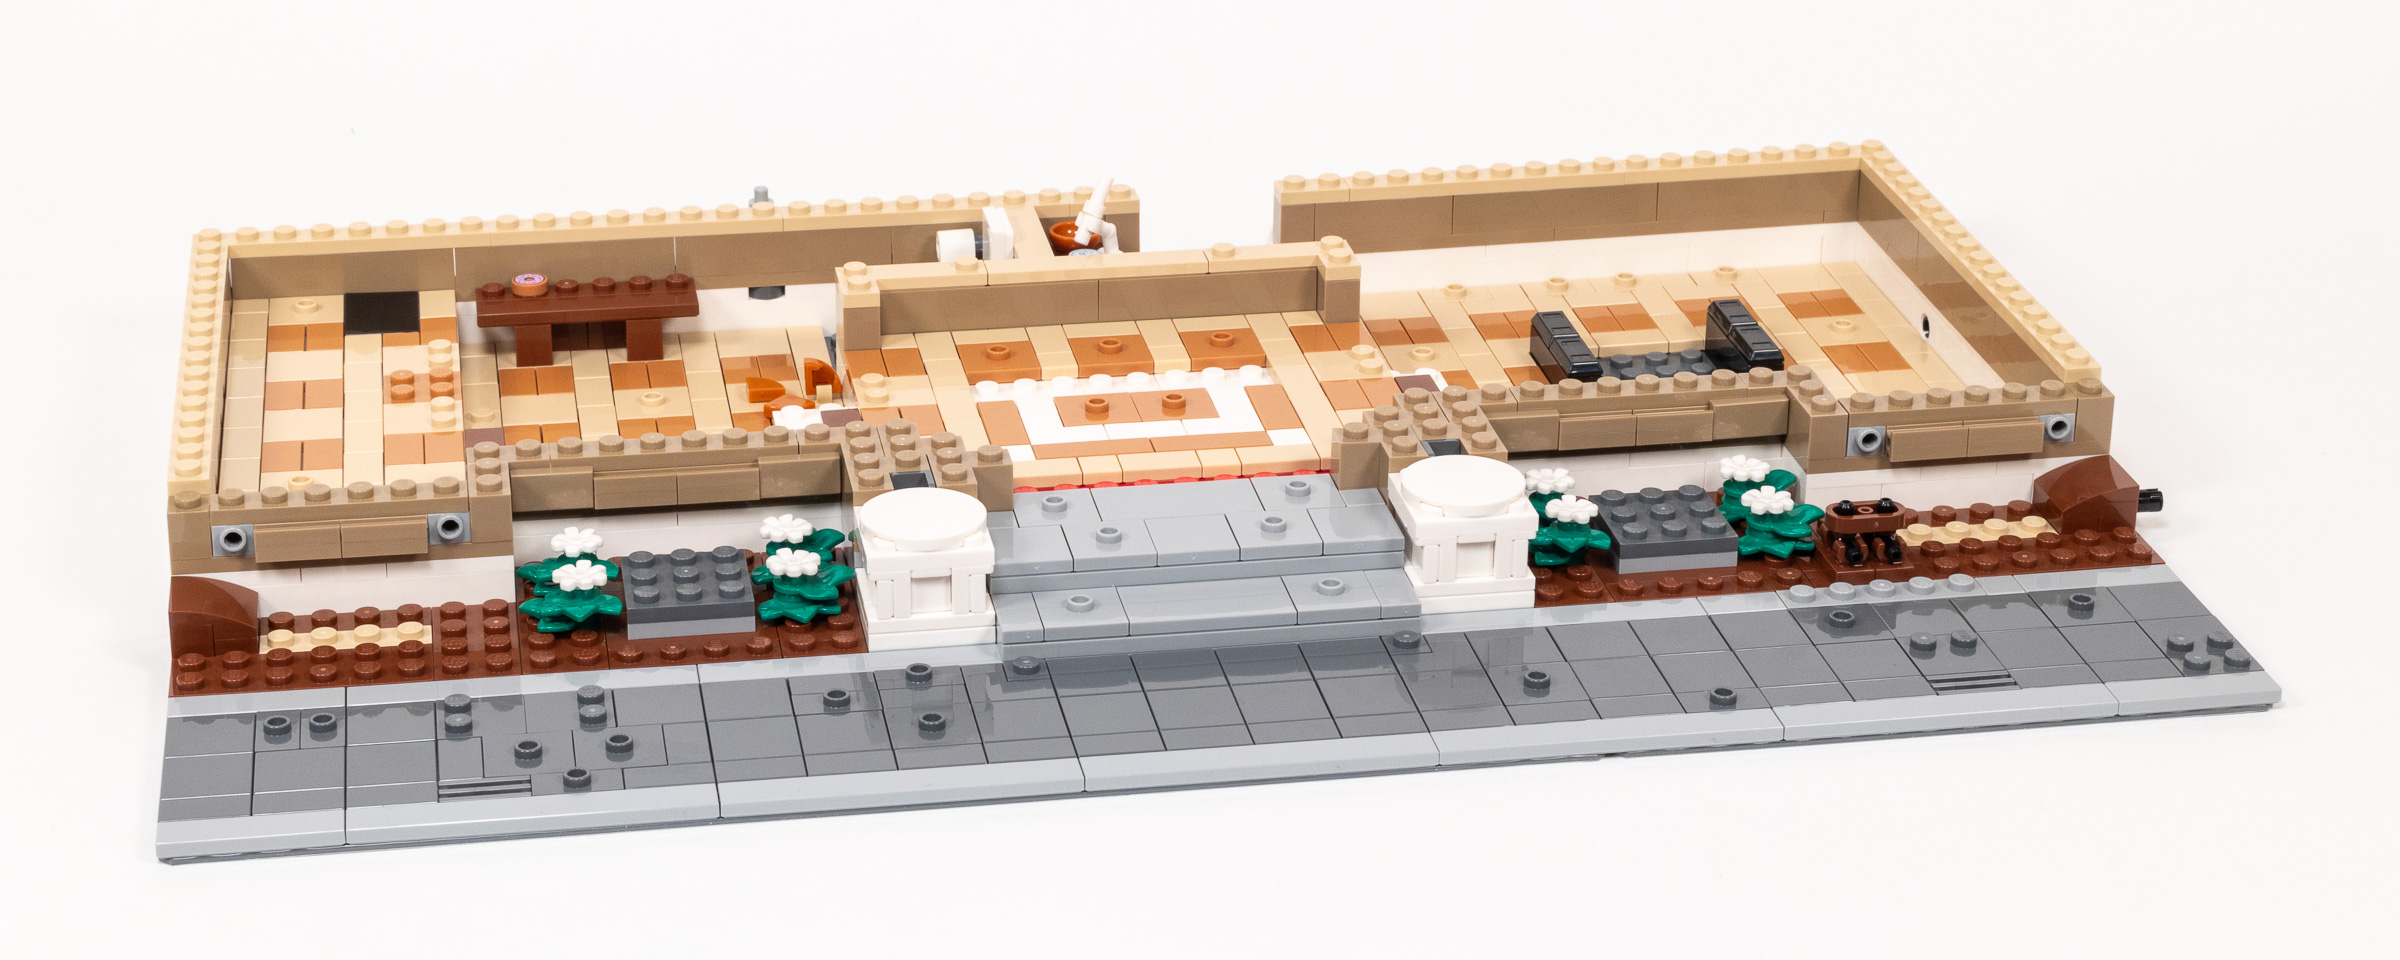
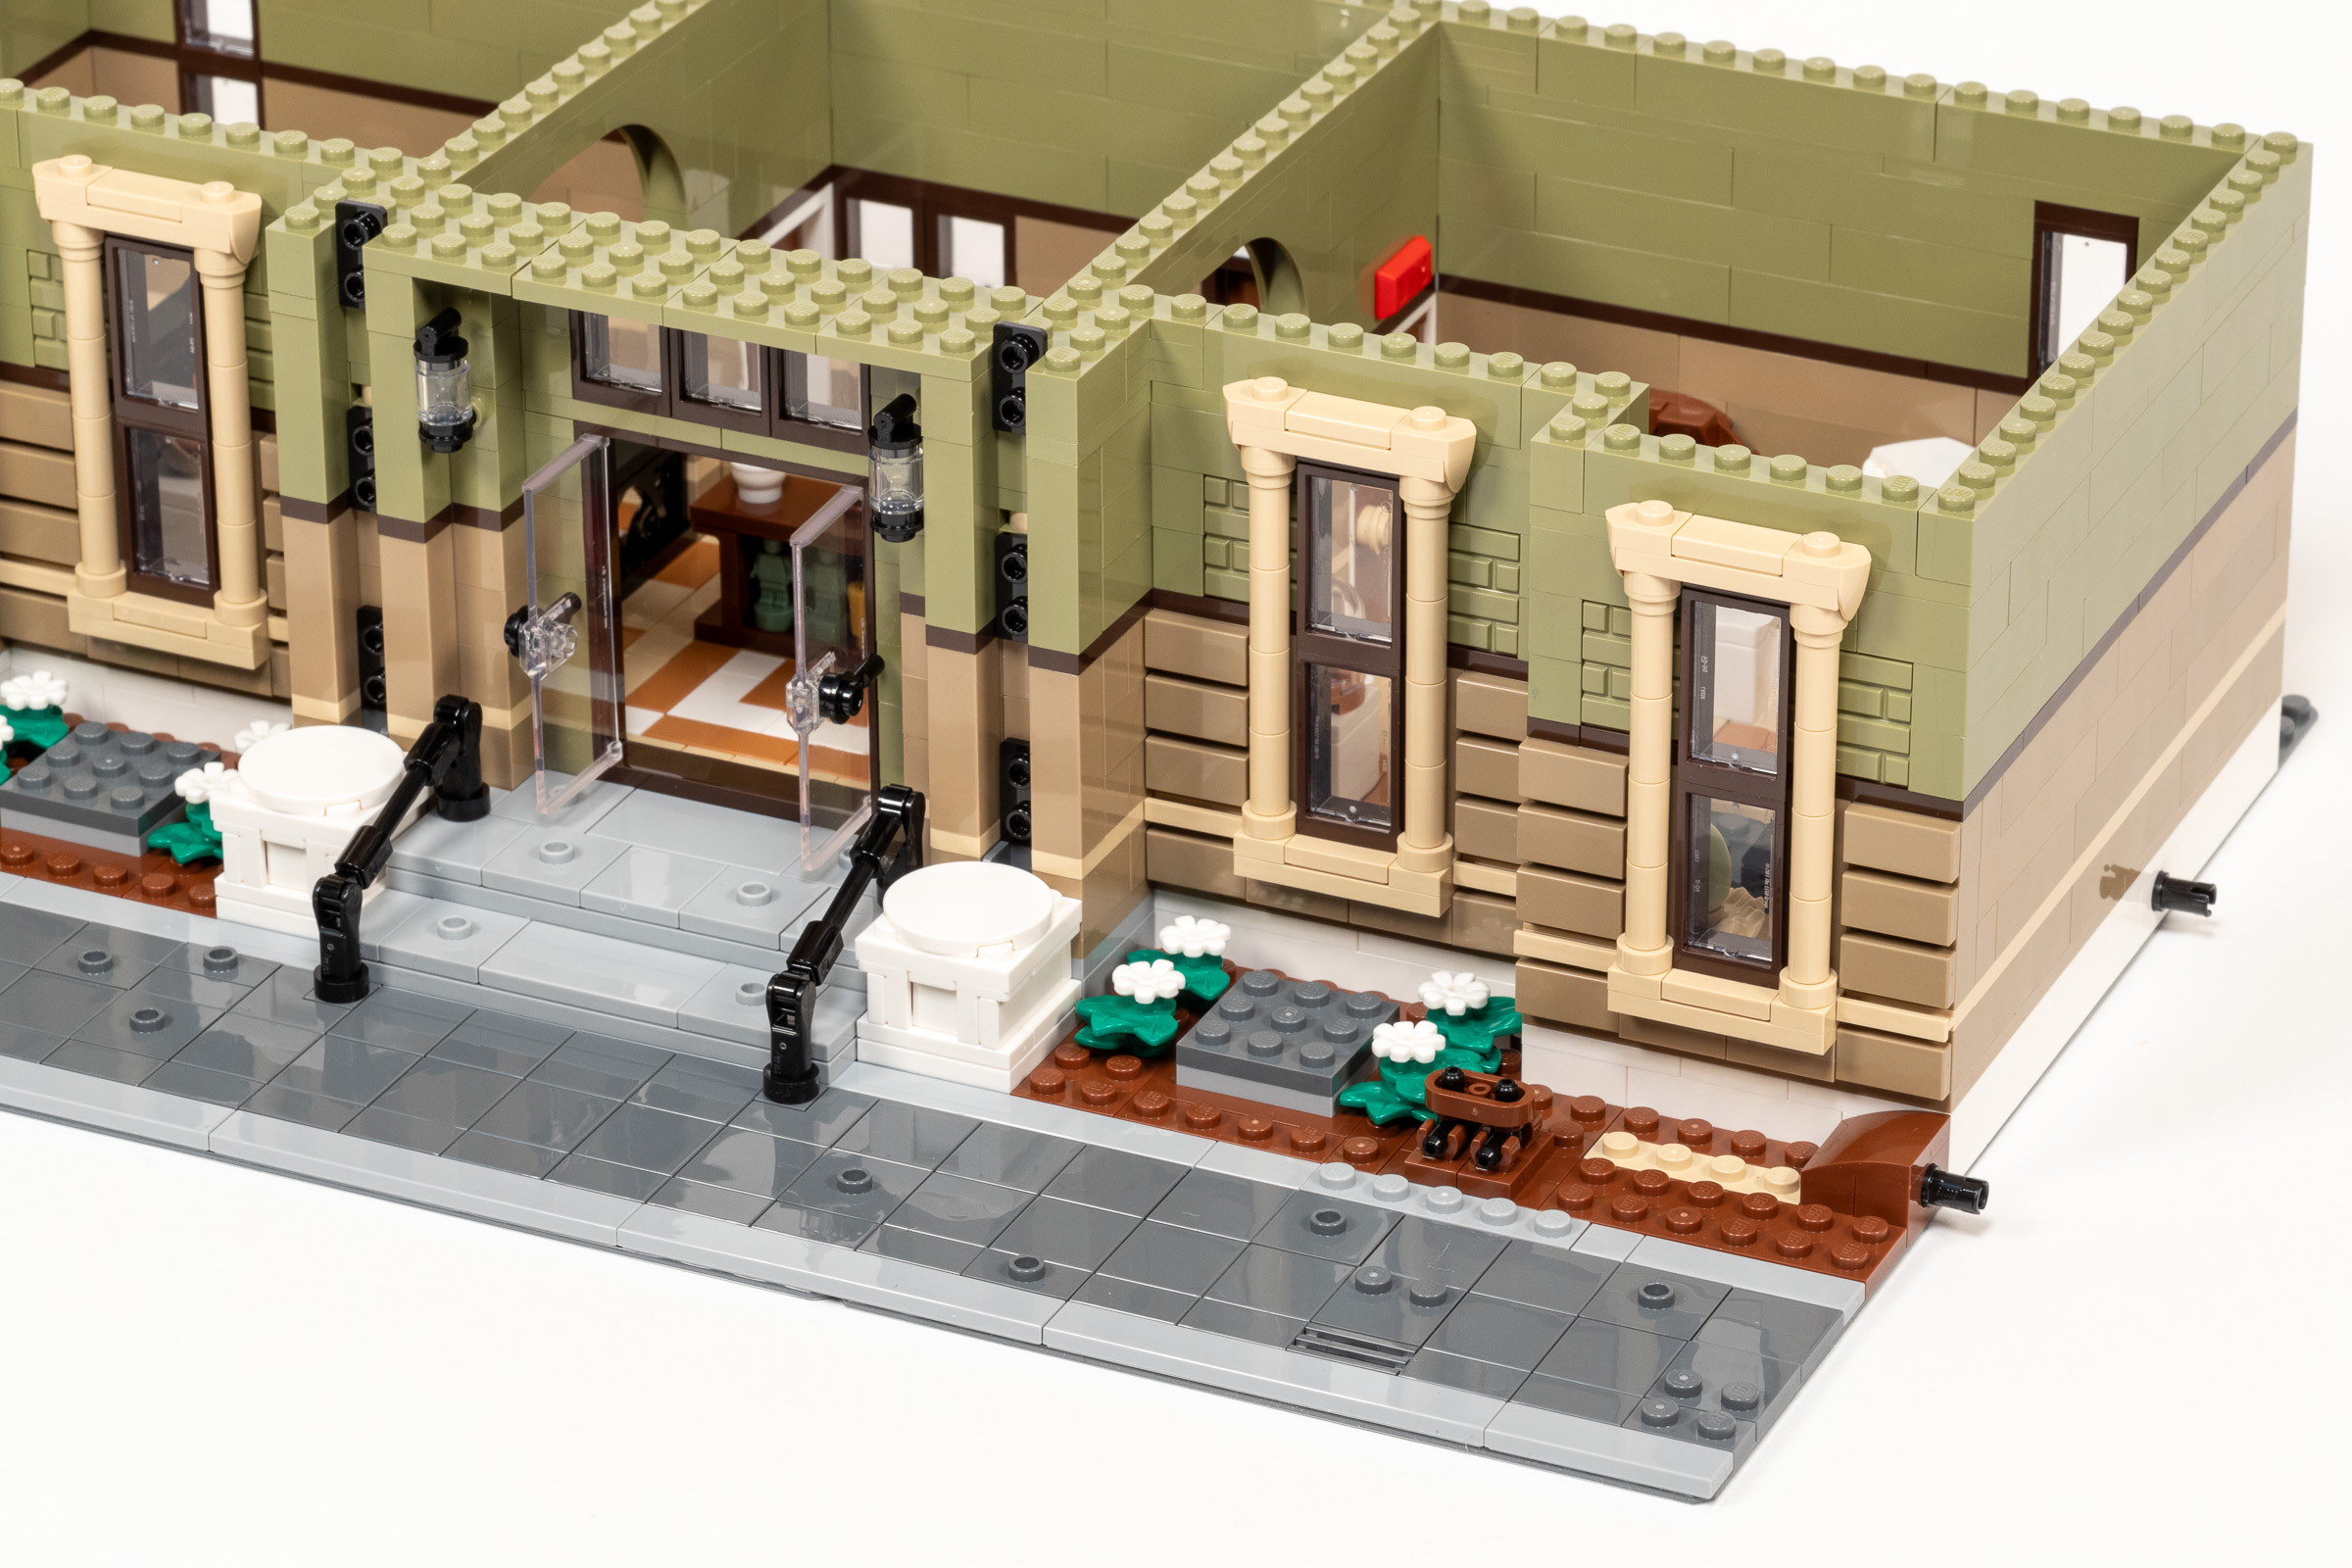
Bag 13 starts with the chunky white columns on both sides of the front door. After this, we finish decorating the ground-level streetscape with a intricate wrought-iron fence using the Harpoon (part 18041) to create a row of wrought-iron fencing painted in a familiar black color. We also add statues on pedestals to both sides of the door, and bays of foliage on both sides.
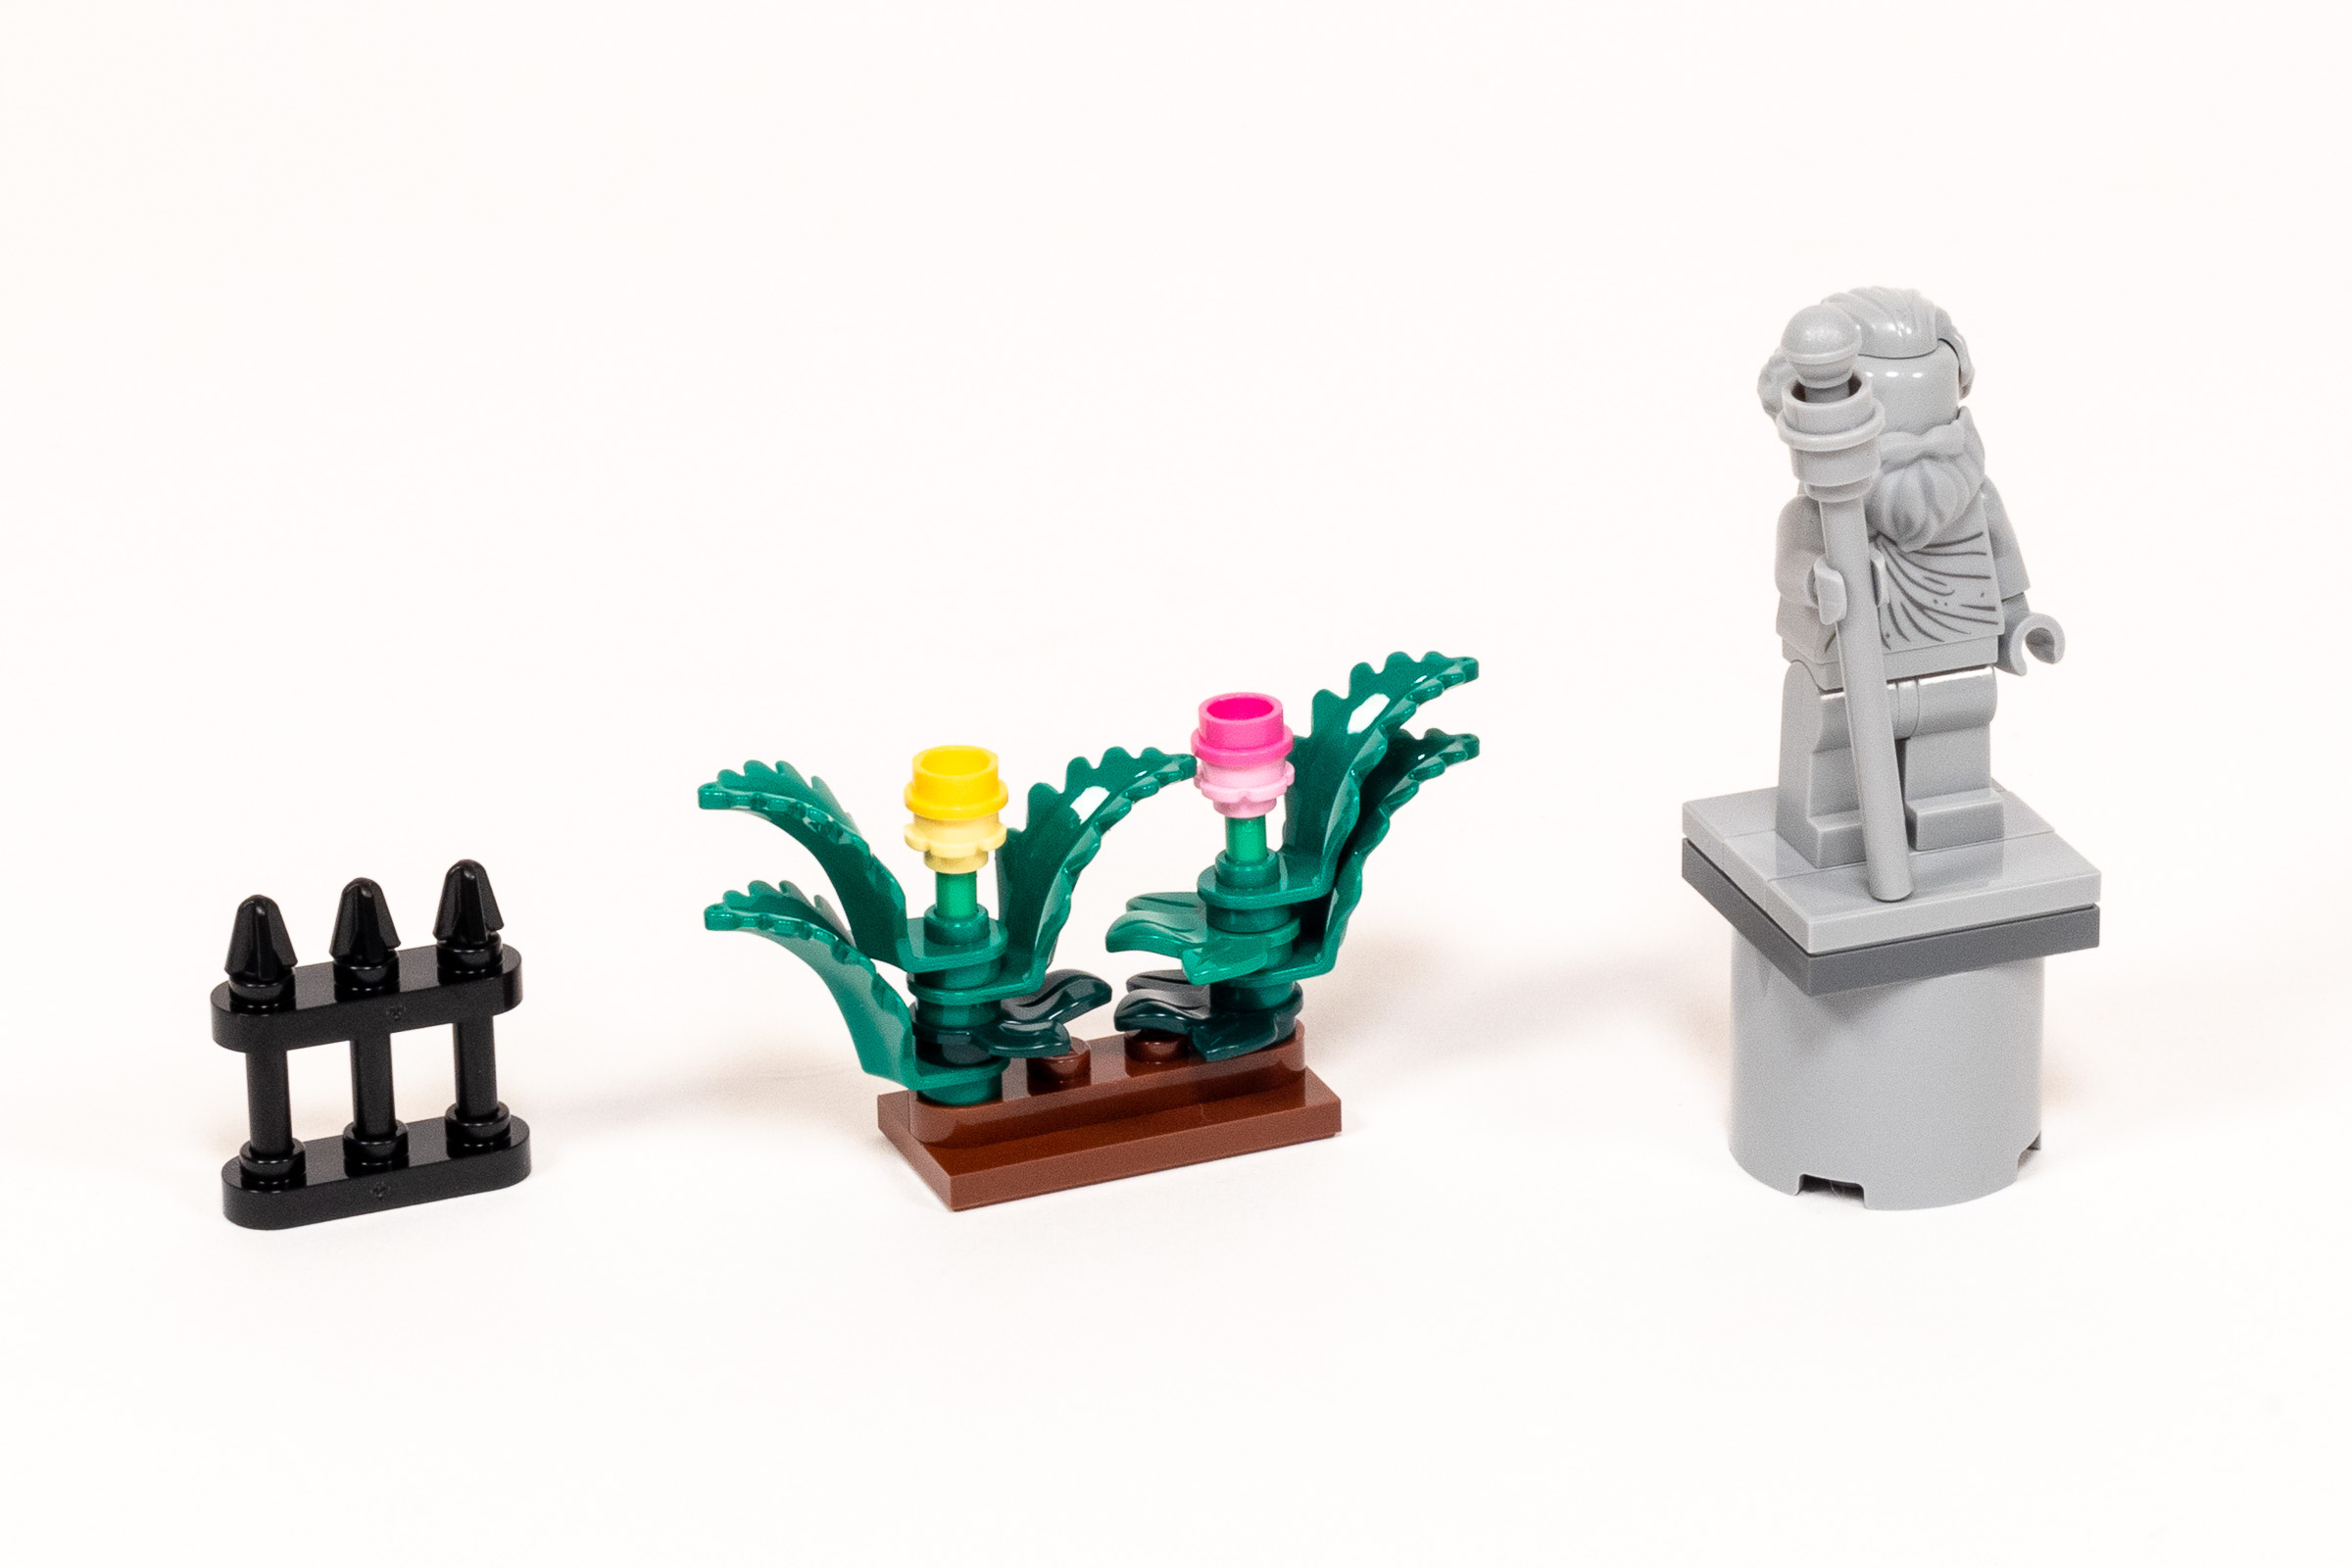
Intricate sub-assemblies to decorate the front entrance.
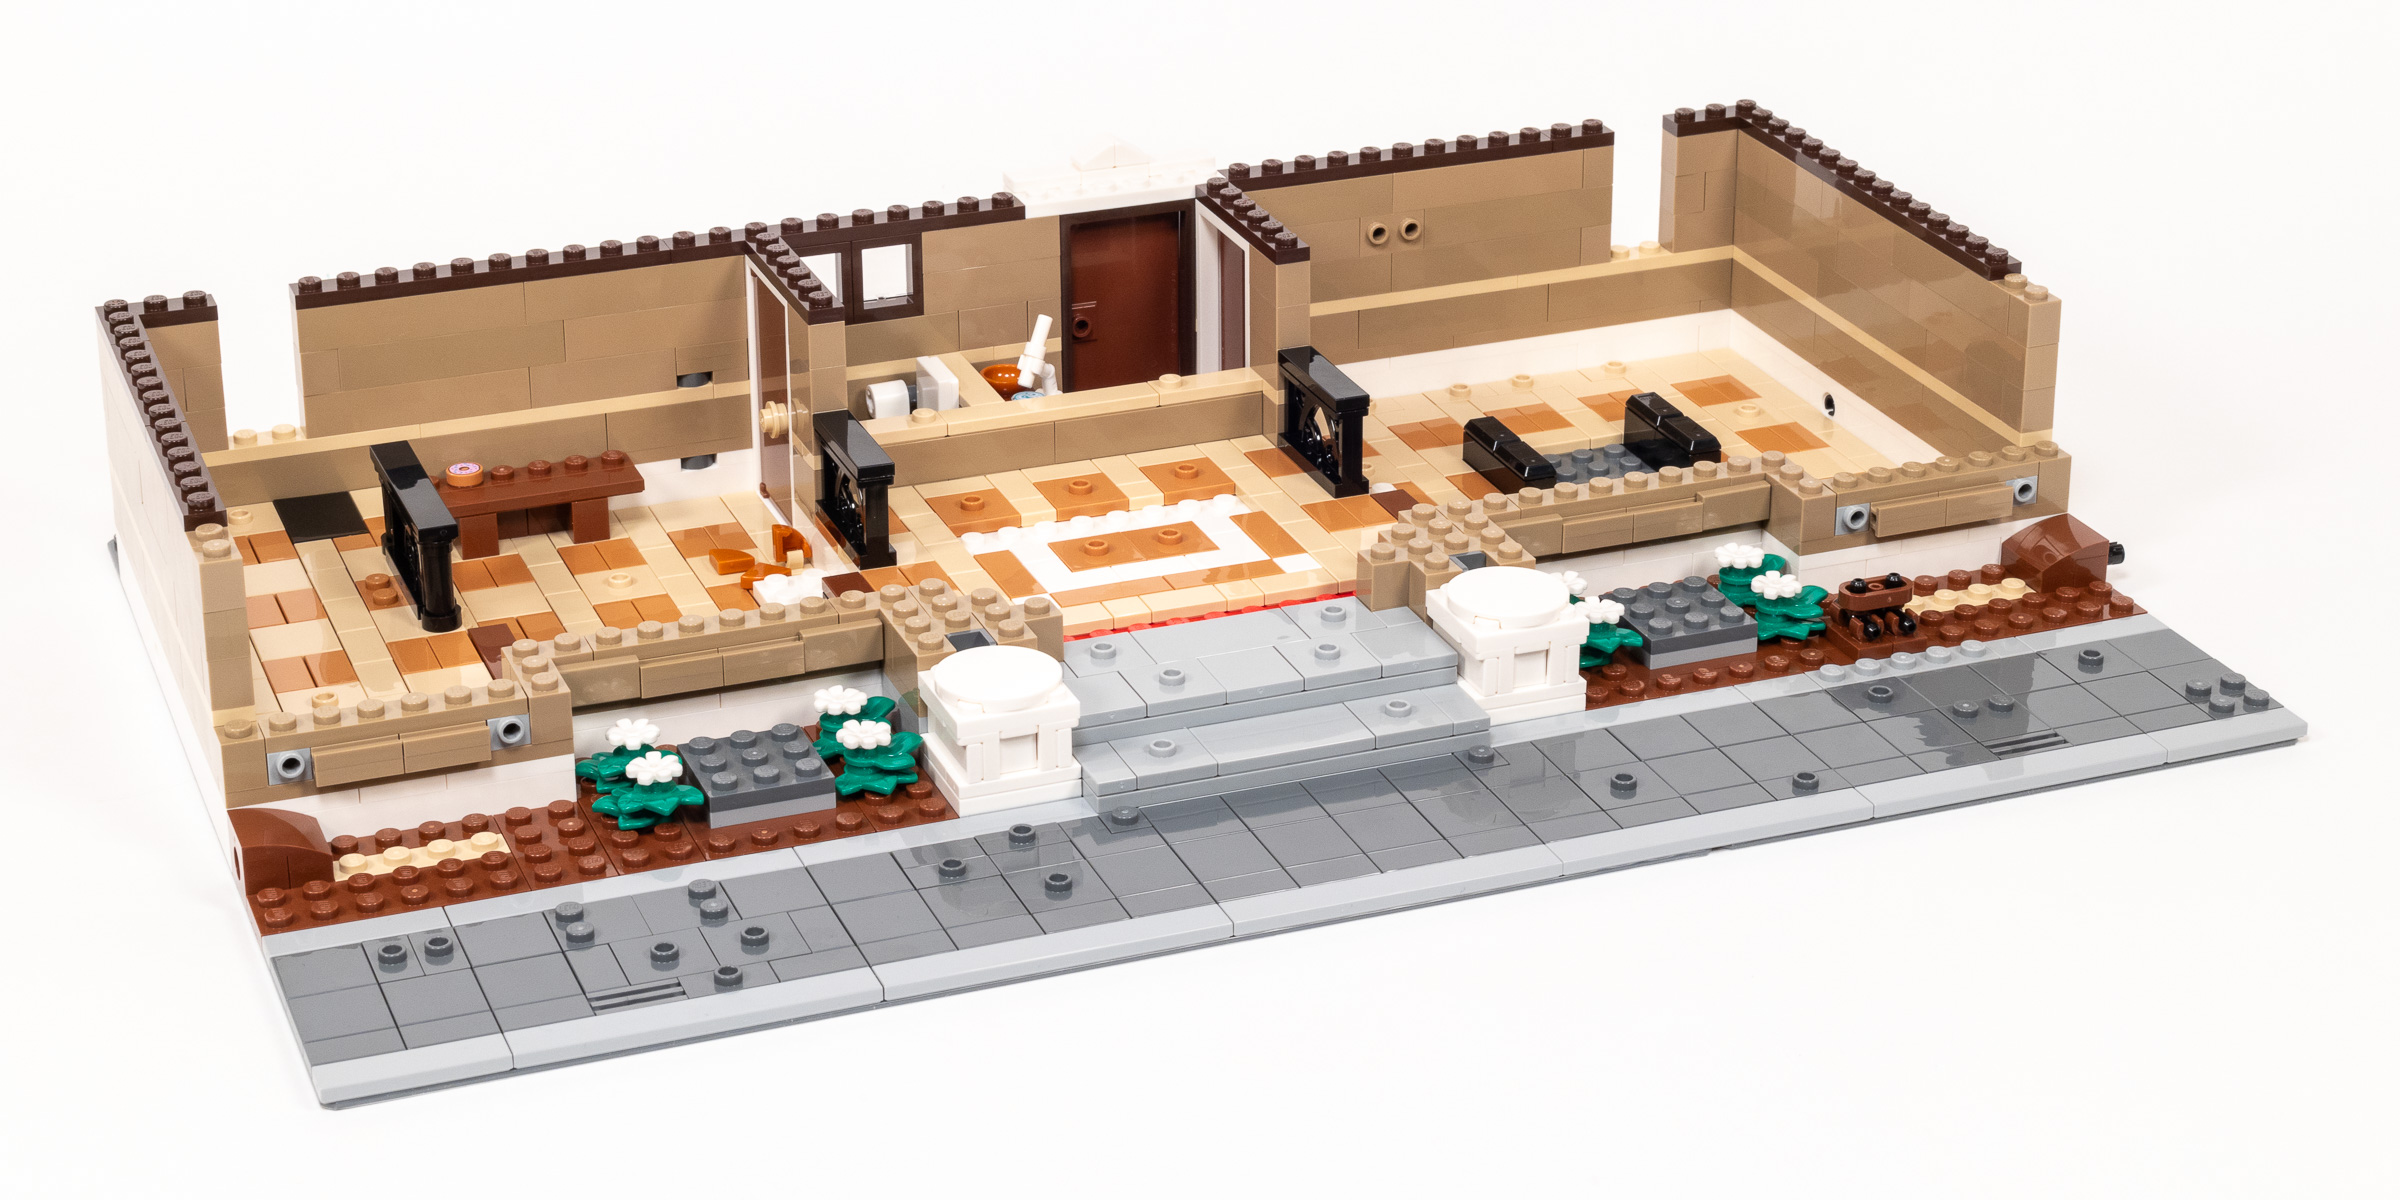
The first floor is looking pretty good, although we definitely need to build that dinosaur skeleton which will be placed in the right side of the building!
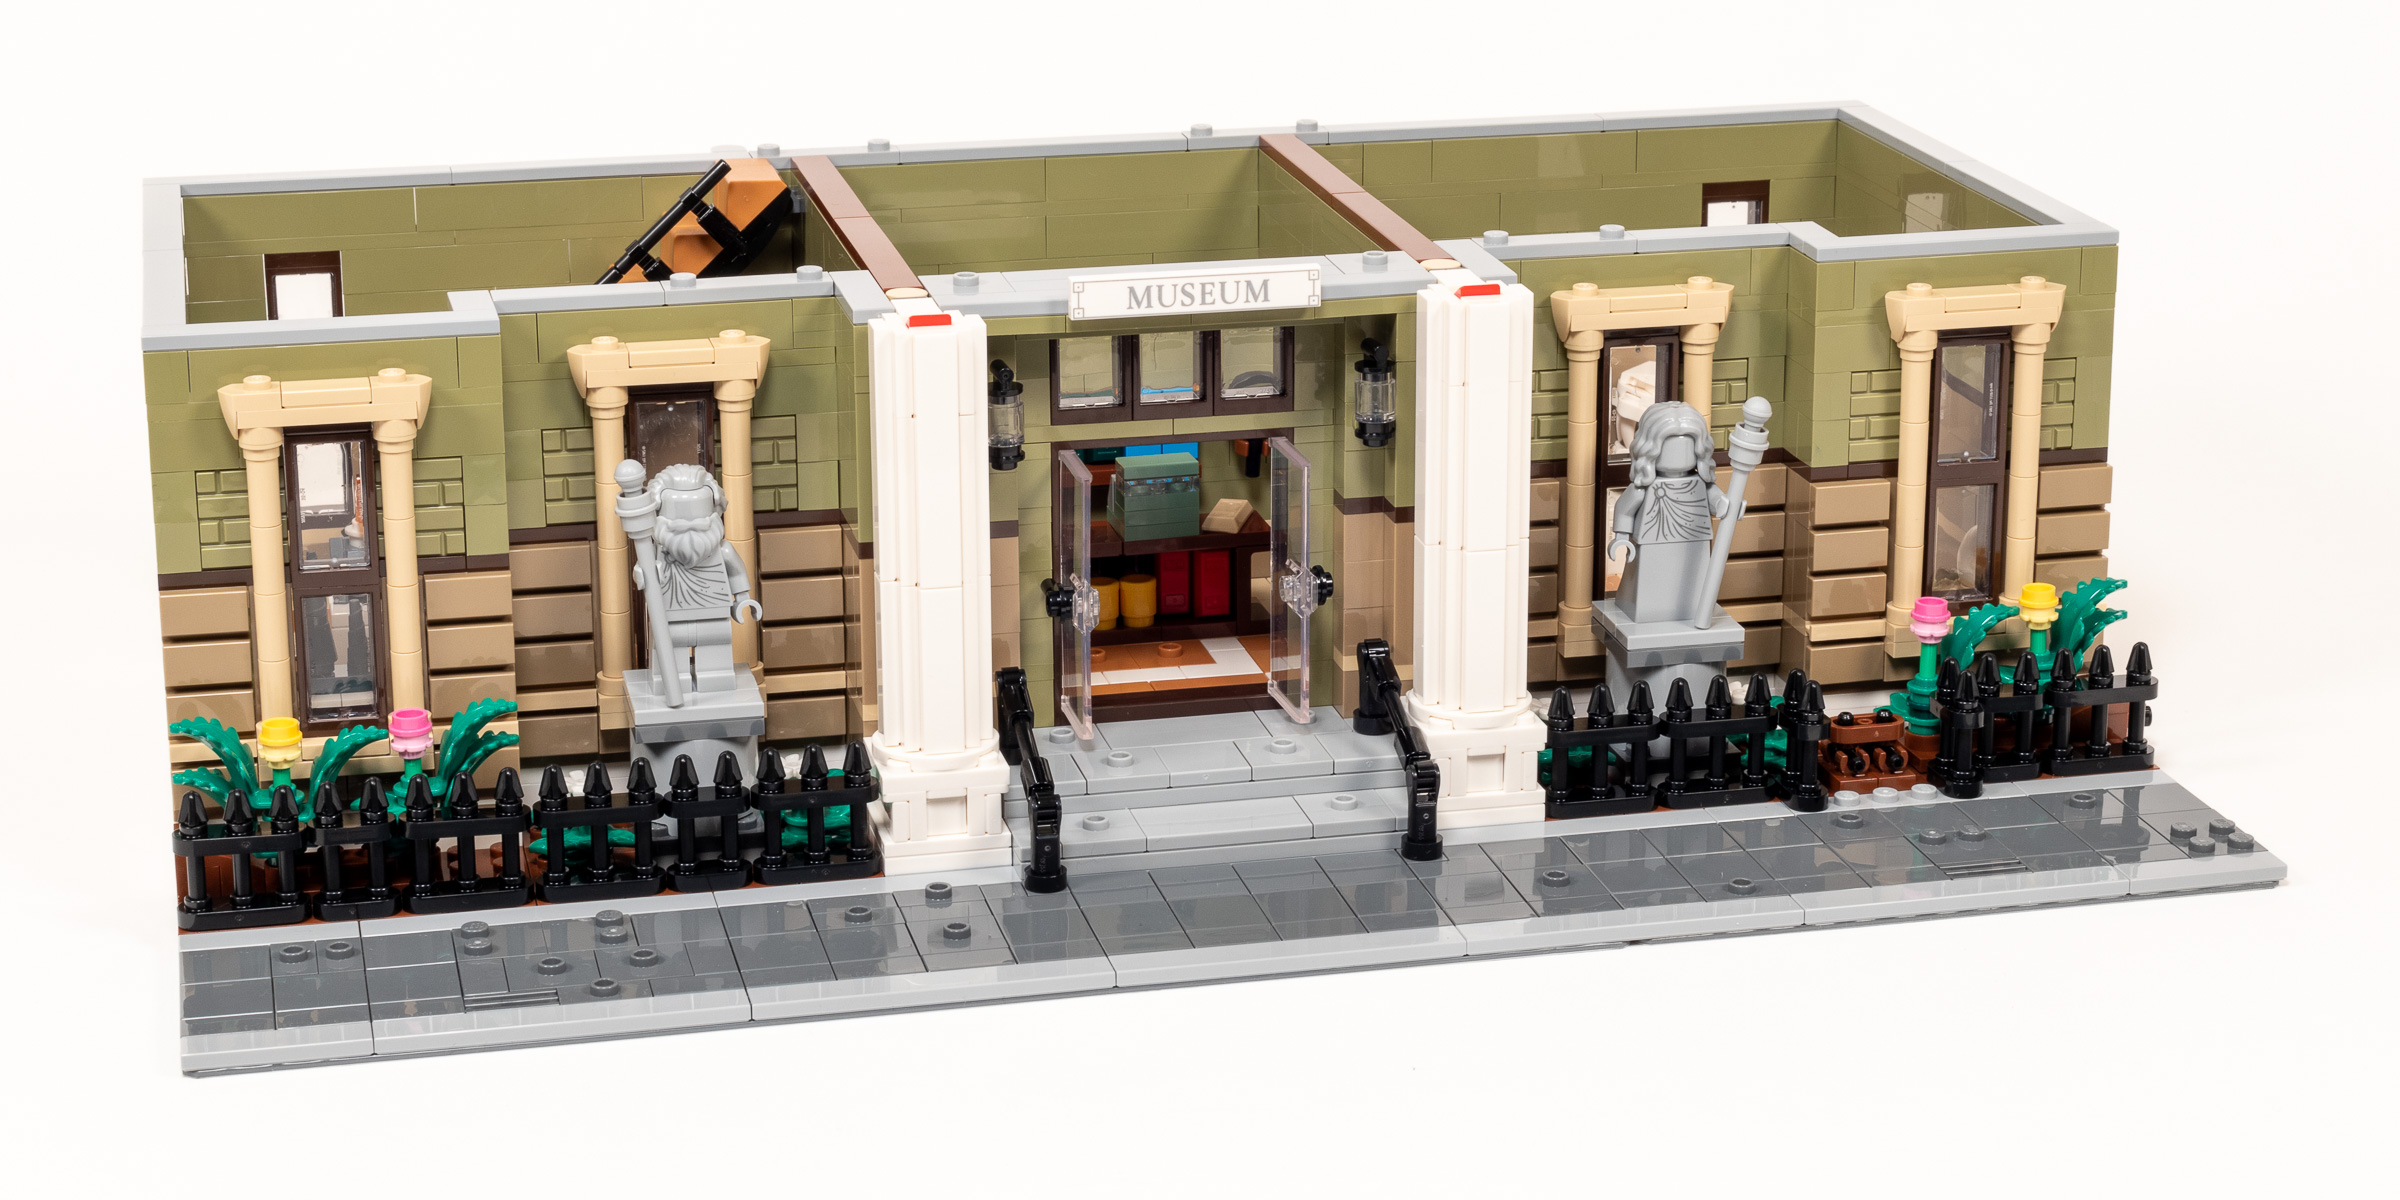
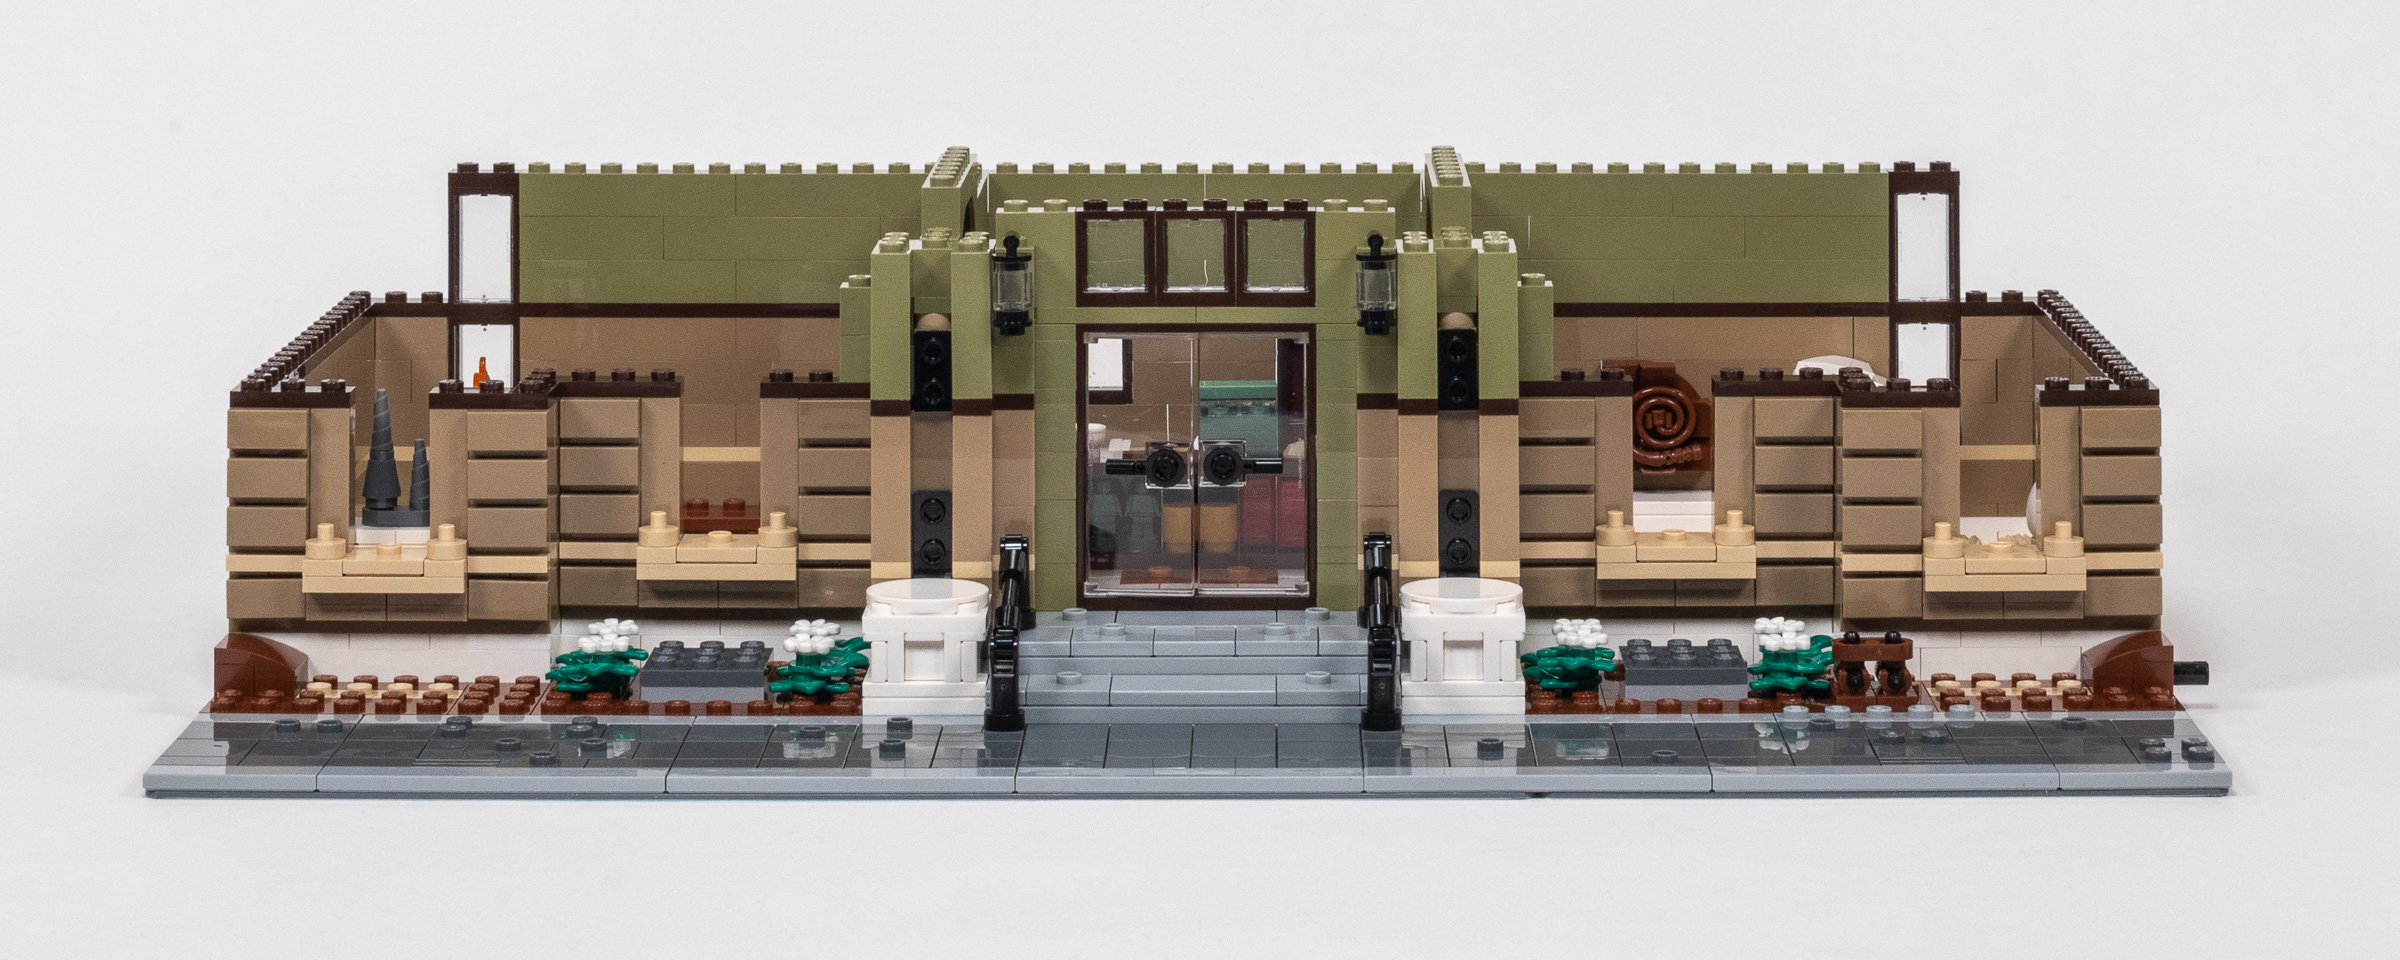
The first floor is complete!
Build time: 116 minutes. (Bag 5: 16 minutes, Bag 6: 11 minutes, Bag 7: 13 minutes, Bag 8: 11 minutes, Bag 9: 13 minutes, Bag 10: 9 minutes, Bag 11: 11 minutes, Bag 12: 13 minutes, Bag 13: 19 minutes.)
Bag 14: Dinosaur Skeleton
This bag is notable as it results in a complete standalone model. While you are encouraged to put it where it belongs on the right-side of the ground floor, it also looks good on it’s own. I set this one aside to build with my 5-year old son who loves dinosaurs.
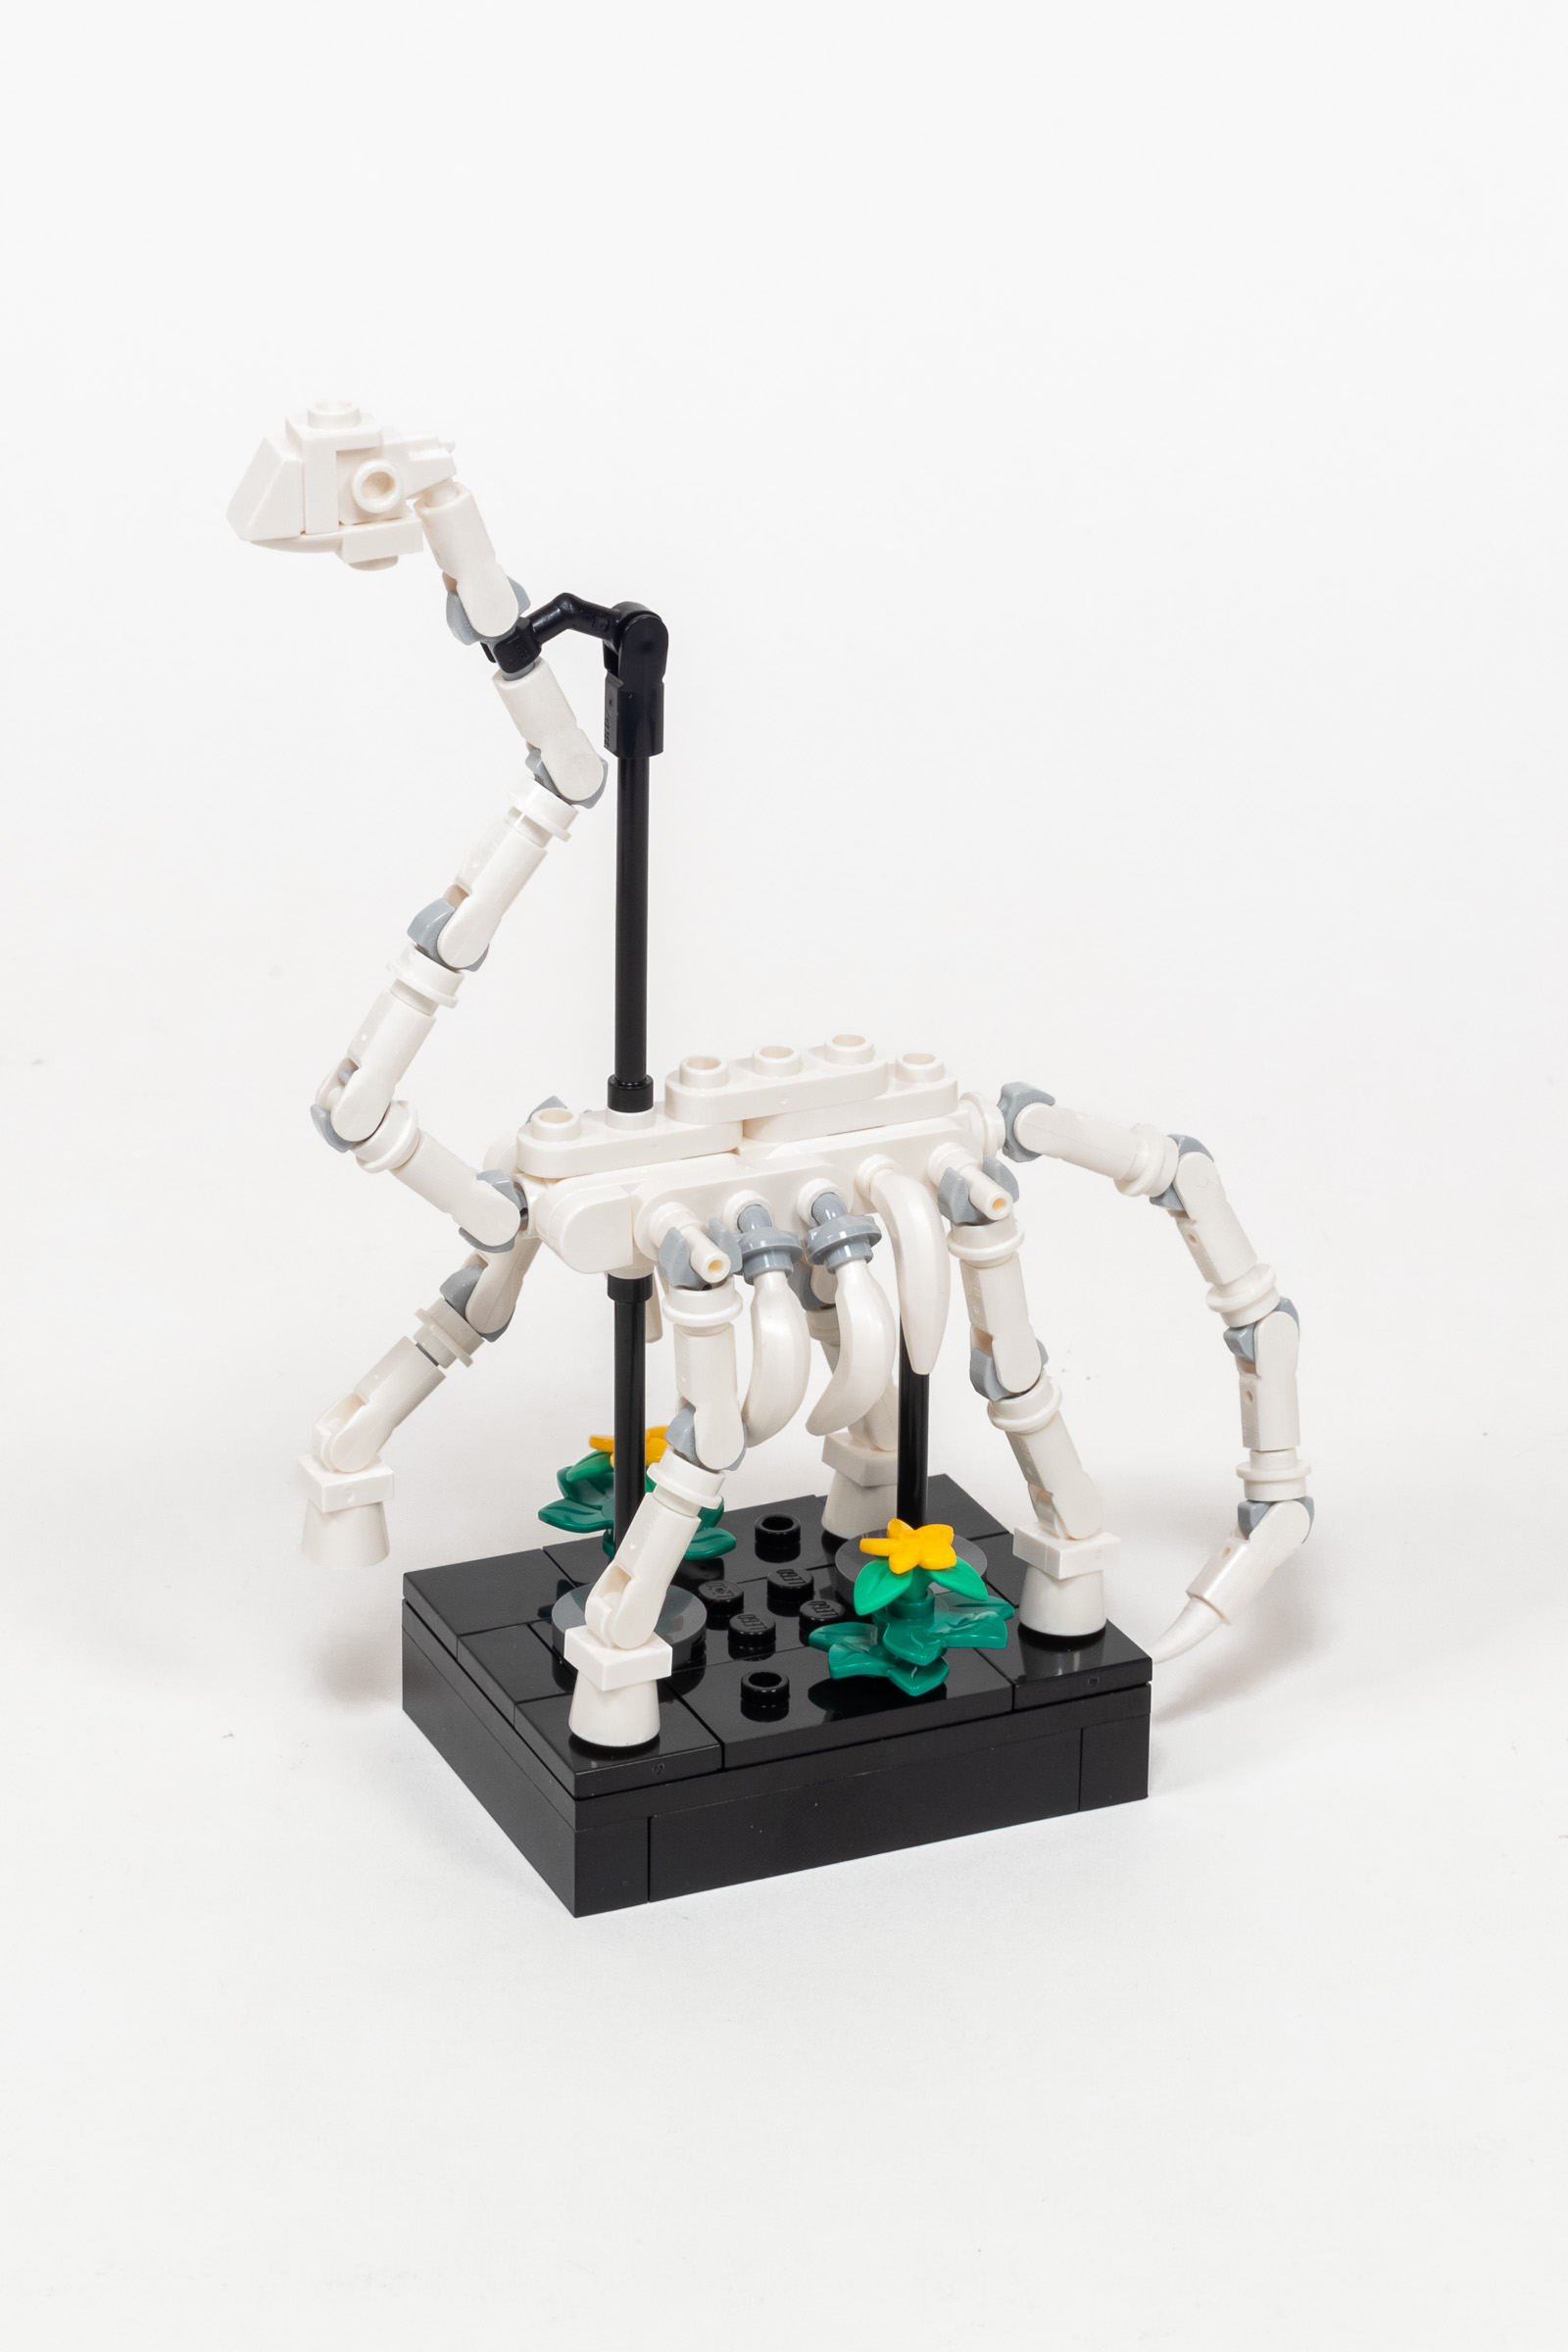
The Dinosaur skeleton is a standalone build, but fits perfectly on the first floor of the museum.
Due to the small size, it is a pretty intricate build, with lots of small parts attached using clips to create poseable legs and tail. It is very large, tall enough to exceed the height of the first floor. We’ll have to see how this is handled as we move on to the second floor.
Build time: 16 minutes.
Second floor and roof
We already used the parts which came in a smaller box, so it’s time to continue building with all of the bags that we found loose in the outer box.
Bags which are loose in the outer box:
- Bag 15: 1x large bag (marked 638S3).
- Bag 16: 1x large bag (marked 638S3).
- Bag 17: 1x medium bag (marked 438S3).
- Bag 18: 1x medium unmarked bag.
- Bag 19: 1x small unmarked bag.
- Bag 20: 1x medium bag (marked 438S3).
- Bag 21: 1x medium bag (marked 638S3).
- Bag 22: 1x large bag (marked 438S3).
- Bag 23: 1x small bag (marked 438S3).
- Bag 24: 1x small unmarked bag.
- Bag 25: 1x extra-large bag (marked 438S3).
- Bag 26: 1x large bag (marked 638S3).
- Bag 27: 1x medium unmarked bag.
- Bag 28: 1x medium unmarked bag.
- Bag 29: 1x large bag (marked 438S3).
- Bag 30: 1x medium unmarked bag.
- Bag 31: 1x medium bag (marked 438S3).
- Bag 32: 1x large bag (marked 638S3).
- Bag 33: 1x medium bag (marked 538S3).
Bags 15-24: Second Floor
The base for the second floor is even simpler and more symmetrical than the first floor. It only took a couple minutes to finish bag 15 and begin the next bag. Bag 16 continues to be largely symmetrical, adding a layer of plates and bricks to the walls, the bottom edge of four window frames along the front of the moder, and a semi-circular railing in the middle.
Progress after bags 15 and 16.
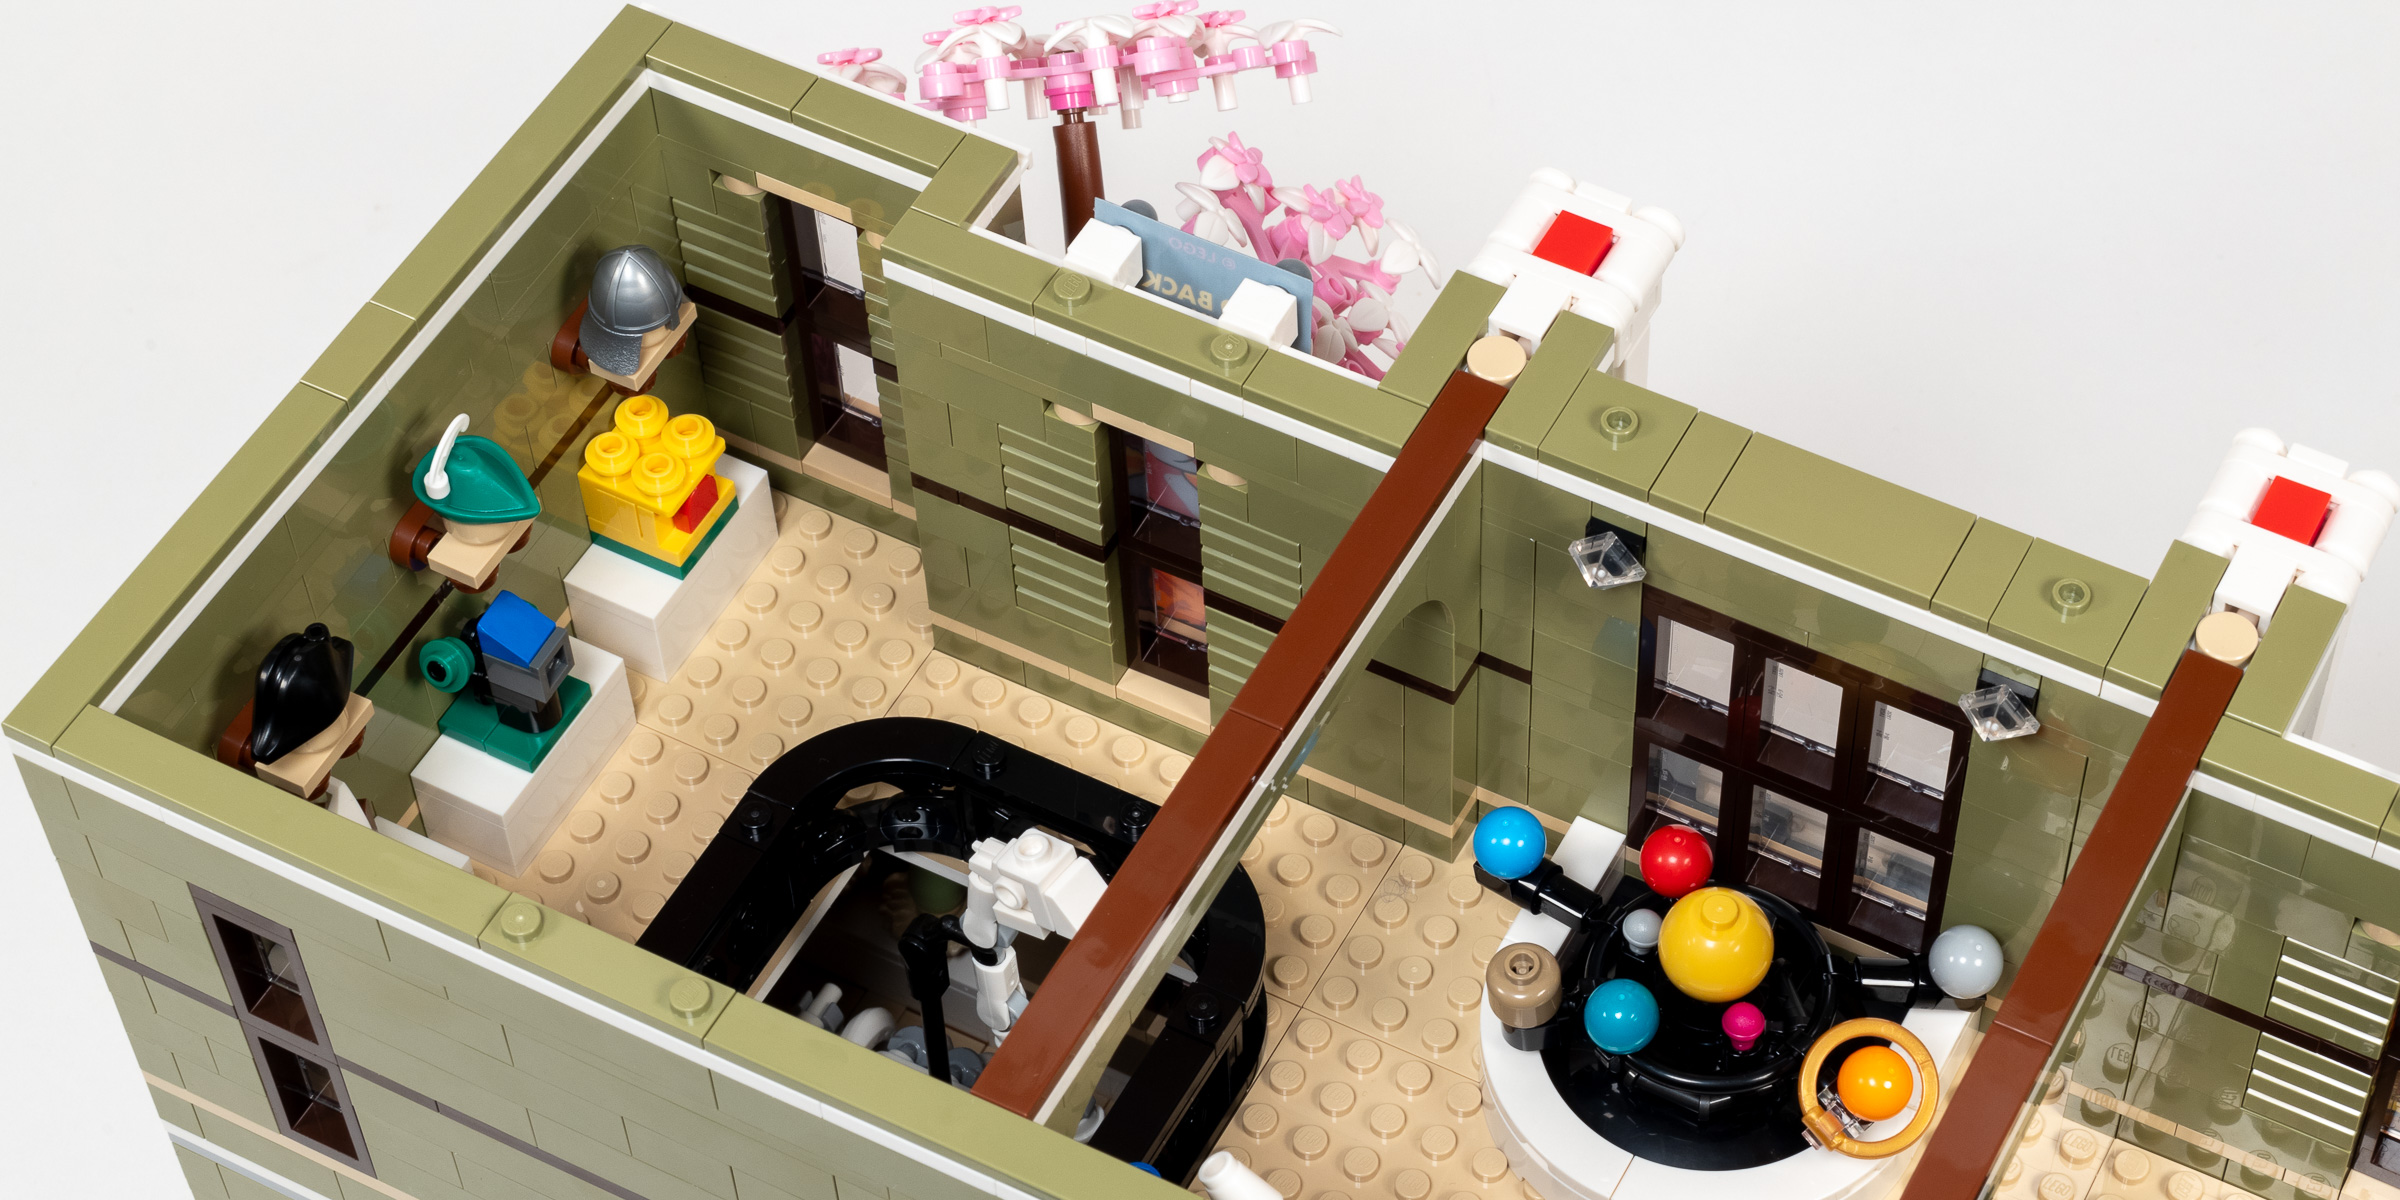
The seventeenth bag continues with another layer of boring walls, but finishes with a really nice sub-assembly representing the 8 planets of our solar system. They aren’t quite to scale (Jupiter is the same size as Earth) but the color offers an adequate clue about which planet is which. I think this looks really good and sets the stage for other space-themed details in the second floor.

Sub-assembly representing the Solar System.
Bag 18 adds a series of delightful nanoscale displays to the second floor. Four of the models re-create classic LEGO sets and themes using fewer than a dozen pieces each. We also build tables containing a meterorite and a space shuttle.
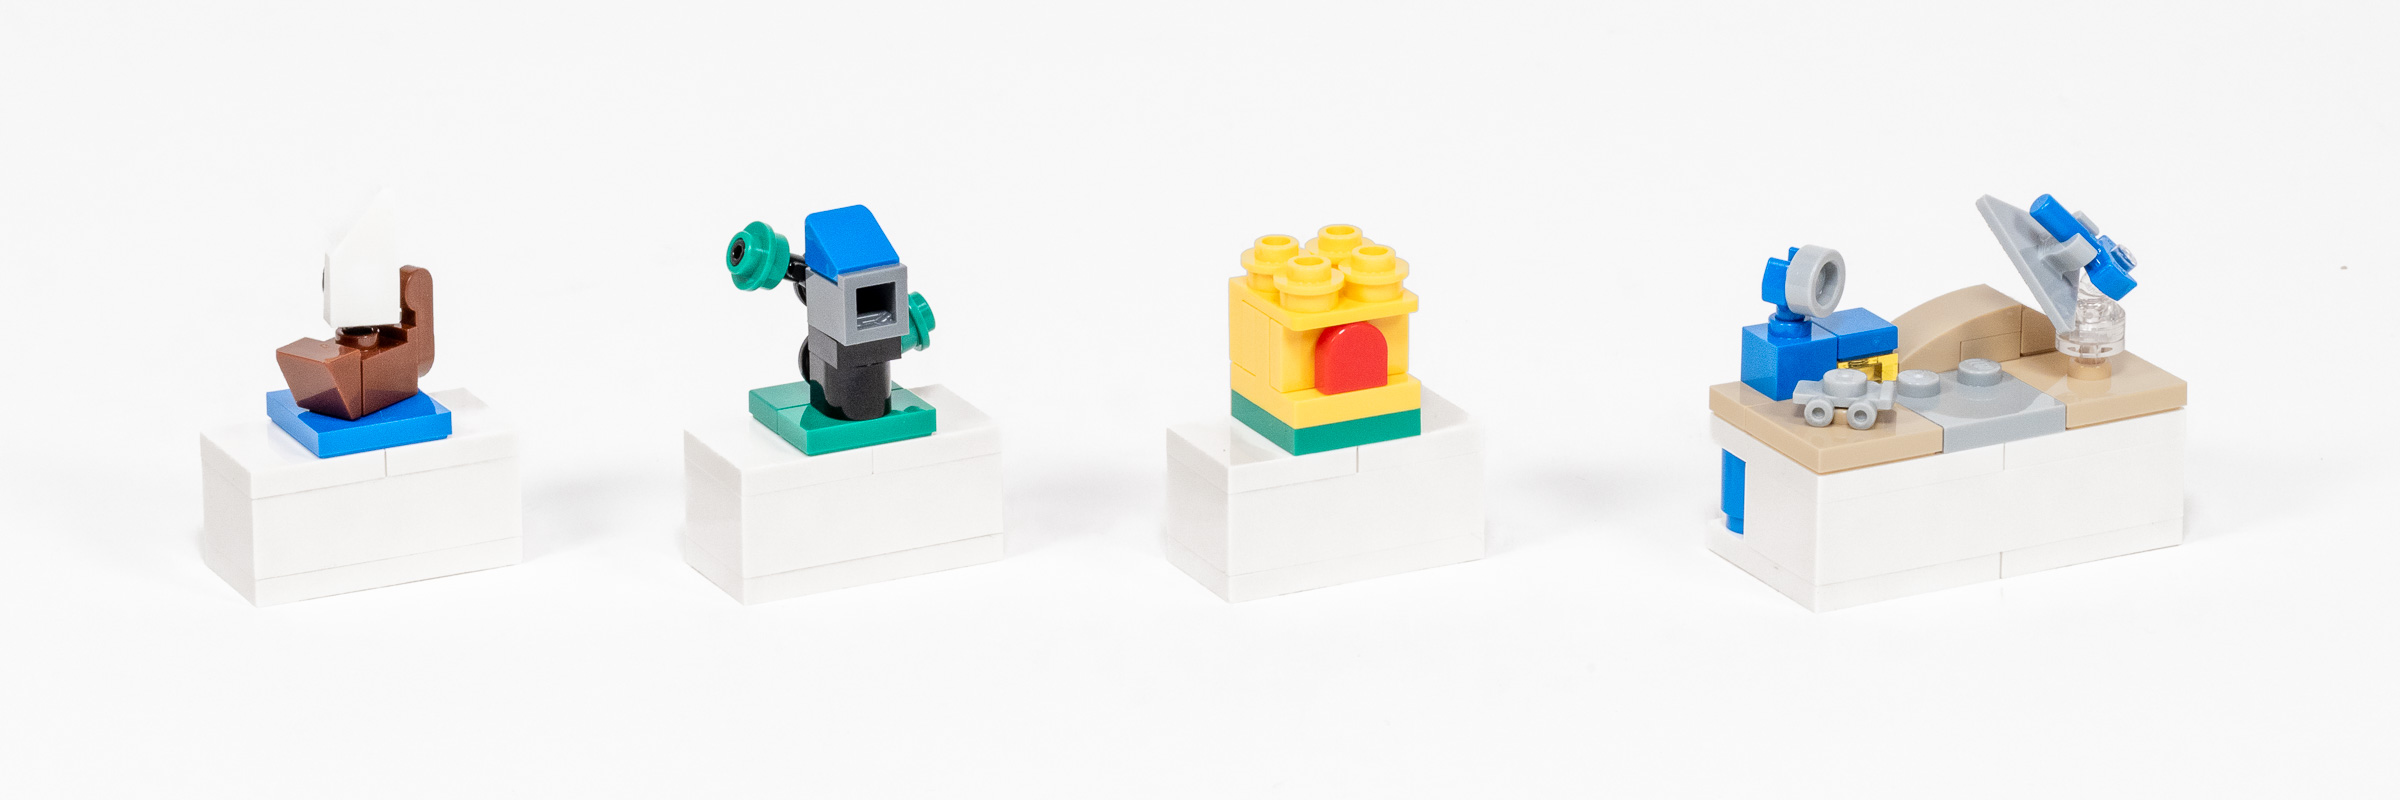
Vignettes based on classic LEGO sets.
The four vignettes are based on:
- Classic Pirate ship (1989’s #6285 Black Seas Barracuda)
- Forestmen Hideout (1988’s #6054 Forestmen’s Hideout)
- Castle (1978’s #375 Yellow Castle)
- Classic Space (1979’s #497 Galaxy Explorer)
We continue adding basic bricks and plates in Bag 19 and Bag 20. I enjoyed building a large map of the world showing the path of a rocket over it. We also add the windows to the second floor, and another arched section strengthening the walls of the second floor.
Progress at end of Bag 20.
Bag 21 continues adding walls, with a brief interruption to add two decorations that are attached high on the right and left walls. On the left side, we get an old-fasioned brass telescope, and on the right we get unambiguous nods to the three classic LEGO themes I already highlighted, in the form of a Pirate hat, Forestmen’s hat, and Castle helmet – all directly above the LEGO models they relate to.
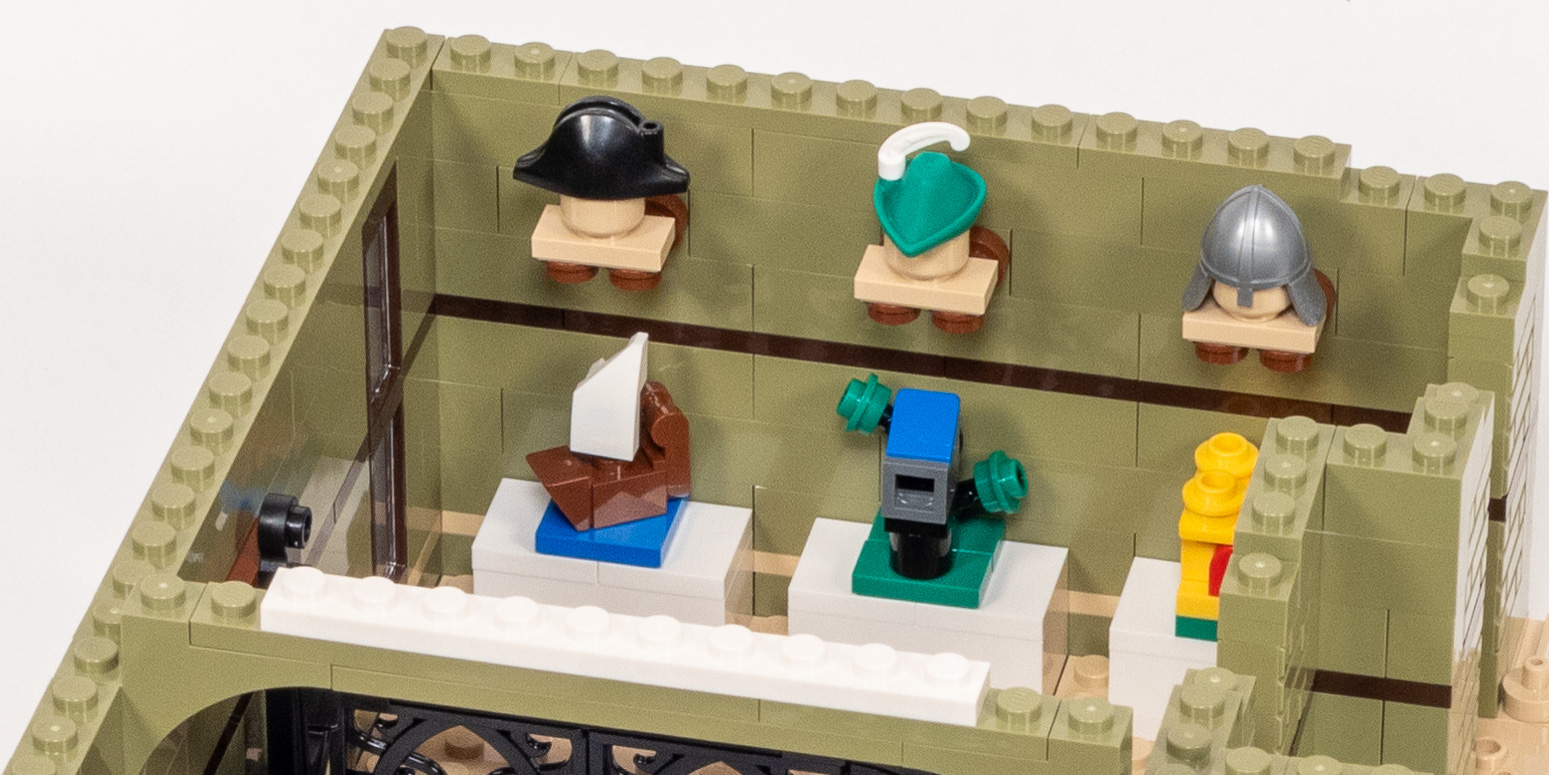
Pirate hat, Forestmen’s hat, and Castle helmets hanging on the wall.
Bag 22 is another straightforward process, adding the windows and columns that are nearly identical to the ground floor in style and technique, except for a different treatment on top of each window. We continue with another laywer of bricks and plates to make the walls taller.
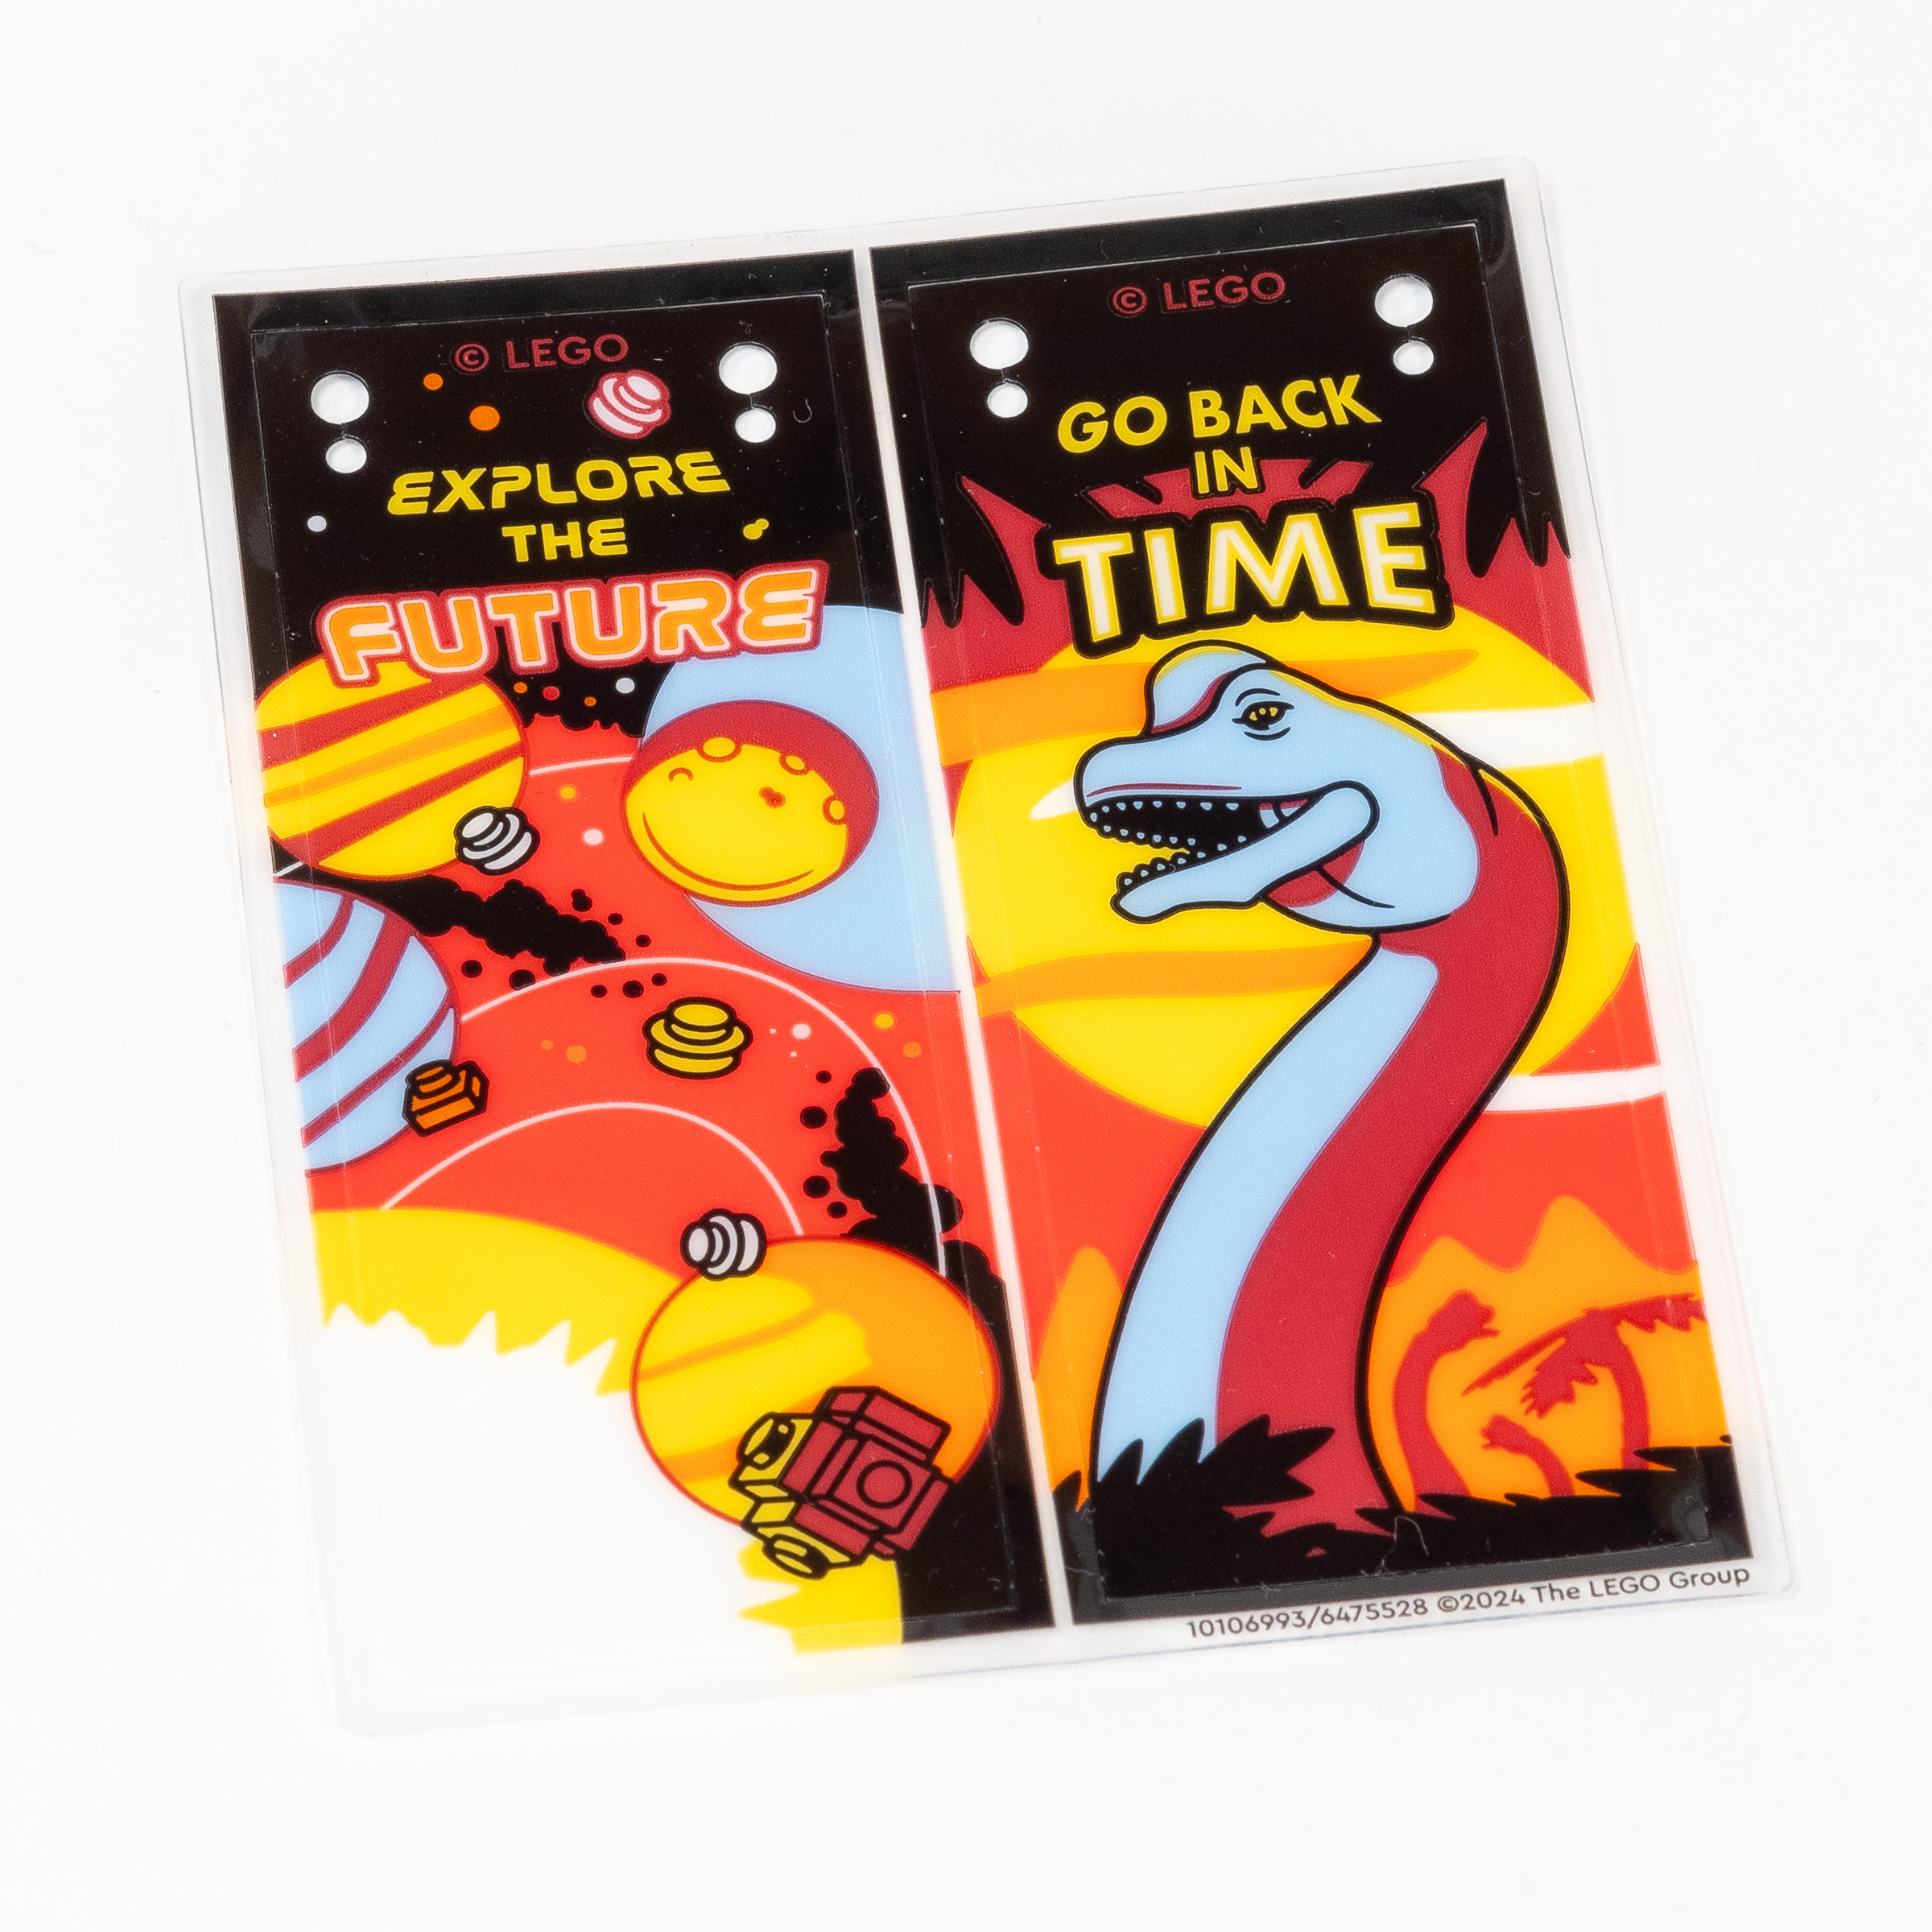
Instead of stickers or printed tiles, this set uses large vinyl banners to decorate the building exterior.
Bag 23 applies smooth tiles to the top edge of this floor. We add another staircase directly above the one on the ground floor, using the same building techniques. We finish up this stage by carefully puching out the vinyl banners, which are attached to the front facade using Towball with Bar (part 22484), which can be carefully inserted without bending the vinyl at all.
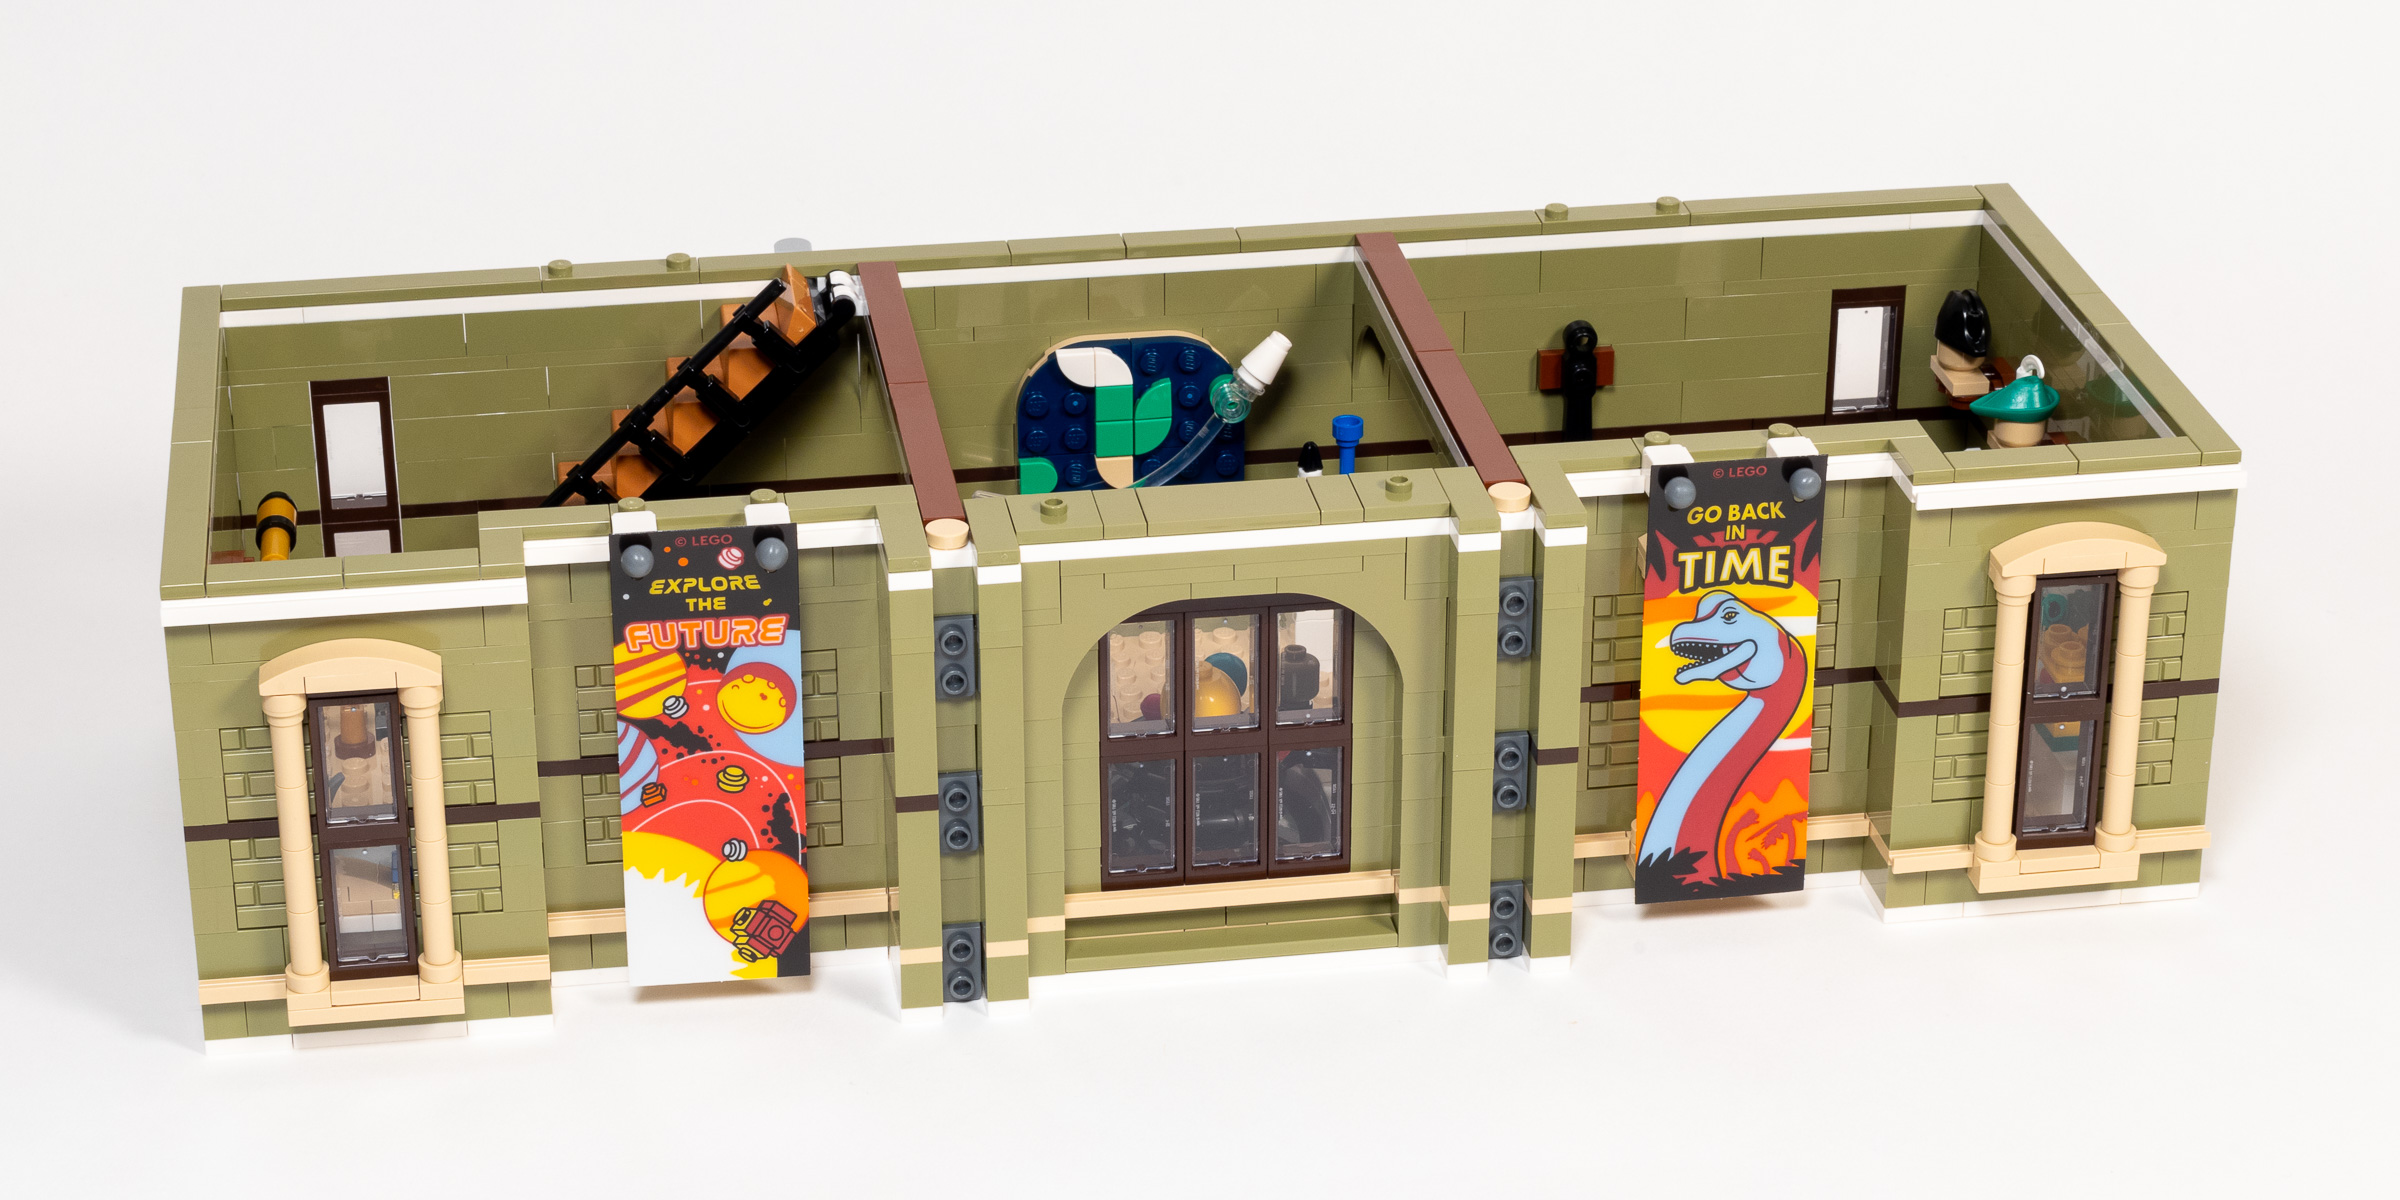
Vinyl banners hanging from the front of the building.
We finish the second floor in the 24th bag, which is a quick one… Here we create the top half of the massive white columns on the front of the building. This one is a bit different from the lower floor. They are Ionic Columns, which you can identify based on the spiral-shaped scrolls on the top of each column.
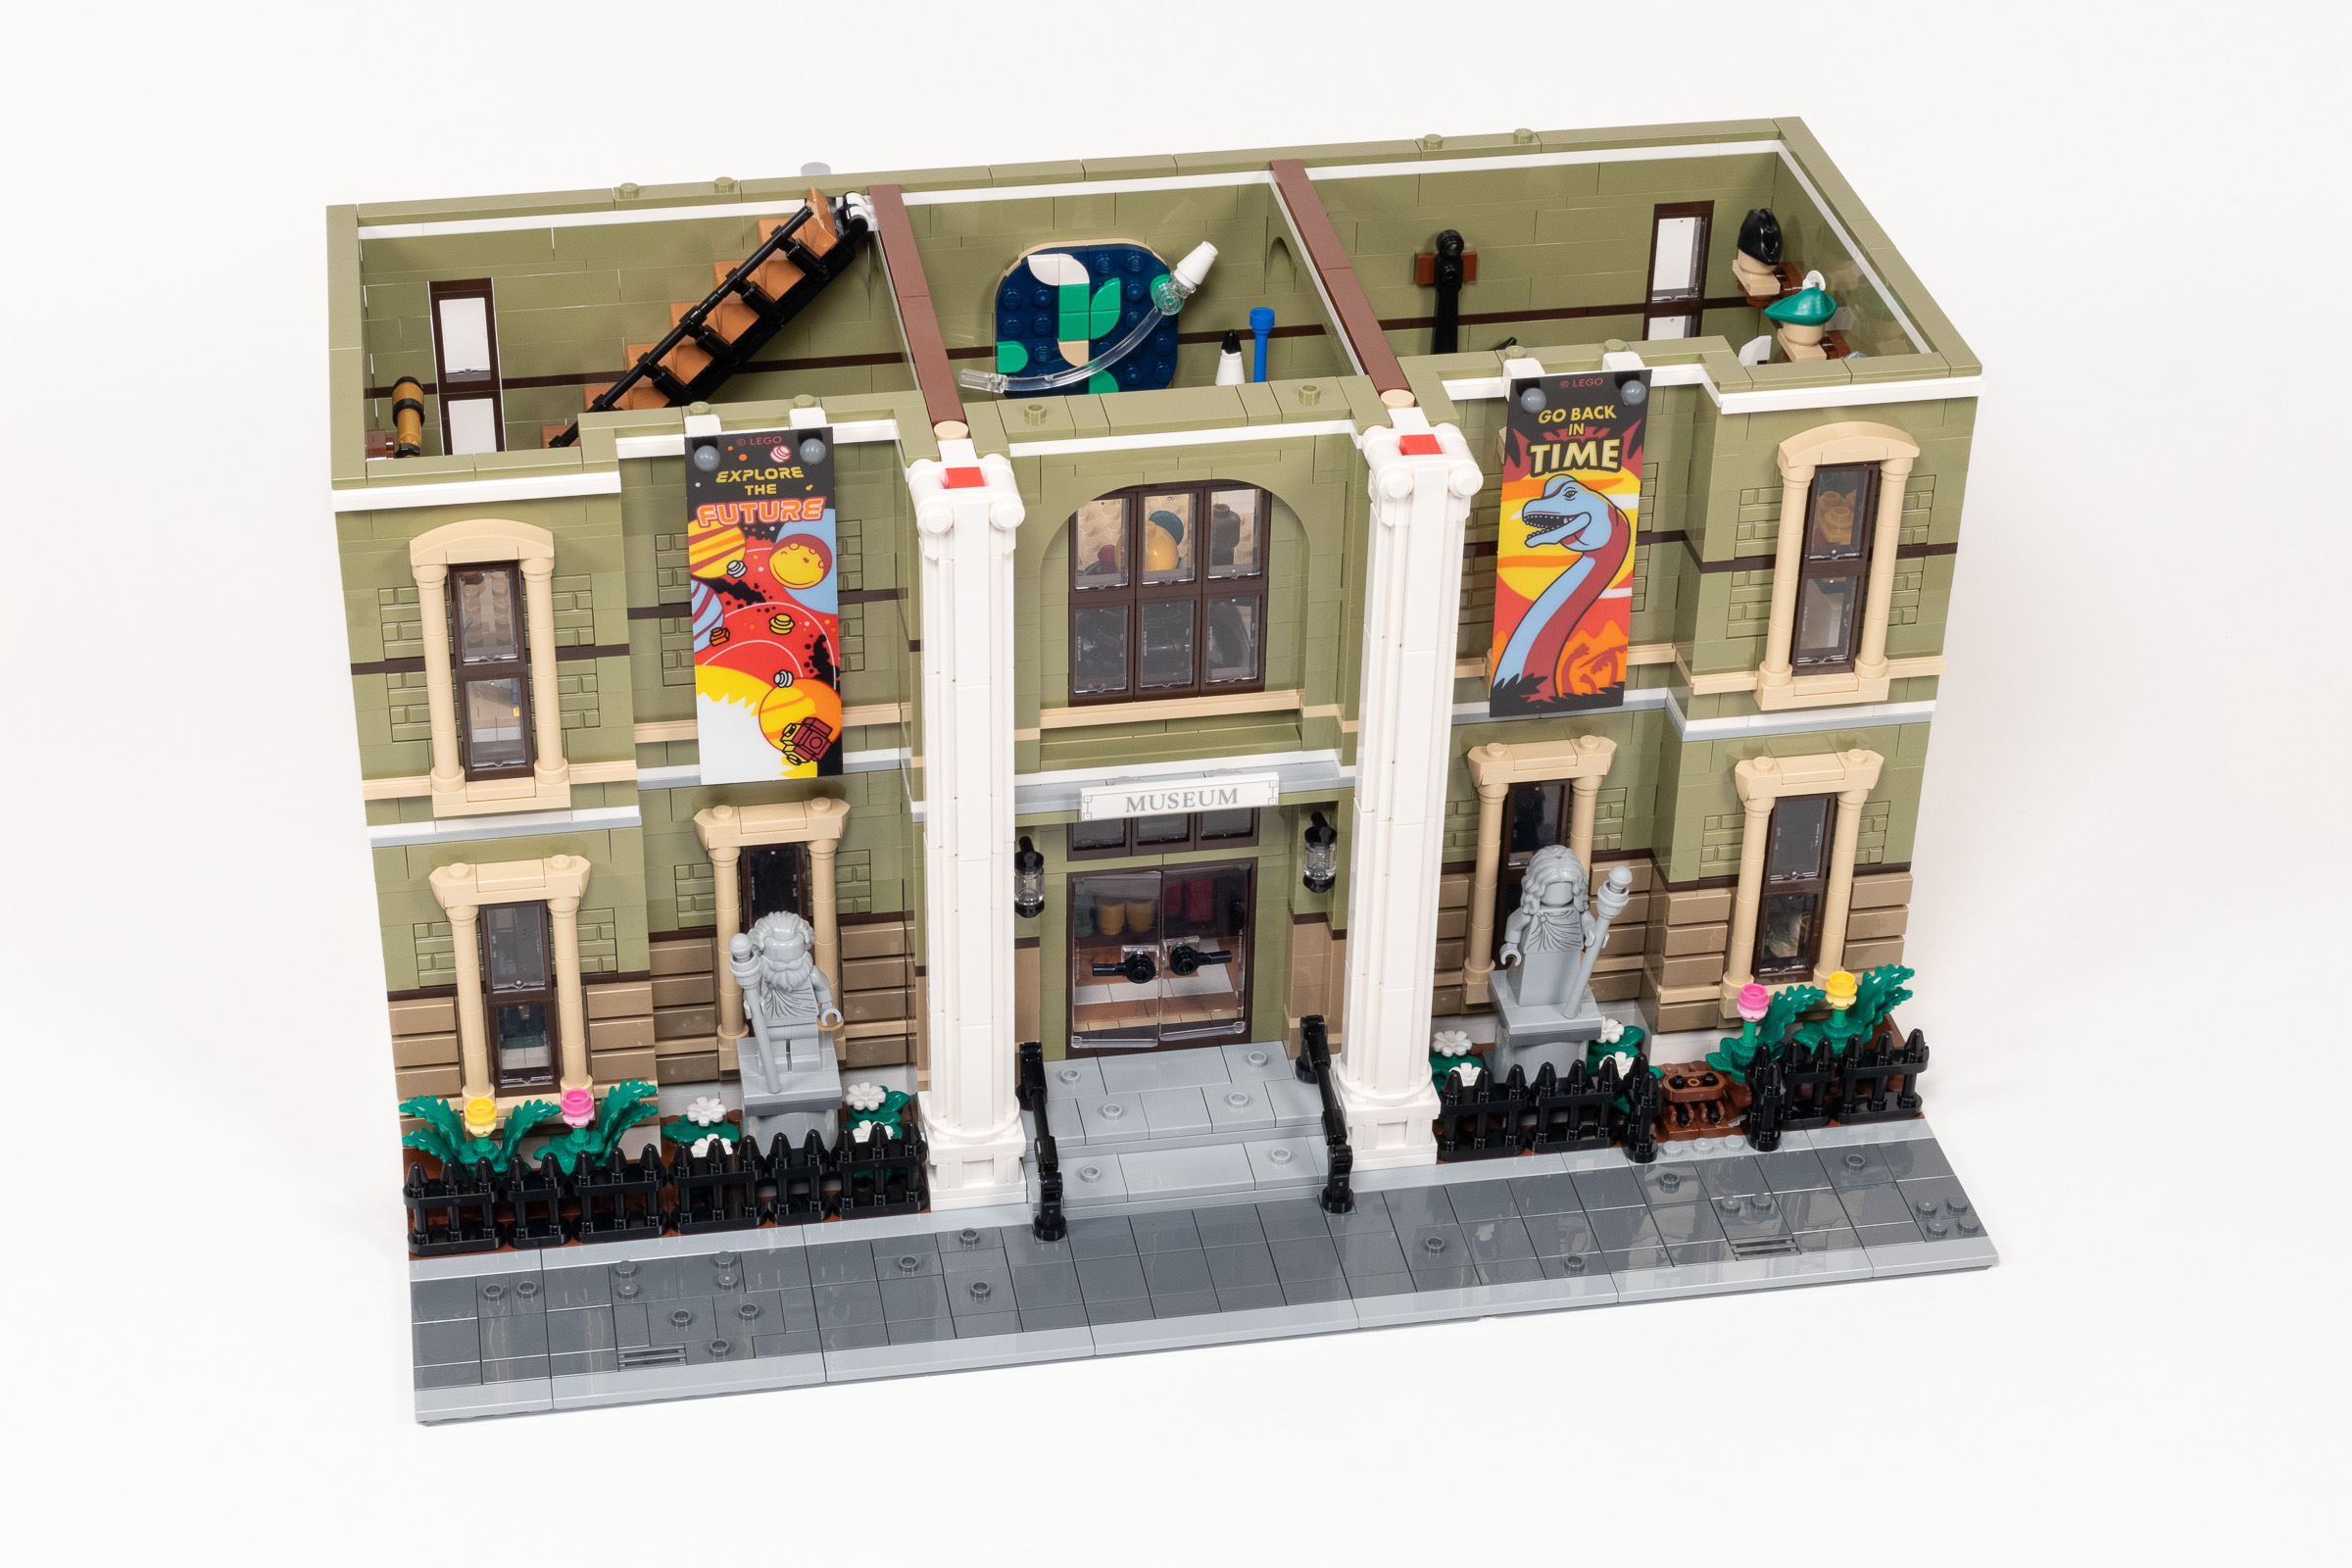
Stacking the second floor on top of the first floor to see the tall columns in place.
What is striking after completing the second story (and placing it on top of the ground floor) is how tall the model already is. This has a striking presence compared to recent additions to the Modular Building Series, due to the fact that we have a large nearly-uninterrupted rectangular mass of a single color. The white colums look very stark on top of the dark exterior, but this is consistent with the style and doesn’t actually break up the space because I am so used to seeing columns in front of large buildings. I am quite eager to see how the roof ties it all together, as well as seeing how much the tree on the right side of the model breaks up the composition.
Build time: 90 minutes. (Bag 15: 4 minutes, Bag 16: 9 minutes, Bag 17: 11 minutes, Bag 18: 11 minutes, Bag 19: 7 minutes, Bag 20: 10 minutes, Bag 21: 11 minutes, Bag 22: 12 minutes, Bag 23: 9 minutes. Bag 24: 6 minutes.)
Bags 25-32: Roof
The first bag of the roof flies by, quickly assembling a simple rectangular frame with a couple cutouts. We continue with Bag 26 where we add some structural integrity to the module, as well as what looks like a small room which is emerging in the middle of the roof. Another surprise was the two small plants with 226Cool YellowBright Light Yellow flowers on either end. I suspect that they will be visible trough the skylight which we haven’t built yet.
We frame out the roof in Bags 25 and 26.
BNag 27 adds a nice trim detail along the edge of the roof, this time involving a row of 1×2 Gold Ingots (part 99563) in 1White, which are tucked inbetween a pair of Door Rails. We also begin to add the 199Dark Stone GreyDark Bluish Gray slopes that will comprise the Mansard Roof. Lastly, we carefully install a door that is facing upward, which I expect will be the only safe way to access the roof.
Progress at end of bag 27.
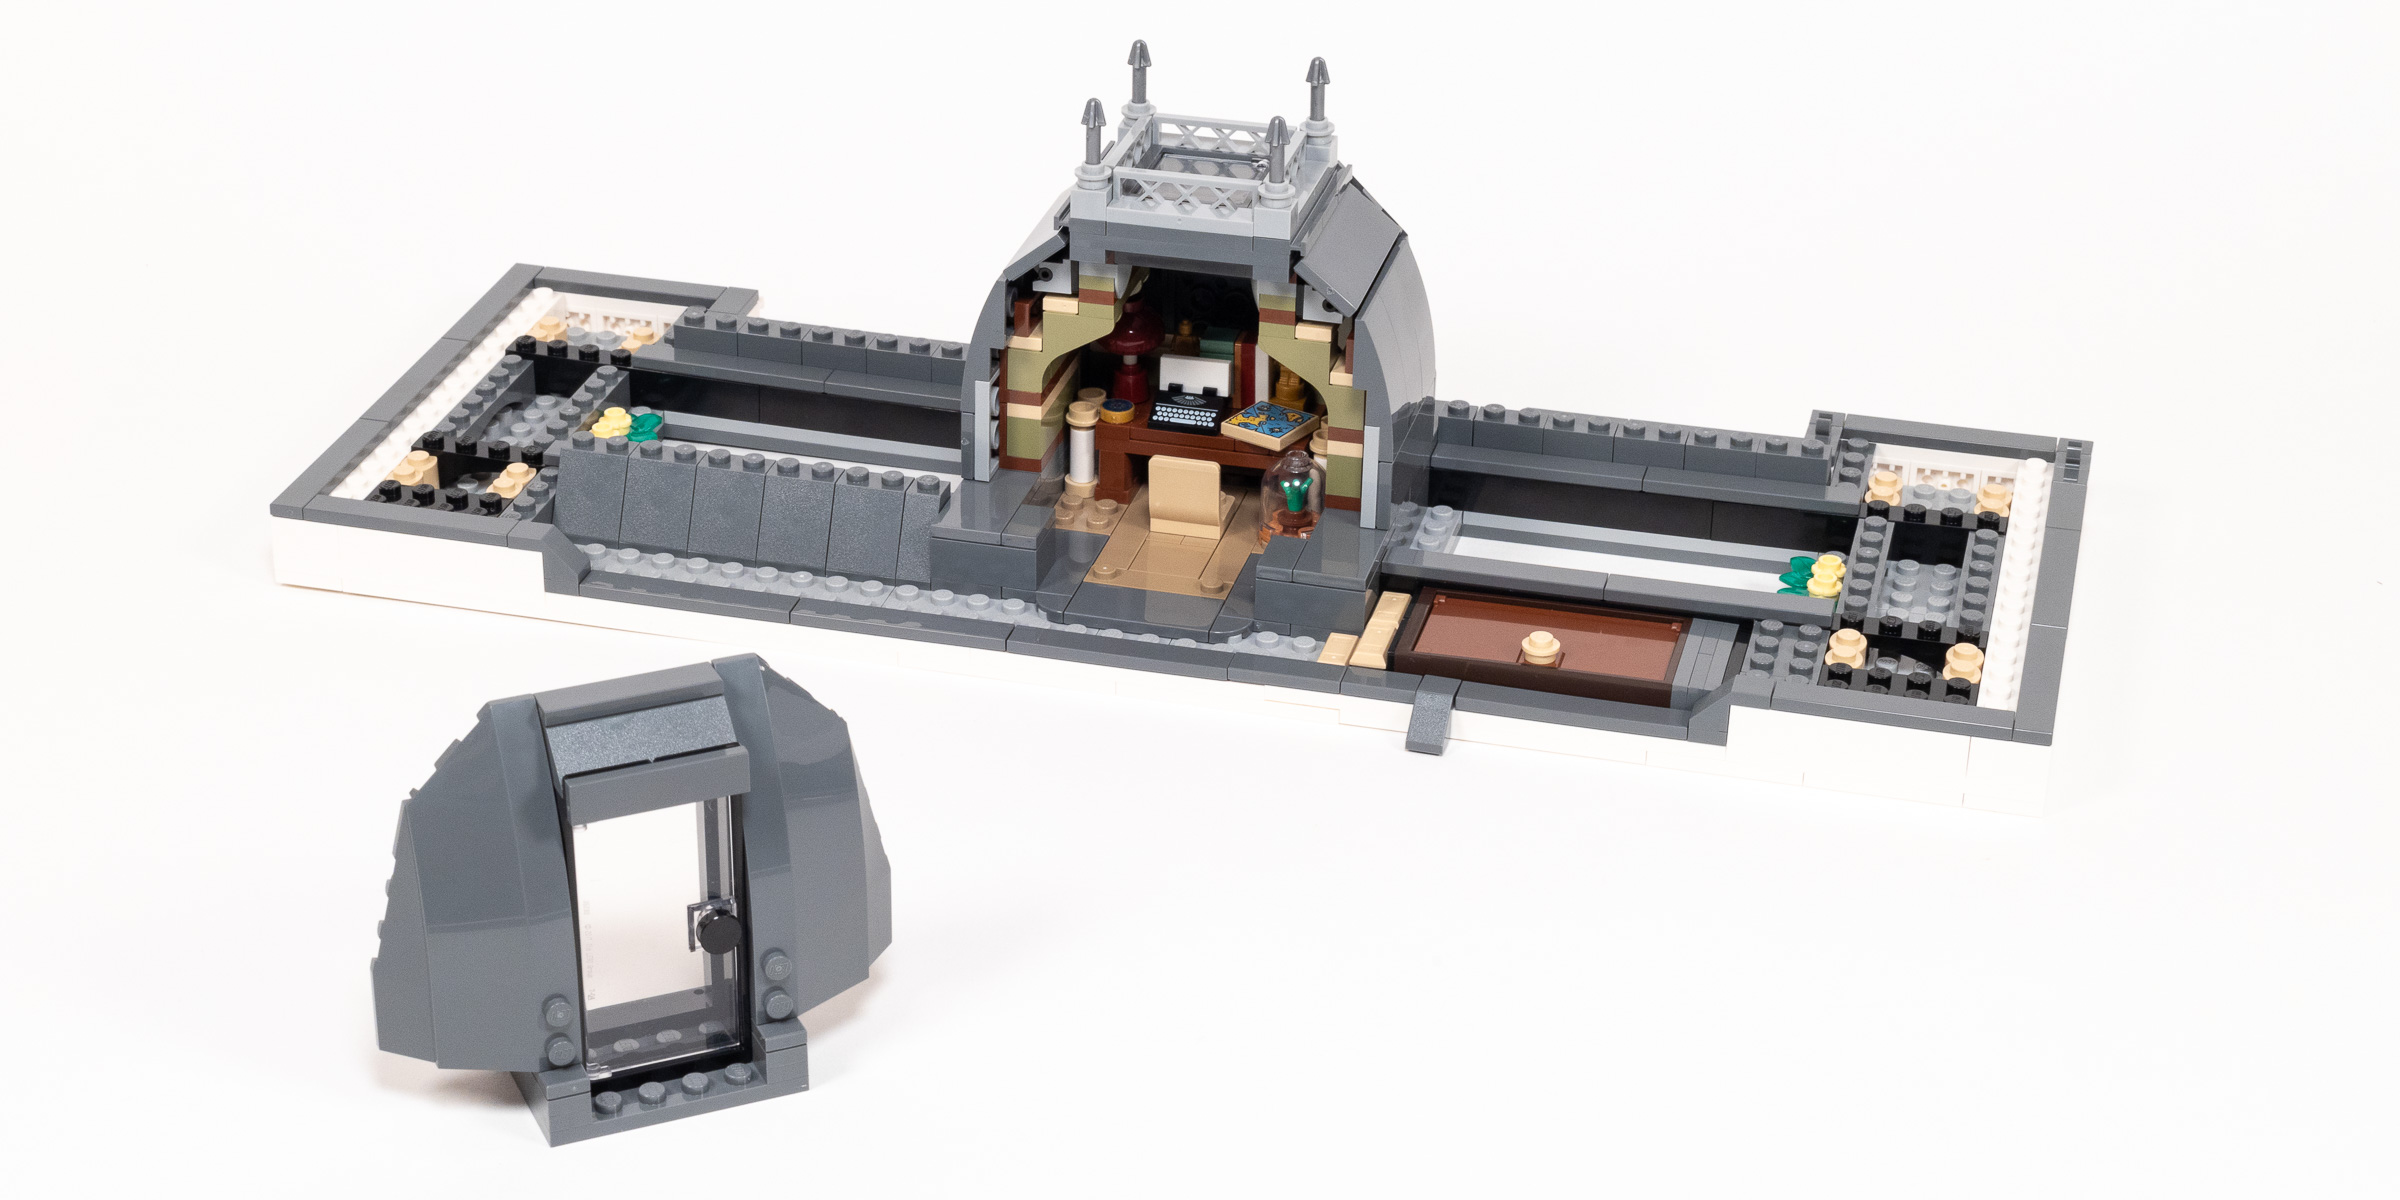
Thiggs get more interesting in Bag 28, where we begin by creating a cute desk that is overflowing with books, statues, and a typewriter. As we begin surrounding this with walls, we see that this is a very small room for the curator to plan future exhibits. The instruction booklet tells us that this character is a reference to earlier sets, specifically the Palace Cinema.
Desk for the curator (left) and supporting text in the instruction booklet (right).
The 29th Bag finishes enclosing that small rooftop room. It has a door in the back, but that module is removeable so you can actually reach inside to put a minifigure in the small room. I also like the harpoon points decorating the four corners of the central roof.
You can open the door or remove the whole panel to access the small room on the third floor.
We add a lot more to the mansard roof in Bag 30. This includes some really nice detailing on the four corners of the building, plus a tiny statue in an arched niche on both sides of the front.
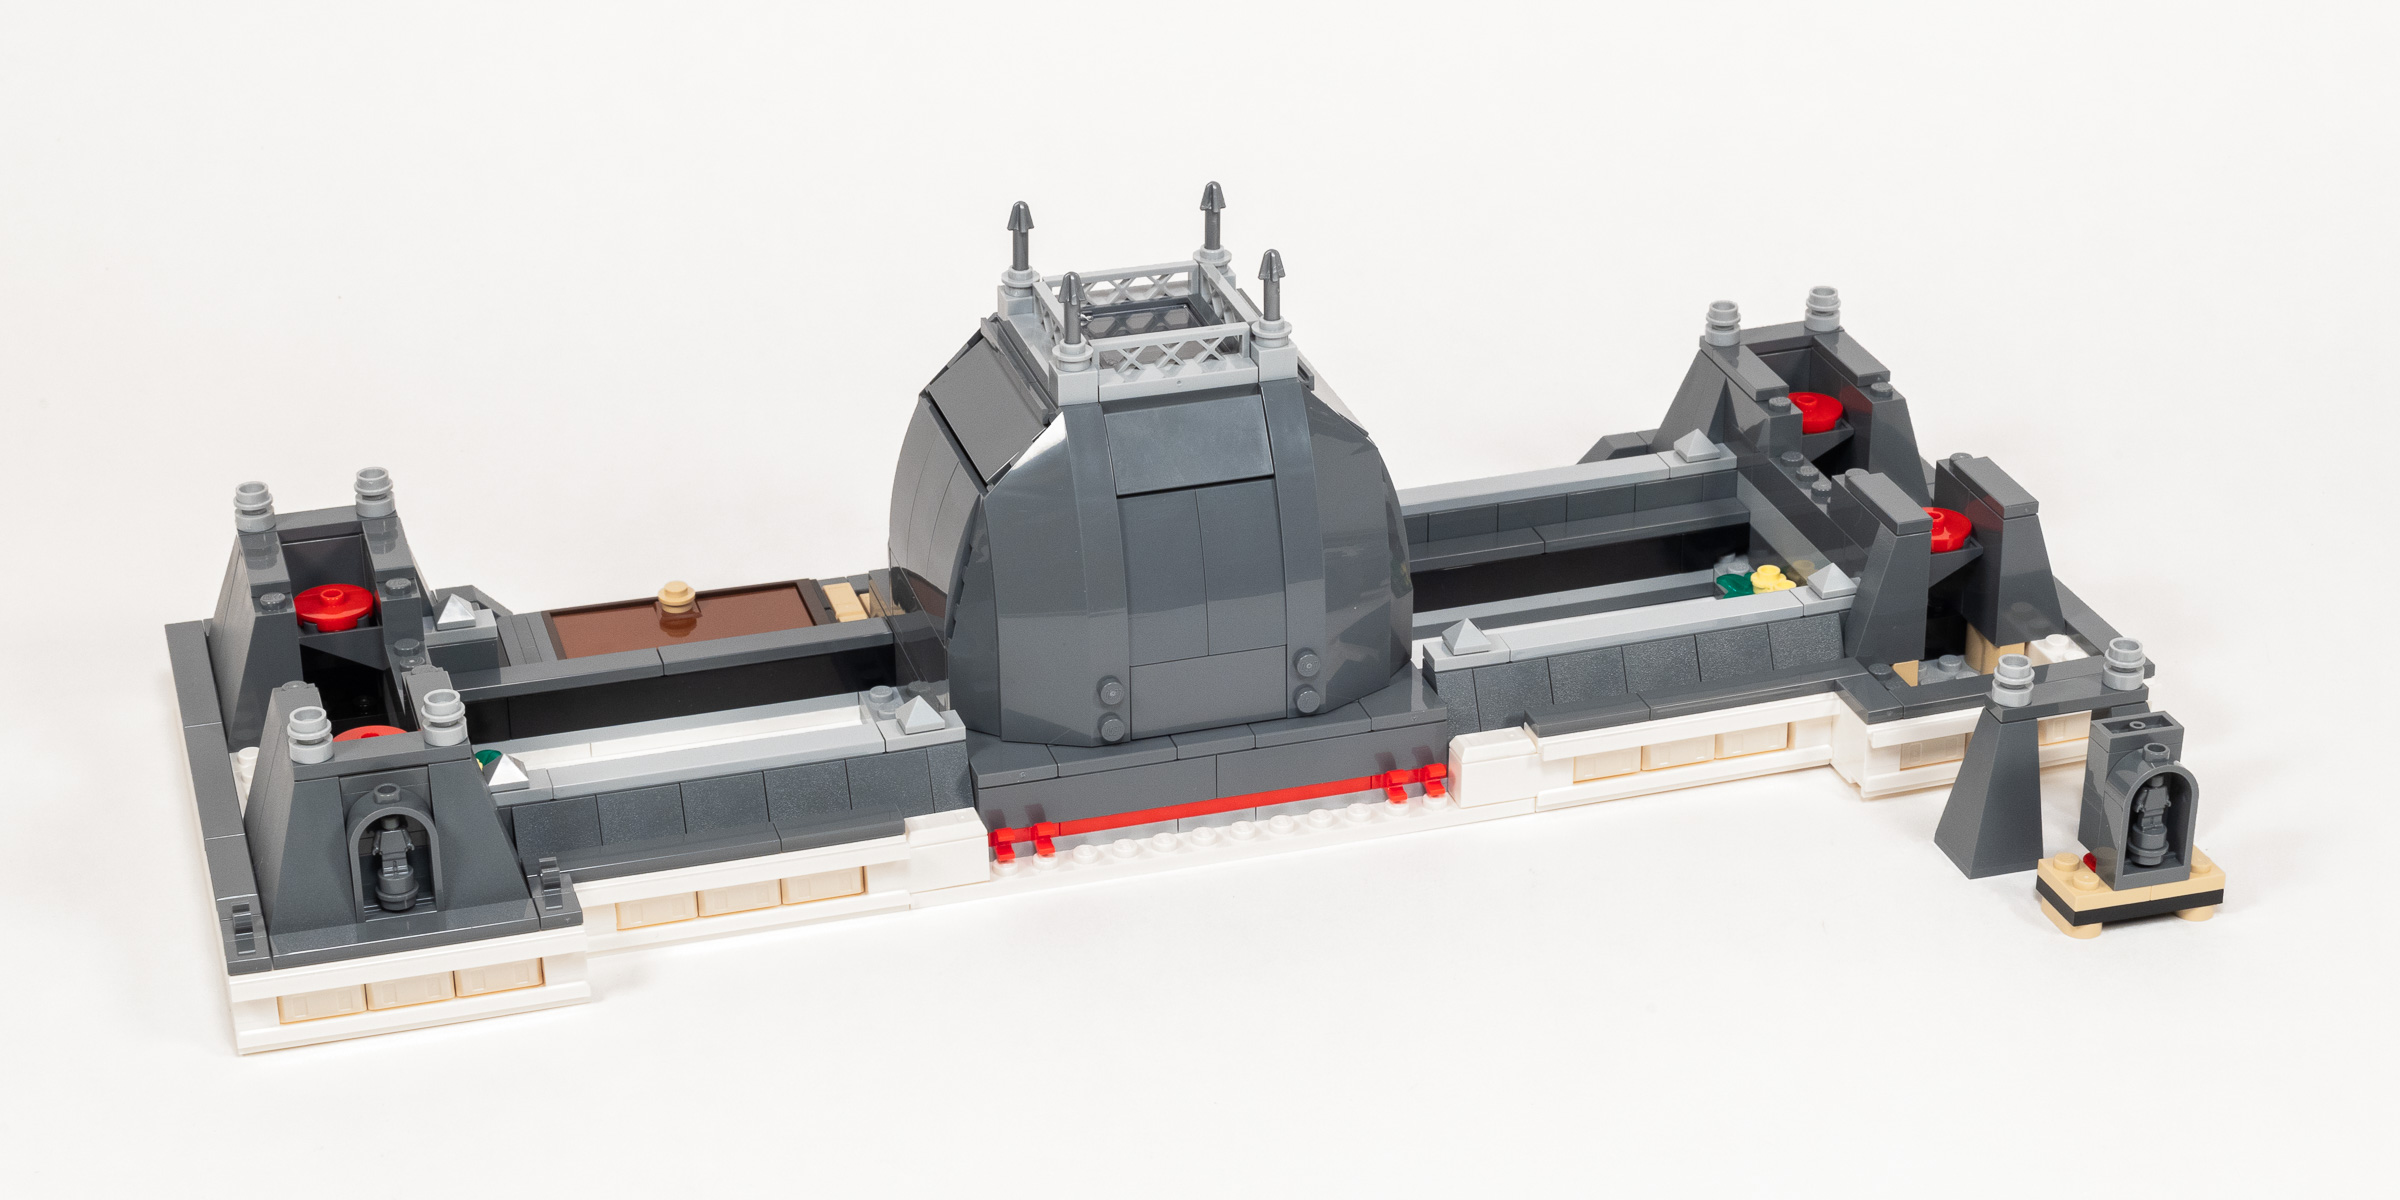
The roof has small niches with a statue on both side.
Almost there! Bag 31 focuses on the two large glass skylights which would bathe natural light onto the exhibits on the two floors below. They are really sturdy assemblies which are built using a ton of small 2×2 window panes, using both the rectangular and curved window frames. After this, we build a cute vintage telescope that is accessible on the rear side of the roof, opposite the door accessing the roof.
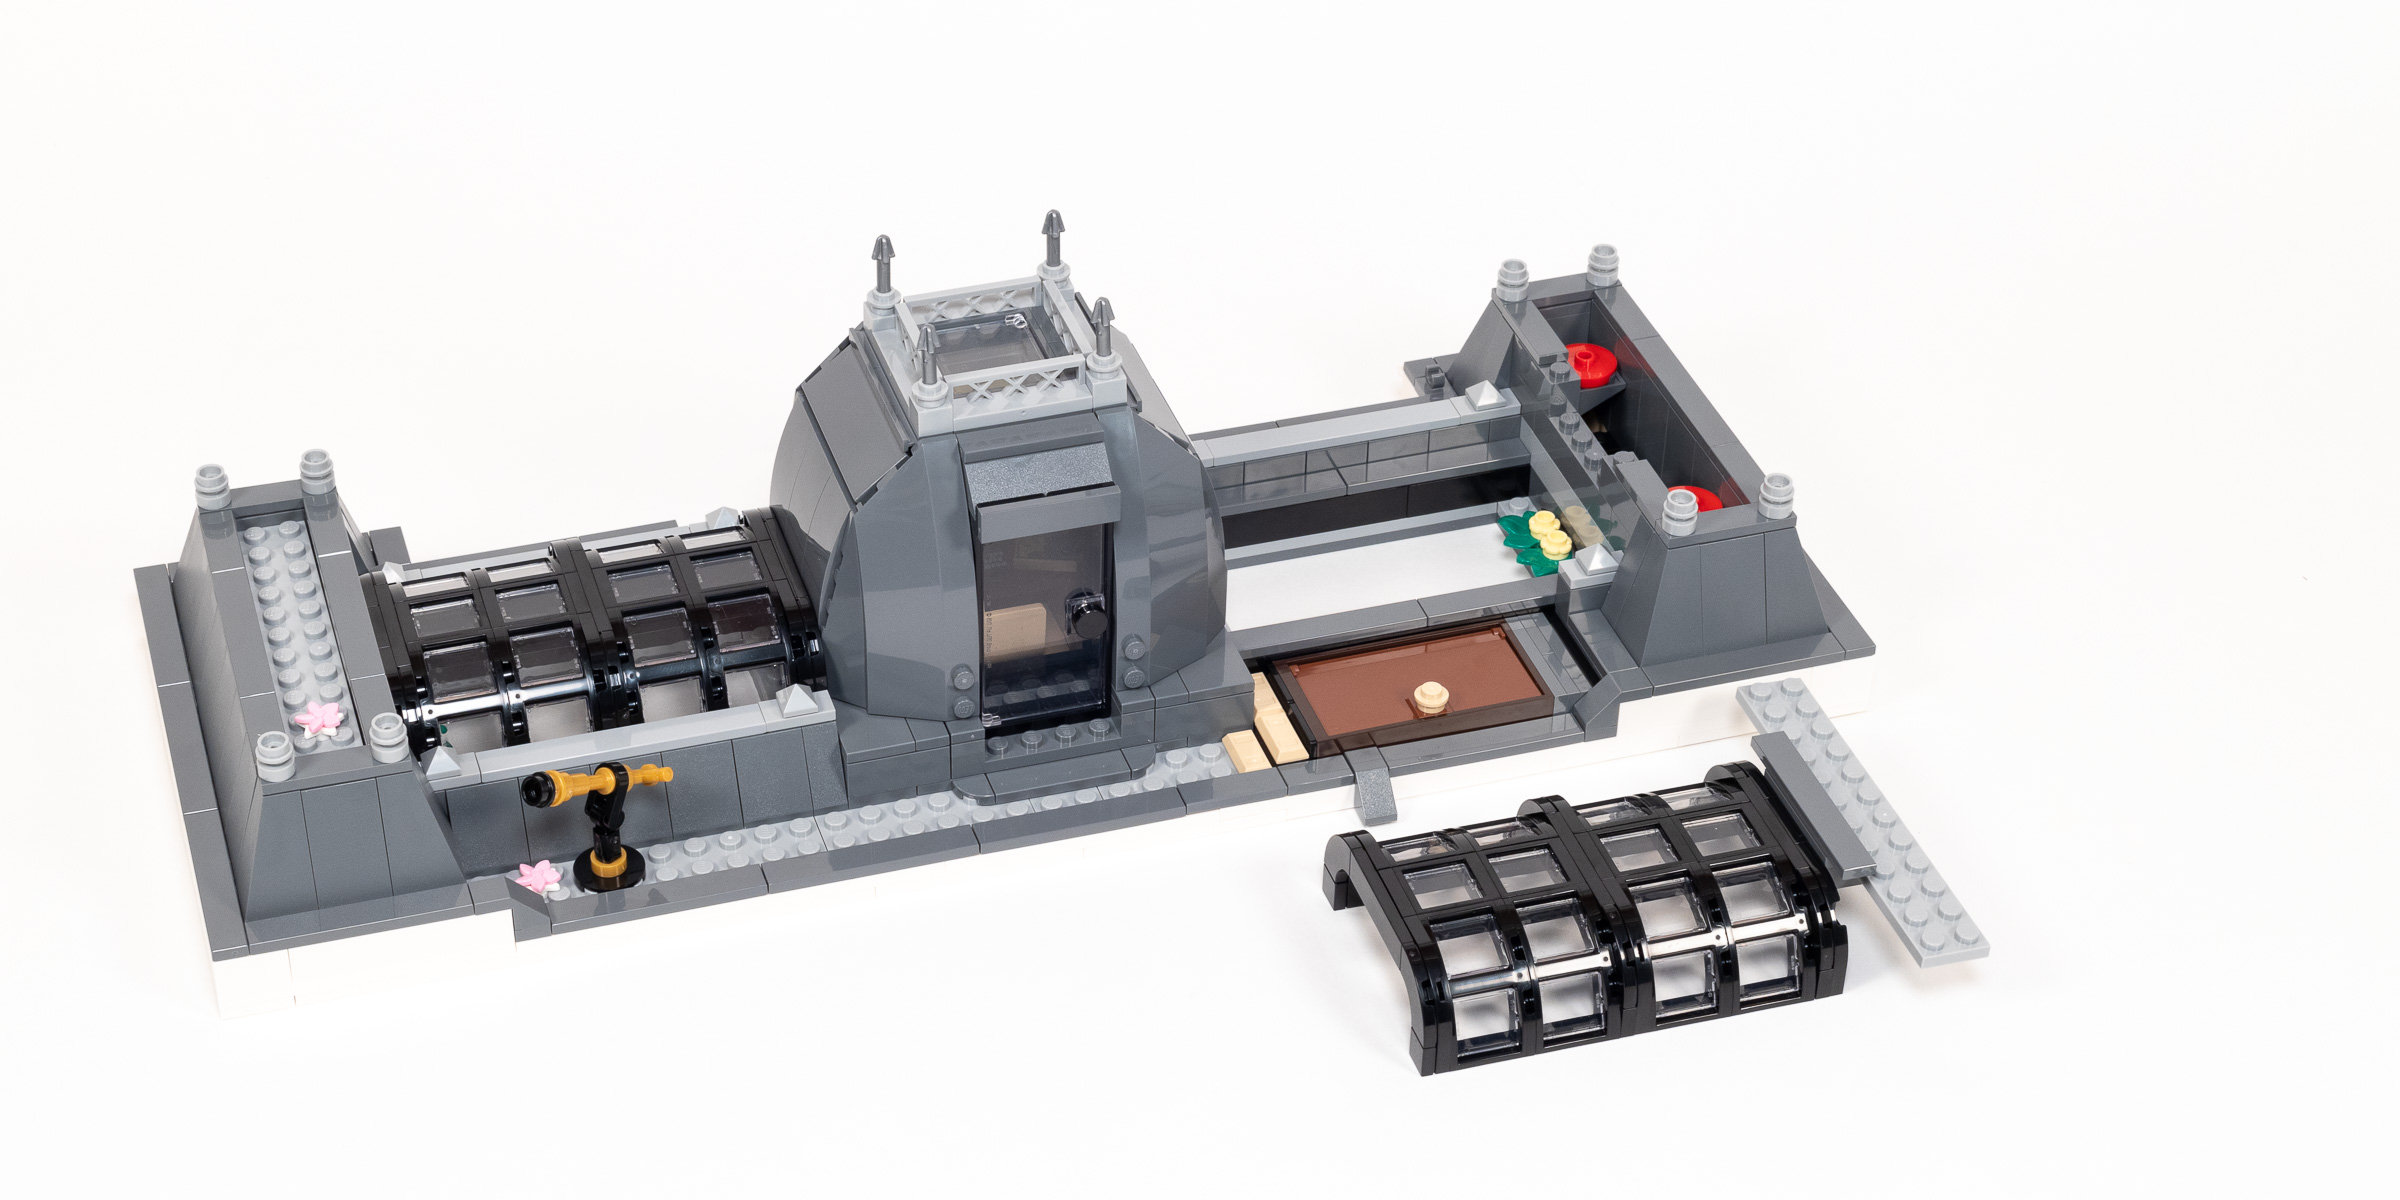
The two skylights are built as large sub-assemblies.
We finalize the roof section with Bag 32, where we build a large pediment and angled roof that sits above those two large columns. The roof is attached using an increasingly common approach, using a Technic Liftarm to achieve a precise angle. This assembly looks oversized in isolation, but looks great when the roof is attached to the two floors below, especially the scrollwork and inverted heart filling the triangular space in the middle.
Triangular pediment with intricate detailing will sit above the large columns.
Build time: 81 minutes. (Bag 25: 5 minutes, Bag 26: 6 minutes, Bag 27: 10 minutes, Bag 28: 11 minutes, Bag 29: 13 minutes, Bag 30: 12 minutes, Bag 31: 12 minutes, Bag 32: 12 minutes.)
Bag 33: Scaffolding and Tree
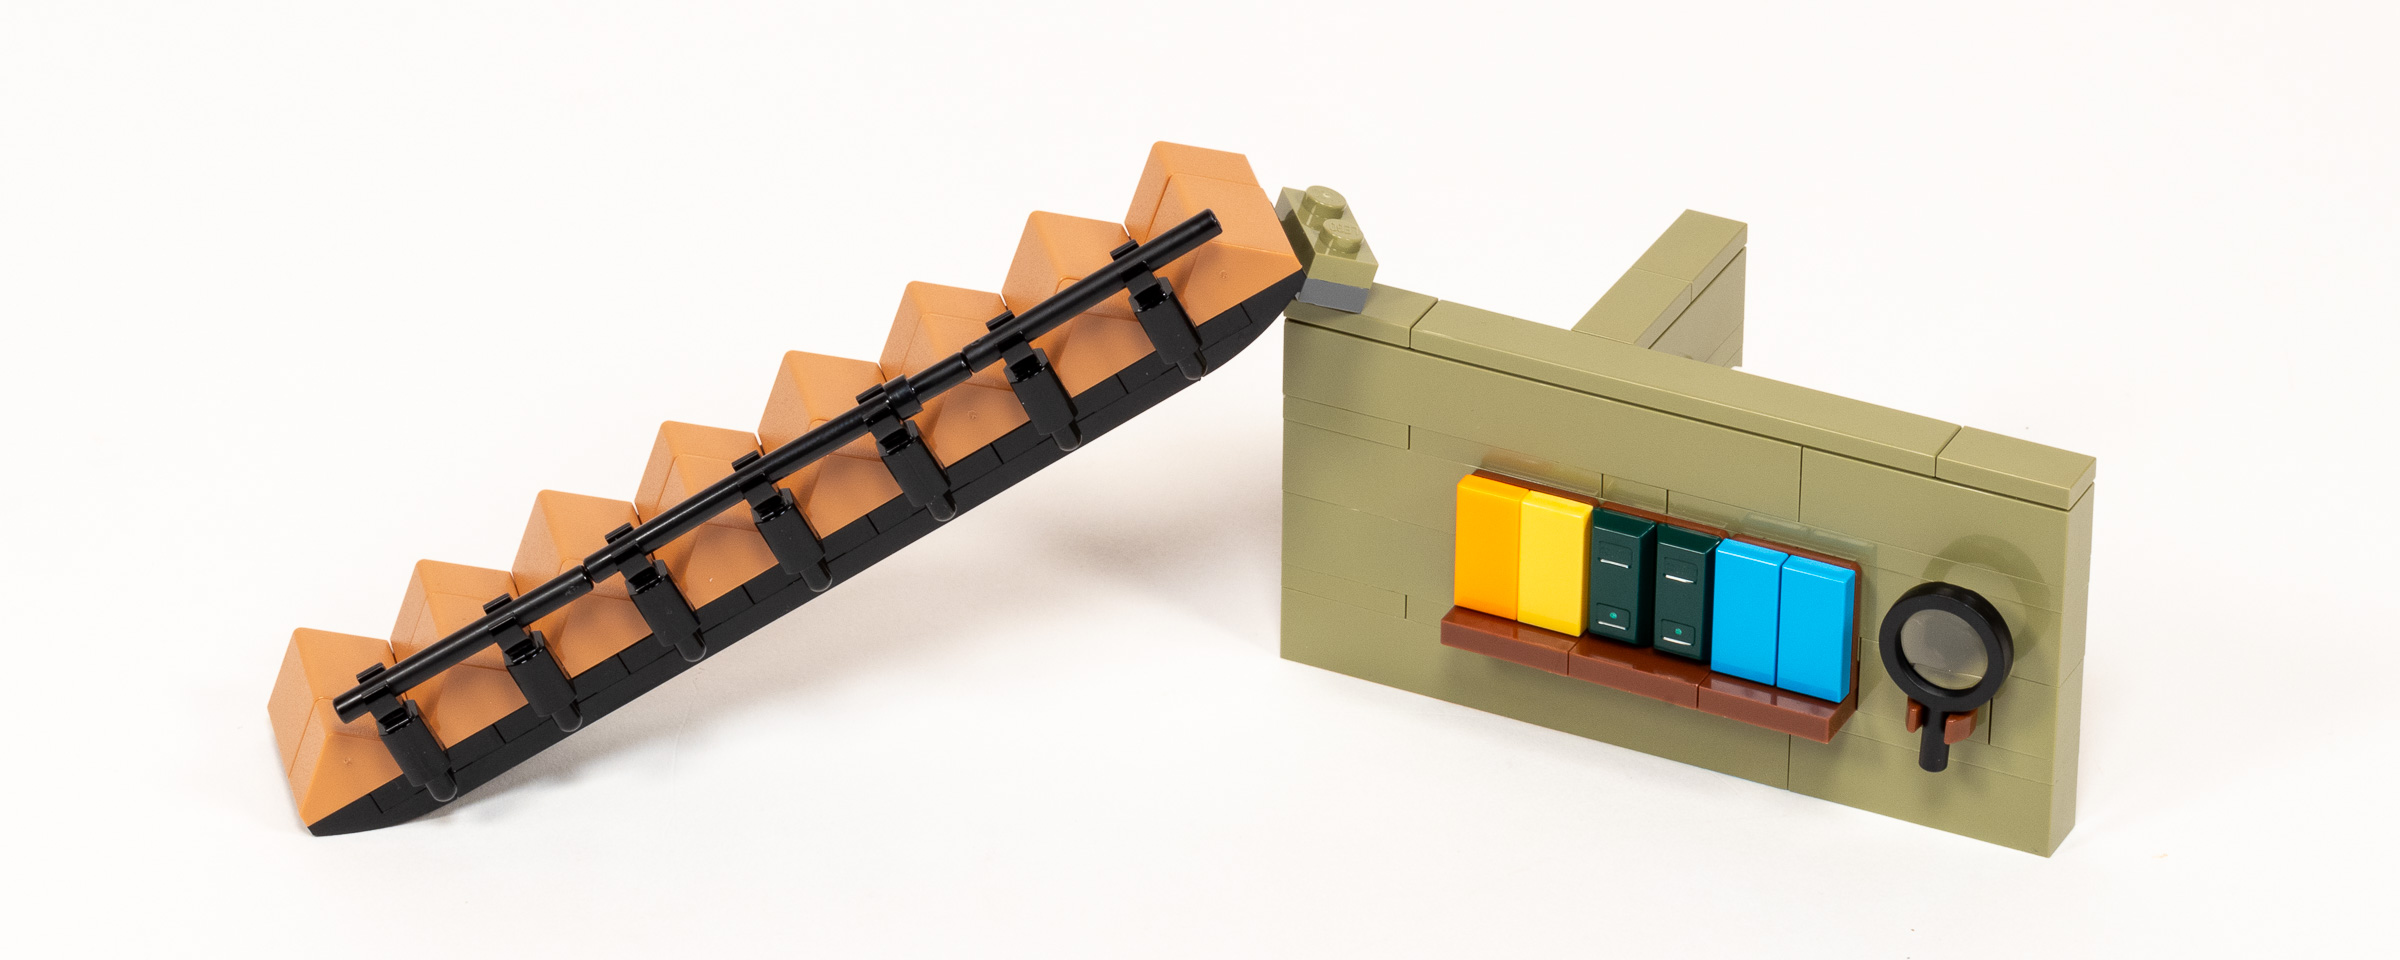
The final bag adds a selection of smaller details to the finished model. This includes hanging scaffolding to clean the windows, although it can only attach in a single spot on the left side of the model. We also get a bench and mailbox on the left side, where a cookie has fallen on the ground with two eager birds ready to eat the crumbs.
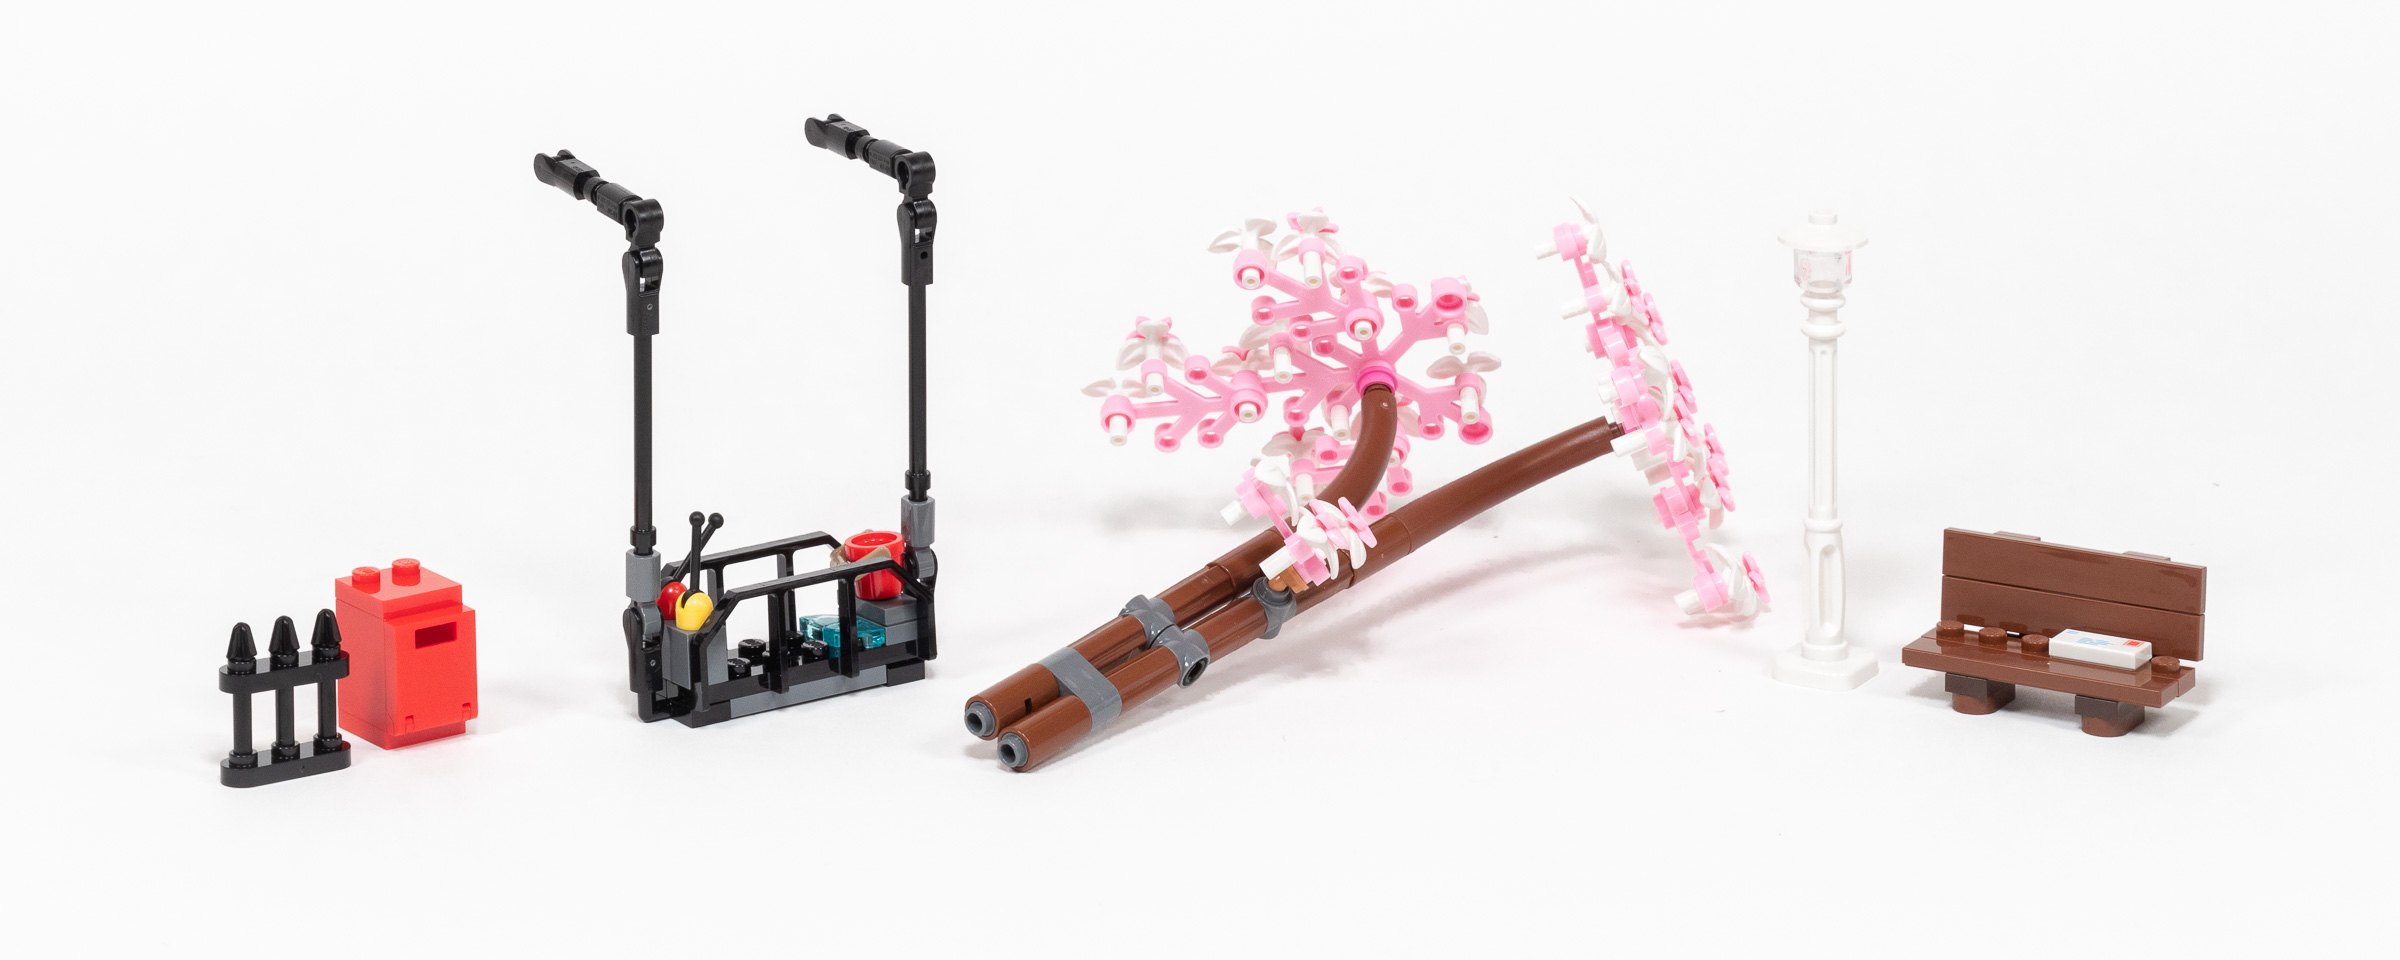
Ready to install the final set of sub-assemblies on the nearly finished model.
The largest additional detail is a large tree which attaches on the right side of the entrance. The 222Light PurpleBright Pink and 1White flowers are strewn throughout the completed model, with two on the roof and three on the ground below.
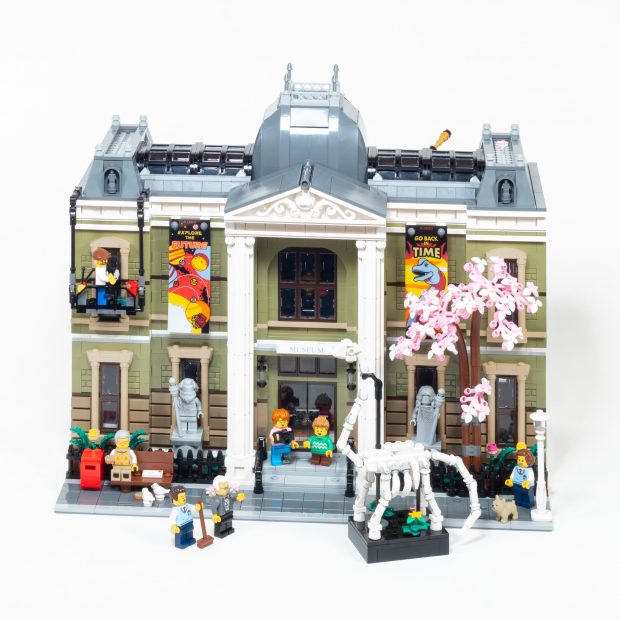
#10326 Natural History Museum – Completed Model.
Build time: 18 minutes.
Value
Assessing the value of a LEGO model is pretty subjective, which is why I like to include more objective assessments of value such as price-per-part and my preferred metric: price-per-gram. I am also experimenting with price-per-minute to see if this offers any insight into value and the building experience.
Price-per-part
I much prefer price-per-gram as it better captures the difference in value between a set with lots of small parts versus a set with lots of tiny parts. Nonetheless, this set does fare well in this classic metric of value.
About 4000 pieces for $300 works out to a generous $0.074 per-piece.
Price-per-gram
As noted above, assessing price based on the weight of the LEGO elements included in the set results in a cleaner assessment of value.
| Set | Price | Part Count | Price-per-part | Weight | Price-per-gram |
|---|---|---|---|---|---|
| #31203 World Map | $249.99 | 11,695 pieces | $0.021 per-piece | 4020 grams | $0.062 per-gram |
| #21056 Taj Mahal | $119.99 | 2022 pieces | $0.059 per-piece | 1811 grams | $0.066 per-gram |
| #21058 Great Pyramid of Giza | $129.99 | 1476 pieces | $0.088 per-piece | 1832 grams | $0.071 per-gram |
| #77013 Escape from the Lost Tomb | $39.99 | 600 pieces | $0.067 per-piece | 530 grams | $0.075 per-gram |
| #10278 Police Station | $199.99 | 2923 pieces | $0.068 per-piece | 2602 grams | $0.077 per-gram |
| #71741 Ninjago City Gardens | $299.99 | 5685 pieces | $0.052 per piece | 3719 grams | $0.081 per-gram |
| #71043 Hogwarts Castle | $399.99 | 6020 pieces | $0.066 per-piece | 4899 grams | $0.082 per-gram |
| #10292 Friends – The Apartments | $149.99 | 2048 pieces | $0.073 per-piece | 1778 grams | $0.084 per-gram |
| #10326 Natural History Museum (this set) | $299.99 | 4014 pieces | $0.075 per piece | 3343 grams | $0.090 per-gram |
| #10297 Boutique Hotel | $229.99 |
3066 pieces | $0.075 per-piece | 2380 grams | $0.097 per-gram |
| #10312 Jazz Club | $229.99 | 2899 pieces | $0.079 per-piece | 2392 grams | $0.096 per-gram |
| #10270 Bookshop | $199.99 | 2504 pieces | $0.080 per-piece | 2085 grams | $0.096 per-gram |
| #10320 Eldorado Fortress | $214.99 | 2509 pieces | $0.087 per piece | 2188 grams | $0.098 per-gram |
| #21060 Himeji Castle | $159.99 | 2125 pieces | $0.075 per piece | 1600 grams | $0.100 per-gram |
| #10282 Adidas Originals Superstar | $79.99 | 731 pieces | $0.109 per-piece | 735 grams | $0.109 per-gram |
| #10316 Rivendell | $499.99 | 6167 pieces | $0.081 per piece | 4375 grams | $0.114 per-gram |
| #77015 Temple of the Golden Idol | $149.99 | 1545 pieces | $0.097 per piece | 1308 grams | $0.115 per-gram |
| #10305 Lion Knights’ Castle | $399.99 | 4514 pieces | $0.089 per piece | 3265 grams | $0.122 per-gram |
| #77012 Fighter Plane Chase | $34.99 | 387 pieces | $0.090 per piece | 285 grams | $0.123 per-gram |
| #21341 Disney Hocus Pocus: The Sanderson Sisters’ Cottage | $229.99 | 2316 pieces | $0.099 per piece | 1860 grams | $0.124 per-gram |
| #10303 Loop Coaster | $399.99 | 3756 pieces | $0.106 per-piece | 3189 grams | $0.125 per-gram |
| #42146 Liebherr Crawler Crane LR 13000 | $699.99 | 2883 pieces | $0.243 per piece | 5100 grams | $0.137 per-gram |
| #60339 Double Loop Stunt Arena | $159.99 | 865 pieces | $0.267 per-piece | 865 grams | $0.185 per-gram |
Note: Prices based on date of initial release. (The LEGO Group increased the price of many older sets in late 2022.)
The reason for the better value based on price-per-gram is easy to explain… Compared to other recent modulars, this set includes a lot of basic bricks (including a ton of 1×6 bricks), and fewer small parts to achieve intricate details. This results in a better value based on the weight of the parts included in the set.
Price-per-minute
I have been recording the build time for most of the sets that I built in the past couple years. This allows me to experiment with a new value metric: price-per-minute. This metric assumes that I build every set at about the same speed… This is probably not entirely true, but since I am only including models which I built in the table below, it should offer one additional way to think about the value of a LEGO set.
In the case of this set:
$300 / 213 minutes = $1.30 / minute.
| Set | Price | Part Count | Price-per-part | Price-per-gram | Build time | Price-per-minute |
|---|---|---|---|---|---|---|
| #31203 World Map | $249.99 | 11,695 pieces | $0.021 per-piece | $0.062 per-gram | 613 minutes | $0.41 per-minute |
| #10325 Alpine Lodge | $99.99 | 1517 pieces | $0.070 per-piece | $0.095 per-gram | 151 minutes | $0.66 per-minute |
| #21056 Taj Mahal | $119.99 | 2022 pieces | $0.059 per-piece | $0.066 per-gram | 177 minutes | $0.68 per-minute |
| #10297 Boutique Hotel | $229.99 |
3066 pieces | $0.075 per-piece | $0.097 per-gram | 333 minutes | $0.69 per-minute |
| #21060 Himeji Castle | $159.99 | 2125 pieces | $0.075 per-piece | $0.100 per-gram | 210 minutes | $0.76 per-minute |
| #10307 Eiffel Tower | $629.99 | 10,001 pieces | $0.063 per-piece | $0.092 per-gram | 803 minutes | $0.78 per-minute |
| #10312 Jazz Club | $229.99 | 2899 pieces | $0.079 per-piece | $0.096 per-gram | 295 minutes | $0.88 per-minute |
| #21058 Great Pyramid of Giza | $129.99 | 1476 pieces | $0.088 per-piece | $0.071 per-gram | 146 minutes | $0.89 per-minute |
| #10320 Eldorado Fortress | $214.99 | 2509 pieces | $0.087 per-piece | $0.098 per-gram | 260 minutes | $1.01 per-minute |
| #10303 Loop Coaster | $399.99 | 3756 pieces | $0.106 per-piece | $0.125 per-gram | 378 minutes | $0.106 per-minute |
| #10326 Natural History Museum (this set) | $299.99 | 4014 pieces | $0.074 per-piece | $0.090 per-gram | 213 minutes | $1.30 per-minute |
| #42146 Liebherr Crawler Crane LR 13000 | $699.99 | 2883 pieces | $0.243 per-piece | $0.137 per-gram | 467 minutes | $1.50 per-minute |
I want to be super clear that build times are approximate. There is a good chance that I have gotten slightly faster at building over time, and I assure you that some of these build times are inflated due to lack of sleep or building while distracted by an interesting podcast.
What stands out for me is the huge discrepancy in this small dataset, from at little as 66 cents-per-minute to as much as $1.50 per-minute (more than double). There are a ton of possible explanations for when sets have an exceptionally high price-per-minute, or a lower one. A few possible reasons for better value in this metric include: low price-per-part (lots of small parts to assemble), complicated building instructions, or even just less repetitive builds. Even the average number of parts per numbered bag plays a major role, since you can more quickly find the parts you need if you only have fewer parts on the table at a given time.
In this case of this set, I believe the main cause for the high cost-per-minute is that this is an unusually simple build for a set in the Modular Building Series. There are very few advanced techniques. Furthermore, this set continues a recent trend of having a ridiculous quantity of numbered bags, averaging fewer than 125 pieces per bag. I will discuss how this impacts my overall assessment of this set in the conclusion below.
Comparison with previous Modular Buildings
I find myself trying to assess this set alongside a rich heritage of 18 previous sets, especially the five most recent sets (which I have built and reviewed on this site). This set is a bit confusing in that context; it’s large size is only 50% wider than recent sets in the series, but it reads a lot larger than that visually since our eyes do not see the edges of each modular, but rather see the edges of each building when they are laid out in a streetscape.
#10326 Natural History Museum with the two most recent sets in the Modular Building Series.
In that context, we are comparing the 48-stud width of this set to the roughly 26-stud width of corner buildings like the Boutique Hotel or Corner Garage (depending on the angle), the 20-stud width of the Police Station or Jazz Club, and the 16-stud width of the Bookstore. On the other hand, museums are massive buildings that dwarf the size of ‘normal’ buildings in a city, frequently taking up a full city block or more. I can easily rationalize the large size in this context, even though it does look a bit too big in practice.
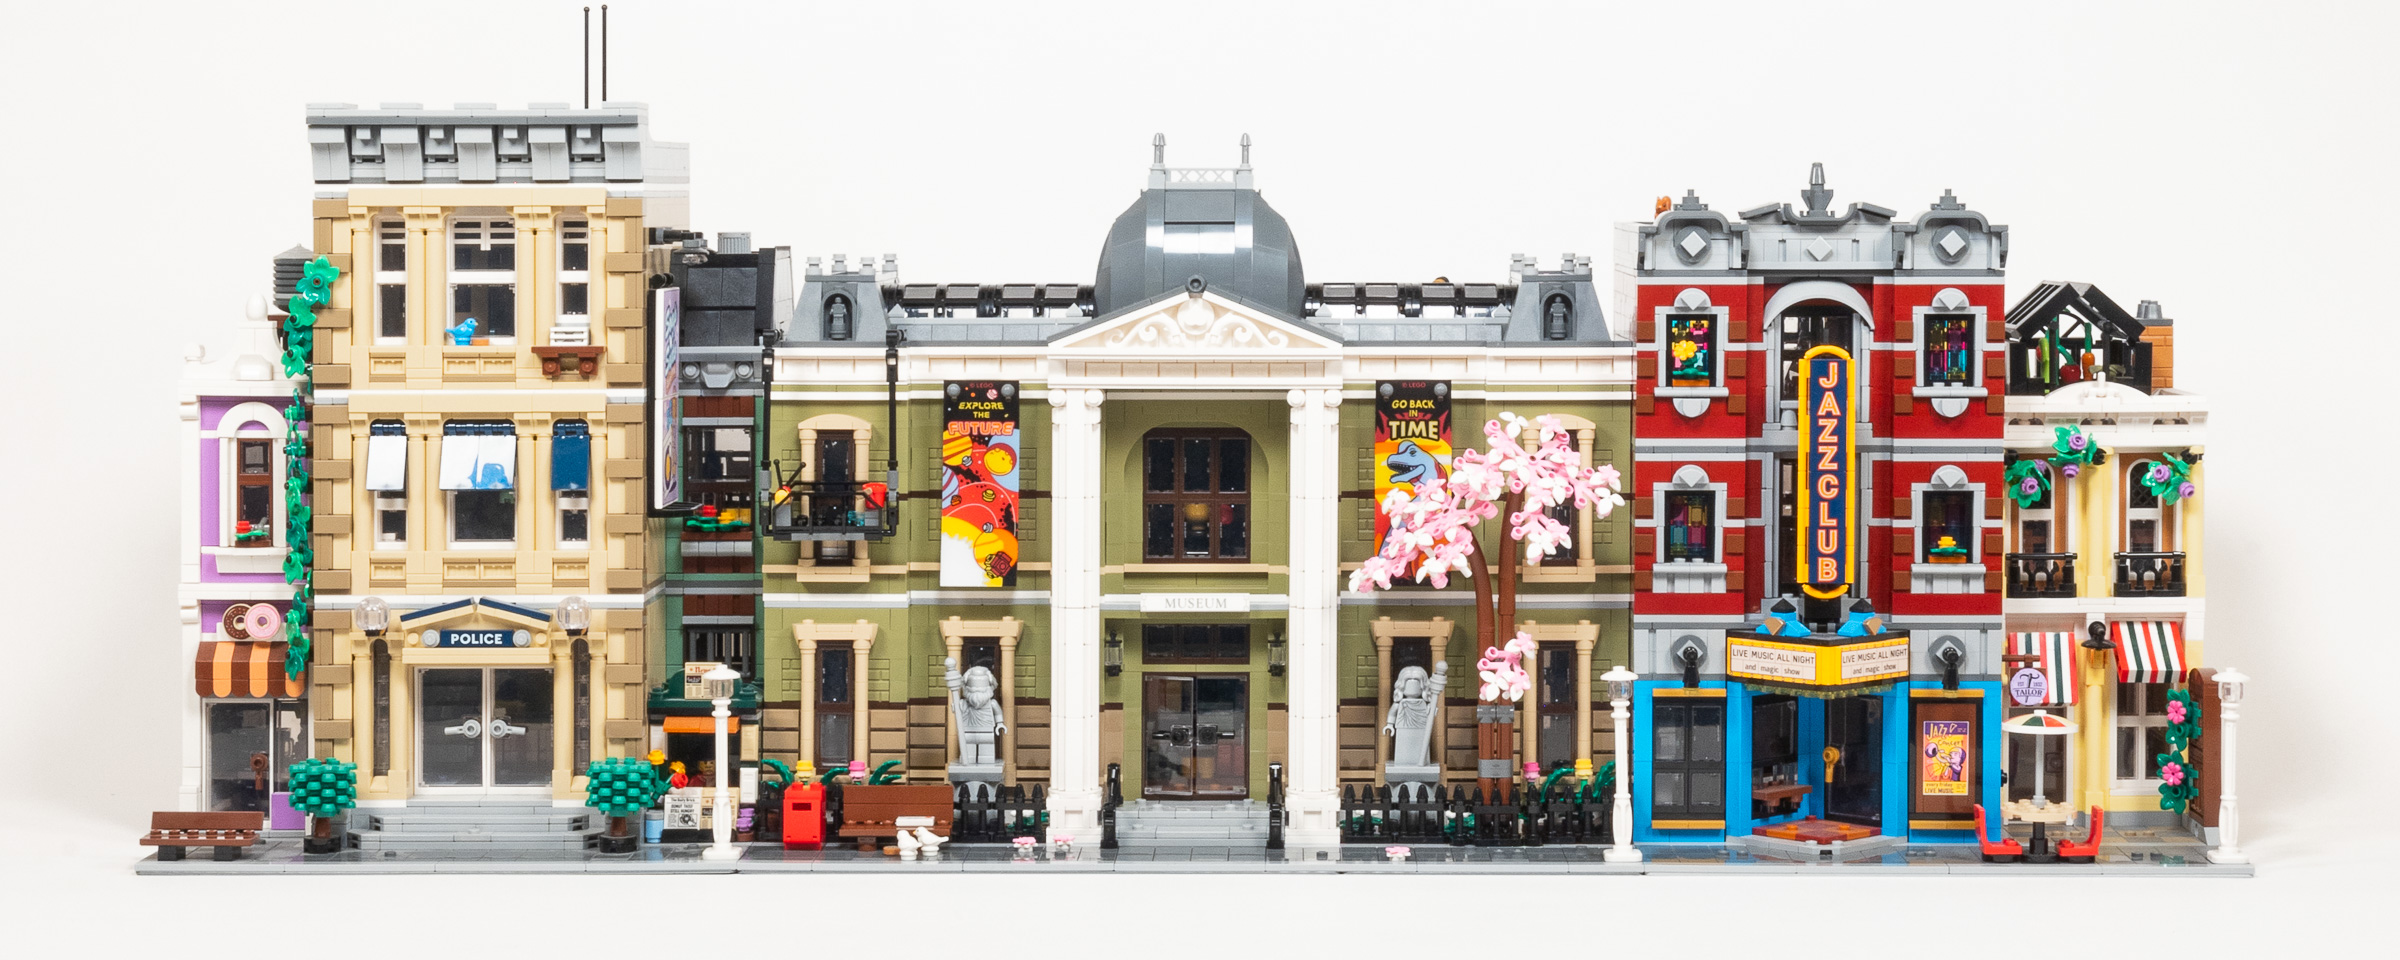
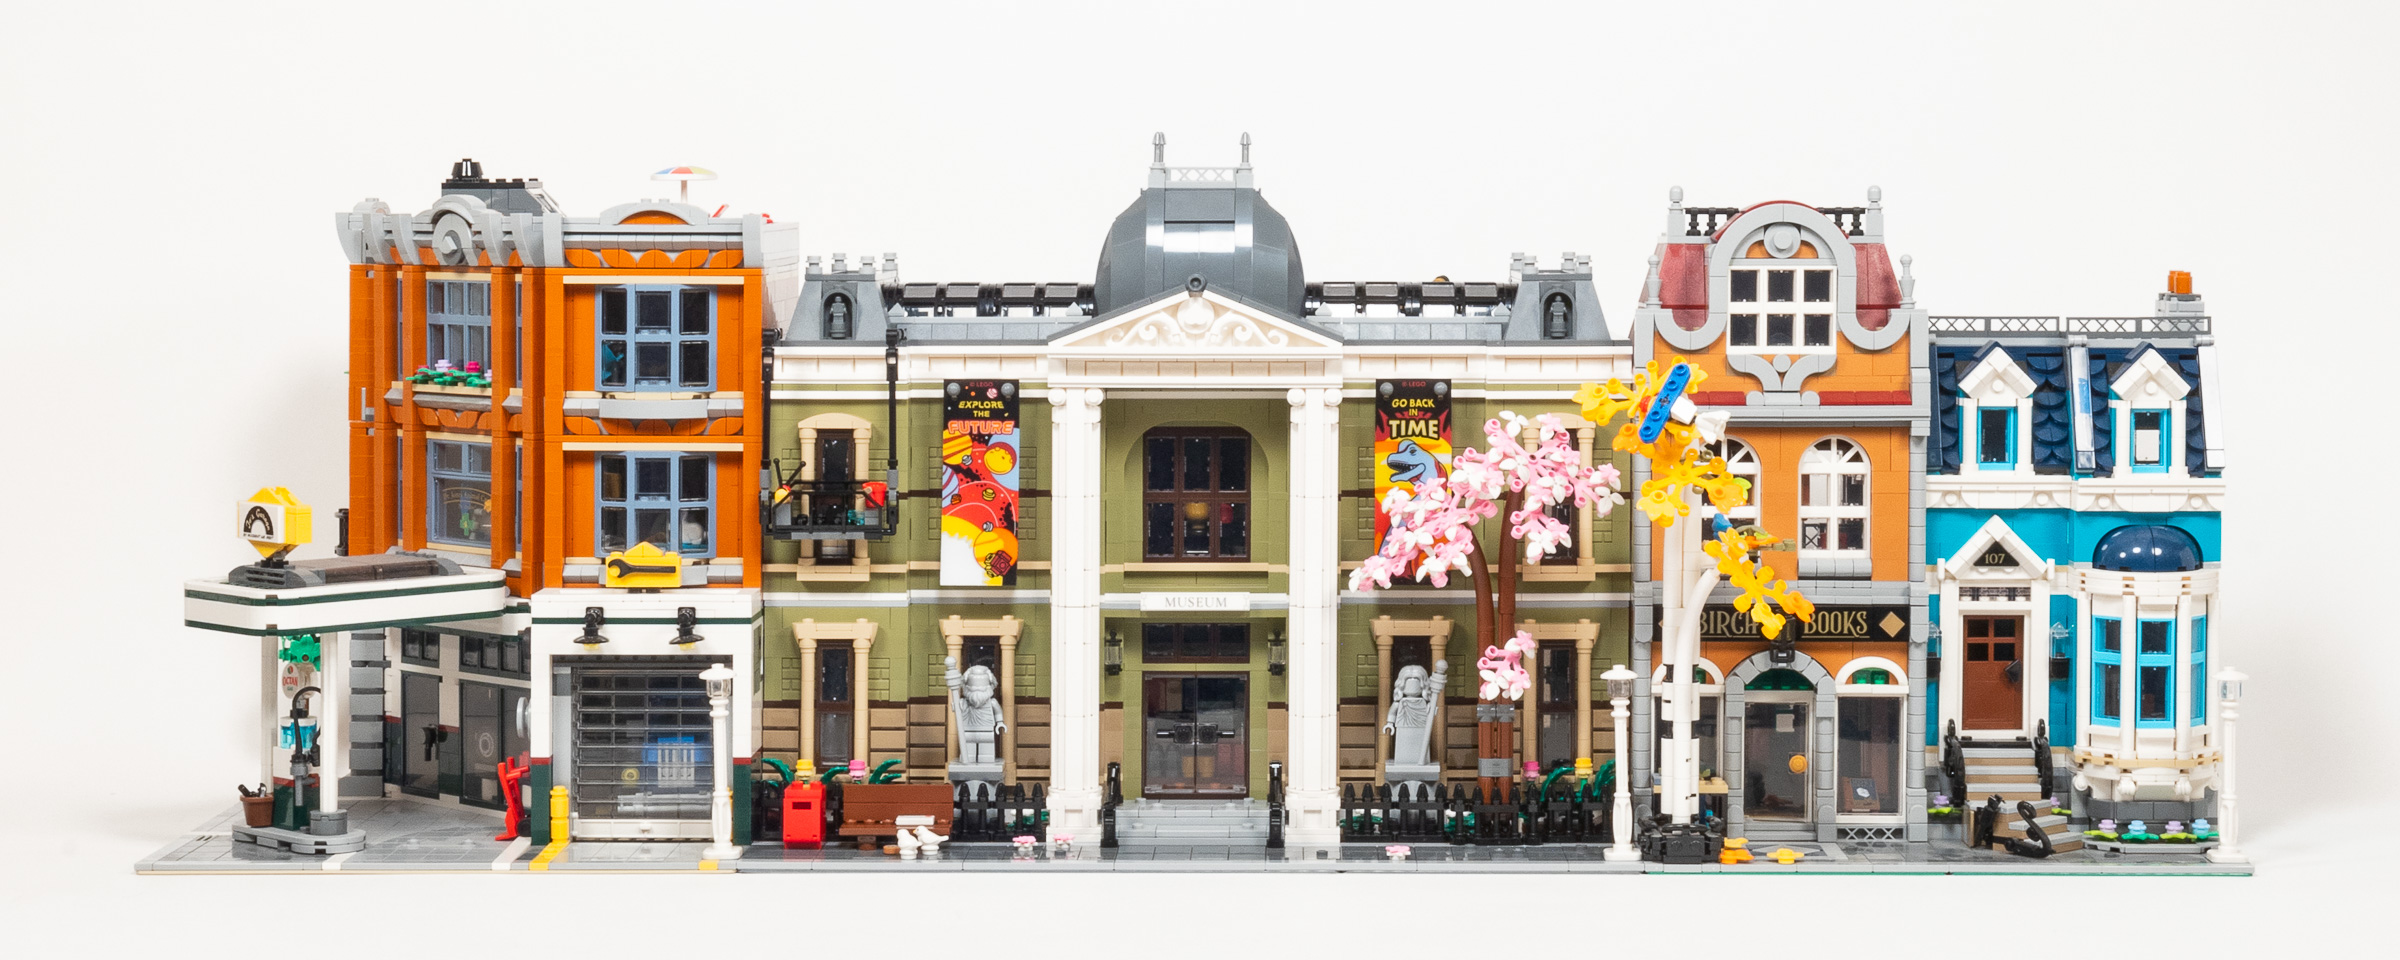
The Police Station looks good on the left side, and the Jazz Club works okay on the right side.
I also wanted to determine which of the Modulars I own look best on both sides of this set. For the left side, I think #10278 Police Station looks best. The Bookstore module from #10270 Bookshop look pretty good as well, due to similar heights, complementary architectural styles, and by bringing a second tree to the streetscape. #10312 Jazz Club looks okay from a composition perspective, but the 226Cool YellowBright Light Yellow color of the pizzeria fights with the 330Olive Green color of the Museum.
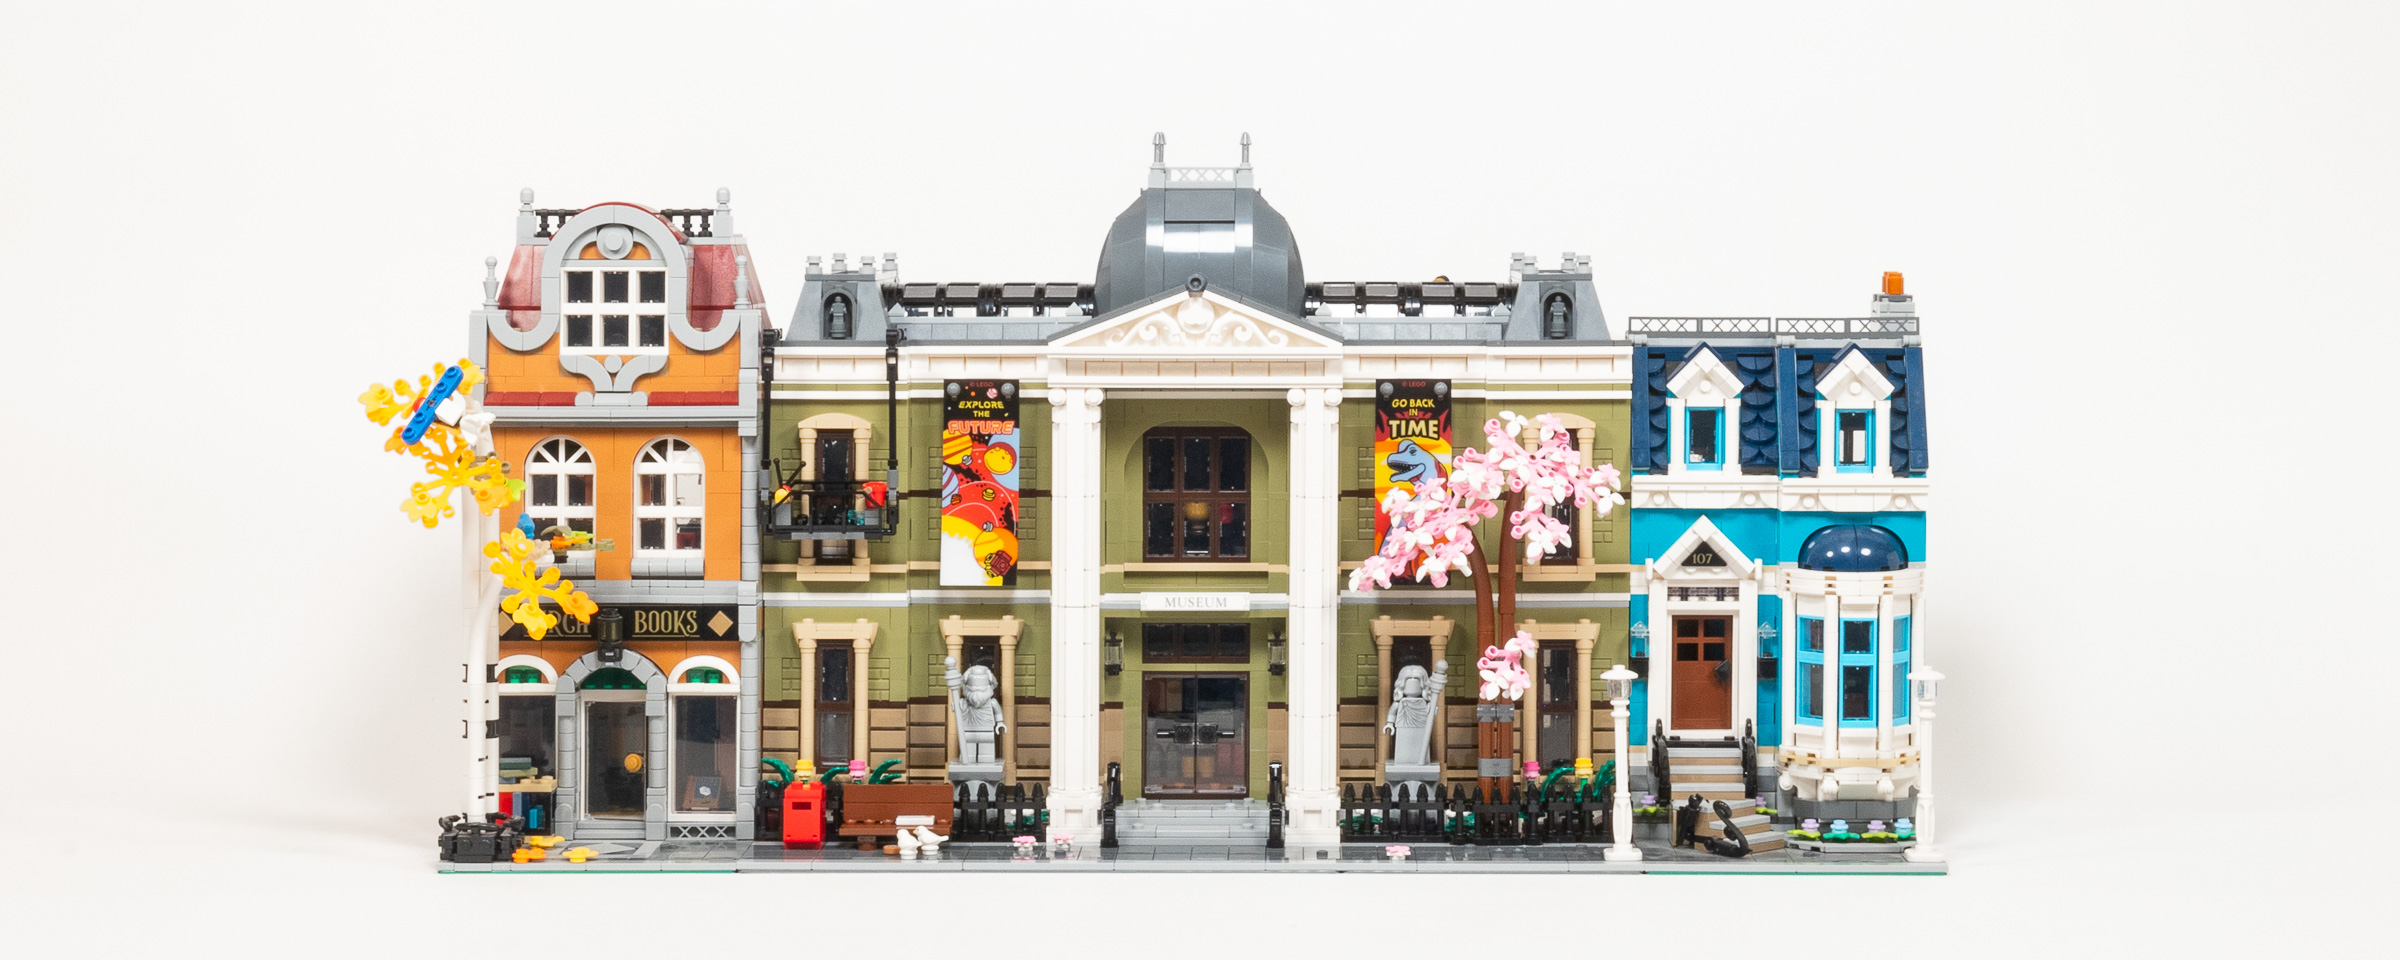
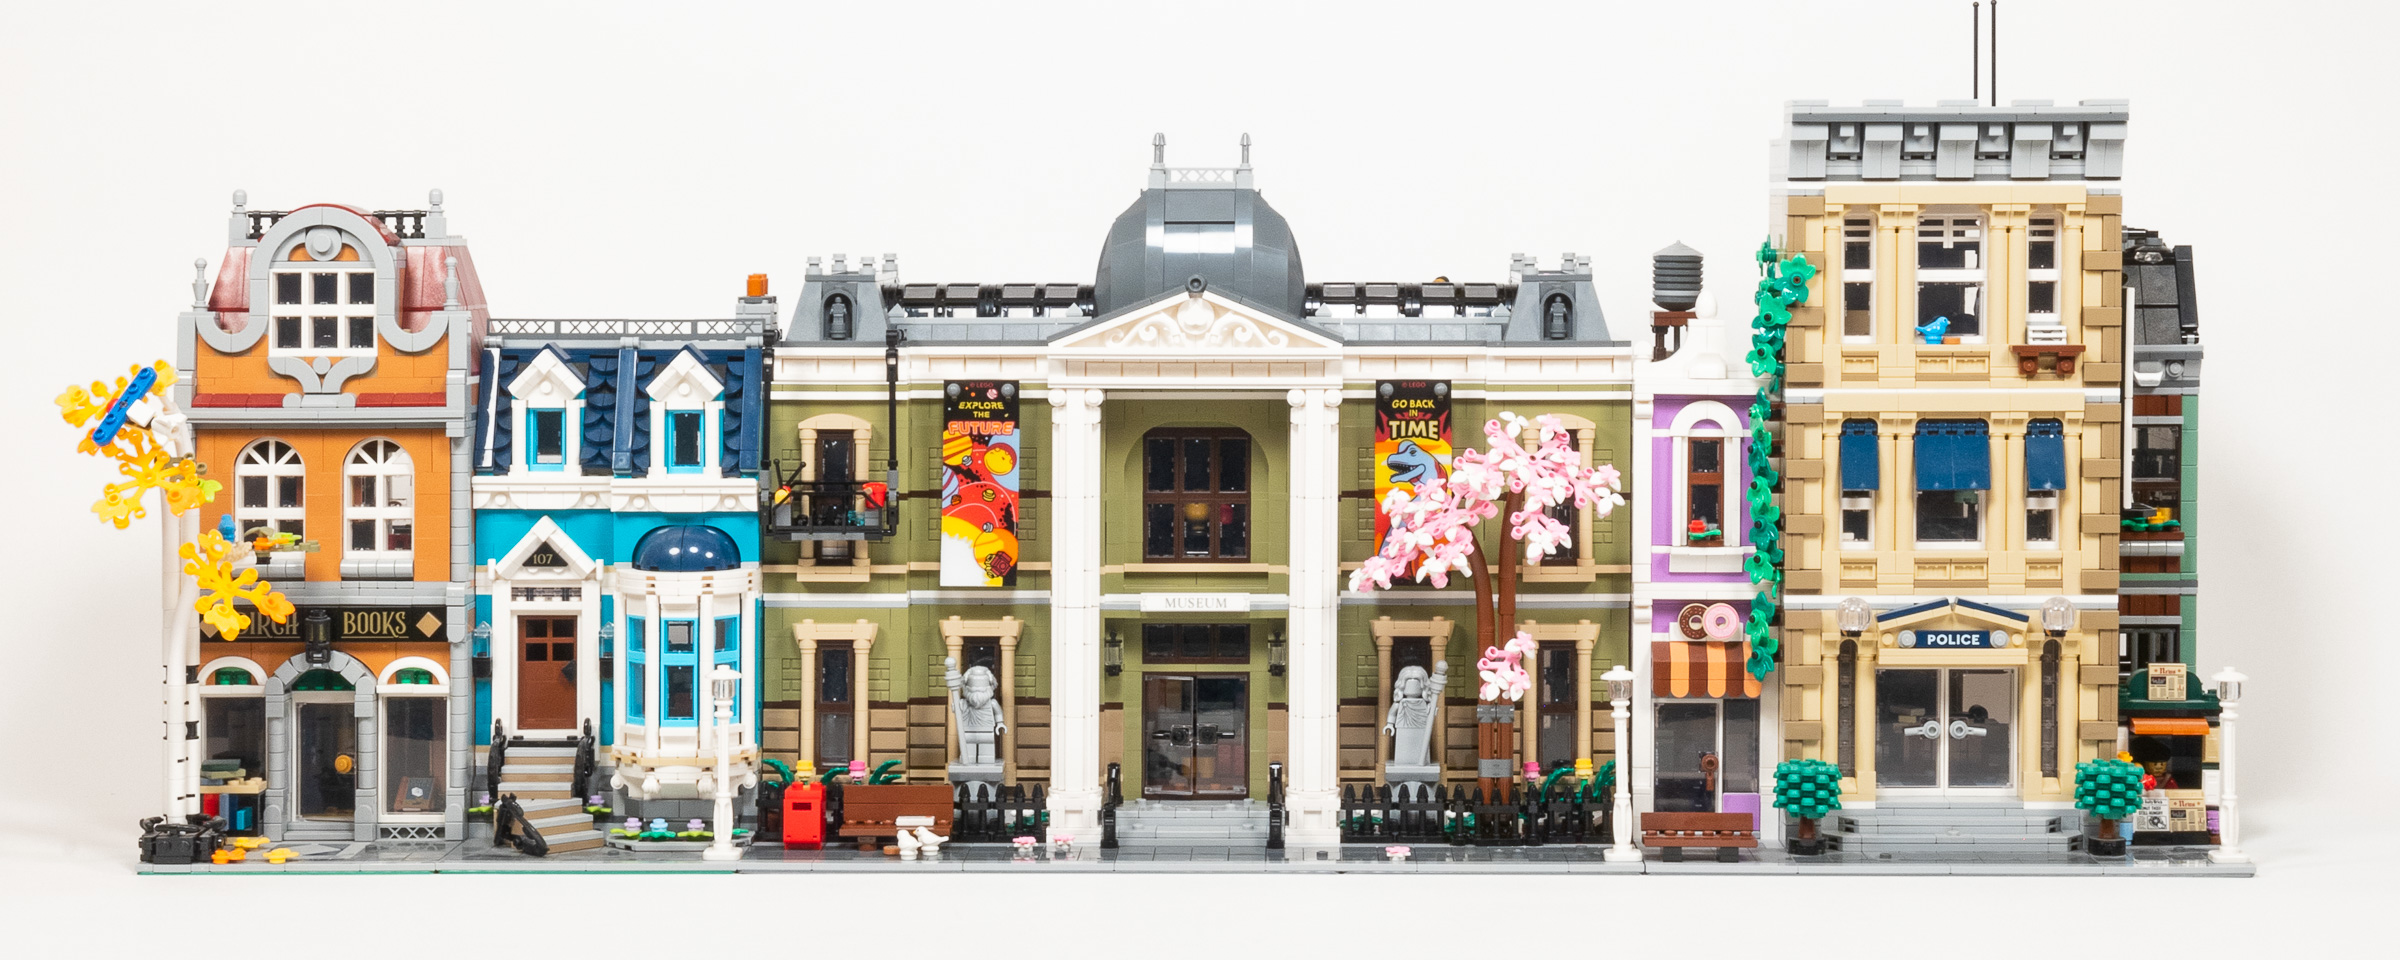
The Bookstore looks good on the left side, but the Blue house looks bad on either side because it is too bright.
The Blue house that comes with #10270 Bookshop looks bad on either side because it is too bright. I think #10264 Corner Garage clashes on either side because the architectural styles do not complement each other very well.
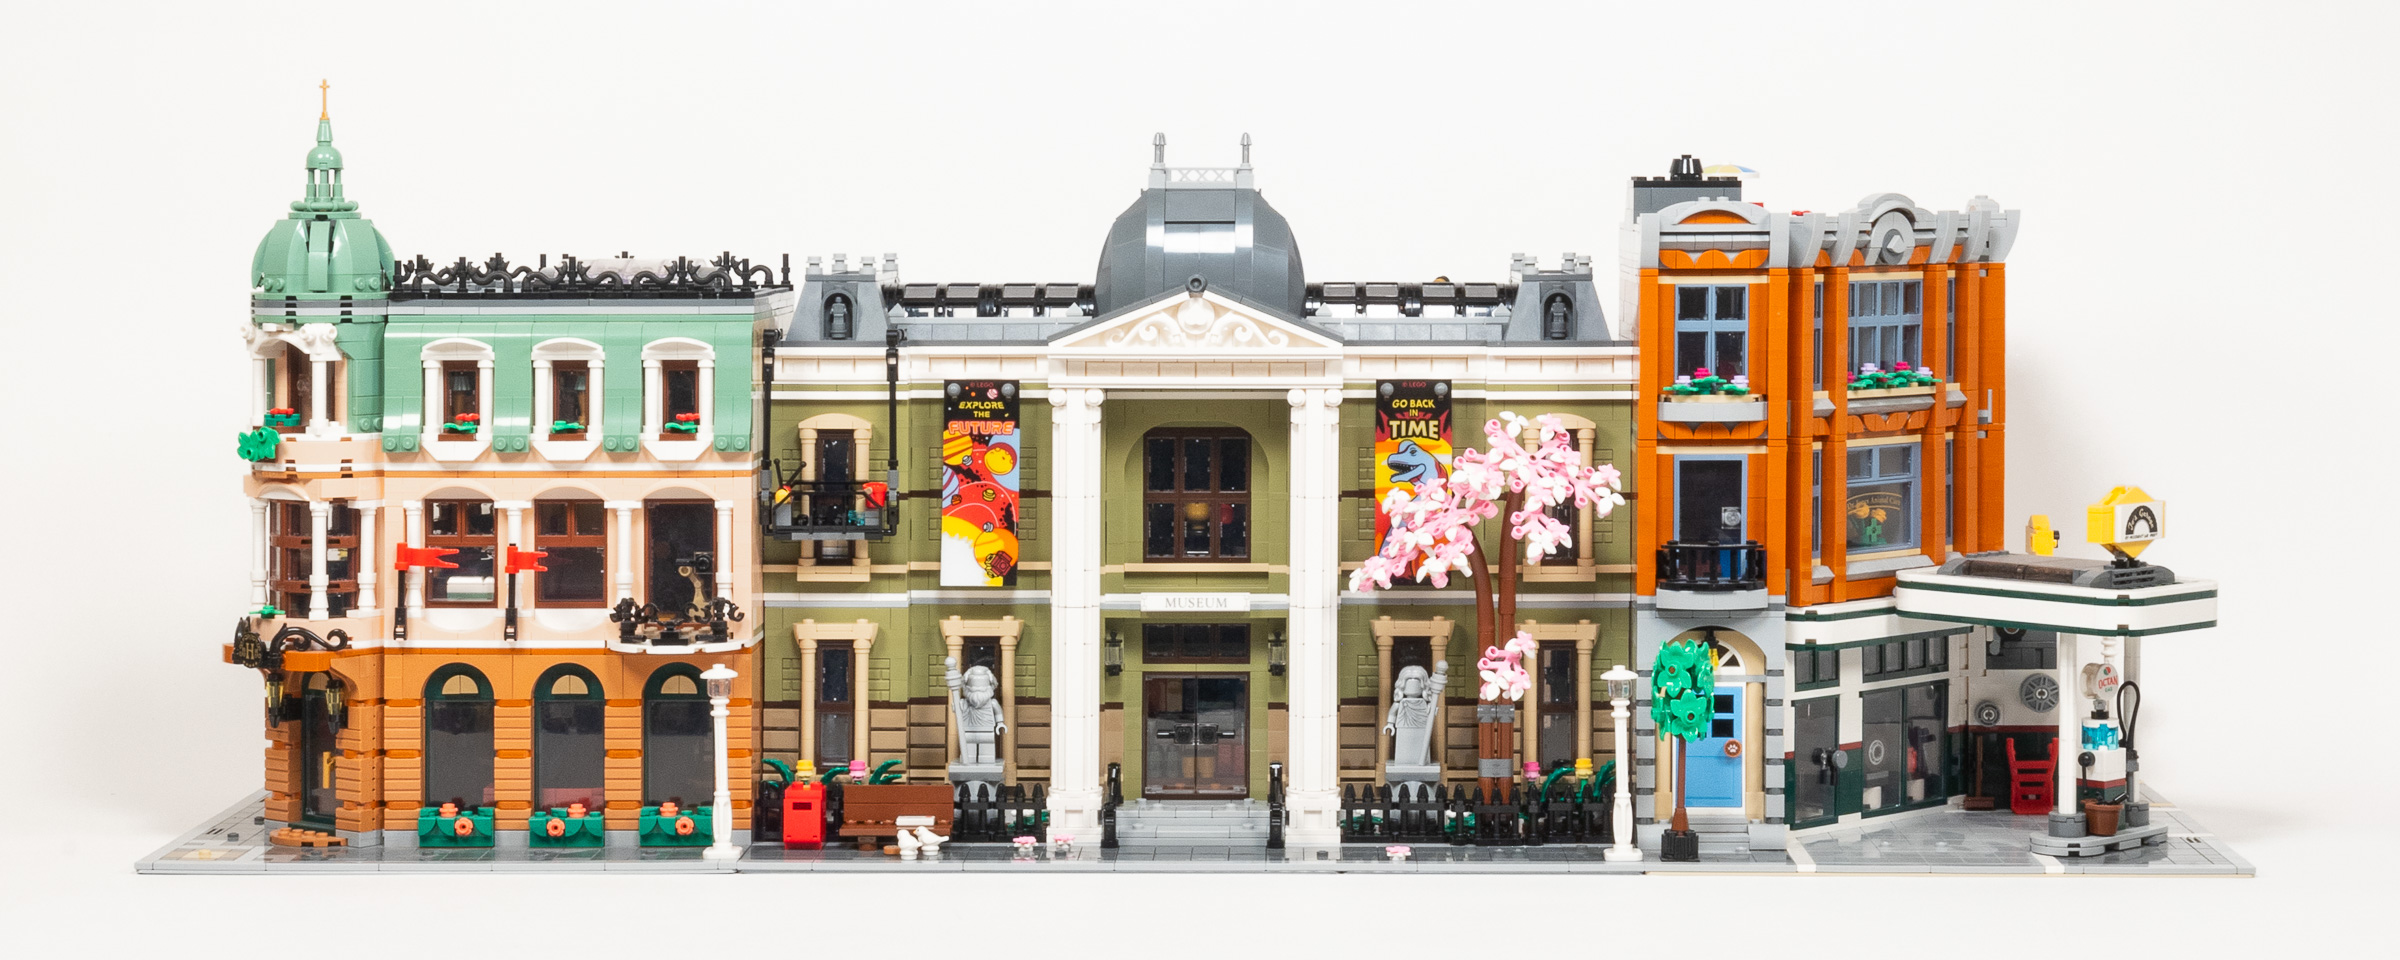
The Garage looks bad on the left due to clashing architectural styles, and the Bookstore looks bad on the right because they trees are too close together.
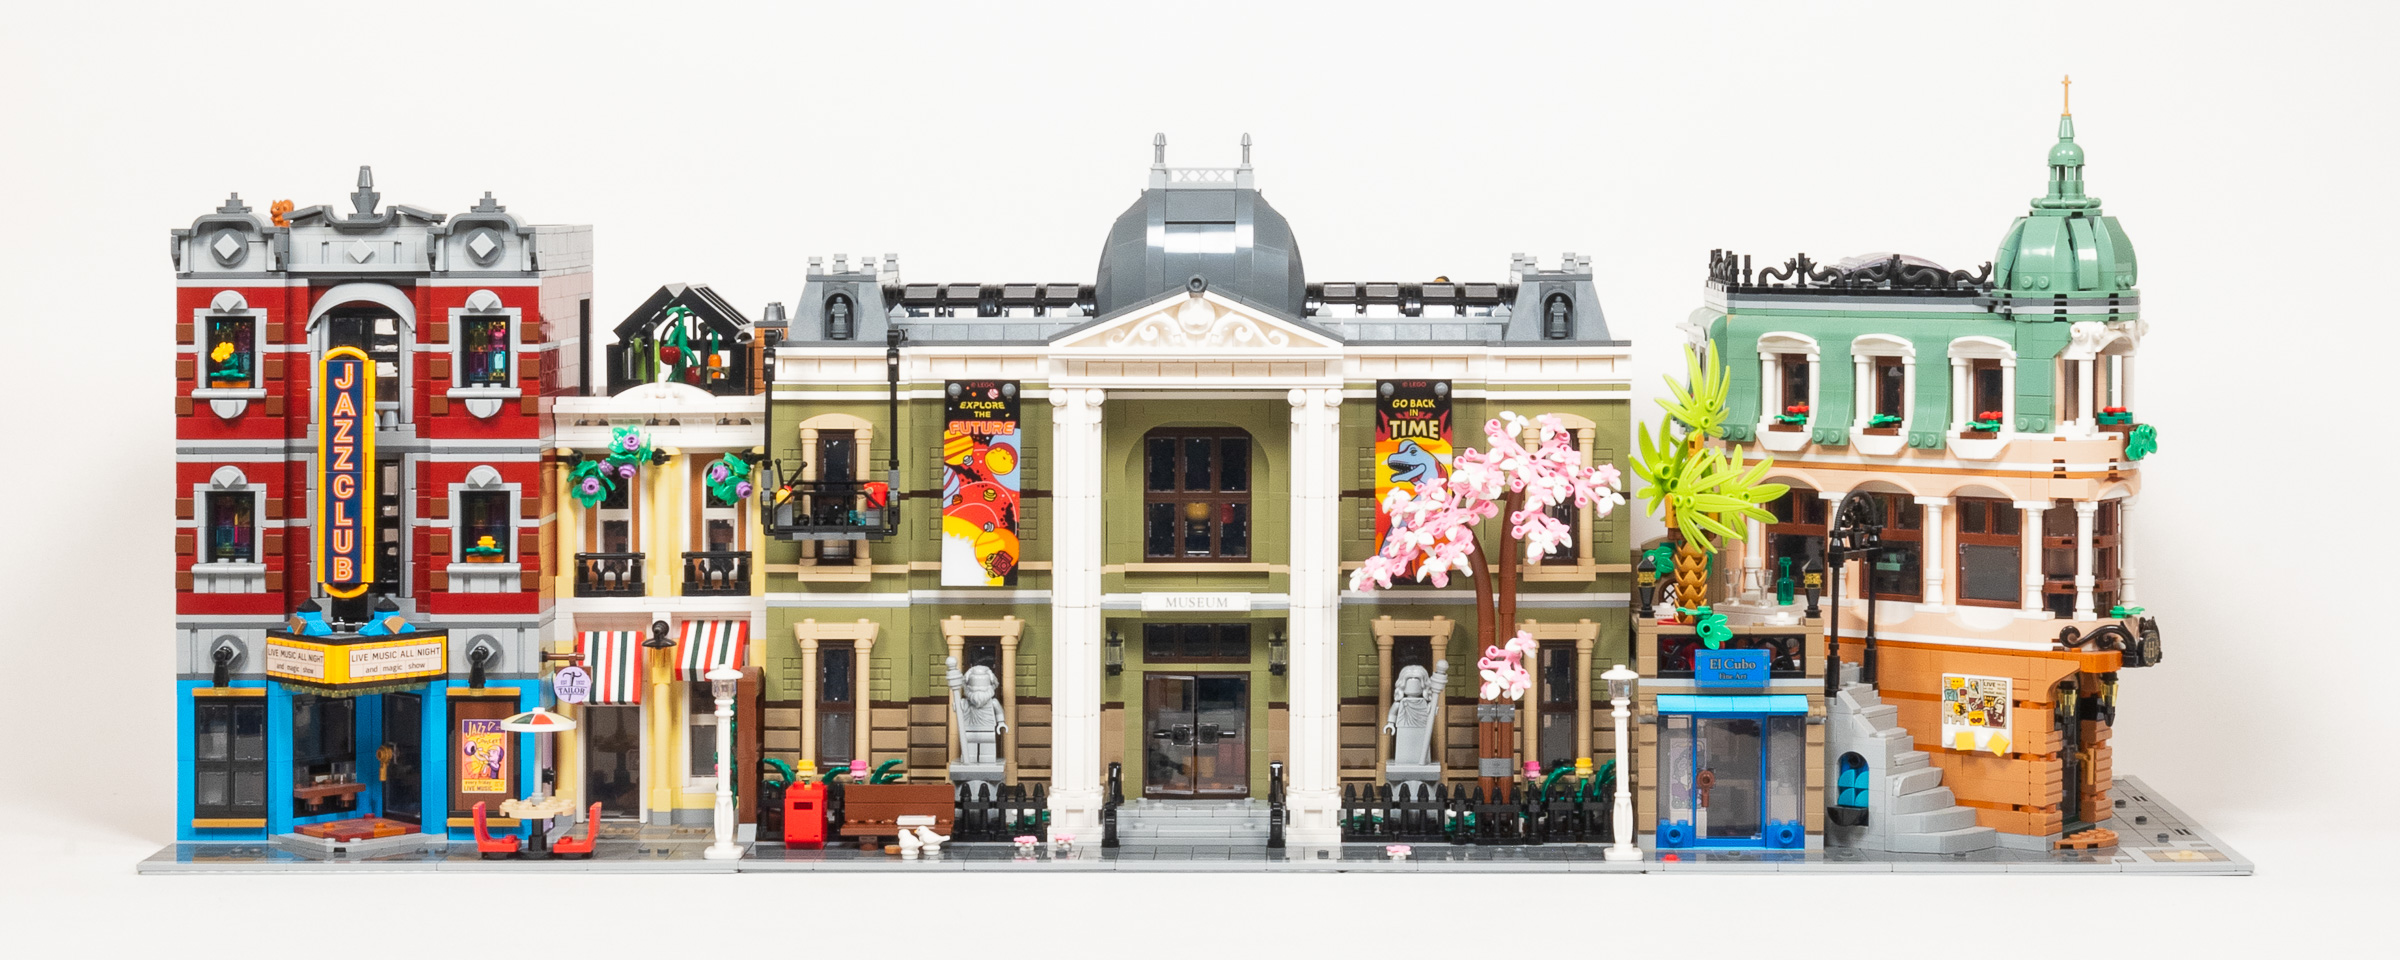
The right side is more difficult, with only the #10312 Jazz Club and #10297 Boutique Hotel working well on this side. Architecturally, #10278 Police Station works on this side too, but I don’t love how 324Medium Lavender looks next to 330Olive Green.
A bolder choice is to frame the Museum with Azure on one side and Purple on the other.
Since it is such a large model, you might even decide to put a corner module on both sides. I can’t recommend this arrangement, as the exposed back edge of #10297 Boutique Hotel looks bad, and #10264 Corner Garage feels out of place next to a museum.
Here’s how it looks with a corner module on both sides.
Conclusion
This is an unusual addition to the LEGO Modular Building Series for a number of reasons. It is one of just two sets that are wider than 32 studs, it focuses on just one building instead of a collection of smaller buildings, and it offers significantly less complex (and interesting) building techniques than we often see in the series.
Early Release?
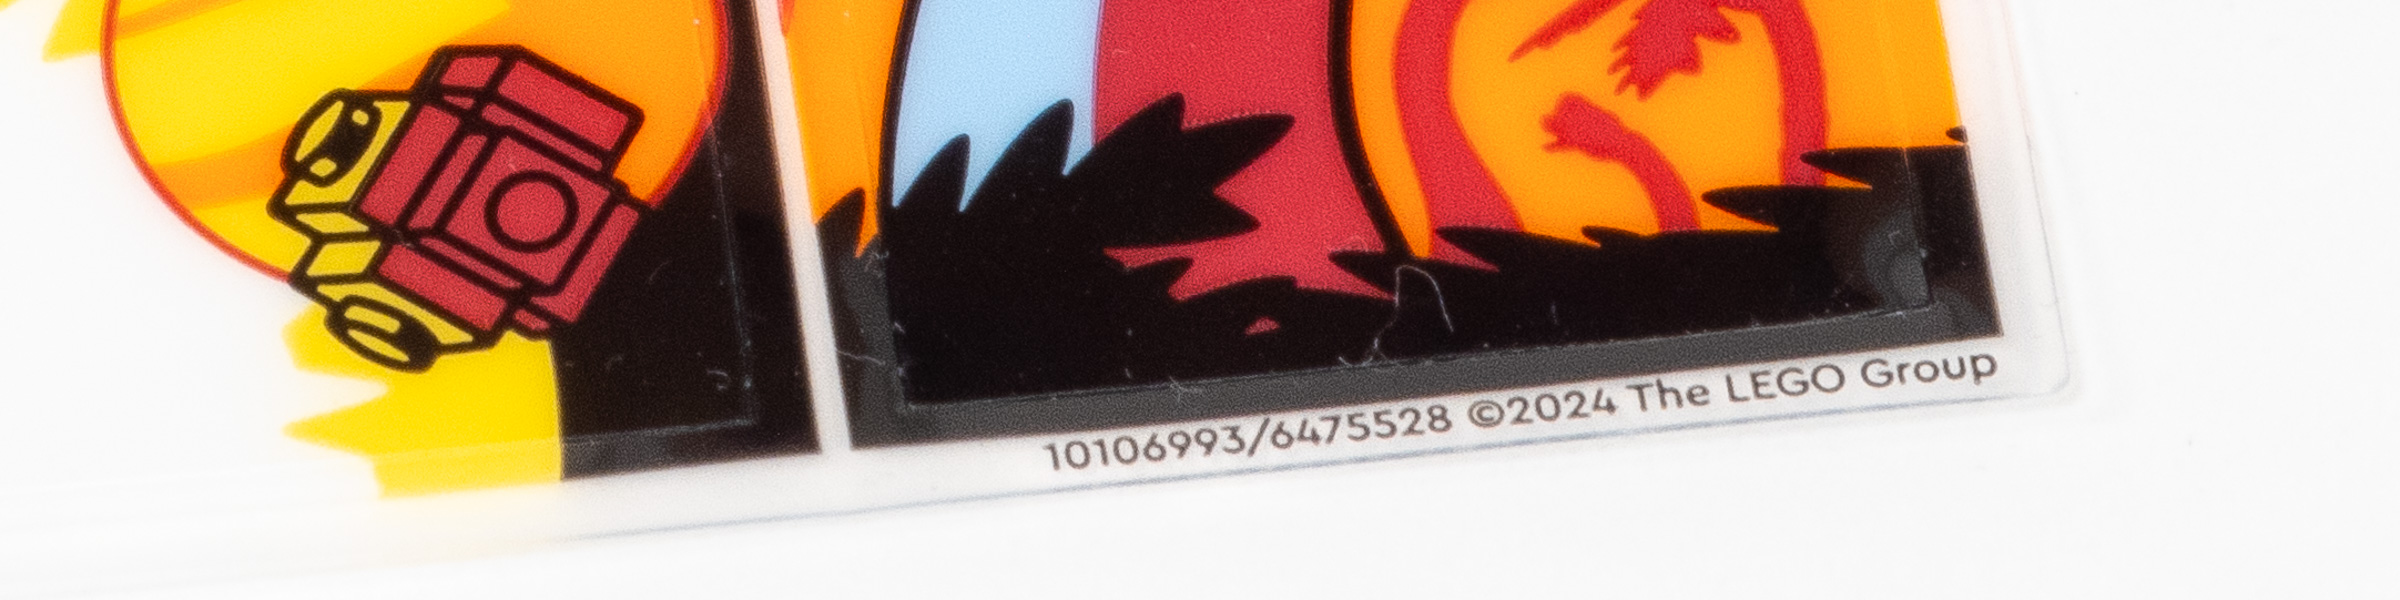
“©2024 The LEGO Group” shown on the printed banner.
While I do not know why they decided to move the release date a month earlier, I have two theories… The simplest explanation is that they had another large AFOL set planned to release before Christmas, but the product was delayed or cancelled. Another theory is that The LEGO Group is intentionally shifting the Modular release to before the Holiday gift giving season in the hopes of greater sales overall by creating family traditions around buying and building the latest Modular every holiday. This could also be linked to shifting global economic patterns, which could make it harder for people to make large discretionary purchases, especially just after the expensive holiday gift-giving season.
Storytelling and Minifigs
There are a nice selection of 7 minifigures, a dog and two birds in this set. The way I see it, we have three museum patrons (including a child), two museum staffers, the museum curator, and a one-man maintenance crew. I have not researched the printed parts, but they are rarely unique to a given modular set.

Seven minifigures are included in this set.
In practice, most of the storytelling that I noticed comes through the displays instead of the minifigs. The entire first floor is dedicated to Natural History, and they hit on all of the iconic aspects that I would expect to see: Dinosaurs/Skeletons, Geology, and Minerals.
The upstairs exhibits are very cool, but don’t really fit in a “Natural History” museum.
The upstairs shifts to what would more accurately be described as Space Exploration, History, and Anthropology. They are very clever vignettes with historical references which will be appreciated by AFOLs, but my narrow definition of Natural History suggests that they should be in different museums. I do not think this is a big problem as most builders won’t be taking the Natural History part too literally anyways. (I think the curator is sleeping on the job in his quiet rooftop office.)
Final Thoughts
At a glance, this model is architecturally sound because it offers a reasonable facsimile of Second Empire architecture. I also think that the Olive Green color is appropriate to the style, even if I do not like that color very well.
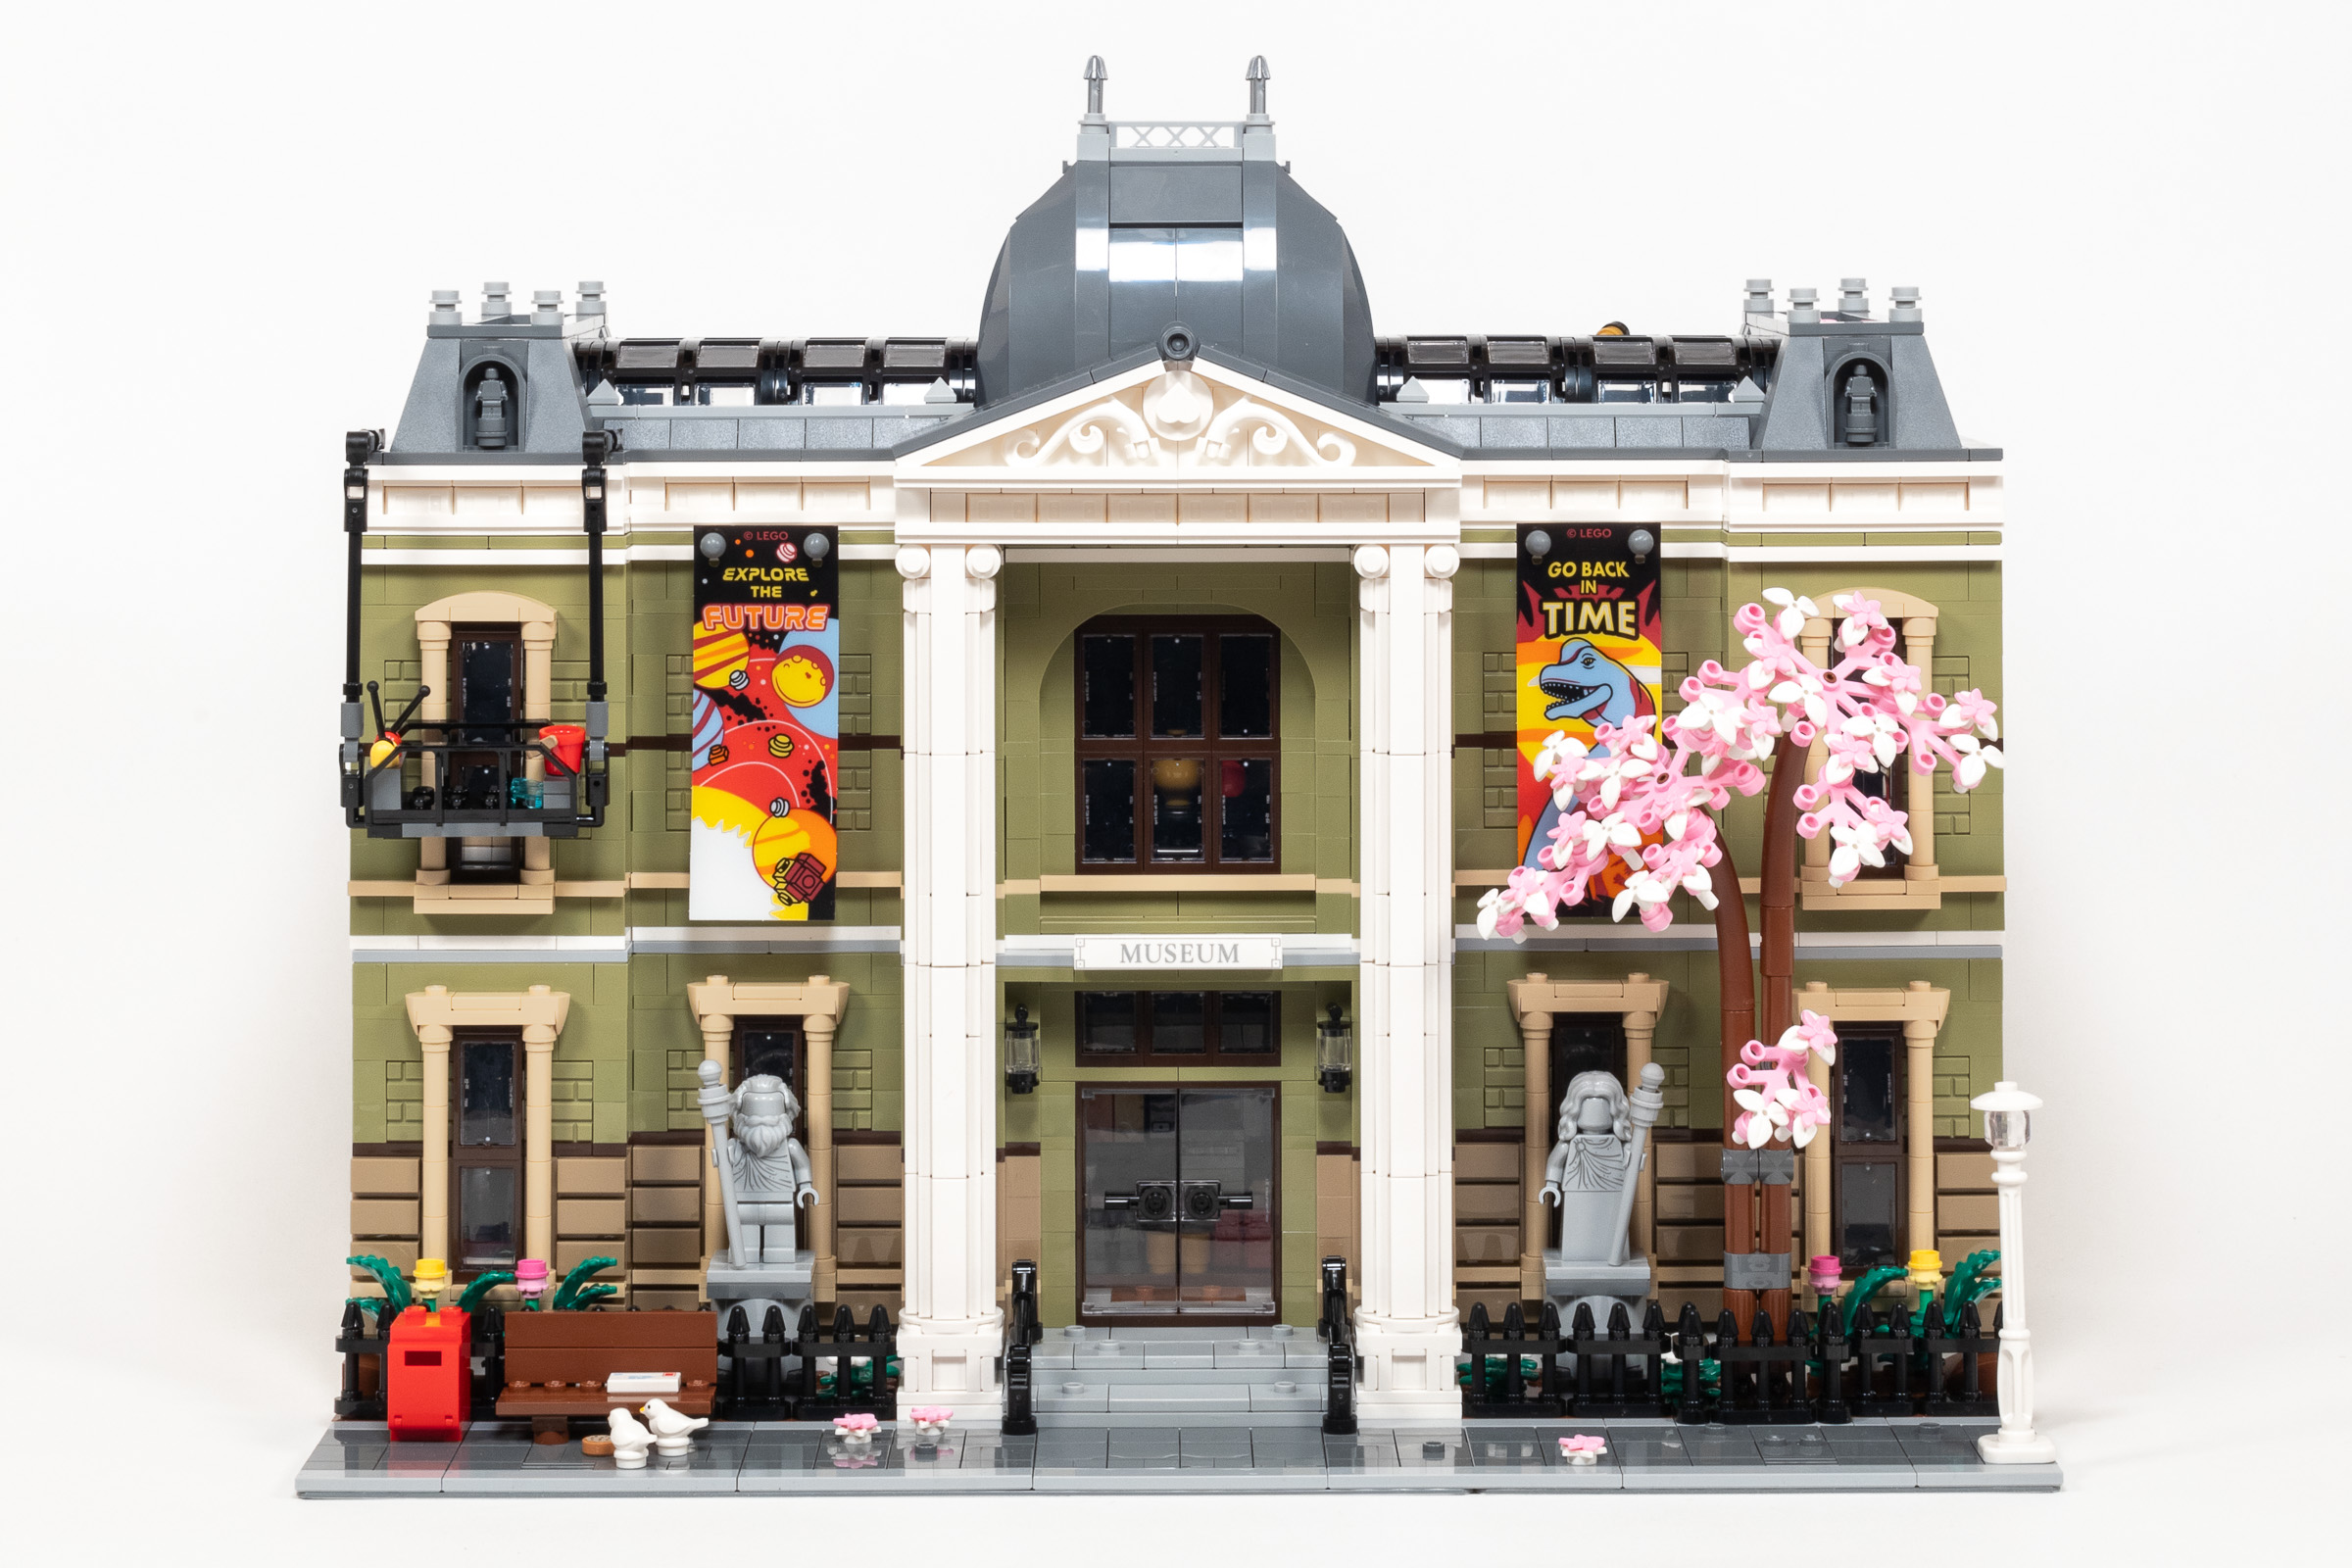
The Mansard Roof and large columns are appropriate to the French Second Empire style.
As for the building experience, it is unfortunately a bit boring! The obvious reason is that previous modulars have included multiple different buildings and architectural styles in a smaller amount of space, which results in diversity of colors and building techniques. The other reason is that it doesn’t have many advanced techniques to begin with, relying almost exclusively on vertical stacking of bricks for the majority of the build process. That said, it does offer some really fun stages, most notably when we stop building walls and build the exhibits, foliage, fences and other finer details.
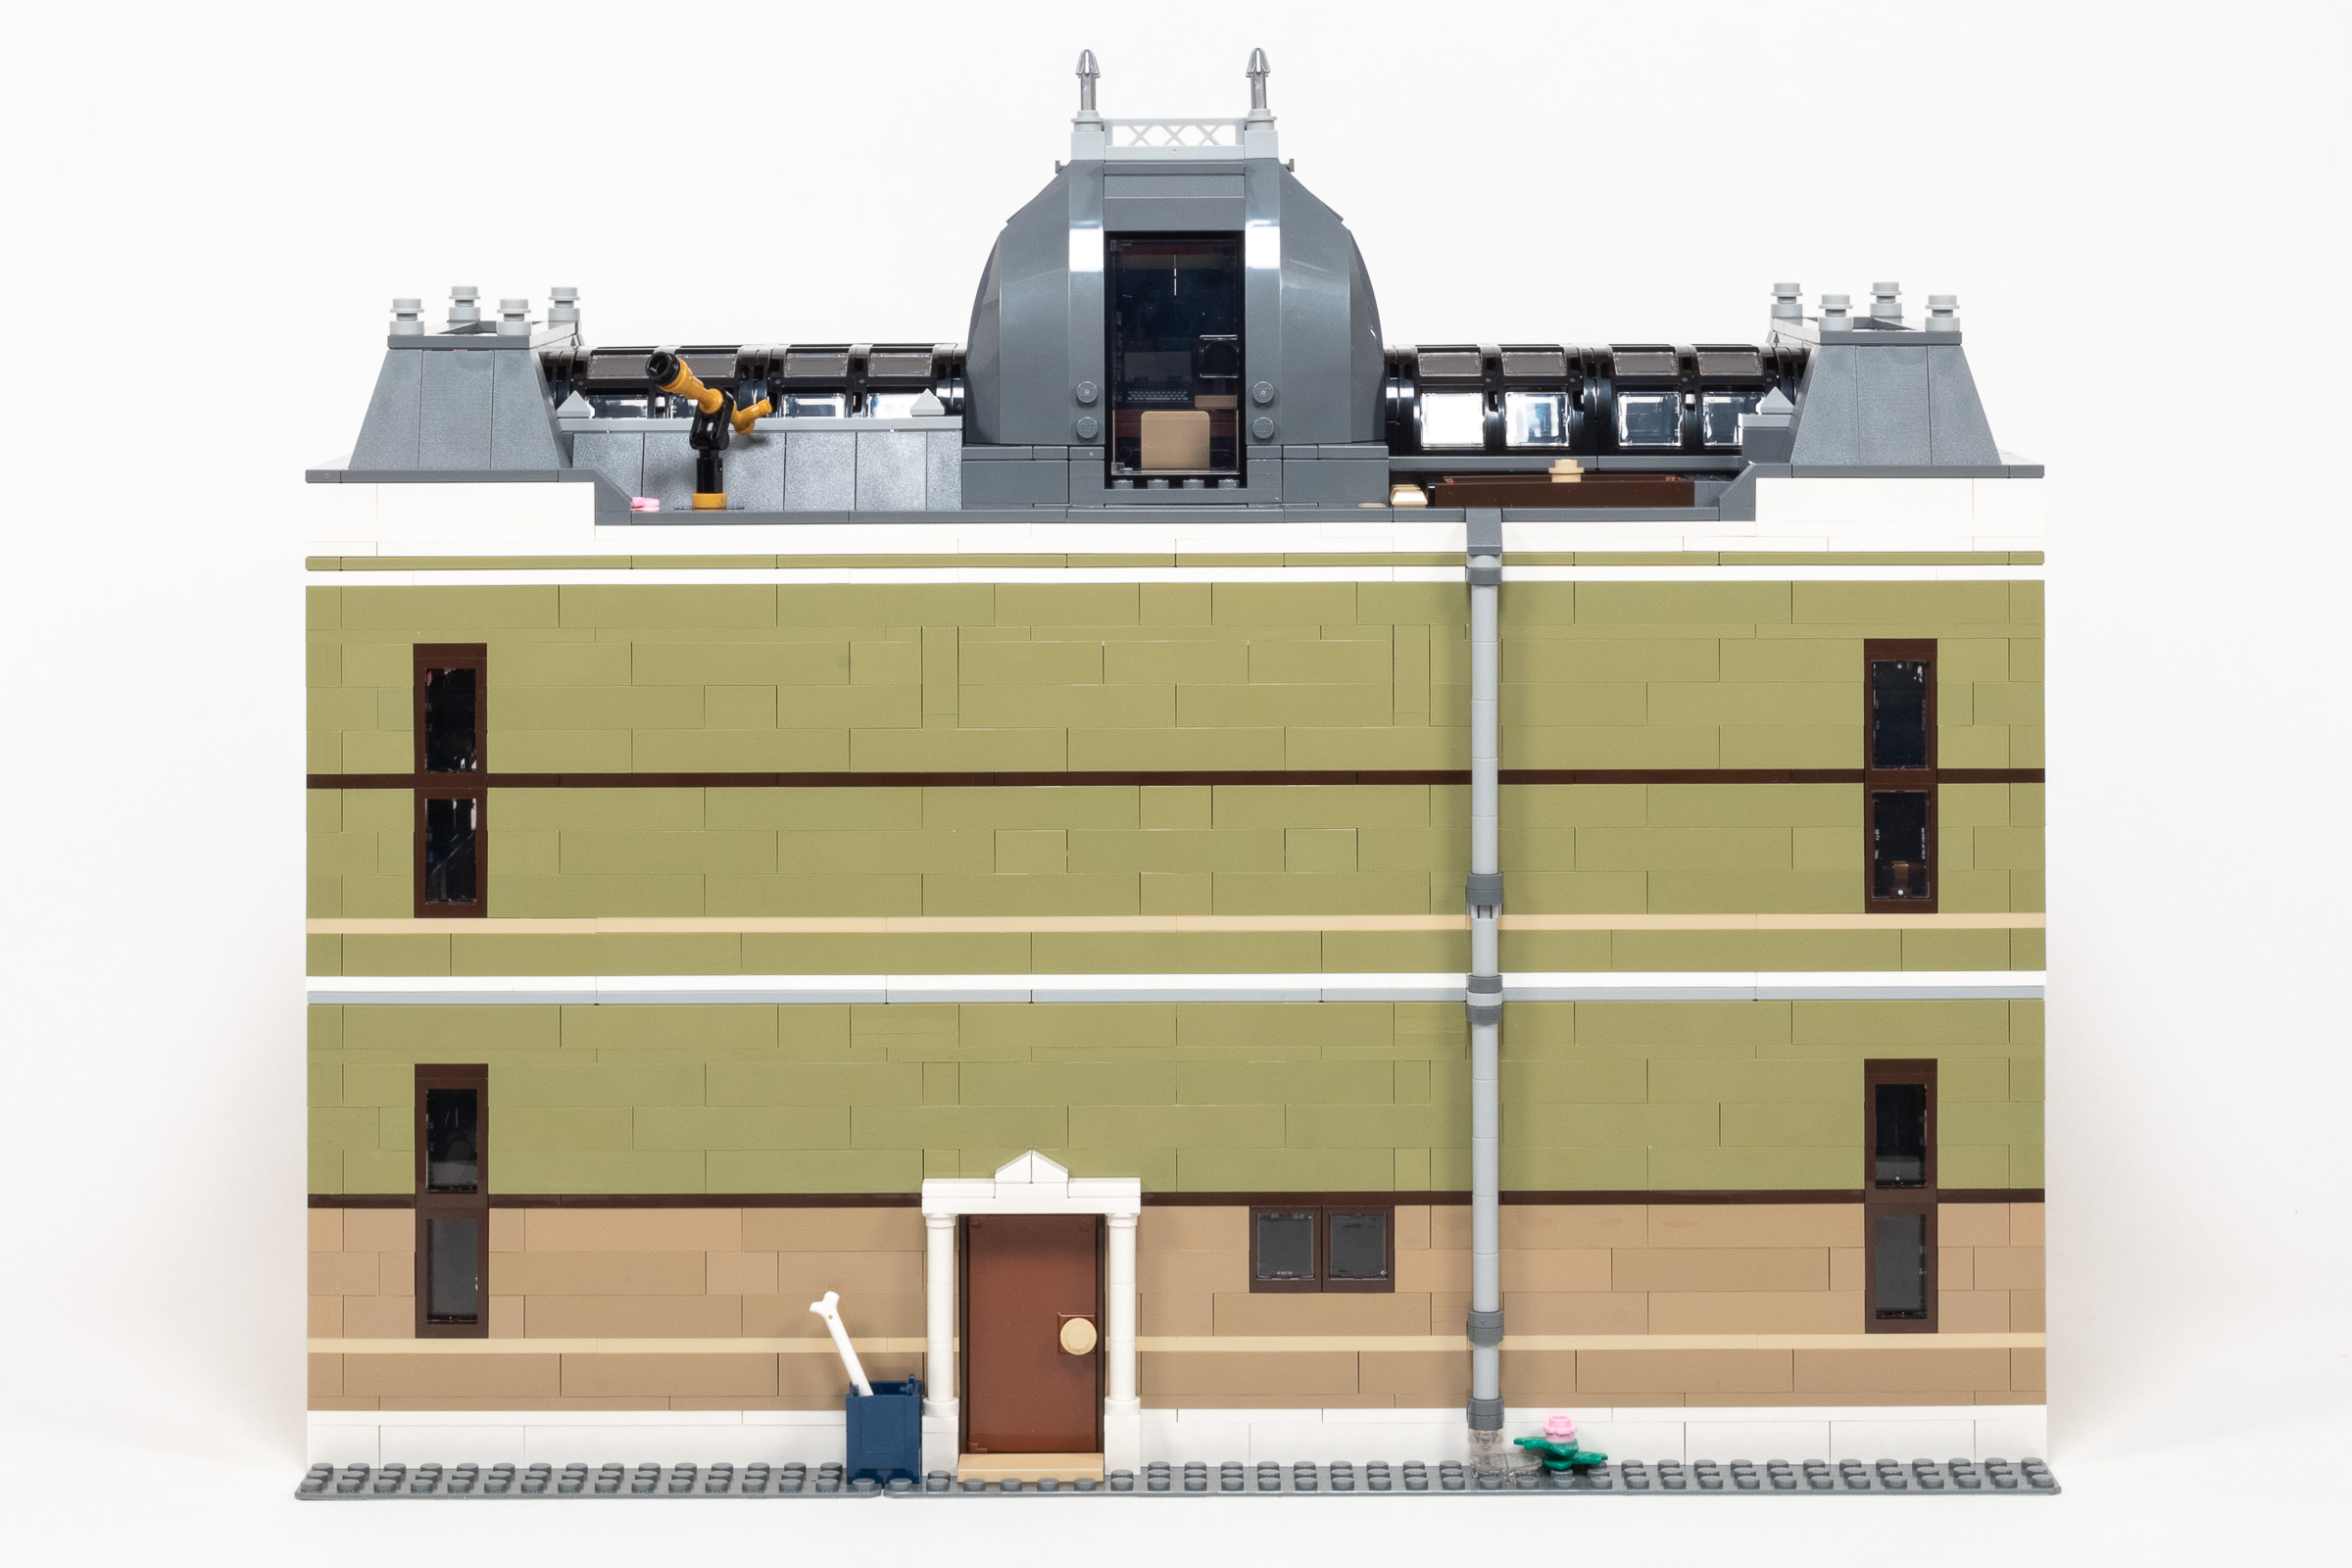
The back of the model showcases the repetitive stacking of basic LEGO bricks.
This is evident in the price-per-minute metric which shows that this is a pretty short build for the cost. I am pretty certain that the main issue is that much of the set is symmetrical, and it doesn’t use a lot of advanced building techniques. Even the choice to break the build process into a whopping 33 bags speeds things up, and I don’t think that’s a good thing. I find sets with about twice as many parts per numbered stage to be more satisfying to build, since each stage represents meaningful progress.
#10326 Natural History Museum – $300, Available December 1, 2023 (you can preorder now).
I suspect that I may be alone in finding this set a bit lacklustre, especially compared to the consistenly high level of excellence we usually find in the Modular Building Series. The storytelling is a bit weaker than recent sets in the series, and I find it looks a bit big when placed next to other recent sets in the series. Most problematic is that the walls are repetitive, with very few decorations to break up the monotony. For these reasons, #10326 Natural History Museum only earns a Good (3/5 star) rating, putting it near the bottom of the Modulars released in the past 5 years.
Ranking the six most recent modulars:
- #10278 Police Station (2021) – Must Have (5/5 stars).$200, 2923 pieces.
- #10297 Boutique Hotel (2022) – Recommended (4/5 Stars).
$230, 3066 pieces. - #10312 Jazz Club (2023) – Recommended (4/5 Stars).
$230, 2899 pieces. - #10270 Bookshop (2020) – Recommended (4/5 Stars).
$200, 2504 pieces. - #10326 Natural History Museum (2023) – Good (3/5 Stars).
$300, 4014 pieces. - #10264 Corner Garage (2019) – Good (3/5 Stars).
$200, 2569 pieces.
I think #10278 Police Station looks best on the left, and #10297 Boutique Hotel looks best on the right.
I just finished the set and omg I really felt the need to read what others felt about it. Gladly it was not just me. You, sir, couldn’t have said it any better. All my thoughts and insights about the set are perfectly stated here! Very well done. Such a huge disappointment and a missed opportunity.
Thank you for this review so detailed. It’s always a pleasure to read you and I learn something at each time. I love the green olive color, LEGO should sell an alternative color maybe like the FIAT 500, or the recent parrot… Why not !
This model is superb and I will buy it for sure !
Can you show it next to some older Modulars? Like next to the Parisian Restaurant, Brick Bank and Palace Cinema would be great!
I have used copies of those earlier modulars, but haven’t built them yet. As I go back in time to build and review the retired sets, I will try to include some of these comparison photos. (Since I am working backwards, Downtown Diner is next on the list.)
I really look forward to your review of Downtown Diner!
Me too. When is this planned?